In this chapter a variety of brushes are used to create painterly pictures of children and young people. The chapter starts with an explanation of some of the brushes in the Blenders category, as these are particularly useful when making portraits and also for finishing off pictures of all types.
Brush categories which I find particularly valuable for portraits are the Pastel and Chalk, and there is a step by step example using the Pastel brushes which are great for making light delicate portraits.
Another traditional style of painting is Oils, where the rich textures give a much more substantial finish with some lovely brush textures. The example of Griff shows how to use some of the Oil brushes.
Also included in this section is a step by step illustration of how to use inset mounts to make a picture more special.
Using Blender brushes

Some of the most valuable brushes for creating cloned pictures of people are the Blenders. These reside in several different brush categories including Blenders, Tinting and Distortion, and can also be created from many other brushes by altering the settings.
Before we start making the first step by step tutorial it will be useful to check out the brush examples below as they highlight some of the most useful blending brushes.
The principal characteristic of a blending brush is that it smears or distorts the existing image and in doing so creates soft, rough or textured versions of the original picture. The brushes work directly on the image and although in all cases we will use a clone copy to work on, the brushes do not depend purely on taking information from the original.
At the size shown here it may not be possible to see the different textures very clearly so a pdf file with the pictures enlarged is included on the accompanying DVD.
Example (A):
Blenders>Grainy Blender was used for the edges and the background; this is a rough blender which is affected by the chosen paper.
Blenders>Coarse Smear was used for the hair; this is similar to the previous brush but is not affected by the choice of paper. Both the above blenders are useful for hair.
Blenders>Just Add Water was used on the face; this is a very soft smooth blender which is a useful brush for removing blemishes on skin. Use it at a low opacity for the best results.
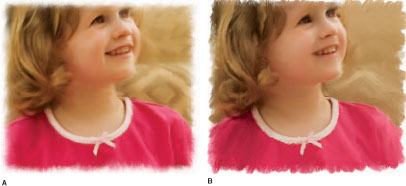
FIG 9.2 AGrainy Blender: Just Add Water.
BCoarse Oily and Soft Blender Stump
Example (B):
Blenders>Coarse Oily Blender was used for the background and gives a very chunky, rough appearance and smears the images around significantly.
Blenders>Oily Blender was used for the hair; this is smoother than the grainy blenders used in Figure 9.2A.
Blenders>Soft Blender Stump is a good brush for the face; used at a low opacity it polishes the skin beautifully. I used it here at between 5% and 10% Opacity.
Example (C):
Tinting>Diff user 2 was painted all over this picture at 49% Opacity and brush size 30. This gives a very attractive Watercolor effect to the edges. Blend the edges outwards first then run the brush around the edges several times and the edge will spread very effectively. The central area was then restored with Soft Cloner. Distortion>Grainy Mover was used for the hair and dress.
Diffuser>Grainy Water was used on the face; this leaves a little more texture than in the earlier examples.
Example (D):
Distortion>Marbling Rake, size 23, strength 100% was painted all over this picture. This is a rather drastic result but it achieved the intention which was to thoroughly break up the image. The central areas were then restored with Soft Cloner.
Distortion>Diffuser was blended over the central areas at various sizes and opacities, leaving the edges roughed up. The face was blended at 25% Opacity.
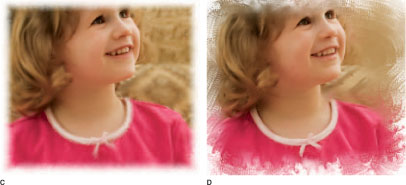
FIG 9.3 C Tinting: Diff user 2: Diff user: Grainy Water.
D Distortion: Marbling Rake: Distortion: Diff user.
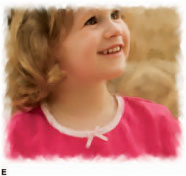
FIG 9.4 E Acrylic Captured Bristle
Example (E):
The Acrylic Captured Bristle from the Smart Stroke Brushes category.
The background and edges were painted using a size 26 brush with 41% Opacity.
The face was blended with brush size 11 and Opacity 51, then again with size 56 and Opacity 5%.
This is a very bristly brush and gives the edges an attractive finish.
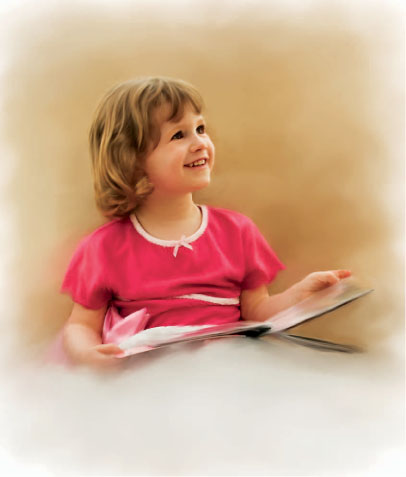
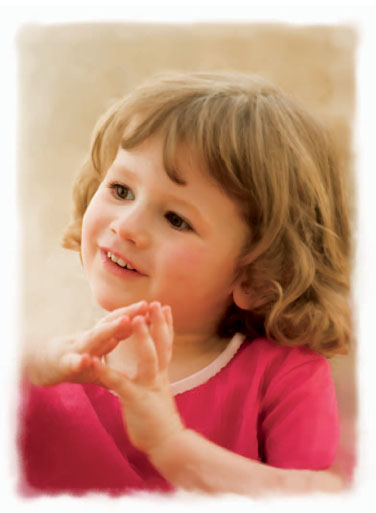
Portrait using Blenders
In this first example you will use some of the blenders described on the previous pages. The general process with portraits is to start with the rougher brushes and to gradually bring back more detail where required. In all cases it is advisable to work on a clone copy so that you always have the option of using the Soft Cloner to return parts to the original source state.
1. Open Annabel 1 from Chapter 9 folder on the DVD.
2. Canvas>Canvas Size and add 150 pixels to each side and 200 pixels to the top and bottom. This will add a white border into which the edges can be blended.
3. File>Clone.
4. Select the Blenders>Grainy Blender 30, brush size 136, Opacity 100%.
5. Change the paper to Sandy Pastel Paper and paint over all the edges leaving the head and body clear. The intention is to remove all traces of the original picture edge, but not to extend right to the edge of the Canvas. If you paint over part of the figure by mistake it can be restored with the Soft Cloner. Figure 9.6A shows the picture at this point.
6. Select a new brush from the Blenders brush category Just Add Water, size 160, Opacity 20%. Paint over all the background with this large brush until all the area is completely smooth. You will need to reduce the brush size down gradually to do the areas around the head and body. Figure 9.6B shows the result.
7. If you have encroached on the face and clothes, this is the time to restore it to the original. Select the Cloners Soft Clone brush and brush over the areas which need replacing. There is no need to be totally accurate with this step as the edges will be softened in the next step; the face is the most important.
8. Change to the Distortion Grainy Mover 20, brush size 20, strength 25. Paint over the hair making sure that you follow the direction in which the hair flows. Cover all the hair with brush strokes. Reduce the brush size to 10 and smooth out all the texture; the hair should look soft and silky when you have finished (Figure 9.7).
9. Select the Blenders Grainy Blender 10, size 10, Opacity 38% and paint over the pink top following the lines and shadows of the material. Leave the white lace until you have finished the pink, then use the same brush and paint over the lace with small circular motions; this will remove the photographic appearance but it will remain distinct from the pink.
10. Use the Blenders Soft Blender Stump 10, size 10, Opacity 20% to smooth out any rough areas. These are usually near the darker sections; Figure 9.7B shows a detail of the dress.
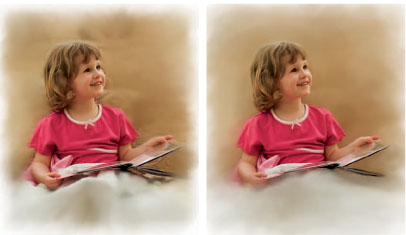
FIG 9.6 A Using the Grainy Blender to break up the background
B Just Add Water
11. Return to the Grainy Blender 10 and blend the book and the remaining non-blended areas, with the exception of the face and arms. Soften the rougher sections with the Soft Blender Stump as before.
12. To paint the face and arms select the Soft Blender Stump 10, size 4.9, Opacity 25%, Grain 23% and Bleed 56%. Enlarge the picture on the screen and carefully blend all over the face; remember that the blenders will drag one color into the next so do not drag darker tones such as eye shadow into light areas. For larger areas of skin use a larger brush, up to size 25; this will give a smoother overall blend.
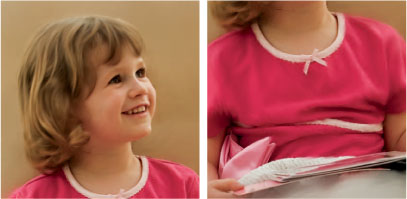
FIG 9.7 A Blending the hair B Dress detail
13. When you blend the hair shadow on the left side of the face, move the brush in the direction of the hair, which will lighten the area slightly.
14. Continue with the same brush and blend the arms and hands.
15. Look at the picture to see if it needs any further work. In the one I have made, the white blanket under the book looks rather dark, so select the Airbrush Soft Airbrush 50, size 206, Opacity 2%. Hold down the Alt/Opt key and click on a light gray area of the blanket. This will activate the Eyedropper tool and select the color with which to paint. Lightly paint over the darker gray areas. If necessary, select lighter tones and paint until it looks bright but not overbright.
16. Finally, check over the picture and blend any areas that still look photographic or are rather rough. The final version is shown in Figure 9.8.
Portrait in Pastel
For this next picture we will use brushes from the Pastels section. This particular brush is a favorite of mine as it has such a lovely finish to the brush strokes.
1. Open ‘Annabel 2’ from Chapter 9 folder on the DVD.
2. Canvas>Canvas Size and add 150 pixels to each side. This will add a white border into which the edges can be blended.
3. File>Clone.
4. File>Select the Pastels Artist Pastel Chalk, size 127, Opacity 65%.
5. Click the Clone Color option in the Colors palette.
6. Change the paper texture to Sandy Pastel Paper.
7. Paint around the edge, pushing the color to the outside, then run the brush around the very outside to restore the white border. Paint out all the background. Unlike the previous example, this brush is cloning from the source picture and not just blending the picture. Figure 9.10 shows this completed.
8. Reduce the brush size to 12.2 and make the Opacity 100%. Paint over the hair, following the flow of the hair; this will give it quite a chunky appearance.
9. In order to restore some delicacy to the hair select the Cloners Smeary Camel Cloner brush. Make the brush size 23, Opacity 50% and move the Feature slider to 4.9. The Feature slider affects how the individual hairs in the brush work and, by increasing this to 4.9, the individual brush hairs are emphasized; you should experiment with this slider to understand how the control works. Figures 9.11A and 9.11B show the difference in the hair.
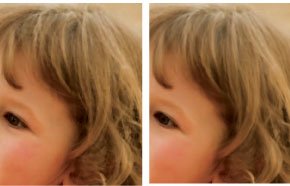
FIG 9.11 A Hair detail – step 8 B Hair detail – step 9
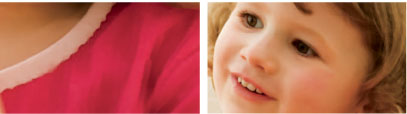
FIG 9.12 A Dress detail B Painting the face with the Chalk brush
10. Return to the Artists Pastel Chalk and with brush size 22 and Opacity 100% paint over the pink dress.
11. The face can be painted with the same brush – reduce the Opacity to 21% and make the size about 40. At this opacity the brush will smooth out any blemishes but still leave a delicate texture on the skin.
12. Paint over the lips and eyes with care; use a small brush and vary the size and opacity until they look right. Eyes are particularly difficult to handle as too much overpainting will look wrong, while not enough will look too photographic.
13. Check over the picture now for final corrections. Tidy the edge if necessary and adjust saturation and contrast prior to printing.
Compare this picture to the previous step by step tutorial; the choice of a Pastel Chalk brush has given it a more obvious pastel finish while the first example in this chapter has a watercolor look.
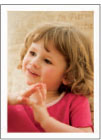
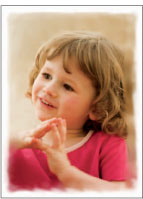
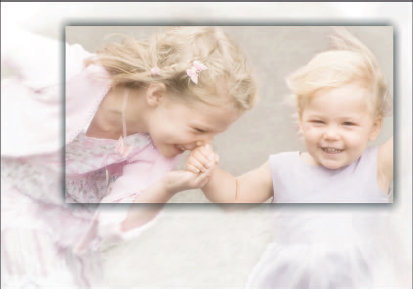
Making an inset mount
This charming picture was taken at a wedding. I loved the expressions on the faces of the girls but the background was rather distracting and needed to be simplified. This tutorial explains how to change the tones to a very pastel finish and make the inset mount.
1. Open ‘ Wedding Children ’ from Chapter 10 folder on the DVD.
2. The first step is to remove all the distracting background, but before we do that the picture can be cropped to reduce the amount of work. Crop the left to the edge of the girl’s sleeve and the right side to where her arm goes up to the hand.
3. Use the Rubber Stamp tool, hold down the Alt/Opt key and click in the picture from where the imagery is to be taken, then paint. Use 100% for most of the background and reduce it to around 20% around the hair. It is not necessary to get it perfect as some imperfections will be hidden by later steps.
4. File>Clone.
5. In the Layers palette make a new empty layer.
6. Edit>Fill With Clone Source.
7. Effects Tonal Control Adjust Colors and reduce the Saturation to zero, which will turn the layer into monochrome. Figure 9.15 shows this stage completed.
8. Make a new empty layer and once again Fill with Clone Source.
9. In the Layers palette change the Layer Composite Method to Screen and reduce the Opacity to 75%. This will gently overlay the original color Figure 9.16.
10. Effects Focus Super Soften and set 13.0 in the number box. This will add a very attractive gentle glow to the picture Figure 9.17. This is a very useful technique for adding a softening layer to pictures.
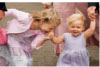
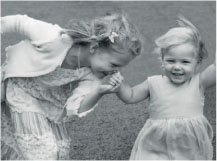
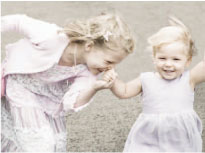
FIG 9.16 Reduced color (step 9)
FIG 9.17 Super soften (step 10)
11. Make another new layer; choose white in the color picker and Edit>Fill>Current Color. Change the Layer Composite Method to Soft Light; this will gently lighten the whole picture.
12. Make another new layer and fill again with white. Leave the Layer Composite Method on Normal; this will hide the entire picture.
13. Create a layer mask (click the mask icon in the Layers palette).
14. From the Brush Selector choose the Airbrush Fine Tip Soft Air brush, size 108, Opacity 10%. Click on the mask to activate it and change the painting color to black. Activate the Tracing Paper briefly to see where you are painting then brush over the faces and clothing and gently remove the white from these areas. Reduce the layer opacity to around 50%. Figure 9.18 shows the picture at this point. As always with a layer mask, if you want to reverse the effect simply choose white in the Color palette and paint in the mask again.
15. Add another new layer and with the same Airbrush as before, size 160, Opacity 10%, slowly paint with white around the edges creating a vignette. It is a good idea to paint outside of the picture and allow the brush strokes to gradually encroach into the image. If you don’t already have your picture full screen, press Ctrl/Cmd M to allow you to paint in this way. This creates the soft edges seen in Figure 9.20. You could use an oval selection to make the vignette but I prefer the flexibility available with this method. The layer opacity can be adjusted if necessary. This completes the first stage of the picture.
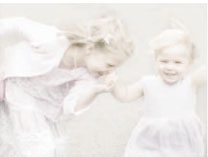
FIG 9.18 White layers (step 14)

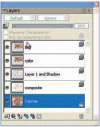
FIG 9.19 Layers palette at step 15
16. The next step is to create the inset mount. You should have been saving the file at regular intervals but you need to save another copy at this point in its layered version. Then save it again using Save As and give it a new name so that you do not inadvertently overwrite it.
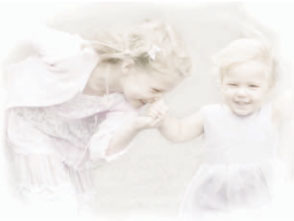
FIG 9.20 White edges (step 15)
17. Highlight all the layers except the Canvas by holding down the Shift/Opt key and clicking on them in turn. All the layers except the Canvas should have turned blue.
18. Click on the Layers palette menu and select Collapse. This will merge all the highlighted layers leaving the Canvas intact. Rename this layer Composite.
19. Select the Rectangular Selection tool from the Toolbox and make a selection which encloses the two children. This can be any size; you can see what I have chosen in the final version on page 259. This technique also works with circular or freehand selections.
20. Select Save selection and give it a name. This step is useful in case you lose the selection at any point. Make sure the single layer is highlighted before the next step.
21. Edit Copy then Edit Paste in Place. This will copy the selection and put it onto a new layer.
22. With the newly created layer active go to Effects Objects Create Drop Shadow. Use the settings in Figure 9.21 or experiment with your own. Tick the Collapse to one layer box. This layer can have the opacity reduced if the effect is too strong; I have reduced it to 68%.

FIG 9.21 Drop Shadow dialog box (step 22)
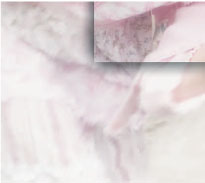
FIG 9.22 Background blending (step 23)
23. Click on the layer above the Canvas and select the Blenders Grainy Blender 30 and change the size to 41and the Opacity 50%. Paint over all the background that is visible; this will add an attractive texture to the picture.
24. Now to add back some of the original color to the central panel. Go to Select Load Selection and choose the previously saved selection.
25. Click on the Canvas layer and Edit Copy and Edit Paste in Place to create a copy of the layer at the top of the stack. Reduce the layer opacity to about 30%.
26. Return to the Canvas layer, reload the selection and copy and paste the image again to make another layer on top.
27. Change the Layer Composite Method to Screen and reduce the Opacity to 20%.
28. To give this a final blur, go to Effects Focus Soften and select Gaussian and level 40.00.
29. The final layer stack is shown in Figure 9.23. Turn the layers on and off to see what each one does – changing the opacity of any layer will alter the final appearance. I have made a final crop to tighten up the composition.
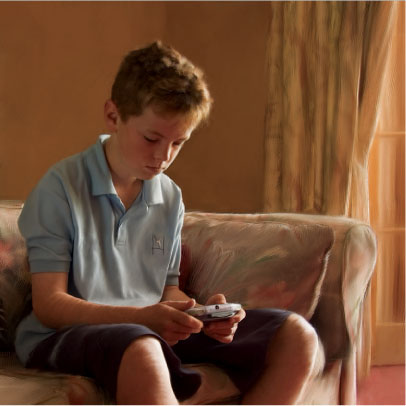
Portrait in Oils
The sun shining through the open door highlights this teenager filling in a waiting moment by playing with his electronic game. The warm tones will work well in Painter but there are background distractions. In this step by step you will see how easy it is to remove undesirable elements by simply painting over them.
1. Open ‘ Griff ’ from Chapter 10 folder on the DVD.
2. File>Clone.
3. Select the Oils>Round Camel Hair brush, size 41, Opacity 100%, Resat 17, Blend 100 and Feature 7.8. The Feature slider has been increased from the default and will result in a more textured finish.
4. Click the Clone Color option in the Colors palette.
5. Start by painting the curtains. Brush down the folds until the pattern has disappeared and the colors have blended well. The glass doors can be brushed straight down and the horizontal bars reintroduced by running a slightly smaller brush along them.
6. Continue to brush out all the background and the chair – follow the shape of the chair covers (Figure 9.26). This is a fairly large brush and you may well paint over the boy’s face or shirt, but this can be corrected quite easily later.
7. Having completed the background and chair, it is time to remove the distractions from the background. In order to really simplify the picture we will remove the two pictures, the stone fireplace on the left, and also the black objects behind his left shoulder. I also feel that the patterned wallpaper will be better painted out.
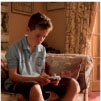
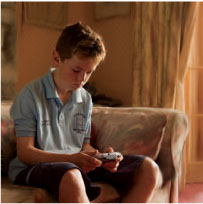
FIG 9.26 Painting the background (step 6)
8. In the Colors palette untick the Clone Color option so that the brush will paint color rather than clone. Holding the Alt/Opt key, click on an area underneath the picture on the wall; wherever you click, the brush will use that color to paint.
9. Paint over the picture until it cannot be seen, then continue down the wall, hiding the texture of the wallpaper. Change the color frequently so that the wall has some small variations of color. Watch out for the shadow in the corner where the two back walls meet – this should be retained to keep the perspective.
10. Paint out the other wall, picture and stone chimney and the black area by his left shoulder (Figure 9.27).
11. Change to the Soft Cloner brush and clean up the edges of the boy where previous brush strokes have spread too far.

FIG 9.27 Overpainting the background (step 10)
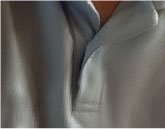
FIG 9.28 Shirt detail (step 12)
12. Use the Camel Hair brush again for his shirt, making sure you are back in Clone Color mode. We will use a smaller brush with less bristles: size 16.9, Opacity 60% and Feature 6.3. Follow the folds of the clothing but also paint the opposite way; this will give a subtle crosshatching effect. The lower opacity with overpainting several times will allow a more subtle finish to build up (Figure 9.28).
13. When you get to the design and writing on the shirt, go out of cloning and paint over the area; remember to sample the color many times and to keep the overall shape of the cloth. Logos and writing on clothes are difficult to handle; if you clone them very accurately it often looks false and if they are smeared then it can look dirty. In this case we will paint out all of the writing then bring back some parts.
14. Turn on the Tracing Paper and reduce the brush size to 2.9. Enlarge the view on the screen and clone the bird design and the posts onto the shirt.
15. We now come to the face where we have another problem because Griff has freckles. We cannot paint every freckle but if we smooth out all the freckles then this will not reflect Griff as he appears. The solution in this case is to clone over the face using a medium opacity and a light touch on the pressure sensitive pen so that the sense of the freckles will still be there but in a diff used form (Figure 9.29). If you are using a mouse for this then reduce the Opacity to around 30%.
16. Reduce the brush size to 4.6, Opacity 60% and the Feature to 2.9. We could use a blender brush here but by altering some aspects of the brush, but retaining the general characteristics, the brush marks stay consistent with the rest of the picture. Paint over the face carefully; don’t rush this stage as the face is the most important part of the picture. Under the chin, and for some areas of the face, a larger brush can be used. This will give a slightly more textural finish.
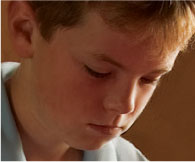
FIG 9.29 Face detail (step 15)
17. Paint the arm and hands in the same way but use a larger brush, around 6.9, and use crosshatching again, pulling the light areas of the arms into the dark. Figure 9.30 shows this stage.
18. Paint the legs now. Use a larger brush, size 15.6, and a lower Opacity 28% and concentrate on where the light and dark areas come together. The reason for the light strokes pulling into the dark and vice versa is the Resat and Bleed settings. Try changing these and see how the brush characteristic changes.
19. Paint his trousers with the same brush. Remember that we do not need clean edges in this area; slightly smudge the edges to reduce their importance.
20. If you have painted over any part of the electronic game you can restore the clarity with the Soft Cloner, then use the Camel Hair brush, size 5.4, opacity 65% and feature 2.0 to give back some texture.
21. The hair can be done now. Change to the Medium Bristle Oils brush, size 9.6, Opacity 28% and click the Clone Color option in the Colors palette. The default bristles are too thick for this picture so go to the Window menu on the top bar, click on Brush Controls and then on Show Bristle. This will bring all the brush control palettes on screen and in the Bristle palette change the thickness to 29%.
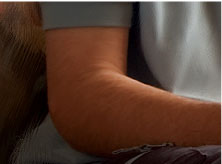

FIG 9.31 Hair detail of original picture
22. Brush over the hair following the flow of the hair and allow the brush to streak out a little around the edge of the head so that the transition between the head and background looks good.
23. The back of the head is very black so untick the Clone Color option and reduce the brush opacity to about 15%. Holding the Alt/Opt key click on a lighter part of the hair to select a suitable color and then lightly brush in some detail into the very dark areas. Don’t fill all the dark areas in, just enough to provide some detail and texture. Figures 9.31 and 9.32 show details of the work on the hair.
24. As always, this is the time for a final check around the picture and to finish any areas which are not satisfactory. Crop if necessary.
25. To finish the picture it is often useful to add a texture overlay in order to emphasize the brush strokes. It is more flexible to apply this on a separate layer so that it can be reduced later if it proves to be too intrusive.
26. Select>All, Edit>copy, then Edit Paste in Place will make a new layer with a copy of the Canvas.
27. Effects>Surface Control>Apply Surface Texture. Select Image Luminance in the Using box, set the Amount at around 30% and click OK.
28. Check the result at 100% size on the screen. I reduced the overall layer opacity to 41% and still felt that the brush strokes on the face were too intrusive, so I made a layer mask and painted with gray in the mask, which reduced the effect on the face but left the remainder intact.
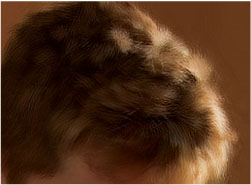
FIG 9.32 Hair detail of final picture
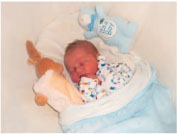
Blenders and Pastels
This step by step example shows how to create a soft gentle picture, the sort that will suit a newly born baby. Auto-Painting takes us through the first stage and then one of the new Real brushes, introduced in Painter 11, is used to bring in the detail. This brush has a very attractive painterly texture which will clone and blend the colors beautifully, yet when reduced in size is capable of really good detail.
1. Open ‘ Jesse ’ from Chapter 9 folder on the DVD.
2. File>Clone (not Quick Clone as we want to blend the existing photograph).
3. Select Basic Paper from the Papers palette.
4. Select the Blenders>Oily Blender, size 66.6 and Opacity 43%.
5. Click the Clone Color option in the Colors palette.
6. Open the Auto-Painting palette, ensure that the Smart Stroke box is not ticked, and select Scribble Large. Turn the Tracing Paper off.
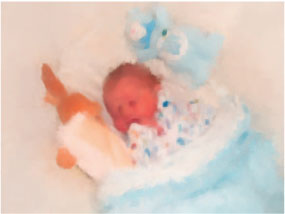
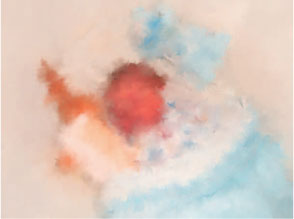
FIG 9.36 Bringing in more detail with the Real Soft Pastel brush
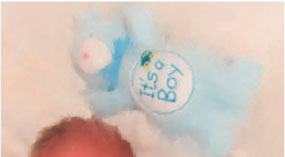
FIG 9.37 Painting with the smaller sizes will bring in extra detail
7. Click on the Start button and allow to run until all the picture is blended, about 3–4 minutes probably, depending on the speed of your computer (Figure 9.35 shows this stage).
8. Select the Pastels Real Soft Pastel, size 104 and Opacity 22%.
9. Paint the face and surrounding area, and also the rabbit and blue bear; this brush will start to return some definition to the shapes. Turn the Tracing Paper on and off regularly to check where to paint (Figure 9.36).
10. Use your pressure sensitive pen at an angle to smudge and smooth areas; paint with the pen vertical to bring in more detail.
11. Reduce the brush size to 48.2 and paint over the central areas again. When you need to refine an edge, such as the hair, paint both sides of the line – this clarifies the different tones.
12. Use circular polishing movements when painting the face – this will smooth the features.
13. Reduce the brush size to 21.3, increase the Grain to 43%, and paint the face and also the toy which says ‘ It’s a Boy ’. At this size the brush will bring in a lot of detail, so only paint the key areas as the less important sections will look better very diff used (Figure 9.37).
14. Increase the brush size to 56.6, reduce the Opacity to 12% and soften any areas that look rough.
15. Make a copy of the Canvas (Select All, Edit Copy, Edit Paste in Place) and in the Underpainting palette increase the Brightness by 12% to give the picture more sparkle.
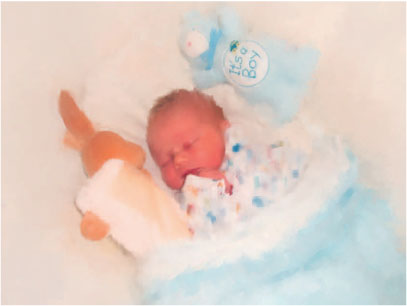
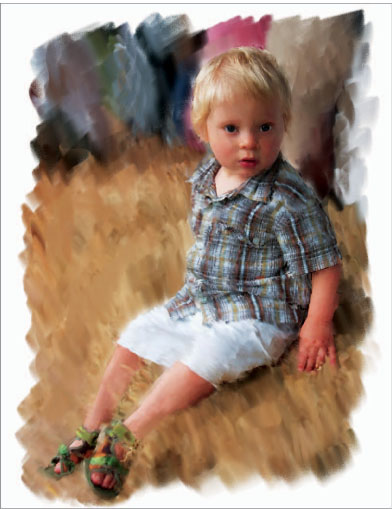
FIG 9.39 Jack, painted with the Real Soft Colored Pencil