Chapter 11
Pigmented and Alternative Processes
Gum Bichromate Process
John Pouncy patented the first workable gum bichromate photo process in the late 1850s. This printing process was a favorite of the Pictorialists from the 1890s until the advent of f/64 and its overwhelming “straight photography” aesthetic in the 1920s. Gum printing experienced a revival in the late 1960s when photography started being offered in university art departments and incorporated with other media, which lead to the rise of the Alternative Photography Movement.
The gum bichromate process operates on the principle that colloids (gelatinous substances) become insoluble when they are mixed with certain light-sensitive chemicals and exposed to UV light. This effect is called hardening or tanning. In the gum bichromate process, the support material is coated with gum arabic that contains a pigment (watercolor or gouache, which is opaque) and with a light-sensitive chemical (ammonium or potassium dichromate) to produce images in various colors from a contact-size negative. Gum arabic, a water-soluble colloid, is hardened by exposure to UV light and thus made insoluble in direct proportion to the density of the negative. The areas that are not hardened remain water-soluble and are washed away with the unexposed pigment during development. The hardened areas are left intact and bond the pigment to the support. A great deal of control over the final image can be exercised through the following: choice of paper, pigment, localized development, recoating the paper a different color, or using the same or different negatives for additional exposures. Box 11.1 lists gum print characteristics that attract artists to the process.
Box 11.1 Gum Printing Attributes
■Inexpensive because it uses no metal salts.
■Permits extensive manipulation of the image.
■Versatile and can be combined with other processes.
■Permanent.
■Allows choice of color or multiple colors of the Final image, as opposed to other processes with predetermined tones like cyanotype, kallitype, platinum, and Vandyke.
Ironically, the disadvantages of gum printing stem from its versatile nature. It is a more difficult process to control than the nonsilver processes discussed in Chapter 10. Multiple coats of emulsion and exposure are necessary to build up a deep, rich image. The support material (paper) must be presoaked (shrinking the paper) and sized, or the registration of the different exposures will not line up, thus producing blurry images. Any subtle or fine detail will be lost in the process. Gum also does not deliver a realistic color balance, although some photographers will go to great lengths to produce digital color separation negatives (as described in Chapter 4, Digital Negative Making) in pursuit of creating full color gum prints (see Tri-Color Gum Prints later in this section).
This section, provided by Brian Taylor, Executive Director of the Center for Photographic Art and Professor of Art at San Jose State University, offers a starting point for making gum prints on paper. There are countless formulas for gum printing, and the process can be used with almost any type of support material. Keep a record of your working methods and make adjustments. Feel free to modify the suggested working methods whenever necessary.
Paper
Stunningly rich and complex gum prints can be created on many different brands and surfaces of paper, as well as fabrics such as cotton, polyester, and silk. Start with a high-quality watercolor or printmaking paper that has a slight texture and the ability to withstand repeated soaking and drying. Some widely available papers include Arches and Fabriano brands of watercolor paper, and Strathmore 500 Series. Beginners may want to start with a responsive paper that has been a favorite among gum printers for decades: Rives BFK heavyweight paper 280 gsm (grams per square meter). This paper shrinks less than other papers when making multiple exposure prints. Also, it retains white paper highlights and produces less staining of white areas from the watercolor or gouache pigment. Regardless of brand and weight, all paper should be presoaked and sized when planning to make more than one exposure.
Preparing the Paper for Printing: Preshrinking
If you are content with a single color gum print, there is no need to do any preparation to the paper, simply use it straight from its package. However, most artists yearn to create more sophisticated gum prints comprising delicate, multiple colors. Each layer of color requires the print to be developed (soaked) in a tray of water in between exposures. Immersing cotton paper in water causes the paper to shrink slightly, so one must preshrink the paper before the first exposure to allow the negative to be placed “in register” in the same exact place on the image for each exposure without the paper changing dimension (see section on Registration later in this chapter.)
Steps to Preshrink Your Paper
1.Heat up a large pot or teakettle on the stove till boiling, and then pour the hot water directly into a professional darkroom tray, which is designed to withstand
2.Cut or tear the typically large 22 3 30 inch sheets of watercolor paper down to slightly larger than the size you are going to print, such as 8 3 10 or 11 3 14 inches, allowing about ½ inch margins on each side of the image in which to place registration marks.
3.Immediately immerse the sheets of paper into the tray of hot water. Slide in as many sheets as will comfortably fit in the tray, such as ten 8×10 inch sheets in an 11×14 inch or larger tray.
4.Let these soak and get fully saturated, rotating them occasionally until the water cools down and becomes tepid, about 15 minutes.
5.Hang the sheets by clothespins on a strong line (ideally strung outdoors) and let dry (about 2 hours on a sunny day). A hair dryer can be used in less sunny locales to speed drying.
Sizing
While preshrinking achieves the desired effect of removing any shrinkage from the paper (for better registration later during multiple printings), this step unfortunately also removes the factory gelatin sizing from the paper. After preshrinking and drying the paper, size the paper. There are several widely used methods of sizing. The quickest and easiest way is to use spray starch. Pin or tape the paper to a clean, smooth support board. At a distance of about 12 inches, start spraying the starch at the bottom of the paper in horizontal sweeps and work upward to the top of the paper. Do not overspray, as too much starch will prevent the emulsion from sticking to the paper. Use a soft, clean, damp sponge to wipe off any excess starch and to ensure an even coat. Apply a thin coat of starch between exposures after the print is dry from the water development, to prevent the colors from staining the highlight areas of the image.
Another easy and non-toxic approach is using Gamblin brand, PVA Size available online and in art supply stores. Some gum printers have good luck using it undiluted, but this often creates too slick a surface and the gum emulsion will lift off during the water development. Try diluting it in a 1:1 ratio with room temperature water (one part sizing to one part water — 20 ml sizing with 20 ml water). Mix in a beaker and apply to the front of the paper (the side you will print on) with an inexpensive black foam brush. Lay flat to air dry, or use a hair dryer to speed drying. This gives just the right amount of coating to the paper to protect the highlights (whites of the paper) during several subsequent gum coatings, exposures, and developments. Nothing more is needed in terms of sizing.
The gelatin method of sizing is perhaps the most effective and traditionally most popular, but also more time-consuming. Dissolve three packets of unflavored gelatin, such as Knox Gelatin available in grocery stores, into 1 liter of hot water. Allow it to swell (sit) for about 10 minutes with occasional stirring until it is completely dissolved. Pour the solution into a tray and soak multiple sheets of preshrunk paper for at least 10 minutes, but remove them before the solution becomes too cool and begins to turn to gelatin. Lightly squeegee off the excess solution by dragging the printing/front side of the sheet of paper over the edge of a tray, and hang the paper up to dry (low heat may be used). Another popular squeegee method involves securely hanging the paper and using two Plexiglas rod dowels, placing one rod on the back of the paper, and one on the front horizontally, drawing them down the sheet together to force excess sizing down and off the paper.
Hardening
The gelatin sizing must be hardened or else it will wash away during processing. In a well-ventilated area or outdoors, harden the surface by immersing the paper in a bath of 25 milliliters of 37 per cent formalin (less toxic than formaldehyde) in one liter of room temperature water for 2 minutes and then hanging it to dry, using gloves. A less toxic, 1 per cent glyoxal solution can also be used to harden gelatin sizing. In a well-ventilated area, add 25 ml of glyoxal 40 per cent solution to 1 liter of room temperature tap water Immerse the sized paper in the glyoxal solution for 5 minutes and then hang to dry.
Emulsion
The emulsion is made of watercolor or opaque gouache pigment, gum arabic, and dichromate sensitizer. Varying the amounts of these ingredients will result in noticeable changes in image characteristics. For this reason, experimentation and making careful notes are a must. A specific combination might deliver results that are pleasing to one imagemaker but unsatisfactory to another.
Pigments
The easiest way to add color to the emulsion is with good-quality tube-type watercolors such as Winsor & Newton or Grumbacher. Many workers find that opaque gouache-style watercolors perform well for a very rich, bold and graphic effect.
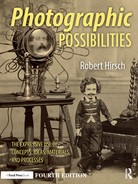
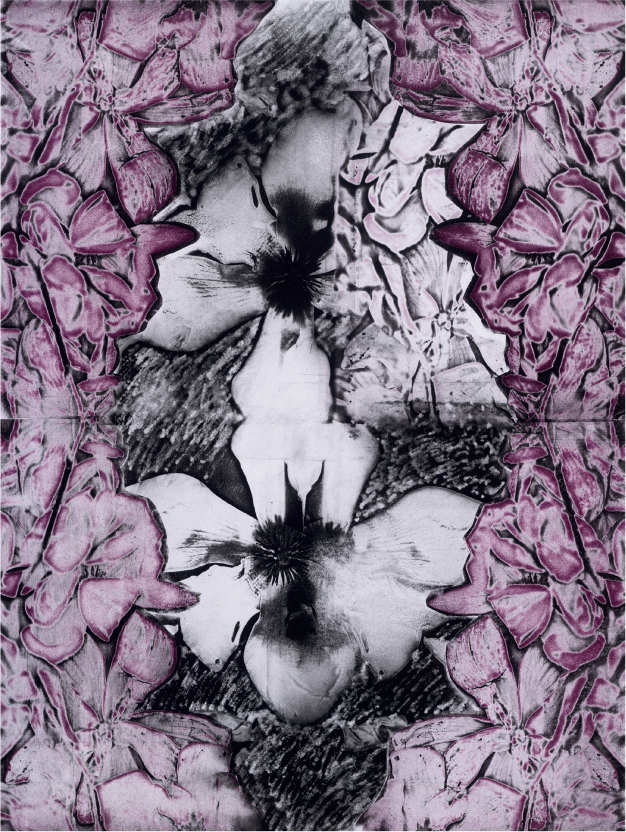
© Brian Taylor. Noah's Ledger, 2007. 20×24 inches. Hand-colored gum bichromate print over cyanotype with mixed media.
The following is a basic color palette that approximates the subtractive primaries of color photography (yellow, magenta, and cyan plus black).
■Cadmium yellow (pale). Hansa yellow is a less expensive synthetic that can be substituted for cadmium.
■Alizarin crimson (close to magenta).
■Monastral or thalo blue. Prussian blue is not recommended because it is chemically incompatible with cadmiums and vermilions.
■Lamp black.
In addition to these three primary colors, there are earth colors such as burnt sienna (brownish brick red), raw sienna (yellower than burnt sienna), burnt umber (dark red-brown), and raw umber (yellowish brown). These colors, in conjunction with lamp black, are useful in making a wide variety of tones.
Note that the chrome colors, such as chrome yellow, can be chemically incompatible with the sensitizer and with other organic pigments. Emerald green, which is poisonous, should not be mixed with other colors, as it is not chemically compatible.
Gum Arabic Solution
The gum solution traditionally requires soaking powdered gum Arabic wrapped in cheesecloth overnight in a jar of water, but this is a laborious method that also necessitates adding toxic preservatives such as formaldehyde to prevent the growth of bacteria. Fortunately, premixed, liquid lithographer's gum solution (14°Baume) is available from graphic arts and alternative photographic suppliers (see Resource Guide at end of this section). These premixed bottles have preservatives added and will keep for a year or more, indeed some gum printers feel that gum Arabic improves with aging.
Sensitizer
The recommended sensitizer is ammonium dichromate (originally called bichromate in the nineteenth century) because it is more sensitive to light than potassium dichromate, thus making faster exposure times, although ammonium is more toxic than potassium dichromate. Store sensitizer in an opaque bottle. If precipitate forms during storage, reheat to dissolve the solution.
Box 11.2 Ammonium Dichromate Formula
| Distilled water (80°F/27°C) | 100 ml |
| Ammonium dichromate* | 10 g |
*Wear protective gloves, as this may cause skin irritation.
Preparing the Ernuisior
The amount of pigment should be varied depending on the desired effect and the type of paper being used. The following is provided as a general guideline, but experimentation is always useful.
Box 11.3 Gum Dichromate Emulsion Formula
| Gum arabic solution | 40 ml |
| Pigment (tube-type watercolors)* Ammonium dichromate sensitizer |
40 ml |
*Pigment amounts vary greatly depending on the desired effect. The following is only a starting point:
| ■ | Alizarin crimson | 3g |
| ■ | Monastral or thalo blue** | 2g |
| ■ | Cadmium yellow | 3g |
| ■ | Burnt sienna | 3g |
| ■ | Burnt umber | 3g |
| Lamp black | 3g |
**Pure blues are difficult to achieve because the orange dichromate tends to shift the color balance to green. Many gum printers make a cyanotype exposure for their blue.
Weigh the pigment on small digital scales, or squeeze a line of pigment from the tube onto wax paper near a ruler. One gram of pigment is approximately one inch of pigment, although carefully weighing the pigment on scales will produce more accurate and consistent results. Place the pigment and the liquid gum arabic in a clean plastic bowl and stir with a small plastic spoon until the pigment is fully dissolved. Gum arabic is the medium in which pigment is dissolved in tubes of watercolor, so this mixing can be done in room light, for it is not light sensitive until the dichromate sensitizer is added. Then, under a simple, 60 watt yellow “bug light” available from hardware stores, add the dichromate sensitizer and stir until the solution is uniform. (No need for a dimmer, official darkroom safelight.) Generally, the gum arabic and dichromate solutions are mixed in equal proportions, while the amount of pigment is varied. It is advisable to use the complete emulsion within two hours of mixing, as it does not keep well.
Visual Effects of Varying the Emulsion Ingredient
Varying the proportions of the gum, pigment, and sensitizer results in the following changes:
■Increasing the gum permits more pigment to be retained without staining, but may increase exposure times.
■Decreasing the gum causes the emulsion to set up more slowly and also may cause pigment staining. This also risks adding too much pigment, in which case the emulsion will be too thick to be easily applied and may flake off during development.
■Increasing the pigment causes the emulsion to set up more rapidly and deepens the color in the shadow areas. This often requires forced development and may produce stains in the highlights. Too much pigment may cause the image to flake off the paper (like small pepper flakes) during development.
■Decreasing the pigment allows the highlight areas to develop more readily but produces very low contrast, as there will be little shadow density.
■Increasing the sensitizer delivers less contrast, as it thins the emulsion; thus less pigment is deposited on the support surface.
■Decreasing the sensitizer results in reduced light sensitivity, causing longer exposure times.
With all these variables, it is best to standardize your gum arabic/sensitizer ratio to 1:1 for consistent results, especially when printing a series of images to ensure it is visually coherent.
Applying the Emulsion
The emulsion is not very sensitive to room light while it is wet, so coating can be carried out under subdued tungsten lights. Since the gum emulsion is most sensitive to ultraviolet or blue light, many gum printers coat their prints under a bright, 60 watt yellow “bug” light available at hardware stores. The paper should be pinned or taped to a smooth, flat board. Generally, the lightest color is applied and printed first to represent the highlight areas of the finished image. This is especially true when using watercolors, since the transparent, lighter colors will not appear if printed over darker, shadow colors. Some gum printers like to print a cyanotype first, to enhance the shadow detail and make registration easier when additional coats are applied. The subsequent colors of gum exposures hide the cyanotype, so there is no concern about ending up with a blue colored image.
Using gloves, mix the emulsion in a small plastic or glass bowl. Dip a spreading brush at least two to three inches wide into the emulsion. For thick, dense gum prints, many gum printers use a Japanese “hake” brush consisting of white, rabbit or goat hair. For thinner, more transparent gum prints, others prefer to use an inexpensive 2 or 3 inch black polyfoam brush. Squeeze out the excess emulsion on the side of the bowl. Coat the paper with long, smooth, horizontal strokes and then with vertical ones. Have enough emulsion on the brush to make one complete stroke without having to redip or “reload” the brush. The strokes should overlap slightly. Perform this operation as rapidly as possible (10-15 seconds for an 8×10 inch piece of paper). Do not let the emulsion puddle or flood the paper, or this overly thick layer will flake off during development.
Immediately take a dry, soft blending brush, such as a dry hake brush, and holding it vertically to the paper, paint in long, gentle strokes, using only the tip of the brush to smooth out the emulsion. This step also should be done as quickly as possible. The coating must be even and thin, or the emulsion may flake off the print later.
Stop blending as soon as the emulsion becomes stiff or tacky. Most of the brush strokes will smooth out as the paper dries, and will not be visible in the finished print.
Hang the paper to dry in a darkened room. A fan or hair dryer, set on low heat, can be used to speed drying. The paper should be exposed within an hour or two of drying, as it will not keep for more than one day. Try to avoid working in humid conditions, as the moisture from the air may affect the unexposed gum emulsion on the print and stain the highlights.
Exposure
Combine the negative and paper (emulsion to emulsion, negative closest to the light) in a contact-printing frame or under a clean piece of glass with a smooth support board, applying pressure on each side for good contact with 2 or 3 inch chrome, “bulldog” clamps available at office supply stores. Expose this contact print “sandwich” to ultraviolet light (UV). Typical sunlight exposures can be 5–10 minutes depending on location, time of year, and time of day. Many gum printers prefer to use artificial UV lights that allow printing during overcast days and at night. This method of exposure also allows for more consistent, timed results. The most popular form of artificial lights are fluorescent UV bulbs (F40/350 BL bulbs). Special, custom-built exposure units incorporating these UV bulbs are available through alternative photographic suppliers (see Material Resources Guide at the end of this chapter). While producing less UV light and longer exposures, traditional 250 watt photofloods can also be used at a distance of 18–24 inches from the printing frame, exposures may be 20–60 minutes. When using photoflood lights, use a fan to cool the lights and keep the negative and print from getting too hot as excessive heat may produce a pigment stain in the print and a warping or buckling of the negative and paper.
Development
Immediately after exposure, the print should be developed in subdued tungsten light. Slide the print, emulsion side down, into a tray of room temperature water. Allow it to float without agitation. The emulsion of the print is extremely delicate and fragile during water development, be careful not to scrape it on the sides or bottom of the tray — try using a smooth bottom tray with no ridges. Yet, this fragility is one of the most creative aspects of gum printing as the printer can use soft brushes to make marks, remove, or “burn and dodge” the image during development. Change the water after about 10 minutes when it has become cloudy with emulsion that has drifted off the paper, being careful of the fragility of the image. Changing the water can be achieved by transferring the print to a second tray of fresh water or by removing the print and changing the water in the tray, then carefully returning the print to the tray face down. For the full range of tones, development should be complete in about 30-60 minutes. You can determine development is complete when the highlight areas are clear. If development seems to be going too slowly due to overexposure or the use of too much pigment, raise the temperature of the water to 100°F (38°C). If a print is underexposed, you can use additional layers of exposure to build up the image density. Overexposure or too much heat can harden the emulsion, making it nearly impossible to wash off. Try leaving the print face down in a tray of water overnight as a last ditch effort to rescue an overexposed image. The emulsion of an extremely underexposed image might float off the paper during development. If the emulsion flakes off, it was applied too thickly.
Forced Development
A soft brush or a directed stream of water (from a hose, graduate, or atomizer) can be used to manipulate the image. These forced development methods permit the use of creative manipulations of the image, particularly adding highlights and contrast to the image. The amount of pressure applied by the brush or stream of water determines the abrasive effect. Generally, very gently pouring water from a short distance of about 6 inches over select areas of the print yields the subtlest changes and opens the highlights, while using a small, soft watercolor brush delivers more dramatic effects and noticeable marks in the image. The print may be removed from the tray of water, placed on a piece of Plexiglas for manipulation, and then returned to the tray to finish the development process. When development is complete, hang the print to dry.
Multiple Printing
After a single exposure, most gum images look flat and weak, lacking color saturation and a sense of visual depth. Multiple printing increases contrast of the shadow areas, extends the overall tonal range, and creates the rich appearance of greater depth. In basic multiple printing, the dried image is recoated with a different color and re-exposed with the same negative in register. This can be repeated numerous times. Gum printing can be successfully combined with cyanotypes for heightened color and contrast.
Registration Methods: Marks in the Margins, Crosshairs, and Pins
If one is satisfied with the results of a single exposure gum print, registration (alignment of negative and print) is never an issue, since the negative is printed once, and need not be aligned a second time over the initial image. However, many gum printers desire the complexity of color and layering that is only possible with multiple printings, one precisely on top of another. Variations in multiple printing include printing negatives with different densities, using color-separation negatives, using entirely different negatives, and changing the pigment color.
When multiple exposures are required, a simple way to register the print is to mark all four corners of the negative on the paper with a soft lead pencil before making the first exposure. These marks will aid the alignment of the negative for subsequent exposures.
Taylor favors a simple method of making registration marks in the clear margins of his negatives: using a waterproof marking pen, make opaque marks, such as crosshairs or dots, in the margin outside the image area, on one side of the image, and then again in the opposite margin. These opaque marks will leave a white photogram (shadow) of themselves in the margins of the first print, which can be visually aligned once again with the crosshair marks on your negative during succeeding printings. Be sure to make these marks on your negative before your first exposure, so they can guide registration for all succeeding exposures. Photographers making enlarged negatives digitally can use Photoshop's specific tool for creating registration marks or “printers’ bulls eyes” in the margins outside the image area.
Taylor also recommends another simple and invisible registration method of placing the negative on the coated and dried paper, then inserting a pushpin through one side of the negative and the paper, then forcing a second pushpin through the opposing far side of the negative and paper. Next tape the negative in place and remove the pushpins. Now you have two small holes that can be used to register the negative with the print during succeeding printings by temporarily replacing the pushpins in the negative once again, and then using the points of the pins to relocate the holes they originally created in the print (of course, tape the negative to the print once again and remove the pushpins). This is a highly accurate registration method, which often reveals the slight shrinkage that unavoidably occurs between runs, but allows a printer the ability to average out the shrinkage between the two holes. This method is especially helpful if you have no margins or extra paper outside your image — these small pinholes remain hidden inside your image area, invisible in the finished print.
Regardless of how much care is taken in initially preshrinking the paper, slight shrinkage often occurs between exposures (especially after extended development times longer than 60 minutes). To compensate for shrinkage between multiple exposures, Taylor turns the print over and wipes the back of the paper with a moistened paper towel. This imparts a slight dampness to the paper, causing it to swell and enlarge during the next few minutes. This swelling lengthens the image and allows your registration marks to line up once again. One can achieve precise registration with a careful combination of dampening the back of the paper to lengthen it, and using a hair dryer to shrink it.
Clearing: An Optional Procedure
After all the printing exposures are finished, a slight yellow stain (from the dichromate sensitizer) may be visible. If this occurs, it may be cleared in a 5 per cent solution of potassium metabisulfite or sodium bisulfite. Wearing gloves and in good ventilation, immerse the print in the clearing bath for 2-5 minutes, wash the print for 15 minutes, and carefully hang to dry.
Drying
After development, gum prints can be dried face up on drying screens or hung from clothespins on lines. Always be careful not to scrape the delicate surface of your print as it comes out of the water tray. Once dry, the image surface is no longer delicate and cannot be manipulated or affected during subsequent exposures of other gum colors (this is good thing, since all your future manipulations occur only on the current gum exposure and do not remove underlying colors).
Resource Guide
For a behind-the-scenes look at Brian Taylor making gum prints visit: www.briantaylorphotography.com/index.php?/details/the-art-of-getting-lost/
Tri-Color Gum Prints from Digital Negatives
While gum printing produces a myriad of varied results, often maddeningly unexpected, artists turn to it for distinctive visual effects. Some gum practitioners are satisfied with the fine and delicate results of a single exposure/single color image, but most endure the trials and tribulations of making multiple exposures in search of remarkable combinations of colors and densities. However, there is yet another, more meticulous approach, in which photographers seek to create full-color renditions of their subjects using the three primary colors of printing known as the Tri-Color Gum Process. This is a more demanding and premeditated approach, requiring starting with a color digital image and separating it into different color channels in Photoshop. The resulting prints deliver a surreal, dreamlike color rendition that is reminiscent of the early Technicolor process due to the impreciseness of the color rendition.
Preparing Tri-Color Digital Negatives
1. Open a color image in Photoshop, make any necessary aesthetic or compositional adjustments and then flip it horizontally (so the scene is backwards left to right).
2. Go to IMAGE in the top pull down menu bar, then ADJUSTMENTS, then INVERT (which turns your scene into a weird color negative).
3. Increase the CANVAS SIZE to create roughly ½ inch margins on each side. (This allows space to print registration marks in these new margins of the main RGB image.)
4. Use the text tool to type a few bold upper case LLs in the clear margins on two opposite sides of the image, (which show up in all three channels in the same spot — very important. You can also create official registration marks (like crosshairs or printers’ bull's-eyes) available in Photoshop.
5. Go to the WINDOWS pull down menu on the top bar, scroll down to CHANNELS, which opens a Channels Palette window on the side. There you’ll see a separation of each channel. Notice that only your original RGB image is in color, whereas when you click on the individual RGB channels, they appear in black-and-white.
6. Select each channel and print each one, one at a time on OHP transparency film, such as Pictorico or Freestyle's Arista brand, so that it prints as a black-and-white negative (not color). You may have to convert each channel to grayscale in order to have them print in black-and-white. (Although printing black-and-white negatives may seem strange for a color process, the color is added to the image later by printing with watercolor pigments.)
7. Make a separate black-and-white negative for each of the three channels, for a total of three negatives. It is very crucial to label each negative for the channel it represents as each one comes out of printer. Use a permanent marker to write R, G or B somewhere in the margin. This will indicate which watercolor to use with each negative later, which will be the complement/ opposite color of the channel.
Paper Preparation
As this is a multiple exposure and development process, the paper must be prepared ahead of time: preshrink and size paper according to previous instructions. Use Rives BFK paper to obtain the best results, as it will shrink less than Arches or Fabriano WC paper.
Exposure
Make three exposures in the following order:
1. Cyan exposure through red channel negative Dilute the working cyanotype solution 1:1 with water and brush onto Rives with black foam brush (this gives a less overpowering blue). Blow-dry with high heat to force paper to shrink before first printing. Expose cyanotype under UV lights for approximately 15 minutes with typical digital negatives. Develop in running water for 10 minutes then hang to dry.
2. Yellow exposure through blue channel negative Use Winsor Newton Cadmium Yellow Pale Watercolor for transparency, not gouache. (Other colors like Transparent Yellow are either too intense or dominant or too opaque.) Expose for approximately 10 minutes under UV lights, about 6 inches away from the light bulbs. Mix 2 grams of watercolor pigment in 20 ml (10% strength) ammonium bichromate and 20 ml liquid gum arabic (this quantity will do about five 11×14 inch prints). Dissolve the pigment in the gum solution and thoroughly stir (subdued tungsten light is okay at this stage) before adding the potassium dichromate. Now work under a bright, 60 watt yellow “insect light,” which is safe and gives off a great amount of light. Add the dichromate and further dissolve the solid pigment with a small stiff brush (not used for coating). Brush the emulsion onto the paper as described earlier in this chapter. When dry, expose the negative and paper under UV lights, then develop the print face down in a tray of room temp water for 30-60 minutes, changing the water about every 15 minutes, then carefully hang to dry.
3. Magenta exposure through green channel negative Use Winsor Newton Permanent Alizarin Crimson, which works better than Winsor Newton Permanent Magenta. Expose about 6 minutes under UV lights, as it needs less time than the preceding yellow run. Mix in same ratio as described above. Follow same development procedure as for the yellow exposure above. If the exposures are correct, your print should appear in full color when it's dry after this third exposure.
4. Fourth run to deepen blacks and increase shadow density This is optional, but recommended. Make a final exposure using the cyanotype solution for 20 minutes through the same red channel negative as the first cyanotype run instead of lamp black (as this will produce less staining than black pigment). This final cyanotype exposure is usually very valuable and does NOT create a blue image; rather it yields increased overall sharpness and an increased, deepening contrast and richness in the shadow areas. If you prefer to print a final layer of black pigment instead of cyanotype, use Winsor Newton Neutral Tint watercolor.
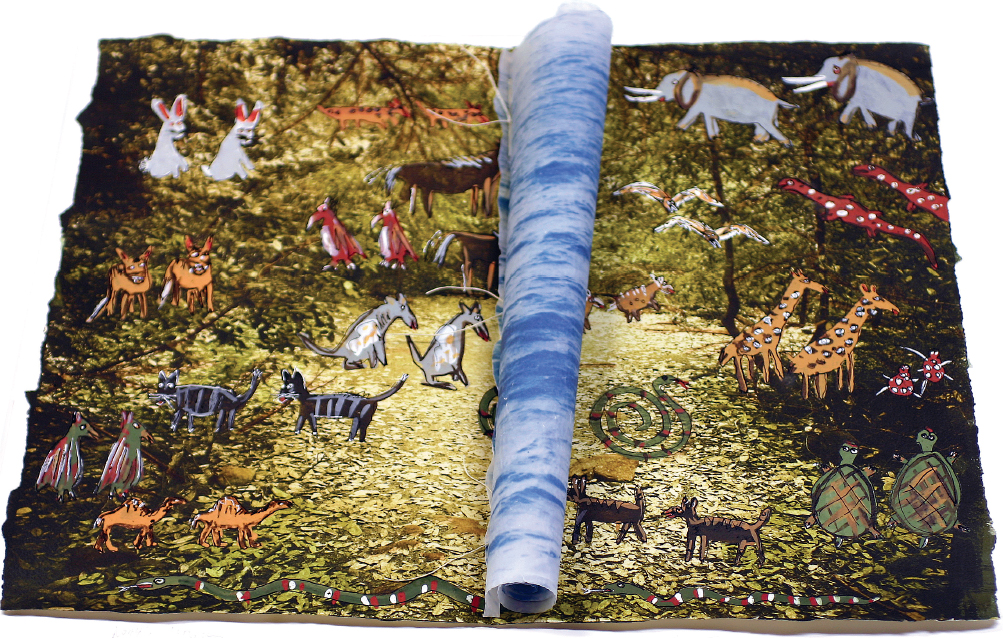
© Brian Taylor. Two Painting Students, Yekaterinburg, Russia, 2011. 15¼×24 inches. Tri-color gum print.
The Bromoil Process
In the bromoil process a gelatin silver bromide print is bleached and then silver is replaced with ink. Introduced in 1907, bromoil offers the option of making an enlargement from a small negative and allows the color, tonal effects, and the diffusion of detail in the final print to be controlled by hand. Multiple impressions can be made with different colored inks. Bromoil's latitude, rich texture, and painterly appearance gave it a following among expressive printmakers through the 1940s.
Traditionally, bromoil prints are produced in either black or brown. The initial image is produced through the conventional black-and-white printing process. The image is then bleached, dried, resoaked, and finally ink is forced onto the emulsion to create the image. Inks cling only to areas on which the paper previously displayed the silver image. After one last drying, a bromoil print has been produced. This print is then archivally stable.
Bromoil Print Summary
The following introduction to the bromoil process is provided by Jill Skupin Burkholder, which is based on her extensive work and that of Gene Laughter with the process.
1. Select a negative possessing a full range of midtones and detail in both shadow and highlight areas.
2. Make a test strip or a test print on fiber photographic paper to determine optimum exposure and times for burning and dodging. The choice of photographic paper is critical with matte surfaces being preferred. This print will also serve as a guide when inking the matrix to determine the tonal values and details you wish to bring out in the inking process.
3. Make a guide print and process it normally at the exposure established in Step 2.
4. Make a print for bromoil by opening up one f-stop more than the exposure for the guide print if you are using super-coated paper (US) or ¼ f-stop more if you are using nonsuper-coated paper (UK and Europe). Super coating is a hardened anti-abrasive layer applied by the manufacturer. The overexposure of the print allows the gelatin of the super-coated paper to sufficiently swell later in the bromoil process. For ease of handling, leave a white border, about 1 inch (2.5 cm), around the bromoil image.
5. Develop the print for 3 minutes in Kodak Dektol 1:9, Ethol LPD, or Rodinal film developer 1:30 with continuous agitation. Then put the print into a 28 per cent acid stop bath for 45 seconds or a water bath for 5 minutes. Next fix the print in a rapid fix without the hardener or in a 10 per cent solution of sodium hypothiosulfate.
6. Wash the print for a minimum of 30 minutes in an archival print washer or with a siphon washer in a tray. Gently blot off any surface water. Air dry for at least 6 hours. Then use a hair dryer on the hot setting 4 inches (10 cm) above the print until it is crisply dried. Now completely soak the print for 5 minutes in a tray of water at room temperature and then drain it.
7. Mix a tray of bleaching/tanning solution at working strength from the following:
| 10 per cent copper sulfate stock solution | 2¼ oz (70 cm) |
| 10 per cent potassium stock bromide solution | 2¼ oz (70 cm) |
| Potassium bichromate stock solution | 1 oz (30 cm) |
| Distilled water to make 1 quart (0.95 liter) |
This solution should treat about eight to ten prints with an image size of 6 × 8 inches (15 × 20 cm). Constantly agitate no more than three or four prints at a time while bleaching them for 8–10 minutes. Use tongs and gloves.
8. Wash these bleached prints, known as matrices, for 10 minutes to remove all the bichromate. Fix in a fresh bath of rapid fix without hardener or a 10 per cent solution of sodium hypothiosulfate for 5 minutes. Wash prints in running water for at least 30 minutes. Gently blot off water. Air dry for at least 6 hours. Super dry (Step 6) again. On many papers a faint latent or a greenish tan image may be visible. Dark brown or black areas indicate you may have exhausted the bleach solution or printed too dark an image.
9. Place a pea-size dollop of lithographic ink on one corner of an inking tile (a 12 inch/30.5 cm smooth, white ceramic bath or floor tile) and spread it, like you are buttering toast, into a thin layer with the edge of a palette knife. Using a rubber ink brayer, spread the ink out into a perfectly smooth square patch on the tile. If you plan on applying ink with a roller, the square should be about 1 inch (2.5 cm) larger than the roller. If you plan on applying ink with a brush, roll the ink into a 2 inch (5 cm) square.
10. Soak the matrix in a tray of tap water at 68–110°F (20–43°C) for 10–20 minutes. The time and temperature of the soak can vary depending on the hardness of the water and the type of photographic paper. Soak only one matrix at a time, and keep it completely submerged by placing coins or pebbles on the white
11. Place the matrix on blotting paper and remove all traces of surface water from both sides with a folded soft paper towel. Dry the back of the matrix by gently rubbing, and blot dry all of the water from the emulsion side of the bleached matrix.
12. Move the matrix, emulsion side up, to a plate glass support angled against a support to suit your comfort. Painter's tape can be used to hold down the edges during inking. Using your wrist as a fulcrum, apply the lithographic ink at the desired stiffness (consistency). Inking techniques vary widely among bromoilists and various brushing actions will deliver different results. Some use small sponges and foam rollers to aggressively clear the highlights of ink. Beginners can use a bristle pastry brush or round fitch brushes found in hardware stores.
Resoak the partially inked matrix for a few minutes in room-temperature water. During the resoak, reroll the ink on your tile with a brayer to even the ink. Blot the matrix dry again. Continue inking and resoaking until the bromoil print reaches the desired state. See Table 11.1 “Common Bromoil Problems” for solving technical problems.
Table 11.1 Common Bromoil Problems
| Image is completely white; ink does not stick to the paper | Exposure time is too short |
| Paper is too wet during ink application | |
| Paper has not been completely dried | |
| Image is grey | Bleach is old |
| Exposure time is too short | |
| Improper developer or fixer used | |
| Paper has not been completely dried after bleaching and fixing Inking method has not been mastered | |
| Image is only black- and- white with no midtones | Image has been over-wiped at the end of inking |
| Inking technique needs improvement- try a hot water soak to increase the amount of gelatin swelling and use ink thinned with a very small dot of oil | |
| Image only has midtones; black is gray and white is dull | Bleach is old |
| Improper developer or fix used | |
| Inking technique needs improvement- highlights should be cleared of ink with each inking and additional inking steps may be needed to build the shadows | |
| Shadow areas do not bleach or show a red tone during bleaching | Print has been improperly fixed or rinsed before bleaching |
| Bleach may be old or not correctly prepared |
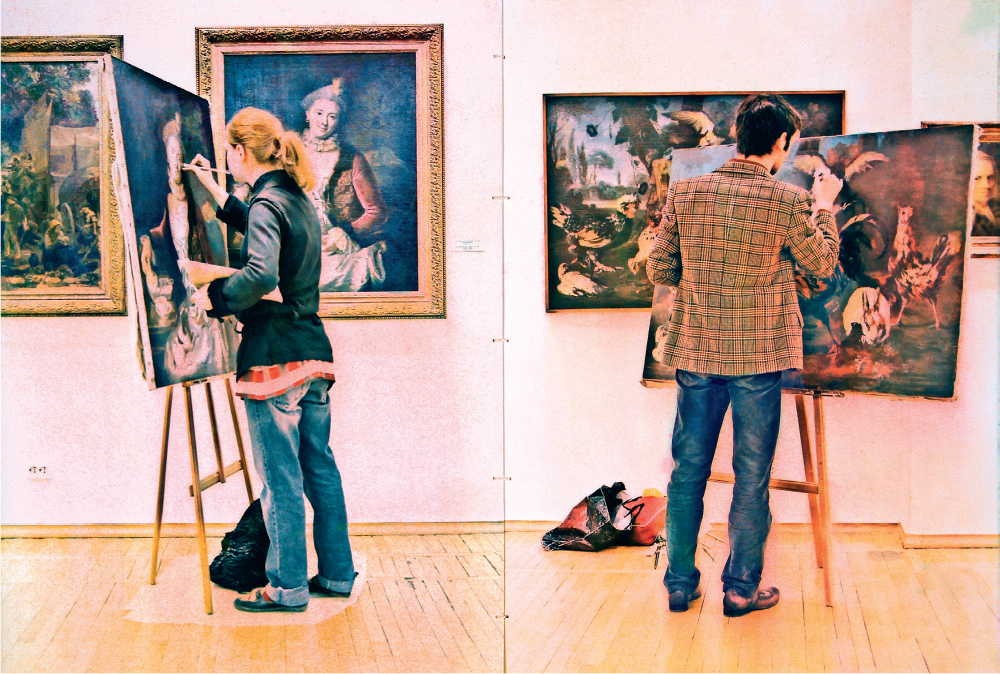
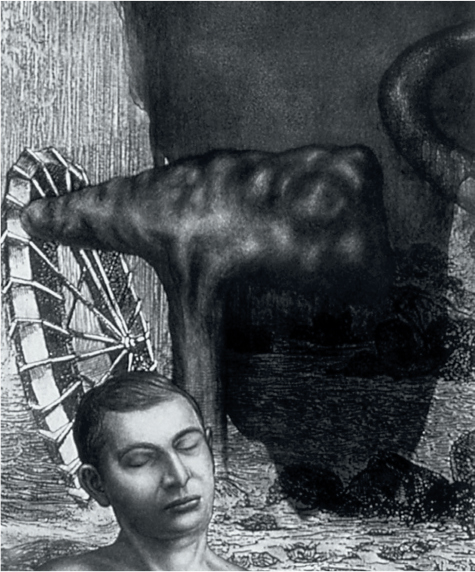
©Jill Skupin Burkholder. Screaming Man, 2004. 8×12 inches. Pigmented ink print from original bromoil.
Resource Guide
Laughter, Gene, Bromoil 101: A Plain English Working Manual and User's Guide for Beginners in the Bromoil Process, Sixth Edition. Self-published, 1999.
The Bromoil Circle: www.gryspeerdt.co.uk/index.html
Gumoil
Gumoil printing, invented by Karl Koenig in 1990, is a polychromatic photographic printmaking process based on black-and-white film. It can produce a look similar to a combination of bromoil, gum bichromate, and painting. In it a positive (not negative) transparent image is contact printed to an unpigmented gum arabic surface coating sensitized with potassium bichromate.
It is developed in running water to wash the unhardened portion of the gum away. This leaves an unpigmented gum resist when dry and oil paint is then rubbed in over the whole image and the excess wiped off. The paint sinks into the open white spaces. The whole print is next etched in household bleach and another tonal region of the gum, now open, is available to a second oil color rubbed over the entire surface. Up to five or six layers of color, from dark to light, can be applied. Paper type and surface are selected by the print maker. The resulting image may be highly photographic (especially on hot-press cotton paper) or more impressionistic (when printed on cold-press paper).
Resource Guide
For processing details, see: Koenig, Karl P. Gumoil Photographic Printing. Revised Edition.Boston, MA: Focal Press, 1999.
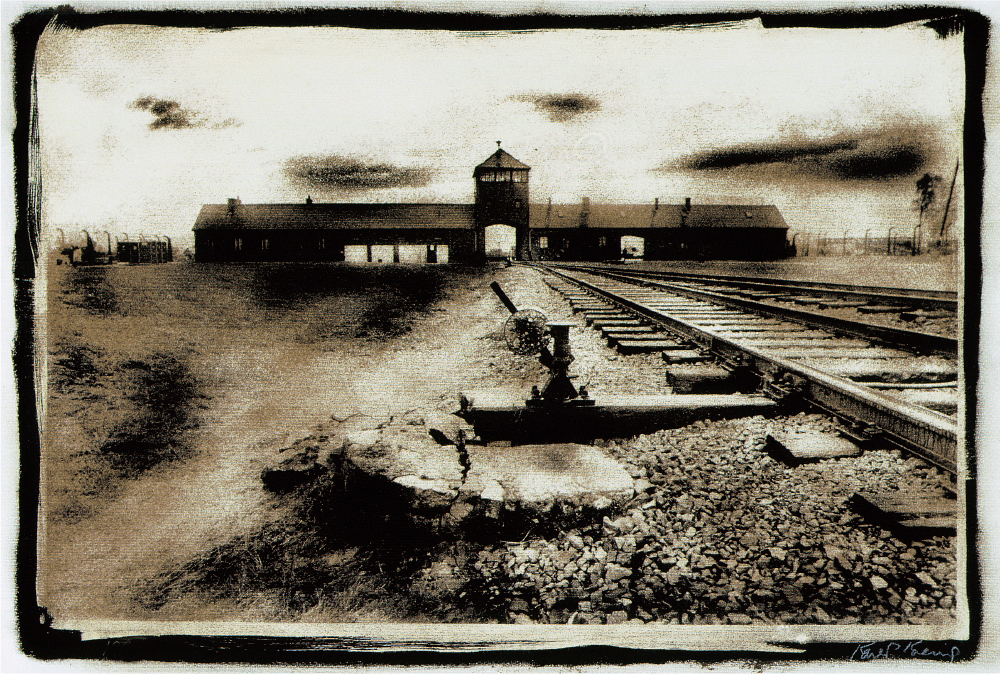
© Karl Koenig. Rail Entrance, Birkenau (Auschwitz II), 2004. 11×15 inches. Gumoil print. Courtesy Holocaust Museum, Houston, TX.
Mordançage
The modern mordancage process, pioneered by French photographer Jean-Pierre Sudre in the 1960s, has historically been referred to as etch-bleach (1897), bleach-etch, gelatin relief, and reverse relief among others. In this process a caustic, acidified copper bleaching solution is utilized to bleach and dissolve away the silver image. This leaves a print in a reverse relief, whereby the dissolution occurs proportionately to the dark areas. With a little physical rubbing, the solubilized silver gelatin layer lifts off the print and leaves behind whites in reverse relief where the darks formerly were. Completely rubbing produces a reversed or almost negative image, but often some positive remains because the original print highlights and midtones are not as affected. Large dark areas of the print can be left attached as veils. The print may be redeveloped, toned, or hand-colored after bleaching and rubbing to produce unique, colorful altered prints. Applying a clear, non-yellowing acrylic spray can protect the result. A print subjected to this chemical solution can change in color and character over time, and this should be taken into consideration as being part of the process's nature. If this is not desired, make a scan of the original to keep as a backup.
Resource Guide
For details, see: Anderson, Christina Z. Experimental Photography Workbook: A Manual of Analog Black & White Darkroom Practice, Sixth Edition. Bozeman, MT: Christina Z. Anderson, 2012.
Opalenik, Elizabeth. Poetic Grace. Oakland, CA: OPA Editions, 2007.
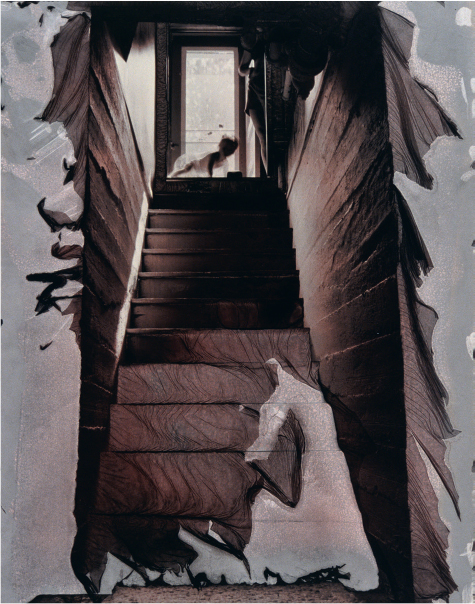
© Christina Anderson. Baby's First Steps, 2003. 14×11 inches. Toned gelatin silver print.
Lith Printing
One can achieve remarkable effects by processing paper in nonrecommended developers. One of the most common examples is known as lith printing, which is really a misnomer, as it has nothing to do with printing from high contrast litho negatives. In this method one processes silver-based paper in an A & B lith developer (often in a diluted form) instead of a conventional paper developer to generate unusual tonal, color, and grain effects with all the other processing steps remaining the same. The color of a finished image is largely determined by a combination of the printing paper, the length of the exposure, dilution of the developer, and the developing time and temperature. There is no conventional standard developing time in lith printing. The print is closely observed and pulled from the developer and quickly placed into the stop bath as soon as the desired color and density is achieved, resulting in colors from a subtle peach, through a greenish brown to a warm black. Unlike conventional silver prints, the results are often unforeseen and problematical to duplicate, making each print unique.
Infectious Development
In lith printing black-and-white negatives are overexposed onto conventional black-and-white paper. The paper is then developed in a lith A & B developer, which often is diluted at least 1:10 rather than the standard dilution of 1:3. A phenomenon known as infectious development takes over during the development cycle. In standard paper developing, the developing activity will slow down after about 2 minutes and eventually the developer will cease working in the shadow areas while continuing to work in the midtones and highlights at a much slower rate. However, in the infectious development process the darker tones develop the fastest, until the darkest shadow areas become a solid black. Additionally this process increases the edge-sharpness or acutance in the higher contrast areas of the print and usually results in warm-toned images ranging from caramel to burnt ochre.
Image Color: Seizing the Print at the Decisive Moment
Image color depends largely on the grain size in the paper's emulsion and time and temperature of the developer. When the development is relatively short (90 seconds or less), the grains remain fine and produce a variety of warm tones. As the development is extended grains become larger and the image tone cooler until it reaches black.
Leaving a lith print in lith developer until the development is complete results in a densely overexposed, cold-toned, dark print. The desired look is achieved by “seizing” the print from the developer precisely as the shadow areas arrive at the density you are looking for, and then quickly and smoothly sliding the print into the stop bath. This procedure gives new meaning to Henri Cartier-Bresson's “Decisive Moment” by acknowledging that such instances can occur any time in the creative process, not just at the moment of exposure. This modus operandi is what gives lith prints their characteristic black shadows juxtaposed against delicate, soft highlights that can vary from yellowish-beige to a peachy pink or olive-yellow, depending on the paper and your processing method. Alternatively, by modifying your technique, you can produce high-contrast, intensely grainy looking prints.
Lith Printing Procedure
Lith printing is about experimentation, but the following offers a basic starting point.
Paper
Higher-contrast conventional papers of Grade 3 or 4, which do not utilize optical brighteners or “built-in” developers, work well. Papers with a high silver contrast work best. Try a variety of papers, as different ones will produce diverse results. For instance, warm-tone paper will generate warmer color effects than a neutral or cold-tone paper. Variable contrast papers also work well as long as you do not use any variable contrast filters. Regardless of paper, contrast is controlled by a combination of exposure and development.
Exposure
Expose for highlight or midtones and develop for shadow details. This is best determined by making a test strip, which has been removed from the developer when shadow detail reaches the desired point. Many practitioners intentionally overexpose the paper by two or more f-stops to ensure there is adequate highlight detail when the print is pulled from the developer. Long exposure times may be necessary to properly expose highlights. Experimentation is a necessity, as changes in exposure time will alter the look of the final print.
Lith Developer
The condition and dilution of the lith developer significantly affects the lith effect. Fresh developer does not always deliver the desired results. Often more intriguing outcomes occur after a few prints have been processed. Alternatively, adding used lith developer to the fresh solution at the starting rate of about 1:4 (old to new) can also be effective.
The A & B lith developers are designed to be mixed 1:1 to process lith film. When processing paper this dilution may be too strong. Many workers are able to produce a wider variety of effects by diluting the A & B solutions with water in ratios starting at 1:10 (developer to water) and going up to 1:30 (developer to water), which will also extend the processing time. Also, varying the ratio of A & B solutions can alter the visual outcome.
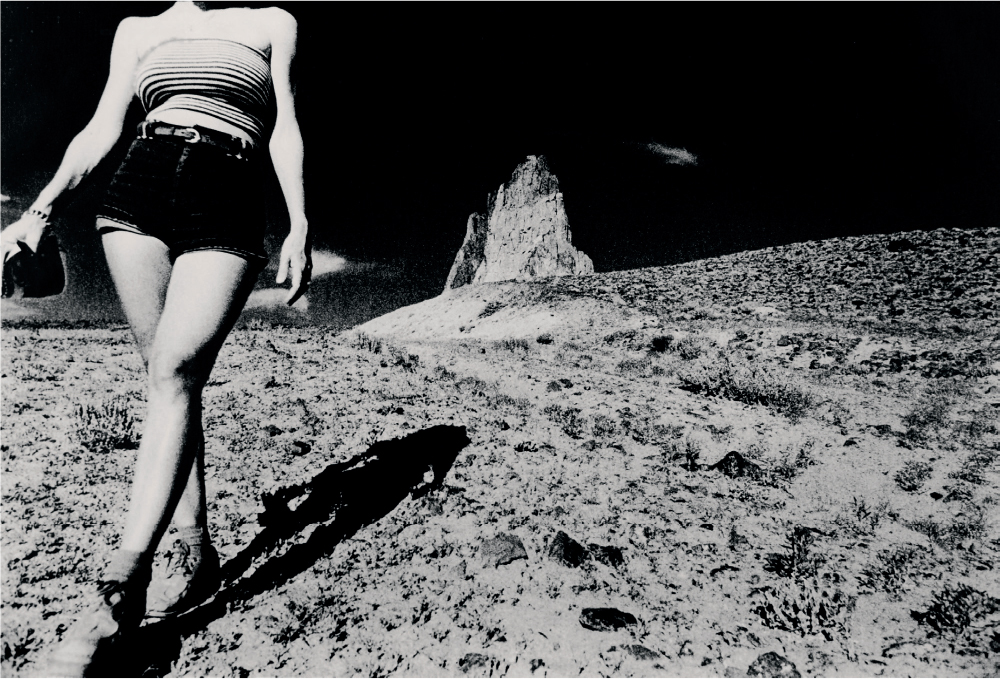
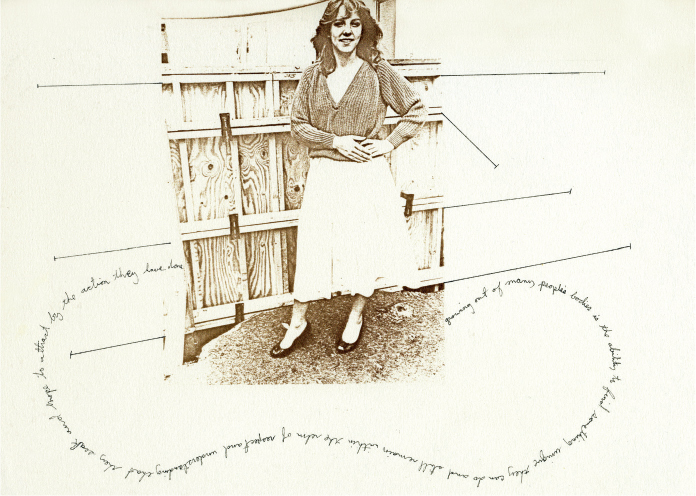
© Robert Hirsch. Identity Crisis, from the series Southwest Space Project, 1978. 16×20 inches. Gelatin silver print.
Depending on the paper, temperature, dilution, and exposure, lith developer typically has a useful development range of about 1½-5 minutes at 68°F (20°C). But since there are no standard development times, times can be as long as necessary. Image color can often be controlled through a combination of exposure and development time (long exposure with short development or short exposure with extended development). Print mottling, called pepper fog, can result from this technique, but some people find that this enhances the look. Clearly, experimentation is in order.
Constant agitation is necessary; otherwise different depths of developer caused by the tray's construction can generate uneven development, producing unintended patterns on the print.
Under the glow of a red or amber safelight, watch for the emergence of detail in the key shadow areas. At the appropriate moment, swiftly slide the print into the stop bath. When it is getting close to the chosen point of completion, the print can be removed from the developer for observation and then immediately placed into the stop bath. Do not hold it up to drain or the critical moment will be missed. Some find it more effective to anticipate the “right” moment a few seconds in advance, pull the print from the developer then, allow it drain for a second, and then quickly slide the print into the stop bath. Use an indicator stop bath, which changes color so you will know when it is exhausted.
The capacity of developer is limited in this nonstandard application and thus can suddenly stop working. Discard the developer when time starts to extend beyond your established processing time. Keep some of the used developer to mix with the next batch. For consistent results, expect to do this often.
Contrast Control
Contrast is controlled by both exposure and development time. Timing depends on your chosen outcome and the state of the developer, which quickly exhausts. Forget about the timer and watch the critical shadow areas you want to control.
Print Assessment
Assessing a print with faint pink or sepia tones can be difficult under red or amber safelight. Therefore, fix the print in a rapid fixer for a minimum of 60 seconds with a constant agitation and then turn on the white light to make your evaluation. After making your assessment, complete the fixing step and continue with your regular processing procedures. If scum marks appear on the print, soak it in a 3 per cent acetic acid and then thoroughly rewash it.
Resource Guide
For detailed processing instructions and examples, see: Rudman, Tim. The World of Lith Printing, available at www.worldoflithprinting.com/
Fotospeed makes a lith processing kit: www.fotospeed.com
Electrostatic Processes: Copy Machines
The prototypes for modern copy machines can be traced back to the patent awards for the Papyrograph (1874), Electric Pen (1875), Mimeograph (1899), Photostat (1906), Ditto Machine (1910), and Spirit Duplicator (1923). The accessibility of modern copy machines allowed people to expand their original business/scribal role by copying images, objects, body parts, and other items that had not been in the public eye. This generated a subculture/network of making and circulating/publishing artistic, idiosyncratic, and/or rebellious material that could bypass/subvert cultural gatekeepers and copyright restrictions by rolling the author, publisher, distributor, and reader into one. Artists utilized these devices to combine electronic, manual, and mechanical processes in the creation of new images.
Black-And-White Copiers
Black-and-white copy machines are very accessible and less expensive to use than their color counterparts. They provide a good starting point for conducting experiments with copiers. You can apply many of the things you learn on these machines to work on a color copier. The quality of image reproduction varies widely depending on the type of system used. Generally, continuous-tone images lose a great amount of detail when copied. Some systems provide a special screen, which can be used to improve the copy delivered from a full-tone image. Graphic images tend to work well with most machines.
All the black-and-white copiers allow the image-maker to alter the density of the print. Some accept a variety of paper stocks, including different colors. Most machines make enlargements and reductions at fixed percentages of the original. Others permit you to make more than one copy on the same piece of paper; thus multiple exposure combinations are possible.
The black-and-white copiers rely on a number of different systems to form a completed copy print. The systems using an electrostatically charged toner that can form an image on any type of paper, including acid-free rag paper, provide the most stable print.
Color Copiers
Color copiers are widely available and artists are using them to explore their more complex imaging functions. Color copiers use the subtractive colors (magenta, yellow, and cyan). Each color is separated from the original through an internal filtering unit. The image is then reproduced with toners (pigments) made up of thermoplastic powders that are electronically fused onto the paper, making a permanent image. Copiers that use toners do not require a specially treated paper and therefore can be fused onto a variety of artist's papers.
The original color copiers worked like a simple camera, using a lens to take a picture of the document to be copied. It produced a very flat and limited field of focus that extended only about ¾–½ inch above the copier glass. Current color copiers are digital (see next section). Color copiers provide many printmaking options, including the following:
■Rapid and consistent duplication and production.
■Ready conversion of 3-D objects into flat printouts.
■Manipulation of colors and contrast (many can produce a monochrome copy).
■Image enlargements and reductions.
■Printing on many different supports, such as archival artist's paper, acetate, and silicon transfer sheets (which can be ironed onto paper or fabric). An added virtue is that the pigments used to form the image are stable and provide a long print life. The rapid feedback of this process enables instant correction and further interaction of the printmaker with the materials and processes. Prints made on artist's paper can be hand-colored with pencils, dyes, inks, or watercolors. Individual prints can be connected with one another to form a larger mosaic of images.
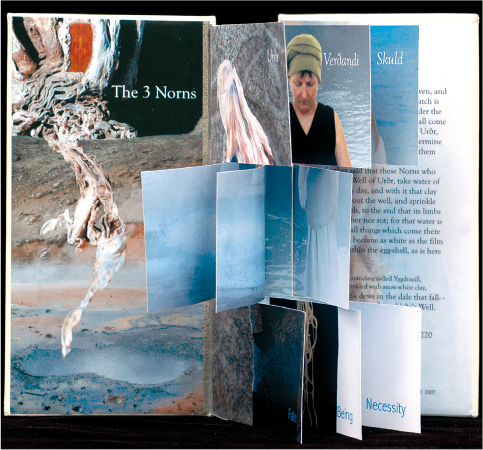
© Bea Nettles. Fate, Being, and Necessity, 2007. 8×4×½ inches. Electrostatic prints with mixed media.
Digital Color Copiers and All-In-One-Machines
Digital color copiers have a scanner (see Chapter 4) that reads the image to be copied and converts it into digital signals that are then sent to a raster image processor (RIP). The RIP converts color files into printing instructions that are transmitted to a laser printer capable of delivering color copies of up to 64 gradations per color. Like the original optical copier, digital color copiers use the subtractive color system, but in addition to magenta, yellow, and cyan, these copiers also use black. The black enables these machines to reproduce colors more accurately and to provide a greater sense of depth.
Digital color copiers have features that can be used with an image-editing unit, but typically do not offer noticeably higher quality than optical copiers. All-in-one multi-functional machines provide print/copy/scan capabilities in a single unit. All digital machines offer a wide range of features including:
■Excellent image resolution.
■Sharpness control to accentuate or soften detail.
■Programmable color balance memory.
■Enlargement or reduction feature that permits a subject to be stretched or squeezed to fit a specific space.
■Slanting control to set the horizontal and vertical copying ratios separately and position the original at a variety of angles.
■Multi-page enlarger that divides the image into multiple sections that can be printed in sequence and assembled into a single piece.
■Color conversion mode that lets you change the color of an original or a specified portion of the original.
■Image composition key that lets you combine original color materials with black-and-white text.
■Area designation that allows you to frame, blank out, or segment the image.
■Shifting modes that let the image to be reduced and moved to any position on the page.
■Ability to make a color copy from a negative as well as a slide.
■Capability to connect the copier to a computer network.
Electrophotography: The Xerox Flat Plate System
The Xerox flat plate system (electrophotography) is relatively unknown in the history of photography. This is because Xerox never intended their machines to be used as a tool for artists and photographers, such as Tom Carpenter, whose extensive research in this area is the basis for this section. Xerox developed their process to make copies of typed office documents in 1952. Another reason for its inconspicuousness is Rochester area artists used this equipment predominantly as the Xerox Corporation was headquartered in Rochester, New York during this time. Often work produced with the flat plate system is categorized as “copy art” because it was produced with a xerographic process. Unlike current automatic copy systems, the flat plate system is a completely manual camera based process that requires multiple steps and photographic knowledge. Charging, exposing, developing, transferring, and fusing steps had to be manually carried out by the user. As the process requires many separate stages, there are numerous opportunities for adjustments manipulation.
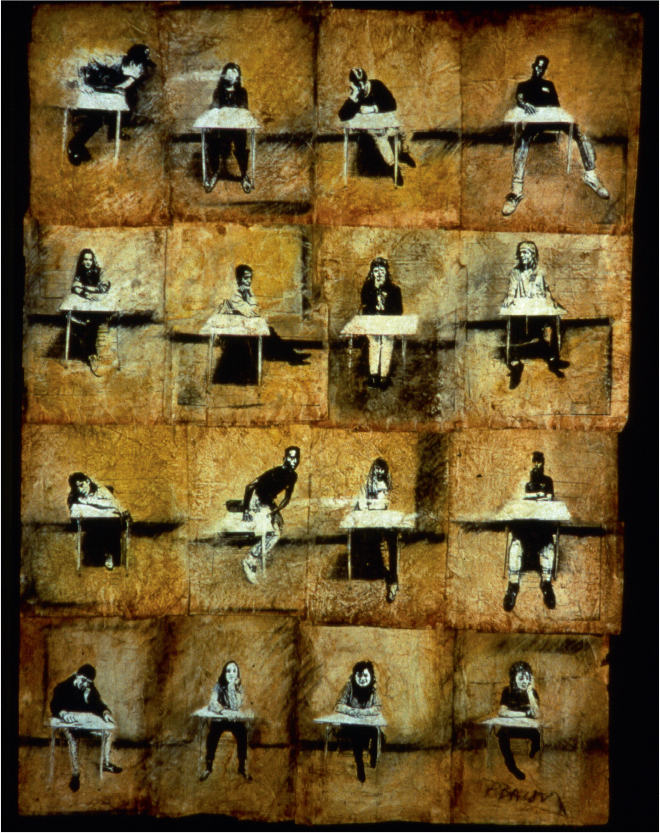
© Pat Bacon. Students and Desks (detail), 1991. 50×48 inches; overall size 50×192 inches. Electrostatic print with mixed media.
A Brief History of Electrophotography/Xerography
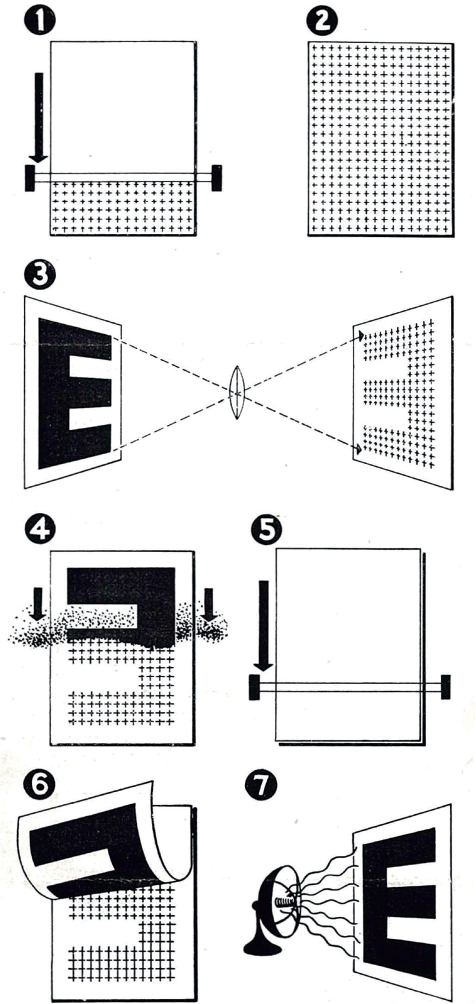
Electrophotography is based on the concept that opposite charges attract and like charges repel (Figure 11.10). The same force that holds a balloon to a wall when you rub on it against your hair makes electrophotography work. Chester Carlson (1906–1968), a physicist, patent attorney, and inventor, began working with the idea when he found a need for making quick copies of documents and drawings in his work in the 1930s. Working in a patent office Carlson could have had documents retyped, used a mimeograph or have drawings photographically copied. Knowing that others were working with reproducing documents through “wet” photographic means, Carlson went in a different direction. Working with a zinc plate coated in sulfur and lycopodium powder he made his first “dry” successful experiment in 1938. Carlson went on to patent his inventions and looked for a company who was interested working with his concept. His idea was passed by over twenty companies including IBM, Kodak, and the U.S. Navy. Carlson persisted and Battelle Memorial Institute agreed to develop his dry copy idea 1944. Dr. Harold E. Clark, of the Battelle Memorial Institute recalled:
Electrophotography had practically no foundation in previous scientific work. Chet [Carlson] put together a rather odd lot of phenomena, each of which was obscure in itself and none of which had previously been related in anyone's thinking. The result was the biggest thing in imaging since the coming of photography itself. Furthermore, he did it entirely without the help of a favorable scientific climate. There are dozens of instances of simultaneous discovery down through scientific history, but no one came anywhere near being simultaneous with Chet. I’m as amazed by his discovery now as I was when I first heard of it.1
Eventually in 1946 Haloid, a small photo paper company in Rochester New York, agreed to work with Battelle to turn his idea into a commercial product. Haloid started to call this process Xerography rather than Electrophotography to avoid any connotations that this was a wet photographic process that required chemicals. Xerography came from the Greek words xeros (dry) and graphein (writing).
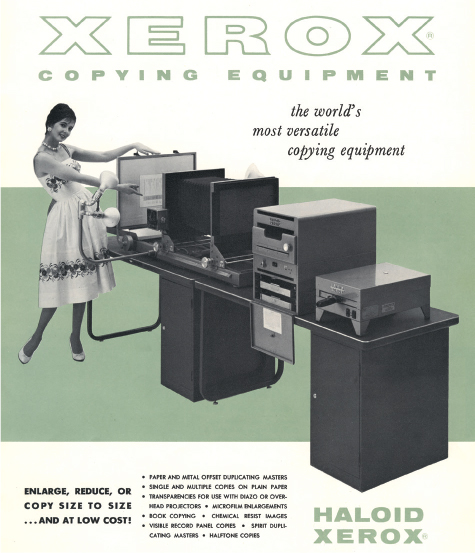
Courtesy Xerox Historical Archives.
Courtesy Xerox Historical Archives.
The first machine Haloid sold in 1949 was the Model A, an all-inclusive device requiring several steps, which produced one to one copies of documents. Haloid subsequently released the #4 Camera in 1952 that was to work in conjunction with the model D processor and fuser. The #4 camera allowed for enlargement of documents by being able to zoom into the document being held in the contact frame. Over the next ten years Haloid, later known as Haloid Xerox before eventually becoming Xerox, developed this technology into the first all-in-one copier. In 1959 Xerox released the 914, which only required the user to put the document face down and press a button. All the manual steps required in the previous Xerox machines now automatically took place without any intervention from the user. The 914 would become a huge success and make the name Xerox synonymous with copying documents.
The success of the 914 made the flat plate system obsolete for use in an office environment, but it was still utilized for decades in print shops for making offset litho masters. Due to this practice, it is possible to find flat plate equipment today hidden away in small prints shops, eBay, or on Craigslist.
Box 11.4 Xerox Flat Plate Equipment
1. Selenium plate measuring 11×14 inches, held in a modified camera film holder. The process is completed by the operator utilizing three separate pieces of equipment.
2. Charging unit: for charging the selenium plate.
3. Large process camera: for exposing the selenium plate.
4. Fusing unit: small oven that melted the toner into the paper.
Basic Steps of the Xerox Flat Plate Process
1. The selenium plate is positioned in the charging unit and exposed to thousands of volts of electricity, giving the plate a positive electrostatic charge. A dark slide is slid into the plate holder to protect it from light.
2. The #4 camera is focused on its subject in the same manner as a traditional medium or large format camera.
3. The ground glass is removed and selenium plate is inserted. The dark slide is pulled out and the exposure, lasting from a few seconds to a few minutes, is made. The areas of the plate that are hit with light lose their positive charge. Exposure times are similar to that of wet-plate photography. In normal daylight conditions 10 seconds is a good place to start. However, trial and error is required to find your correct exposure.
4. The plate is now ready for development. The plate is placed on a tray full of toner and carrier beads. Carrier beads are small metal balls that have a weak electrostatic charge that allows the toner to adhere to them. The dark slide is removed and the plate is rocked back and forth in a process known as cascade development. The toner is held to the carrier beads with an electrostatic charge. The parts of the plate that have not been exposed to light still have a positive charge stronger than the carrier beads, thus pulling the toner off of them and adhering the toner to the plate.
5. When the plate is removed the image is complete and should be visible as a reversed positive, just as one would see a daguerreotype. At this point the image can be transferred.
6. A sheet of paper is placed over the image taking care not to move the paper causing the image to smudge.
7. The plate and paper are placed back into the charging unit and the same electrostatic charge used for charging the plate is used to “lift” the negatively charged toner onto the piece of paper.
8. The plate is pulled out and the paper is lifted off.
The image is now no longer reversed and is ready for fusing. At this stage before fusing one can smudge, draw on or transfer the image to other surfaces such as thick fine art paper, wood, metal, or even clay.
Selenium Plates Data
Unlike other photographic processes, the Xerox flat plate process employs reusable selenium plates. The plates are no longer manufactured and ones that have never been used suffer from the effects of degradation. Even with careful handling plates will accumulate scuffs and scratches. Some people find this aged surface to be captivating while others find it unsatisfying. The scratches can be removed by careful polishing with basso.
Artistic Uses of the Xerox Flat Plate System
After the flat plate system became obsolete, it found its way into the hands of Rochester imagemakers. The first known artist to extensively work with the equipment was Charlie Arnold (1922-2011), a photography professor at the Rochester Institute of Technology, who crafted exquisite still lifes with deep rich blacks and incredible gradations. Arnold would rework a photograph or Xerox after it was processed. He also modified the large Xerox camera to meet his aesthetic criteria. The original Xerox configuration was designed to photograph typed office documents mounted in the contact frame. Arnold did away with the document holder and cut off over a foot of camera bed length. He mounted his modified camera on an early nineteenth-century studio camera stand. This do-it-yourself setup allowed him to move the camera and make height and angle adjustments with ease. Arnold made custom toner colors. Using standard color copier toners, he mixed his own sepia colored browns. He also worked extensively with white toner on black paper, which was used by Disney in making animation cells, but not widely available.
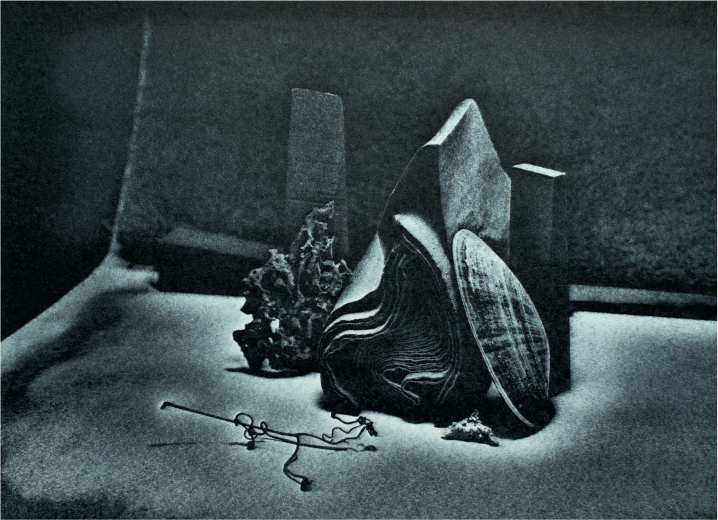
© Charles Arnold. Untitled (Sea shell), 1984. 13×10 inches. Electrostatic print with white toner on black paper. Courtesy Charles Arnold Estate.
Joan Lyons (b. 1937) used the flat plate process to produce several series of larger-scale pieces. Multiple images were transferred onto sheets of paper allowing the unfixed image to be further altered or drawn into. The pieces were finally fused with lacquer solvents in a large felt-lined box. She used a similar process to transfer the unfixed camera images to aluminum lithographic printing plates, which were subsequently printed on a large flatbed offset press. The flat-plate system at The Visual Studies Workshop, where both Lyons and Joel Swartz (see next paragraph) taught, was used from the 1970 through the 1990s. Faculty, students, and visiting artists used it to produce small edition offset artists’ books as well as unique prints.
Joel Swartz (b. 1944), another Rochester maker, worked broadly with the process and was responsible for teaching countless others the ins and outs of the process (including myself). Swartz's attraction to the process was its ability to print photographic images onto various fine art papers. He also mixed his own toner colors and added handwritten text to his work. For some work, Swartz would pause a film he had made and photograph it off a television screen. The resulting images show the grain of the television screen. He also transferred his images onto ceramic surfaces. He would heat the ceramic piece until the toner became sticky then he would dust the image with ceramic oxides. The piece, once fired in the kiln, would have the color of whatever ceramic powder he chose.
One of Swartz's most important innovations was his development of the “Hot Wire.” He tapped into the power supply of the model D charging unit. Swartz added a very large resister and attached a banana clip plug in the side of the machine. An insulated wire with a needle soldered onto the end was plugged in. This invention allowed for the transferring of the image that had not been heat set onto other surfaces.
Toner Transfer Process
Both black-and-white copiers and laser printers rely on a number of different steps to form an image. The first step is exposure. Most laser printers will have a drum unit, which houses a photosensitive cylinder. The cylinder is exposed to light, which causes the toner to adhere only to parts of the photosensitive surface that have not been exposed to light. In older optical copiers light is reflected off the document on the platen (or glass) and onto the light sensitive drum. In modern copiers the document is scanned and a laser draws the image onto the photosensitive cylinder. In both processes after the cylinder is exposed it is coated with toner. The toner is then transferred to a piece of paper that then runs through a fuser that heats the toner and melts it onto the paper. The toner is very stable and images can be printed on any type of paper including acid free rag paper, providing archival quality prints (see Box 11.5).
© Joan Lyons. Untitled, from the Series Symmetrical Drawings, 1979. 22×30 Inches. Haloid-Xerox Transfer Drawing. Courtesy Visual Studies Workshop, Rochester, NY.
©Joel Swartz. Woman Posing, 1988. 9⅝×12 15/16 inches. Electrostatic print.
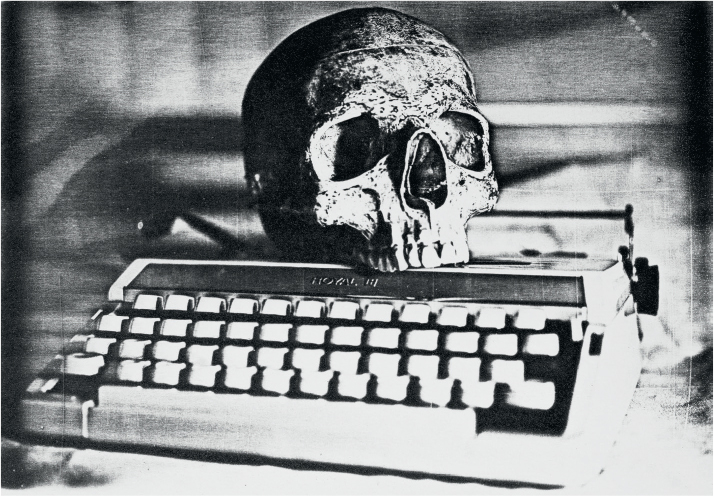
© Tom Carpenter. Still Life With Typewriter, 2015. 14×17 inches. Electrostatic print.
Manipulating the Transfer Process
One of the least known methods of working with and manipulating electrostatic prints is to interrupt the fusing process, which will give you an image on paper that can be transferred easily to other surfaces (see Table 11.2).
Using a laser printer is a simple way to explore with this process and with appropriate care you will not harm your laser printer. High contrast images or images with halftones are a good place to start. If you have text or you do not want the image to be reversed, you will need to flip (reverse) the image before printing.
Before printing load a sheet of 8½ × 11 inch paper in the manual paper tray. This will allow you to watch as the paper advances into the printer. Once you press print watch as the paper advances. When the paper has entered the machine shut the printer off. Experimentation is required to determine the right point at which to shut down the printer.
Once the printer has been turned off you will remove the drum unit. This contains the photosensitive cylinder and holds the toner as well. Once removed you should see the paper stopped on its path through the machine. Your goal is to stop the machine after the image has been transferred to the paper, but before it has run through the fuser.
You want to have an unfused area, about 5 × 8 inches, on the 8½ × 11 inch paper.
The resulting image can be transferred to just about any smooth surface by rubbing or burnishing the back of the paper with something like a bone folder (a dull edged hand tool to burnish, crease, score, or smooth paper or other material).
Once the image is on the new surface the image can be made permanent by spraying with Krylon's Fixatif, which is an acid-free, reworkable, clear spray finish that will protect the image and keep the toner from smudging. The image can also be fused to the paper by heating in an oven for less than a minute at about 350°F or using a heat gun. When heating, the toner based image will darken slightly. This color change is a good indication that it has melted and is now safe to touch without smudging.
Resource Guide
Alternative Photography: www.alternativephotography.com
Crawford, William. The Keepers of Light: A History and Working Guide to Early Photographic Processes. Dobbs Ferry, NY: Morgan and Morgan, 1980.
Eichhorn, Kate. Adjusted Margin: Xerography, Art, and Activism in the Late Twentieth Century. Cambridge, MA and London: The MIT Press, 2016.
Graphics Atlas: www.graphicsatlas.org presents an object-based approach for the identification and characterization of prints and photographs.
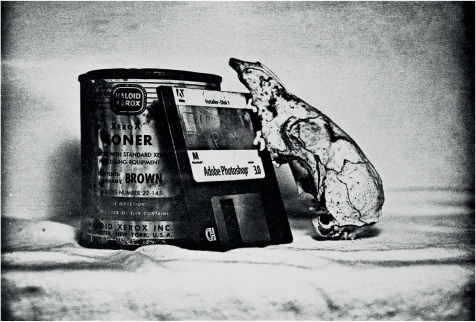
© Tom Carpenter. Still Life With Floppy Disk, 2014. 14×17 inches. Electrostatic print.
Table 11.2 Interrupting the Fusing Process
| 1. | Prepare an image on a computer graphics program such as Photoshop. |
| 2. | Load the paper into the manual paper feed tray. |
| 3. | When the paper is loaded press print |
| 4. | Watch as the paper advances. When the paper has entered the machine shut the printer off. Experimentation is required to determine the right point at which to shut down the printer. |
| 5. | Open the printer and pull out the drum unit. |
| 6. | Carefully remove the paper and examine to see that the image has not passed through the fuser. |
| 7. | Place the unfused image face down onto receiving surface and rub or burnish the back of the paper. |
| 8. | The resulting image can be sprayed with a fixative or heated to melt the toner onto the receiving surface. |
Box 11.5 Toner Transfer Attributes
■Inexpensive. Laser printers can be purchased new for as little as $50 and can be found used online.
■Archival — Toner is extremely stable (depending on support material).
■Allows for experimentation. The image can be smudged, erased and scratched prior to being made permanent by fusing or spray Fixative.
■Various surfaces. The toner based image can be transferred to just about any smooth surface. Paper, metal, wood, glass or ceramic.
© Adele Henderson. Lazaretto No. 10, 1995. 14×11 inches. Toner Transfer Drawing.
Material Resource Guide
Artcraft Chemicals: www.artcraftchemicals.com (photographic chemicals for a variety of photographic processes including wet-plate, platinum/palladium and other alternative processes).
Artist Paper: www.artpaper.com
Bostick & Sullivan: www.bostick-sullivan.com (catalog of materials kits for platinum and alternative process printing).
Chicago Albumen Works: www.albumenworks.com (a line of products including a gelatin chloride print-ing-out paper).
Fisher Scientific: www.fishersci.com
Freestyle Photographic Supplies: www.freestylephoto.biz
Photographers' Formulary: http://stores.photoformulary.com
Spectrum Chemical & Laboratory Products: www.spec-trumchemical.com
END NOTE
1John Brooks. “Profiles: XEROX XEROX XEROX XEROX,” The New Yorker, April 1, 1967, 74. http://archives.newyorker.com/?i.1967-04-01#folio.074