Chapter 12
Transforming Photographic Concepts: Expanding the Lexicon
Hand Altered Work
The hand altering of photographic images began soon after the daguerreotype process was made public in 1839 to compensate for the latter's inability to record color. By the beginning of the twentieth century hand-altered work was popular with the foremost Pictorialists, such as Edward Steichen, Frank Eugene, and Gertrude Kasebier, whose images often resembled drawings, lithographs, and paintings. They hand-altered their work to demonstrate that photography was more than an automatic mechanical process, and could be controlled and manipulated with the same expressive intent as traditional art forms. Today hand-altered processes are not done for compensation or imitation but to expand the boundaries of the photographic medium. Hand alteration enables photographers to bring into existence concepts, dreams, and feelings that cannot be achieved through standard photographic practice, thereby providing a bridge that can meaningfully unite ideas, materials, practice, and vision.
The Kitchen of Meaning
To grasp the ever-changing cultural dialogue, an image-maker has to be ready to seize time's wonders. Generally this does not come easily. Being an artist entails making a long-term commitment to aesthetic and technical training in what French writer and theoretician Roland Barthes dubbed “the kitchen of meaning,” where one willingly toils to realize a bountiful visual roux. Hand-altered work allows photographers to prolong their interaction with the process and/or re-interpret past works, thereby redefining the temporal and/or technical architecture of the image. This shift in time enables the moment of exposure to act as a beginning rather than as an ending for imagemaking. This flexibility can expand the consciousness of a maker and give rise to an extended sense of reality that can articulate both an objective exterior and a subjective interior view of a subject. Hand-altered work can express how photography is an elastic process of discovery and invention and not just a fixed body of technical data that is permanently frozen at the moment of exposure. Hand-altered work may commingle at the juncture of what is real and what might be real, reminding us that the invisible and the intangible are as important as what we see in concrete reality. Such processes encourage an artistic and intellectual rethinking of the action between a matter-based and a mind-based interpretation of a subject, which can expand the interaction among the materials, the work, the maker, and the viewer.
Pushing beyond the Familiar to an Enhanced Reality
Hand alteration is a way to expand the photographic lexicon and is not meant to replace traditional modes of working. When hand-altering work, take the freedom to push and pull the ideas and materials until resistance is felt. Push on the confines of familiarity, but learn to stop before resistance turns into chaos. When one hits resistance to new ideas and methods, it indicates you are entering uncharted waters. There are no guides, instructions, or maps to offer direction. You are on your own. This enables you to know how far you can stretch the medium and yourself. Maintain a record of your experiments so the results can be duplicated and your knowledge shared. Keep in mind what Pablo Picasso said: “The eyes of an artist are open to a superior reality.”
Since there are fewer conventions in hand-altered practice than in regular methods, how does one find satisfaction? Your mind will quit circling and say YES to what has been created. During the act of making there may even be a dynamic haptic interchange between the artist and the materials, which physically culminates at completion. This is when you know it is time to cease working. Your own character is now intertwined with the piece. As the image is transformed, so are the maker and potential viewers.
Doing the Opposite: Creating a Doppelganger
Much of this book has been devoted to providing known pathways for the expressive photographic imagemaker. As soon as you have gained control over the medium and tools and are able to express what you desire, it is time to avoid getting bogged down by too many rules. Pretend to have a Doppelgänger, an apparitional double or counterpart, who does the opposite of what you normally do. Too much technical expertise can be as inhibiting as too little. Doing the opposite keeps one from being too complacent and judgmental. Reaching into the unknown is one way to grasp new possibilities. Keep a notebook of new ideas for future reference.
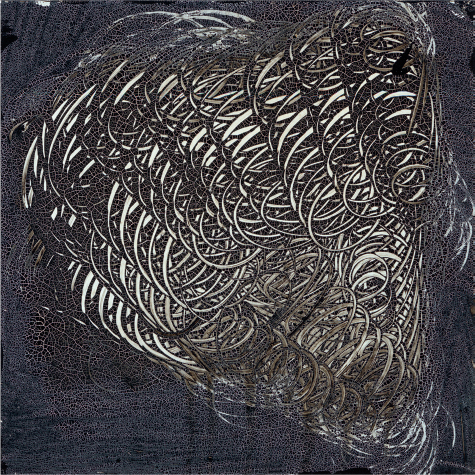
© Kevin Kline. More Stars #79, from the series More Stars Than The Sky, 2011-2015. 8×10 inches. Gelatin silver print with mixed media.
Try not to become smug with what you already know. Learning is a continuous process of waking up and focusing your attention on the subject at hand. It means giving in to possibilities and allowing yourself the opportunity to see what may not have been apparent or visible when you began the process.
The Anxiety of the New
When something new is created, it brings with it a sense of anxiety. This is because the new is not identifiable with our daily familiar world. Such anxious insecurity occurs when you are able to leave the beaten path and not yield to the comfort of habit, imitation, trend, or even praise. The new often produces resentment as it entails throwing over a previous set of working conventions and responses. Having blind faith in the ways of the past can lead to stagnant mediocrity that wallows in nostalgia. The New is dynamic and forces one to confront the past, discard its illusions, make corrections, and move forward in different, untried directions.
Not all new images and working methods will take you to the destination you seek. Often the act of doing something for the first time helps to uncover what will ultimately bring new structure to a vision. Stay focused on the imagemaking process itself, that vital interplay between alternative configurations and passions, rather than fixating on a particular form of closure. Each outcome can then be both a transitory hypothesis and a declaration of the will to know. One of the beauties of art making is that it can relinquish a closed system in which there is only one right way to do something in favor of an open approach that allows multiple correct answers to a question. Hand-altering work animates the imagemaker to feel free to transform the ingredients of imagination and physical existence into a collection of previously unseen appearances and structures. In his story “The Legend of the Sleepers,” Danilo Kis sums up this meditation about the past, present and future: “Oh, who can divide dreams from reality, day from night, night from dawn, memory from illusion.”1
This chapter covers various key aspects of hand-altered work by dividing it into the following working methods: cameraless images, camera based photographs, darkroom-generated pictures, and postdarkroom work including making an artist book.
Resource Guide
Barrett, Terry. Criticizing Photographs: An Introduction to Understanding Images, Fifth Edition. New York: McGraw-Hill, 2011.
Hughes, Robert. The Shock of the New, Second Edition. New York: Knopf, 1991.
Cameraless Images
Photograms
A photogram is a cameraless, lensless image made by placing 2-D or 3-D objects directly on top of light-sensitive material and then exposing it. Conceptually, the photogram is entirely different from traditional camera images based on outer reality in which a photographer starts with everything and eliminates or subtracts anything that is not wanted in the frame (a process of subtractive composition). When making a photogram, an imagemaker begins with nothing except a blank piece of paper, like a painter approaching an empty canvas, and adds the necessary ingredients to make the final piece (a process of additive composition). Cameraless images can also be produced from an enlarger or digitally with a scanner (see Chapter 4).
© Thomas Brummett. Light Projection Variation #2, from the series The Infinities, 2013. 38×47 inches. Inkjet print. Galliere Karsten Greve, Paris.
The photogram plays with a viewer's expectations of what a photograph is supposed to look like. Although it appears on the surface to be a photograph, there is a sense of ambiguity and mystery, as a viewer attempts to understand the reality of the image.
The light source used to make the exposure can be straight-ahead, angled or even moving rather than perpendicular to and stationary with the light-sensitive material. When the image is developed, no exposure effects will be visible where an opaque object was completely covering the light-sensitive emulsion. What is created is a silhouette of the object when translucent or transparent objects are placed on the emulsion. Partial shadowing occurs under opaque objects that are not in complete contact with the emulsion creating a wide assortment of tones. Any area left uncovered will get the maximum exposure and hence be opaque without any discernible detail.
The early pioneers in search of a practical photographic process were Johann Schulze in 1727, Thomas Wedgwood and Humphry Davy in 1799, and William Henry Fox Talbot from 1834 through the mid-1840s. All of them worked with cameraless images, establishing it as the earliest means of making light-sensitive pictures. The technique did not see much application until Christian Schad, a Dadaist painter, revived it in 1918 to create abstract images that he called Schadographs. Within a short time, Man Ray countered with his Rayographs. In Berlin during the 1920s, Laszlo Moholy-Nagy followed suit with what we now refer to as photograms. The contributions of these three imagemakers helped to perfect and re-establish the photogram in the twentieth century.
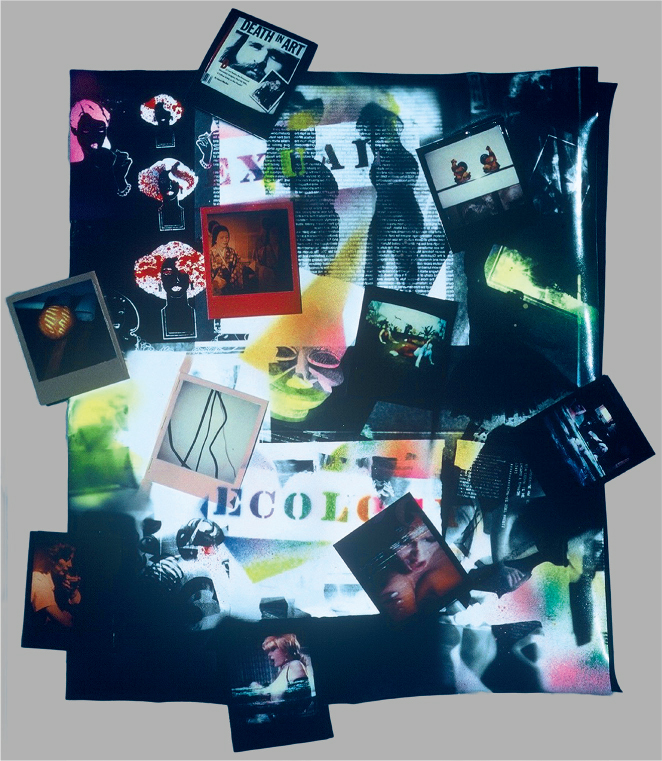
© Thomas Barrow. Sexual Ecology, 1986. 26×25 inches. Gelatin silver print with stapled Polaroid SX-70 prints and spray lacquer paints.
What to Print on Opaque, Translucent, and Transparent Materials
Photograms can be made on any type of light-sensitive material. Black-and-white paper is a good place to begin experimentation. One can then move on to color paper and other materials such as cloth. Black-and-white paper is convenient and familiar, and it can be handled under normal safelight conditions. This makes it easier to arrange the objects in the composition.
Careful consideration must be given to the choice of objects used in making a photogram. The selection of materials is limitless. Go beyond the hackneyed approach of taking some coins and keys out of your pocket or purse. Consider using natural objects such as feathers, flowers, grass, leaves, plants, rocks, and sand. Try putting raw eggs or oil in a zip-lock bag to make fluid compositions. Objects such as glass and stencils offer additional avenues to pursue. If you do not find what you need, make it yourself. Start simply, and as you master the working technique, increase the complexity of the arrangements. Ink applied on a thin piece of glass or acetate and then overlaid on the paper and exposed can widen your field of ideas. Also try combining natural, human-made, homemade, opaque, translucent, and transparent objects with ink to form a composition.
Exposure Methods
Although the easiest way to make an exposure is by using the enlarger or room light as a source, it also offers the least in terms of visual variety in the final print. To increase the range of visual effects, use another source of exposure, such as an electronic flash or a small desk light with a flexible neck. Using a fractional power setting on the flash or very low-wattage bulbs (15 watts) will produce longer exposure times and thus provide more opportunity for manipulation. Fluorescent tubes will deliver a more diffused and softer image than a reflector bulb or flash. Using a light source at different angles to the paper will produce a wide range of results. Varying the intensity of the light or the distance of the light from the paper during exposure will help to create a wider range of tonality in the final print.
Another method is to use a penlight. Wrap opaque paper around the penlight to act as a simple aperture-control device, thus enabling you to have more precise control over the intensity and direction of the light. The penlight can be used like a drawing instrument to emphasize specific areas of exposure. It also may be attached to a string and swung above and around the paper to produce unusual exposure effects.
Rather than making a single exposure from one source, try a series of brief exposures that combine different angles and light sources. Also try moving as well as stationary exposures.
For repeatable results, without ruining the arrangement of objects, place a piece of glass on spacers above the printing surface. The glass should be slightly bigger than the paper being printed. Blocks of wood or film take-up reels can be used for spacers. Arrange the objects on the glass rather than directly on the paper. Define the exact printing area beneath the glass by using tape or a china marker to indicate where the corners of the paper should be positioned. After the objects are composed on the glass, turn off the white light and slide the photographic paper under the glass, lining it up with the corner marks. Before making the exposure, remove the spacers and carefully lower the glass on top of the paper. Be careful not to disturb any of the arranged items. Now expose the paper. If the exposure is made with the glass still up on spacers, the final image will be softer and less sharp. Box 12.1 provides the basic starting steps for making a photogram.
Box 12.1 Basic Photogram Steps
Under white light conditions:
1. Put a piece of glass or clear Plexiglas, a little larger than the paper being printed on, up on spacers such as small toy building blocks.
2. Define the exact printing area under the glass by making marks with tape or a grease marker to indicate where the corners of the paper should be placed.
3. Using your collection of source materials, create a composition on the glass itself.
Under safelight conditions:
4. Place the light-sensitive material under the glass, lining it up with the previously marked corner positions.
5. Carefully lower the glass or Plexiglas from the spacers.
6. Expose the paper. A working exposure range can be determined by making a test strip. Place a piece of unexposed paper under the glass. Hold or place the light source at the distance it will be used to make the exposure. Make a series of 3- to 5-second exposures, just as you would when making a regular print. Process the paper and select the desired time and density combination.
7. Process following normal procedures. Adjust, and repeat until desired results are achieved.
Photogram Combinations
The color of the completed image can be changed through toning (see Chapter 9). After the print has dried, additional alterations are possible by drawing or painting on the image. Photograms can be also produced on color negative and positive materials. They also can be combined with other photographic methods. For instance, try combining a camera-made image with a camera-less one. Try rephotographing the photogram and combining it with another cameraless image. Magazine pictures also can be combined with other cameraless materials. Magazines are a print-through technique, and both sides of the page will be visible (see Robert Heinecken's work in Chapter 1).
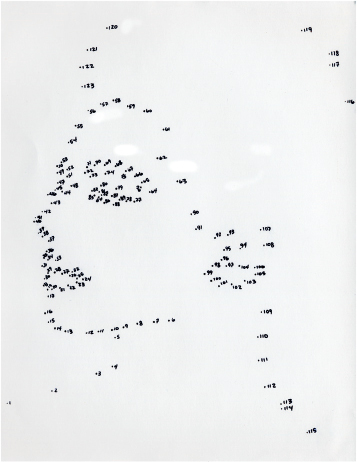
© Susan Evans. Dot to Dot Portrait, from the series Dot to Dot, 1992. 10×8 inches. Gelatin silver print.
Experimentation with the choice of objects, sources of exposure, different types of light-sensitive materials, and postdarkroom techniques will enable you to discover the possibilities photograms have to offer.
Resource Guide
Neususs, Floris M., Thomas Barrow, and Charles Hagen (Eds). Experimental Vision: The Evolution of the Photogram Since 1919. Boulder, CO: Roberts Rinehart Publishers, 1994. www.photogram.org
Chemigram
The process of making chemical images on light-sensitive material can be traced back to the origins of photography, but it was Pierre Cordier who actively researched this area to make lensless, fine art photography. In 1958, Cordier named his process a chemigram (chimigramme), a combination of chemistry and the Greek “gramma,” meaning writing, inferring it is a drawn or written chemical sign. A basic chemigram is constructed in full daylight by applying photographic chemicals, usually developer and fixer, without the use of a camera, enlarger or darkroom, sometimes to previously exposed photographic paper or film. The chemical reaction creates the image and the tone of the final print, or as Cordier puts it, “In the chemigram, chemistry writes; light does not.” Cordier says, “The chemigram, which combines the physics of painting and chemistry of photography, is most likely the ultimate adventure of gelatin silver bromide.” Many workers also employ “localizing” products, such as oil, varnish, and wax, to create more complex forms. Basically, any product found in your kitchen, bathroom, or paint store that can adhere to emulsion paper may be used to make a chemigram.
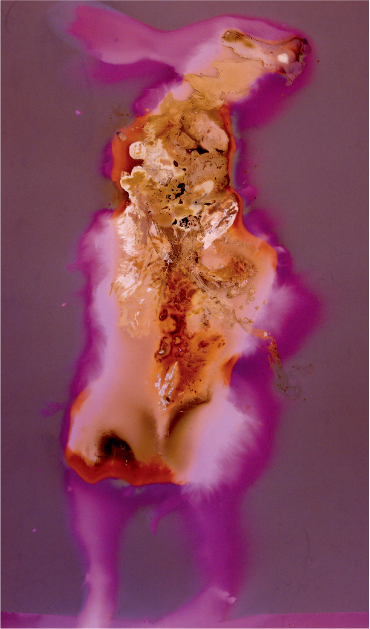
© Jerry Burchfield. Rabbit Roadkill #1, 2000. 14×10 inches. Gelatin silver lumen print.
© Pierre Cordier. Chimigramme 6/3/81 III Hommage á Robert Capa, 1981. 12×14 inches. Gelatin silver chemigram.
Norman Sarachek, who wanted to work with a blank picture space and construct images from his mind, suggests several guiding principles for those interested in the chemigram process. We know that exposing photographic paper to white light and placing it in the developer produces a maximum black. However, if the paper is first brought into contact with fixer, the silver in that part of the paper touched by fixer will not darken in light. By playing these two phenomena off each other one can create a fascinating image. Immersing part of the paper in one of the chemicals with movement of the paper can result in thought-provoking marks. Working with the white lights on, Sarachek uses a “soft” resist to protect parts of the paper while immersing it in the chemical baths. His resist does not stick to the paper like varnish, but adheres briefly while the paper is exposed to the chemicals. He suggests trying gels and painting grounds/gessoes as resists. After the resist and chemicals are washed off the paper it is developed in the usual way. He also has devised a “slurry” of resist mixed with the chemicals. Applying this to the paper gives him control over where the chemical comes in contact with the paper and how long it remains in contact with the paper. For his work the resist or the slurry are applied with a range of tools including brushes, crumpled paper, old socks (washed first), calligraphy pens and even feathers gathered from the garden.
Resource Guide
Pierre Cordier. Le Chimigramme [The Chemigram]. Brussels: Racine Editions, 2007.
© Norman Sarachek. After Fukushima/Memory of Nature (F), 2012. 3×2 inches and 24×56 inches. Gelatin silver chemigram and inkjet print.
Cliché-Verre
Cliché-verre, drawing on glass, is another cameraless method used to produce a photographic image. Three English artists and engravers, John and William Havell and J. T. Wilmore, invented the technique. They displayed prints from their process in March 1839, making it one of the earliest supplemental methods to be derived from the invention of photography. In the original autographic process, an opaque varnish was applied to a piece of glass and allowed to dry. Then a needle was used to etch an image through the varnish. The etched piece of glass was used as a negative and contact printed onto light-sensitive paper to make a repeatable image.
In the early 1850s, Adalbert Cuvelier modified the process by etching on glass collodion plates that were intentionally fogged by light. Cuvelier introduced his method to artist Jean-Baptiste-Camille Corot, who used it as a means of producing fast and inexpensive editions of monochrome prints. Corot's success with cliché-verre caused many other artists of the French Barbizon School to follow suit. Thus the 1850s marked this process's high point in popularity.
There was only sporadic interest in cliché-verre during the first six decades of the twentieth century. Man Ray, Laszlo Moholy-Nagy, Francis Brugiere, Henry Holmes Smith, and Frederick Sommer carried out experiments. In the US, the process experienced a small revival during the late 1960s. Since then only a few imagemakers have used it, making it ripe for new exploration.
Making a Cliche-Verre
Obtain a piece of clean, clear glass that is a little larger than the size of the final print. 8×10 inches is a good minimum size; anything smaller makes it difficult to see what is being etched on the glass. Have the edges ground smooth to avoid glass cuts. Paint the glass with an opaque paint or varnish. Matte black spray paint also can be used. After the paint has dried, use a stylus (a sharp, pointed instrument such as an X-Acto knife, a heavy needle, a razor blade, or even a piece of rock or bone) to etch through the painted coating to the clear glass.
When the etching is finished, bring the glass into the darkroom. Under safelight conditions, lay it on top of a piece of unexposed black-and-white photographic paper. Make a print following normal working methods. As in photograms, try using different sources of light at a variety of angles to alter the look of the final image. The thickness of the glass will influence the clarity and sharpness of the final print. Thinner glass gives a sharper image. Generally, glass provides the smoothest and most concise line quality of any of the support materials.
Alternative Method 1: Color
Traditionally, cliché-verre was a black-and-white technique, but color paper may be used. By dialing in various color filter packs, one can produce a wide variety of color effects. Try multiple exposures using different filter packs and varying the type of light used for making the exposures.
Alternative Method 2: Paint Substitute!.
Other media besides paint and varnish can be used to opaque the glass. One method is to “smoke” the glass by holding it over the chimney of a lighted kerosene lamp. Frederick Sommer used a smoked-glass technique very effectively in the 1960s. Henry Holmes Smith poured Karo corn syrup on glass, then photographed it and made dye-transfer color prints from the camera images. Opaque and translucent inks can be applied instead of paint, and printer's inks may be rolled onto the support surface.
Box 12.2 Combination Methods
■Scratch directly into the emulsion of a camera-made negative and then make a print.
■Combine the cliché-verre with a camera-made negative.
■Use ink and scratching with a camera-made image.
■Coalesce a scanned image with an analog technique.
■Do not opaque the glass or acetate completely. Etch only the opaque portion and use the remaining clear area to incorporate a camera image or photogram.
■Collect images from newspapers and magazines. Under safelight conditions, position them directly on top of the light-sensitive material, cover it with glass, and make an exposure. Remember, they will be reversed, and both sides of the image will print. Try opaquing and etching part of the glass in concert with this method.
■Use a liquid emulsion such as liquid light to produce a cliché-verre on other porous materials such as fabric or clay.
Alternative Method 3: Glass Substitutes
Sheet film that has been exposed to white light and developed to its maximum density can be used in place of the opaque glass support. Film has the advantage of not being breakable and can also be put in the enlarger, so cliché-verre prints can be produced in various sizes. Generally, etching sheet film will produce a rougher and more ragged line quality than that achieved from a piece of etched painted glass. Acetate also can be used in place of glass or film. It can be purchased already opaque, or it may be painted or inked.
Alternative Method 4: Scanning
Draw an image on a ground-coated transparent material and scan it, which will allow one to manipulate and print digitally.
Resource Guide
Glassman, Elizabeth, and Marilyn F. Symmes. Cliché-verre: Hand-Drawn, Light-Painted, A Survey of the Medium from 1839 to the Present. Detroit, MI: Detroit Institute of Arts, 1980.
© Peter Feldstein. #527, 1998. 42×42 inches. Gelatin silver print.
Extended Camera Exposures
When most people take up photography, they have the ”1/125 second mentality.” We have been conditioned to believe the photographer's job is to capture the subject by freezing it and removing it from the flow of time. By simply extending the amount of time the camera's shutter is open, an entirely new range of images can come into existence. This additional time also can provide an opportunity for a photographer to increase the interaction with the subject and in turn extend viewer involvement.
Equipment
You need a camera with a B (bulb) or T (time) setting to make extended time exposures. With the B setting, you hold the shutter in the open position for the entire exposure. With the T setting, you press the shutter release once to open the shutter and then press it again at the end of the exposure to close it. Some cameras have programmable time exposures. The camera is usually attached to a well-constructed tripod. The shutter can be fired by means of a cable release with a locking set screw, which permits hands-off exposures. This reduces the chances of blurred images due to camera movement and vibrations. A sensitive hand-held exposure meter can be useful because some built-in camera meters do not read available darkness with accuracy.
For maximum steadiness, use a sturdy tripod and do not raise the center column any more than is necessary. A heavy weight can be hung from the center column as ballast. Sandbagging the legs of the tripod also makes it less prone to movement. Close the shutter if the camera is shaken and resume the exposure after the disturbance has passed.
Cardboard Shutter
Hold a piece of black matte cardboard close to the front of the lens. When you are ready to end the exposure, place the cardboard in front of the lens and then close the shutter (using a cable release) to help reduce recording any camera jiggle. This is important when using any type of SLR or DSLR camera body whose mirror flips back down at the end of the exposure. This technique also can be used to permit changes in aperture and focus during the exposure. If the camera should be jarred during any of these procedures, allow it to settle down before removing the cardboard from in front of the lens and continuing the exposure.
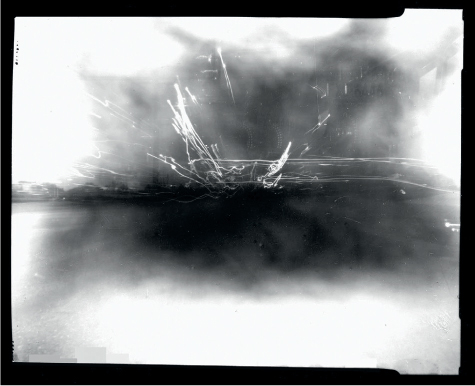
© William Larson. Untitled: 8 Mile Pinhole Exposure on Route 476, Philadelphia, Pennsylvania, 2007. 30×40 inches. Inkjet print.
Adjusting the Aperture
Varying the length of exposure time drastically affects the final outcome of the image. Opening the lens to a wide aperture diminishes the depth of field and delivers the shortest exposure time. Closing down the lens to a small aperture increases the depth of field and gives longer exposures. Closing down the lens also allows for changes in focus and aperture. The extended exposure time permits you to work with additional sources of light, such as a strobe or flashlight, during the course of a single exposure.
Where to Start
Begin with a negative film of ISO 100. Stop the lens down three f-stops from its maximum aperture. Bracket all the exposures (one f-stop under and up to three f-stops over in full f-stop increments). Keep a written record to compare with the results so more accurate exposures can be obtained with less bracketing in the future. Bracketing can always be useful, as the different lengths of time affect how the scene is recorded. Bracketing also is helpful in learning how to compensate for probable reciprocity failure, which is likely to accompany long exposures. For instance, if the indicated exposure is 1 second, one-half f-stop more time at 10 seconds, and one full f-stop at 100 seconds. This correction can be made by using either the lens aperture or shutter speed control. With color film, reciprocity failure also produces a shift in the color balance. For exact times and filter corrections of specific films, consult the manufacturer's reciprocity failure guide.
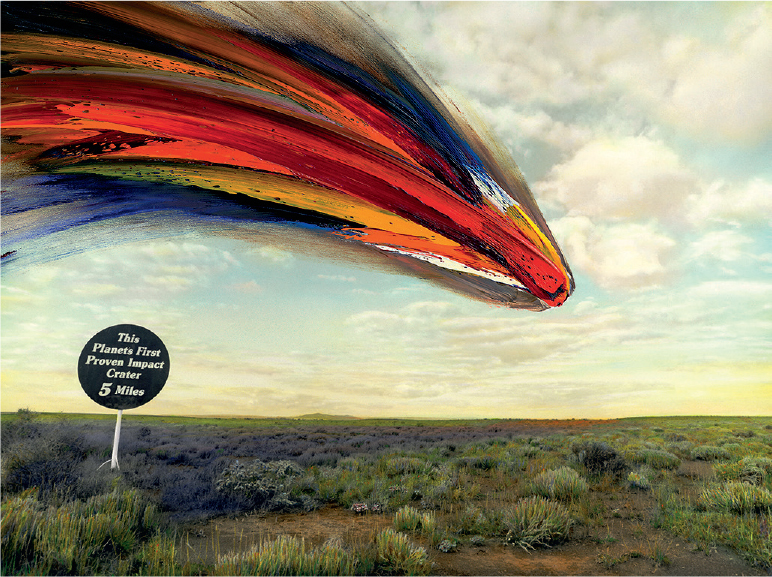
© Chris McCaw. Heliograph 093, 2015. 20×24 inches. Gelatin silver paper negative. Yossi Milo Gallery, New York.
Reciprocity Failure
Reciprocity failure occurs with very brief or very long exposures. Each film has its own reciprocity failure characteristics, losing effective speed at different exposure levels and at different rates. A typical black-and-white negative film of ISO 100 might need one-third f-stop more
The majority of cameras rely on battery power to operate their shutters. Shooting a 36-exposure roll with minute-long times can drain a battery's power (button cells are more susceptible than AA alkaline or 6 volt lithium cells). Some of these electronic cameras offer a mechanical B setting. If you are not sure whether your camera has this feature, set the shutter to B, remove the batteries, depress the shutter release, and see if the shutter opens. If the camera does not have a mechanical B setting, take a fresh set of backup batteries, just in case the ones in the camera fail during the session.
Using Neutral Density Filters
When we contemplate long exposures, we tend to think of low-light situations, such as early evening, night, or inclement weather. One way to extend the amount of exposure time in any situation is to use an ND filter. An ND filter blocks equal amounts of all the visible wavelengths of white light. Such filters are available in various strengths, which will reduce the amount of light reaching the film or sensor by one, two, or four f-stops. ND filters may be used in tandem (one attached to the other) to reduce the intensity of the light even further.
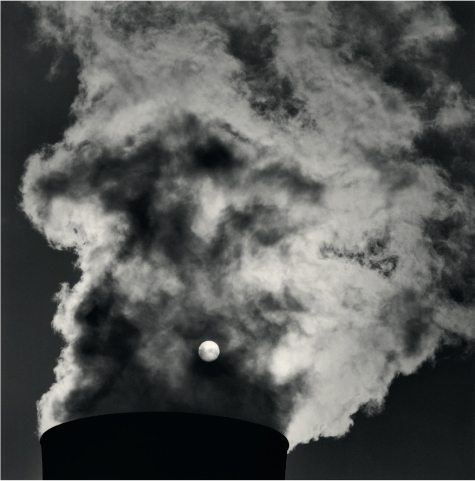
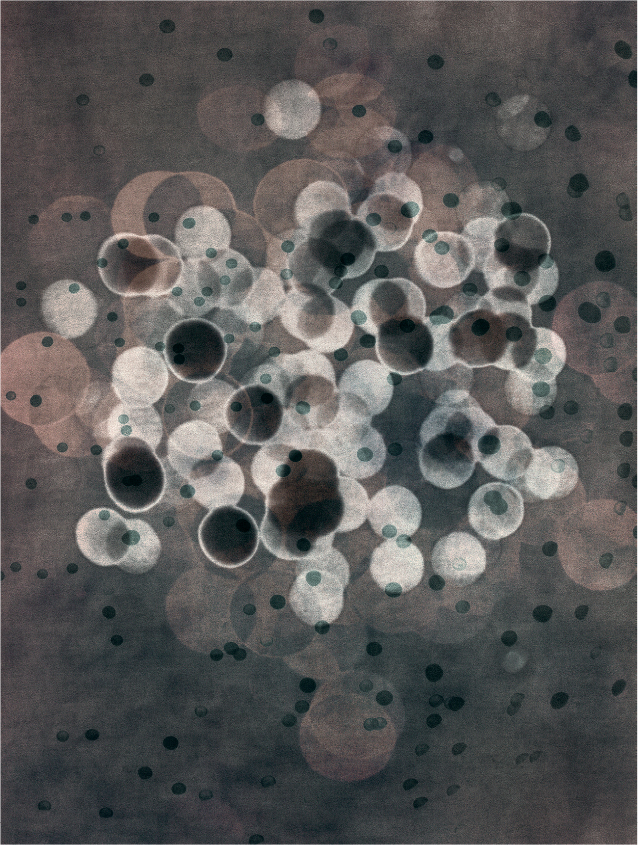
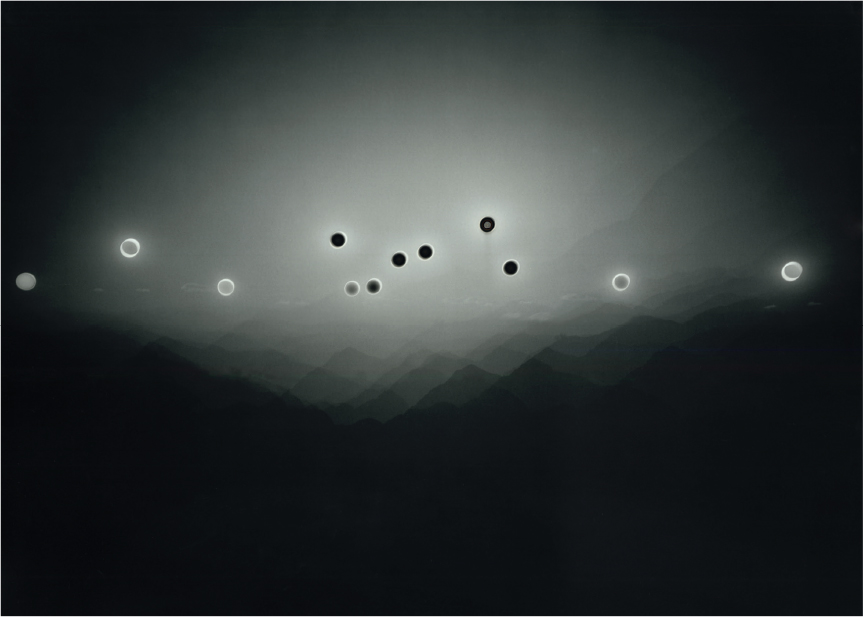
© Michael Kenna. Ratcliffe Power Station, Study 68, Nottinghamshire, England, 2003. 8×8 inches. Toned gelatin silver print.
Flash and Flashlight Techniques
A flash can be used to illuminate parts of a scene. Large areas can be “painted” with multiple flash exposures. With the camera on a tripod and the lens open, a person dressed in dark clothes can walk within the scene and fire the flash to illuminate specific items or to light a large space. A flash also can be combined with other techniques. For instance, one can focus on one area of a scene and illuminate it with a flash, then shift the focus to another area in the composition and use the flash to light it. Colored gels can be used to alter the color relationships within a scene.
A flashlight also may be used to illuminate the subject. Start with a subject in a darkened room. Put the camera on a tripod and set the aperture to f-8 or f-11. Use the B or T setting to open the shutter. Begin painting the subject with the flashlight, using a broad, sweeping motion. Avoid pointing the light into the camera's lens. When you are done painting, close the shutter.
As you gain experience, you will be ready to tackle more complicated situations, such as working outside at night. When doing this, wear dark, nonreflective clothes so you may walk around within the scene without being recorded on film. Since it is impossible to know exactly what the final effect will be, make a series of exposures varying the intensity of the light and the type of hand gestures used in applying it. Some gestures may be smooth and continuous; others may be short and choppy. Have fun experimenting; try dancing around, running, hopping, jumping, or waving with the light.
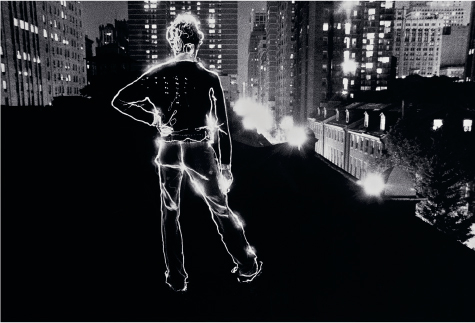
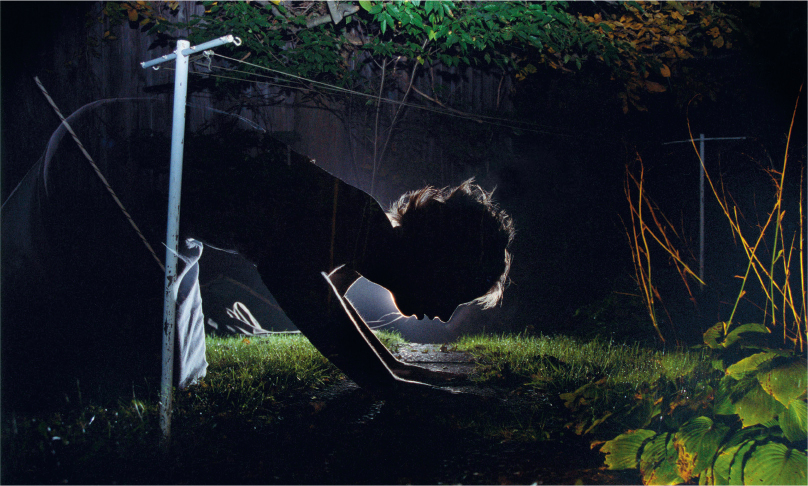
© David Lebe. Angelo on the Roof, 1979. 16×20 inches. Gelatin silver print.
Pictures From a Screen
Making pictures from a monitor or television screen offers a photographer the opportunity to become an active participant instead of being a passive spectator. The camera can be used to stop the action on the screen or extend the sense of time by allowing the images to blend and interact with one another. The literal distortion of photographing directly from the screen is both its strength and Achilles’ heel. To make pictures from a television or monitor screen follow the steps in Box 12.3. Untraditional representations from the screen are possible using the methods listed in Box 12.4.
A Blue-Ray, DVD player gives one the chance to be selective about the images on the screen and also enables you to repeat the image on the screen until it can be photographed in the manner that is desired.
Box 12.3 Making Images from a Screen
1. Clean the screen.
2. Place the camera on a tripod. Digital capture allows quick review and adjustments. A macro or telephoto lens can be used to fill the entire frame or to work with a small area of the screen and control the distortion produced, especially if the screen is curved.
3. Turn off the room lights and cover windows to avoid getting reflections on the screen. Place a black card in front of the camera, with a hole cut in it for the lens, to help eliminate reflections.
4. If available, use a “hood” device designed to capture images directly from a computer screen with a camera attachment to cover the screen area and block out ambient light.
5. Adjust the picture contrast to produce slightly darker (flatter) than normal for an accurate, straightforward rendition.
6. Adjust the color to your personal preferences.
7. Most monitors generate a new frame every 1/30 second. If the shutter speed is higher than 1/30 second, the leading edge of the scanning beam will appear on the picture as a dark, slightly curved line. If you do not want this line, a shutter speed of 1/30 second or slower should be used. Experiment with shutter speeds of 1/15 and ⅛ second. If the image being photographed is static or can be “frozen” on the screen, try using the slower speeds to ensure the frame line is not visible. Cameras with a leaf-type shutter may synchronize better with the monitor's raster lines.
8. Once the correct shutter speed is determined, make all exposure adjusts by using the lens aperture.
Box 12.4 Unusual Screen Representations
■Vary the shutter speed from the 1/30 second standard.
■Readjust the screen's color balance from its normal position.
■Vary the horizontal and vertical hold positions.
■Make a series of multiple exposures from the screen onto one frame.
■Place a transparent overlay of an image or color in front of the screen.
■Project an image onto a scene and rephotograph the entire situation.
■Fabricate a situation to be photographed that includes a screen image.
■Use a magnet to distort the picture. Use an old TV, as it will likely put the unit out of adjustment, requiring a repairperson to fix it.
■Photograph images on a movie theater screen (for noncommercial use only).
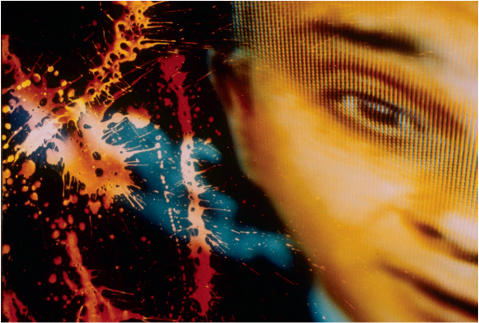
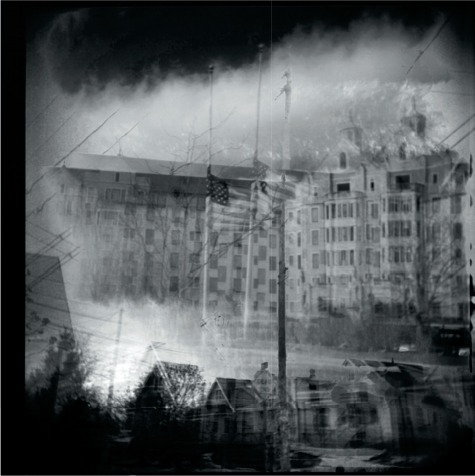
© Diane Bush. Warhead #23, 2005. 17×23 inches. Chromogenic color print. Courtesy George Eastman Museum, Rochester, NY and Rutgers University, New Brunswick, NJ.
When working digitally, experiment with different white balance settings, checking on a color corrected monitor, until the desired results are realized.
If no screen lines are wanted, one can use the HDMI output from a digital cable box with a tuner to grab an image on to a computer with a mini recorder capture device, which makes its image based on electronic signals rather than from a screen.
When using film, be mindful that different films deliver a variety in color renditions due to the film's spectral sensitivity and dye-image formation system. If color film is used to photograph a black-and-white monitor, the resulting image may have a blue cast. With daylight balanced color film, the resulting image will probably have a blue-green cast. This may be partially corrected by using a No. CC3OR, No. CC4OR, or No. 85B filter at the time of initial exposure with appropriate exposure compensation.
Postcamera Technic Jes in Search of Time
The traditional photographic concepts of motion, space, and time can be altered in the studio and darkroom as well as in the camera to build additional spans of time (experiences) back into a photograph. The methods discussed allow for alternative potentialities to be amplified, embellished, expounded or revisited. Some techniques allow an imagemaker to mobilize and secure connections between formal artifice and disorder. Others permit the weaving of a simultaneous network of complex associations, a rich tangle of cross-stitching that can reveal an alternative temporality of a subject and demonstrate that the past, present, and future are a product synthesized by the memories of imagemakers and viewers. All these approaches can yield new insights into a subject and make the overall visual account richer and more thought provoking. Additionally, numerous photographers reinterpret their negatives over time as their concepts expand and new techniques, especially digital, allow them to visualize what was previously not possible. As artist Francisco de Goya observed, “Fantasy abandoned by reason produces impossible monsters; united with her, she is the mother of the arts and the origin of their marvels.”2
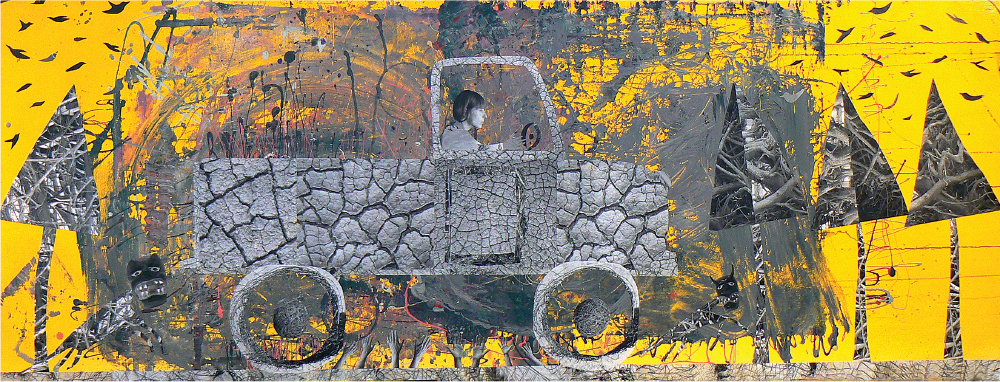
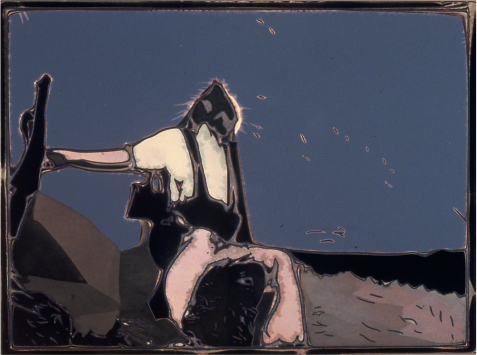
© Holly Roberts. Mud Truck, 2006. 30×80 inches. Mixed media.
Painting the Print with Light
One can re-expose the light-sensitive printing material with a controlled source of light after the initial print is exposed or while it is developing. This can be achieved with a small penlight. Wrap a piece of opaque paper around the penlight so it extends a few inches beyond the body of the light source. Secure it to the penlight body with tape. This paper blinder will act as an aperture to control the amount of light. Pinch the open end of the paper together to control the intensity and shape of the light source. Fiber optics also can be attached to the end of the penlight for tighter control over the light.
Working Procedure
Correctly expose the image on black-and-white paper. Place a red filter beneath the enlarging lens. Since black-and-white paper is not sensitive to red light, the red filter enables you to turn on the enlarger and see the projected image without affecting the paper. Open the lens to its maximum aperture. Turn on the enlarger and project through the red filter. This allows you to see where to draw with the penlight. Begin drawing with the light. You can cover specific areas of the print with opaque materials to prevent re-exposure.
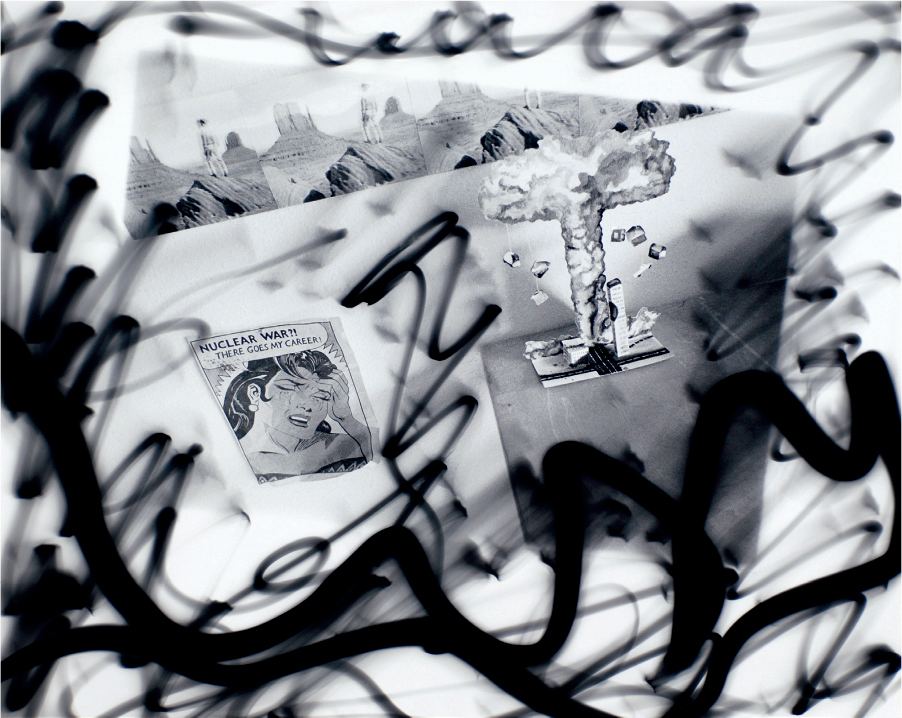
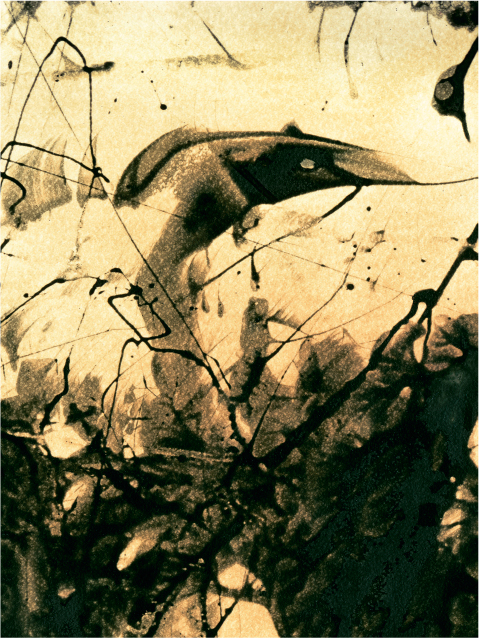
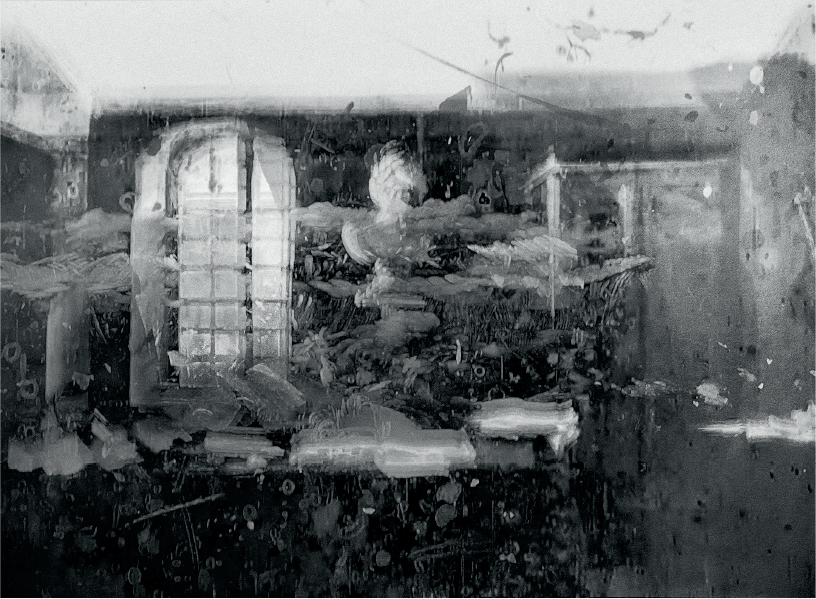
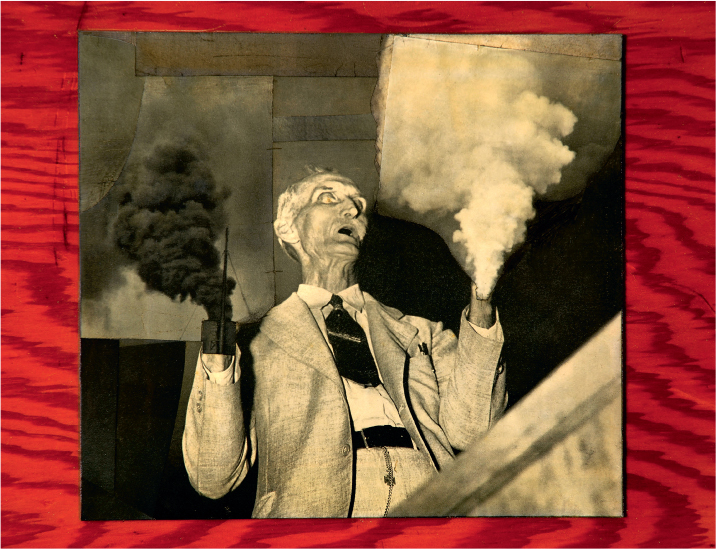
© Robert Hirsch. Nuclear War?!... There Goes My Career! 1983. 16×20 inches. Toned gelatin silver print.
It is also possible to draw with the light as the image begins to appear in the developer. This can produce a grayer line quality or a partial Sabattier effect.
Projection
A digital projector or a slide projector with a zoom lens also can be used to paint a scene with light (by placing a colored gel or gels over the lens) or to project an image, images, or moving images onto a scene to create a visual layering effect. Try using old images, making new images of the same subject, combining black-and-white and color images, appropriating images or text from other sources, projecting more than one image, projecting different images onto different parts of the composition, or varying the size of the projection. Amend your color balance according to the desired effect.
Moving the Fine Focus
By moving the fine-focus control on the enlarger during the exposure, a maker can cause the projected image to expand and/or contract. Start by giving the print two-thirds of its correct exposure. Then begin to move the fine-focus control and give the print the remaining one-third of its time. For example, if the normal exposure time is 24 seconds, give the print its first exposure of 16 seconds and the remaining 8 seconds while moving the fine focus. It may be necessary to stop down the lens and increase the overall exposure so there is more time available to manipulate the fine-focus control. The final outcome is determined by the following:
■The ratio of the normal exposure to the moving exposure.
■The speed at which the Fine focus is moved.
■How long the moving exposure is left at any one point.
■Whether the Fine focus is used to expand or contract the image.
■When the moving exposure is made. Different effects will be produced depending on whether the Fine focus is moved before, in the middle of, or at the end of the normal exposure.
© Michael Bosworth. Analog Projector 5, 2014. Variable Dimensions. Mixed Media.
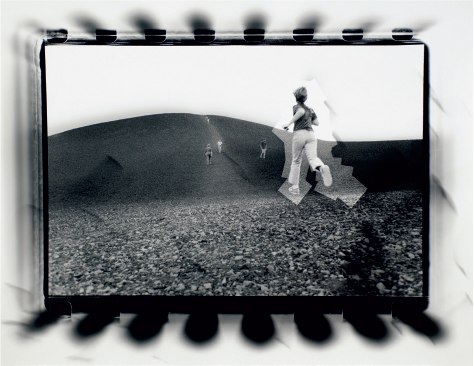
© Robert Hirsch. Running on the Craters of the Moon, 1985. 16×20 inches. Toned gelatin silver print. Courtesy Dr. Philip Perryman Collection.
Multiple-Exposure Methods
In-Camera Multiple Exposures
To make more than a single exposure in the camera on one single frame, begin with a controlled situation having a dark background. One must use a camera that has a double-exposure capability (see the camera's manual for specific instructions on how to carry out this procedure). Use one source of illumination to light the subject. Put the camera on a tripod, focus, and then figure the exposure for each frame based on the total number of exposures planned for that frame. Generally, the individual exposures are determined by dividing the overall exposure time by the total number of exposures. For instance, if the overall exposure for a scene is f-8 at 1/60 second, the time for two exposures on one frame would be f-8 at 1/125 second each. This tends to work well if the illuminated subject(s) overlap. If there is no overlap and a dark background is used, the correct exposure would be f-8 at 1/60 second for each exposure. Be prepared to do some testing. Using the monitor on a digital camera will allow for quick review and adjustments.
Nir Evron. Dreyfus/Melies (La dicstée du borderau Star Film Company 206,1899), 2014. 7×9 1/2 inches. Inkjet print.
Variations
You can change the amount of time given to the separate exposures within each frame by altering the f-stop or shutter speed. This can produce images of varying intensities and degrees of motion within the composition. Changing the f-stop will introduce differences in the amount of depth of field from one exposure to the next. Altering the shutter speed can produce both blurred and sharp images in a single frame. Moving objects around within the composition can create a ghostly half-presence in the picture. Altering the position of the camera can help you avoid exposure build up, which will produce gross overexposure. Start simply, bracket your exposures, review on your camera monitor, and work your way into more complex situations.
Also, individual digital images can be layered in Photoshop to compress an extended period of time
Using a Masking Filter
A masking filter, which exposes only half the frame at a time, can be used to make a single image from two separate halves. One can buy this filter or make it by cutting a semicircular piece of opaque material to fit into a series-type filter holder designed for the size of the lens being used. An intriguing variation is to make a mask that has a number of doors, each of which can be opened for individual exposure. These doors may be of different shapes and sizes. The composition can be rearranged and relit for each exposure. The following is a basic guide for using a masking filter with an SLR camera.
© Adrianne Little. End of Road #65, 2007-08. 24×24 inches. Lightjet print.
Box 12.5 Using a Masking Filter
1. Place the masking Filter on the camera lens. Compose and normally expose half the frame.
2. Wind the shutter without advancing the Film.
3. Rotate the masking Filter so the First half of the image that was exposed is not masked off.
4. With the second half of the frame now in view, compose and expose the second half normally.
5. After this second exposure, advance the Film to the next frame.
Generally, allow each image to cross the centerline of the frame (mask) and come about one-third of the way into the blocked area. This can help make the blend line less noticeable. The major problem with this technique is that it is often easy to see the line where the two images meet. Extra care in dodging and burning when making the print can make this less noticeable.
© Michael Northrup. Mad Donna, 1995. 24×20 inches. Chromogenic color print. Courtesy Strobophoto Studio, Baltimore, MD.
Darkroom Multiple Exposure
There are numerous methods for accomplishing multiple exposure in the darkroom. The simplest method of altering the perception of time and space within a composition involves exposing a single negative more than once on a piece of light-sensitive material. Box 12.6 lists some of the many variations on this procedure.
Combination Printing
Combination printing is when two or more negatives are printed on a single piece of light-sensitive material to make the final image. Combination printing is not a contemporary innovation, but was originally devised for use with the collodion wet-plate process in the mid-1850s to overcome the slowness of the film's emulsion and its inability to record certain parts of the spectrum. The technique was popularized in England by Oscar Gustave Rejlander and Henry Peach Robinson, and peaked by the 1880s. As technical improvements such as panchromatic emulsions and flexible roll film became available, combination printing was no longer necessary, and its practice rapidly declined. The process experienced a major rebirth in the 1960s with the images and teaching of Jerry Uelsmann. He used this precomputer technique in a surrealistic manner to juxtapose objects for which there was no correlation in the ordinary world.
Before the widespread use of digital imagemaking, combination printing was a way to make a composite of images by photographic means. Although the computer's ability to amalgamate images is unparalleled, not all imagemakers have abandoned combination printing. In an online exhibition of his work, Uelsmann addressed why he still creates certain images in the darkroom. “While I am interested in these computer options, I still have a basic love of the darkroom and the alchemy it embraces. In terms of the creative process, I find that the overwhelming number of options offered by the computer creates a decision-making quagmire.”
Combination printing can be carried out by switching negatives in a single enlarger or by moving the light-sensitive material from one enlarger and easel to another, each having been set up to project a different image. If more than one enlarger is available, most people find the second method easier to use.
© Tricia Zigmund. Self-Portrait with Ectoplasm, 2006. 26×39 inches. Chromogenic color print. Courtesy Kolok Gallery, North Adams, MA.
Box 12.6 Darkroom Multiple Exposure Practices
1. Enlarge or reduce the image with each new exposure.
2. Allow the exposures to overlap and intermingle.
3. Use different exposure times to create variety in image density.
4. Move the Fine-focus control during some of the exposures.
5. Print only selected portions of the negative.
6. Combine this with other techniques such as cliché-verre or photograms.
7. Sandwich the negative with other negatives or with transparent materials.
8. Combine the negative with a positive (transparency) image.
9. Print from more than one negative.
10. Make masks that can be attached to the easel so that multiple negatives can be exposed with a single enlarger.
Multi-Enlarger Combination Printing
A simple combination print can be made by blending two images, each of which is set up for projection in a different enlarger and easel. This can be accomplished by following the guidelines in Box 12.7.
Opaque Printing Masks
Printing masks can be used to block exposure to different areas of the light-sensitive material. The masks must be carefully cut to avoid making an outline around each area where the exposure was blocked.
A multiple opaque mask can be used with a single negative. In this case, a mask is made the same size as the final print. The mask is cut into various shapes corresponding to those in the image. One section of the mask is removed, and an exposure is made. This section is then replaced, and another is removed and exposed. The process is continued until all the sections have received exposure. The amount of exposure can be varied from section to section to create different density effects.
Box 12.7 Combination Printing Guidelines
1. Look through your contact sheets and Find two images to combine. Select images that have a clear horizontal or vertical dividing line, as this will simplify the blending process.
2. Place each image in a different enlarger.
3. Size and focus the images. Allow them to slightly overlap.
4. Put a piece of plain white paper in the First easel. Use a marker to indicate the placement of the major objects and where the blending line will be.
5. Move this paper to the second easel and line up the second image and blending line with the indicated marks.
6. Make a test strip to determine the correct exposure for each enlarger.
7. Place the light-sensitive material in the First enlarger and make the exposure, using an opaque board to block the exposure around the blending line. Keep the board moving and allow some of the exposure to cross the blending line so there is no visible joining line.
8. Transfer the light-sensitive material to the second easel. Expose the second negative, using the opaque board in the same manner as in Step 7 to block the First exposure.
9. Expect to carry out this procedure a number of times until you master moving the board to get a seamless blend. Patience and craftsmanship are necessary to successfully create this illusion.

©Jerry Uelsmann. Man on Desk, from the book Process and Perception, 1976. 20×16 inches. Gelatin silver print.
Numbering the sections can help you keep track of what you have done.
Resource Guide
Uelsmann, Jerry N., with essay by John Ames. Uelsmann: Process and Perception. Gainesville, FL: University of Florida Press, 1985.
Fabrication: Creations Made for the Camera
Throughout most of photography's history, the majority of pictures were primarily of people, places, and things. Now many contemporary imagemakers are exploring ways to expand the photographic lexicon to comment on internal realities. One of the means photographers have used to express their inner concerns is fabrication. In the photographic sense, fabrication is the creation of a new reality, one that cannot be naturally found in the visible world. To accomplish this goal, a maker appropriates, constructs, devises, or invents an assemblage of subjects to be photographed. The techniques and methods used often investigate and question the nature of photography, photographic time, and how it is used. Such work propels the photographer and the viewer to become more aware of the artificiality of photographic reality by posing questions such as: What makes up reality? What is a photograph? Why is appearance constantly taken for truth? Where and how does a photograph obtain its meaning? Do our representations correspond to reality? Could the world be different from the way we represent it? As art critic Arthur Danto observes, “Philosophy is the effort to understand the relationships between subjects, representations and reality.”3 Some of methods photographers use to probe these questions and relationships can be found in Box 12.8.
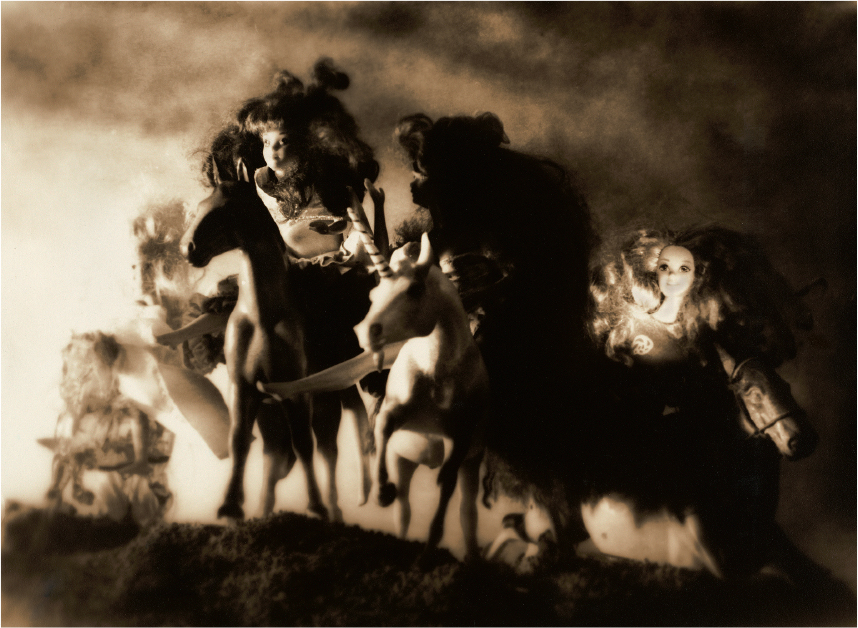
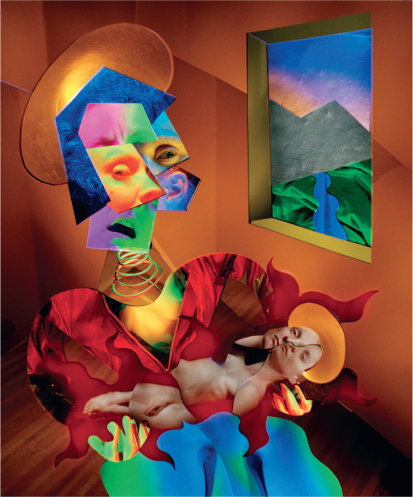
© Clarke Bedford. The Four Barbies of the Apocalypse, 1993. 9 1/2×13 inches. Toned gelatin silver print.
Box 12.8 Fabrication
■Constructing environments, including found objects, to reflect ambitions, dreams, fantasies, and social commentaries.
■Combining images and text by using typesetting, press type, rubber stamps, and handwritten messages that appear on or around the photograph.
■Creating 3-D photographic images by means such as painting emulsions on a variety of surfaces, cutting up images and hanging them from objects, sewing and stuffing cloth that has been treated with a photo-sensitive emulsion, or making freestanding floor screens based on classic Oriental models.
■Layering transparent images over one another, which are then rephotographed to create new pictorial meanings.
© David Emitt Adams. Getting Along, from the series Conversations with History, 2013. 14×12×18 inch. Collodion and mixed media. Courtesy Etherton Gallery, Tucson, AZ.
Sequences
Another aspect of fabrication involves departing from the traditional of only using a single image to convey a message. Cinematic seeing presents a series of images in which each frame modifies the sense of photographic time and space of the frame before and after it. This interaction between frames delivers more data, thus enabling the audience to witness a different point of view or a new episode that can enhance their understanding of the subject. This technique can be accomplished directly in the camera using previsualization methods or created from prints using postdarkroom procedures. Box 12.9 lists methods to explore cinematic imagemaking.
Box 12.9 Cinematic Imagemaking Methods
■A sequence is a collection of images designed to function as a group rather than individually. Typically, sequences tell stories (although they do not have to be empirically narrative in nature), present numerous points of view, and provide information over an extended visual time period. Sequences can be made in the camera or put together using prints. They are often presented in a book format to encourage intimate viewing whereby meaning is built up page by page. A classic example of this strategy is Robert Frank's The Americans (1959).
■A grid format, an evenly spaced grating framework of crossing parallel lines (like a tick-tack-toe board), has been used both at the moment of exposure and during printmaking to enclose and analyze an image. The grid breaks down an image into separate units while still containing it as a unified form.
■A modified grid using a specially constructed easel that has individually hinged doors that may be opened and closed. This permits a single image to be broken down into separate quadrants, each of which can receive different exposure times. The overall effect in a single image can be fractured by light to create separate units within the whole.
■A contact sheet sequence combines aspects of the in-camera sequence and the grid. A scene is visualized in its entirety, but photographed as individual segments. When these separate frames are laid out and contact printed, they create a single unified picture.
■Using joiners, the practice of photographing a scene in individual parts and then fitting these together to form one image, was impeccably deployed by painter David Hockney during the 1980s. The images may be printed at the same size (as Hockney did) or cut into different sizes or shapes and arranged and attached in place.
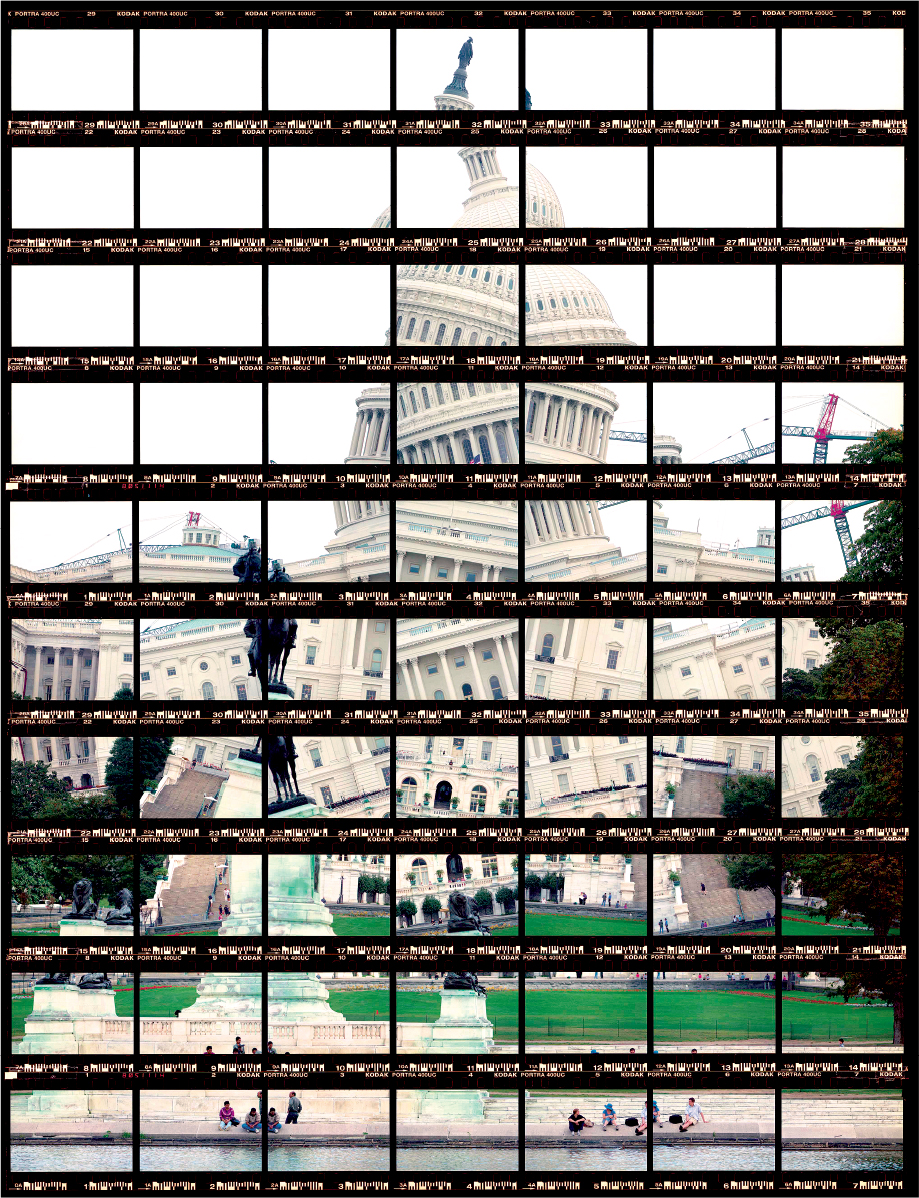
© Thomas Kellner. Washington, Capitol 1, 2004. 13¾×10½ inches. Chromogenic color print. Courtesy Schneider Gallery, Chicago, IL.
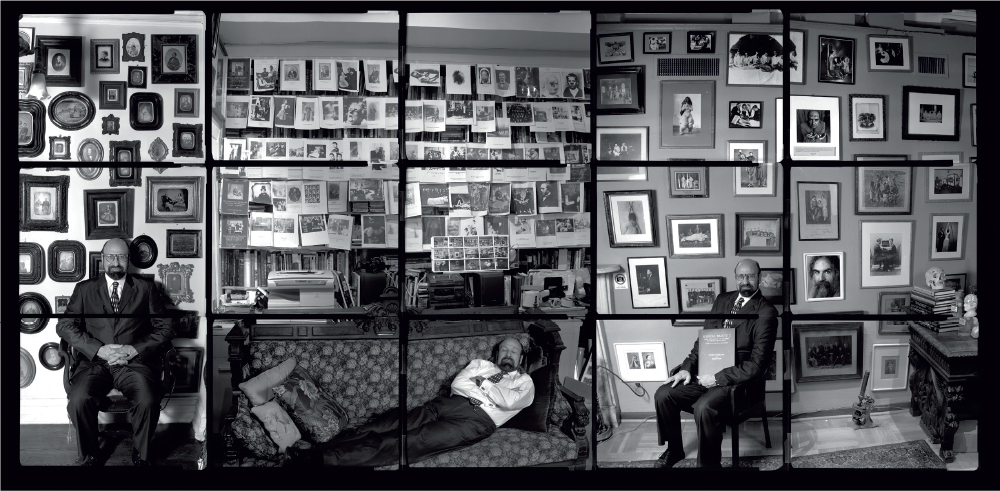
© Stu Levy. Sleeping Beauty (Stanley Burns, M.D.), 2002. 24×40 inches. Inkjet print. Courtesy Verve Gallery, Santa Fe, NM.
Resource Guide
Hoy, Anne H. Fabrications: Staged, Altered and Appropriated Photographs. New York: Abbeville Press, 1987.
Composite Variations
The Collage
A photographic collage is produced when cut and torn pieces from one or more photographs are combined on a common support material. Images may be woven together as well. A photographic collage may also include printed images from magazines, newspapers or the Internet; a combination of colored paper, wallpaper, or fabric; natural materials such as sand, grass, flowers, and leaves; and 3-D objects. No attempt is made to deny that this complete image is an assemblage created from a variety of source materials. It is not rephotographed and is itself presented as the final product.
The Montage
A montage follows the same basic rules as those used in making a collage. However, the major difference is that the finished collection of materials is rephotographed. The making of this new photographic image allows the end product to be transformed back into a photographic print, from which additional copies may be produced. Sometimes the imagemaker attempts to hide the source of the various images and materials in an effort to present a new, seamless photographic, as opposed to digital, rendition that will make people ask, “How can that be?” Great fun, innovation, and provocation are possible by juxtaposing people, places, and things that would otherwise not be seen keeping company together.
Making a Collage or Montage
To assemble a collage or montage one should consider the materials listed in Box 12.10.
You will need the following materials to assemble a collage or montage.
© Dinh Lê. Untitled, 2007. 53 × 76½ inches. Woven chromogenic prints and linen tape. Courtesy PPOW Gallery, New York and Shoshana Wayne Gallery, Santa Monica, CA.
Box 12.10 Collage and Montage Materials
■Large collection of source images and materials.
■Support print, board, or other material for a common backing base. This background material may be a piece of matte board or a photograph. Generally, photographs having open, uncluttered areas offer a good starting point. The support should be large enough to allow plenty of room within which you can maneuver — 16×20 inches is usually a good size to begin with.
■Sharp scissors.
■Sharp X-Acto knife (a #11 blade is good).
■Extra Fine sandpaper (Grit 300).
■Adhesive glue or dry-mount tissue (if permanence is a concern, use an archival glue).
■Spotting colors.
■Fine sable brush (# 0).
■Fine-tip felt pens, in various shades of gray and black, which are lightfast and waterproof.
■Tacking iron and dry-mount press (if dry mounting is planned).
Box 12.11 Constructing a Collage or Montage
1. Spread out all the source materials you are considering using. Be generous.
2. Try a variety of arrangements and juxtapositions on the background support.
3. After you have made a preliminary selection, trim the source materials down to their approximate Final size. If you are using dry mounting, tack the dry-mount tissue to the back of each selection so it will adhere properly after Final trimming.
4. Trim materials to their Final size. For the smoothest Finish, use sharp scissors to make long, continuous, beveled cuts. Use the X-Acto knife only when cuts cannot be made with scissors. Cutting with a blade tends to produce a more jagged edge. Smooth out rough edges with extra Fine sandpaper.
5. Using the appropriate gray or black felt-tip pens, color the edges of the trimmed materials so they match each other and the support board. An edge that is too dark will be just as noticeable as one that is white.
6. Attach the trimmed, shaded pieces to the background support with glue or dry-mount tissue.
7. Add shadows with diluted spotting colors if desired.
Box 12.11 contains a basic working guide for constructing a collage or montage.
Copying
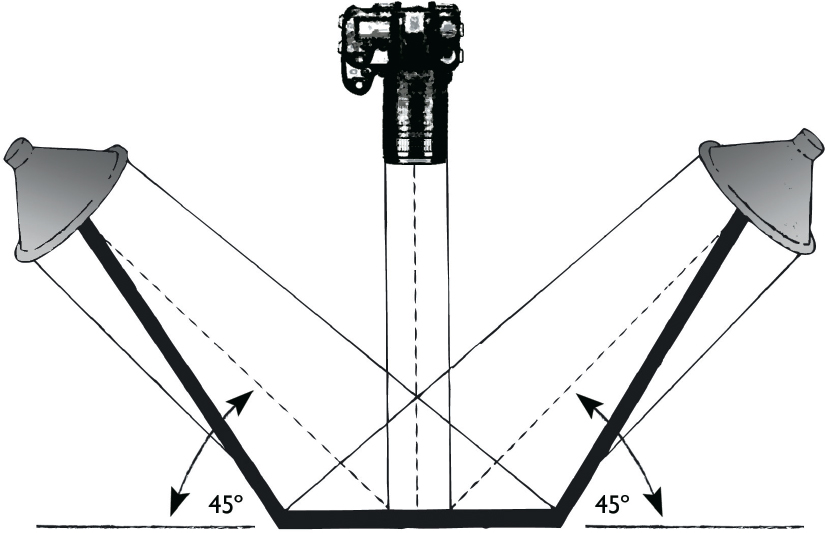
If you are making a montage, the assembled work can be copied outside in clear, direct sunlight. Place the work on a clean, flat surface. The sunlight should be striking it at a 30-45 degree angle. Photograph the work with a camera, ideally equipped with a macro lens to provide maximum flatness of field and sharpness. If you do not have access to a macro lens, you can use a 50 mm lens instead, which will easily fill the frame of for making standard sized prints. Make sure the camera is parallel to the work being copied. Stop the lens down to f-8 or f-11 to ensure good depth of field. For maximum detail and minimum pixels/grain, set your digital ISO to 100 or use a slow, fine-grain film. Determine the proper exposure by reading an 18 per cent gray card in front of the work. Do not meter directly from the work, or you may get a faulty reading. Use a tripod or a shutter speed of at least 1/125 second or higher to ensure sharp results.
The work may also be copied indoors using lights with daylight fluorescent bulbs set-up at 45-degree angles to the work, allowing the path of the lights to crossover each other (Figure 12.29) Be certain the camera's color balance matches the color temperature of your light sources. With film, use filters if necessary.
The piece may be flat or tacked or taped to a wall. A large, wall mounted, magnetic copying board with small magnets is very handy. Using a gray card, measure the light falling on the work from each lamp, making sure each is casting even illumination across the work. Then place the gray card in front of the work and take a meter reading off it with both lights on. Polarizing filters can be attached to the lights and/or to the camera to control reflections and to adjust brightness, contrast, color balance, and color saturation. For the sharpest results, use a large-format camera to copy the work. Also, collages may be scanned or copied on a black-and-white or color electronic copy machine.
Resource Guide
Ades, Dawn. Photomontage. Revised Edition. New York: Thames & Hudson, 1986.
Golding, Stephen. Photomontage: A Step-by-Step Guide to Building Pictures. Rockport, MA: Rockport Publishers, 1997.
Sudhalter, Adrian and Deborah Roldan. Photomontage Between the Wars 1918–1939. Madrid: Fundacion Juan March, 2012.
Teitelbaum, Matthew (Ed.). Montage and Modern Life: 1919–1942. Cambridge, MA: MIT Press, 1992.
Photo Based Installations and Performance Art
Photo based installations can comprise arrangements of images, objects, sound, and text that are designed to function as a single work. Installations provide viewers with the experience of being in and surrounded by the work, and often feature interactive digital components, including video and sound, to produce a more intense sensory realization. Precedents for installations can be found in the Pop Art era of the late 1950s and 1960s, such as Allan Kaprow's 18 Happenings in 6 Parts, 1959 or Red Groom's “sculpto-pictoramas” such as The City of Chicago, 1967. Most installations are not salable and generally are exhibited and dismantled, leaving only photographic documentation of their existence.
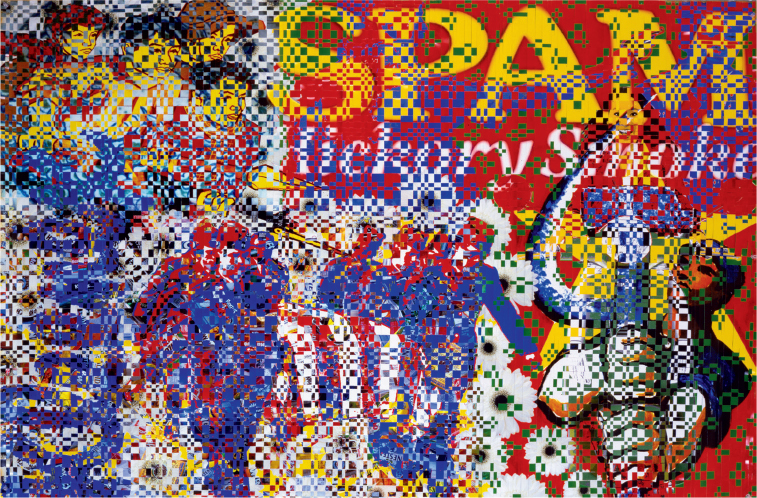
©Joe Mills. Untitled #291 (The Smoker), 2004/2007. 25×20×1 inches. Photomontage. Courtesy Hemphill Fine Arts, Washington, DC.
Courtesy Greg Erf.
The conceptual artist Bruce Nauman utilized the supposed objectivity of the photograph to give a documentary look to his contrived situations, known as performance art. This term has been retroactively applied to early live-art forms, such as body art and happenings. The progressive disintegration of conventional artist materials and presentation forms led artists to engage with the actual body as a forum for cultural critiques. Performance art is an open-ended classification for art activities that include elements of dance, music, poetry, theater, and video, presented before a live audience and usually “saved” by photographic methods and shown to larger audiences. One of its purposes is to provide a more interactive experience between artists and audiences.
Robert Smithson's constructed Earth Work projects, like Spiral Jetty (1970), a 1500 foot long spiral of earth and rock that jutted out into Great Salt Lake, and Christo's temporary projects, such as wrapping a building, or his Running Fence (1976), a 24½ mile fence of fabric, rely on photography to reach larger audiences. Initially, many conceptual artists resisted being documented, claiming that photographs would convert their art into marketable objects, violating their basic concept that such work was supposed to be experienced in person. But soon, Smithson was exhibiting his photographs and Christo was selling his. Artists like Smithson, who created transitory situations that he extracted from nature or left for nature to decompose, fixed his work with photography, stating: “Photography makes nature obsolete”4 Such strategies helped to dissolve the boundaries that separated photography from other media.
Processing Manipulation: Reticulation
Reticulation is the wrinkling of a film's emulsion into a spider web-like pattern or texture. Normally this is viewed as a processing mistake caused by differences in the temperature of the film's developing solutions. Until the 1950s, reticulation was not an unusual occurrence. Contemporary films do not suffer from this problem because of improvements in emulsion making, such as the use of improved hardeners. It can, however, be purposely induced for visual effect. Reticulation can literally dissolve the camera based reality and replace it with a manipulated reality in which line, shape, and space are distorted and rearranged on the film's surface.
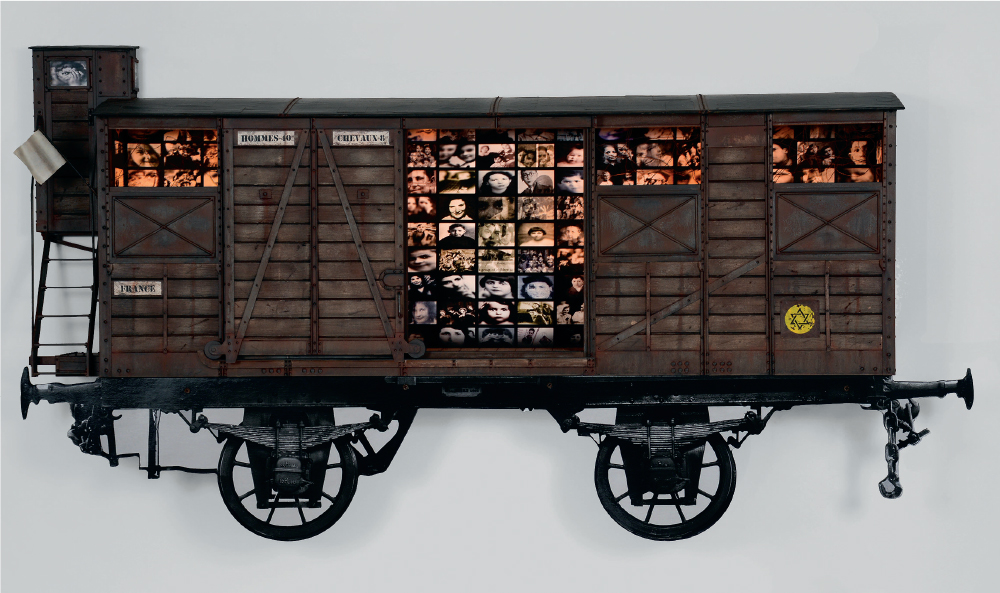
© Robert Hirsch. Guardhouse Boxcar #3 from Ghosts: French Holocaust Children, 2015. 36×72×18 inches. Mixed media. Courtesy CEPA Gallery's Big Orbit Project Space, Buffalo, NY.
Reticulation can be accomplished through two basic methods. One way is to create extreme differences in temperature between the processing steps during film development. The other method is to induce it chemically after the film has been developed.
In the first method the film is developed at an elevated temperature (90°F/32°C or higher), then put in a very cold stop bath followed by a warm fixer. After this, the film is frozen before it is given a final hot wash. Even with these extremes, the hardener built into many modern films makes reticulation difficult if not impossible to accomplish.
With the second method, the film is reticulated by chemical means, which gives the advantage of working with normally processed film. (It is most effective with freshly processed film, but even film that is a couple of years old can work.) It also enables direct observation and interaction with the process, allowing you to stop the reticulation when you see fit. This chemical method works with many black-and-white films.
Sodium Carbonate Reticulation
Sodium carbonate can be used to produce simple random reticulation. No two films seem to react to it in the same way. Even negatives on the same strip of film can respond differently, making this process highly unpredictable. Kodak's TRI-X is one film that works well with this technique. Using a medium- or large-format negative allows you to readily observe the process.
As mentioned earlier, previously processed film may be used, which can be useful for testing. However, the older the film is, the harder its emulsion surface tends to be, thus increasing the time it takes for reticulation to take place and also limiting its effects. Best results are achieved with freshly processed film (see Box 12.12).
Water Reticulation
Some films that have not been fixed with an acid hardener can be reticulated in water. Put the freshly processed film, fixed only with a nonhardening fixer, in plain water at 150°F (65°C) and allow it to sit until the water cools down to normal room temperature. This method will produce a much finer, softer pattern than that induced with sodium carbonate.
Masking
Specific areas of a negative can be masked with Fotospeed MK50 Fotomask or rubber cement to prevent reticulation (see Chapter 9, “Selective Toning: Using Frisket”). Use a fine brush to apply the mask directly on the emulsion (dull) side of the film and let it dry. Then immerse the film in the reticulating solution.
There may be some slight reticulation around the edges of the mask, depending on the length of time the film is in the solution. After the film has been washed and dried, the mask can be removed with Fotomask Cleaner, masking tape or with your finger. Film may be masked, partially reticulated, washed and dried, remasked, and further reticulated to create a variety of patterns within a single image.
Hand-Coloring
Hand-coloring lets an imagemaker voyage beyond the conventional limitations of the photographic process to change the reality of a scene. Synthetic color can be applied to alter the mood, eliminate unnecessary elements, and add space and time that were not present at the moment of exposure. This methodology can help bridge the gap between the inner/subjective and outer/ objective realities by enabling imagemakers to control the color of the external world with their imaginations.
Materials for Adding Color
A wide array of materials and processes can be used to apply color to a photograph. Some widely used coloring materials include acrylic paint, colored pencils, dyes (both fabric and food), enamel paint, marking pens, Marshall's Photo-Oil Colors, oil paint, photographic retouching colors, photographic toners (see Chapter 9), and watercolors.
Solvent Based Materials
These materials can be divided into four basic groups: lacquer based, oil based, water based, and miscellaneous.
Combining Coloring Agents
Coloring agents can be combined, as long as you keep in mind the old adage about oil and water not mixing.
Box 12.12 Chemical Reticulation Guidelines
1. Start with a completely processed and dried negative.
2. Prepare the reticulation solution by combining 30 g of sodium carbonate with 500 ml of water at 140–150°F (60–65°C). This solution has a useful temperature range of 105–160°F (40–71°C). As the temperature goes down, the action of the solution becomes slower. If the temperature gets too high, it will ruin the Film's plastic base. You can maintain the temperature with the use of a hot plate.
3. Place the Film directly in the hot solution, which is held in a clear glass jar or a small tray. For easy handling, attach a paper clip through a sprocket hole to individual frames of 35 mm film before placing them in a clean baby food jar Filled with solution. Take care not to let the Film come in contact with the walls of the jar or uneven reticulation will result. Some workers prefer the tray process. For tray processing tape the Film, emulsion side up, to a slightly larger piece of thin Plexiglas or glass and place in a tray. This technique makes observation and manipulation easier, and it provides a solid horizontal support. The tray method also permits extending the time in the solution, which increases the effect and allows other visual distortion such as veiling effects to take place. Veiling is caused by the physical breakdown of the emulsion as it begins to dissolve and fold up. Be careful not to leave the Film in the solution too long, or the emulsion will completely slide off its base. One can push the loose emulsion around with a brush or a very weak stream of water to create other effects.
4. When the Film is placed in the solution, the protective gelatin layer will dissolve and rise to the surface. Allow the Film to remain in the solution for 5-20 minutes, with occasional agitation. Reticulation may begin within 45 seconds. The First stages will produce a Fine-textured pattern. As time passes, the pattern should become larger and more exaggerated. The process may not take as long with 35 mm Film as with a 6×7 cm format. This is because the pattern will be more evident when the 35 mm Film is enlarged to the same size as the 6×7 cm Film. If the process is allowed to go too far, the pattern will become more visually important than the original subject.
5. When the desired result is obtained, remove the Film from the solution. A pair of tweezers can be helpful when dealing with unattached pieces of Film. Wash it in cool running water for 10 minutes, treat with Photo-Flo, and then hang it up to dry.
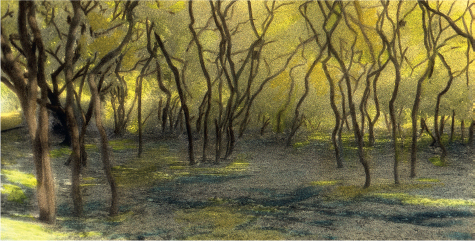
©Jill Enfield. Fire Island Trees, 1985/1990. 11×14 inches. Hand-colored gelatin silver print.
Box 12.13 Hand-Coloring Materials
■Lacquer based paint is usually sprayed from a can or airbrush.
■Oil based materials are among the most common and easy-to-use coloring agents. Quality artist oil paints can be applied to almost any photographic surface. Before painting, a fine coat of turpentine is generally applied to the print surface with a cotton ball. Marshall Photo-Oils and Pencils are available in complete kits with directions for their application. Oil based materials produce soft, subtle colors. Blending large areas of color is easy with oils. Since oils are slow drying, you can fix mistakes with cotton and turpentine.
■Water based materials, such as acrylic paint, certain concentrated dye toners such as Edwal photographic retouching colors, and watercolors are considered additive coloring agents. They can be applied straight or mixed to form new colors on a palette. Overall coloring agents are considered to be toners and are covered in Chapter 9. Nonacrylic water based coloring agents like watercolors affect the print surface in the same manner as conventional spotting. The color penetrates the surface and becomes a permanent part of the image. Mistakes cannot be erased as with oils but must be painted over. Consequently, more care, skill, and forethought are required.
■Intense and subtle color effects can be created with water based materials, depending on how much water is used to dilute the coloring agent. Since these materials do not sit on the print surface, as do oil based materials, colors tend to appear brighter, clearer, and more intense. When covering large areas, water based materials must be applied rapidly and smoothly if you do not want brush strokes to be evident in the final image. Dipping a brush in diluted Photo-Flo or lightly wetting the areas to be colored with a clean cotton ball and fresh water can reduce the likelihood of streaking.
■ Acrylics are somewhat different from other water based materials. Acrylics reside on the surface of the print and so tend to appear brighter and more opaque. If these qualities are not problematic, it can be easier to work with acrylics than with watercolors because they are slower to dry. Thus, they can be removed while still wet using cotton and water.
Box 12.14 Factors Affecting the Permanence of Additive Coloring Agents
■Keeping properties of the specific coloring agents.
■Combinations of coloring agents.
■Type and condition of the surface being painted.
■Levels of exposure to UV light.
■Proper display and storage conditions, including moderate temperatures and medium to low relative humidity.
Remember that lacquer and oil do not adhere well to water based materials and that water based agents do not adhere well to lacquer and oil based materials. Box 12.14 lists the factors affecting the permanence of additive coloring agents.
Box 12.15 provides starting points for applying additive colors to a photographic print. As experience is gained, begin to diverge from the given modes of application. Try hand-coloring on fabric and nonsilver emulsions or combining the procedure with toning and masking. Hand-coloring is a highly individualistic process, so be adventurous and experiment. Do not be afraid to make mistakes. The ability to make meaningful photographs often comes through an intellectual and/or spiritual instinct that mastery of technique and hours of practice have liberated.
Box 12.15 Hand-Coloring Guidelines: Applying Additive Colors to a Photographic Print
1.Begin with a dry, processed, well-washed print. Most workers prefer a matte surface, but a glossy surface also can be used.
2.Gather together all the needed materials, including the coloring agents and applicators. Colors can be applied with various sizes of good-quality brushes, 0-Tips, cotton balls, lintless cloth, or small sponges. A mixing palette, water or another solvent, and white paper on which you can test mixed colors are required. In addition, your work area should have an adjustable, high-quality, daylight work light.
3.Read all the manufacturer's instructions and follow all safety procedures as outlined in Chapter 5 and Addendum 1.
4.Practice your technique with throwaway prints.
5.The Final results depend on a combination of application, print surface, type of coloring agent, temperature, and humidity.
6.Images made with water-soluble materials, including inkjet prints, can be made water-resistant by spraying them with a Fixing agent, such as Marshall's Image Guard, which also enhances UV light resistance and helps prevent fading.
© Ted Orland. Meteor! 1998. 13×20 inches. Hand-colored gelatin silver print. Courtesy Ansel Adams Gallery, Yosemite, CA.
Airbrushing
The airbrush, invented in 1882, is a small spray gun capable of delivering a precise combination of fluid (ink, dye, or paint) and air to a specific surface location. This versatile tool offers the satisfaction of physically interacting with an image. To master airbrushing one must be willing to perform the task repeatedly. Most airbrushes come with instructions containing basic exercises to get you acquainted with how the brush works. Also, there are books and online tutorials on basic airbrush technique. Once you have grasped these methods, move on to practicing on unwanted prints. Once you have built up your confidence, try your hand with a good duplicate print. Opportunity abounds with the airbrush. See what you can accomplish.
Canned Spray Paint
Experimenting with colored canned spray paints offers a hands-on way to get an overall sense of what one can do with an airbrush. However, canned spray paint provides a much wider field of spray and is not suggested for precise work, as it is more difficult to control than an airbrush. Canned spray paint and an airbrush can be combined. Follow all the same general airbrush working and safety procedures.
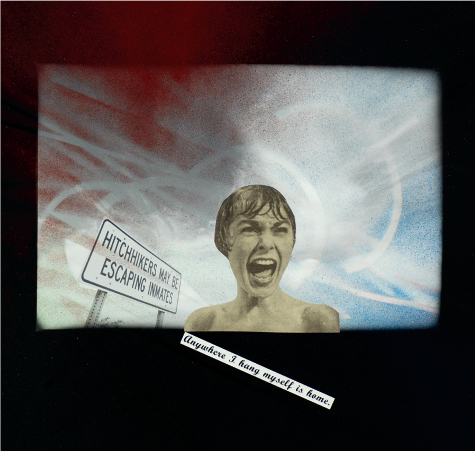
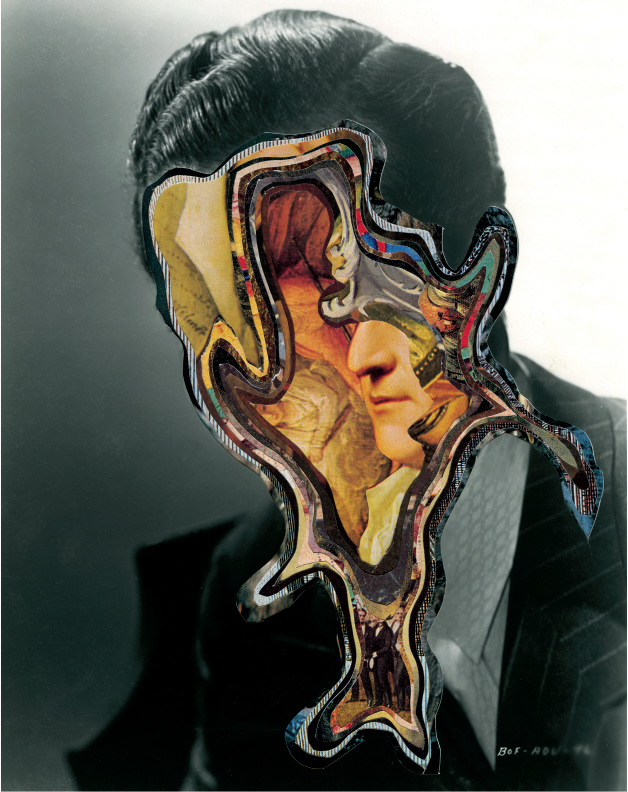
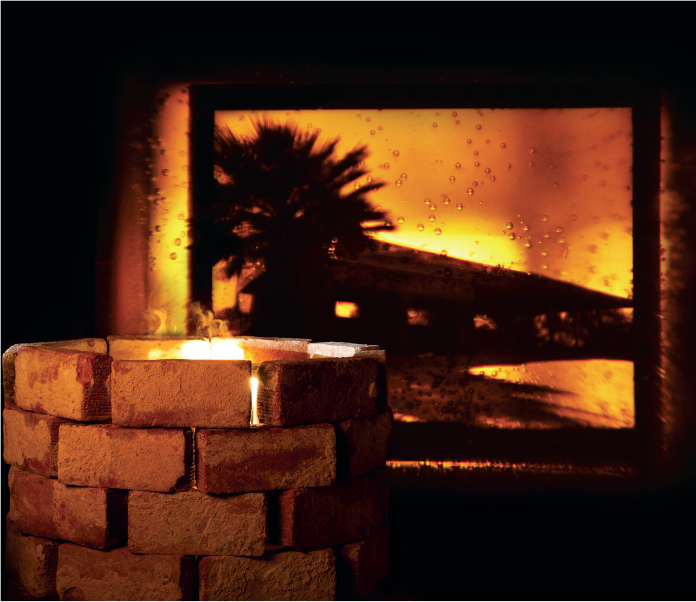
© Robert Hirsch. Anywhere I Hang Myself Is Home, 1992. 16×20 inches. Toned gelatin silver print with mixed media.
Resource Guide
Badger Air-Brush Company (equipment, paint, supplies, educational aids): www.badgerairbrush.com
Paasche Airbrush Company (equipment, paint, supplies, and educational material): www.paascheairbrush.com
Transfers and Stencils
A wide variety of transfer processes permit an image to be transferred to another receiving surface. Transfers offer a fast, inexpensive, and cool way to work with your images or those from other sources like magazines. Transfers will be reversed (like a mirror image) so all lettering will be backwards. There will also be a shift in color. One can transfer more than one image to a single receiving surface, creating a collage of images. Most methods are experimental and can be done without the use of a printing press.
Stencils can be used in place of images and the material used to form the new image is only limited by one's imagination. Stencils can be cut by hand using an X-Acto knife and a sharp blade, or commercially by a sign-making or graphic arts company. Paint, ink, or other materials can be applied to a variety of surfaces through the stencil's openings.
© Kim Abeles. Theodore Roosevelt and Ronald Reagan, from the series Presidential Commemorative Smog Plates, 1992. 734 inch diameters. Smog on porcelain with gold enamel. Courtesy of a private collection.
Transfer Materials
Materials needed for transfers vary, but those listed in Box 12.16 can be useful for most applications.
Magazine Transfers: Petroleum Ink Bases
Images from freshly printed, clay-coated, slick magazines deliver the most contrast and color saturation. Test with water and if pigment dissolves, use water to make the transfer (see section on “Black-and-White Copier, Laser-Printed, and Inkjet Transfers”).
Lay receiving material face up on a hard, smooth surface. Position the image to be transferred face down and use drafting tape (to avoid paper tears) to secure one edge only, so that the paper can be folded back to expose its image without shifting its position. Generously apply the solvent chosen with a cotton ball or brush to the face of the image. Quickly lay the coated magazine image back in contact with the receiving surface, and apply hard and even pressure with a burnishing tool to transfer the dissolved ink.
Box 12.16 Transfer Materials
1. A burnishing tool. “Bone folders” are ideal; however, any blunt-edged tool such as a butter knife, a clay burnishing tool, a metal or wooden spoon, or a soft lead pencil can work.
2. A receiving surface. Ideally a smooth, absorbent material such as printmaking paper; however, cloth and other materials can be used if they have a Fine, tight weave. Textured surfaces may also work but deliver less detail.
3. Large cotton balls and/or soft brush.
4. Appropriate solvent. Since solvents vary in their ability to dissolve inks one needs to experiment, starting with water, the least toxic solvent available. If this proves unsatisfactory use mineral spirits (paint thinner). If this does not work, move up to acetone, or “Goof-Off,” available in hardware stores. These solvents evaporate rapidly. Transparent gels used for diluting oil based silkscreen ink are generally very effective. Gels penetrate the paper, readily loosen the print image, and evaporate more slowly than liquid solvents. Silkscreen bases are available at art stores and commercial print supply companies. All these solvents contain volatile ingredients and can pose potential health hazards. Read the warning labels with each product. Work only in a well-ventilated area and follow all general safety rules (see Chapter 5 and Addendum 1).
Each tool will yield a different result. Try a combination of tools for a variety of effects. Periodically check the results by lifting one corner of the magazine image up and inspecting the receiving base. When the magazine image dries and will not transfer any more ink, add more solvent to the image. Repeat this process until the image has been transferred. Be patient. This procedure can take up to 15 minutes. If you have access to a printing press it can be used instead of the hand burnishing.
Newspaper Transfers: Petroleum Ink Base
Newspapers transfer unpredictably, which is their charm if one wants a distorted image. If you want something more predictable, copy (Xerox) or scan and laser-print the newspaper image (see next section). This also permits the image to be reversed so text will read correctly.
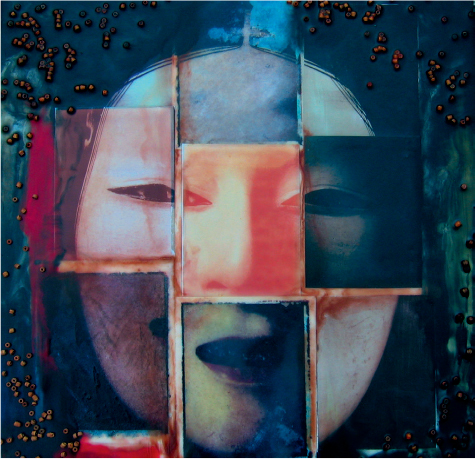
© Shelby Graham. Noh Mask: Rooted, 2006. 12×12×3 inches. Polaroid transfer with mixed media.
Lay receiving material face up on a hard, smooth surface. Trim (if desired) and position the image to be transferred face down. Tape in place if desired, or simply hold in place while working. Lightly saturate a cotton ball with solvent, then blot the cotton ball on paper towels until damp (if it is wet it will cause the ink to run). With hand pressure, apply the damp cotton ball to the back of the newspaper in circular motions until the paper becomes transparent. You can check the progress of your transfer by lifting a corner and peeking. Replenish solvent as needed. If too much of the newsprint comes off on the cotton ball, try using a thin slip sheet (blank piece of paper) between the cotton ball and the newspaper.
Black-And-White Copier, Laser- Printed, and Inkjet Transfers
A black-and-white image (made with a digital laser-printer or dry-toner copier) can be transferred onto another surface using a strong solvent. The method is identical to the newspaper transfer, previously mentioned, except that you will not need a slip sheet. A citrus-oil solvent may work on freshly printed images.
The advantage of the digital laser-print is that the image can be “flipped” prior to output and transfer, resulting in correct left-to-right orientation.
Inkjet printers can be used to make transferable images by using a waxy paper, such as computer label sheets or a release paper that is used as a protective overlay in dry-mount operations by using the procedure outlined in Box 12.17 that only requires plain water.
Color Copier or Laser-Printed Transfers
Color copiers used to have inks that readily transferred with solvents. This is now currently a rarity, but you may still find an old machine that will allow you to do this. One can experiment as the industry is always changing. Failing direct transfers, decal papers or Lazertran paper is an alternative.
Release Papers
Release paper, such as Acrylic Image Transfer Paper, is used for the so-called “paperless” transfer of photocopied images, as this paper washes away with water much more easily and completely than standard copy paper. Designed to be used with laser printers and toner based copiers, it can withstand the high fuser temperature of newer photocopiers. Note that the face of the image to be transferred must be coated with gloss acrylic medium.
Acrylic Image Transfer Paper for inkjet printers is specially designed to make “paperless” color acrylic image transfers with your inkjet printer. However, you will need an inkjet printer with waterproof ink in order to effectively use this product.
Box 12.17 Inkjet Transfer Process
1. Put the transfer paper, shiny side up, into the printer. Be sure to remove any labels that might be on the paper.
2. Adjust the image settings to print about 20 per cent darker and 5 per cent higher in contrast than normal.
3. Select the highest quality printing mode and print the image. The image will look very dull.
4. Briefly soak a piece of blank receiving hot-press printmaking or watercolor paper in a tray of water, then remove, and blot excess moisture with a paper towel or cloth. If the paper is too wet, a dot pattern will result. Cold-pressed papers will deliver a softer effect.
5. Place the inkjet print face down onto the damp receiving paper. Hold Firmly in place and gently rub the back of the transfer paper and then carefully lift it off.
6. A soft or foam brush may be used to blend and manipulate the inks.
7. Watercolor paints or pencils can be applied on either a wet or dry print. Pastel chalks may be used on a dry print.
8. Dry the print with a hair dryer or air dry, face up on a plastic screen.
Also, color copies are subject to fading while black copies made with toner containing carbon are much more stable.
For process details, see Talbot, Jonathan. Collage: A New Approach, 5th Edition, available at: www.talbot1.com.
Water or Vegetable Based Color Print Transfers
Common small- and large-format digital printers use inks or dyes that can be transferred using plain water, water based transparent silkscreen gels, or even acrylic gels. The most archival results begin with pigment based prints. Patience and experimentation will be required. Density of ink, variations between printer hardware, inkjet paper, and receiving paper will result in dramatically differing results.
Many people have success using a printing press to transfer the image because it can quickly apply a large amount of even and intense pressure. The procedure relies on devising a way to evenly dampen the inkjet print and/or receiving paper. Generally, printing paper (made for hand lithography or intaglio) is soaked for 20-30 minutes, then blotted between two large clean towels (and a rolling pin) until damp, not soaking wet. It is then quickly placed on the printing press, the color inkjet print is laid face-down on the damp paper, covered with a clean thin sheet of flexible plastic (such as Lexan or polycarbonate), and quickly run through the press. The transfer is then checked; if the image needs more dampening to release, this can be applied by using a spray bottle, a dampened sponge, or damp blotting paper. The variables are many and experimentation is necessary.
Decal Papers
Most copiers and digital printers have manufacturer-recommended clear “decal” or transfer papers for use with their machines — be sure the decal paper is compatible or it could ruin the machine. These are often “ironed” on with heat and therefore application is limited. The results can be quite detailed; however, the clear plastic of the decal remains on the surface, even in areas where there is no image.
Lazertran Transfer Products
Lazertran Ltd makes transfer papers for color copiers and laser printers. After outputting the digital file or color copy onto Lazertran paper, the image is trimmed and soaked briefly in water. This releases the image from its backing paper, and it can be applied onto paper, canvas, ceramics, tiles, glass, metal, plaster, plastic, or wood. Unlike decals that are ironed on, Lazertran's makers of contact paper often used inside kitchen cabinets claim that it can be fused to bond permanently with a number of surfaces. They also make an iron-on transfer for silk and other sheer fabrics as well as one that allows you to cover curved surfaces and corners. For product details, see: www.lazertran.com.
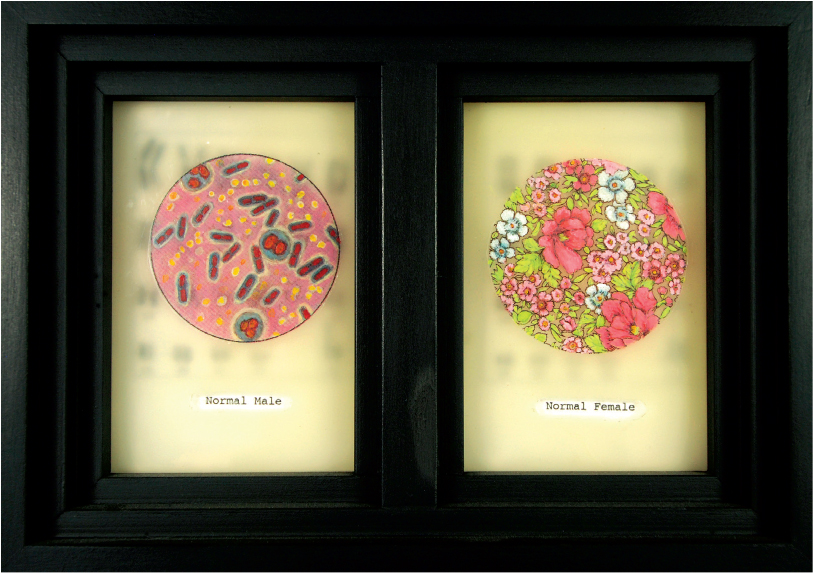
© Adele Henderson. #53, from the series Normal Male/Normal Female, 1998. 7½×9½ inches. Print on paper, Plexiglas, wax, white shellac, wood frame, and one or more of the following: engraved and inked lines, litho ink transfers, hand painting in oil, asphaltum, or Lazertran transfer.
Transparent Contact Paper Transfers
Clay-coated magazine pictures can be transferred by using transparent contact paper having an adhesive backing. This is the type of contact paper is often used inside kitchen cabinets. It is not photographic contact-printing paper.
Select a clay-coated magazine picture. Remove the backing from the transparent contact paper and stick it onto the front of the magazine image. Burnish the clear contact paper well with a blunt edged tool. This will remove all bubbles and transfer the ink onto the adhesive layer of the contact paper.
Soak the adhered image and clear contact paper in hot water until the paper backing of the image dissolves enough to be removed with a small sponge or your finger. When this step is complete, only the ink transfer will remain on the contact paper. Hang the image up to dry. To protect the dry image and make it easier to handle, place a new piece of clear contact paper on the nonlaminated side of the dried image and burnish it.
Aside from making a final piece with contact paper, you can use contact paper transfers for the following:
■Print them on light-sensitive material to get a negative
■Contact print them on a film to make a negative from which prints can be made.
■Put them in a slide mount and project them.
■Use them in a copy machine or scanner that can make prints from slides.
Flexible Transfers
A clay-coated casein paper image may be transferred to an acrylic medium to deliver a flexible transparent transfer. Acrylic matte mediums range in consistency from pourable to moldable with varying degrees of sheen and transparency and are used in a wide range of transfer processes. They can also be used to create glazes, extend paints, build texture, and change finishes plus many are excellent glues for collage work.
Select an image that has been printed on a clay-coated paper. Using a soft, wide brush, coat the front side of the printed image with acrylic gloss painting medium. Apply the acrylic medium quickly, in only one direction, and allow it to dry. Then apply it again in another direction and allow it to dry. Continue repeating this process until you have at least eight layers of medium.
Soak the coated image in hot water until the magazine picture dissolves and can be peeled off, leaving only the printer's ink in the acrylic medium. Hang the image up to dry. The acrylic medium will be white when it is wet, but it should become transparent after it dries.
The acrylic medium is flexible and can be shaped and stretched for many applications in which a regular transfer would not work. Warm the medium with a hair dryer before attempting to re-form it or it may break. Re-application of the acrylic may be needed if it begins to tear or get too thin. Place it face down on a piece of glass and begin working it from the edges to form a new shape. The flexible transfer can be stretched around 3-D objects or be stitched, stuffed, and attached to other support bases.
Dass Art Emulsion Transfer System
The Dass Art Emulsion Transfer System encompasses a number of products, such as DASS ART SuperSauce Concentrate, which lets one transfer inkjet prints via DASS ART Transfer Film to other surfaces. Additionally, DASS Universal Precoat II is a liquid inkjet emulsion employed to coat various surfaces so that they can be printed on with an inkjet printer. This product is utilized for preparing porous and nonporous surfaces to accept the inkjet pigment. It can be applied on a variety of surfaces for direct printing or as a surface preparation to receive transfer “sauces.” Additionally, it can be used to create decals/skins when using the Dass Art Carrier Sheets. An image transfer process video can be seen at: https://vimeo.com/120328230. Additional videos are available at: https://vimeo.com/dassart.
Polaroid Image and Emulsion Transfers
Images formed on Polaroid instant print film can be transferred to another receiving surface, such as artists’ paper, 4×5 or 8×10 inch sheets of black-and-white or color film. These surfaces work well and provide an image large enough for viewing. Emulsion transfer is a process for removing and transferring the top image layer of Polaroid film onto another support surface. For the latest instant film products and how to manipulate them visit: https://blog.the-impossible-project.com/tutorials.
Going against the Grain
The expression, “going against the grain” derives from woodworking where the tree's growth rings are called “grain.” If you want a wood finish to be smooth, one needs to run their tools “along” the grain and not “against” it. The expression was made famous in William Shakespeare's tragic play Coriolanus (1609) to indicate doing something that is the opposite of what is expected. In the photographic arts, it refers to makers who cast aside conventional methods in favor of personalized approaches that often involve physical interaction with their materials. Their highly individual tactics throw the rulebooks out the window and take risks by treading into unknown territory. This outlook requires experimentation and operations courting chance as pioneered by the American composer John Cage who believed that “all answers answer all questions.” Influenced by Zen Buddhism and the I Ching, an ancient Chinese divination text, Cage explored “nonintention” through his merging of Eastern and Western systems. Running counter to the formal discipline of the academy, his open sense of play encouraged artists to invite spontaneous happenings into their workflow. This impacted not only avant-garde music, but all the arts, with his ideas being an inspiration for the Fluxus movement. Such creative freedom often alarms cultural gatekeepers who see it as a seductive threat to “important” values like tradition or intellectual rigor. They dismiss such work as being naive, simplistic, and more often about craft than significant or trending theoretical ideas. Like Cage did with East and West, uniting the hand with the mind can produce a primordial sensation of creation and imaginative dramatic theatre that opens innovative windows of perception.
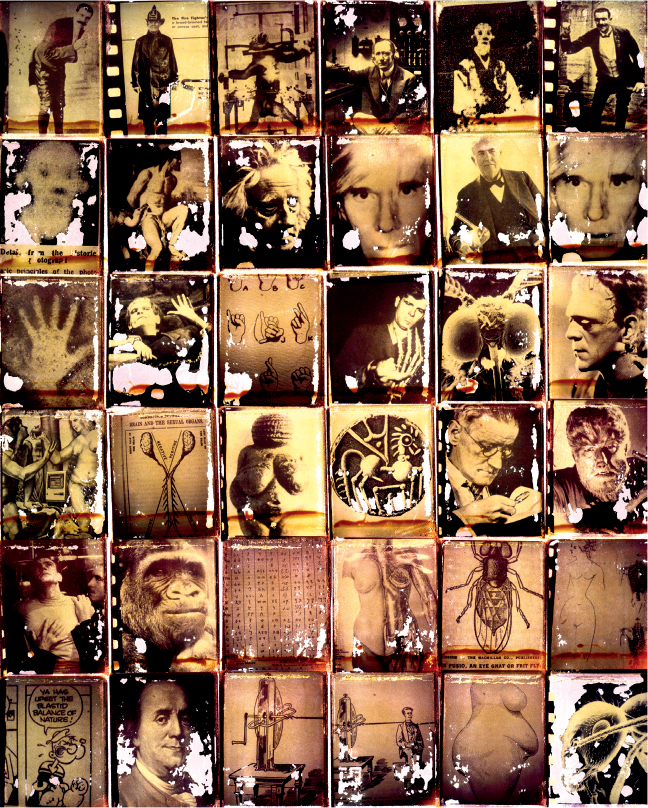
© Rick McKee Hock. Codex (Frankenstein), 1986. 30×22 inches. Polacolor transfer. Courtesy Red Dot Contemporary, West Palm Beach, FL.
Cross-Processing: Slides as Negatives and Negatives as Slides
E-6 film, such as Fujichrome 200, can be cross-processed in C-41 chemistry to achieve an artificial, hyper-enhanced color scheme with intense contrast. Expose at ISO 100 and develop in the C-41 process. Bracketing is recommended. Prints can then be made on conventional color paper or negatives can be scanned, adjusted, and digitally printed.
Similarly, color negative film (C-41) can be developed in slide chemicals (E-6). One can anticipate muted, pastel colors with low contrast. Contrast can be increased by push processing the film two or three stops during development.
Resource Guide
Hirsch, Robert. Exploring Color Photography: From the Darkroom to the Digital Studio. Sixth Edition. New York and London: Focal Press, 2015.
© Marco Breuer. Untitled (C-1485), 2014. 19 15/16×16 13/16 inches. Chromogenic color paper, folded, burned, and scraped. Courtesy Yossi Milo Gallery, New York.
Print-On-Demand: The Self-Published Handcrafted Photobook
The first self-published photobook, Photographs of British Algae, was created in 1843 by English botanist and photographer Anna Atkins. Her hand-assembled, sewn, and bound book of original cyanotypes established many of the key design elements artists still emulate and value.
Since Atkins's time, professional designers and publishers have largely taken over the job of making photobooks, removing the artist's hand. With digital self-published print-on-demand platforms, artists can reclaim the creative process of making a book of their photographs. Such companies provide do-it-yourself design templates, and for the more serious bookmaker, integrated InDesign plug-ins to generate the industry-standard PDF files that are used for printing. Self-publishing has become a viable, respected, and necessary option for getting one's work into circulation. Larissa Lelair, founder of Indie Photobook Library, further states that “[s]ome of the most potent and challenging photographic work being done today is in the form of self-published photobooks. Freed from traditional publishing constraints, the photographer influences the overall book form in new ways. When content, form, and experience merge, the book is magical.”5

© Joyce Roetter. Plantas de Peru, 2004. 20×16 inches. Chromogenic color print with paint. Courtesy Dr. Bill Wright Collection.
Print-on-demand is just that — one can order any number of copies at a time, and there are no up-front costs as there are in traditional and independent publishing. These books are highly affordable, depending on the chosen features and number of pages. E-book versions are also available. Now publishing is within reach of many, but making it happen can require a new skill set. Currently, print-on-demand bookmaking (POD) is taught in many college photography programs and is recognized as a necessary skill for promotion and/or presentation of one's work.
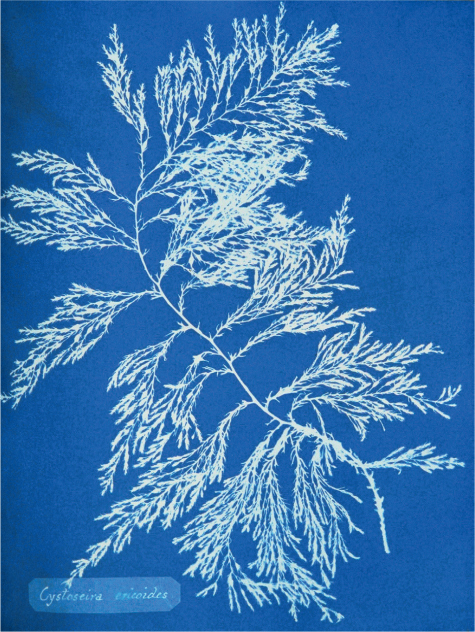
Courtesy New York City Public Library Digital Collections.
Book Making Skill Sets
Color Management
Our eyes see a visible spectrum particular to our species, but cameras, monitors, and printers are a different species, so to speak — they each see only portions of the spectrum (see Figure 12.42). Color management involves procedures to assure that what we see through our camera and on our monitor will be nearly what we see in print.
The most critical part of color management for bookmakers is to calibrate one's monitor regularly, which assures consistent color during processing and from book to book. This can be done with a computer's internal calibration interface or for greater accuracy, with an external display calibration device, which is a good investment. Regardless of method, the computer is creating a profile that fixes a target white point, luminance, and ambient light level of the screen so one can preview their files more accurately. With this baseline, one can then process files and soft proof — preview how the printer will view the file and then edit accordingly.
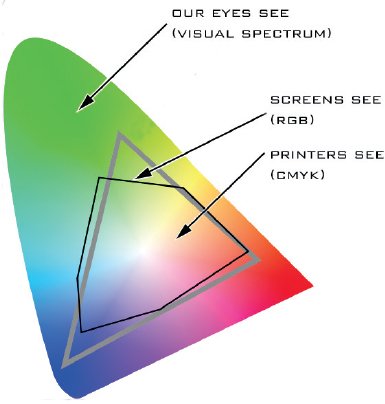
© Laurie Türner.
Soft Proofing
Soft proofing is a virtual version of a physical paper proof. Soft proofing is done after processing digital files. It allows one to preview an image as the press/printer sees it, providing an opportunity to make corrections. When using InDesign, soft proof images are prepared in the same manner as they are for normal digital printing. The requirements of each platform determine a specific workflow.
To soft proof in Photoshop, make a copy and keep the original on the screen. Work on the copy and select View > Proof Setup > Select (one of the options from CMYK to a Custom profile). Then select View > Proof. Toggle between the copy and original while endeavoring to match the original: the copy will be placed in InDesign.
Indesign
InDesign, part of the Adobe Creative Suite, has an interface similar to Photoshop, though the programs are significantly different. It is the industry-standard layout tool for books and other print media. Many POD platforms include plug-ins for generating a PDF from an InDesign project. InDesign college courses, plus YouTube tutorials, and an InDesign manual will adequately prepare one to create text and work with layers and color swatches (see Resource Guide). InDesign does have a longer learning curve than using a POD company template, but it offers more custom design possibilities.
Photobook Making Process
Motivation and Audience
Photobook makers should have well-defined goals about the purpose they want to achieve, as this will determine audience and guide editorial decisions. Some objectives to consider include the following:
■Archive - To preserve bodies of work.
■Fundraising - For a cause or a not-for-profit organization (501.C3).
■Gifts - For family, friends, and colleagues.
Promotion - Serve as a take-away for curators, gallerists, and publishers at photography reviews, or for mailings of print or electronic versions.
■Sale - For personal profit.
Concept
It is imperative to be able to clearly and concisely explain a book project in a few sentences without any jargon (a.k.a. an elevator speech). This concept will also guide editorial decisions. Figure 12.43 offers a succinct description of Tümer's concept.
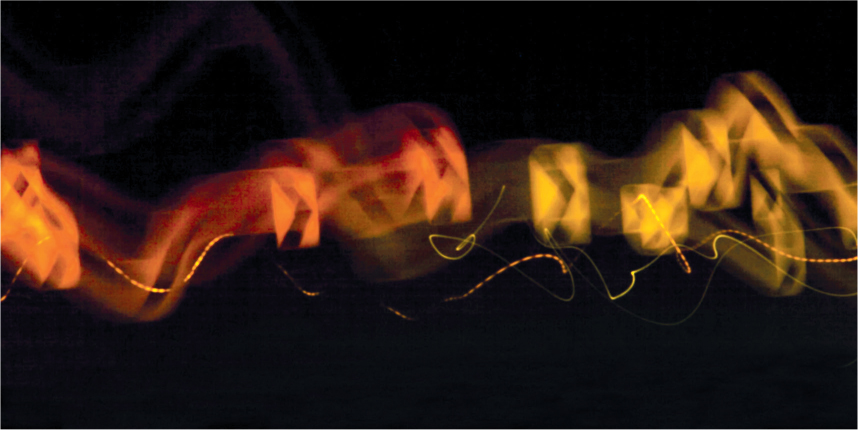
© Laurie Türner, Untitled #1 from the series Night Writer, 2016. 8×16 inches. Inkjet print.
Format
Each POD platform offers different sizes or formats from square to rectangular. Even with a limited budget, do not underestimate the aesthetic impact of a small book.
Editing
Place all of the images you wish to consider for your photobook in a new folder dedicated specifically to the project. This folder is for organization purposes, but is also critical when working with InDesign, as the images are actually linked to the files on the hard drive - they do not exist in InDesign. The link is the path between InDesign and the file location so it “breaks,” if location changes this requires extra time to locate and refresh.
Now that all images are in a folder, it is time to edit, which involves choosing what to leave in and what to take out. Many people have a difficulty eliminating images, which leads to books with two or three times the number of images necessary. So keep in mind the “less is more” adage and eliminate all images that deliver the same message or distract from the arch of your visual story.
Consider following the classic advice given to writers when editing their writing: “Murder your darlings.” In this case, the darlings are those images photographers are attached to, but have problems with composition, exposure, redundancy, or harmonizing with others. To help determine which of your “darlings” may need to go, it is useful to ask one's confidants: “If you were to take out three images, which would they be?” A book is often only as good as its weakest image or text. If one becomes stuck, get input from a professional designer who has no skin in the game.
© Laurie Türner. Clouds (cover), 2015. 8×8 inches. Inkjet print.
Layout
Layout refers to the sizes of the images and how they are arranged on a page or full spread (two adjoining pages). The best way to learn about layout is to look at other photobooks (in person and online) and make notes about your favorite and least favorite layouts. Figure 12.45 provides some of common options for full page spreads.
Traditionally you made a paper dummy of your book. Now many people prefer to do their layouts directly with InDesign. Try both approaches, and note the pluses and minuses of each, and then decide which method works best (see Figure 12.46).
Sequencing
Sequencing, the order, placement, and size of images within the layout, is the most challenging part of the process. Sequencing may be completely or partly determined by chronology or it can suggest an expressive narrative. It may be useful to think of sequencing in musical terms as a musical composition orders notes to create harmony, form, and rhythm for artistic and emotional effect.
There are three basic placement strategies to consider:
1. Place the strongest images at the beginning of the layout.
2. Intersperse the most engaging images throughout.
3. Concentrate the finest images towards the end of the layout to produce a memorable closing arrangement.
© Donna Brownell.
© Laurie Türner. Untitled, #3, from the series Clouds, 2015. 8×16 inches. Inkjet print. Courtesy photo-eye Gallery, Santa Fe, NM.
Bear in mind, most readers do not initially look at a book from start to finish. Rather they flip through it in reverse order paying only partial attention, so it important to have enticing material wherever a reader lands. Also, pay attention to how the pairing of images can increase or decrease viewer intensity/interaction and/or change how the images might be interpreted.
Text
Text can enhance or diminish the importance of images in a book and affect its meaning. Therefore, one should carefully plan and evaluate this interaction. Text options include: title page, epigraph (opening quotation), introduction (project summary and its goals), an interview, a poem plus acknowledgments.
Final Edits
Bookmaking is a circular process, so it is common at this juncture to add and/or remove images, rearrange the layout, or change the cover. Final editing involves critical self-examination of the work and listening again to the responses of others. After final edits, it is time to order a test book to check color accuracy and overall storytelling impact. It often takes several test books to adjust images, text, and sequencing to your satisfaction. POD books provide the ability to continue to edit and produce new and improved iterations/editions.
Incorporating Handmade Elements
There are numerous ways to personalize the POD books by incorporating handmade elements including:
■Write directly in the book
■Create fonts of your writing using one of the online resources, such as www.myscriptfont.com, which can be effective for a cover or title page
■Make a dust jacket or a letterpress wrapper
■Cut pages separately so the size of each page differs from the next
■Tip in physical prints on or inside the covers
■Make pockets to hold prints or other custom-made materials
■Include removable gift prints
■Fold out prints (adhered or not)
■Slipcases for one or more books
■Removable wrap around strips
Resource Guide
Himes, Darius D. and Mary Virginia Swanson. Publish Your Photography Book, Revised & Updated. Princeton, NJ: Princeton Architectural Press, 2014.
InDesign Manual: https://helpx.adobe.com/pdf/indesign_reference.pdf
Tümer, Laurie. Night Writer. (Self-published, 2016).
Tümer, Laurie. Clouds. (Self-published, 2016).
END NOTES
1 Kis, Danilo. Encyclopedia of the Dead. New York: Farrar, Straus and Giroux, 1989.
2 Goya (Francisco de Goya y Lucientes). Los Caprichos, Plate 43, The Sleep of Reason Produces Monsters, 1799. 8½1×6 inches. Etching, aquatint, drypoint, and burin.
3 Danto, Arthur. Connections to the World: The Basic Concepts of Philosophy. Berkeley: University of California Press, 1997, 40.
4 Bargellesi-Severi, Guglielmo (Ed.), Robert Smithson Slideworks. Verona: Carlo Frua, 1997, 13.
5 Himes, Darius D. and Mary Virginia Swanson. Publish Your Photography Book, Revised & Updated (Princeton, NJ: Princeton Architectural Press, 2014), 17.