12. Preparing Images for the Web
If you take digital photos, you may want to post them to a Web page or a social-networking site like MySpace or Facebook. Whether you decide to post a snapshot of an old push mower to eBay or just want to share vacation photos with your Aunt Ruth, the considerations are much the same.
Size and speed influence most decisions regarding image preparation for the Web, and they are the central themes of this chapter. While broadband is now widely available worldwide, it’s still a good idea to optimize the size of your digital images: the smaller the image file size, the more quickly it appears, even with the fastest Internet connection.
That’s not to say I’m abandoning aesthetics—after all, there’s little purpose in uploading a photograph that’s too fuzzy or distorted to be seen clearly. This chapter’s focus is also about creating compact files that look good.
If you’re looking to post a gallery of photos instead of optimizing and saving images one at a time, see Chapter 14.
Understanding Image Requirements for the Web
Preparing images for the Web presents a set of challenges distinct from commercial and ink-jet printing. Even with abundant broadband worldwide, a significant percentage of Web users have dial-up or relatively slow broadband connections. This means your images need to be small enough to download quickly while retaining color and clarity comparable to your original image.
Photoshop Elements offers some digital sleight of hand through a process called optimization. Optimization pares down and streamlines an image’s display information based on settings you can choose among and preview to determine the best combination of values.
By limiting the number of colors in an image, or by selectively discarding pixels that are less critical than others, Elements removes information from an image and reduces the associated file size. Once an image has been streamlined in this way, it is optimized (Figure 12.1).
Photoshop Elements offers four file format options for optimizing an image: JPEG, GIF, PNG-8, and PNG-24. Generally speaking, JPEG and PNG-24 are most appropriate for images that contain subtle transitions of tone and color (like photographs), while GIF and PNG-8 are best for graphics or illustrations containing a lot of flat color or typography (Figure 12.2).
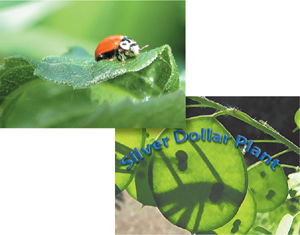
Figure 12.1 The original illustration of the ladybird beetle (left) contains a great deal of detail and subtle gradations of tone and color. The over-optimized version (right) is greatly simplified and contains far less color and image information.
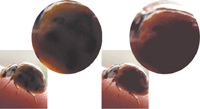
Figure 12.2 The photograph on the left, with its subtle and varied tones and color, is a good candidate for JPEG optimization, whereas the flat, bold colors and use of typography in the illustration on the right make it more appropriate for GIF optimization.
About the Save for Web Dialog
The Save for Web dialog might be more appropriately called the “Prepare Web Images” or “Optimization” dialog. Within it, you’ll find all the tools, drop-down menus, and text fields necessary to transform any digital photograph, painting, or illustration into a graphic that will work well in a Web browser.
The original and optimized image previews, the heart of this dialog, provide instant visual feedback whenever setting adjustments are made. Information fields below the image previews constantly update to reflect the current optimization format, file size, and download times. And at any time in the optimization process, you can preview and verify exactly how your image will appear in any Web browser loaded on your computer.
Optimizing an Image for the Web
With the Save for Web command, Photoshop Elements provides a simple, automated method that not only saves an optimized copy of your original image, but also preserves the original high-resolution image, untouched and intact. Simply choose from a list of predefined settings, and your image is instantly optimized for the Web. You may want to experiment with the custom optimization settings, but the predefined settings should satisfy the requirements of most of your optimization tasks.
To save an image for the Web:
1. Open the image you want to optimize.
2. From the File menu, choose Save for Web (Figure 12.3), or press Command-Option-Shift-S. The Save for Web dialog opens on top of the active image window, displaying the image in side-by-side original and optimized previews (Figure 12.4).
Figure 12.3 Open the Save for Web dialog from the File menu.
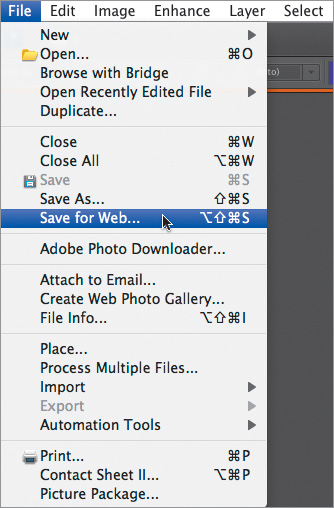
Figure 12.4 The Save for Web dialog. The image on the left shows the original image. The image on the right shows a preview of what the same image will look like after it’s been optimized.
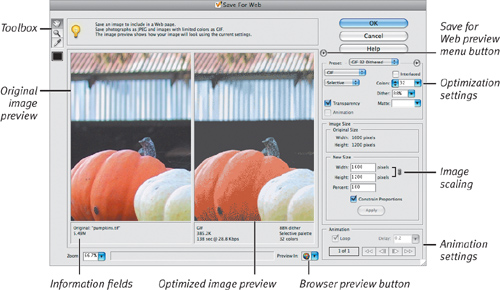
Figure 12.5 Choose from the list of predefined settings for JPEG, GIF, or PNG optimization formats.
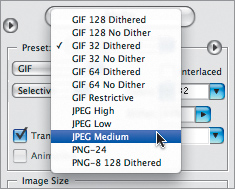
Figure 12.6 Once you’ve chosen a predefined optimization setting, the rest of the options change accordingly. Here, the options have automatically changed to reflect the Medium JPEG optimization format.
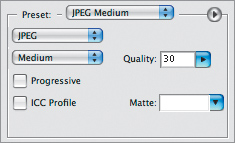
Figure 12.7 Click OK to save your optimized image.
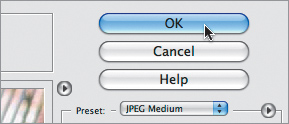
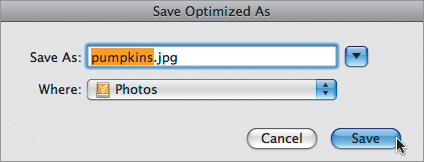
Figure 12.8 Enter a name and destination for your optimized file in the Save Optimized As dialog.
3. From the Preset drop-down menu, choose a predefined optimization setting (Figure 12.5).
The various drop-down menus within the Preset portion of the dialog change to reflect the setting you’ve selected (Figure 12.6), as does the optimized preview in the center of the dialog.
4. Click the OK button (Figure 12.7).
5. In the Save Optimized As dialog, type a new name for your file and verify that the file type matches the optimization format you chose in the Save for Web dialog (Figure 12.8).
6. Choose a location for your file and then click Save.
The Save Optimized As and Save for Web dialogs automatically close, and your optimized image is saved to the location you specified.
The Preview menu (Figure 12.9), which you can find by clicking the triangle button to the right of the optimized image in the Save for Web dialog, is one of those easy-to-overlook tools in a space already packed with check boxes, panels, and drop-down menus.
As its name implies, the Preview menu works with the image preview (the optimized side of the image preview, to be exact) and establishes parameters for the way that the image preview is displayed. Depending on the color space you select in the top portion of the Preview menu, you can view your image as it would appear in a browser on your own monitor or on a standard Macintosh or PC monitor; or, you can see a preview of how it would appear if it were saved with its color profile.
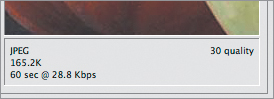
The bottom portion of the menu offers a variety of standard dial-up and high-speed Internet connection settings. Whichever connection speed you choose here determines the estimated connection speed value displayed in the information box below the optimized preview image (Figure 12.10). So, by doing nothing more than selecting from a handful of menu options, you can get a good idea of how much time it will take anyone, with any number of connection speeds, to download and display your image.
None of the settings you choose from the Preview menu affect the actual image file in any way. They’re for the purpose of previewing only and are completely independent of the attributes you actually apply to an image in the Settings portion of the dialog. There’s no way to include a setting for connection speed with an image, since connection speed depends on the type of Internet service each individual uses.
Figure 12.9 It’s a little hard to find, but the Preview menu controls the appearance of the optimization preview and the information displayed below it.
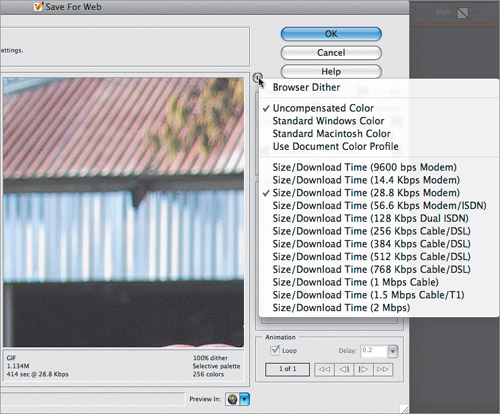
Figure 12.10 After you’ve chosen a connection speed from the preview menu, the Save for Web dialog uses that input, along with the optimization format you’ve selected, to estimate the size the file will be when optimized and the time it will take to download. That information is displayed below the optimized preview.
Adjusting Optimization Settings
You’re not limited to using predefined settings to optimize your images. You can fine-tune these settings further by using the collection of drop-down menus, check boxes, and sliders available in the Settings portion of the Save for Web dialog. For example, if you want your JPEGs to retain a little more image quality as they’re compressed for the Web, you can change the default quality setting for a Medium JPEG image from 30 to 45, improving its sharpness and detail without much increasing its download time. As you make adjustments, refer to the optimized image preview to the left of the Settings column where you can see how your changes affect the image, as well as view its current potential file size and download time.
To apply custom JPEG optimization settings to an image:
1. Open the image you want to optimize, then choose File > Save for Web to open the Save for Web dialog.
2. From the Preset drop-down menu, choose one of the predefined JPEG settings (Figure 12.11).
You don’t have to choose one of the presets, but they can serve as a good jumping-off point for building your own settings. For instance, if you decide small file size and quick download time are priorities, you might want to start with the predefined JPEG Low setting and then customize the settings from there.
3. Verify that JPEG is selected from the Optimized file format drop-down menu, or if you’ve decided to skip step 2, choose JPEG from the Optimized drop-down menu (Figure 12.12).
Figure 12.11 If you like, choose one of the predefined JPEG settings to use as a baseline for your own custom settings.
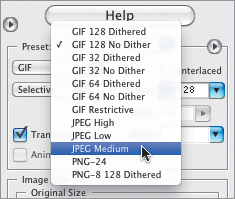
Figure 12.12 Optimization formats can be changed at any time from the drop-down menu.
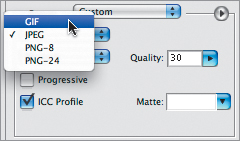
Figure 12.13 Choose from five basic quality options for JPEG images.
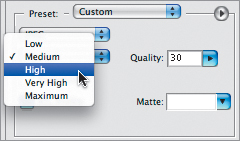
Figure 12.14 Once a quality option has been selected, use the slider control to fine-tune it.
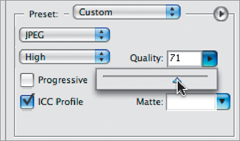
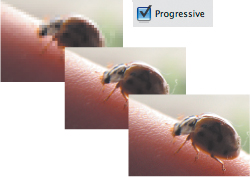
Figure 12.15 The Progressive feature draws your JPEG image incrementally on a Web page as it downloads, eventually displaying the image in its final state.
4. To set the image quality, do one of the following:
![]() From the compression quality dropdown menu, select a quality option (Figure 12.13).
From the compression quality dropdown menu, select a quality option (Figure 12.13).
![]() Drag the Quality slider while referring to the optimized preview (Figure 12.14).
Drag the Quality slider while referring to the optimized preview (Figure 12.14).
The Quality slider has a direct impact on the Quality drop-down menu, and vice versa. When the slider is set between 0 and 29, the level in the Quality drop-down menu will be Low. A setting of 30 through 59 registers as Medium, 60 through 79 as High, 80 through 99 as Very High, and 100 as Maximum. Remember that a setting in the Very High or Maximum range will create a file six to eight times larger than one saved in the Low range.
5. Select the Progressive check box if you want your image to build from a low-resolution version to its final saved version as it downloads in a Web browser (Figure 12.15).
This option is more critical for large, high-quality images with download times in the tens of seconds. Rather than leaving a blank space, the low-resolution image appears almost immediately, giving your Web page visitors something to look at until the complete file is downloaded.
6. Select the ICC Profile check box if you’ve previously saved a color profile with your image and want that information preserved in your optimized image.
Unless your photo or art contains some critical color (a logo with a very specific corporate color, for instance), you should leave this box unchecked. Not all Web browsers support color profiles, and the inclusion of the profile information can increase a file’s size significantly.
7. If your original image contains transparency, see “Making a Web Image Transparent” later in this chapter.
8. Click the OK button in the Save for Web dialog to rename and save your optimized image.
To apply custom GIF optimization settings to an image:
1. Open the image you want to optimize, then choose File > Save for Web to open the Save for Web dialog.
2. From the Preset drop-down menu, choose one of the predefined GIF settings, or choose GIF from the Optimized file format drop-down menu (Figure 12.16).
3. From the Color Reduction Algorithm drop-down menu, choose a color lookup table to apply to your image (Figure 12.17). (For more information, see the sidebar “About Color Models and Color Lookup Tables” earlier in this chapter.)
4. From the Colors drop-down menu, choose the maximum number of colors that will be displayed in your image by specifying the number of colors the image’s panel will contain (Figure 12.18).
You can choose from the list of eight standard color panel values, use the arrows to the left of the text box to change the values in increments of one, or simply enter a value in the text box and press Enter. When formatting GIF images, the number of colors you specify will have a larger impact on final file size and download time than any other attribute you set. Naturally, the fewer colors you select, the smaller the image file size will be, so experiment with different values, gradually reducing the number of colors, until you arrive at a setting you find acceptable (Figure 12.19).
Figure 12.16 Choose the GIF setting to optimize illustrations, vector art, or type.
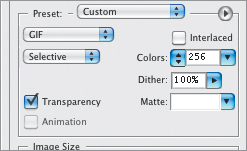
Figure 12.17 The GIF format offers several schemes for interpreting and displaying the color in your image.
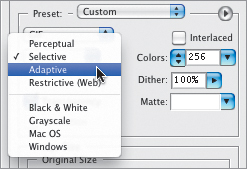
Figure 12.18 A GIF image can contain from 2 to 256 colors.
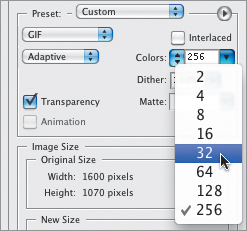
Figure 12.19 This illustration was optimized with three GIF color panels containing progressively fewer colors. From left to right, the illustrations were saved with panels of 16, 8, and 4 colors, creating file sizes of roughly 88K, 72K, and 50K, respectively.
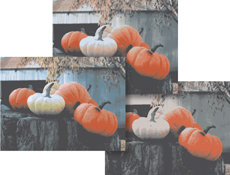
Figure 12.20 Since diffusion is the default dither option for any GIF image you create in the Save for Web dialog, you can control the amount of dithering that occurs: from 0 to 100 percent.
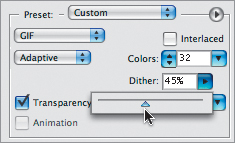
Figure 12.21 The Interlaced feature works like JPEG’s Progressive option to draw your image incrementally on a Web page as it downloads.
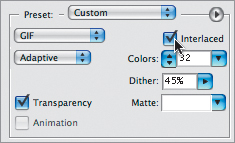
5. Use the Dither slider to specify a percentage for the dither (Figure 12.20).
Higher percentages create finer dither patterns, which tend to preserve more detail in images where limited color panels have been specified.
Although not accessible from the Save for Web dialog, Photoshop Elements gives you the option to save a GIF image with one of three different Dither options. (For more information, see the sidebar “Choosing Dithering Options.”)
6. If you want your image to build from a low-resolution version to its final saved version as it downloads in a browser, select the Interlaced check box (Figure 12.21).
Interlacing a GIF image works in much the same way as applying the Progressive option to a JPEG image. If you choose not to select the interlace option, your image won’t display on a Web page until it’s completely downloaded.
7. If your original image contains transparency, see “Making a Web Image Transparent” later in this chapter.
8. Click the OK button to rename and save your optimized image.
![]() Tip
Tip
![]() If you want to save an image in the PNG-8 format, you’ll notice it uses all the same options as for GIF, and the procedures for applying custom PNG-8 settings will be exactly the same as those for GIF. The only options available for PNG-24 are transparency and interlacing.
If you want to save an image in the PNG-8 format, you’ll notice it uses all the same options as for GIF, and the procedures for applying custom PNG-8 settings will be exactly the same as those for GIF. The only options available for PNG-24 are transparency and interlacing.
Because a GIF image works with a limited color panel, it’s impossible to reproduce most of the millions of colors visible to the human eye, much less subtle gradations of tone and color. GIF optimization employs a little visual trick called dithering to fool the eye into perceiving more colors and softer transitions than are actually there. By reorganizing pixels of different hues and values, dithering can do a surprisingly good job of simulating thousands of colors with a panel of a hundred colors or less (Figure 12.22). Dithering involves placing colors adjacent to one another in a small checkerboard pattern of pixels to create the illusion of another color. Blue and yellow pixels mixed together will blend to create green. Black and white pixels mixed in varying proportions will simulate a graduated fill or soft-edged drop shadow. (Dithering is related to halftoning, which uses dots of different sizes to show varying shades of gray or colors.)
Dithered GIFs created via Save for Web use a diffusion dither. But if you save an image from the Save As dialog (File > Save As) and select CompuServe GIF from the Format drop-down menu, Photoshop Elements offers you a choice of three dithering options.
Diffusion is the default scheme for any of the predefined GIF settings; it creates a random pattern that usually yields the most natural-looking results. Diffusion is the only option that allows you to control the percentage of dither present in your image.
Pattern, as its name implies, lays down pixels in a uniform grid pattern. It can have the effect of a very coarse halftone screen such as you might see in low-resolution newspaper photography.
Noise creates a random pattern similar to Diffusion, but attempts to blend color transitions further by allowing color from one area to spill over slightly into an adjoining area. It occasionally produces an interesting effect, but will rarely be your first choice.
Figure 12.22 The original image (left) relies on thousands of subtle tonal and value changes to define shapes, shadows, and highlights. The GIF-optimized version (right) shows the close-up results of dithering. Since GIF optimization uses a limited panel of colors, it gathers together pixels of whatever colors are available to reproduce an approximation of the original image.
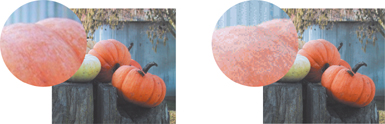
Figure 12.23 Choose Optimize to File Size for additional optimization control.
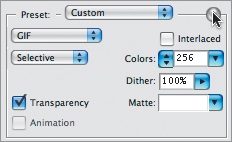
Figure 12.24 In the Optimize to File Size dialog, you can choose to have file size take priority over image quality.
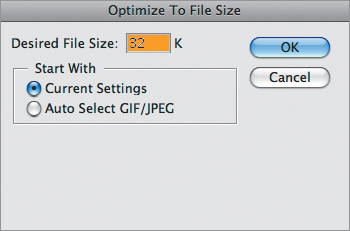
Photoshop Elements has yet one more little optimizing trick. There may be times when image quality isn’t as critical as the data size of your files. Perhaps you want to e-mail a weekend’s worth of photos to some friends, but don’t want to clog up their mailboxes with megabytes of image files. You can send a batch of mediocre-quality images, and then let them pick out the ones they’d like you to create high-resolution copies or prints of. On the right side of the Save for Web dialog, just next to the main optimization settings drop-down menu, is the Optimize to File Size arrow button. Click the button, and then select Optimize to File Size (Figure 12.23). In the Optimize to File Size dialog, type in the size you want your file to be (Figure 12.24). In the Start With area of the dialog, you can also choose from Current Settings, which tells Elements to do its best with your Save for Web settings; or Auto Select, which allows Elements to choose the format that will work best for your image, given the file size constraints.
Making a Web Image Transparent
In just a few simple steps, you can preserve the transparency of any image using options available in the GIF formatting settings. Once transparency has been set, an image of any shape (even one with a transparent cutout) can be placed on a Web page and made to blend seamlessly—matted—with its background.
To apply transparency to an image:
1. Open the image you want to make transparent.
2. By default, Elements creates a single layer for an image called Background (Figure 12.25). In the Layers panel, double-click the Background layer, change its name in the Name field to something like “Regular Layer” (Figure 12.26), and then click OK.
3. Using any combination of selection tools you choose, select the part of the image that you want to be transparent. (See Chapter 5, “Making Selections.”)
4. Choose Edit > Delete to remove those selected parts of the image. A checkerboard pattern fills those areas, indicating they’re now transparent (Figure 12.27).
5. Choose File > Save for Web to open the Save for Web dialog.
6. Select any one of the GIF formats from the Preset drop-down menu.
7. If it’s not already selected, click to select the Transparency check box.
The image in the optimized preview area will be displayed against a transparency grid pattern (Figure 12.28).
Figure 12.25 The Background layer is created by default when an image is opened, but it doesn’t allow transparency.
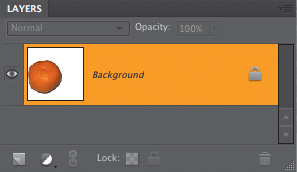
Figure 12.26 Rename the background layer so you can create transparency in the image.
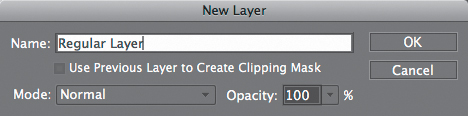
Figure 12.27 Select the parts of the image to remove, and use Delete to create a transparent background.
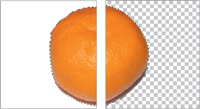
Figure 12.28 GIF optimization offers the added bonus of preserving transparency in your Web-bound images.
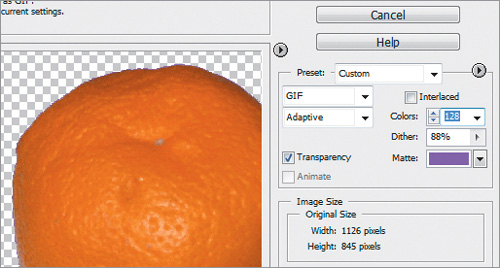
Figure 12.29 Choose a matte color from the Color Picker to match your intended Web page background.

Figure 12.30 Choose an option from the dropdown menu to use a preset color.
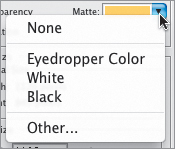
Figure 12.31 The color you select from the Matte dropdown menu or color box fills in the semitransparent pixels around your image, helping to maintain a smooth edge and creating a seamless transition when the image is placed on a Web page of the same color.

8. To select the color that will be used to blend, or matte, your image with the Web page background color, choose one of these two options:
![]() Click the Matte color box to open the Color Picker; then select a color from the main color window or enter color values in either the HSB, RGB, or Web color space text boxes (Figure 12.29).
Click the Matte color box to open the Color Picker; then select a color from the main color window or enter color values in either the HSB, RGB, or Web color space text boxes (Figure 12.29).
![]() From the Matte drop-down menu, choose a color option (Figure 12.30).
From the Matte drop-down menu, choose a color option (Figure 12.30).
Only the semitransparent pixels around the edges of the image are filled with the matte color. If the matte color matches the color of the Web page background, the transition between the transparent image and its background will be seamless (Figure 12.31).
![]() Tips
Tips
![]() JPEG doesn’t support true transparency, but you can set transparent areas in your source image with the background of the Web page for which the JPEG image is intended. Follow the steps in the earlier task, “To apply custom JPEG optimization settings to an image,” and then click the Matte color box to open the Color Picker. Select a color; then click OK. The transparent areas fill with the matte color.
JPEG doesn’t support true transparency, but you can set transparent areas in your source image with the background of the Web page for which the JPEG image is intended. Follow the steps in the earlier task, “To apply custom JPEG optimization settings to an image,” and then click the Matte color box to open the Color Picker. Select a color; then click OK. The transparent areas fill with the matte color.
![]() If your Web page will use a patterned background, set the matte color to None; otherwise, you’ll get a distracting halo of color around the image.
If your Web page will use a patterned background, set the matte color to None; otherwise, you’ll get a distracting halo of color around the image.
![]() The Eyedropper Color option is helpful only if the color of your Web page background also happens to be present in your image. The Other option simply opens the Color Picker. You’re better off using the Matte drop-down menu only when selecting the White, Black, or None options.
The Eyedropper Color option is helpful only if the color of your Web page background also happens to be present in your image. The Other option simply opens the Color Picker. You’re better off using the Matte drop-down menu only when selecting the White, Black, or None options.
You’ll need to do a little homework to identify the color of your Web page background if you didn’t choose that value yourself (or haven’t made a note of it) before you can precisely assign a matte color to your transparent GIF images in Photoshop Elements.
The most accurate method of determining the color of the Web page is to identify the color values in the Web page’s source code. This isn’t nearly as intimidating as it sounds. Open any Web page, then from the browser’s menu, find the command to view the source code. (In Internet Explorer, you simply choose View > Source; in Mozilla Firefox, View > Page Source.) A window will open, with code describing everything from the location of graphics and text to the background color.
Once you have the source code window open, scan down the entries for the one that begins with <body> near the top of the page. In the same line, directly to the right, it will say, bgcolor= followed by either a 6-digit Web color code (something like #663300) or RGB color values (Figure 12.32). The “bgcolor” stands for background color with the number corresponding to that color. Simply jot down the color values from the Web page source code, and then return to Photoshop Elements and enter those same values in the bottom field of the Color Picker to assign the matte color.
If the site uses Cascading Style Sheets (CSS) to define a background color, look for an area near the top of the page that reads body { color: #number, and use the code that appears instead of number.
Sometimes CSS styles are linked to another file. Look for a line near the top of the source code that reads in part, <link href=”stylesheet.css”. Open that file via your browser (enter the filename after the domain name), and look for the body { color: information there.
Figure 12.32 In this example, I’m viewing the source code for a page from a Web site. On the <body> line is the color code for the Web page background—bgcolor=”#663300”—which translates to brown.

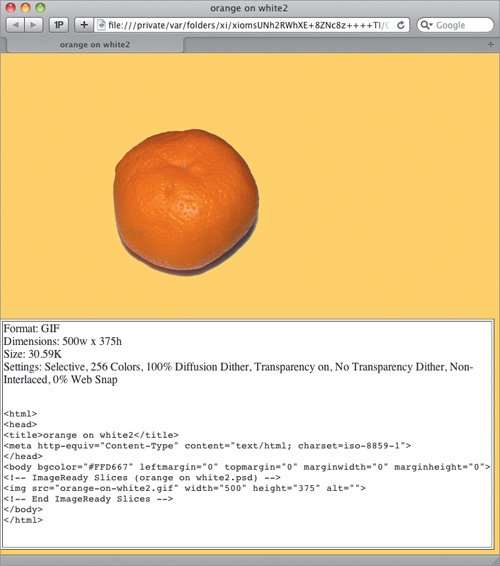
Figure 12.33 You can open your optimized image directly in a browser for previewing.
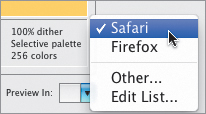
Figure 12.34 When your image opens in a browser, it’s accompanied by all of the settings you specified in the Save for Web dialog.
Previewing an Image
Before you commit to saving your optimized image, you should see exactly how the image will appear in a Web browser window. Although the Save for Web optimized preview gives you a good approximation of how the final image will look, there’s no substitute for seeing the image displayed in its natural environment.
Additionally, you can remain within the Save for Web dialog to preview your image as if it were viewed on an older, lower-end system, limited to just 256 colors. This can be helpful, because it allows you to design primarily for most current computer systems while giving you the opportunity to fine-tune your settings to accommodate the limited display capabilities of older systems. Note that this is only a preview and in no way affects your actual image file or its settings.
To preview an image in a Web browser:
1. Open the image you want to preview, then choose File > Save for Web to open the Save for Web dialog.
2. At the bottom of the Save for Web dialog, choose a Web browser or click the current browser icon on the Preview In dropdown menu (Figure 12.33).
The browser opens displaying the optimized image plus its dimensions and the settings you specified (Figure 12.34).
3. Close the browser window to return to the Save for Web dialog.
To preview an image as it would display on older monitors:
1. From the preview menu in the Save for Web dialog, choose Browser Dither (Figure 12.35).
The image in the optimized preview window appears just as it would on an 8-bit (256-color) monitor, allowing you to anticipate what this image will look like on older computer systems (Figure 12.36).
2. To turn off the browser dither preview, choose Browser Dither again from the preview menu.
Figure 12.35 Select Browser Dither from the preview menu if you want to view your image using a limited Web-safe panel.
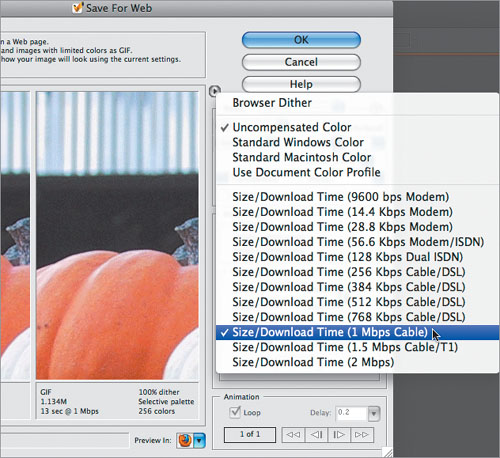
Figure 12.36 When you select Browser Dither, the optimized preview changes to display your image as it would appear on an older, 256-color monitor.