1. The Basics
Before you start really working in Photoshop Elements, it’s good to take a look around the work area to familiarize yourself with the program’s tools and menus. The work area includes the document window, where you’ll view your images, along with many of the tools, menus, and panels you’ll use as you get better acquainted with the program.
Understanding the Work Area
The Photoshop Elements work area is designed to make the tools easy to find and use. Just as with a well-organized workbench, the menus, panels, and tools are intuitively arranged in a way that makes them easy to find when you need them.
The Welcome screen
When you first start Photoshop Elements, the Welcome screen automatically appears on your desktop (Figure 1.1). Think of the Welcome screen as a handy launching pad for organizing your photo library and editing and enhancing photos.
 Tip
Tip
![]() Click the Show at Startup button at the lower-right corner of the Welcome screen to uncheck the box, which will skip the screen when launching Elements in the future (Figure 1.2).
Click the Show at Startup button at the lower-right corner of the Welcome screen to uncheck the box, which will skip the screen when launching Elements in the future (Figure 1.2).
Figure 1.1 The Photoshop Elements Welcome screen provides a simple and fast way to start organizing and editing your images.
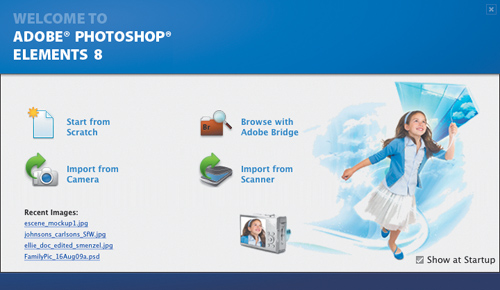
Figure 1.2 Decide whether the Welcome screen launches at startup.
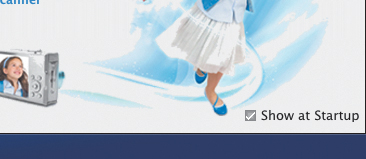
Figure 1.3 The menu bar offers myriad dropdown menus, with commands you choose to help perform tasks.
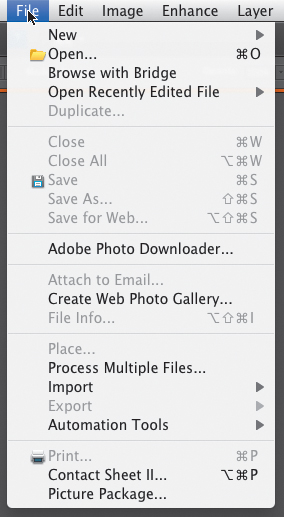
Figure 1.4 The options bar changes its display depending on the tool you select in the Tools pane.
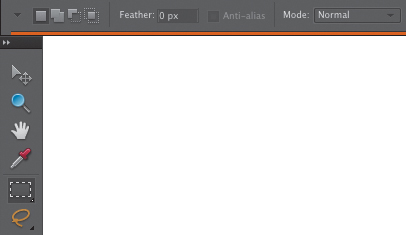
Figure 1.5 The Panel Bin gives you easy access to some of Photoshop Elements’ most common operations, such as creating, browsing, and printing files.
Menus, tools, and panels
The menu bar offers drop-down menus for performing common tasks, editing images, and organizing your work area. Each menu is organized by topic. For example, the File menu offers commands for opening, importing, saving, and batch processing your images (Figure 1.3).
The options bar, running above the work area, provides unique settings and options for each tool in the Tools pane. For instance, when you’re using the Marquee selection tool, you can choose to add to or subtract from the current selection; and when you’re using a Brush tool, you can adjust settings like brush size and opacity (Figure 1.4).
The Panel Bin groups common tasks and controls into the right edge of the window (Figure 1.5). Clicking a colored heading displays the panels for organizing, editing, creating, and sharing. To temporarily hide this area and make more room for working, choose Window > Panel Bin.
The Tools panel may be the single most important component of the work area. It contains most of the tools you’ll use for selecting, moving, cropping, retouching, and enhancing your images. The tools are arranged in the general order you’ll be using them, with the most commonly used selection tools near the top, and the painting, drawing, and color correction tools toward the bottom. The Tools panel is docked on the left edge of the work area where the tools are displayed in a single, long column (vertical space permitting). If you prefer, the panel can be displayed in a two-column format (Figure 1.6) by clicking the top bar.
Tall or wide, the Tools panel can also be pulled a short distance from the left edge to become a floating panel.
Figure 1.6 The Tools panel contains most of the tools you’ll use to edit your images.
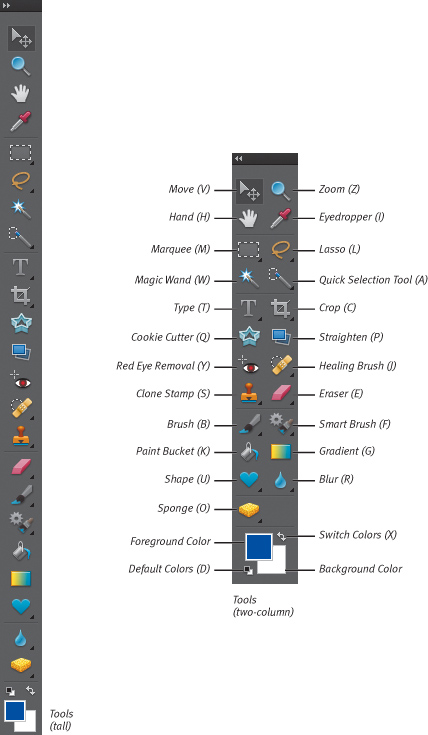
Figure 1.7 Panels can be used from within the Panel Bin (as shown) or moved to your work area.
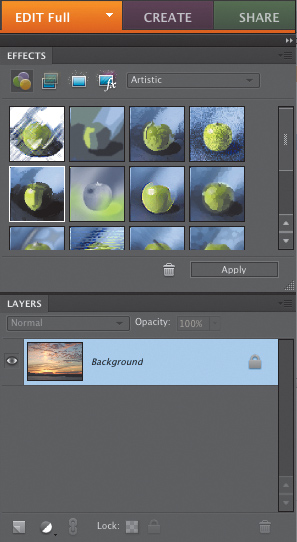
Figure 1.8 The Project Bin is a holding area where you can access all of your open images.
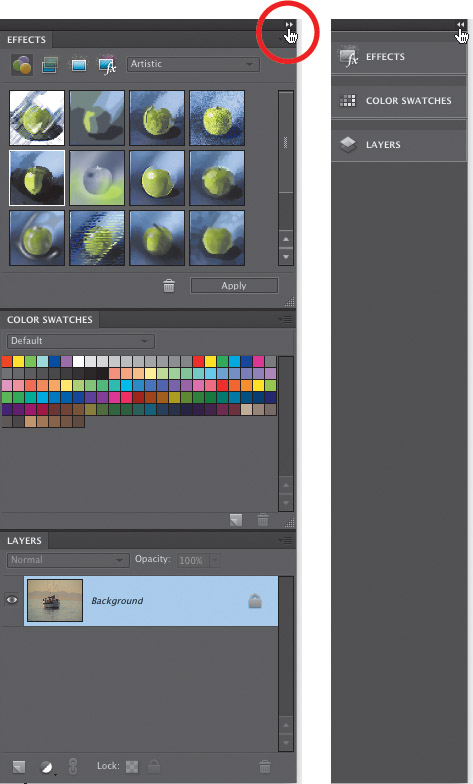
The Panel Bin, located on the right side of the desktop, contains the Effects and Layers panels (Figure 1.7). Any of the other panels can also be stored in the Panel Bin, though by default they appear in the main work area when you open them from the Window menu.
You can work with panels from within the Panel Bin or you can drag them to the main work area. Panels can also be grouped together or docked to one another, depending on your individual working and organizational styles.
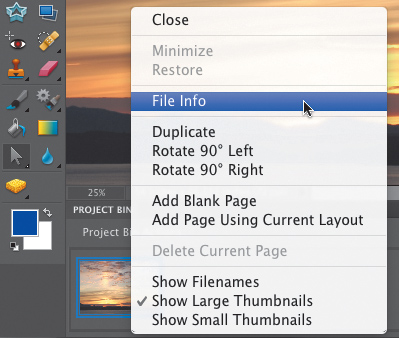
The Project Bin, located at the bottom of the desktop, serves as a convenient holding area for all of your open images. In addition to providing a visual reference for any open image files, the bin allows you to perform several basic editing functions. Click to select any photo thumbnail in the Project Bin, and right-click to display a pop-up menu. From the thumbnail menu you can get file information, minimize or close the file, duplicate it, and even rotate it in 90-degree increments (Figure 1.8).
Opening and Closing Files
There are several ways to get image files into Photoshop Elements for editing. If you want to open a file on your hard disk, it may be easier to just open it directly as described here. You can also locate it in Adobe Bridge CS4 or iPhoto, which I cover in Chapter 2. Also see Chapter 2 to learn how to import photos from your digital camera.
To open a file from the Open dialog:
1. To find and open a file, choose Open from the File menu (Figure 1.9), or press Command-O. The Open dialog appears.
2. Browse to the folder that contains your images (Figure 1.10).
3. To open the file you want, do one of the following:
![]() Double-click the file.
Double-click the file.
![]() Select the file and click the Open button.
Select the file and click the Open button.
The image opens in its own document window.
To close a file:
![]() Click the close button on the title bar for the active window.
Click the close button on the title bar for the active window.
![]() From the File menu, choose Close, or press Command-W.
From the File menu, choose Close, or press Command-W.
![]() Tip
Tip
![]() If several files are open, you can close them all at once by choosing Close All from the File menu or by pressing Command-Option-W.
If several files are open, you can close them all at once by choosing Close All from the File menu or by pressing Command-Option-W.
Figure 1.9 Choose Open from the File menu to open an image file on disk.
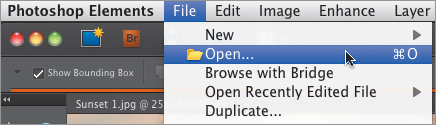
Figure 1.10 The Open dialog displays all files that match formats Elements understands.
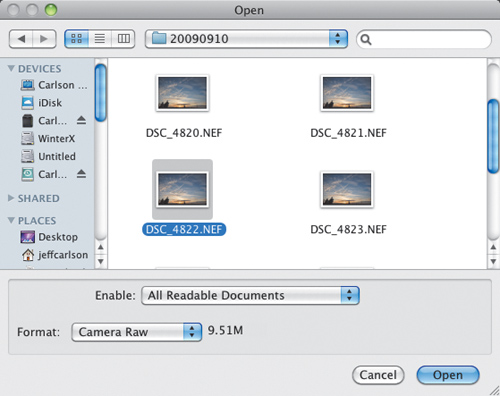
Figure 1.11 The Save As dialog includes several options beyond just naming the new file.
Saving Files
As you work on an image in the Editor, it’s good practice to save the file to your hard drive regularly. When you save a file, you can choose from a number of file formats. (For detailed information on the formats, see Chapter 13, “Saving and Printing Images.”)
If you’re interested in posting your photos to the Web, you can choose the Save for Web option. Saving your images for the Web involves its own set of unique operations; these are covered in detail in Chapter 12, “Preparing Images for the Web.”
To save a file:
![]() From the File menu, choose Save, or press Command-S.
From the File menu, choose Save, or press Command-S.
To save a file in a new format or to a specific location:
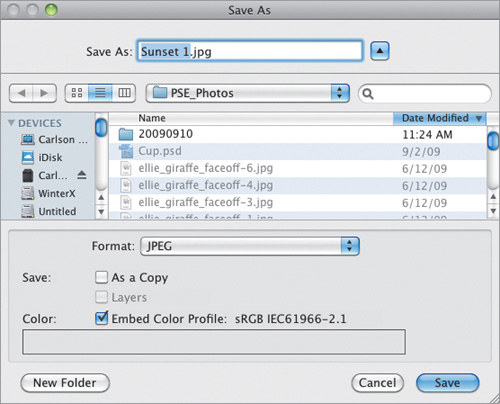
1. From the File menu, choose Save As, or press Command-Shift-S. The Save As dialog appears (Figure 1.11).
2. Choose a destination for the file by browsing to a location.
3. In the Save As field, type a name for the file.
4. If you want to save the file in a different format, choose one from the Format drop-down menu.
If you’re not sure which format to use, choose either the native Photoshop format (PSD), which is the best all-purpose format, or the JPEG format, which works especially well with digital photos. When saving an image as a JPEG file, choose the highest quality setting possible.
5. If you want to be sure not to alter your original file, select the As a Copy option to save a duplicate. This selection protects your original file from changes as you edit the duplicate.
6. To include color profile information, make sure the Embed Color Profile box is selected. For more information on managing color in your images, see Chapter 7, “Changing and Adjusting Colors.”
7. When you’ve finished entering your settings, click Save.
Depending on the format you chose, you may be prompted to set other options, such as with JPEG files (Figure 1.12).
![]() Tips
Tips
![]() Saving using the As a Copy option is a good idea if you’re experimenting with various changes and want to ensure that you keep your original version intact. It’s also handy if you want to save an image in more than one file format, which is useful if you want to save a high-quality copy for printing and keep a smaller-sized file for e-mailing to friends.
Saving using the As a Copy option is a good idea if you’re experimenting with various changes and want to ensure that you keep your original version intact. It’s also handy if you want to save an image in more than one file format, which is useful if you want to save a high-quality copy for printing and keep a smaller-sized file for e-mailing to friends.
![]() Photoshop Elements allows you to customize your Save settings. From the Photoshop Elements menu, choose Preferences > Saving Files. In the Saving Files dialog you can control how file extensions are displayed, choose whether to include image previews with your saved files (image previews are small thumbnail images that appear in the Open dialog when you select a file), and specify under what circumstances you would like to be prompted with the Save As dialog (Figure 1.13).
Photoshop Elements allows you to customize your Save settings. From the Photoshop Elements menu, choose Preferences > Saving Files. In the Saving Files dialog you can control how file extensions are displayed, choose whether to include image previews with your saved files (image previews are small thumbnail images that appear in the Open dialog when you select a file), and specify under what circumstances you would like to be prompted with the Save As dialog (Figure 1.13).
Figure 1.12 Each image format has its own specific settings, such as those shown in this dialog for saving a JPEG file.
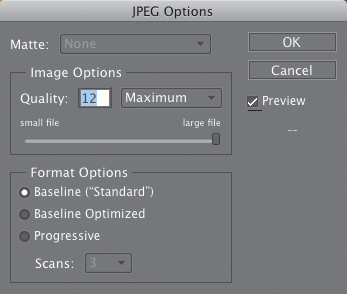
Figure 1.13 Choose how files are saved in Photoshop Elements’ preferences.
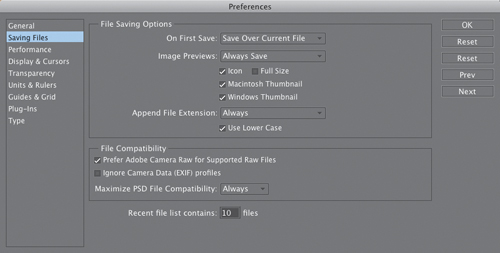
Figure 1.14 A small triangle next to a tool icon indicates additional tools.
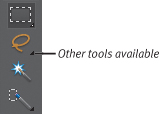
Figure 1.15 When the Lasso tool is selected, the mouse pointer changes to the Lasso tool icon.
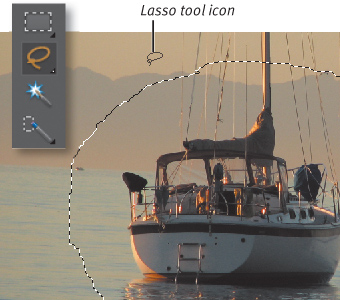
Figure 1.16 Click and hold the mouse button or rightclick to view the hidden tools.
Selecting Tools
The Tools pane contains all the tools you need for editing and creating your images. You can use them to make selections, paint, draw, and easily perform sophisticated photo-retouch operations. To view infor mation about a tool, rest the pointer over it until a tool tip appears showing the name and keyboard shortcut (if any) for that tool.
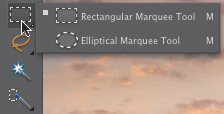
To use a tool, first select it from the Tools pane. Some tools hide additional tools, as indicated by a small triangle at the lower right of the tool icon (Figure 1.14).
To select a tool from the Tools pane:
![]() Click the tool’s icon in the Tools pane.
Click the tool’s icon in the Tools pane.
When you move your pointer into the document window, the pointer changes appearance to reflect the tool you have selected (Figure 1.15).
To select a hidden tool:
1. On any tool that displays a small triangle, either click and hold down the mouse button, or right-click (or Control-click) the tool icon. A menu of the hidden tools appears (Figure 1.16).
2. Click to select the tool you want to use.
![]() Tips
Tips
![]() For easier access to tools, just use keyboard shortcuts. You’ll find them in tool tips, on the printed Quick Reference card included in the product box, and in the online help. For example, press T on your keyboard to activate the Type tool. (Note that when you press a letter to select a tool with a hidden tool group, Elements selects the tool from the group that was used most recently.)
For easier access to tools, just use keyboard shortcuts. You’ll find them in tool tips, on the printed Quick Reference card included in the product box, and in the online help. For example, press T on your keyboard to activate the Type tool. (Note that when you press a letter to select a tool with a hidden tool group, Elements selects the tool from the group that was used most recently.)
![]() To cycle through hidden tools, repeatedly press the tool’s shortcut key.
To cycle through hidden tools, repeatedly press the tool’s shortcut key.
Using the Options Bar
Think of the options bar as a natural extension of the Tools pane. After you select a tool, you can adjust its settings from the options bar. The buttons on the options bar change depending on the tool selected. If you’re using the Brush tool, for example, you can use the options bar to select a brush size and opacity setting.
To use the options bar:
1. From the Tools pane, select a tool.
2. In the options bar, choose an available option for that tool (Figure 1.17).
Figure 1.17 Use the options bar to customize the tool you’ve selected, including selecting alternate tools.
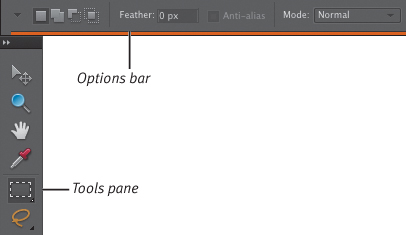
Figure 1.18 Show or hide any panel from the Window menu.
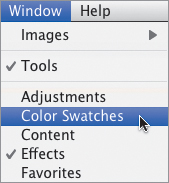
Figure 1.19 To move a panel from the bin, just drag the tab outside the bin, where it becomes a standalone panel.
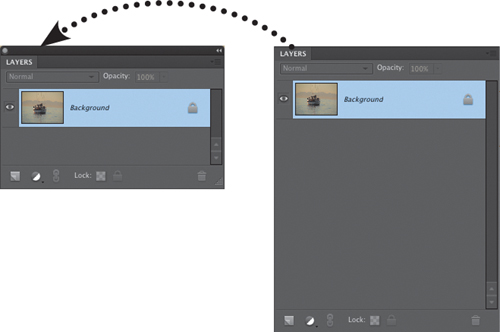
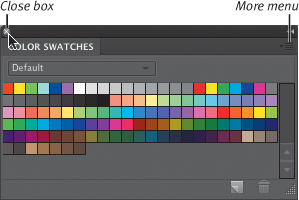
Figure 1.20 The More menu (which admittedly is almost invisible) includes more actions. To close a panel, click the close icon on the title bar.
Working with Panels
Although the Editor opens with just three panels displayed in its Panel Bin, a total of 11 panels are available from the Window menu. Each panel can be used entirely on its own or can be combined with other panels to help organize and streamline your workflow. All the panels feature handy drop-down menus that allow you to perform additional tasks or customize panel options.
To display a panel:
![]() From the Window menu, choose any panel to display it in your work area (Figure 1.18).
From the Window menu, choose any panel to display it in your work area (Figure 1.18).
To move a panel out of the Panel Bin:
1. Click the tab of the panel that you want to move from the Panel Bin.
2. Drag the tab until the panel is in the desired location in your work area (Figure 1.19).
The panel is now a floating panel on the desktop.
To use panel menus:
![]() Click the More button in the upper-right corner of any panel (Figure 1.20).
Click the More button in the upper-right corner of any panel (Figure 1.20).
To close a panel:
Do one of the following:
![]() From the Window menu, choose any open panel; open panels are indicated by a check mark.
From the Window menu, choose any open panel; open panels are indicated by a check mark.
![]() If the panel is open in your work area (outside the Panel Bin), click the close box on the panel title bar.
If the panel is open in your work area (outside the Panel Bin), click the close box on the panel title bar.
If the panel is inside the Panel Bin, you can first move it into the work area and then click its close box; or, click the More menu and choose Close.
To return a panel to the Panel Bin:
![]() Click the panel tab and drag the panel back into the Panel Bin. A horizontal blue line appears in the bin to indicate where the panel will end up when you drop it.
Click the panel tab and drag the panel back into the Panel Bin. A horizontal blue line appears in the bin to indicate where the panel will end up when you drop it.
To group panels:
1. Make sure you can see the tabs of all the panels you want to group.
2. Drag a panel tab into the window of the target panel (Figure 1.21).
A thick line appears around the window of the target panel to let you know that the panels have been grouped.
To ungroup a panel, simply drag the panel’s tab out of the panel group.
![]() Tips
Tips
![]() Pay attention to that blue line that appears when adding panels to the Panel Bin. A horizontal line indicates that the panel will be stacked with the rest. A blue outline means the panel will be added to a panel group.
Pay attention to that blue line that appears when adding panels to the Panel Bin. A horizontal line indicates that the panel will be stacked with the rest. A blue outline means the panel will be added to a panel group.
![]() If you choose to close a single panel residing in a panel group, the entire panel group will close. However, making one panel in the group visible using the Window menu makes the entire group visible again.
If you choose to close a single panel residing in a panel group, the entire panel group will close. However, making one panel in the group visible using the Window menu makes the entire group visible again.
![]() To hide the Panel Bin and gain more workspace, choose Window > Panel Bin.
To hide the Panel Bin and gain more workspace, choose Window > Panel Bin.
Figure 1.21 Drag a panel tab into another open panel (top) to form a panel group (bottom).
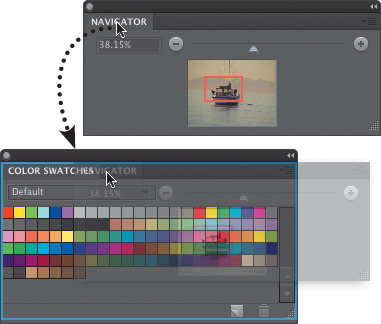
Figure 1.22 Docking one panel below another helps avoid clutter in your work area.
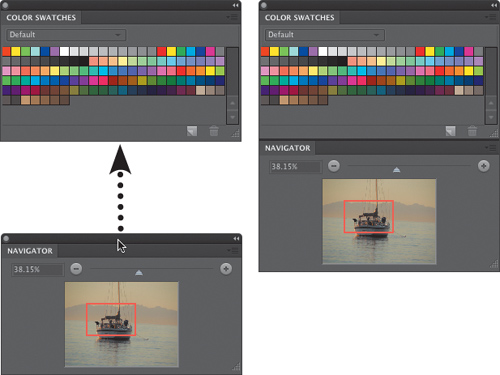
Figure 1.23 Double-click the panel tab to collapse a panel or panel group.
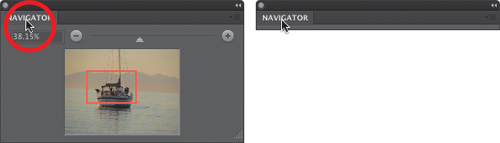
Figure 1.24 Click the Collapse to Icons button to reclaim workspace from panels and the Panel Bin.
To dock panels:
![]() Drag any panel’s tab to the bottom of any panel outside the Panel Bin. Drag the panel by its title bar to successfully dock it to another panel (Figure 1.22).
Drag any panel’s tab to the bottom of any panel outside the Panel Bin. Drag the panel by its title bar to successfully dock it to another panel (Figure 1.22).
To undock a panel, select one panel’s tab and drag it away from the other panel.
To collapse panels to titles:
![]() Double-click the panel tab or title bar (Figure 1.23). Double-click again to reveal the panel.
Double-click the panel tab or title bar (Figure 1.23). Double-click again to reveal the panel.
To collapse panels to icons:
![]() Click the Collapse to Icons button at the top of a panel or panel group. This option gives you the most additional workspace, at the expense of hiding controls. You can click the button again to expand the panels (Figure 1.24).
Click the Collapse to Icons button at the top of a panel or panel group. This option gives you the most additional workspace, at the expense of hiding controls. You can click the button again to expand the panels (Figure 1.24).
Clicking a panel’s icon reveals the contents of only that panel.
To return panels to their default positions:
![]() From the Window menu, choose Reset Panel Locations.
From the Window menu, choose Reset Panel Locations.
![]() Tip
Tip
![]() Click once in the area to the right of a panel’s tab to collapse it to its title. You can also click once anywhere on the bar above the panel to collapse it to an icon—you don’t need to hit the Collapse to Icons button itself.
Click once in the area to the right of a panel’s tab to collapse it to its title. You can also click once anywhere on the bar above the panel to collapse it to an icon—you don’t need to hit the Collapse to Icons button itself.
Using the Zoom Tool
It’s rare that you’ll want to view your images at the same magnification—editing out dust, for example, requires a close-up view. The Zoom tool magnifies and reduces your view, which you can control using a variety of methods.
The current level of magnification is shown in the document status bar and, when the Zoom tool is selected, in the options bar above the document window. In the options bar you can adjust the magnification either with the Zoom slider or by entering a value in the Zoom text box (Figure 1.25).
To zoom in:
1. In the Tools pane, select the Zoom tool, or press Z on the keyboard. The pointer changes to a magnifying glass when you move it into the document window.
2. Be sure that a plus sign appears in the center of the magnifying glass. If you see a minus sign, click the Zoom In button on the options bar (Figure 1.26).
3. Click the area of the image you want to magnify.
With a starting magnification of 100 percent, each click with the Zoom In tool increases the magnification in 100 percent increments up to 800 percent. From there, the magnification levels jump to 1200 percent, then 1600 percent, and finally to 3200 percent!
Figure 1.25 With the Zoom tool selected, adjust the magnification level using a slider on the options bar.
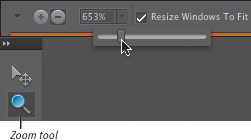
Figure 1.26 To zoom in on an image, check that the Zoom In button is selected on the options bar.
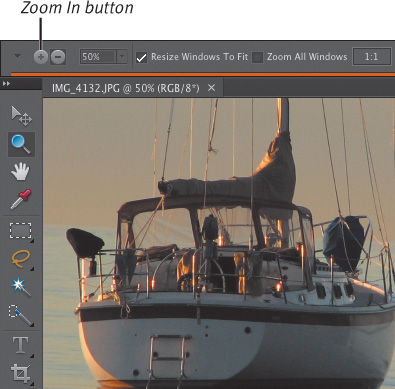
Figure 1.27 To zoom out on an image, check that the Zoom Out button is selected on the options bar.

Figure 1.28 Drag with the Zoom tool to zoom in on a specific area of an image.
To zoom out:
1. In the Tools pane, select the Zoom tool, or press Z on the keyboard.
2. Click the Zoom Out button on the options bar, and then click in the area of the image that you want to zoom out from (Figure 1.27).
With a starting magnification of 100 percent, each click with the Zoom Out tool reduces the magnification as follows: 66.7 percent; 50 percent; 33.3 percent; 25 percent; 16.7 percent; and so on, down to 1 percent.
To zoom in on a specific area:
1. In the Tools pane, select the Zoom tool; if necessary, click the Zoom In button on the options bar to display the Zoom tool with a plus sign.
2. Drag over the area of the image that you want to zoom in on.
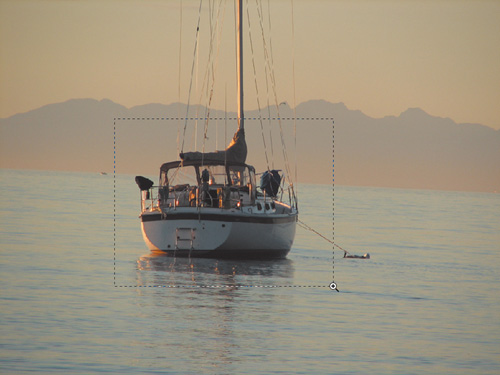
A selection marquee appears around the selected area (Figure 1.28). When you release the mouse button, the selected area is magnified and centered in the image window.
3. To move the view to a different area of the image, hold down the spacebar until the hand pointer appears. Then drag to reveal the area you want to see. For more information on navigating through the document window, see “Moving Around in an Image” later in this chapter.
![]() Tip
Tip
![]() You can also change the magnification level from the zoom-percentage text box in the lower-left corner of the document window. Double-click the text box to select the zoom value, and then type in the new value.
You can also change the magnification level from the zoom-percentage text box in the lower-left corner of the document window. Double-click the text box to select the zoom value, and then type in the new value.
To display an image at 100 percent:
To display an image at 100 percent (also referred to as displaying actual pixels), do one of the following:
![]() In the Tools pane, double-click the Zoom tool.
In the Tools pane, double-click the Zoom tool.
![]() In the Tools pane, select either the Zoom or Hand tool, and then click the 1:1 button on the options bar (Figure 1.29).
In the Tools pane, select either the Zoom or Hand tool, and then click the 1:1 button on the options bar (Figure 1.29).
![]() From the View menu, choose Actual Pixels, or press Command-Option-0.
From the View menu, choose Actual Pixels, or press Command-Option-0.
![]() Enter 100 in the Zoom text box in the options bar, and then press Enter.
Enter 100 in the Zoom text box in the options bar, and then press Enter.
![]() Enter 100 in the status bar at the bottom of the document window, and then press Enter (Figure 1.30).
Enter 100 in the status bar at the bottom of the document window, and then press Enter (Figure 1.30).
![]() Tips
Tips
![]() With any other tool selected in the toolbar, you can toggle to the Zoom tool. Hold down Command-spacebar to zoom in or Option-spacebar to zoom out.
With any other tool selected in the toolbar, you can toggle to the Zoom tool. Hold down Command-spacebar to zoom in or Option-spacebar to zoom out.
![]() To change the magnification of the entire image, press Command-+ (Control and the plus sign) to zoom in or Command-–(Control and the minus sign) to zoom out.
To change the magnification of the entire image, press Command-+ (Control and the plus sign) to zoom in or Command-–(Control and the minus sign) to zoom out.
![]() Toggle the Zoom tool between zoom in and zoom out by holding down the Option key before you click.
Toggle the Zoom tool between zoom in and zoom out by holding down the Option key before you click.
![]() You can automatically resize the document window to fit the image (as much as possible) when zooming in or out. With the Zoom tool selected, click the Resize Windows to Fit check box on the options bar. To maintain a constant window size, deselect the Resize Windows to Fit option.
You can automatically resize the document window to fit the image (as much as possible) when zooming in or out. With the Zoom tool selected, click the Resize Windows to Fit check box on the options bar. To maintain a constant window size, deselect the Resize Windows to Fit option.
Figure 1.29 Clicking the 1:1 button on the options bar returns the image view to 100 percent.
![]()
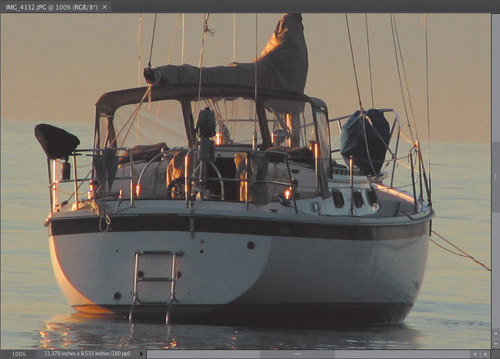
Figure 1.30 Entering 100 in the status bar also changes the image view to 100 percent.
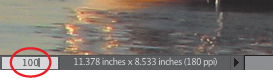
Figure 1.31 To view a different area of the same image, drag with the Hand tool.
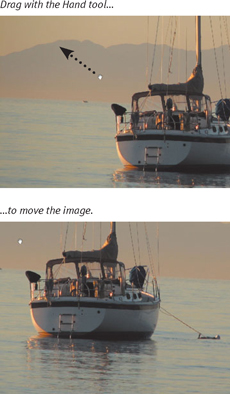
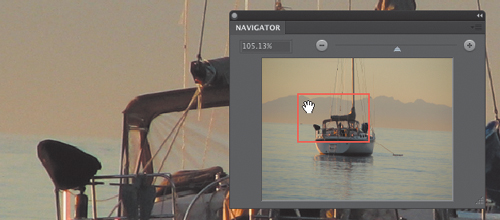
Figure 1.32 You can also use the Navigator panel to view a different area of the same image.
Moving Around in an Image
When working in Photoshop Elements, you’ll often want to move your image to make a different area visible in the document window. This can happen when you’re zoomed in on one part of an image or when an image is just too large to be completely visible within the document window.
To view a different area of an image:
Do one of the following:
![]() From the Tools pane, select the Hand tool and drag to move the image around in the document window (Figure 1.31).
From the Tools pane, select the Hand tool and drag to move the image around in the document window (Figure 1.31).
![]() Use the scroll arrows at the bottom and right side of the document window to scroll to the left or right and up or down. You can also drag the scroll bars to adjust the view.
Use the scroll arrows at the bottom and right side of the document window to scroll to the left or right and up or down. You can also drag the scroll bars to adjust the view.
To change the view using the Navigator panel:
1. Choose Window > Navigator to open the Navigator panel.
2. Drag the view box in the image thumbnail (Figure 1.32).
The view in the document window changes accordingly.
![]() Tips
Tips
![]() With any other tool selected in the toolbar, press the spacebar to give you temporary access to the Hand tool.
With any other tool selected in the toolbar, press the spacebar to give you temporary access to the Hand tool.
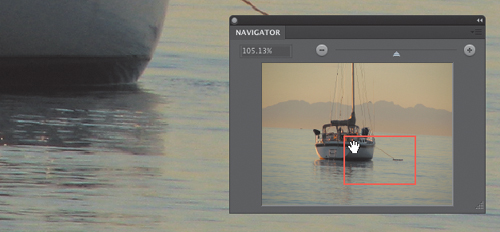
![]() Drag the slider in the Navigator panel to adjust the magnification level in the document window.
Drag the slider in the Navigator panel to adjust the magnification level in the document window.