14. Sharing Your Images
If you’re shooting photos and making compositions within Photoshop Elements, it’s a safe bet that you want to share them with others. In the past, you’d make prints and either carry them everywhere or send them through the mail. Now, you can make your own slideshow (without the cumbersome projector), put images on a Web site for family to view, and e-mail photos.
Making Your Own Slide Show
With Photoshop Elements, you can create a self-contained, portable slide show—a useful and elegant way to share your photos and images with friends and family.
Elements and Bridge leverage Adobe’s ownership of PDF (Portable Document Format) and Flash to output a slide show as PDF file. You can view a PDF file on nearly any Windows or Macintosh computer.
When you open the PDF file in Adobe’s Acrobat Reader, the slide show automatically opens in full-screen mode. Slides can change with a transition you select when creating the PDF (Figure 14.1).
To create a PDF slide show:
1. Do one of the following:
![]() In Bridge, select one or more photos to appear in the slide show and switch to the Output workspace.
In Bridge, select one or more photos to appear in the slide show and switch to the Output workspace.
![]() In Photoshop Elements, with at least one image file open, click the Create tab in the Task Pane, and then click the PDF Slide Show button (Figure 14.2). Bridge becomes active with the Output workspace enabled.
In Photoshop Elements, with at least one image file open, click the Create tab in the Task Pane, and then click the PDF Slide Show button (Figure 14.2). Bridge becomes active with the Output workspace enabled.
2. Select the files you want to use in the Content panel. You can drag them to change the playback order.
3. Choose a layout from the Template dropdown menu (Figure 14.3).
4. Scroll down the Output panel to specify how the images appear, including the number of photos per page and whether to include text overlays.
Keep in mind that this feature is very print-centric—Bridge is essentially building a contact sheet in PDF.
Figure 14.1 When you create a slide show, you can specify how your slide show transitions from one image to the next. This slide show displays the Wipe Down transition, where a new image rolls down over the previous image’s slide.
Figure 14.2 The Create tab leads to a variety of creations.
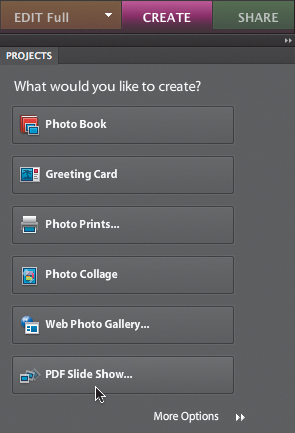
Figure 14.3 Choose a layout from the Template drop-down menu in Bridge’s Output panel.
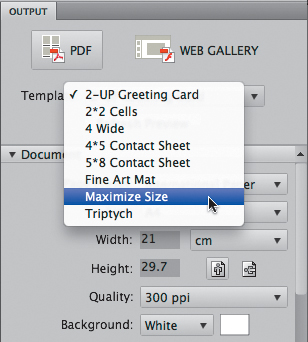
Figure 14.4 Add a little interactivity using the Playback settings.

Figure 14.5 The Output Preview panel gives you a sense of how the PDF will appear.
5. Specify interactive content that plays back in Adobe Reader, such as transitions between pages and how long each page appears onscreen (Figure 14.4).
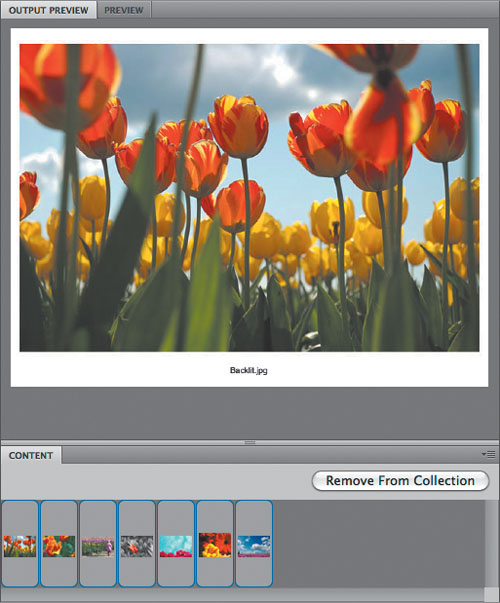
6. Click the Refresh Preview button to generate a sample version of one of the images, which appears in the Output Preview panel (Figure 14.5).
7. After you’ve set the PDF options, scroll to the bottom of the Output panel and click the Save button.
Enable the View PDF After Save check box to open the file in Adobe Reader once it’s created.
8. In the dialog that appears, give the PDF a name and specify a location on disk, and then click the Save button.
To view a PDF slide show:
1. Make sure Adobe Acrobat Reader is installed on your computer. If it’s not, install it from the Photoshop Elements installation disc, or download it free from www.adobe.com. (Transitions and full-screen playback do not work in Apple’s Preview application.)
2. In Acrobat Reader, open the PDF slide show you created. The slide show appears, taking up the full screen. If the slide show is set to run automatically, each image is displayed for the time you specified in the Playback settings.
3. To navigate the slide show, use the following keyboard commands:
![]() Move forward one slide by pressing Enter or the right arrow key.
Move forward one slide by pressing Enter or the right arrow key.
![]() Move back one slide by pressing Shift-Return or the left arrow key.
Move back one slide by pressing Shift-Return or the left arrow key.
![]() Exit Full Screen view by pressing Command-L or Esc.
Exit Full Screen view by pressing Command-L or Esc.
Creating a Web Photo Gallery
Preparing a gallery of photos for use on the Web can be repetitive, tedious work. You have to resize and format each image, one at a time—a lengthy process. Photoshop Elements eliminates this drudgework with its Web Photo Gallery feature. Bridge builds a Flash-based slideshow that can be saved to your hard disk or uploaded directly to a Web server via FTP (File Transfer Protocol).
To create a Web Photo Gallery:
1. Do one of the following:
![]() In Bridge, select one or more photos to appear in the slide show and switch to the Output workspace. In the Output panel, click the Web Gallery button.
In Bridge, select one or more photos to appear in the slide show and switch to the Output workspace. In the Output panel, click the Web Gallery button.
![]() In Photoshop Elements, with at least one image file open, click the Create tab in the Task Pane, and then click the Web Photo Gallery button (Figure 14.6). Bridge becomes active with the Output workspace enabled.
In Photoshop Elements, with at least one image file open, click the Create tab in the Task Pane, and then click the Web Photo Gallery button (Figure 14.6). Bridge becomes active with the Output workspace enabled.
2. Select the files you want to use in the Content panel. You can drag them to change the playback order.
3. In the Output panel, set the gallery’s appearance by choosing from the Template and Style drop-down menus (Figure 14.7).
Click the Refresh Preview or Preview in Browser buttons at any time to view a sample (Figure 14.8).
4. Use the Site Info, Color Palette, and Appearance panes to customize the look of the gallery.
Figure 14.6 Click the Web Photo Gallery button to get started.

Figure 14.7 Bridge includes several templates and styles from which to choose.
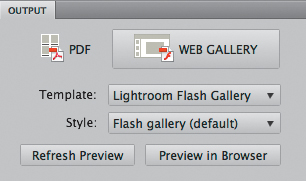
Figure 14.8 Preview the Web gallery directly in the Output Preview panel.
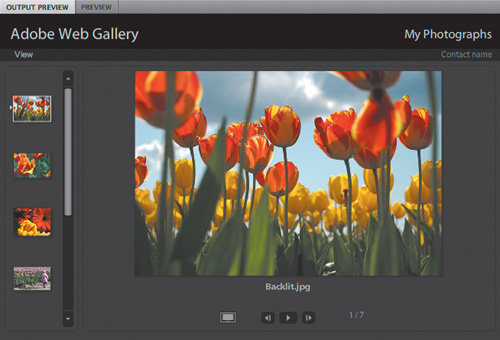
Figure 14.9 Saving the gallery to disk lets you upload the files later or send them to someone who will upload the files.
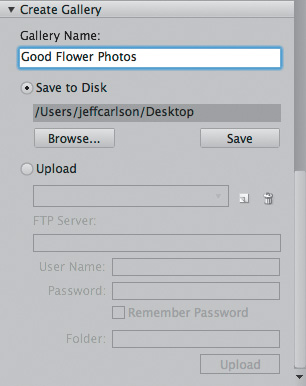
Figure 14.10 The saved gallery viewed in a Web browser.
5. In the Create Gallery pane, enter a title in the Gallery Name field.
6. Specify whether to save the output files to your hard disk or to upload them to an FTP server (Figure 14.9).
7. Click either the Save or Upload button, depending on the destination.
8. To view the gallery, do one of the following:
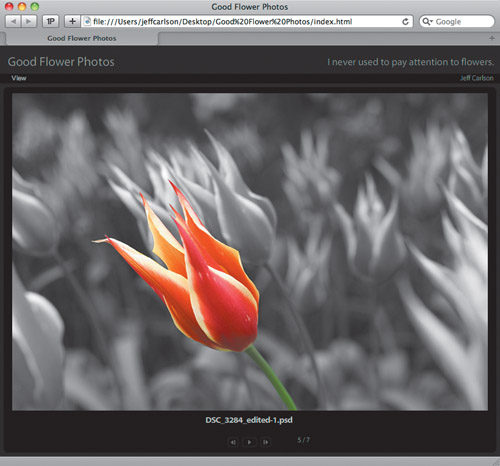
![]() If it was saved to disk, go to the Finder and open the folder (with the name you entered in step 5) that was created at the destination you specified. Then, using a Web browser, open the index. html file located there to load the site (Figure 14.10).
If it was saved to disk, go to the Finder and open the folder (with the name you entered in step 5) that was created at the destination you specified. Then, using a Web browser, open the index. html file located there to load the site (Figure 14.10).
![]() If the gallery was uploaded to an FTP site, enter its address in a Web browser.
If the gallery was uploaded to an FTP site, enter its address in a Web browser.
Sending Images by E-mail
With the E-mail Attachments feature, Elements streamlines the process of sending digital photos to family and friends. If your photo is too large or is in the wrong file format, Elements can automatically resize your image.
To attach a photo to e-mail:
1. In Photoshop Elements, select the photo or image you want to send.
2. Click the Share tab in the Task Pane and click the E-mail Attachments button (Figure 14.11).
3. The Attach to Email alert appears if the file size is too large (Figure 14.12). Click Auto Convert to let Elements resize and compress the image. Otherwise, click Send As Is.
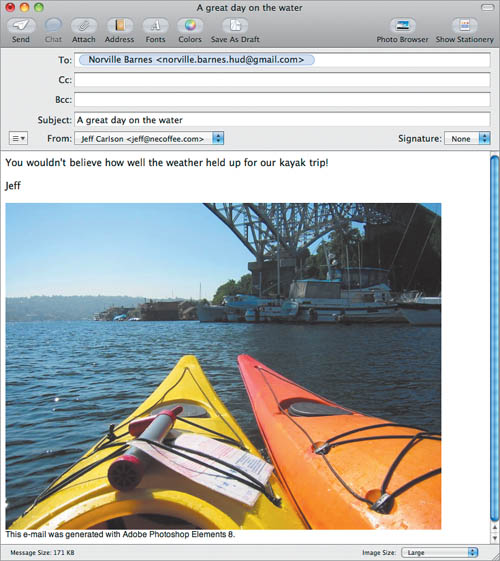
Elements converts the images and attaches them to an outgoing message in your default e-mail program (Figure 14.13).
Figure 14.11 From the Share tab, choose E-mail Attachments.
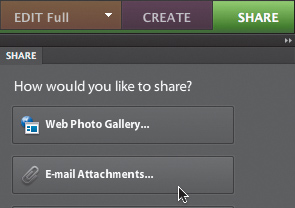
Figure 14.12 Unless you really need to send an original-sized photo, click Auto Convert.
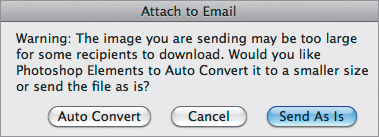
Figure 14.13 An e-mail message, with the attachment included, is automatically created for you to address and personalize.