Chapter 8. Layer Essentials

Layers are the lifeblood of Adobe Photoshop. It was Diane Fenster, a pioneering digital-imaging and collage artist, who observed that layers are akin to life: “The more you work, experiment, rearrange, and composite with them, the richer your image (and life) becomes.”
This chapter is dedicated to layers, layers, and more layers. You’ve worked with them before in the course of your explorations with selections and some of the important concepts that go into planning and creating a successful composite. Now you’ll dive deeper to explore the many possibilities that layers have to offer.
This chapter will help you understand the fundamental principles and application of layers so that you can collage, montage, composite, and create the images that are in your mind’s eye. In this chapter, you’ll learn to:
• Work with and manage layers
• Take advantage of layer groups, clipping masks, and Smart Objects
• Appreciate how layers provide control and flexibility
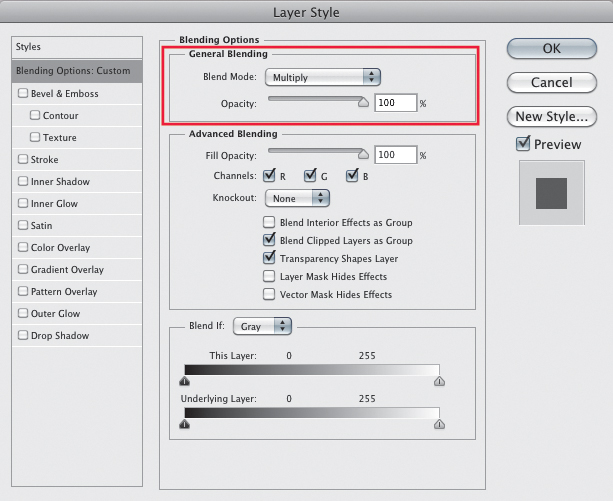
• Understand the Blending modes and Advanced Blending options
Working with Layers
It’s difficult to overstate just how important layers are to working in Photoshop. Much of the “magic” created by fascinating composites and amazing image transformations is made possible by layers. Layers let you experiment, explore, and combine photos in different ways, and change your mind over and over again—all in an effort to perfect or dramatically transform an image. The three of us have been using Photoshop long enough that we can remember a time before the program had layers. Creating multi-image composites without layers (or a History panel!) in those early versions of Photoshop was quite a different proposition than it is today!
Different image layers in a Photoshop file are a bit like several different photo prints in a stack on your desk. Each layer contains a separate piece of image information. But that’s where the analogy ends, because in Photoshop you can manipulate layers in ways that you can’t with the stack of photos on your desk. You can move them left, right, around, or up and down within the layer stack; change the translucency of a particular image by using layer opacity; alter how an image layer blends with other layers underneath it with the blending modes and advanced layer blending controls; vary the shape and size of the layer; and fine-tune the visibility of layered elements with great precision using layer masks.
An essential concept to understand when working with layers is the safety-feature factor: When you alter one layer, you are affecting only that layer, not the rest of the image. You simply activate the layer you want to change by clicking on it in the Layers panel, apply the desired change, and evaluate the result before continuing.
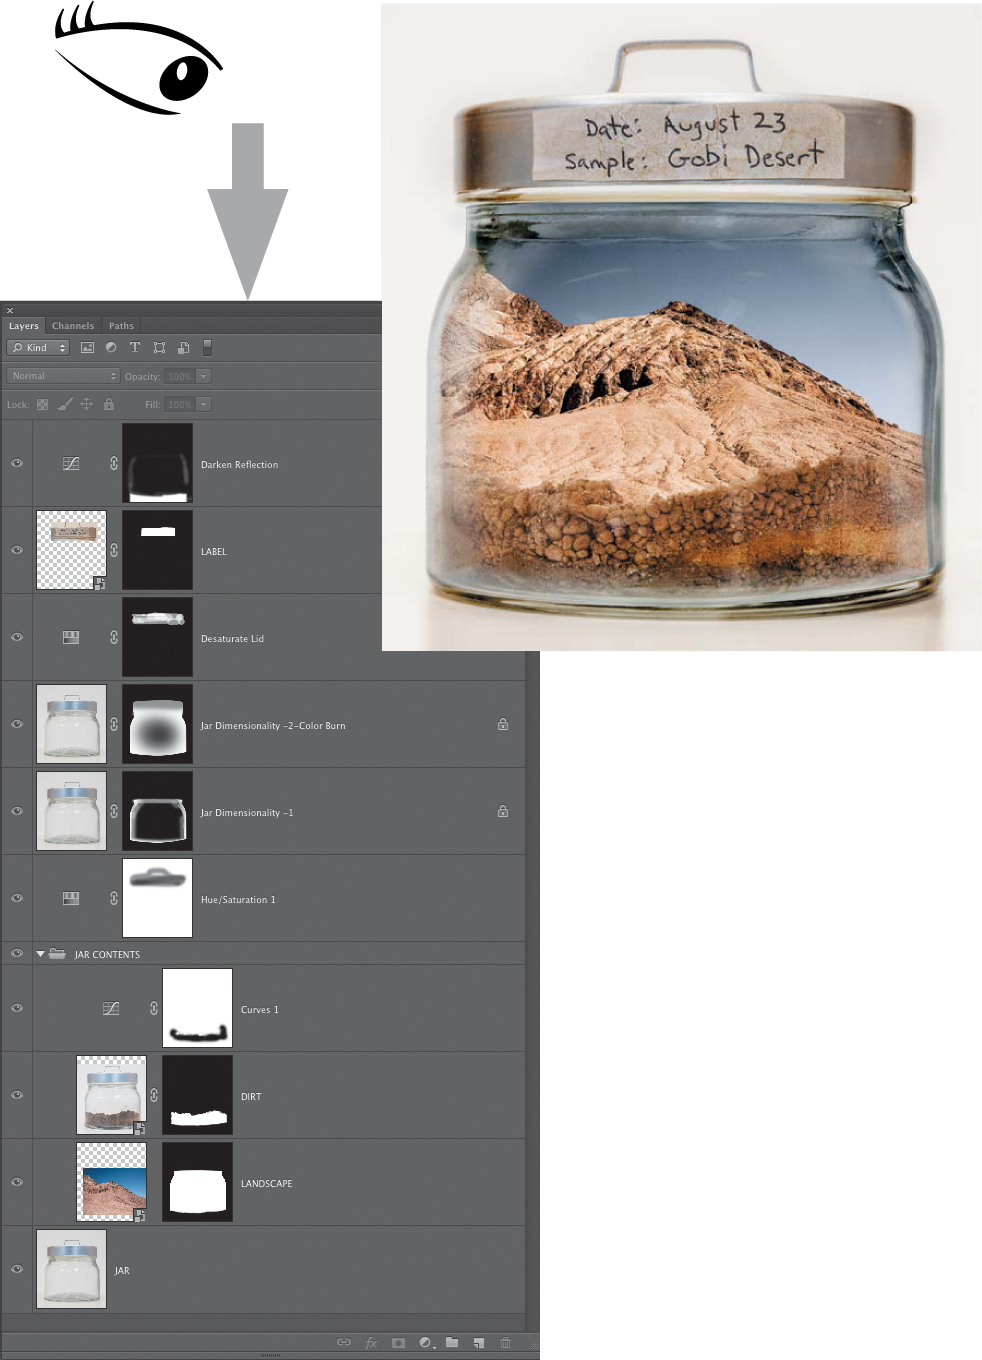
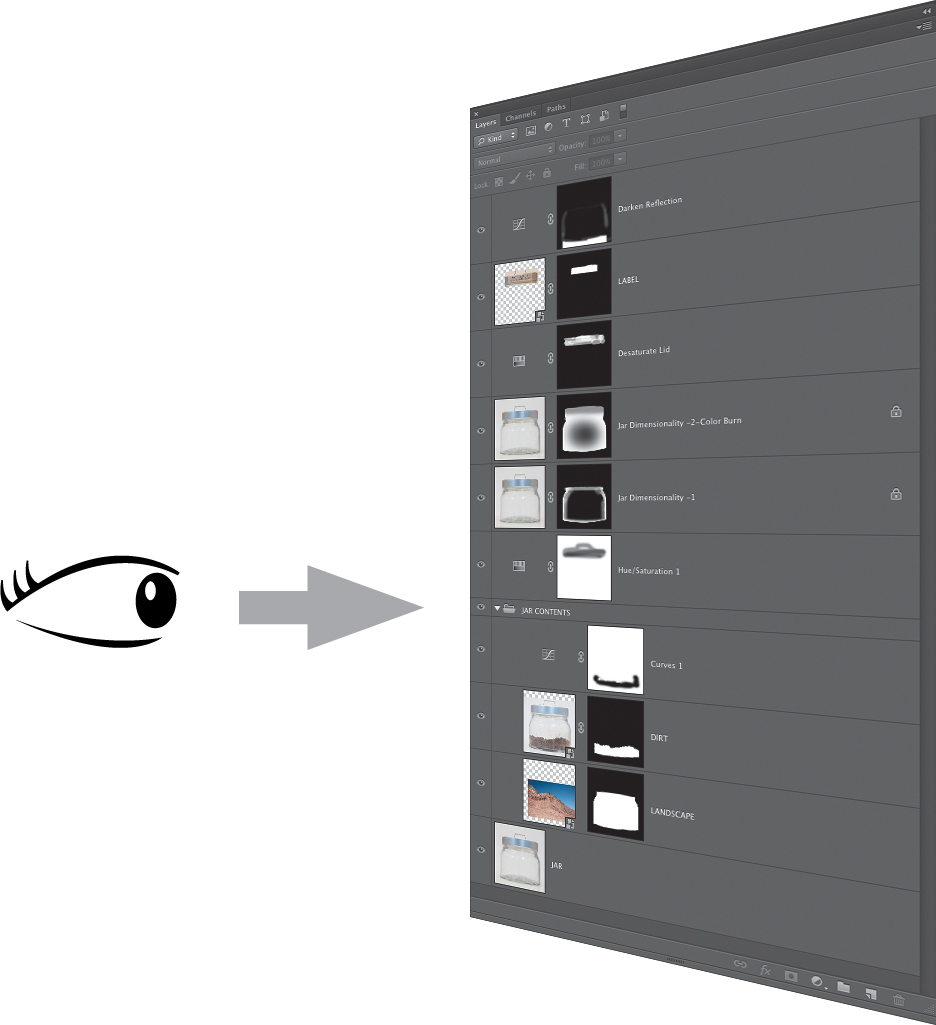
When you view a layered document in Photoshop, you get a bird’s-eye view. Photoshop displays the image starting from the top layer and progressing downward through the layer stack using all of the visible layers (FIGURE 8.1). When you look at the Layers panel, your view of the image is more like seeing a cross-section, similar to the different layers of geological strata that are visible in the sides of a hill or a cliff (FIGURE 8.2). Photoshop layers are much more flexible and easy to work with than geological strata, and you can control how layers interact with each other based on their position in the layer stack, as well as the use of opacity, blending modes, and masks.
© SD
Figure 8.1. Photoshop “sees” and displays layered files as if the layers are being viewed from the top down.
Figure 8.2. You view the Layers panel from the front where the different components of the file appear as a stack of layers.
Types of Layers
The beauty of layers is that they allow you to structure your file so that different parts of the image are placed on different levels, which enables you to treat each component differently. This gives you a great deal of control in how the image is constructed, as well as the type of visual effects you can achieve. Photoshop has several different types of layers, but they can be broken down into two very general categories: image and effect. Image layers contain pixel or vector-based image information that adds a visible image element to the composite. Effect layers are used to add tonal and color adjustments; color, pattern, or gradient overlays; and texture effects.
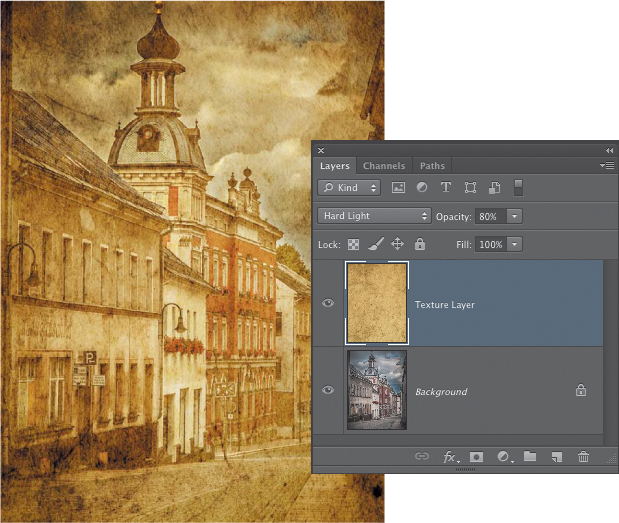
These two categories describe the different types of layers in very broad strokes. There can be times when there is some overlap between the two depending on the type of layer and how it is being used. For instance, a pixel-based image layer can be used to create an effect when it is applied with a certain type of blending mode, such as when a photograph of a texture is used to add that texture to a composite (FIGURE 8.3). In the following sections we’ll take a closer look at the different types of layers that Photoshop offers.
© SD
Figure 8.3. The texture effect is created with an image layer of the texture set to the Hard Light blending mode.
The Background Layer
When you open most image files in Photoshop for the first time, a single layer named Background appears in the Layers panel (FIGURE 8.4). The Background layer is an exception to nearly all other types of layers because it lacks the functionality that all other layers have. Unless you convert it to a standard layer, it cannot support layer masks, blending modes, opacity, repositioning, or any other type of layer “extras” that are so useful for compositing work.
Figure 8.4. Most images opened in Photoshop for the first time have a single Background layer.
Before you commence pushing pixels to transform your image, save a working copy or a master file version first by choosing File > Save As. Give the file a different name to distinguish it from the original, and save it in a format that supports layers (e.g., PSD or TIFF). Working on a separate copy from the original image file will protect it from being changed. To convert the Background layer into a standard layer, double-click on its Layer icon and rename it (you don’t have to rename it, but a descriptive, meaningful name is useful, especially if the file will eventually have lots of layers!). Once the Background has been promoted to a standard layer, you can take advantage of all the useful functionality of the Layers panel.
Never—ever—apply significant edits directly to the Background layer. The Background layer is your original, your reference, your guide, and your image foundation. Use adjustment layers for color and tonal modifications or separate pixel layers for retouching or other changes!
Duplicating the Background layer
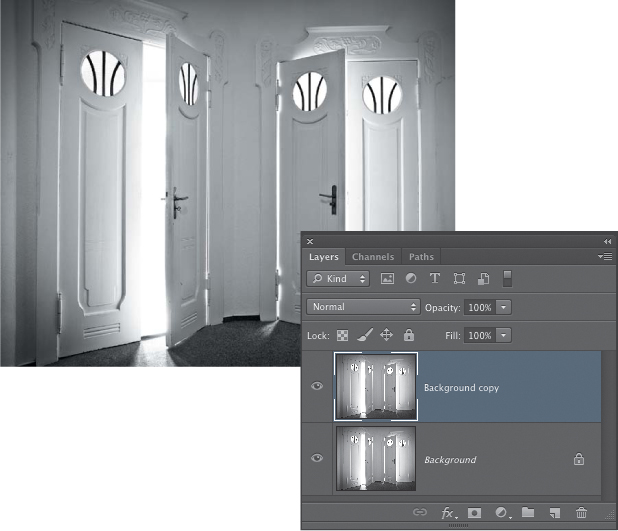
Even in a working version of the file, you may still want to preserve the initial state of the image as a reference for what the original looked like, especially if you will be significantly altering the original image with extensive retouching. To do this, you can create a copy of the Background layer (or the former Background layer if you’ve already converted it to a regular layer) by dragging it to the New Layer icon at the bottom of the Layers panel (FIGURE 8.5). You can also choose Duplicate Layer from the Layers panel menu, from the context menu that appears when you Control-click (right-click), or from the main Layer menu at the top of the screen.
© SD
Figure 8.5. Duplicating any layer by dragging the layer to the New Layer icon creates an exact copy, in perfect registration, on which you can work without affecting the original data. Use the shortcut Command+J (Ctrl+J) to quickly duplicate a layer.
Just because you can duplicate the Background layer doesn’t mean that you should. If all of your editing will be applied using other image layers or adjustment layers, there is no reason to make a copy of the Background layer. It will end up serving no purpose to the file and will just make the file size much larger than it needs to be (at least twice as large). Although some retouching might justify making a copy layer, simple dust spotting does not necessarily warrant duplicating the entire Background layer. If the image originated from a raw file, spotting should ideally have been taken care of at the raw processing stage, either in Adobe Lightroom or in Adobe Camera Raw. Even if minor spotting still needs to be done once the image is in Photoshop, there are better ways to handle this than making a copy layer of the entire image. Using partial or empty layers for retouching is one approach (we’ll cover those next).
Many compositing artists start each image with a blank document (File > New) and drag the image elements into the new working surface. This is a valid method for ensuring that you don’t inadvertently overwrite important image information.
To create a new empty file that is the same size as another file you are working with, choose Edit > Select All in the first file, and then choose Edit > Copy. After copying, choose File > New. In the New File dialog, the default size of the new document will be the same size as the copied image information.
Empty Layers
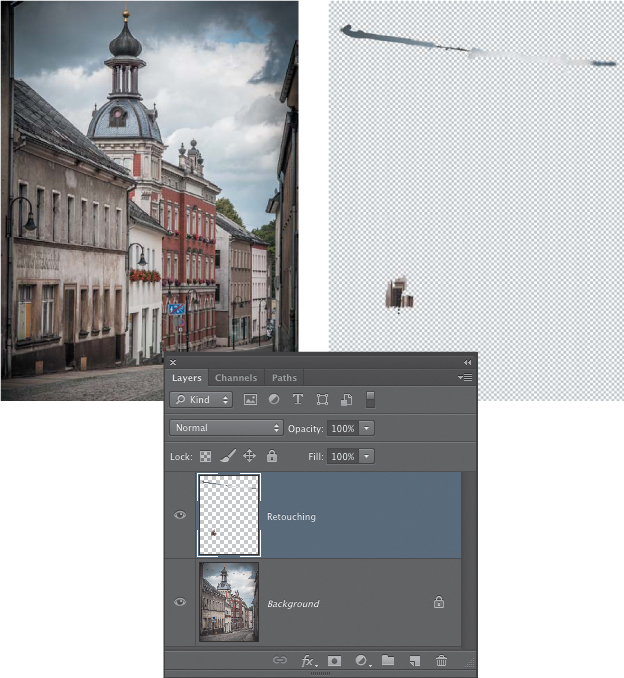
For many types of retouching or simple image cleanup, you can actually work on an empty layer that is immediately above the Background layer. Working on an empty layer can be a useful technique for some types of retouching. Because the retouching is not being applied directly to the pixels of the Background layer, it is nondestructive and more flexible in case future edits or corrections to the retouching need to be applied (FIGURE 8.6). By starting with an empty layer, the increase in file size is kept to a minimum because new pixel information is added to the layer only in the areas you are working on. With the changes on a separate layer, you can turn the visibility off and on to periodically check to see how convincing your retouching or other pixel manipulations are. Working on an empty layer works well in many scenarios, but there may be times when you need additional pixel information on the layer you’re working on to achieve a specific result. For those times, you can create a partial layer.
Figure 8.6. Photoshop represents the transparent areas of empty layers with a checkerboard pattern. Think of these empty layers as clear sheets of acetate on which you paint, clone, and heal without affecting the pixel data of the layers underneath. In this example the retouching of the power line and a road sign has been done on an empty layer.
To apply retouching to an empty layer that is immediately above the Background layer, make sure that the Sample menu in the Options bar for the Clone Stamp or the Healing Brush is set to Current and Below.
Partial Layers
Sometimes you may need to apply more in-depth pixel modifications or retouching to a specific area of the image, and an empty layer may not work very well. In such cases you do not want to apply these changes directly to the Background layer, but making a duplicate layer of the entire image may be overkill for the work you need to do. An alternate approach is to make a partial layer that contains only the part of the image you need to work on. To do this, simply use the Lasso or the Rectangular Marquee tool to make a loose selection of the area you want to work on. Choose Layer > New > Layer via Copy (Command+J [Ctrl+J]) to turn the selection into a new, partial layer.
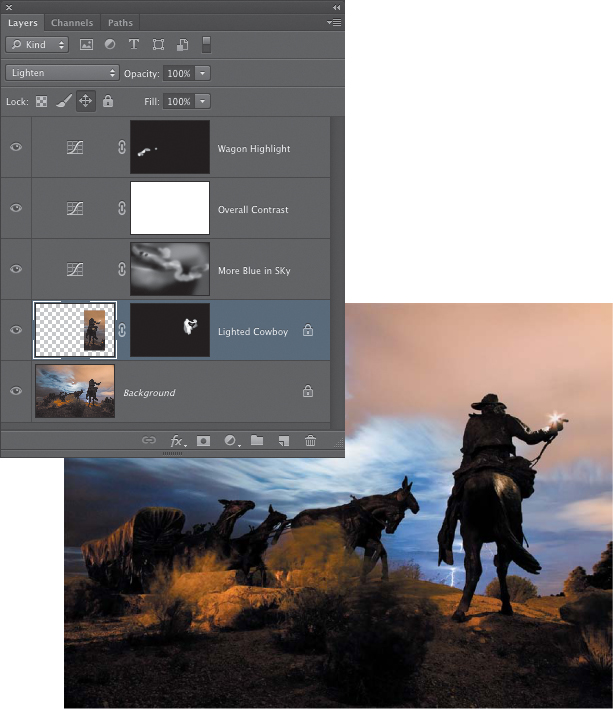
In addition to retouching, you can composite in another exposure of the same scene that contains different image information you want to add to the scene. For example, in the night exposure of a wagon train sculpture during a lightning storm (FIGURE 8.7), one exposure was made with a small flashlight positioned in the cowboy’s raised hand and a partial section of this exposure was used in the final composite. For those times when using a partial layer makes sense, once you have the partial layer in place, click the third lock icon from the left at the top of the Layers panel to lock the position of the layer so that it cannot be accidentally moved. Using partial layers prevents the file size from becoming larger than necessary.
© SD
Figure 8.7. A partial layer containing detail from a two-and-a-half minute, tripod-mounted exposure is used to add the bright point of light to the cowboy’s hand and the illuminated area on the horse’s side. This layer’s position is locked to prevent it from being accidentally moved.
Adjustment Layers
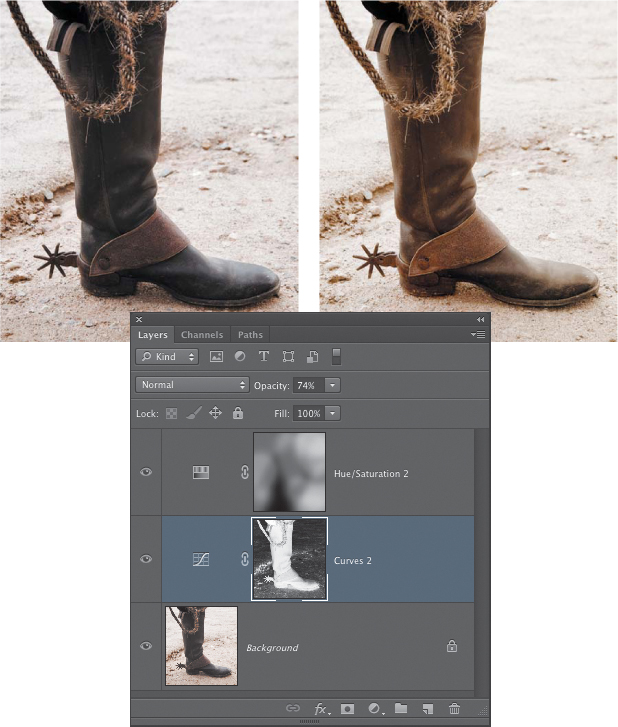
For general photographic work, adjustment layers are one of the most useful types of layers, because they allow you to apply tonal and color modifications nondestructively and in a way that is flexible and easily modified (FIGURE 8.8). In addition to the controls of the specific adjustment that is being applied, the effect of an adjustment layer can also be modified using blending modes, layer masks, and the layer opacity controls.
© SD
Figure 8.8. Adjustment layers enable you to apply global and selective tonal and color corrections.
Fill Layers
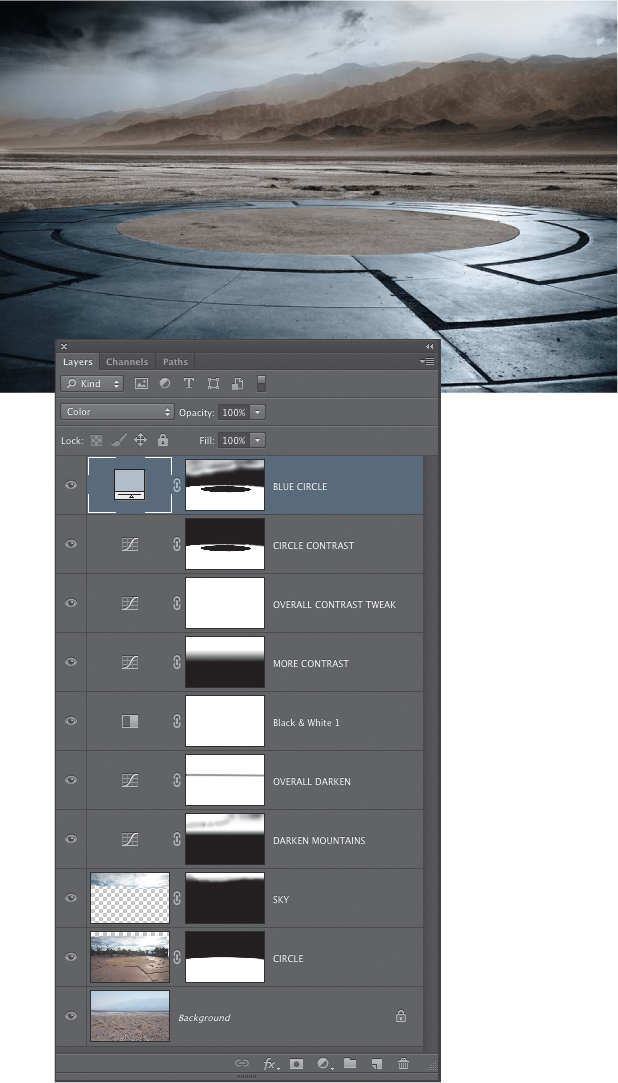
Fill layers are similar to adjustment layers (and they share the same menu in the Layers panel). Whereas adjustment layers are designed to apply a tonal or color modification to the image, a Fill layer is a layer that is filled with a solid color, a gradient, or a pattern. Like an adjustment layer, the type of fill content that you choose is nondestructive and can be easily modified at anytime. The way the fill content interacts with the layers below it can be controlled using layer masks, vector masks (a mask defined by a vector path), or the layer blending modes. By using blending modes, Fill layers can sometimes be made to behave very much like adjustment layers, allowing you to create layers that apply a color tint, correct an exposure imbalance, or modify the color cast in an image (FIGURE 8.9).
© SD
Figure 8.9. In this composite example, a Color Fill layer set to the Color blending mode creates the blue tint for the circle, as well as for some areas of the sky.
Neutral Layers
A neutral layer is not a layer type that is available in the Photoshop Layer menu but is a specific technique for using layers that takes advantage of characteristics offered by certain blending modes. A blending mode controls how the active layer interacts with layers below it. The different effects that can be achieved with blending modes are quite varied and are an essential element in multi-image compositing.
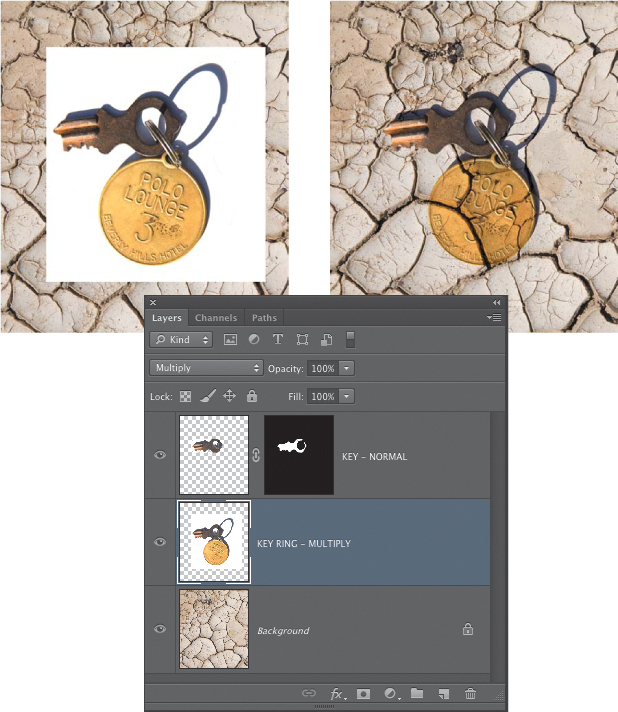
Neutral layers leverage the fact that the colors of black, white, or 50% gray are treated as neutral by some of the blending modes. Neutral means the blending mode does not “see” the color, so it does not affect the underlying layers in any way. This effect can be put to use for many types of editing, including advanced retouching techniques, adding textures and noise, sharpening, or compositing images together without the need of a layer mask. FIGURE 8.10 shows how the white background of the key layer is completely hidden when the blending mode for the layer is set to Multiply. White is a neutral color for the Multiply blending mode, meaning it will not show up in the image. This makes it easy to create a composite of the key ring and its shadow on the cracked surface of the dry lake bed. We’ll discuss using neutral layers in more detail later in this chapter when we explore the wonders of the blending modes.
© SD
Figure 8.10. In this composite example, the Multiply blending mode does not show white areas of the key ring layer because white is a neutral color for that particular blending mode.
Type Layers
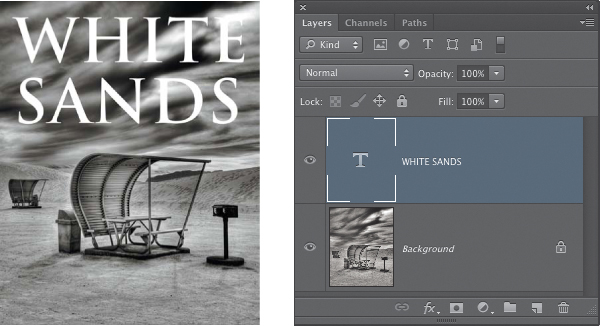
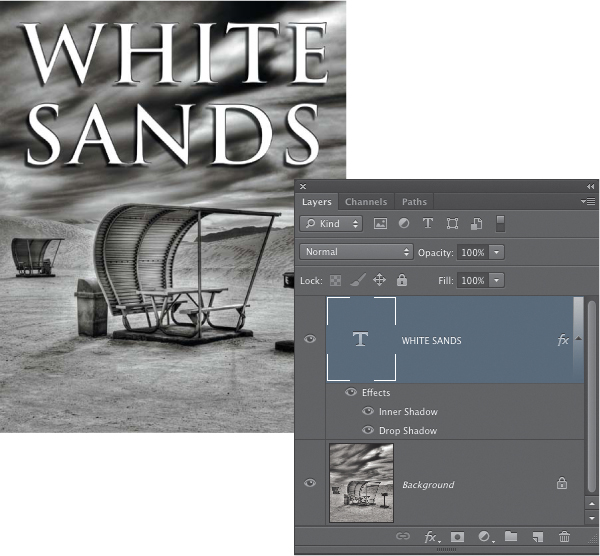
When you activate the Type tool and click in the image to enter text, a Type layer is created. Type layers remain editable as long as the text is not rasterized (converted into pixels). Photoshop will automatically name the Type layer based on the text that has been entered. Although type is commonly used to create titles, such as for book covers or posters, as shown in FIGURE 8.11 and FIGURE 8.12, it can also be used as more of a collage element that is integrated into the fabric and narrative of the scene (FIGURE 8.13).
© SD
Figure 8.11. Type layers remain editable as long as the text is not rasterized.
Figure 8.12. Layer styles: Although not considered a layer per se, Photoshop does count layer styles when calculating the internal layer count, which is limited, if you can call it that, to a total combination of 8,000 layers and layer styles. In this example a Drop Shadow and Inner Shadow style have been added to the text.
© SD
Figure 8.13. Type layers were used in this composite to embellish the scene and create a new narrative.
Smart Object Layers
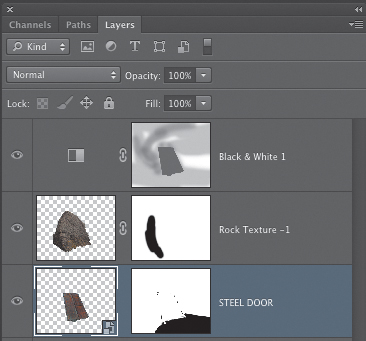
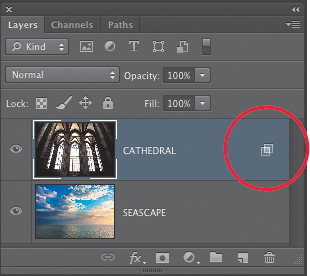
Smart Object layers have special attributes that allow you to nondestructively apply most filters as well as the Transform commands (Scale, Rotate, Skew, Distort, Perspective, and Warp). You can also open a raw file as a Smart Object so that all of the Camera Raw editing capabilities are accessible from the layer in the Layers panel. When you turn a layer into a Smart Object or open a raw file as a Smart Object, that layer or raw file essentially becomes a separate file that is embedded within the main layered file. The version that you see in your Photoshop document is a proxy version that displays all of the changes you have made to it, but the actual pixel or raw file information for that layer is never altered. The layer thumbnail for a Smart Object has an additional badge icon to denote that it is a Smart Object (FIGURE 8.14).
Figure 8.14. Smart Object layers are identified in the Layers panel by an additional icon on the layer thumbnail, as shown on the Steel Door layer in this example.
There are several ways to create a Smart Object:
• In Camera Raw click the blue Workflow Summary link under the main image preview to open the Workflow options. Select the Open in Photoshop as Smart Objects check box.
• Choose Layer > Smart Objects > Convert to Smart Object.
• From the Layers panel menu, chose Convert to Smart Object.
• Control-click (right-click) on the layer in the Layers panel and choose Convert to Smart Object.
• Chose Filter > Convert for Smart Filters.
• With a selection tool active, Control-click (right-click) in the image on the active layer and choose Convert to Smart Object.
When you’re working with a raw file, Smart Objects are useful if you want quick access to the raw processing controls right there within your layered Photoshop file. Double-click the thumbnail of the raw Smart Object layer to edit the embedded file. If it is a raw file, the Adobe Camera Raw plug-in opens. Just keep in mind that if you have added additional color or tonal adjustments using adjustment layers and layer masks, those may no longer work if you go back into the Smart Object to reinterpret the raw file. If the Smart Object layer is a regular layer that has been converted to a Smart Object, double-clicking the thumbnail will open the embedded file. After making changes, which can include adding adjustment layers, layer masks, and even additional layers or nested Smart Objects (e.g., a Smart Object within a Smart Object), close the file, and click the Save button when prompted. The changes you’ve made will be updated into the Smart Object layer.
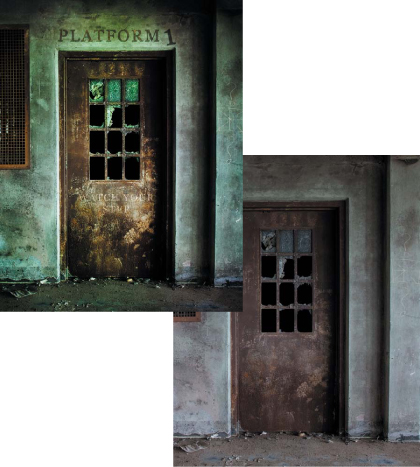
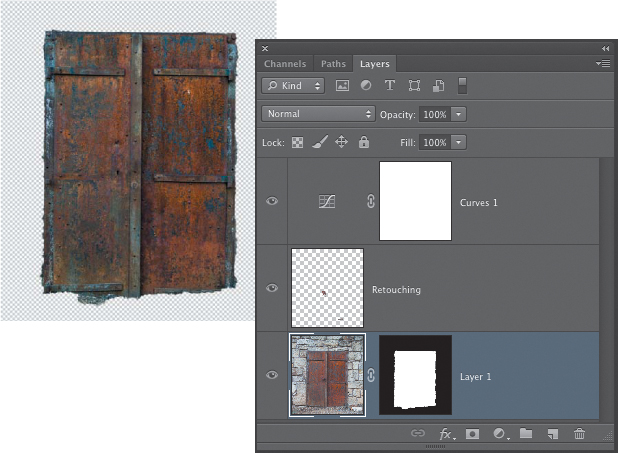
For compositing, Smart Objects offer the ability to nondestructively scale and transform a layer multiple times. Although using Smart Objects involves an extra step, and there are some types of edits such as retouching that cannot be applied directly to the Smart Object layer, there are significant benefits to using them (FIGURE 8.15).
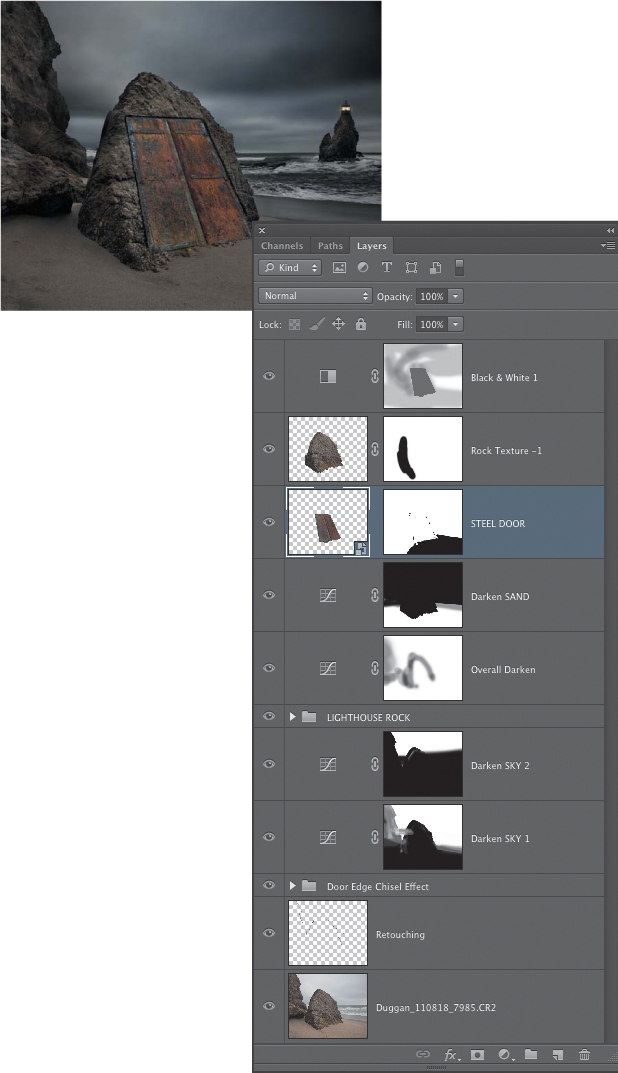
Figure 8.15. In this example you can see how the transformed Smart Object appears in the composite and what the actual embedded Smart Object of the steel door looks like when it is opened. All edits are nondestructive.
Video Layers
Although this book is about masking and compositing techniques for creating still images, it’s worth noting that Photoshop does offer some interesting video-editing capabilities. Video files opened in Photoshop become video layers and can be edited using a timeline in Photoshop CS6. Anything you can do to a regular layer in Photoshop can be applied to a video layer. If you do not have previous experience with video-editing software but are already familiar with some of the basic concepts surrounding layers in Photoshop, the video capabilities in Photoshop CS6 provide an easy way to explore this exciting area of photography.
Layers Equal Creative Flexibility
One of the most useful aspects of layers is that all of the different kinds of layers mentioned (with the exception of the Background layer) support layer masks, vector masks, blending modes, opacity and fill changes, and Advanced Blending options. As you’ll see in the rest of this book, these “layer extras” are essential tools that provide many ways to unlock the power of layers and offer you great creative flexibility for crafting amazing composite images.
Organizing Layers
Layers are one of the best parts of Photoshop. Using them allows you to unlock a whole world of visual possibilities for combining different photos to create an entirely new image. But along with the creative power that layers bring to your Photoshop experience, there is also the very real possibility that your Layers panel will become cluttered and confusing. Understanding the different ways that you can organize and optimize the content of the Layers panel will help you work in Photoshop more efficiently.
Layer Naming and Navigation
In many cases, a composite can require 5, 10, 20, or many more layers. Relying on the generic Photoshop name, such as Layer 1 or Layer 1 copy, to identify layers is a sure path to confusion and frustration when you later try to find the one you need.
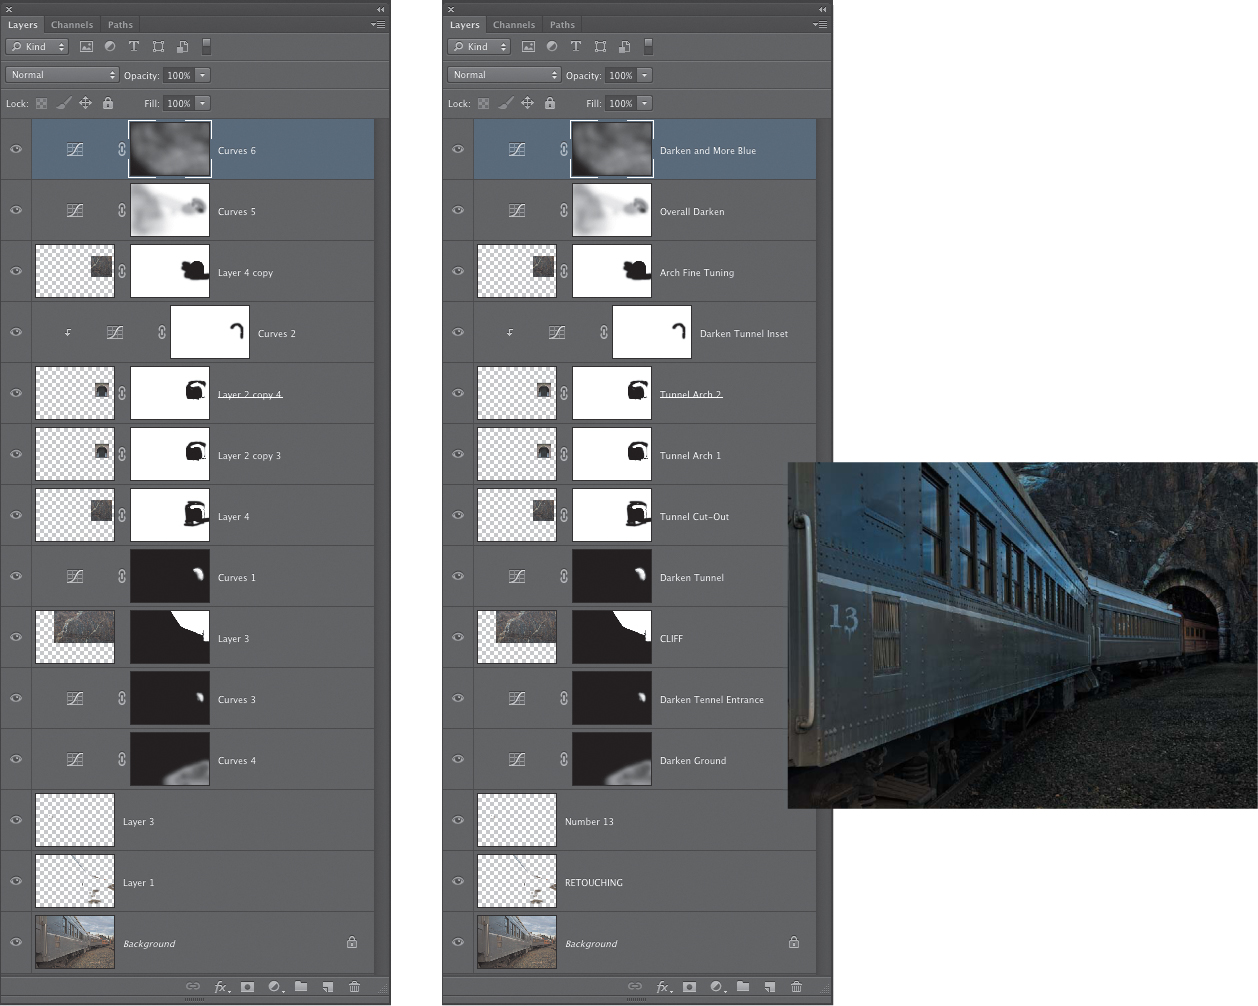
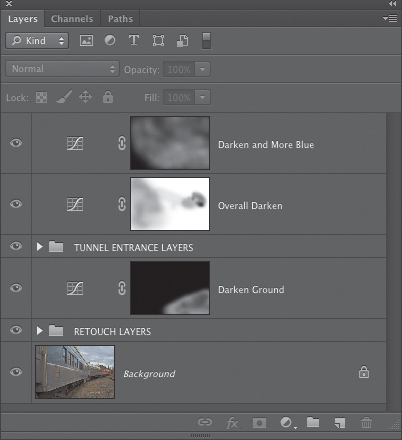
Giving your layers descriptive names as you build an image lets you identify and activate the correct layer quickly and easily. For example, look at the difference between the two layer stacks for the train composite in FIGURE 8.16. On the left are the generically named layers; on the right the layers have useful names, making them much easier to use and navigate.
© SD
Figure 8.16. The generic layer names in the panel on the left won’t help you find your way through a complex image composite, but those on the right show that naming your layers is a good habit to establish.
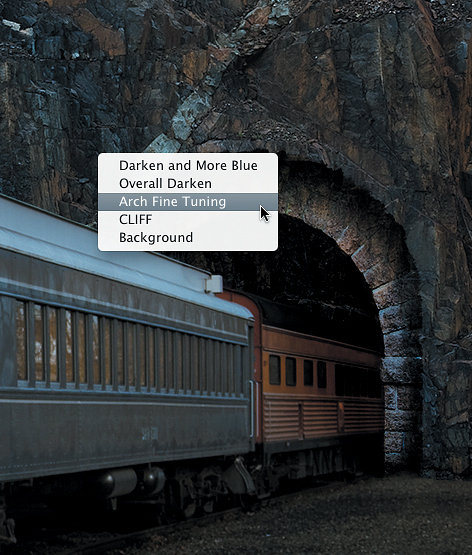
In addition, the Move tool’s context menu gives you instant access to all the layers under your cursor. FIGURE 8.17 shows that by Control-clicking (right-clicking) on any location displays all layers that have pixel information at that exact point. Best of all, you can then click on a specific layer name in the menu and activate it—even if the Layers panel is not open at the time.
Figure 8.17. The Move tool’s context menu shows you the layers that have pixel information at the cursor location.
To name a layer, simply double-click the existing name of the layer in the Layers panel and type in a meaningful name. It only takes a second to name a layer, and it will save you countless minutes of frustration when working on a file with many layers.
Working with Layer Sets
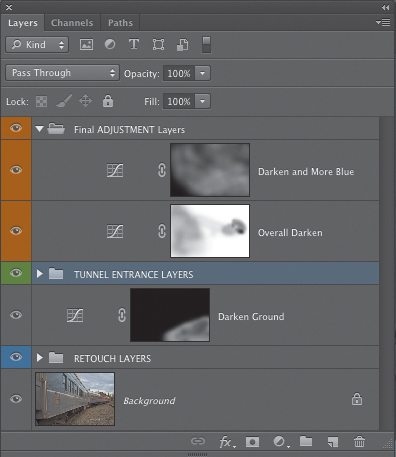
In Photoshop CS6, a single file can contain up to 8000 layers and layer effects. Although such a thing is theoretically possible, actually working on a file with that many layers would be very challenging! Even if your layered file has significantly less than thousands of layers, organizing your layers into groups can help you manage the layers more efficiently. Layer Groups are folders in which you can place related layers. The folders can be expanded or collapsed by clicking the disclosure triangle next to the folder icon; the layers can be moved around within the group; and the layer groups can be moved around within the layer stack. You can have up to ten layer sets nested inside a layer set. The Layers panel for the train composite image in Figure 8.16 looks a lot different when the layers are organized into logical groups (FIGURE 8.18).
Figure 8.18. By organizing the retouching layers and the layers that create the tunnel entrance into layer groups, the Layers panel for the train composite is much easier to navigate.
You can create a layer group in four different ways:
• Select New Group from the Layers panel submenu, name the layer group, and then drag the desired layers into the group.
• Select all the layers you want to put into a layer group by clicking one and then Command-clicking (Ctrl-clicking) additional layers to add them to the selection. To select several contiguous layers, click the first layer and then Shift-click the last layer. Then from the Layers panel submenu, choose New Group from Layers. All the selected layers will be placed into the newly created layer group.
• Select the layers you want to place in a group and then drag them down to the Layer Group button at the bottom of the Layers panel to create a new layer group.
• You can also select the layers for the group by using the very handy shortcut Command+G (Ctrl+G).
You can delete a layer group in four different ways:
• To delete the entire layer group without prompting a warning message box, drag the layer group to the trash can at the bottom of the Layers panel.
• Choose Delete Group from the Layers panel menu. The message box that appears (FIGURE 8.19) provides you with choices to cancel the operation, delete the group only (i.e., the folder) but not the contents, or delete the layer group and the group’s contents.
Figure 8.19. You can delete just the layer group (the folder) or the group and the contents (the layers inside the group).
• Command-drag (Ctrl-drag) the layer group to the trash can to delete the layer group folder without deleting its contents. The layers in the group will remain in the Layers panel in the order they appeared in the group.
• To remove a layer group but not the layers in the group, make the group active and press Command+Shift+G (Ctrl+Shift+G).
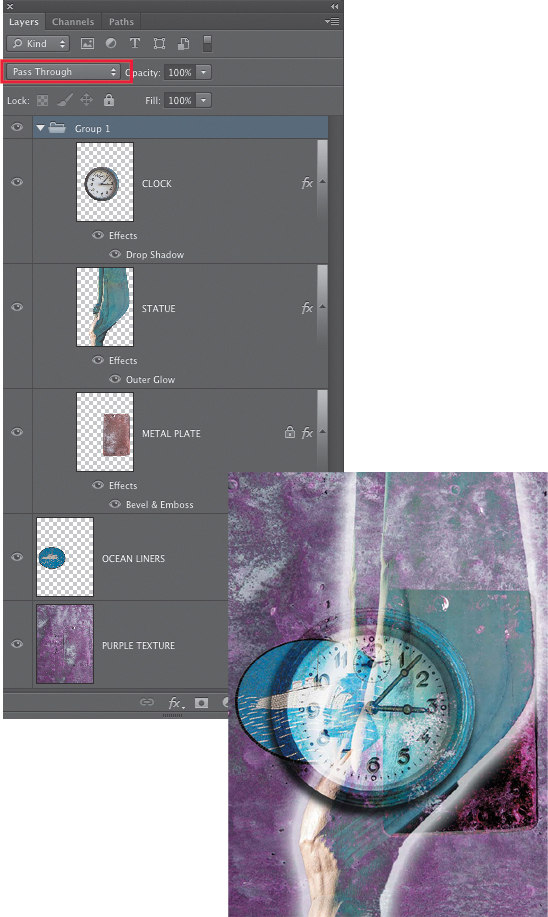
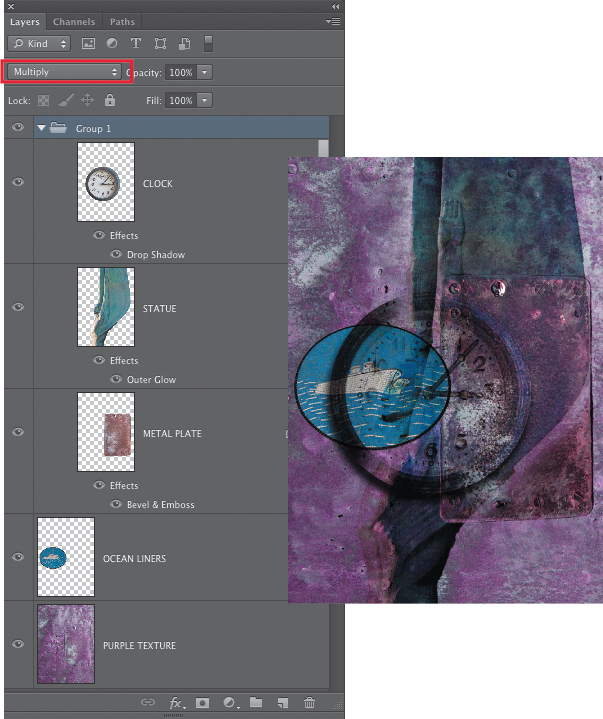
As soon as you add a layer group, the blending mode is set to Pass Through, which lets the layers in that layer group interact with the layers beneath it. Changing the layer group blending mode from Pass Through to Normal treats the entire layer group like a separate layer, and it will not interact with the layers beneath it. This can be very useful when fine-tuning separate image elements of a composite. We’ll take a closer look at blending modes later in this chapter.
Just like regular layers, a layer group can have a layer mask. When a mask is attached to a layer group, it treats all of the layers in the group as if they were a single layer; the mask will affect all of the layers in the group simultaneously. To add a mask to a layer group, click on the layer group folder and then click the Layer Mask icon at the bottom of the Layers panel. Layer group masks can be pixel-based or vector-based, and they behave exactly as their layer counterparts. We’ll delve into layer masks in more detail in Chapter 9, “Layer Masks.”
Color coding layer groups
In addition to naming your layers, you can apply color labels to layers and layer groups to provide another way to visually identify layer content or relationships. For example, you could use one color for adjustment layers, another color for image layers that make up a specific component in the composite, and a third color for retouching layers (FIGURE 8.20). To apply a color label, Control-click (right-click) on the layer or layer group in the Layers panel and choose a label from the context menu.
Figure 8.20. Applying color labels to layers and layer groups is another way to organize the content of the Layers panel.
All in all, organizing, naming, or color coding layers and layer sets takes only a moment, but it can save you from having to hunt and search for the layer you need. If you work with a partner, on a team, or as part of a production workflow, organizing your layers and using clear and meaningful layer names is particularly important. Consider this scenario: Imagine that you’re working on a complicated composite, and for some reason you can’t finish the image. If the layers are organized and well named, someone else on your team can open the file, find the layers that need additional work, and finish the project. However, if the layers are scattered, generically named, or not in layer sets, it will take a while for someone else to determine where to even begin. In the worst-case scenario, a very important layer might be ruined or deleted.
Filtering Layers
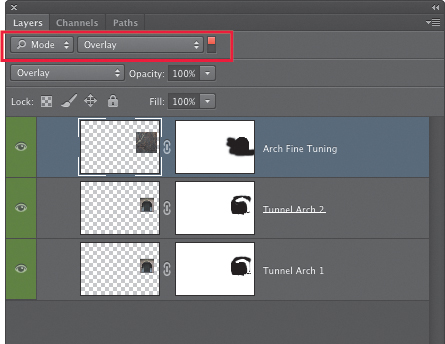
Photoshop CS6 introduced a new feature to the Layers panel: the ability to “filter” the visibility of what layers appear in the panel. The Layer Filter is available at the top of the Layers panel. In addition to using the row of buttons to filter for specific types of layers (pixel, adjustment, type, vector shape, or Smart Object), you can also use the drop-down menu to filter by other parameters, including the name of the layer, layer effect (e.g., drop shadows, bevel and emboss, etc.), blending mode, attribute (e.g., whether the layer is visible, locked, has a mask, has layer effects, uses advanced blending, and many other variables), and color label (FIGURE 8.21). When a layer filter is turned on you will only see layers in the Layers panel that fit the parameters of the current filter. A small “switch” just to the right of the filter options allows you to turn the filter off and on.
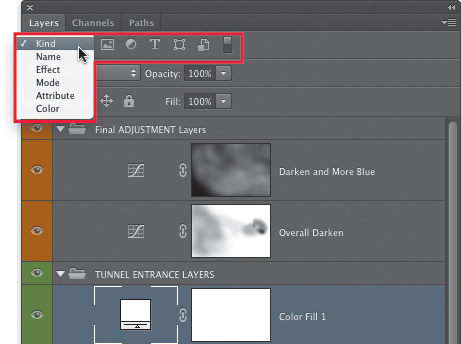
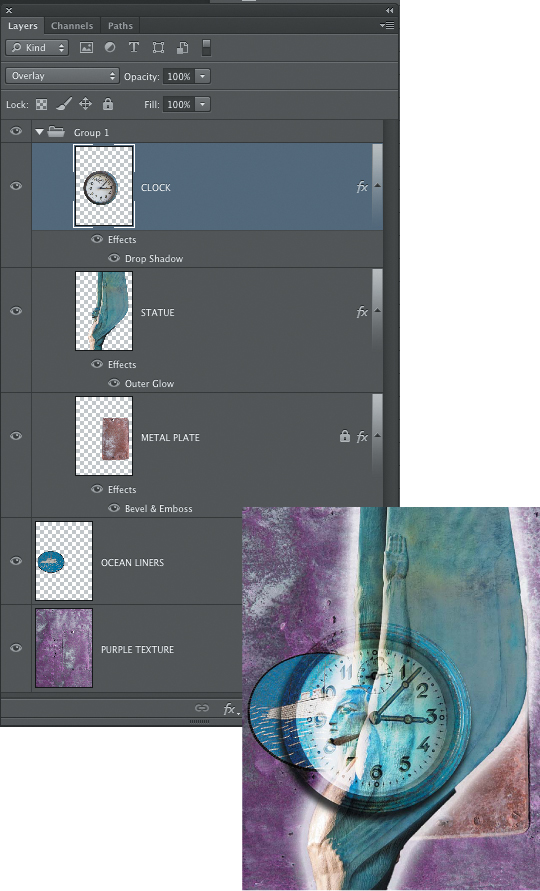
Figure 8.21. The Layer Filter lets you search through a stack of many layers using a variety of parameters. In the second image, a search for the Overlay blending mode reveals three layers that share that mode.
If the file you are working on does not have many layers or different kinds of layers, the Layer Filter functionality may not be that useful. But if you’re ever working on a file with many different kinds of layers or many layers that use different types of layer effects or blending modes—which is often the case with more complex and intricate composites—the Layer Filter may prove to be a welcome addition to the Layers panel.
Merging and Discarding Layers
To preserve our creative options, we typically don’t delete layers unless they’re no longer needed or not bringing anything to the image. If we feel there’s a chance we might need an element in a composite project or want to save a layer in case we want to revisit a particular creative direction, we’ll keep those extra layers around and just turn off their visibility (we’ll often arrange unused layers into their own layer group to reduce clutter in the Layers panel). You never know if a layer mask or tidbit of information from a layer will be useful later on.
Still, there are times when it becomes clear that you may not need all of the separate layers in the file. One way to minimize the number of layers is to consolidate similar layers that all share the same blending modes and opacity setting. A good example of this might be retouching layers where several layers are used to retouch different areas of an image. As long as these layers share the same opacity settings and blending mode, they can easily be merged into a single layer by using the Merge Down command. To do this with several layers that are contiguous in the Layers panel, click on the top one to make it active and then choose Layer > Merge Down. The active layer will merge with the one immediately below it. Repeat this step until all of the separate layers you want to consolidate have been merged into a single layer. The Merge Down command is also available in the Layers panel context menu by right-clicking on the layer in the panel or by pressing Command+E (Ctrl+E). We never flatten our master layered files because that would prevent future changes to the composite. The only time you need to flatten an image is when you’re creating a copy of the file to send to a print lab or preparing a version of the image for publication in a page layout program.
The Price of Layers
As wonderful as layers are, they do come at a price, which is increased file size. Fortunately, not all layers “weigh” as much as others. When calculating how much a layer will affect the file size, Photoshop adds just the actual pixel information of the layer—meaning that if the layer has only a small percentage of pixel information on it, it will not add to the file size as much as a layer that is 100 percent pixel information.
The most efficient layers are Fill and adjustment layers (in which you do not use the layer mask); each one adds only 4 Kb to 6 Kb to the file. The least efficient layers are duplicated and merged layers that contain 100 percent pixel information (i.e., no transparent areas). This includes a full-sized pixel layer that is turned into a Smart Object.
Even though layers do result in a larger file size, which can be significant on high-megapixel images that are opened as 16-bit files, their advantages far outweigh their drawbacks. If working with a multilayered file is slowing you down, consider the following options to improve Photoshop performance:
• Get the fastest, most powerful processor you can afford. The speed of the central processing unit (CPU) will affect how fast your computer can process information. In general, Photoshop will run much faster on a multiprocessor system, although certain features can make more use of a faster CPU. Although RAM also affects how fast Photoshop runs (more on that in the next bullet item), keep in mind that RAM can always be added after you purchase your computer, whereas the processor cannot be as easily replaced or upgraded.
• Get as much RAM as you can afford. Adding more RAM to your computer allows you to work faster and more efficiently, providing you with more opportunity to experiment with creative variations. It is very artistically stifling to think about doing something in Photoshop and then not do it simply to avoid the progress bar or the spinning clock. Photoshop CS6 runs in 64-bit mode on a Mac and, depending on the operating system you have, either in 32-bit or 64-bit mode on Windows. The advantage of 64-bit mode is that Photoshop can address as much RAM as you can put into your computer. When running in 32-bit mode on Windows, the amount of RAM that Photoshop can use is limited.
To determine whether you might benefit from adding more RAM to your computer system, do the following: With a document open that is representative of a common file size you work with, choose Efficiency by clicking the black triangle in the Status bar on the lower left of the screen (this is only visible when you are in standard screen mode). For Windows users, if the status is not visible, from the menu bar choose Window > Status Bar. Monitor this as you work on the file. If the efficiency dips below 100 percent, adding more RAM is recommended if your machine will support it. RAM is like chocolate—you can never have too much!
The following are some ways to improve the performance of Photoshop and your computer system in general:
• Use the Performance settings in the Photoshop Preferences to allocate as much RAM to Photoshop as possible. Adobe recommends three to five times the amount of RAM in relation to your file size. When Photoshop has used all of the available RAM, it uses a scratch disk (empty space on a hard drive) as additional space for its calculations. RAM will always be faster than scratch disk space, but in the event that Photoshop does need to use a scratch disk, adding a fast, dedicated hard drive reserved only for a Photoshop scratch disk can help speed up the program when the machine’s RAM is maxed out. A scratch disk on the same drive as the computer’s operating system and other programs is always less effective than having a dedicated and fast second hard drive as a scratch disk.
• Use a solid state disk (SSD) as a scratch disk. An SSD will significantly improve scratch disk performance for those times when Photoshop does have to access a scratch disk.
• Back up your files regularly, delete backed-up and unnecessary files, and use a maintenance program to defragment all of your hard drives.
• Only keep the files open that you need at the moment. Every open image is loaded into RAM, which reduces the RAM that Photoshop has for the image you’re working on. The same goes for additional software you may have open, especially other resource- and RAM-hungry programs. If you really don’t need to have other applications open as you work on that large multilayered file, close those programs.
Essential Layers Functionality
Before we get into some of the really cool things you can do with layers, we’ll take a look at some essential functionality of the Layers panel. Knowing these basic “dance steps,” as Seán likes to refer to them, will make it easier to quickly move from a good idea to making that idea work in your image.
The Layers panel in Photoshop CS6 is divided into several distinct areas. From the top down, these are layer filtering (covered earlier in this chapter in “Organizing Layers”); blending modes; opacity attributes and locking options; the visibility column on the left side; the main area in the middle of the panel where you control layer naming, positioning, smart filters, and layer styles; the buttons at the bottom of the panel; and the panel menu, which you access in the upper-right corner (FIGURE 8.25).
Figure 8.25. The Layers panel is divided into different areas.
To make the following explanation of the various controls in the Layers panel more realistic, it would help to have a layered file open as you read this section.
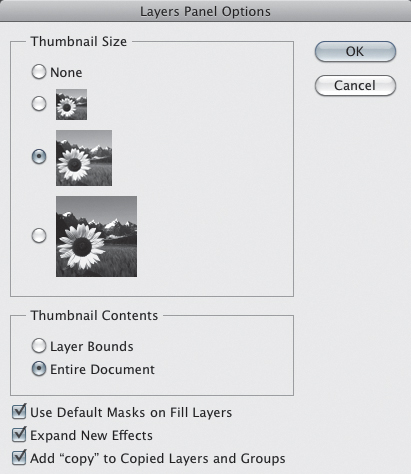
To choose a Layer thumbnail icon viewing size—from None to large—use the Layers panel submenu to access the Layers Panel Options dialog (FIGURE 8.26). You can also access this option by right-clicking in the empty area of the Layers panel between the Background layer and the buttons at the bottom. Throughout the book, we’ve used the large setting for illustrations showing the Layers panel, but normally we use the medium setting for our imaging projects.
Figure 8.26. Use the Layer Panel Options dialog to choose a layer thumbnail size.
Visibility
On the left side of the Layers panel is the visibility column. Clicking an eye icon to turn it off temporarily hides that layer. Option-clicking (Alt-clicking) an eye icon reveals just that one layer while hiding all the other layers. Option-clicking (Alt-clicking) the eye icon again turns on all the layers that were previously visible. Control-clicking (right-clicking) an eye icon displays a menu for hiding or showing just that one layer, as well as applying color labels.
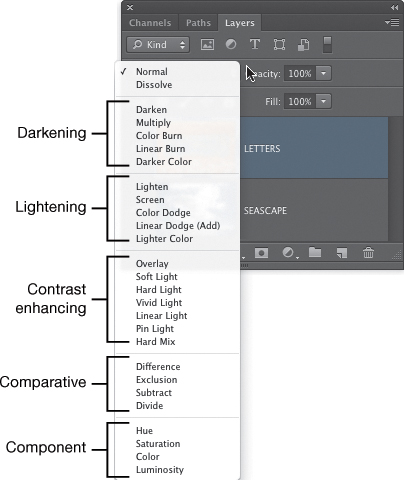
Blending Modes
The Blending Modes menu near the top of the Layers panel is one of the most useful tools for any digital artist, but especially for anyone who wants to create multiple image composites (FIGURE 8.27). In addition to offering powerful functionality for seamlessly blending images together, blending modes are also some of the most magical features in Photoshop. Unlike some features in Photoshop, there is no analog corollary to what blending modes do to an image. They offer the ability to create amazing effects that cannot be made in any other way. If you ever want to have a fun, creative play session in Photoshop, simply add a few photos into a new file and start playing around with the layer blending modes. You’ll soon be off on a magical mystery tour to unexpected destinations!
Figure 8.27. The blending modes are organized into functional groups.
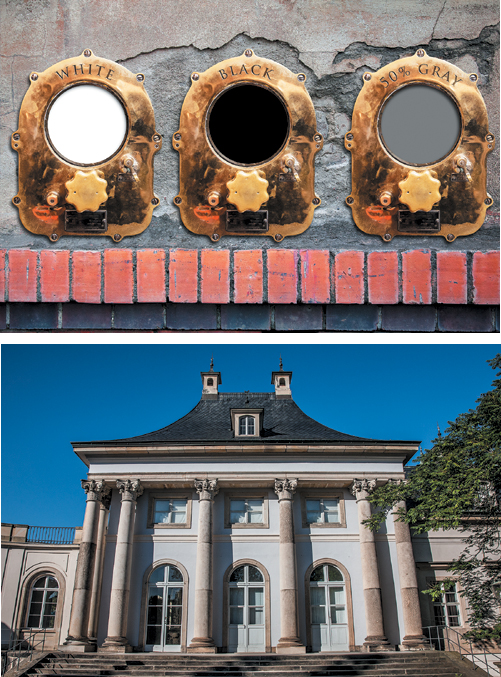
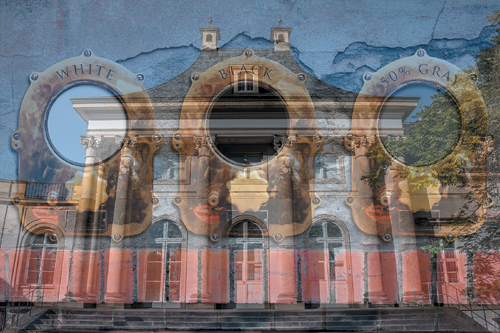
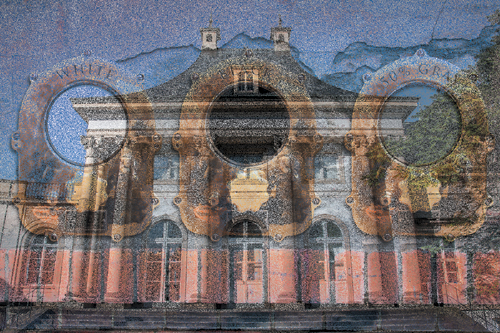
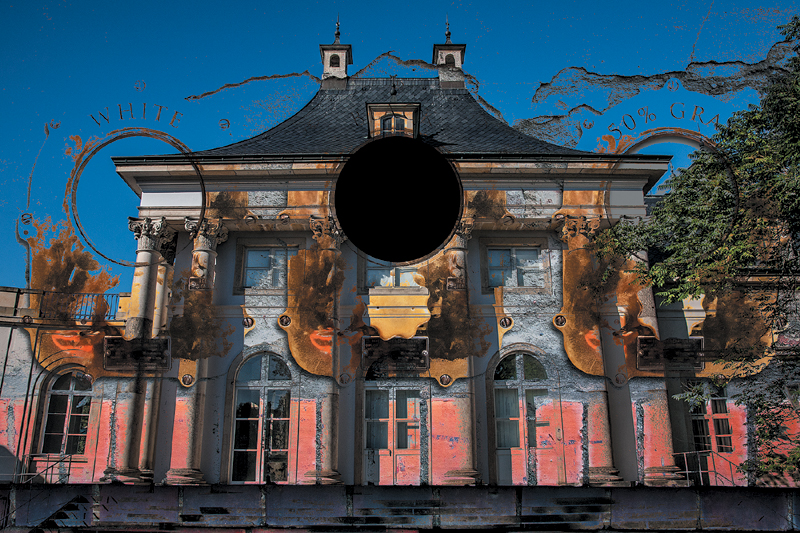
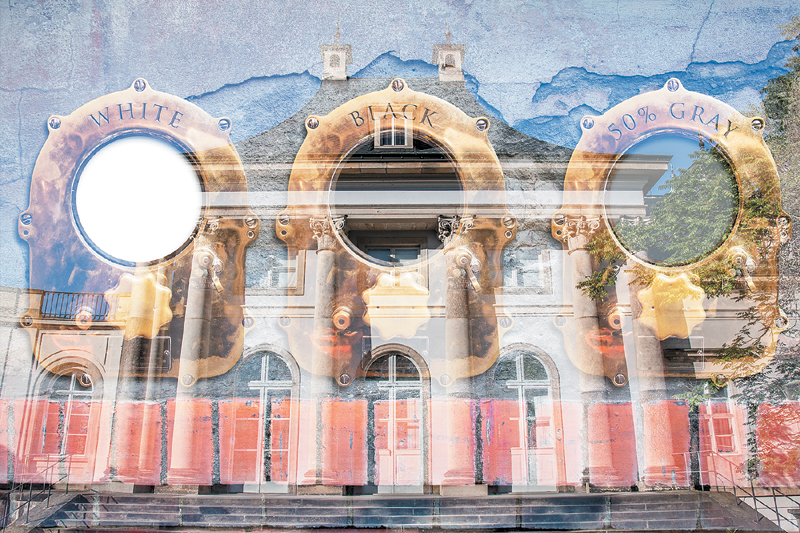
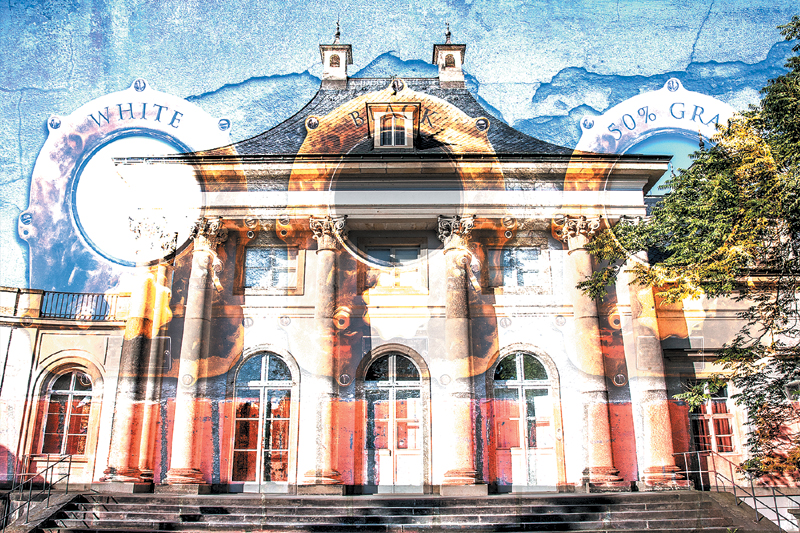
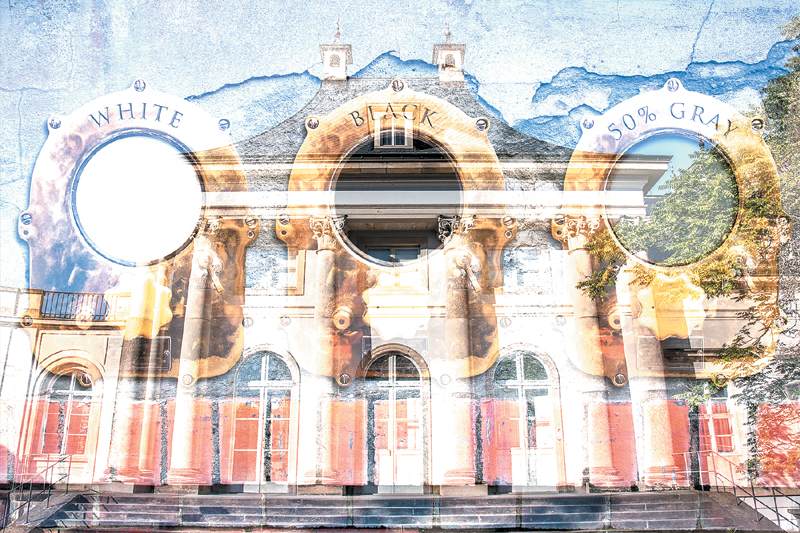
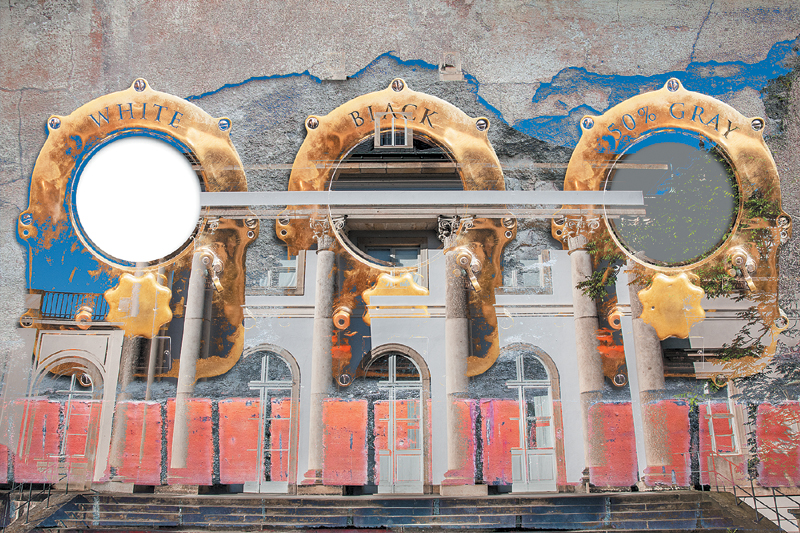
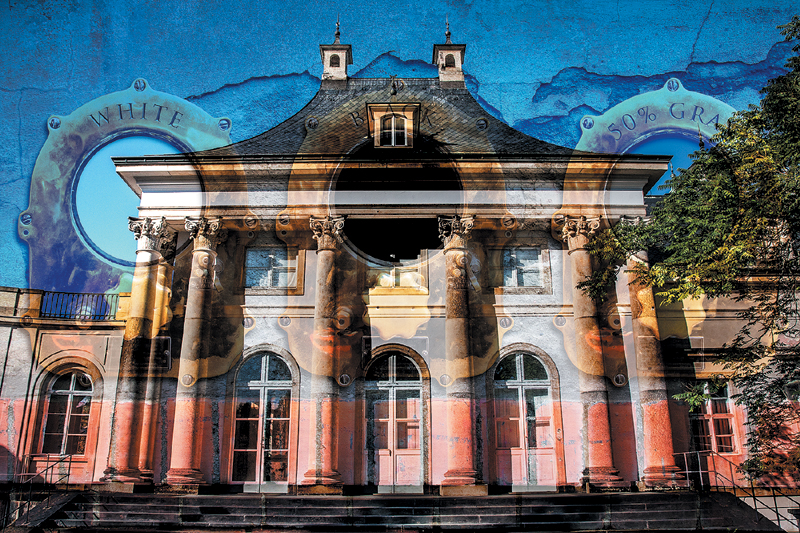
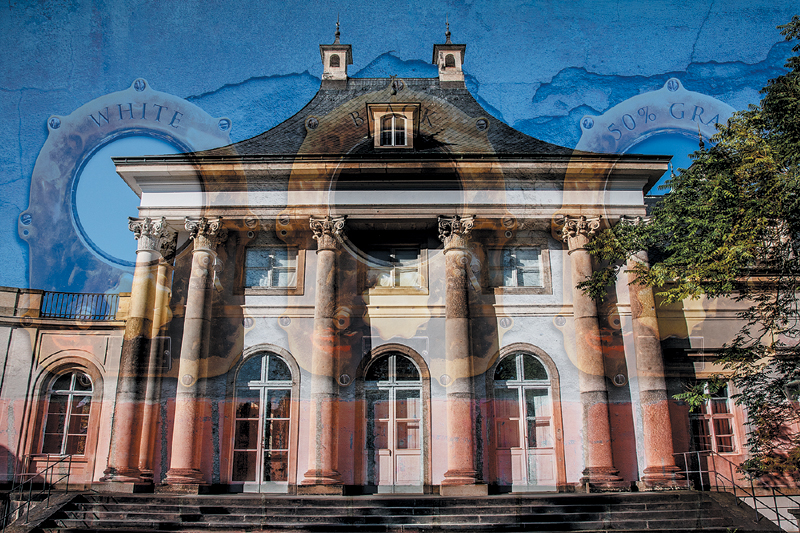
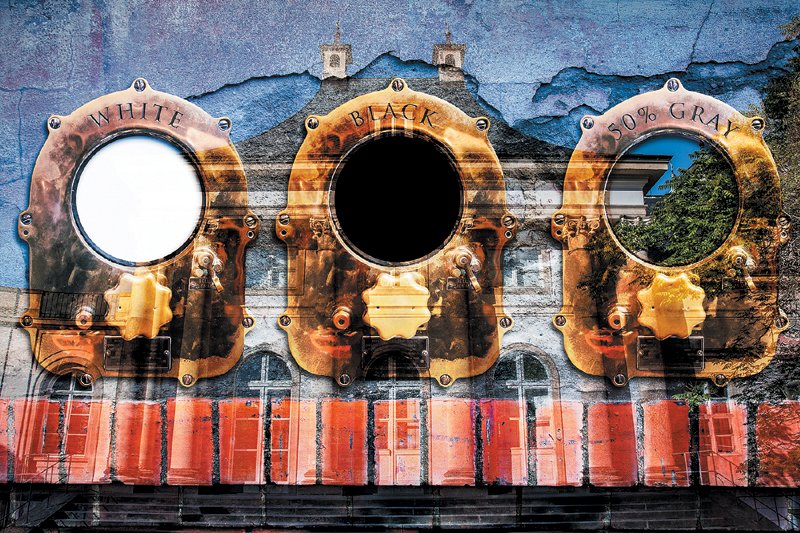
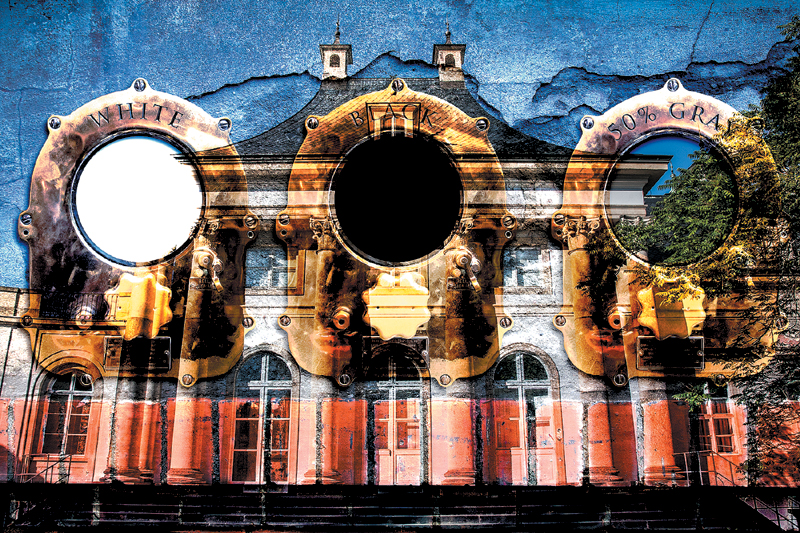
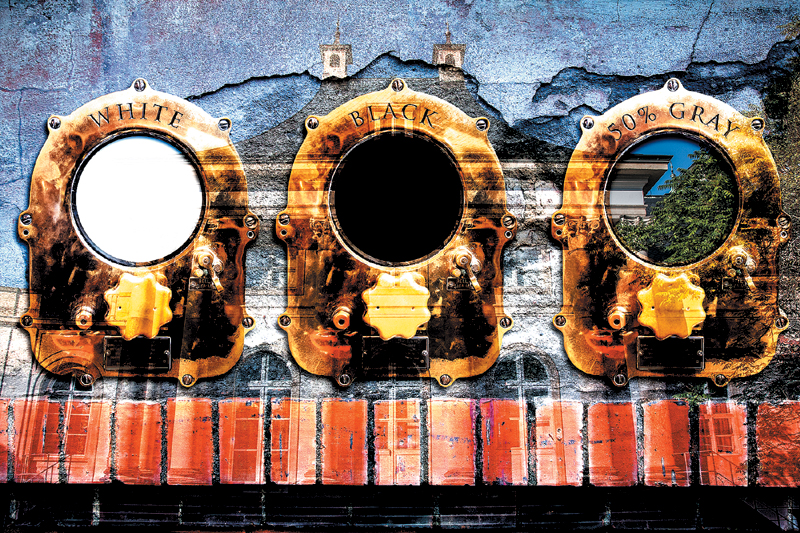
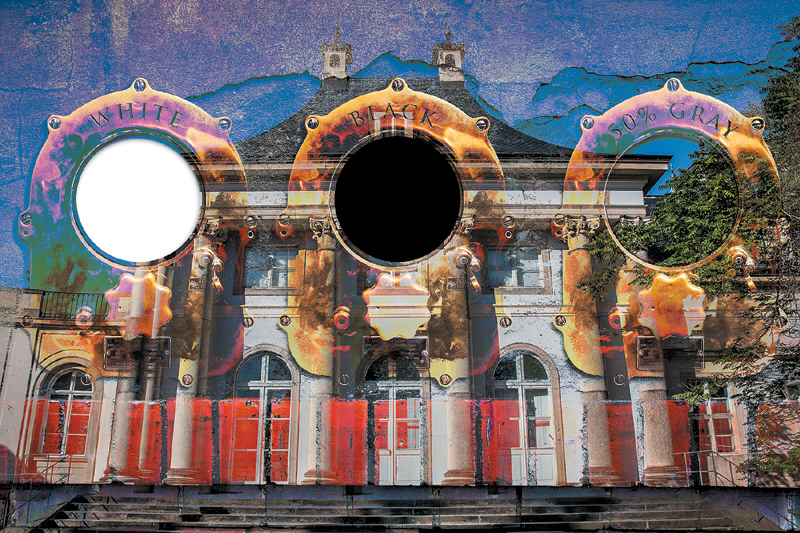
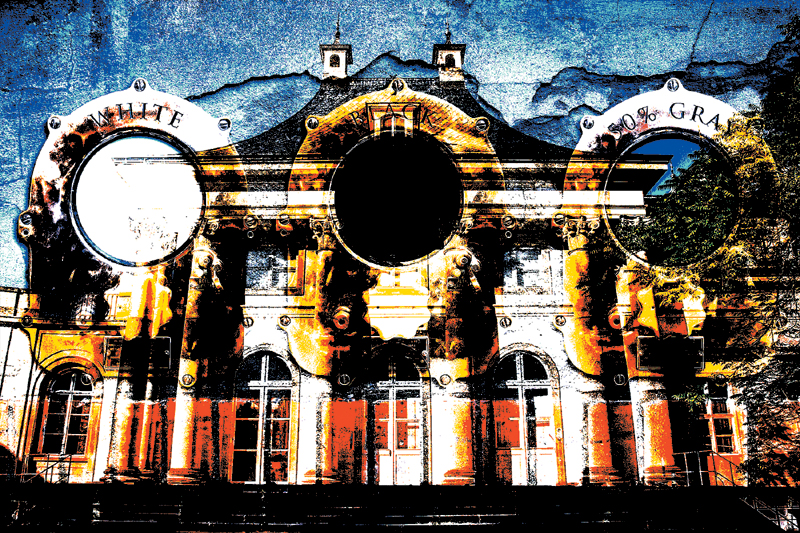
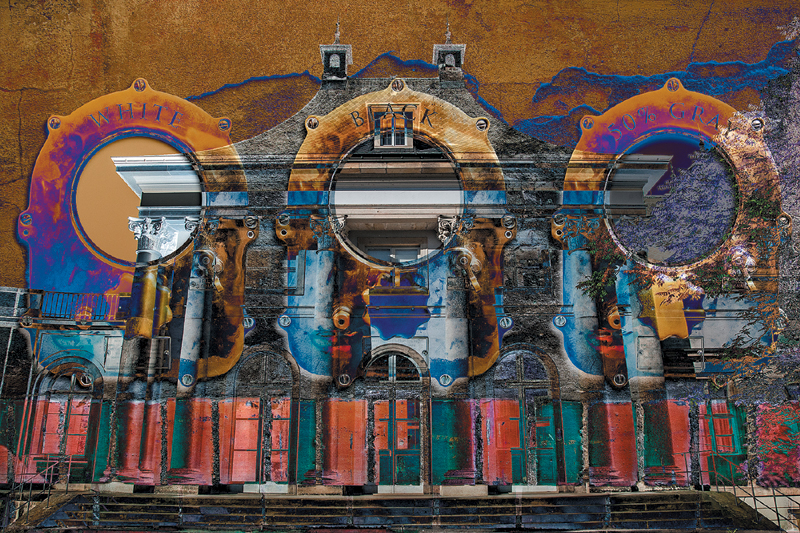
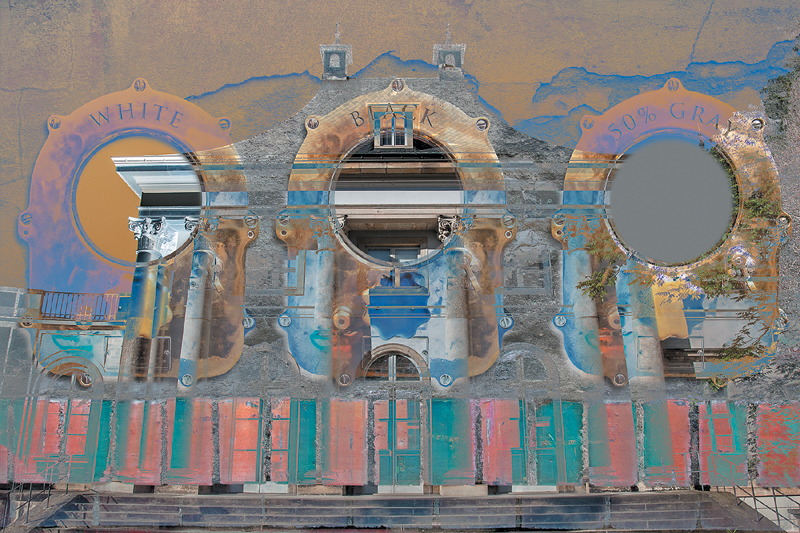
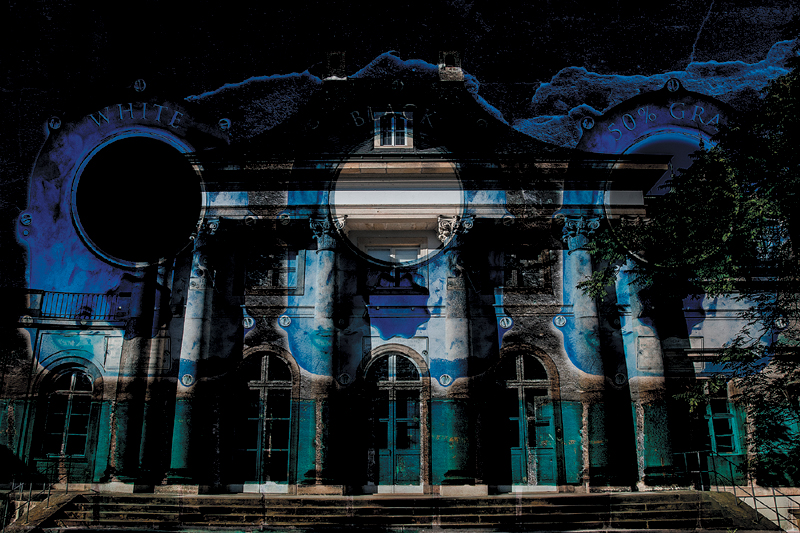
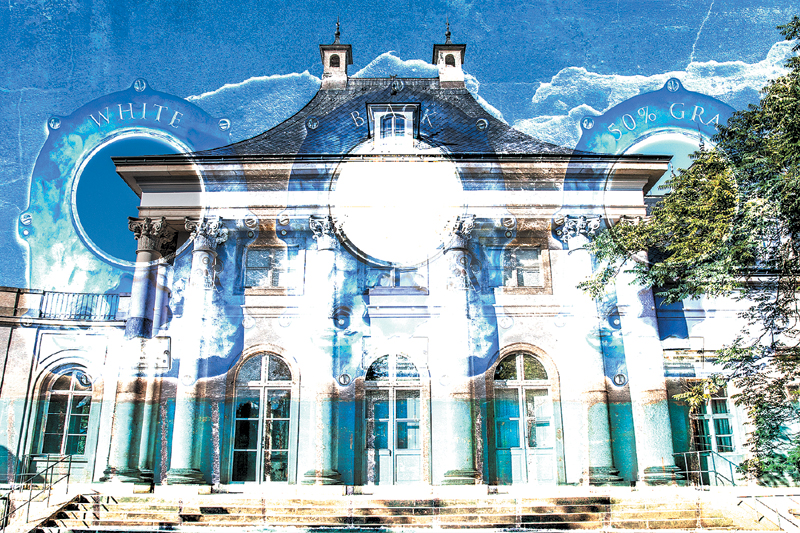
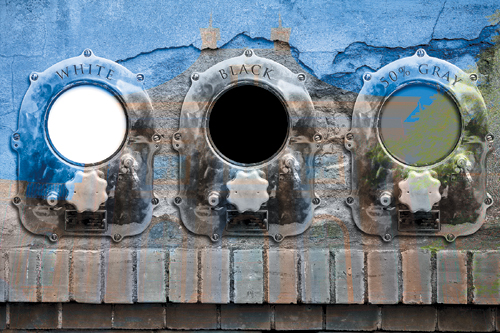
Every type of Photoshop layer, except for the Background layer, supports blending modes, which influence how a layer interacts with the layers below it. This happens on a channel-by-channel basis, so blending modes can in some instances create unexpected, and often interesting, results, as shown in the figures throughout this “Blending Modes” section. One important detail to be aware of is that certain blending modes do not recognize the colors of white, black, or 50% gray. These colors are referred to as neutral colors for some blending modes. When used with the right blending mode, those colors will not appear at all in the composite image. However, using these colors can be a very useful compositing technique, as you’ll see later in this chapter. The top layer featured in the series of blending mode examples in this section has circular areas of each of those colors so you can see how they react to some of the blending modes (FIGURE 8.28).
© SD
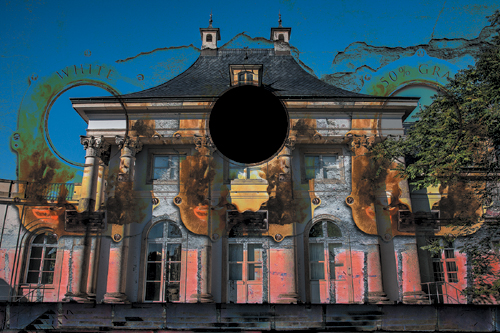
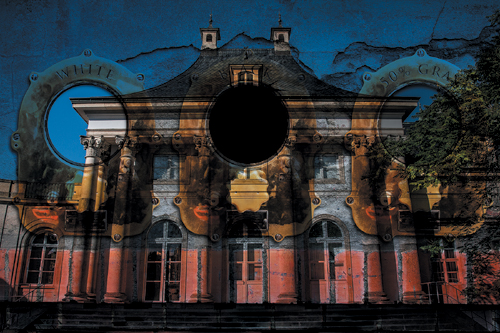
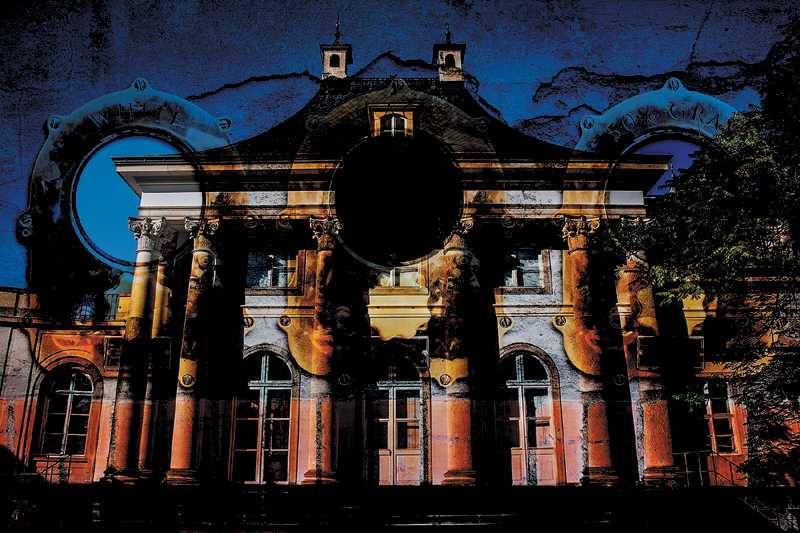
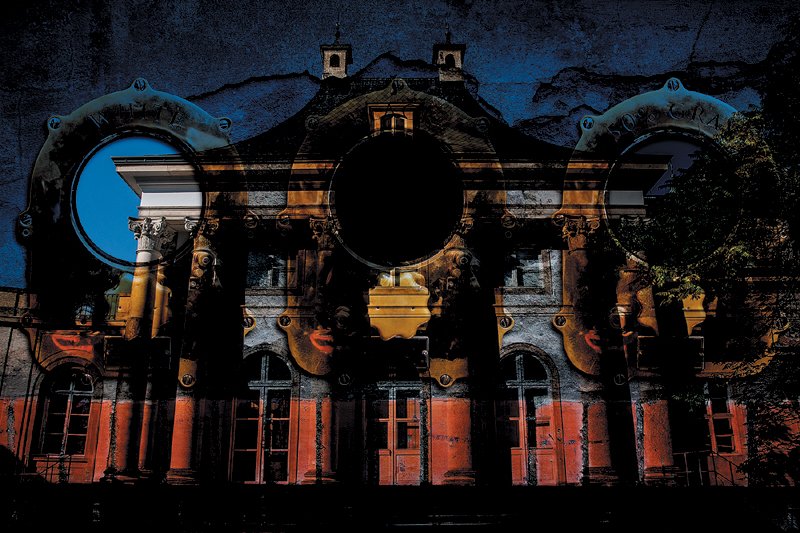
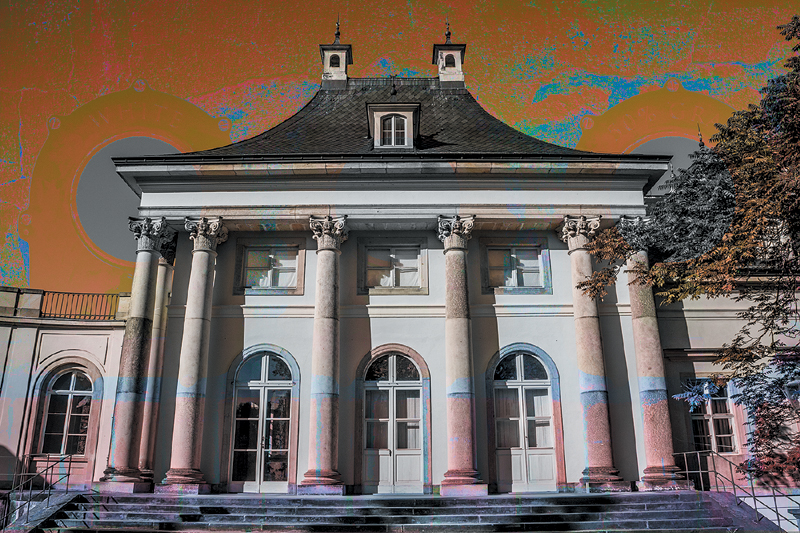
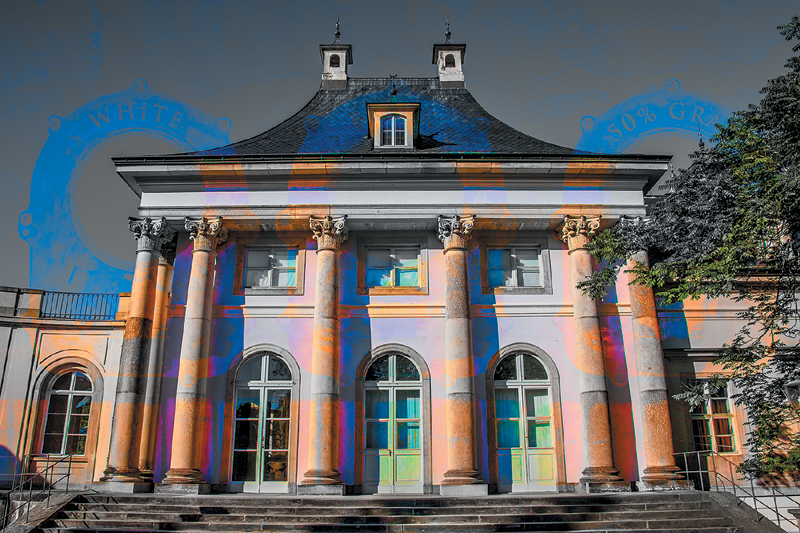
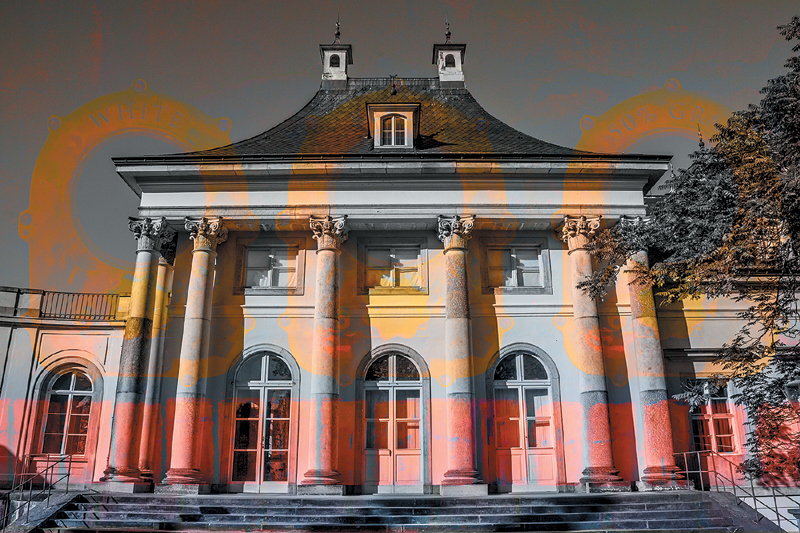
Figure 8.28. Use the palace and blend-o-matic images to experiment with the blending modes to produce surprising image relationships.
![]() ch8_blend-o-matic.jpg
ch8_blend-o-matic.jpg
ch8_palace.jpg
With just the Background layer active, the layer attributes at the top of the panel that control opacity, fill opacity, locking, or blending modes are not active. Click on any layer besides the Background layer to activate these attributes. Or, you can “promote” the Background layer to a regular layer by double-clicking on it in the Layers panel.
In the following sections we’ll review each of the different layer blending modes and describe how they affect the active layer.
Normal and Dissolve
The Normal and Dissolve blending modes will have no apparent effect in terms of blending with the layers below unless the layer opacity is lowered to less than 100%, or, in thee case of the Dissolve mode, when a layer mask creates the effect of partial transparency, as FIGURES 8.29 and 8.30 illustrate.
Figure 8.29. Normal is the default blending mode. The top layer will totally cover the layer below unless the opacity is reduced. In this example, the opacity of the top layer is reduced to 50%, allowing the underlying layer to be visible.
Figure 8.30. Dissolve creates a stippled texture effect when the active layer is set to less than 100% opacity or when a layer mask creates areas of partial transparency. Changing the opacity will alter the effect of the speckles. In this example, the top layer opacity is set to 50%.
Darkening blending modes
The Darken modes (FIGURES 8.31 through 8.35) create darkening effects when using colors darker than 50% gray. With these blending modes, white is the neutral color, meaning that any areas on the active layer that are totally white will be completely hidden. Note how the white circle on the left of the top layer does not show for any of the five blending modes in the Darken group.
Figure 8.31. Darken compares the active layer with the underlying layers and replaces the lighter values with darker values. These calculations are applied to each color channel separately, so the effect may be a bit unpredictable at times. To apply the Darken effect to all color channels at once, use the Darken Color blending mode.
Figure 8.32. Multiply darkens all pixel values by multiplying the pixel values of the two layers (or the active layer and all the layers beneath it). To use 35mm slides as an example, Multiply is a bit like taking two slides, sandwiching them together, and viewing them on a lightbox. You can see some of both images, but the result is always darker than either of the two source images.
Figure 8.33. Color Burn darkens the dark tones by increasing contrast. Blending with white results in no change.
Figure 8.34. Linear Burn, a combination of Multiply and Color Burn, darkens by decreasing brightness. Blending with white results in no change.
Figure 8.35. Darker Color is similar to Darken, but it affects all color channels simultaneously rather than separately, as is the case with Darken.
Lightening blending modes
The Lighten modes lighten when using tonal values brighter than 50% gray, as illustrated in FIGURES 8.36 through 8.40. With these blending modes, black is the neutral color, meaning that any areas on the active layer that are totally black will be completely hidden. Note how the black circle in the middle of the top layer does not show for any of the five blending modes in the Lighten group.
Figure 8.36. Lighten is the opposite of Darken; it compares the active layer with the underlying layers and replaces the darker values with lighter values As with the Darken blending mode, these calculations are applied to each color channel separately, so the effect may be a bit unpredictable at times. To apply the Lighten effect to all color channels at once, use the Lighter Color blending mode.
Figure 8.37. Screen is the opposite of Multiply; it lightens the entire image while reducing contrast. To return to the 35mm slide analogy, Screen is a bit like having two slide projectors showing two slides on one screen. You can see some of both images, but the result is always brighter than either of the two source images.
Figure 8.38. Color Dodge is the opposite of Color Burn; it lightens light tones and colors and increases contrast but has less effect on very dark image areas. The darker the area, the less the effect.
Figure 8.39. Linear Dodge (Add) lightens by increasing brightness. Unlike Screen, it will clip the highlights to pure white and has a stronger lightening effect than either Screen or Color Dodge.
Figure 8.40. Lighter Color is similar to Lighten, but it affects all color channels simultaneously rather than separately, as is the case with Lighten.
Contrast Enhancing blending modes
In the Contrast group, which begins with Overlay, all of the blending modes increase image contrast by changing the Highlight and Shadow values (FIGURES 8.41 through 8.47). With all but one of these blending modes (Hard Mix), 50% gray is the neutral color, meaning that any areas on the active layer that are 50% gray will be completely hidden. Note how the 50% gray circle on the right side of the top layer does not show for the first six blending modes in the Overlay group.
Figure 8.41. Overlay multiplies the dark values and screens the light values while maintaining the darkness and lightness of the base layer.
Figure 8.42. Soft Light is a combination of Darken and Lighten. It is similar to both Overlay and Hard Light but creates less dramatic effects than either of those blending modes.
Figure 8.43. Hard Light is a mixture of Multiply and Screen, and is useful for boosting image contrast. In some cases it is a more exaggerated version of Overlay. On some layers, however, the effect of Overlay and Hard Light may be identical or very similar.
Figure 8.44. Vivid Light combines Color Dodge and Color Burn to lighten and darken image values. Lighter areas are decreased in contrast, and darker areas are increased.
Figure 8.45. Linear Light, a combination of Linear Dodge and Linear Burn, decreases or increases an image’s brightness. Lighter areas are increased in brightness, and darker areas are decreased.
Figure 8.46. Pin Light is a combination of Lighten and Darken. It can be fairly unpredictable and usually results in very exaggerated effects.
Figure 8.47. Hard Mix is an extreme combination of Lighten and Darken that creates a posterized, cartoonish result containing only eight colors. Reducing the fill opacity reduces the high-contrast effect and gradually increases the number of colors. For this blending mode, 50% gray is not a neutral color.
Comparative blending modes
The Comparative modes, beginning with Difference (FIGURES 8.48 through 8.51), mathematically compare and evaluate layers with one another. With all but one of these blending modes (Divide), black is the neutral color, meaning that any areas on the active layer that are totally black will not be visible. Note how the black circle in the middle of the top layer does not show for the first three modes in the Comparative group.
Figure 8.48. Difference compares layers; identical values on each layer are rendered as black, and values that are different are inverted, creating a negative image effect.
Figure 8.49. Exclusion is a less-contrasted version of Difference; the values that are different in the active and underlying layers are rendered as gray.
Figure 8.50. The Subtract blending mode subtracts the numeric value of a pixel on the active layer from the value of the corresponding pixel on the underlying image. If the resulting number from this calculation is a negative number, the pixel is displayed as black. As with Difference and Exclusion, the color black on the active layer is a neutral color (i.e., it is not visible).
Figure 8.51. With Divide, middle gray tones of 50% gray will slightly darken the image, with this effect becoming progressively less as the tones become lighter. White is a neutral color (does not show in the image). Darker colors will create a harsh, blown-out lightening effect, with black values becoming totally white.
Image Component blending modes
The Image Component blending modes (FIGURES 8.52 through 8.55) change the individual attributes of hue, saturation, color, and luminosity.
Figure 8.52. Hue combines the hue of the active layer with the luminance and saturation of the underlying layer.
Figure 8.53. Saturation combines the saturation of the active layer with the luminance and hue of the underlying layer.
Figure 8.54. Color applies the hue and saturation of the active layer and maintains the luminance values of the underlying layer. This is a very useful blending mode for creating hand-tinting effects.
Figure 8.55. Luminosity is the opposite of Color and maintains the luminosity information of the active layer in relation to the color underneath.
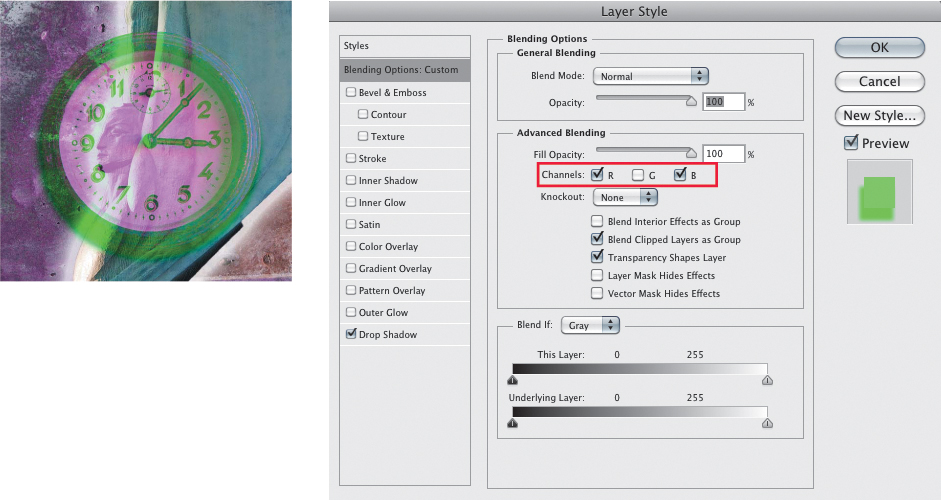
The best thing about working with blending modes is that the result is often quite surprising and completely reversible, which lets you experiment to create the desired results. In addition to the Layers panel, blending modes can be accessed in several other places in Photoshop, including as options for the painting tools and layer styles, and in the Calculations and Apply Image commands. Although the blending modes in the Layers panel represent the easiest way to create interesting blends between layers, Advanced Blending Options are also available; we’ll explore those a bit later in this chapter.
Blending mode shortcuts
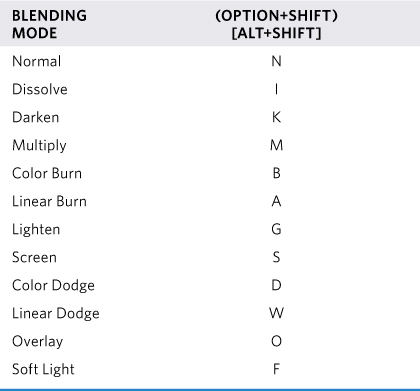
To cycle forward through the blending modes, press V to activate the Move tool, click on the appropriate layer, and then press Shift++ (plus key) to cycle down the blending modes or Shift+- (minus key) to cycle up the blending modes. With the Move tool active you can also use the single-letter keyboard shortcuts shown in TABLE 8.1 to change the layer blending modes. If a painting tool is active, the shortcut will change the blending mode for the active tool.
Table 8.1. The Blending Mode Shortcut Guide
Opacity and Fill Opacity
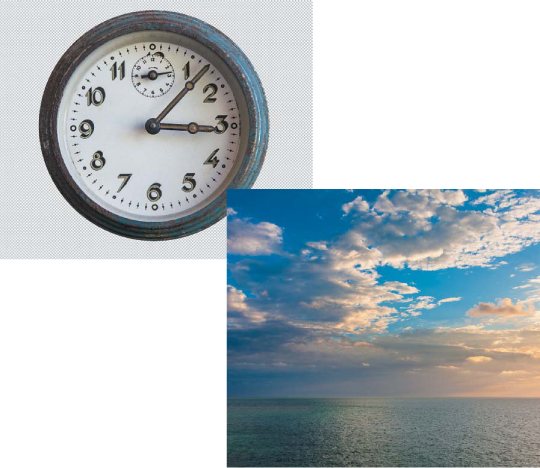
When one layer is placed on top of or adjacent to another layer, the meaning of the separate image elements changes because a new relationship between the two has been created. One of the easiest and often effective methods for creating, seeing, and responding to this changed relationship is to adjust the layer opacity, which determines the layer transparency. Lowering the opacity allows you to “see through” the active layer to the layers underneath it (FIGURE 8.56).
© SD (both images)
Figure 8.56. The original source images. The clock layer is surrounded by transparency.
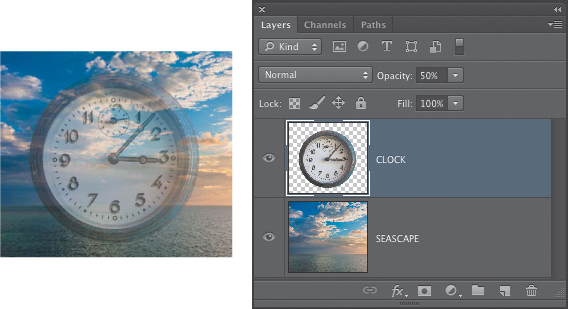
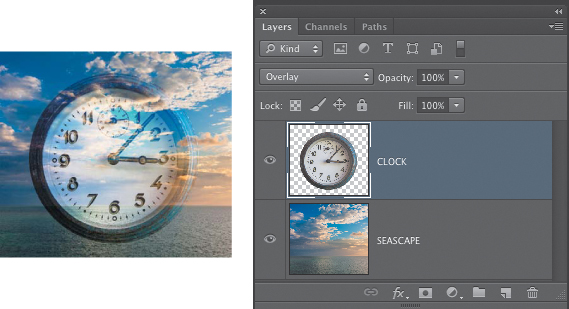
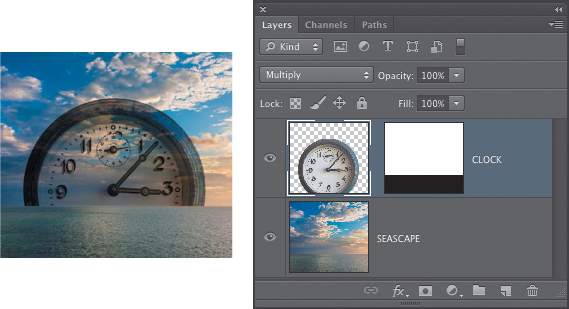
A seemingly simple control, layer opacity is often the first parameter we adjust when we want to view the image relationships that are forming between layers (FIGURE 8.57). The visual relationships that can be created using the Opacity slider can also be refined with more control and additional effects with blending modes, as explained in the previous section (FIGURE 8.58) and with layer masking (FIGURE 8.59). We’ll explore layer masks in Chapter 9.
Figure 8.57. The interaction of the layers with the clock layer set to 50% opacity.
Figure 8.58. Changing the blending mode changes the aesthetic interaction between the elements: The clock layer is set to Overlay.
Figure 8.59. The clock layer is set to Multiply with a simple layer mask hiding the lower part of the clock, making it appear to be slipping below the horizon.
To adjust layer opacity, make sure that the correct layer and the Move tool are active. Using the numeric keypad or keyboard, type the first number of the desired opacity: 0 equals 100%, 1 equals 10%, and so on. Typing two numbers in quick succession adjusts the layer opacity to that value. For example, typing 45 reduces layer opacity to 45%.
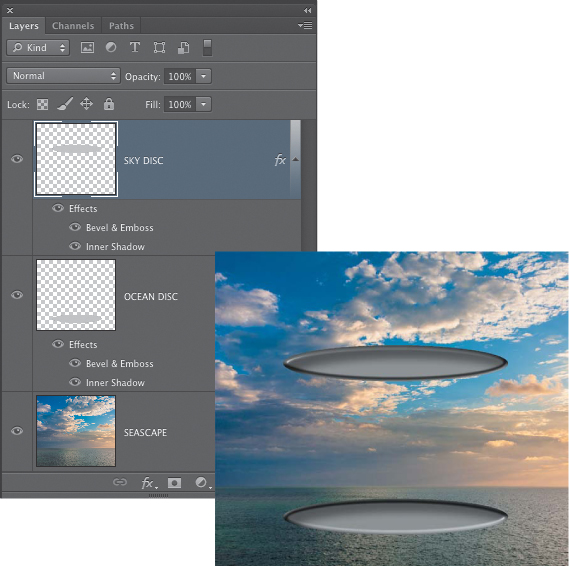
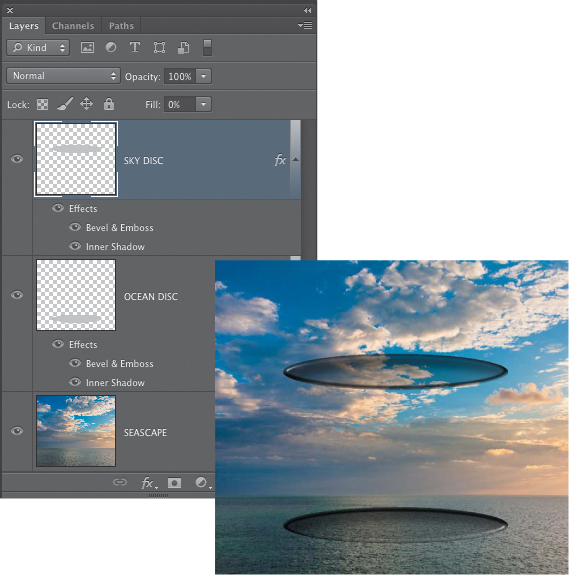
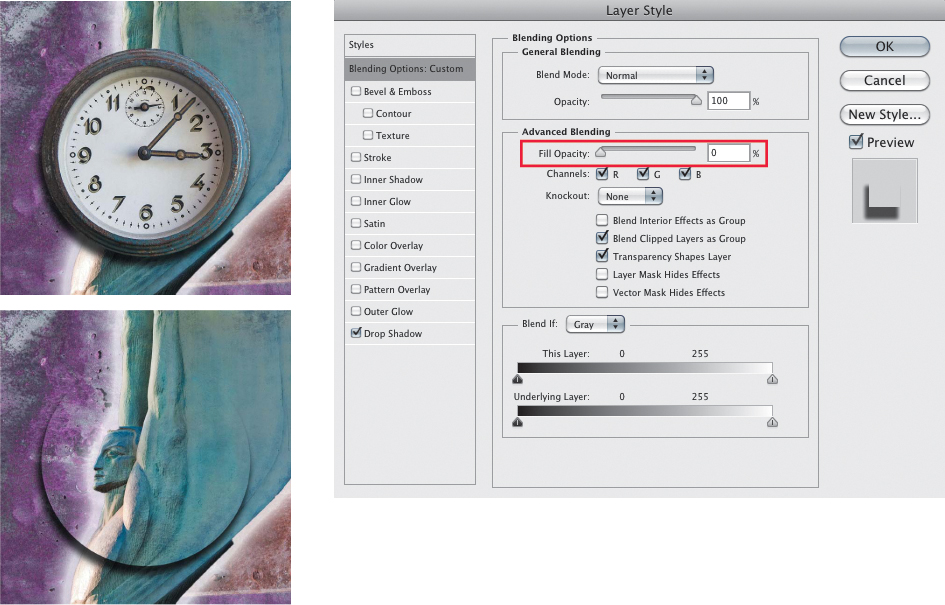
Fill opacity is used primarily in combination with layer styles, such as drop shadows, bevel and emboss effects, and so on (FIGURE 8.60). Reducing fill opacity reduces the opacity of the actual layer (the “fill”) while still maintaining the layer style at full strength (FIGURE 8.61). This can be a helpful feature to use when you need the look of a specific layer style but do not want to show the actual content of the layer that creates the shape of the effect.
Figure 8.60. A bevel and emboss and inner shadow layer style has been added to two oval shapes.
Figure 8.61. Reducing the fill opacity makes the oval shapes transparent while maintaining the layer effect.
To adjust the fill opacity, press the Shift key and enter the first number of the desired opacity: 0 equals 100%, 1 equals 10%, and so on. Pressing the Shift key and entering two numbers in quick succession adjusts the fill opacity to that value. For example, entering 65 reduces fill opacity to 65%.
Locking and Protecting Layers
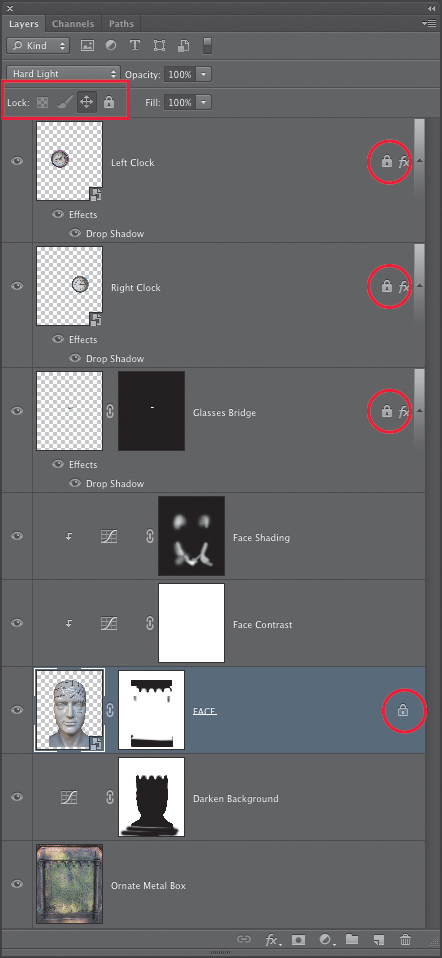
Just to the left of the Fill Opacity controls are four small buttons that lock (or protect) Transparency, Pixels, Position, and All. Click one of the buttons to activate it, and click it again to turn off the protection. As soon as any locked button is clicked, a small lock icon is added to the active layer in the Layers panel (FIGURE 8.62).
Figure 8.62. The Lock buttons are a useful way to protect the position of layers within the image, as well as different aspects of the layer content.
On the Layers panel, from left to right, the layer attribute icons do the following:
• Lock Transparent Pixels is available for layers that contain transparency, such as partial image layers. Clicking it protects the clear areas of the layer. Protecting transparency is very useful when using filters such as Gaussian Blur to limit the effect to the actual pixels without changing the edge quality of the layer information.
• Lock Image Pixels will not let you use any painting or retouching tools on the layer, but it will allow you to move and transform the layer contents.
• Lock Position is a very useful control because it locks a layer into place and prevents you from inadvertently moving a layer. If the precise position of a layer is essential to the look of a composite, you’ll use this feature a lot.
• Lock All applies all of the lock functions to the layer.
Locking layer attributes is a quick, easy, and completely reversible method for protecting layers from mistaken moves or edits.
Changing the Order of Layers
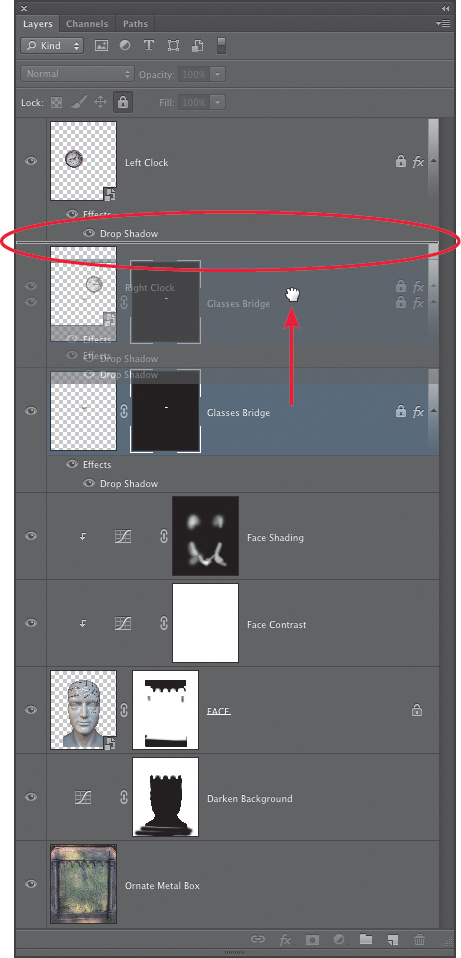
To change the position of a layer within the layer stack shown in the panel, click and drag the layer to where you want the new position to be. As you drag up or down, a thin highlight line appears between the layers to indicate the new position in the layer stack (FIGURE 8.63). Release the mouse button to place the layer into the new position. If you drag the layer over an existing layer group, the highlight line will appear around the entire group, indicating that the layer you are moving will be placed inside that group. When dragging a layer into a layer group, it will always be placed at the bottom of the layers within the group.
Figure 8.63. Drag a layer in the Layers panel to reposition it within the layer stack. As you drag, a small highlight line appears between layers to show you where the layer will be placed if you release the mouse button at that moment.
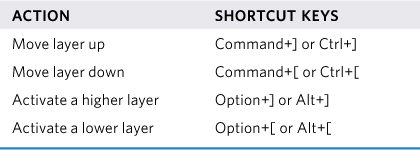
You can also reposition layers in the layer stack and change which layer is currently active using the keyboard commands listed in TABLE 8.2.
Table 8.2. Layer Positioning Command Keys
Selecting Layers
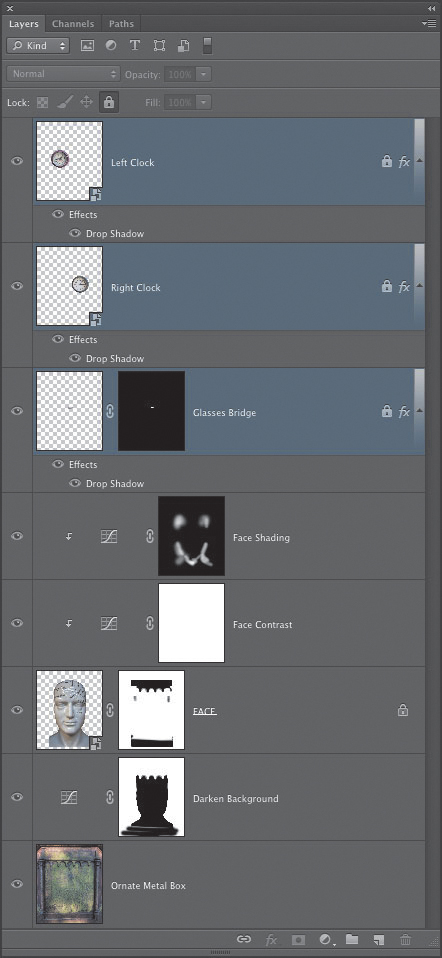
To make a layer active, simply click on it in the Layers panel to select it. A highlight color will indicate that the layer is active (note that the term “select” in this context refers to making layers active, not to loading a selection from the layer). Any edits you apply will only affect the active layer. To select more than one layer at a time, start with one layer active and then Command-click (Ctrl-click) any other layers you want to select. To select several contiguous layers, click the first layer and then Shift-click the last layer (FIGURE 8.64).
Figure 8.64. Layers that are active (selected) will be indicated with a highlight color. In this example, the top three layers are all active.
Layers that are selected/active in this way are temporarily linked together. If you use the Move tool and drag any of the active layers on the image canvas, all of the selected layers will move together. Transformation commands can also be applied to several layers at once (more on that shortly). Once you click on a layer in the panel again, either a currently active layer or another, nonactive layer, the active state will switch to the layer you clicked on.
It is possible that no layers can be selected. To deselect/deactivate all layers, click in the empty area of the panel between the edge of the bottom layer and the control buttons on the lower edge of the panel.
Linking Layers
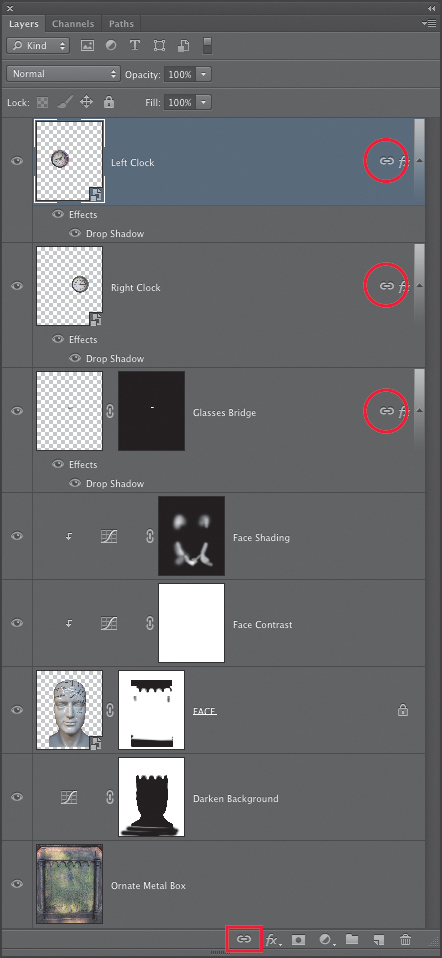
To create a more lasting relationship between layers, select the layers you want as mentioned in the preceding section, and then click the Link button at the bottom of the Layers panel. A chain link icon will appear on any layers that are linked together (FIGURE 8.65). Whenever a layer is active that is linked to other layers, the link icon will identify which layers it is linked to.
Figure 8.65. Link layers that you need to move or transform as a single unit. In this example the top three layers are linked together because they form one element in the composite.
To unlink a layer, simply make it active and click the link button at the bottom of the panel. The layer that was active will be unlinked, but other layers that it was linked to will still be linked together. To remove the linking between all layers that are linked together, select all of the layers you want to unlink, and then click the link button.
Another way to arrange layers so that they can be treated as a single element is to place them into a layer group. Layers that are in a group do not need to be linked together, but when the group is active in the Layers panel, they can be moved and transformed at the same time.
Layers Panel Icons
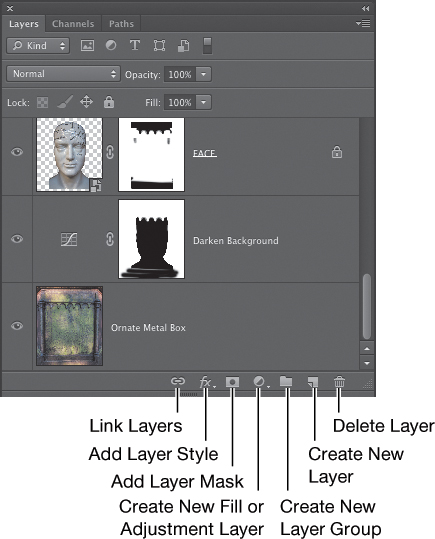
Along the lower edge of the Layers panel are seven icons (FIGURE 8.66) that offer shortcuts to many of the commands contained in the Layer menu and Layers panel submenu:
• Link Layers. As mentioned previously, clicking this button when more than one layer is selected or active will link those layers together. Clicking the button again will unlink the layers. You can also link selected layers via a command in the panel menu.
Figure 8.66. The icons at the bottom of the Layers panel provide useful shortcuts to common tasks.
• Add Layer Style. Click and select the desired layer style, which opens the Layer Style dialog. In Photoshop CS6 the order of the layer styles in the menu has been changed from what it was in earlier versions of the program. This reordering reflects the actual stacking order that would be used when the effects are applied (e.g., drop shadow appears last because a drop shadow appears “under” a layer, and the lowest position in the list reflects its actual position in relation to the other effects). Layer styles remain editable as long as you don’t choose Layer > Layer Styles > Create Layers. Keeping layer styles editable lets you experiment, compare, and combine layer styles for creative effects.
• Add Layer Mask. Click to add a white layer mask that reveals the whole layer; Option-click (Alt-click) to add a black layer mask that hides the entire layer. When a layer mask is already present, click the mask button again to add a vector mask. When a selection is active in the image, clicking the layer mask button will create a mask based on the active selection. Layer masks are addressed in depth in Chapter 9.
• Create New Fill or Adjustment Layer. For a quick and convenient way to add Fill and adjustment layers, Option-click (Alt-click) the Fill or Adjustment Layer icon to open the dialog shown in FIGURE 8.67, which allows you to name, group with the previous layer, change the color label, or select a blending mode before the layer is added. Selecting the Use Previous Layer to Create Clipping Mask check box limits the visible effect of the Fill or adjustment layer to only the pixel information on the underlying layer and will not affect any layers below the clipping mask. A clipping mask is not based on an actual layer mask, but rather uses the shape of a layer to define where the effect is visible. This is discussed in more detail later in this chapter.
Figure 8.67. Determining the layer behavior while adding it is very helpful. To bring up this dialog when using the icons at the bottom of the Layers panel, you need to hold down the Option (Alt) key before you click the Add New Fill or Adjustment Layer icon.
• Create New Layer Group. As discussed earlier in this chapter, clicking this icon adds an empty folder into which you can drag layers to create a layer group. You can also drag selected layers to this icon to create a layer group.
• Create New Layer. Click this icon to create an empty layer above the currently active layer. Option-clicking (Alt-clicking) this icon opens the same dialog shown in Figure 8.67. Command-clicking (Ctrl-clicking) it adds a new layer underneath the active layer.
• Delete Layer. To delete a layer, click the trash can icon and then click the Yes button. To delete a layer without the warning, Option-click (Alt-click) on the trash can. Dragging a layer or a layer group to the trash also deletes the content.
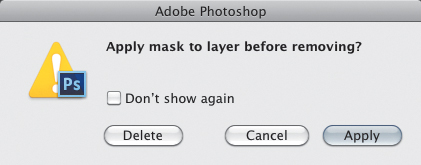
Dragging the thumbnail of a layer mask to the trash can brings up the dialog shown in FIGURE 8.68. Clicking the Delete button throws away the layer mask without applying it to the layer. This is a very useful option when a layer mask is unnecessary or when you need to start the masking process over again. Clicking Apply applies the effect of the layer mask to the pixels, which in most cases will permanently delete the masked or hidden pixels from the layer. We advise you to be careful when choosing the Apply Mask option, because this is a destructive edit that cannot be undone once the file has been saved and closed.
Figure 8.68. When deleting a layer mask, proceed with caution or you may inadvertently create a destructive change to the layer. Often it is less destructive to simply Shift-click on the layer mask to turn it off rather than throw it away.
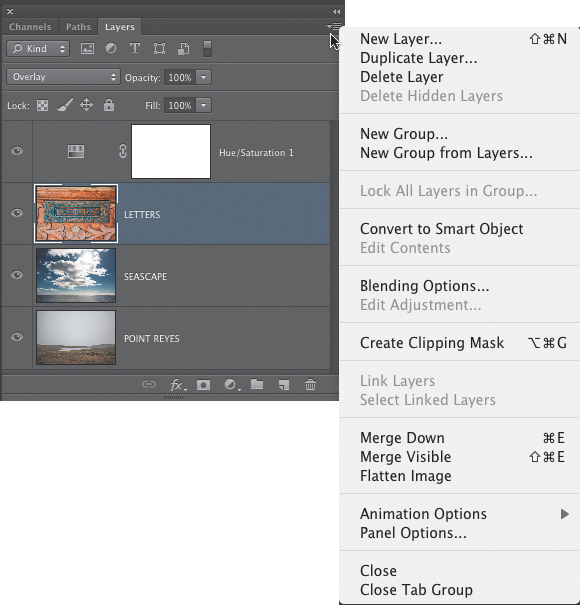
The Layers Panel Menu
To open the Layers panel menu, click and hold on the small menu icon in the upper-right corner of the panel. Most of these commands and options are also accessible through the main Layer menu at the top of the screen or via the buttons at the bottom of the Layers panel. Many of these are self-explanatory, but a few of them can permanently affect whether or not layers can be edited so they bear a closer look:
• Merge Down combines the active layer with the layer below it. You cannot merge down image layers containing pixel content into Fill, adjustment, or Type layers, or onto image layers where the pixel content is locked. Although Fill, adjustment, or Type layers can be merged with underlying image layers, this should be done judiciously because merging down these layers eliminates the ability to edit and adjust them.
• Merge Visible should also be used with great care, because it combines all of the visible layers into one pixel-based layer. Pressing Option (Alt) while selecting Merge Visible merges the visible layers to a new layer that is placed above the active layer. This can be a very useful technique for creating work-in-progress layers or to create a single layer from multiple layers where the cumulative effect is also influenced by other variables, such as opacity, blending modes, or layer masks.
• Flatten is a command we use as rarely as possible because it flattens or merges all visible layers into the Background layer, eliminating any possibility of further adjustments to the different layer components. Of course, you’ll often need a flattened file to create JPEGs for Web pages or to submit it to an online print vendor, or to save flattened TIFFs for page layout applications. But rather than choosing Flatten when working on your layered master file, deselect the Layers check box in the Save As dialog (when saving a JPEG this will happen automatically because the JPEG format does not support layers).
The most destructive functions in Photoshop are Erase, Delete, Merge, Flatten, and Rasterize. All of them delete pixels, throw away layers, or negate image or layer editability. If you must use any of these functions, make sure that you really have no further need for the pixels or layers you’re deleting. Once the file is saved and closed, those changes are permanent.
Moving Layers
To move a layer or layers on the main image canvas, you use the Move tool. When most other tools are active, you can Command-click (Ctrl-click) to temporarily change it to the Move tool (the only tools that do not work with this shortcut are the Vector and Type tools). With the Move tool active, tap the arrows on your keyboard to nudge the active layer one pixel at a time. Holding the Shift key while pressing the arrow key nudges the layer in 10-pixel increments. Shift-dragging with the Move tool constrains the movement horizontally, vertically, or in increments of 45 degrees.
The Options bar for the Move tool contains the following:
• Auto Select allows you to click on a layer or layer group to activate it even if it’s not currently active in the Layers panel. The one potential drawback to this feature is that low-opacity layers can easily fool the Move tool into selecting the wrong layer. For that reason, as well as the fact that it can be somewhat unpredictable, we rarely use this option.
• Show Transform Controls displays a bounding box around the content of the active layer (except for the Background layer). You can click directly on the square handles of this bounding box to transform the size and shape of the layer without having to choose Edit > Transform or use the Transform shortcut Command+T (Ctrl+T). This option can also be very useful when you need to find the exact center of a layer.
• Align and Distribute Layers, located to the right of the Show Transform Controls check box, are only active when multiple layers are active in the Layers panel or are linked together. Graphic, interface, and Web designers often use these buttons to precisely line up text or shape layers.
• 3D Mode controls are only active when you are working with a 3D layer. The 3D functionality in Photoshop CS6 is only available in the Extended version of the program and is beyond the scope of this book, so we won’t be covering those features.
Moving layers between document tabs
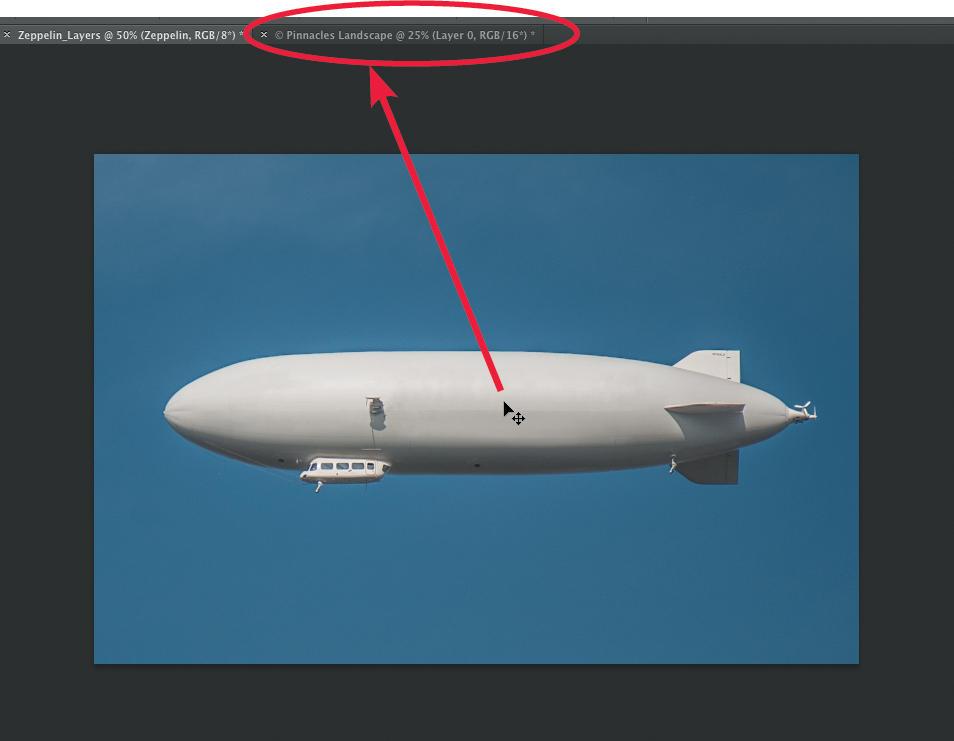
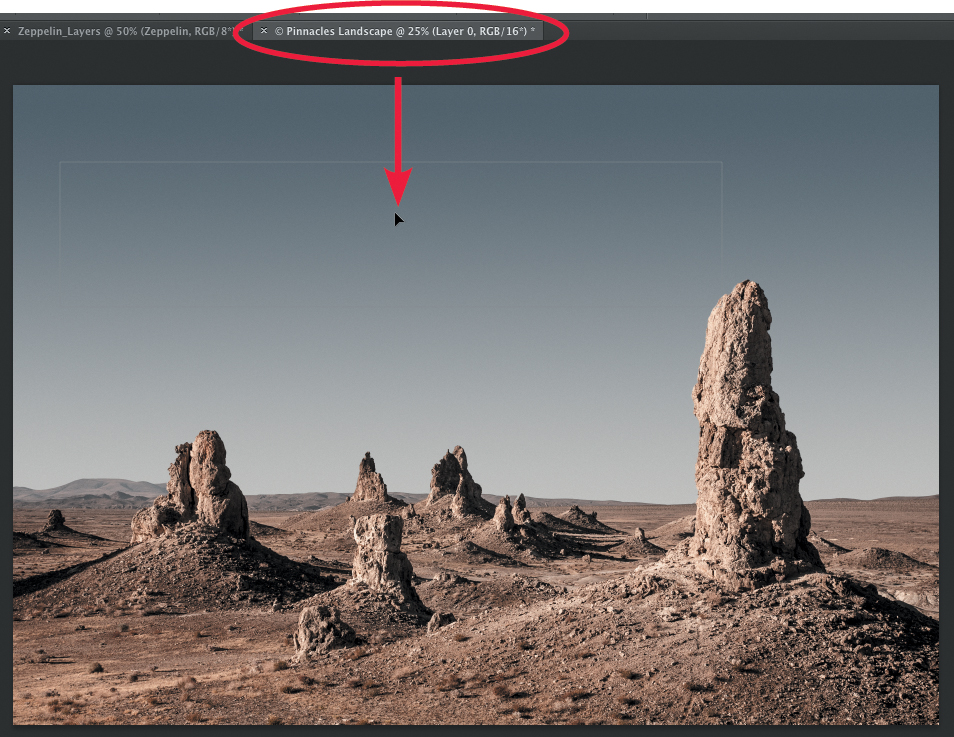
In the default configuration, Photoshop will display multiple open documents as a series of tabs near the top of the work area. Each tab displays the name of the open file, as well as some other information. You can move layers between open files by dragging a layer to the name tab where you want to place it.
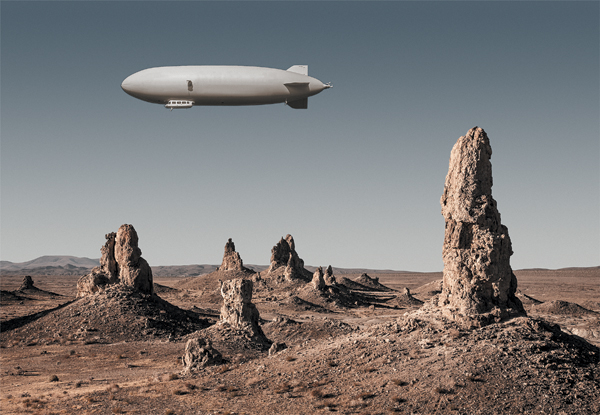
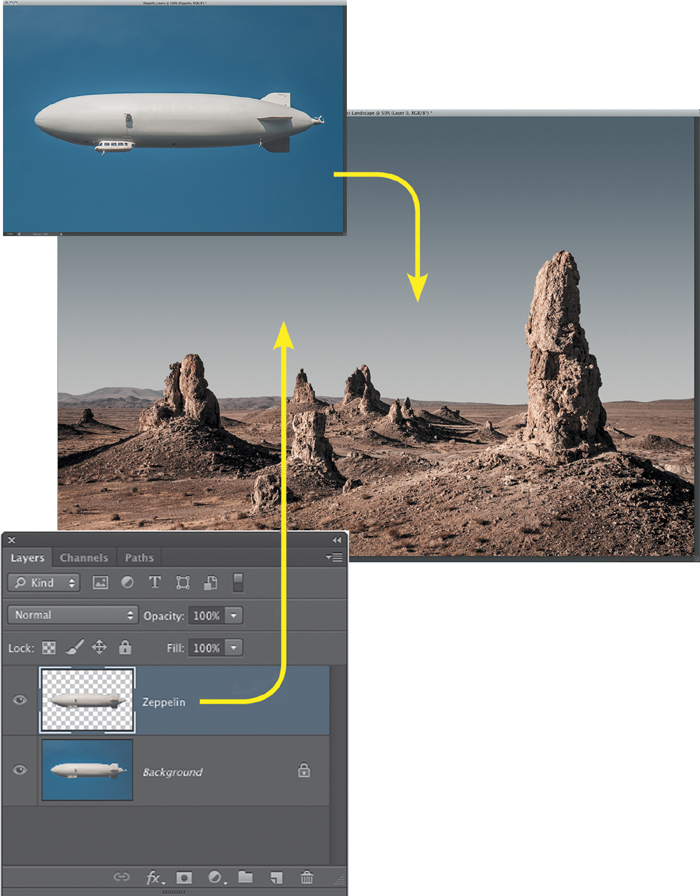
With the Move tool active, drag a layer from the image up to the name tab of the file where you want to move it, hover over the tab until the destination image appears, and then drag down over the image and release the mouse (FIGURE 8.69). This entire operation is one mouse drag. Once you click in the first image and begin dragging the layer, do not release the mouse button until the target image appears and you have moved the cursor down over that image. If you hold down the Shift key as you release the mouse button, the added layer will be centered in the destination image.
© SD (all images)
Figure 8.69. Dragging layers from one image to another via the document name tabs is a very convenient way to move layers between open files.
Moving layers between document windows
If you are viewing your images as multiple open document windows (Window > Arrange > Float All in Windows), you can drag a layer from one document window to another or from the Layers panel to another open document window (FIGURE 8.70). As you drag the layer to the destination image, you’ll notice a faint outline around the destination image; release the mouse and the layer will fall into place. If you hold down the Shift key as you do this, the added layer will be centered in the destination image. If you try to do this and Photoshop tells you that the layer is locked, it’s because your cursor never left the boundary of the first image. Try again, and make sure that the cursor dragging the layer leaves the first document window and is over the target document before releasing the mouse.
Figure 8.70. When viewing your files in separate document windows, as shown here, you can move a layer to another image either by dragging the layer from the document window or directly from the Layers panel.
Moving layers via Copy and Paste
Of course, if either of the preceding methods are not your cup of tea, you can also move layers between open documents by using the old standby method of copy and paste. Make sure that the layer you want to copy is active in the Layers panel, choose Command+A (Ctrl+A) to select all, and then choose Command+C (Ctrl+C) to copy the selected layer. Then make the destination file active, and choose Command+V (Ctrl+V) to paste the copied data as a new layer.
Transforming Layers
There are many ways to transform the shape of a layer. Any transformations you apply to a regular layer will involve pixel interpolation, and if done repeatedly, can result in noticeable degradation of the image detail on the transformed element. To apply transformations nondestructively and preserve your options for changing how the object is transformed, convert the layer to a Smart Object before applying any of the Transform commands.
New to Photoshop CS6 is the ability to specify the interpolation method in the Options bar when you are applying a transformation (in earlier versions the Transform command used whatever interpolation method was set in the General Preferences). Use Bicubic Smoother for scaling up and Bicubic Sharper for scaling down, or let Photoshop figure it out for you by choosing Bicubic Automatic. If you are using Photoshop CS5 or earlier, before performing large up or down scaling, consider opening General Preferences (Command+K [Ctrl+K]) and changing the interpolation setting to the method most appropriate for how you will transform the layer.
The Transform Menu
Choose Edit > Transform to open the primary Transform menu, which provides access to the main transform commands of Scale, Rotate, Skew, Distort, Perspective, and Warp, along with choices for rotating an object by 90 degrees or 180 degrees, and the always useful Flip Horizontal and Flip Vertical (useful for creating image “mirrors” and reflections).
To transform a layer, choose Edit > Transform and choose the option you need to shape the layer information into size and position. After you have chosen a Transform command, you can Control-click (right-click) inside the transform bounding box to display the context menu and access other Transform commands as needed.
Free Transform
Better yet, choose Edit > Free Transform (Command+T [Ctrl+T]) to use keyboard shortcuts to scale, rotate, skew, distort, or apply perspective transformations. Because the Free Transform function gives us access to all the Transform controls with less mouse movements, we typically use that method for applying the Transform commands to a layer.
![]() ch8_round_clock.psd
ch8_round_clock.psd
To test drive some of the Transform commands, open the ch8_round_clock.psd image. Make sure that the top layer of the clock surrounded by transparency is active and choose Edit > Free Transform. After you’ve activated Free Transform, you can use the following keyboard shortcuts directly on the bounding box handles to access the separate Transform commands. Press the Esc key to undo a transformational experiment before moving on to the next one:
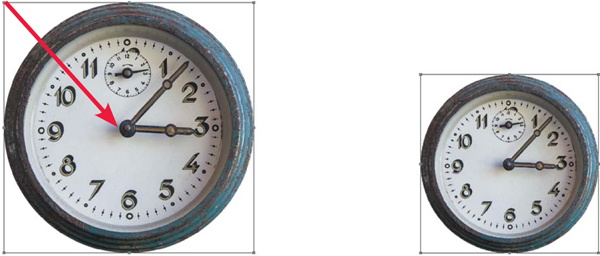
• Shift-drag on a corner handle to scale the object while constraining the proportions to the original aspect ratio. Shift+Option-drag (Shift+Alt-drag) to scale proportionately from the center point (FIGURE 8.71).
Figure 8.71. Free Transform: Shift-drag on a corner handle to scale while constraining the proportions. Shift+Option-drag (Shift+Alt-drag) on a corner handle to scale proportionately from the center.
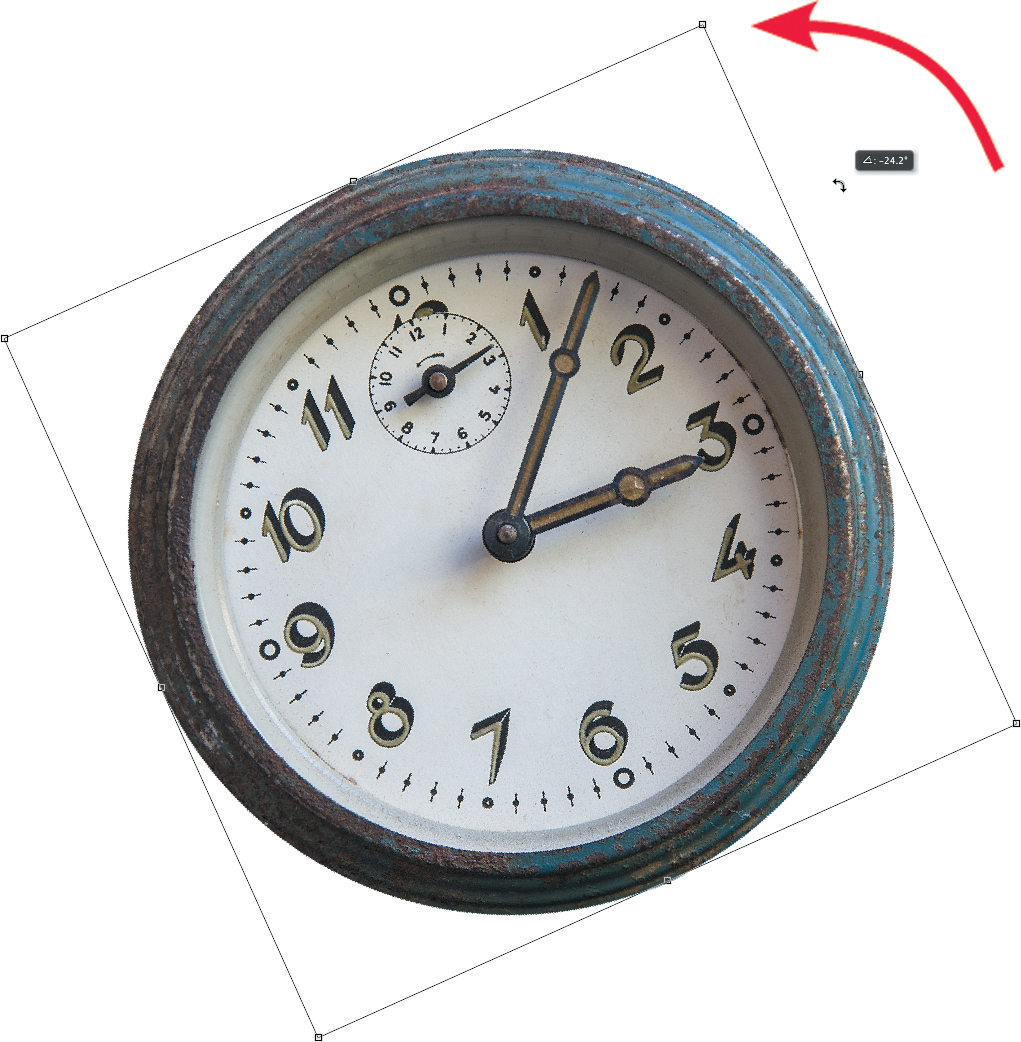
• To rotate the layer, position the cursor outside the bounding box until it becomes a curved double-headed arrow, and drag in the direction you want to rotate the object (FIGURE 8.72). Hold down the Shift key as you rotate to constrain the rotation to 15 degree increments. If you click on the center point, you can drag it to a new location, either inside or outside the bounding box. This will change the rotational pivot point. Drag the pivot point back to the original center, and when it gets close, it will snap back to its original location.
Figure 8.72. Drag outside the Free Transform bounding box to rotate the object.
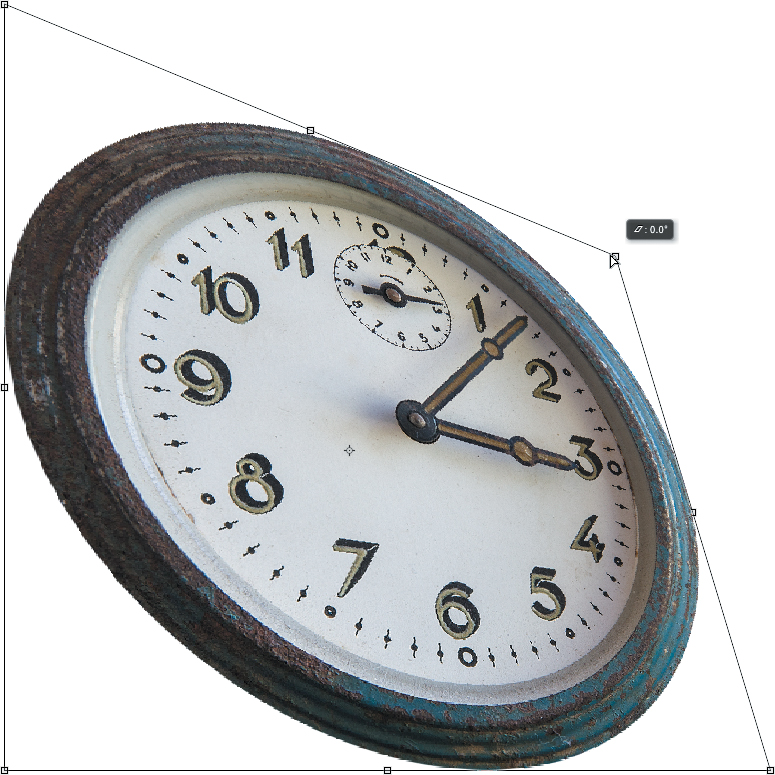
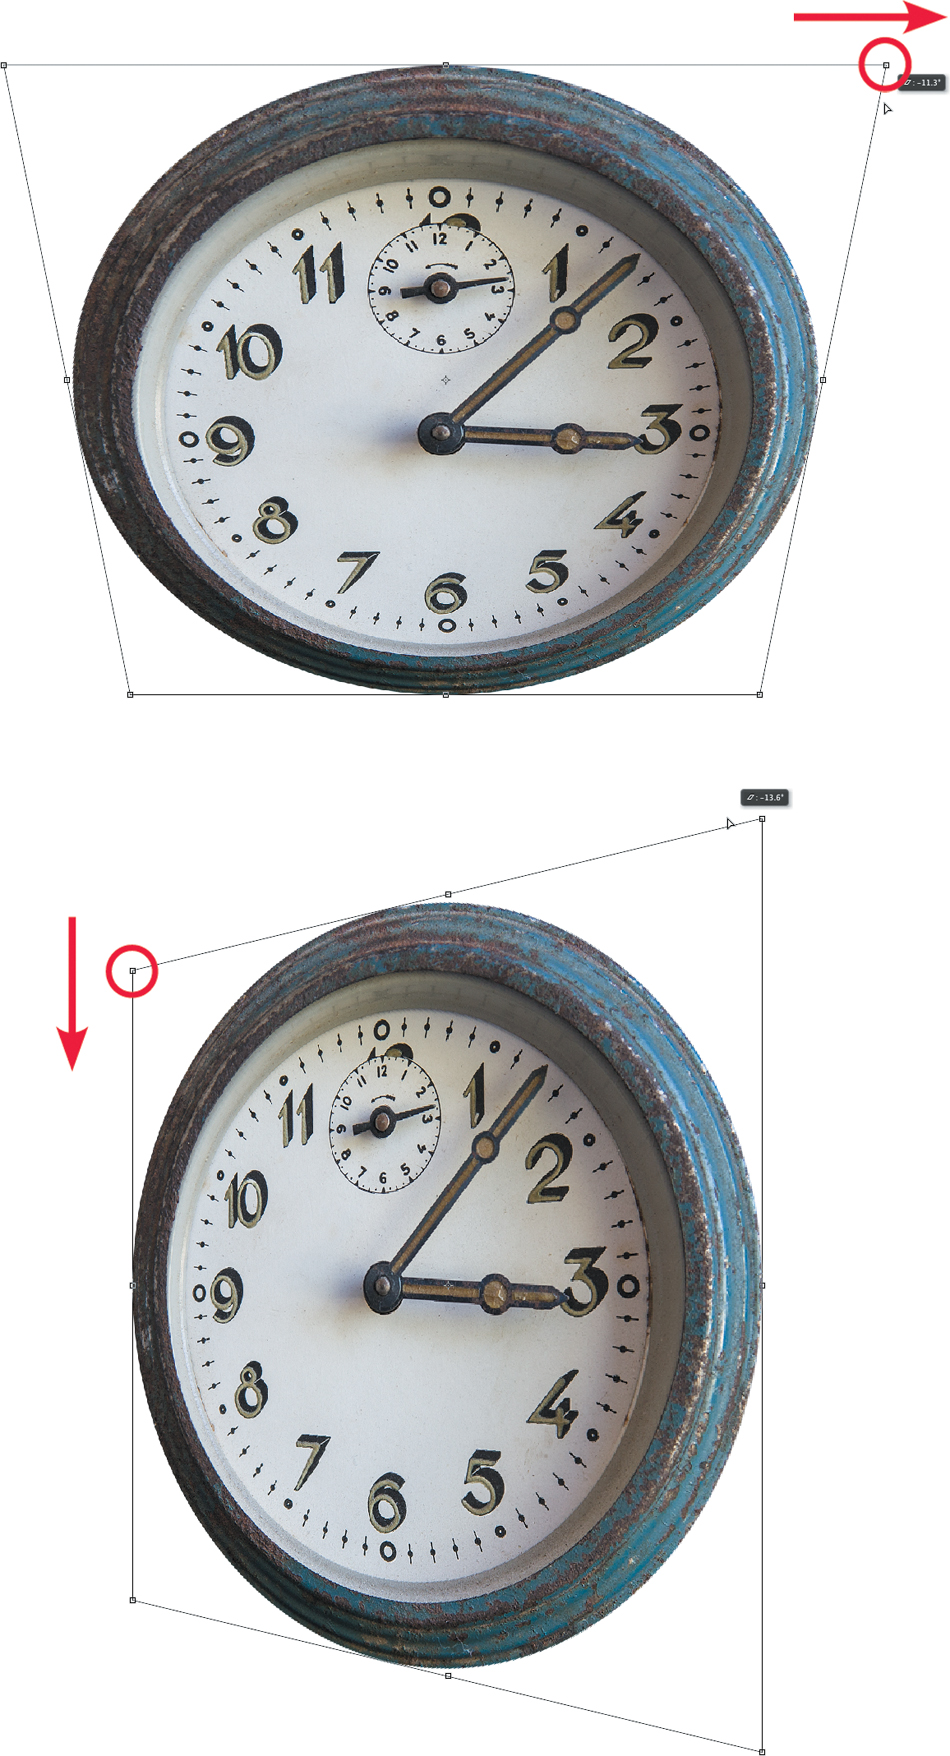
• Hold down Command (Ctrl) while dragging on any of the bounding box handles to freely distort the object (FIGURE 8.73).
Figure 8.73. Command-drag (Ctrl-drag) on a handle to freely distort the object.
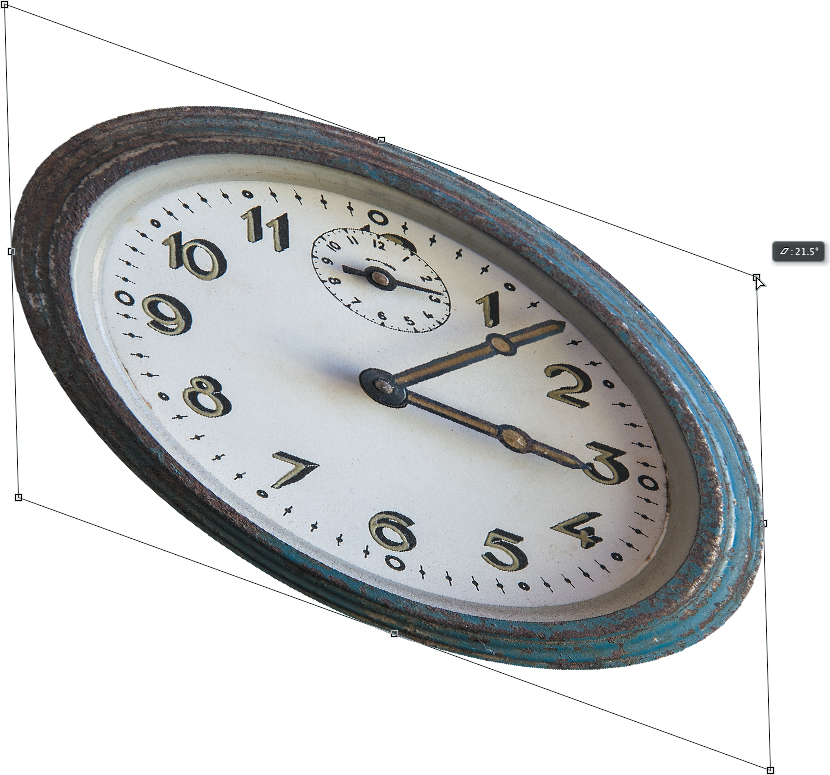
• To constrain the distortion so it is applied symmetrically around the center point of the bounding box, hold down Command+Option (Ctrl+Alt) while dragging on any of the bounding box handles (FIGURE 8.74).
Figure 8.74. Command+Option-drag (Ctrl+Alt-drag) on a handle to symmetrically distort the object.
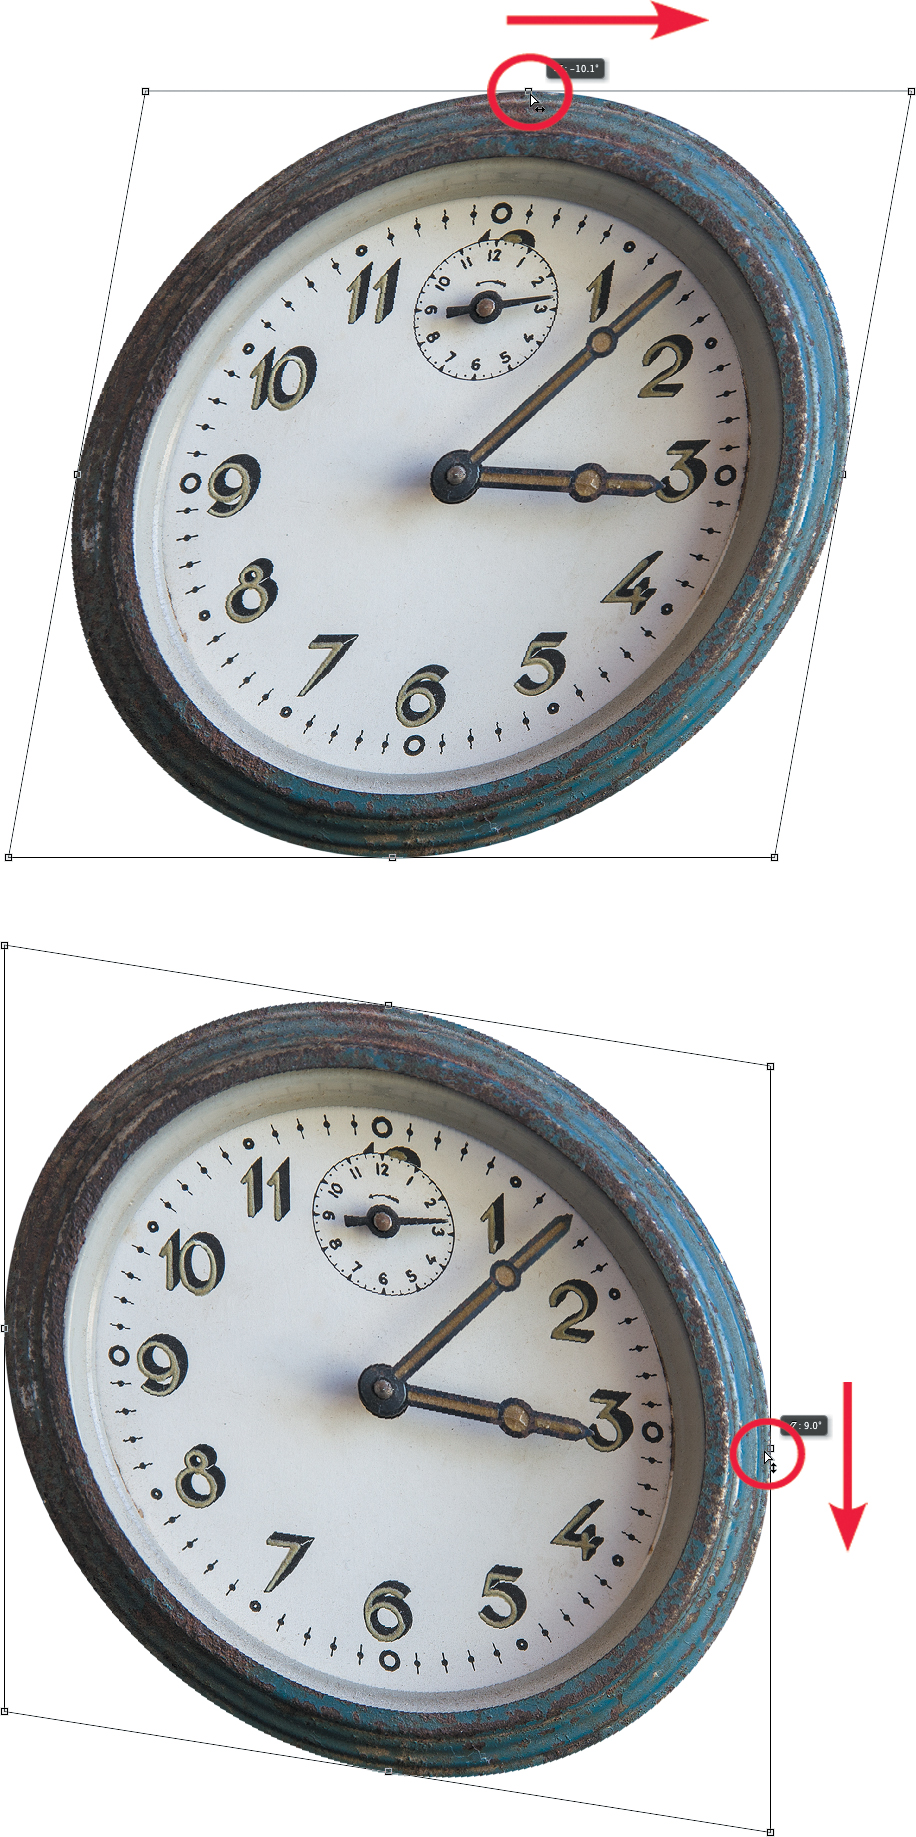
• To skew an image, hold down Command+Shift (Ctrl+Shift) while dragging on one of the side handles (FIGURE 8.75).
Figure 8.75. Command+Shift-drag (Ctrl+Shift-drag) on a side handle to skew the object.
• To apply a perspective distortion, hold down Command+Option+Shift (Ctrl+Alt+Shift) while dragging on one of the corner handles (FIGURE 8.76).
Figure 8.76. Command+Option+Shift (Ctrl+Alt+Shift)-drag on a corner handle to apply a perspective distortion.
While you are working with the Free Transform command, you can undo the most recent edit by choosing Edit > Undo or by pressing Command+Z (Ctrl+Z). When you are satisfied with your transformation, you can apply the command by pressing Return (Enter), double-clicking inside the bounding box, or clicking the check mark button in the Options bar. As mentioned previously, pressing Esc or clicking the Cancel button in the Options bar will cancel the transformation.
After applying a transform, you can apply the same transform to the same layer or a different layer again by choosing Edit > Transform > Again (Command+Shift+T [Ctrl+Shift+T]). To duplicate a layer and repeat an image element transformation, press Command+Option+Shift+T (Ctrl+Alt+Shift+T).
Numeric transformations
Although applying transformations by just dragging on the bounding box handles is probably the most intuitive way to do it, there may be times when you need to apply a more precise, numeric transformation. To do this, you can access the numeric Transform controls in the Options bar (FIGURE 8.77). The Options bar will appear once you have selected any of the Transform commands (or selected the Show Transform Controls check box in the Move tools Options bar):
• Reference Point Location determines the reference point around which the transformation is applied (the default is center). Click on one of the nine nodes in the square icon to specify how the transformation will be applied relative to the shape of the layer (e.g., from the center point, from the upper-left corner, the center-right side, etc.). The reference point can be changed even after you have entered values for the other fields.
Figure 8.77. When a Transform command has been activated, the Options bar allows for precise numeric transformations to be applied.
• Position allows you to change the horizontal (X) and vertical (Y) position of the layer on the image canvas. The X and Y values here represent the distance of the object from the left and top edges of the image. The triangle icon between X and Y uses a relative point to determine the change in position. When this is selected, the change will be applied relative to the current location of the layer.
• Scale changes the size of a layer by allowing you to enter a percentage amount for the width and height. To constrain the proportions of the object as it is scaled, click the chain link icon between the width and height fields.
• Angle specifies a precise rotation value. Positive values rotate in a clockwise direction; negative values rotate counterclockwise.
• Skew allows you to enter a value to skew the object either horizontally or vertically (or both!).
Warp
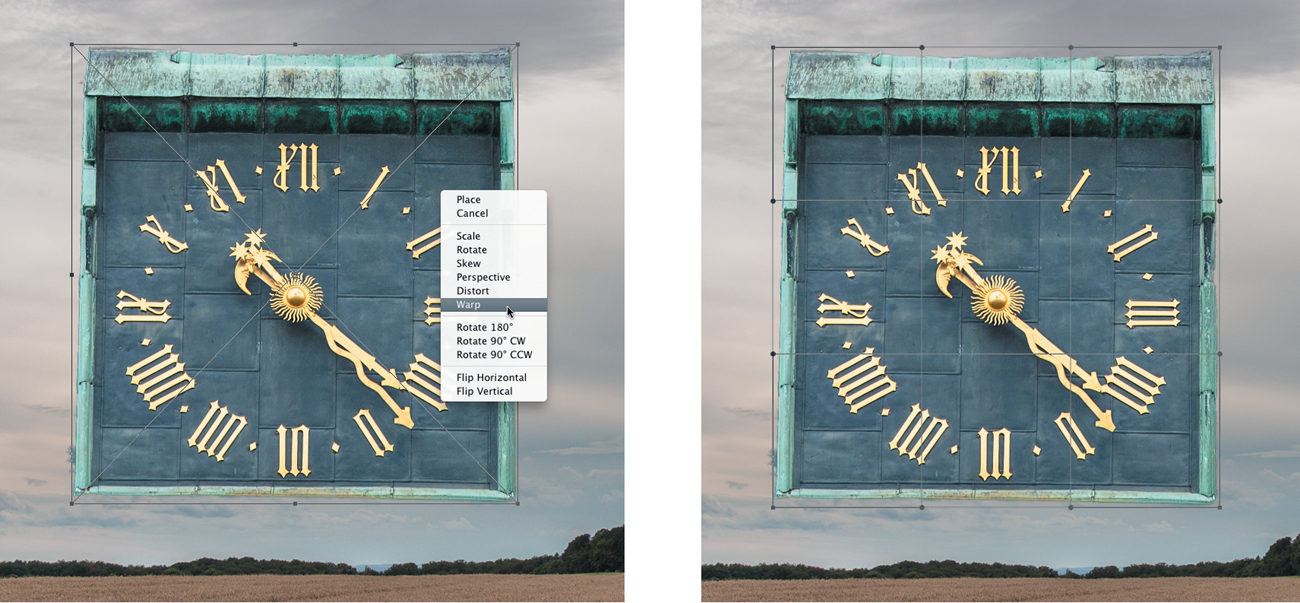
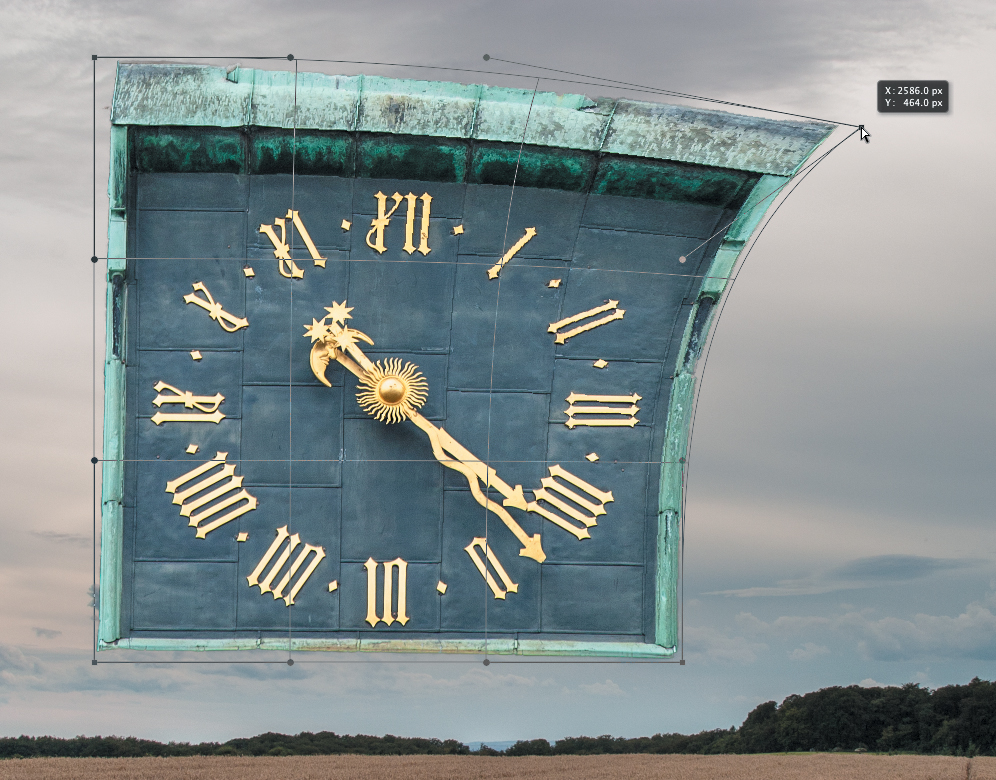
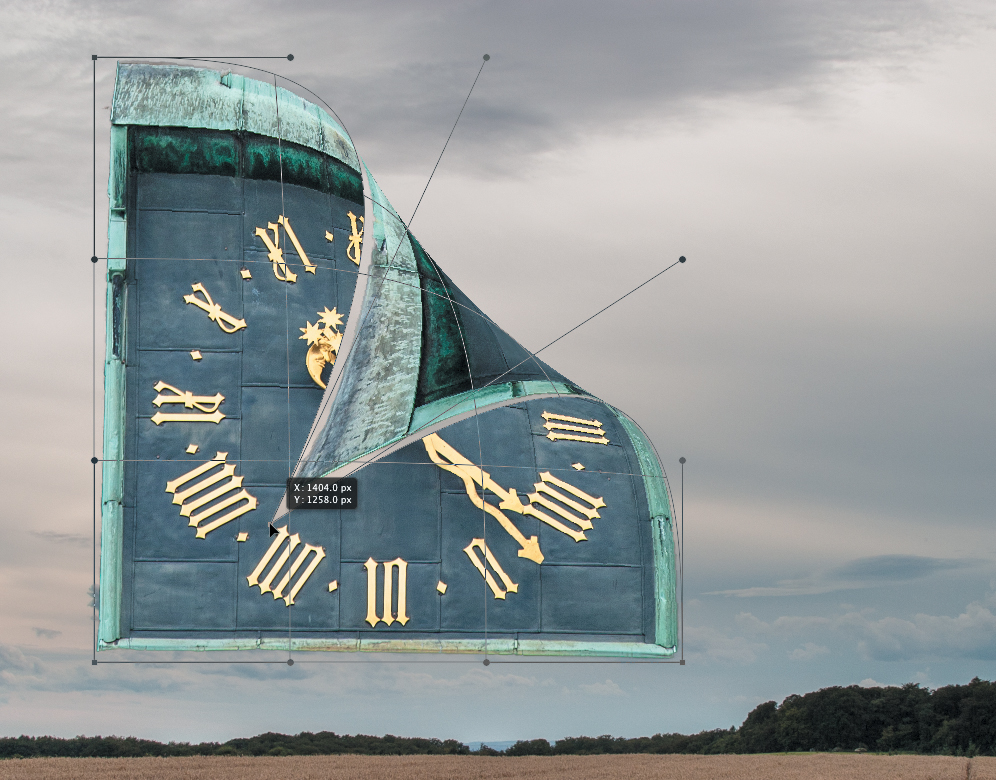
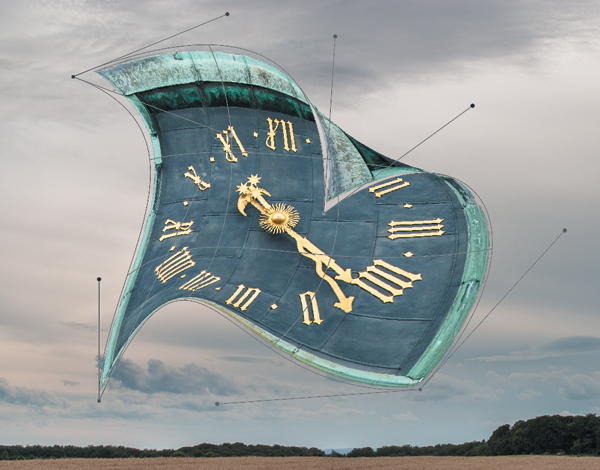
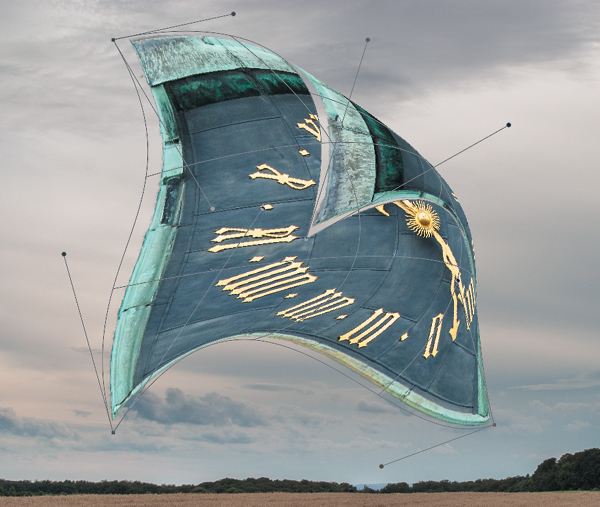
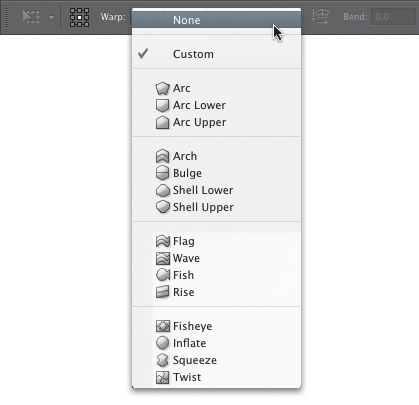
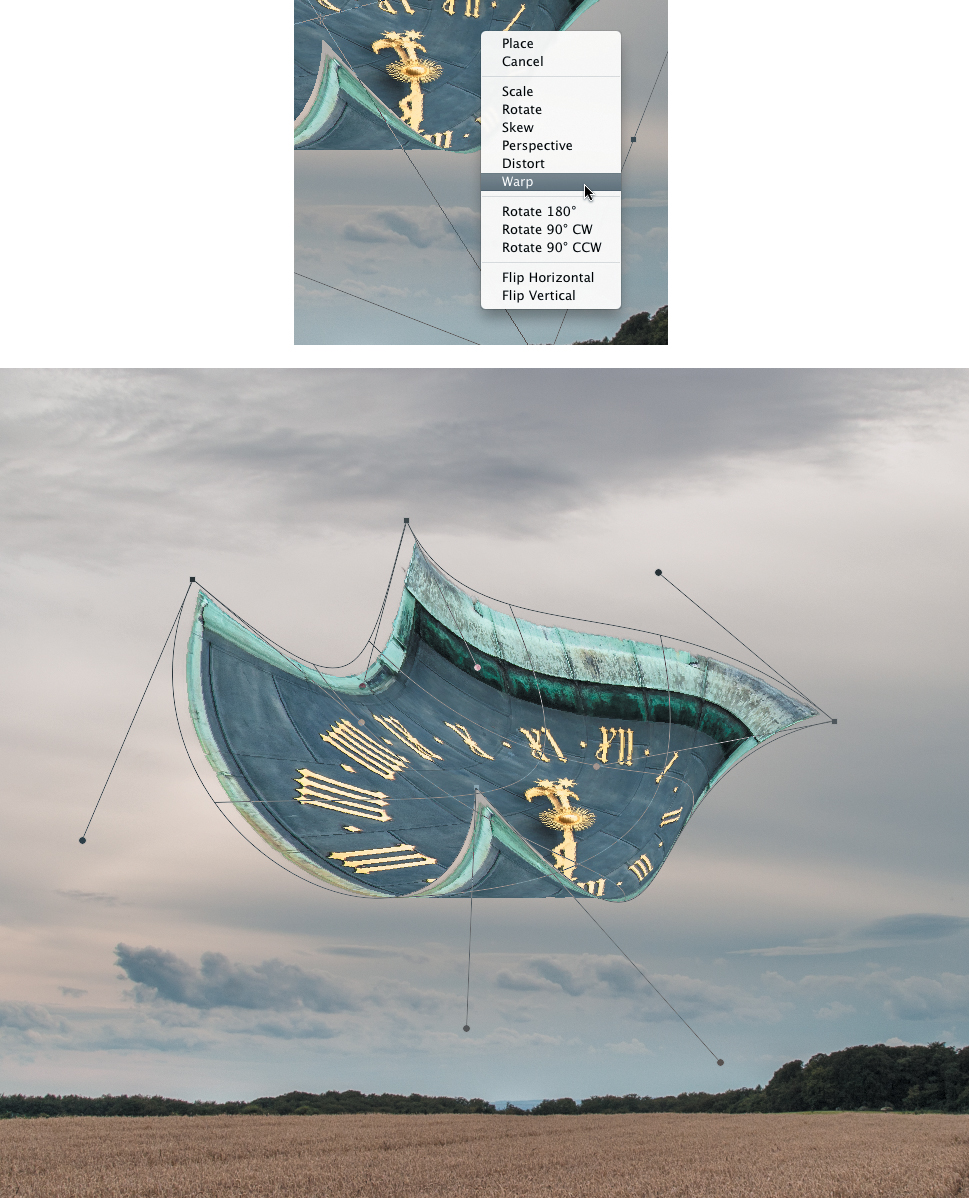
The Warp command lets you apply transformations by dragging on the corners and special control handles of the warp bounding box, as well as directly on the object. Although this may sound similar to how Free Transform works, the big difference is that the transformations made with the Warp command are more fluid and “elastic” than the regular Transform controls. It is this fluidity and rubbery nature of its transformations that make the Warp command a feature that Salvador Dali would have loved (along with the Liquify filter, of course!).
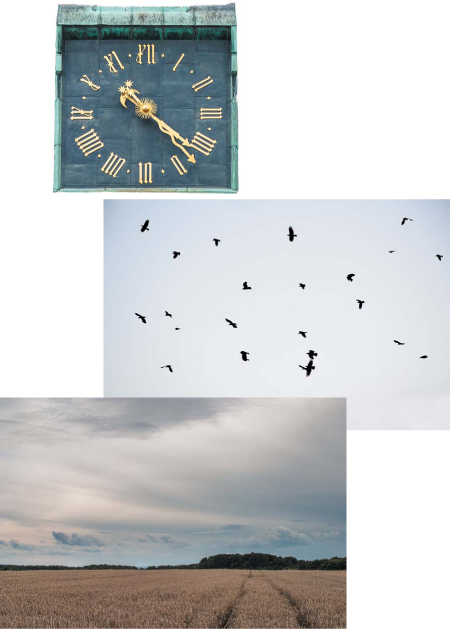
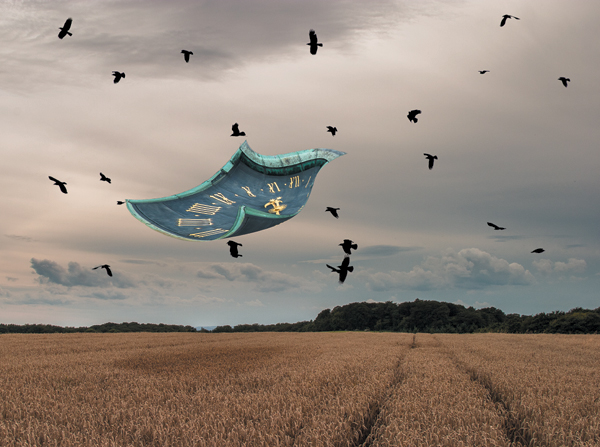
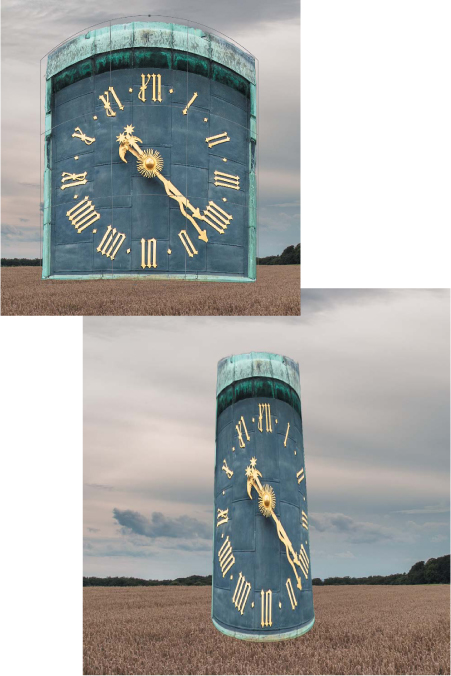
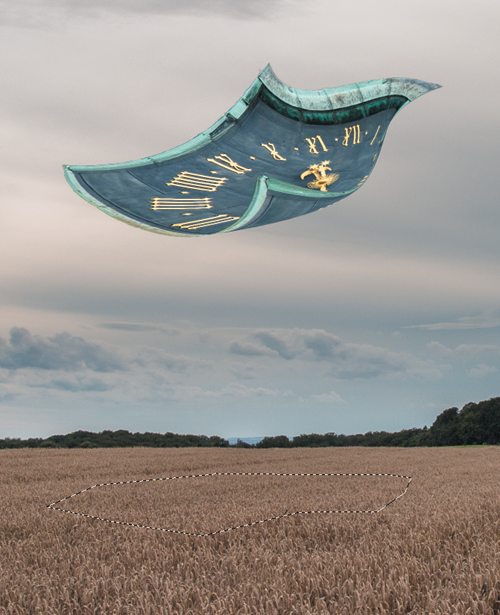
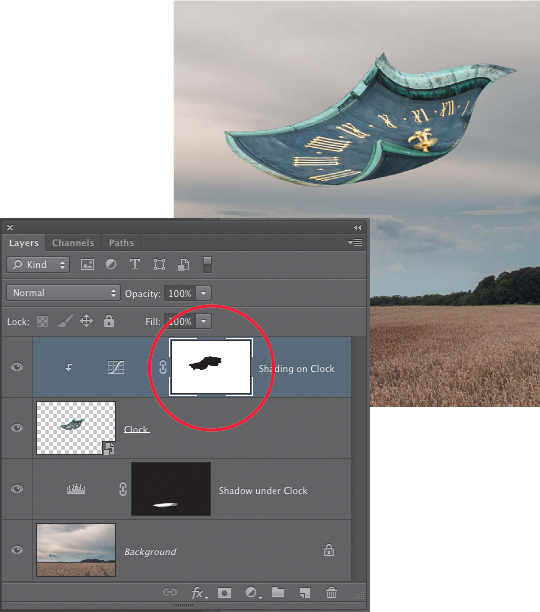
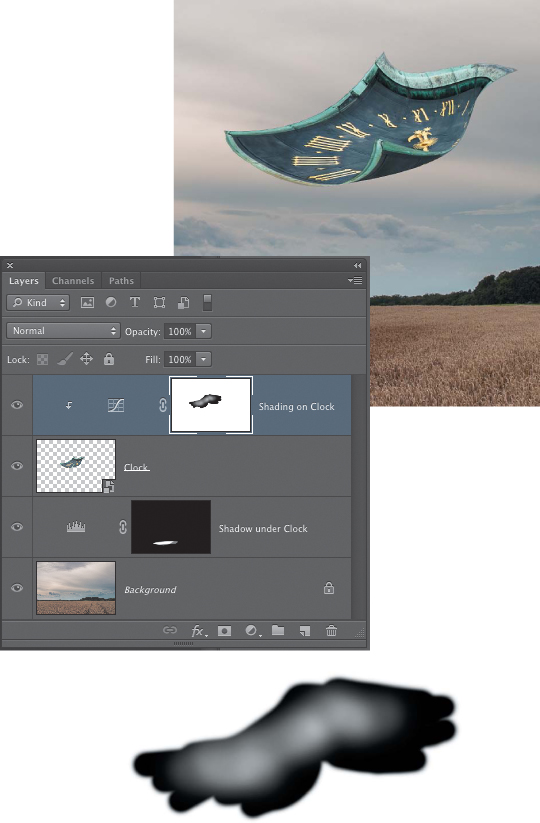
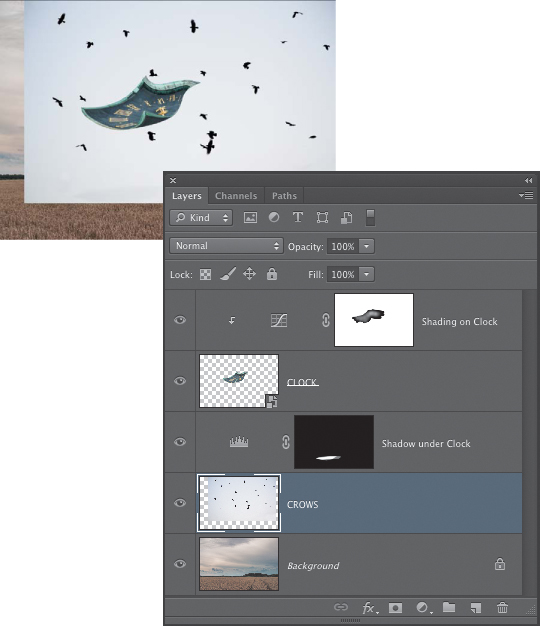
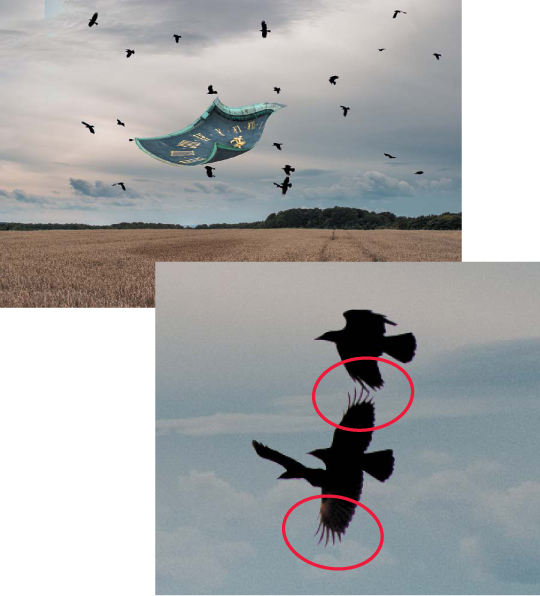
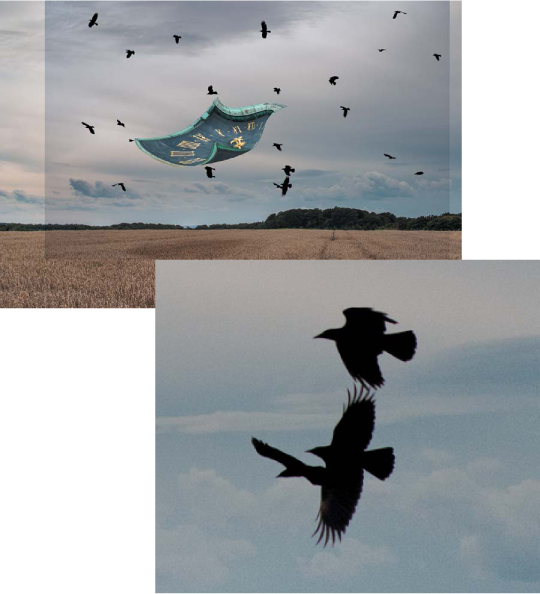
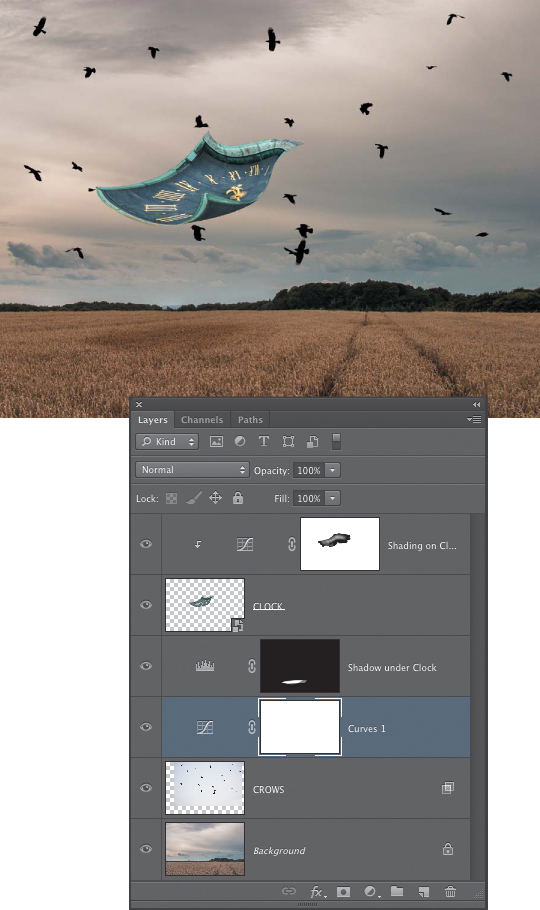
To get a sense of how the Warp command works, open the square clock and wheat field images (FIGURE 8.78). The image of the crows will not be used until the very end of the process. To speed up this exercise and cut right to the topic at hand, the clock has already been isolated on a separate layer. You’ll place the clock into the wheat field image and, channeling the spirit of Dali, warp it to appear as if it is a thin, flexible sheet of fabric blowing through the sky (FIGURE 8.79).
© SD (all images)
Figure 8.78. The square clock, wheat field, and flying crows images.
Figure 8.79. The final image.
![]() ch8_square_clock.psd
ch8_square_clock.psd
ch8_wheat_field.jpg
ch8_crows.jpg
1. Bring the clock image into the wheat field photo. You can do this using any of the methods detailed earlier in the section “Moving Layers.”
2. To keep the transformations nondestructive, convert the clock layer into a Smart Object by Control-clicking (right-clicking) on the layer in the Layers panel and choosing Convert to Smart Object. You could also choose Layer > Smart Objects > Convert to Smart Object.
3. Press Command+T (Ctrl+T) to activate the Free Transform command. Control-click (right-click) inside the bounding box and choose Warp to place a bounding grid over the layer. Notice that the box has square corner points and two round points in the middle of each side (FIGURE 8.80).
Figure 8.80. Choosing the Warp command from the Free Transform context menu and the initial Warp bounding box around the clock layer.
Before you apply the actual transformation to the clock that will be used in this composite tutorial, you can experiment a bit first to test drive the Warp command.
4. Drag on the upper-right corner point and stretch to the right, away from the clock (FIGURE 8.81). Notice how the clock is actually being curved by this move. This type of curvature is not possible with the regular Transform controls. Now drag that same corner point diagonally down to the lower-left corner, inward over the clock. This creates a very interesting effect of the upper corner of the clock being folded over onto itself (FIGURE 8.82).
Figure 8.81. Dragging outward on a corner handle using the Warp command.
Figure 8.82. Dragging inward on a corner handle creates a cool overlapping effect.
5. The inward, overlapping warp has revealed that the round points are actually handles that are attached to each corner. Click and drag on these handles to see how they affect the warping of the clock (FIGURE 8.83). Once again, there is no real agenda here in terms of how the clock should look; this is just exploration aimed at learning how to use this feature.
Figure 8.83. The round corner handles allow for a more fluid and flexible style of warping.
6. You can also drag directly on the bounding box to warp the layer that way. In the example shown in FIGURE 8.84, we dragged the center of the clock to the right to create the effect of it billowing as it is pushed across the sky by the wind. We also made further adjustments to some of the round corner handles to fine-tune this effect.
Figure 8.84. Dragging directly inside the warp bounding box lets you interact with the layer in a different way.
7. When you are performing a warp process, there is only one level of undo; the standard Command+Z (Ctrl+Z) or Edit > Undo. Either will undo the most recent adjustment you have applied to the bounding box. To reset the warp completely but still remain in the Warp command, open the drop-down menu on the left side of the Options bar (it will display as Custom once you’ve manually warped a layer) and choose None at the very top (FIGURE 8.85).
Figure 8.85. The Warp menu is available in the Options bar when the Warp command has been activated.
8. The state of the Options bar will show that you are still in the Warp command, but there will no longer be a warp bounding box around the layer. To recall the bounding box (and the warp functionality), open the drop-down menu again and choose either Custom (for a manual warp) or one of the many warp presets in the menu. Some of the presets are very useful; others are less so (the Fish preset comes to mind!). They can provide a quick way to set up an initial style of warp shape that you can then customize and fine-tune by switching back to the Custom choice in the Warp menu. FIGURE 8.86 shows an example. Seán started with the Arc Upper preset and then modified it into more of a cylinder shape. This, in turn, suggested a tower, which he created by adding an actual tower roof to the warped clock (FIGURE 8.87).
Figure 8.86. After choosing a warp preset of Arc Upper (top), the Warp menu was set to Custom, which allowed for manual fine-tuning based on the initial Arc Upper shape.
Figure 8.87. A customized warp based on the Arc Upper preset is transformed into a clock tower with the addition of an actual tower roof.
Creating the “Time Flies” Composite
As you can see from the previous exploratory exercise, the Warp command allows for transformations that are not possible with the standard Transform controls. Now that you’ve had a chance to work with the Warp tool, let’s finish this simple composite.
1. If you still have any warping effects applied to your clock image, cancel them by clicking the Cancel button in the Options bar or by pressing the Esc key.
2. Activate the Warp tool again by choosing Command+T (Ctrl+T) and then Control-clicking (right-clicking) inside the transform bounding box and selecting Warp. Use the corner handles and corner points, as well as manually dragging directly on the layer to warp the clock so that it looks like a thin sheet of paper or fabric blowing in the wind.
3. If you need to transform the clock layer in other ways, simply Control-click (right-click) inside the warp bounding box to access the other Transform controls (FIGURE 8.88). After applying the desired transformation, press Command+T (Ctrl+T) again and then choose Warp. The warp grid will appear as it was the last time you adjusted it (FIGURE 8.89). When you’re satisfied with the look of your warped clock, press Return (Enter) to apply the transformation, or just click the check mark button in the Options bar.
Figure 8.88. While within a warp transformation, you can access the other Transform controls by Control-clicking (right-clicking) inside the warp bounding box.
Figure 8.89. To reactivate the Warp controls as you left them, just choose the Warp command again.
The ability to re-access the warp controls in the same state as your last adjustment and change them again is possible only when you are working with a Smart Object layer.
Adding Shading and Shadows
Next you’ll add a bit of fine-tuning and finessing to the composite to make it appear a bit more realistic. Even with scenes that are obviously not real, such as the meditation on time in this image, attention to lighting, shading, and depth of field can really help take a composite to the next level. You’ll be exploring these concepts in more depth in subsequent tutorial exercises throughout the rest of the book.
1. Click on the Background layer to make it active. Use the Polygonal Lasso tool to make a selection on the wheat field under the clock (FIGURE 8.90). It will eventually be blurred and feathered so don’t worry too much about the exact shape, but it should be roughly the same size as the clock layer. Try to imagine how large the shadow might be if the clock “cloth” really were floating over the field.
Figure 8.90. A loose selection made with the Polygonal Lasso tool is used to create the shadow under the clock.
2. Click the Add Adjustment Layer button at the bottom of the Layers panel to add a Levels adjustment layer. The selection is turned into a layer mask. Only the areas that were selected will be affected by the adjustment. In the Properties panel, move the middle Levels slider to the right to darken the area (FIGURE 8.91). It’s fine to make it a bit darker than it should be because you can fine-tune this later using the layer opacity slider (we used a value of 0.60 for the middle slider).
Figure 8.91. Use a Levels adjustment layer with a layer mask based on the Lasso tool selection to darken the area under the clock.
3. At the top of the Properties panel are two icons. One is for the adjustment controls, and the other is for making modifications to the layer mask. Click the mask icon and increase the Feather slider to soften the edges of the layer mask. You might also want to experiment with lowering the opacity of the Levels layer. In the example shown in FIGURE 8.92, the opacity was set to 60%. You should also select the Levels shadow layer and the clock layer and click the link icon at the bottom of the Layers panel to link them together. This allows you to move the clock layer and the shadow will move with it.
Figure 8.92. Feathering the layer mask with the Feather slider in the mask section of the Properties panel. The opacity of the Levels layer was also lowered to 60%.
When feathering a shadow layer, keep in mind that shadows will have a harder edge when the quality of the light is harder and more contrasty (e.g., on bright, sunny days), and the closer the object casting the shadow is to the ground. In this image the lighting is soft and diffuse due to the overcast skies, so the shadow has a softer edge.
In the next steps you’ll add some shading to the underside of the clock. When making composites, it’s always best to imagine what the lighting and shadows would be like if the scene you are creating was real. In this case, it’s logical to assume that the underside of the clock would be darker than the top, because the main light source (the cloud-obscured sun) is coming from above.
1. Click on the Clock layer to make it active. Option-click (Alt-click) on the Add Adjustment Layer button and choose Curves. In the New Layer dialog that appears, select the check box Use Previous Layer to Create Clipping Mask (FIGURE 8.93). A Clipping Mask is a very useful way to create a mask without a mask by using the transparency of the underlying layer to determine where the layer above, or the adjustment, will be visible. By clipping the Curves adjustment layer to the clock layer, the darkening adjustment will not affect the rest of the image. In the Layers panel you’ll see that the Curves layer is indented a bit and has an arrow pointing down to the layer it is clipped to (FIGURE 8.94). We’ll cover clipping masks more in the next chapter.
Figure 8.93. In the New Layer dialog you can choose to create a clipping mask as you create a new layer.
Figure 8.94. A layer that is “clipped” to the layer below will be indented in the Layers panel with an arrow pointing to the layer that serves as the clipping mask. The name of the clipping mask layer will also be underlined.
2. Drag down on the middle part of the curve to darken the clock layer (FIGURE 8.95). Use the Brush tool to paint with black at 100% opacity on the layer mask in the areas where you do not want to darken the clock. In this case, it is only the underside, represented in this example by the curled-up front corner, that needs to be darkened, so you should paint over the top part of the clock layer (FIGURE 8.96).
Figure 8.95. Darken the clock layer with a Curves adjustment layer.
Figure 8.96. Mask the darkening from the top part of the layer so that it appears only on the curled-up underside of the clock.
3. If you want to try adding some shading to the top of the clock layer, you can press X to exchange the foreground and background colors so that white is in the foreground swatch. Lower the opacity for the Brush tool to about 20% and paint on some of the curved areas on the top of the clock (FIGURE 8.97). If you want to darken the brush stroke, simply paint over it again to apply a shading effect. If the shading becomes too dark, press X again and paint with black to reduce the effect. This can help to create a bit more depth on the surface of the clock layer.
Figure 8.97. Edit the layer mask to create subtle shading on the top of the clock layer. The lighter gray areas on the mask allow more of the darkening to show through on the top side of the clock.
4. You’ve done a lot of work to this image so far, and that means it’s time to save the file. Choose File > Save As and save the file with a name that makes sense to you and in a place where you can find it again. You’ll add a final element to the composite in the next few steps that will allow you to explore a different way of blending layers together.
5. In the main composite image, click the Background layer to make it active. If it is not already open, open the flying crows image introduced at the beginning of this tutorial. Bring the crows image into the main clock/wheat field composite and position it as shown in FIGURE 8.98. Don’t worry that it is a bit smaller in size than the main image.
Figure 8.98. The flying crows added to the main composite.
6. To blend the birds into the main image, let’s first try a blending mode in the crows layer. Because all you want to see are the crows, and they are darker than anything else in the sky, start with the Darken blending mode. This does an excellent job of totally hiding the lighter sky in the crows image. If you look closely, however, you’ll see that it creates some hard and rough transitions along the delicate finger feathers on some of the birds (FIGURE 8.99).
Figure 8.99. The Darken blending mode does a very good job of hiding the lighter sky in the crows image, but some of the edges along the wing feathers are a bit too hard and abrupt.
7. Change the blending mode to Multiply. This also does a good job of blending the birds into the main image, but the sky in the crows image is appearing as a slightly darker overlay. If you zoom in and check out the detail along the edges of the birds’ wings, however, you’ll see that the edges look very natural and much better than with Darken (FIGURE 8.100).
Figure 8.100. The Multiply blending mode does a much better job of creating natural edges along the wing feathers, but the sky area shows up as a darker overlay on the main image.
8. Fortunately, an easy solution to the problem is close at hand! Leave the blending mode set to Multiply and double-click on the Crows layer in the Layers panel just to the right of the layer name. The Layer Style dialog appears. We’ll discuss this in more detail toward the end of the chapter. Direct your attention to the Blend If sliders at the bottom of the dialog (FIGURE 8.101).
Figure 8.101. The Layer Style dialog.
The Blend If sliders use the tonal values in an image to control how the active layer blends with the layers underneath it. Although they do not offer the more precise manual control of a layer mask, for some situations, they can work wonders at seamlessly blending images together.
9. In the crows image, you don’t want to see the bright areas of the sky that are still showing through the Multiply blending mode, so move the white slider for This Layer to the left until the sky on that layer disappears. By the time the tonal value above reads 185, you should not see any of the sky from the crows layer (FIGURE 8.102). This slider does not show any tonal value brighter than 185 on the crows layer. This is the magic that is hiding the sky. However, on close inspection (and we always recommend a careful evaluation of the fine details!), the edges of the finger feathers on some of the birds are once again a bit too hard.
Figure 8.102. The highlight Blend If slider set to 185 hides the sky on the Crows layer, but once again the edge transitions are too hard.
10. Look closely at the Blend If sliders. You’ll see that there is a line down the middle of them. Option-drag (Alt-drag) to the left on the left side of the highlight slider to split it into two halves. This allows for a softer and more gradual transition between the parts of the layer that are shown and those that are hidden. In the example shown in FIGURE 8.103, the left half is set to 85 and the right half is set to 185. This means that any value brighter than 185 will not be shown. Then there will be a gradual transition down to level 85 where more and more of the layer will be visible. Everything on the layer that is at tonal level 85 or darker will be completely visible. A close look at the details shows that the edges of the birds’ wings look much better.
Figure 8.103. With a Blend If slider split of 85 to 185, the sky is completely hidden and the edge transitions are much better.
You might be asking if this effect could be achieved without the use of the Multiply blending mode. The answer depends on the two layers that you are blending together. Sometimes that will work, whereas for other cases, such as the crows in this image, the use of a blending mode and the Blend If sliders combine to create a powerful compositing technique. We’ll be taking a closer look at the Blend If sliders in the next section.
11. As a final step, we added a Curves adjustment layer to slightly darken the landscape image and cropped the image to remove some of the left side (FIGURE 8.104).
Figure 8.104. The final composite and the final Layers panel.
Advanced Blending
Layers can be blended together in several ways in Photoshop, and you’ve already explored a few of them in this chapter. The blending modes at the top of the Layers panel are the main way to go about this, but you can also use the layer opacity controls, as well as layer masks. You’ve already had a brief taste of how layer masks can be used to blend adjustment effects into a composite image. You’ll continue the exploration of layer masks for more intricate compositing in the next chapter.
In addition to the blending modes and opacity controls, additional blending options are tucked away into the Layer Style dialog. You dipped your toes into the advanced blending waters with the use of the Blend If sliders on the crows layer in the previous exercise. In this section you’ll take another look at the Blend If sliders, as well as the rest of the advanced blending controls. Let’s start with the Blend If sliders because you just used them, and they are arguably the most useful advanced blending controls feature.
The Blend If Sliders
As you saw with the previous composite, the Blend If sliders determine what areas of a layer are visible based on the tonal value of a pixel. The slider for This Layer creates a blend based on the tonal values of the active layer, and the Underlying Layer slider creates a blend based on the tonal values of the layer (or layers) underneath.
Look at the example in FIGURE 8.106. The Cathedral layer has very bright and very dark values, as well as some middle tone areas. The same is true for the Seascape layer underneath it. The ocean scene also has brightly saturated colors.
© SD (all)
Figure 8.106. The Cathedral and Seascape layers.
With the Cathedral layer active, changing the highlight slider for This Layer hides the brighter values in the windows and ceiling, and allows the underlying ocean layer to show through (FIGURE 8.107). In all of these examples, the sliders have been split to create softer transitions. You can split a slider by Option-dragging (Alt-dragging) on one half of it. The farther apart the two halves of the sliders are, the more gradual and subtle the transition.
Figure 8.107. Adjusting the highlight Blend If slider for the Cathedral layer.
Adjusting the shadow slider for This Layer hides the darker values of the cathedral and allows the underlying layer to show through (FIGURE 8.108). An advanced blending icon on the layer in the Layers panel indicates when a layer has advanced blending applied to it (FIGURE 8.109). This is new to Photoshop CS6.
Figure 8.108. Adjusting the shadow Blend If slider for the Cathedral layer.
Figure 8.109. The advanced Blending icon on a layer in the Layers panel.
Adjusting the highlight slider for Underlying Layer lets the lighter values of the seascape show through (FIGURE 8.110); moving the shadow slider for Underlying Layer lets the darker values of the ocean scene become more apparent (FIGURE 8.111).
Figure 8.110. Adjusting the highlight Blend If slider for the Underlying Layer lets bright values from the ocean image bleed through.
Figure 8.111. Adjusting the shadow Blend If slider for the Underlying Layer lets darker values from the ocean image come through.
The best way to get a feel for the Blend If sliders is just to play around with them. Once you understand the basic “rules” by which they operate, you’ll develop a sense for when they might come in handy. You can also apply the Blend If sliders on a per channel basis by choosing a channel in the Blend If menu (FIGURE 8.112).
Figure 8.112. The Blend If sliders can be applied on a per channel basis.
General Blending
The General Blending controls at the top of the Layer Style dialog are the same as those available at the top of the Layers panel (FIGURE 8.113). Here you can choose the blending mode for the active layer, as well as the opacity. There’s no particular advantage to setting these options here or at the top of the Layers panel. It’s just another way to access this functionality.
Figure 8.113. The General Blending controls in the Layer Style dialog.
Advanced Blending
The Advanced Blending controls are a bit more obscure than the General Blending controls or even the Blend If sliders. Although we do find uses for them now and them, we don’t use them all that much. Still, in the right situation, they may be just what you need.
Fill Opacity
Fill Opacity is the same as the equivalent slider at the top of the Layers panel. It reduces the opacity of the layer content without affecting any layer styles, such as drop shadows or bevel effects, that are applied to the layer (FIGURE 8.114).
Figure 8.114. Fill Opacity affects the content of a layer but not any layer styles that are applied to the layer.
Channels
Channel blend check boxes allow you to restrict the blending of a layer to only certain color channels. These produce bright and funky color effects that are often unpredictable (FIGURE 8.115).
Figure 8.115. The color Channel check boxes let you limit which color channels are blended.
Knockout options
The Knockout options only work when you have several layers in a layer group and the layer you are applying the knockout settings to has a blending mode applied to it. These options allow a layer to “punch a hole” through all the other layers below it. In the example image in FIGURE 8.116, three layers are in a layer group. All have different blending modes and layer styles applied to them. Below the layer group are two other layers that are not a part of the group: Ocean Liners and Purple Texture. The Clock layer is set to Overlay blending mode. Double-clicking on the Clock layer brings up the Layer Styles dialog. The three Knockout settings are None, Shallow, and Deep. None is pretty self-explanatory, so let’s look at the other two:
• Shallow punches through all the layers in the layer group and blends the Clock layer as if it were positioned immediately above the Ocean Liners and Purple Texture layers. The other layers that are below the clock in the same layer group do not show up (FIGURE 8.117).
Figure 8.116. The example file for the Knockout options.
Figure 8.117. The Knockout options for the Clock layer set to Shallow.
• Deep punches through all the layers in the layer group and any other layers below that, and blends the Clock layer as if it were positioned immediately above the Background layer with no blending mode applied. The layers below the Clock layer in the same layer group, as well as the Ocean Liners and Purple Texture layers, do not show up (FIGURE 8.118).
Figure 8.118. The Knockout options for the Clock layer set to Deep.
Pass Through blending
When you have a layer group, the default blending mode is Pass Through (FIGURE 8.119). This is essentially a nonblending mode because it treats all the layers in the group as if they were regular layers in a normal, nongrouped layer stack. Choosing any other blending mode, however, will treat the entire layer group as if it were a single merged layer and apply the chosen blending mode to the entire group, ignoring any individual blending modes that may be applied to the layers. In FIGURE 8.120 the blending mode for the layer group has been set to Multiply, and in FIGURE 8.121 it has been set to Screen.
Figure 8.119. The blending mode for the layer group is set to the default of Pass Through.
Figure 8.120. The blending mode for the layer group is set to Multiply.
Figure 8.121. The blending mode for the layer group is set to Screen.
Additional blending options
Below the Knockout options are five check boxes that control additional layer blending behavior (FIGURE 8.122). Two of them are turned on by default. The three that are turned off by default pertain specifically to working with layer styles and are fairly esoteric. Here’s a quick rundown of what they have to offer:
• Blend Interior Effects as Group. This option refers to layer effects or layer styles that are applied to the interior edges of a layer (as opposed to the outer edges). These layer styles include inner glow, satin, and color or gradient overlays). When this option is turned on, the effects will be blended with the active layer first before blending with the main document.
• Blend Clipped Layers as Group. The effects of a layer clipping group are blended before being blended with the main document. Having this option on as the default makes sense because layers that are clipped together via the clipping mask function are generally meant to appear and behave as a single element.
• Transparency Shapes Layer. The transparent areas of a layer are used to determine the interior shape and where the effects will be visible.
• Layer Mask Hides Effects. This option can be quite useful. Normally, when a layer has a layer mask and a layer style is added to it, the shape of the layer as determined by the mask is the shape that the layer style will be applied to. When this option is turned on, you can use a layer mask to selectively hide portions of the layer style if needed.
• Vector Mask Hides Effects. This option is the same as the previous option except that it applies to vector masks instead of layer masks.
Figure 8.122. These check boxes offer additional options for controlling the blending of layers and layer effects.
Closing Thoughts
Layers are one of the best parts of Photoshop. When combined with the power of layer masks, the two create a dynamic duo that enables you to accomplish most any type of compositing task. If we had to choose one aspect of Photoshop to rank as our all-time favorite, it would be how layers and layer masks allow our imaginations to run wild. You’ve seen glimpses of layer masks in action in this chapter and some of the previous chapters (when you reach a certain comfort level with layers, it’s very difficult to work with them without creating layer masks!). In the next chapter, we’ll dive deep into the world of possibilities that layers and layer masks offer you. Chapter 9 is a culmination of several of the previous chapters, and we’ll be synthesizing much of the material so you can take your compositing skills to the next level.

