Get started quickly: Empower your team to start designing and releasing apps right away with pre-built templates, drag-and-drop ease, and speedy deployment and then iterate them as needed.
Build apps without compromising: Give everyone the ability to create the apps they want with advanced features that were previously only available to professional developers, including built-in AI components.
Enable extensibility for developers: Provide experienced developers with the tools they need to add Azure functions and custom connectors to proprietary or on-premises systems so they can effortlessly increase the app’s capabilities.
Understanding Environments
From a developer’s point of view, environments are instances, such as development, UAT, production, and so on, that businesses use to store, manage, and share data, apps, chatbots, and flows. You can also think of environments as containers that separate apps that have different security roles, security requirements, and target audiences.

A quintet of shaded rectangular boxes overlaps each other on their right. Each reads Development, S I T, U A T, U A T, and Production.
Typical environments in common business implementations
Every environment can contain flows, chatbots, solutions, AI Builders, data, and apps with security roles, users, and so on.
As a part of the subscription, a default environment is created automatically and shared by all users in that tenant. It’s important to focus on understanding Power Apps for Dynamics 365 CE/CRM, so instead of using the default environment, you should create a new environment, called Trial (which is subscription-based). Trial environments are intended to support short-term testing needs and are automatically cleaned up after a short period of time. They expire in 30 days and are limited to one per user.
Understanding the Power Platform Architecture
Before going in-depth, you need to understand the architecture of Power Platform and Dynamics 365 Apps. The architecture in Figure 1-2 shows the Dynamics 365 Apps and Power Apps.
Note that the base concept of Power Apps is the environment. It stores all apps, Power Automate (previously called Flow), Power Virtual Agent, Power BI, and AI Builders in environments. Power Apps is divided into three categories—Canvas apps, model-driven apps, and Power Portals.

A process flow of four levels. From the bottom to the top, it reads 1. Tenant with environment and database, 2. power automate, power apps, power virtual agent, power B I, and A I builder, 3. canvas apps, model-driven apps, and power portal, 4. Dynamic 365 apps of sales, marketing, services, field services, and P S A.
Power Platform architecture
Using Power Automate, you can configure automated flows using a cloud application with diversified connectors such as Salesforce, Outlook, Mailchimp, and sometimes a custom connector.
Power Apps can configure applications that are suitable for mobile devices. Canvas apps are suitable for designing apps targeted to mobile and tab devices that support multiple connectors. Model-driven apps can be used to define more complex apps leveraged by scripts and server-side code. Power Portal is intended for public-facing web portals so that public users can interact with the Dataverse without a license.
You can build Power Apps such as model-driven apps, Canvas apps, and Power Portals using the data stored in the Dataverse to build scalable applications fit to your business needs. Power Automate can be configured to automate day-to-day manual processes using the native Microsoft Dataverse and other Microsoft products or third-party applications. Data connectors are a new way of integrating diversified cloud and on-premise applications, ensuring less-code and no-code application development.
AI Builder is another Microsoft Power Platform capability that provides AI models that are designed to optimize your regular business processes. AI Builder enables your business to use artificial intelligence to automate processes. These models can be called from Power Apps and Power Automate with Dataverse data and other application data.
Real-World Scenario
Dataverse: You can create an environment to store your business data in the Dataverse. You can create multiple environments as you wish.
Canvas app: You can develop a Canvas app for doctors to record their visits with a few clicks.
Model-driven app: You can design a complex data-driven app to manage your business using forms, views, charts, and dashboards.
Power Portal: You can capture patient appointment requests, feedback, records, and more, using a public-facing website.
Power Automate: You can automate cloud tasks such as sending auto-emailers, sending reports to patients, and so on, without needing a department to manually handle medical reports.
Power Virtual Agents: You can configure a digital chatbot that interacts with internal and external users to solve issues and answer queries without needing a real agent. For example, you can configure a chatbot to answer patient queries about doctor availability, report delivery times, and so on.
Power BI: You can design dashboards and reports for your business strategy needs. You can report patients’ and doctors’ daily appointments in a dashboard and automate them by integrating them with other cloud apps.
AI Builder: You can extract patient information from documents and identify patients’ reports automatically.
This brief, real-world scenario shows how you can leverage the Power Platform ecosystem to solve your business needs.
Differences Between Power Apps and Dynamics 365 Apps
Canvas apps
Model-driven apps
Power Portals
Dynamics 365 CE/CRM apps are model-driven Power Apps. All capabilities of model-driven apps are inherited by Dynamics 365 CE/CRM apps, including the Sales Hub, the Customer Service Hub, Marketing for Dynamics 365, and Field Service and Project Service automation.
Dynamics 365 apps are built on model-driven Power Apps and you can build your custom apps as well. Dynamics 365 apps are created by Microsoft developers. Advanced features are used to meet common business needs that are not available in custom model-driven apps. You will learn about the details in later chapters.
How Power Apps Supports the Less-Code, No-Code Concept
Microsoft has reimagined the way to develop apps. The new less-code, no-code concept provides more flexibility for non-programmers to develop apps.
Microsoft Power Apps supports a drag-and-drop interface with easy-to-use built-in controls such as sliders, galleries, containers, icons, shares, and so on. It does not require any coding, which is why it’s a no-code concept. For complex applications, though, the no-code concept is not enough. They require some sort of less-code, called Power Fx, to develop more dynamic apps. Power Fx are Excel formula-like scripts that you can use in Power Apps.
In general, you can use the no-code or less-code concept to develop Power Apps by connecting to the Dataverse and other diversified cloud applications through connectors.
The Power Fx Concept in Power Apps
Microsoft Power Fx is a free and open-source low-code, general-purpose programming language for expressing logic across the Microsoft Power Platform. Power Fx is inspired by the Excel formula. In Canvas apps Power Apps, you can use Power Fx to make the app more dynamic and complex. For more detailed information about Power Apps, go to the Microsoft site at https://docs.microsoft.com/en-us/power-platform/power-fx/overview.

A screenshot of a window. It has a title bar at the top that reads f x, Right left parentheses Text Input 1 dot Text comma 5 right parentheses. A down arrow reads hello world, and a select box below reads world.
Power Fx example
Most logic can be reduced to one-liners, with plenty of expressiveness and control for more complex needs. The goal is to keep the number of concepts to a minimum—ideally no more than an Excel user would already know.
Power Fx Features
Asynchronous. All data operations in Power Fx are asynchronous in nature. The Power Apps developer doesn’t need to explicitly specify this in the app.
Local and remote. Whether it’s a local or remote database or service, Power Fx uses the same syntax and functions for data. Power Fx automatically delegates what it can to the server to process filters and then sorts there more efficiently. Remember that delegation works in Power Fx only when the datasource supports delegation.
Excel syntax translation. Excel is used by hundreds of millions of users, most of whom know that & is used for string concatenation. Power Fx uses & for concatenation as well, leveraging the knowledge Excel users already have.
Configuration vs Customization in the Power Platform
Differences Between Configuration and Customization
Configuration | Customization |
|---|---|
Table, fields, relationships configuration | Power Fx code addition |
View, form, chart, dashboard designs | JavaScript code for Power Apps |
Configuring flow | Writing plugins |
Configuring chatbots | Writing custom workflow activities |
AI model configuration | Writing console apps |
Designing Power BI visualizations | Developing custom web apps |
Enhancement Scopes in Power Apps

A flow chart presents the classification of enhancement scopes. It reads plugins, custom workflows, JavaScript, custom web apps, console apps, and power F x.
Enhancement scopes
You can enhance the application by using client-side and server-side code. Client-side code requires the JavaScript scripting language and server-side code requires the C#.Net programming language.
You can configure logic apps, service busses and endpoints, and Azure functions to make your Power Apps more powerful. For Azure integration, more details are available from the Microsoft site at https://docs.microsoft.com/en-us/power-apps/developer/data-platform/azure-integration.
Integration Concepts in Power Apps
Microsoft Power Apps can be easily integrated with native Microsoft applications such as Outlook, SharePoint, and OneDrive, as well as with third-party cloud applications such as web portals, Salesforce, and so on.

A pipeline. Native Microsoft apps at the left that lists share point, one drive, outlook, and OneNote. Integration visual that lists power apps and dynamic 3 6 5 apps in the center. Third part apps at the right lists sales force, oracle, Mailchimp, and currency layer. Reversible arrows are observed between the three stages.
Integration diagram
Sample Domain and Project Analysis
This book focuses on giving practical business scenarios of Power Apps for Dynamics 365 CE/CRM, using a sample project called the Student Management System (SMS) implementation, which is part of an Education domain.

A work plan with a quintet of tables placed 3 in a row. Each table is named students, students, payment details, student registered courses, and courses. The tables list their related details. Data flows through Tables 1, 2, and 3. Data from Tables 5 and 1 flows to 4. Outflow data is 1 and the inflow is N.
ER diagram
Sample User Stories
Sl. No. | User Story | Solution |
|---|---|---|
1 | Systems should allow users to combine different configuration and customization components in a package so that they can be distributed to other environments. | Configure the Power Apps solution and add required components for packaging. |
2 | School management system must allow users to enter student information, such as roll number (auto-number), name, address, father’s name, mobile, email address, and qualifications. System should capture course information and users should be able to record students joined for courses. The app must create payment information with term and payment details. | Solution components include tables, fields, forms, views, and relationships. |
3 | The system should display student-level total amount to be paid and the next renewal due date of the student after one year of joining. | The solution requires developers to configure rollup and calculated fields. |
4 | Mobile number and email should be mandatory when creating a student. | Use the business rules to solve this business need. |
5 | The system should allow associate courses for students; one student can have multiple courses and one course can be chosen by multiple students. | Configure relationships and relationship behaviors. |
6 | The system should be able to display courses by students joined and by joining date. | Configure charts for the solution. |
7 | The system should display a page to display all visualizations for a student. | Create a table-specific dashboard. |
8 | The system should include a portable application for the student management system with dashboards, tables, forms, etc. | Configure a model-driven app and customize a sitemap. |
9 | The app should be accessible only by sales people. | Manage roles for model-driven apps. |
10 | The system should configure a mobile device to enter student information by salesperson. Users should be able to create, update, read, and delete students from the app. | Configure a Canvas app for student entries. |
11 | Users should be able to search students and send emails to students from the mobile app. | Configure Canvas apps with an Outlook connector. |
12 | The system should display login user information in all screens of the mobile app. | Use global and local variables. |
13 | The system must have a public website through which new students can register and choose courses. | Configure Power Portal. |
14 | Students from the portal can create new course registration records, delete existing records, and update existing records. | Configure CRUD operations in Power Portal and then configure authentication and authorization. |
15 | The system must hide the father’s name for the student when registering from the portal. | Use JavaScript and CSS to do the task. |
16 | The system must display the student’s full name on the portal after they are logged in. | Use Liquid code for this requirement. |
17 | The system must provide a process to streamline the student onboarding process to capture general, communication, and course information. | Configure Business Process Flow using Power Automate. |
18 | As soon as a student is created, send a welcome email to them and create a task to collect payment from them three days after the student is created. | Use automated cloud flow through Power Automate. |
19 | The system should automatically send timesheet emails and links of the Power Portal to students to fill in the daily timesheet. | Use Scheduled Flow in Power Automate. |
20 | The system should fetch the latest currency exchange rates from a third-party WEB API currency layer and display it on the Canvas app. | Use Power Apps Trigger Flow. |
21 | Whenever a lead is created in the Dataverse with more than $50,000 annual revenue, send approval from the manager. After approval, update the lead for the qualification process. | Approvals in Power Automate. |
22 | The system should configure a Power Virtual Agent for public users so that the chatbot can capture user information and validate it against the Dataverse. If the user is not valid, create a contact in the Dataverse. Display Power Virtual Agent in an external website such as Power Portal or other websites. | Use Power Virtual Agent and call action. |
23 | The system should display student and course visualization dashboards in Power BI. | Configure Power BI. |
24 | The system should configure an AI Builder to process invoices to fetch data and push them in the Dataverse. | Use AI Builder. |
25 | The system should create personal settings walkthroughs in model-driven apps. | Model-driven apps settings. |
26 | The system should create advanced settings walkthroughs for Dynamics 365 CE/CRM apps. | Dynamics 365 CE/CRM Advanced Settings. |
27 | The system should configure users, security roles, teams, field security profiles, and hierarchy security. | Security Matrix Configuration. |
28 | The system should send an email on the payment due date to students when payment has not been received. | Use parallel wait in CRM workflows. |
29 | The system should provide a way to send reminder emails on-demand to student payments when are not paid after a certain time. | Develop custom workflow activities. |
30 | The system should automatically create payment details as soon as a payment is created. The line numbers will be the same as the terms selected in the payment and the amount should be divided equally. | Develop a plugin for this scenario. |
31 | The system should provide a button on the student form to create a payment record on demand by passing the required data. | Use a command button and form script. |
32 | The system should create a reusable action to send emails and create a task for lead on demand. | Configure custom action. |
33 | The system should create a report on leads and display leads by creation date. | Configure reports. |
34 | Users should be able to track email activities for students in Outlook. | Integrate Outlook with Dynamics 365. |
34 | Users should be able to upload student documents in SharePoint from Dynamics 365. | Integrate SharePoint with Dynamics 365. |
35 | The system should explain the sales model lifecycle in D365 and list the app’s settings, the product catalog, and other settings available to the sales model. | Dynamics 365 Sales module in details. |
36 | The system should explain the marketing model lifecycle and app settings available for the marketing module. | Dynamics 365 Marketing (Legacy module in details). |
These are the typical requirements that will be implemented throughout this book. Note that you must have an online trial version of Dynamics 365 CE/CRM Power Apps to implement these scenarios.
Subscribing to the 30-Day Free Trial Environment
Microsoft provides a 30-day free trial subscription to anyone who wants to learn about the features of Power Apps. Thirty days is sufficient to learn the basics, but if you want to extend the free trial version, you have to provide your credit card information. No money will be deducted; it’s required just for user verification. To configure the trial version, use the following steps.

A screenshot of a text reads a header of Dynamic 3 6 5 sales. Activate digital selling to meet buyers where they are helping you build better relationships and close more details. An option at its left corner is highlighted that reads Try For Free.
Dynamics 365 Sales free trial option

A screenshot of a window that reads a header Dynamic 3 6 5 sales. Let's get started, Enter your email to start your free trial with a box. Please enter a work account for the best trial experience. Click here to set up a new trial account instead is highlighted by an arc. An option at the bottom left reads to start your free trial is highlighted.
Email options in free trial

A screenshot of a window that reads a header 1. Let's get you started, Enter your work or school email address, and we'll check if you need to create a new account for the dynamics 3 6 5 sales premium trial. A box reads email: sppmaestro at the rate of Gmail dot com. A button below reads Next and is highlighted.
Get started by providing a personal email
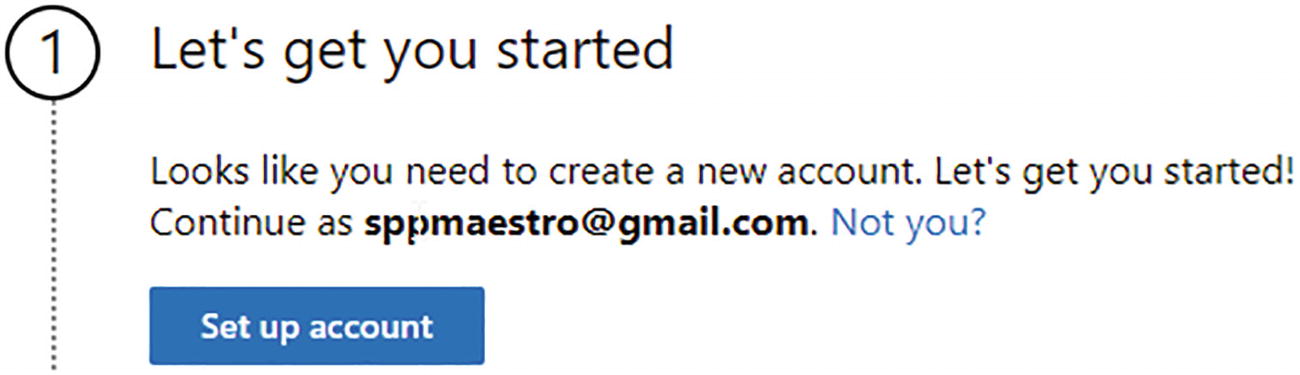
A screenshot of a window that reads a header 1. Let's get you started. Looks like you need to create a new account. Let's get you started exclamation. Continue as sppmaestro at the rate of Gmail dot com. Not you question mark. A button below reads Set up account and is highlighted.
Setup account panel

A screenshot of a window that reads a header 2. Tell us about yourself. First name, middle name, last name, business phone number, company name, company site, and country of the region. Each option reads a box below it. A button at the bottom left reads Next and is highlighted.
The Tell Us About Yourself section

A screenshot of a window that reads a header 2. Tell us about yourself. A text or phone call helps us make sure this is you. Enter a number that isn't V o I P or a toll-free number. It reads a radial box- selected Text me, call me, Country code, and phone number. Two buttons at the bottom left read Send verification code-selected and Back.
Mobile verification screen

A screenshot of a window that reads a header Enter your verification code with a box below reads 2 6 9 5 0 4. Didn’t get it or need a new code question mark Try again. Two buttons Verify and change my phone number are observed below. Verify button is selected.
OTP verification screen

A screenshot of a window that reads 3. How you will sign in. It lists the following options with boxes below. User name, Domain name, Password, and Confirm Password. By selecting Next, you agree to our trial agreement. The privacy statement and Trial agreement are highlighted. A button next is observed at the bottom left and is selected.
Sign-in option in the trial version

A screenshot of a window that reads a header 4. Confirmation details. There are three dots and one is highlighted. Thanks for signing up for Dynamics 3 6 5 sales premium trial with a text below that reads the user email id and the secondary email id. Two buttons at the bottom left read Get started-selected and Manage your subscription.
Trial confirmation screen
Clicking the Get Started option will open the Power Platform Admin Center, where you can configure new environments.

A screenshot of a window titled power platform admin center. It has two panels. Panel 1 lists a menu where the environment is selected. Panel 2 lists a menu bar where a New option is selected. It further reads Environments and its content of the environment, type, and state. The environment column is blurred.
Power Platform Admin Center environment creation

A screenshot of a window reads a header New Environment. It lists the following options with boxes below. Name, Type, Region, and Purpose. It further reads create a database for this environment question mark a slide button greyed out and reads yes. Two buttons Next-selected and Cancel are observed at the bottom right.
Environment-creation process
In the Next screen, choose a language. The default is English. If you want to use local languages for the user interface, choose Options from the Language dropdown. Choose a unique URL for the environment by using a custom domain.
After you provide a custom domain, it will appear like so:
<Custom Domain>.crm.dynamics.com
The custom domain will be automatically changed or selected per the region selected during the signup process. You can read the related information from Microsoft at https://docs.microsoft.com/en-us/power-platform/admin/new-datacenter-regions.

A screenshot of a window reads a header Add database. It lists the following options with boxes below. Language: English, U R L: softchiefdevelopment, and currency. It further reads create a database for this environment question mark a slide button greyed out and reads yes. Two buttons Next-selected and Cancel are observed at the bottom right.
Add Database screen

A screenshot of a window reads a header Enable Dynamics 3 6 5 apps. It lists the following. In addition to power apps. Learn more A slide button reads yes and is highlighted. Automatically deploy these apps with a box below that reads All enterprise applications.
Enable Dynamics 365 Apps
If you want to restrict the environment to a security group only, you can choose the Security Group option.
When an environment is created with a Dataverse database or a Dataverse database is added to an existing environment, all users in the organization are automatically added to the environment unless a security group is selected as an access filter.

A screenshot of a window reads a header Security group. It reads the following. Restrict environment access to people in this security group. Otherwise, everyone can access. Learn more is highlighted. An option plus select is observed at the bottom.
Security Group option

A screenshot of a window titled power platform admin center. It has two panels. Panel 1 lists a menu where the environment is selected. Panel 2 lists a menu bar of New, Refresh, and Recover deleted environments. It further reads Environments lists environment, type, and state. The environment column is highlighted with an arrow.
The environment list

A screenshot of a window titled office 3 6 5. It lists two panels. Panel 1 lists a menu where the grid icon is selected. Panel 2 lists the apps under office 3 6 5 with their icons. Admin, Compliance, Customer voice, Excel, Lists, OneDrive, OneNote, Power apps, Power automate, Power point, Project, Security, Share point, Visio, and Word.
Office apps

A screenshot of an Environment dialog box that overlaps the environment soft chief default window. It reads a search box at the top with development and softchief default. The cursor pointer is on the development tab that further displays the environment.
The environment switcher

A screenshot of a window titled power apps. It has two panels. Panel 1 lists a menu where Home is selected. Panel 2 reads Build business apps, fast. It further reads Start from data, which lists the apps named share point, Excel online, S Q L server, Dataverse, and other data sources with their icons above.
The Power Apps home page
Configure solutions to encapsulate components
Design Dataverse concepts
Configure Canvas apps, model-driven apps, and Power Portals
Configure dataflows
Manage connections
Configure gateways
Configure Flow and AI Builder
Configure chatbots
Summary
Understanding environments
Subscribing to the 30-day free trial environment
Understanding the Power Platform architecture
Understanding the differences between Power Apps and Dynamics 365 Apps
How Power Apps supports the less-code and no-code concepts
The Power Fx concept in Power Apps
Configurations vs. customization in the Power Platform
Enhancement scopes in Power Apps
Integration concepts in Power Apps
Sample domain and project analysis
Understanding Power Apps solutions
Working with table configurations and settings
Working with columns, data types, calculated fields, and rollup fields
Auto-number columns in the Dataverse
Configuring relationships and relationship behaviors
Working with business rules
Configuring views for tables
Table form design and layout
Chart configuration and dashboard pinning
Configuring table-specific dashboards
Understanding alternate keys
Working with data in the Dataverse
Business scenarios, use cases, and implementations