
Chapter 10
Blob Hunter: Creating 3-D Games
In the first half of this book, you spent a good amount of time building your OpenGL ES skills creating Star Fighter. Admittedly, Star Fighter is not going to have gamers beating down your door to play it. However, what this game has done for you is far more important. The skills that you honed while creating a 2-D, top-down, shooter game can easily be translated in to the skills needed to create some stunning 3-D games.
For the remainder of this book, you will put together a 3-D environment that could be used to create any number of compelling 3-D games. Let's start by discussing what differentiates a 2-D game from a 3-D game.
Comparing 2-D and 3-D Games
Visually, we all can tell the different between a 2-D game and a 3-D one. A 2-D game looks flat, much like an animated cartoon, whereas a 3-D game will have the appearance of multifaceted objects in a dynamic space. Are 2-D games irrelevant? Of course not. With the advent of addictive mobile games, such as Angry Birds, and a dizzying array of other iPhone, Android, and Facebook games, the 2-D game market is still alive and quite well. You could continue to expand your 2-D games skills and create some amazing games. However, if more-complex 3-D games are more to your liking, you will need to begin by learning what is explained in the remaining chapters of this book.
When you were creating your 2-D game, Star Fighter, you created flat squares (out of flat triangles). You then mapped a sprite onto the surface of that square to create your characters. However, hold up a sheet of paper, and look at it. Even though it is flat, it is still three-dimensional in your hand. You can turn it, rotate it, or bend it. Take six pieces of paper, and create a cube. Now, the 3-D shape is much more defined, but all you really changed was the number of flat pieces of paper and how they were arranged.
This is a very basic explanation of simple transition between the skills you learned in Star Fighter and what you will need to begin building a new 3-D game-Blob Hunter. You see, without even realizing it, you have been working in 3-D all along. You just flattened out everything by neglecting any values for the z axis and telling OpenGL to render your scene in 2-D.
As far as OpenGL is concerned, 2-D or 3-D, the games are the same in space. The difference is in how you treat objects and how you tell OpenGL to render them. Rather than creating flat squares that have sprites mapped to them, you need to create more convincing complex polygons that become your characters and environments.
In this chapter, you are going to create a new Android project to hold Blob Hunter, which will be a sandbox for you to learn some vital 3-D game development skills. You will also set up the few files needed to begin your 3-D development.
Creating Your 3-D Project
In this section, you will begin creating the project that will be used through the rest of this book. The process to create the 3-D project will mirror the one you used to create the Star Fighter game project.
Following the same steps that you used in Chapter 2, create a new project named blobhunter. This project will hold all of the examples from the remainder of this book. You are not going to create another project as complete as Star Fighter, and you are going to learn the secrets to converting your knowledge of working in 2-D into a 3-D environment.
Once your new blobhunter project is created, fill it with some starter files. Although this project is not going to have all the flash and menus of Star Fighter, you still some basic files to launch your game.
You learned how to make menus and splash screens earlier in this book. Truth is, the processes used to create those key parts of a game are going to remain the same whether the game play is in 2-D or 3-D. Therefore, it does not warrant being covered again here.
However, in the following sections, you will be adding four basic filesto your project that create and display the renderer. That is all that you will be making here. You will not have any menus, or any graceful code killing routines as you did in Star Fighter.
BlobhunterActivity.java
The first file that you will need to create in your new blobhunter project is BlobhunterActivity.java. In the Star Fighter project, StarfighterActivity.java launched the splash screen, which, in turn, launched the main menu. However, since you will not have those components here, BlobhunterActivity can simply launch gameview.
TIP: The majority of the code that you are going to see in this chapter should look very familiar to you. Essentially, it is all taken from the Star Fighter project. The differences are that it has been severely stripped down and renamed.
package com.proandroidgames;


import android.app.Activity;

import android.os.Bundle;


public class BlobhunterActivity extends Activity {

        /** Called when the activity is first created. */


        private BHGameView gameView;


        @Override

        public void onCreate(Bundle savedInstanceState) {

                super.onCreate(savedInstanceState);

                gameView = new BHGameView(this);

                setContentView(gameView);

                BHEngine.context = this;

        }

        @Override

        protected void onResume() {

                super.onResume();

                gameView.onResume();

        }


        @Override

        protected void onPause() {

                super.onPause();

                gameView.onPause();

        }

}
Notice, in the highlighted sections, that this code references a class called BHGameView. The BHGameView class extends GLSurfaceView and serves the same purpose as the SFGameView in Star Fighter. The previous code will not compile until the BHGameView is created in the next section.
BHGameView
The code to create the BHGameView class is very simple and should look like this:
package com.proandroidgames;


import android.content.Context;

import android.opengl.GLSurfaceView;


public class BHGameView extends GLSurfaceView {

        private BHGameRenderer renderer;


        public BHGameView(Context context) {
super(context);
renderer = new BHGameRenderer();
this.setRenderer(renderer);
}
}
Once again, notice that, in the highlighted sections, you are referencing another class. BHGameRenderer is the game loop for this project and will hold the majority of the code.
BHGameRenderer
Now, create a new file class named BHGameRenderer.
package com.proandroidgames;


import javax.microedition.khronos.egl.EGLConfig;

import javax.microedition.khronos.opengles.GL10;


import android.opengl.GLSurfaceView.Renderer;


public class BHGameRenderer implements Renderer{


        private long loopStart = 0;

        private long loopEnd = 0;

        private long loopRunTime = 0 ;


        @Override

        public void onDrawFrame(GL10 gl) {

                loopStart = System.currentTimeMillis();

                try {

                        if (loopRunTime < BHEngine.GAME_THREAD_FPS_SLEEP){

                                Thread.sleep(BHEngine.GAME_THREAD_FPS_SLEEP - loopRunTime);

                        }

                } catch (InterruptedException e) {

                        e.printStackTrace();

                }

                gl.glClear(GL10.GL_COLOR_BUFFER_BIT | GL10.GL_DEPTH_BUFFER_BIT);

                gl.glLoadIdentity();


                loopEnd = System.currentTimeMillis();

                loopRunTime = ((loopEnd - loopStart));


        }


        @Override

        public void onSurfaceChanged(GL10 gl, int width, int height) {


                gl.glViewport(0, 0, width,height);

                gl.glMatrixMode(GL10.GL_PROJECTION);

                gl.glLoadIdentity();
gl.glMatrixMode(GL10.GL_MODELVIEW);
gl.glLoadIdentity();
}
@Override
public void onSurfaceCreated(GL10 gl, EGLConfig config) {
gl.glEnable(GL10.GL_TEXTURE_2D);
gl.glClearDepthf(1.0f);
gl.glEnable(GL10.GL_DEPTH_TEST);
gl.glDepthFunc(GL10.GL_LEQUAL);
gl.glHint(GL10.GL_PERSPECTIVE_CORRECTION_HINT, GL10.GL_NICEST);
gl.glDisable(GL10.GL_DITHER);
}
}
Again, if you look at the code for the BHGameRenderer, you will notice that it is just a stripped down version of what you used for Star Fighter. This is going to be just enough code to really get you going in 3-D game development.
BHEngine
The last file that you need to create to establish your project is BHEngine. In the Star Fighter project, you created the SFEngine file that held all of the global constants, variables, and methods for your game. The same file needs to be created in the Blob Hunter project to hold any game-engine-related code.
package com.proandroidgames;
import android.content.Context;
import android.view.Display;
public class BHEngine {
/*Constants that will be used in the game*/
public static final int GAME_THREAD_DELAY = 4000;
public static final int GAME_THREAD_FPS_SLEEP = (1000/60);
/*Game Variables*/
public static Context context;
}
That is it. You should now have enough code to get your project off the code. However, the code-and the project it is contained within-does not really do anything yet. Let's create a small 3-D test to show off what this new project can do.
Creating a 3-D Object Test
In this section, you are going to take the Blob Hunter project that you set up in the previous section and add some code to it to generate a 3-D test. You are going to use one of the sprite images from Star Fighter to create a quick image that will rotate around the player.
Start by taking the image of the scout, shown in Figure 10–1, and adding it to the drawable-nodpi folder in Blob Hunter's project.
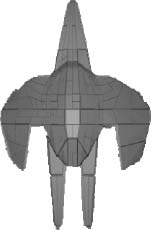
Figure 10–1. The Scout image
With the image added to your project, create a constant for it in the BHEngine class.
NOTE: The steps to create this 3-D test should be very familiar to you and fairly fresh in your mind from being in the previous chapters. Therefore, there will not be as much explanation of some of the basic (previously covered) technologies. However, if something does not make sense, try going back to the previous chapters.
Creating a Constant
Open the BHEngine.java file, and add the following highlighted line of code:
package com.proandroidgames;
import android.content.Context;
import android.view.Display;
public class BHEngine {
/*Constants that will be used in the game*/
public static final int GAME_THREAD_DELAY = 4000;
public static final int GAME_THREAD_FPS_SLEEP = (1000/60);
public static final int BACKGROUND = R.drawable.scout;
/*Game Variables*/
public static Context context;
public static Display display;
}
You are now going to create a flat square, exactly like you did for Star Fighter and then map this scout image to it as a texture.
Creating the BHWalls Class
Create a new class in your project called BHWalls. The BHWalls class is going to be used in future chapters to create walls, but it will serve here as a way to create a flat square. All of the code for the BHWalls class is from the SFBackground class that you created for Star Fighter; nothing has changed.
package com.proandroidgames;
import java.io.IOException;
import java.io.InputStream;
import java.nio.ByteBuffer;
import java.nio.ByteOrder;
import java.nio.FloatBuffer;
import javax.microedition.khronos.opengles.GL10;
import android.content.Context;
import android.graphics.Bitmap;
import android.graphics.BitmapFactory;
import android.opengl.GLUtils;
public class BHWalls {
private FloatBuffer vertexBuffer;
private FloatBuffer textureBuffer;
private ByteBuffer indexBuffer;
private int[] textures = new int[1];
private float vertices[] = {
0.0f, 0.0f, 0.0f,
1.0f, 0.0f, 0.0f,
1.0f, 1.0f, 0.0f,
0.0f, 1.0f, 0.0f,
};
private float texture[] = {
0.0f, 0.0f,
1.0f, 0f,
1f, 1.0f,
0f, 1f,
};
private byte indices[] = {
0,1,2,
0,2,3,
};
public BHWalls() {
ByteBuffer byteBuf = ByteBuffer.allocateDirect(vertices.length * 4);
byteBuf.order(ByteOrder.nativeOrder());
vertexBuffer = byteBuf.asFloatBuffer();
vertexBuffer.put(vertices);
vertexBuffer.position(0); byteBuf = ByteBuffer.allocateDirect(texture.length * 4);
byteBuf.order(ByteOrder.nativeOrder());
textureBuffer = byteBuf.asFloatBuffer();
textureBuffer.put(texture);
textureBuffer.position(0);
indexBuffer = ByteBuffer.allocateDirect(indices.length);
indexBuffer.put(indices);
indexBuffer.position(0);
}
public void draw(GL10 gl) {
gl.glBindTexture(GL10.GL_TEXTURE_2D, textures[0]);
gl.glFrontFace(GL10.GL_CCW);
gl.glEnableClientState(GL10.GL_VERTEX_ARRAY);
gl.glEnableClientState(GL10.GL_TEXTURE_COORD_ARRAY);
gl.glVertexPointer(3, GL10.GL_FLOAT, 0, vertexBuffer);
gl.glTexCoordPointer(2, GL10.GL_FLOAT, 0, textureBuffer);
gl.glDrawElements(GL10.GL_TRIANGLES, indices.length, GL10.GL_UNSIGNED_BYTE, indexBuffer);
gl.glDisableClientState(GL10.GL_VERTEX_ARRAY);
gl.glDisableClientState(GL10.GL_TEXTURE_COORD_ARRAY);
gl.glDisable(GL10.GL_CULL_FACE);
}
public void loadTexture(GL10 gl,int texture, Context context) {
InputStream imagestream =
context.getResources().openRawResource(texture);
Bitmap bitmap = null;
try {
bitmap = BitmapFactory.decodeStream(imagestream);
}catch(Exception e){
}finally {
try {
imagestream.close();
imagestream = null;
} catch (IOException e) {
}
}
gl.glGenTextures(1, textures, 0);
gl.glBindTexture(GL10.GL_TEXTURE_2D, textures[0]);
gl.glTexParameterf(GL10.GL_TEXTURE_2D, GL10.GL_TEXTURE_MIN_FILTER, GL10.GL_NEAREST);
gl.glTexParameterf(GL10.GL_TEXTURE_2D, GL10.GL_TEXTURE_MAG_FILTER, GL10.GL_LINEAR);
gl.glTexParameterf(GL10.GL_TEXTURE_2D, GL10.GL_TEXTURE_WRAP_S, GL10.GL_REPEAT);
gl.glTexParameterf(GL10.GL_TEXTURE_2D, GL10.GL_TEXTURE_WRAP_T, GL10.GL_REPEAT); GLUtils.texImage2D(GL10.GL_TEXTURE_2D, 0, bitmap, 0);
bitmap.recycle();
}
}
Now that you have a class created to build your object, you are going to instantiate it in the game loop.
Instantiating the BHWalls Class
As you are creating the instantiation of the BHWalls, you will also create two floats. These are going to be used to move the image of the ship around in the 3-D space.
NOTE: Just to be clear, you are not creating a 3-D ship with this code. You will only be taking one of the images from the last project and rotating it through 3-D space-something that could not have been done in Star Fighter.
package com.proandroidgames;
import javax.microedition.khronos.egl.EGLConfig;
import javax.microedition.khronos.opengles.GL10;
import android.opengl.GLSurfaceView.Renderer;
public class BHGameRenderer implements Renderer{
private BHWalls background = new BHWalls();
private float rotateAngle = .25f;
private float rotateIncrement = .25f;
private long loopStart = 0;
private long loopEnd = 0;
private long loopRunTime = 0 ;
@Override
public void onDrawFrame(GL10 gl) {
loopStart = System.currentTimeMillis();
try {
if (loopRunTime < BHEngine.GAME_THREAD_FPS_SLEEP){
Thread.sleep(BHEngine.GAME_THREAD_FPS_SLEEP - loopRunTime);
}
} catch (InterruptedException e) {
e.printStackTrace();
}
gl.glClear(GL10.GL_COLOR_BUFFER_BIT | GL10.GL_DEPTH_BUFFER_BIT);
gl.glLoadIdentity();
loopEnd = System.currentTimeMillis();
loopRunTime = ((loopEnd - loopStart)); }
@Override
public void onSurfaceChanged(GL10 gl, int width, int height) {
gl.glViewport(0, 0, width,height);
gl.glMatrixMode(GL10.GL_PROJECTION);
gl.glLoadIdentity();
                gl.glMatrixMode(GL10.GL_MODELVIEW);

                gl.glLoadIdentity();

        }


        @Override

        public void onSurfaceCreated(GL10 gl, EGLConfig config) {


                gl.glEnable(GL10.GL_TEXTURE_2D);

                gl.glClearDepthf(1.0f);

                gl.glEnable(GL10.GL_DEPTH_TEST);

                gl.glDepthFunc(GL10.GL_LEQUAL);

                gl.glHint(GL10.GL_PERSPECTIVE_CORRECTION_HINT, GL10.GL_NICEST);

                gl.glDisable(GL10.GL_DITHER);

        }


}
The BHWalls class has been instantiated, and it is time to call the loadTexture() method.
Mapping the Image
In this section, you will use the loadTexture() method, which was introduced in the Star Fighter game. Recall that the loadTexture() method will map the image onto the vertices of the BHWalls.
package com.proandroidgames;


import javax.microedition.khronos.egl.EGLConfig;

import javax.microedition.khronos.opengles.GL10;


import android.opengl.GLSurfaceView.Renderer;


public class BHGameRenderer implements Renderer{

        private BHWalls background = new BHWalls();

        private float rotateAngle = .25f;

        private float rotateIncrement = .25f;


        private long loopStart = 0;

        private long loopEnd = 0;

        private long loopRunTime = 0 ;


        @Override

        public void onDrawFrame(GL10 gl) {

                loopStart = System.currentTimeMillis();

                try {

                        if (loopRunTime < BHEngine.GAME_THREAD_FPS_SLEEP){

                                Thread.sleep(BHEngine.GAME_THREAD_FPS_SLEEP - loopRunTime);

                        }

                } catch (InterruptedException e) {

                        e.printStackTrace();

                }

                gl.glClear(GL10.GL_COLOR_BUFFER_BIT | GL10.GL_DEPTH_BUFFER_BIT);

                gl.glLoadIdentity();


                loopEnd = System.currentTimeMillis();

                loopRunTime = ((loopEnd - loopStart));
}
@Override
public void onSurfaceChanged(GL10 gl, int width, int height) {
gl.glViewport(0, 0, width,height);
gl.glMatrixMode(GL10.GL_PROJECTION);
gl.glLoadIdentity();
gl.glMatrixMode(GL10.GL_MODELVIEW);
gl.glLoadIdentity();
}
@Override
public void onSurfaceCreated(GL10 gl, EGLConfig config) {
gl.glEnable(GL10.GL_TEXTURE_2D);
gl.glClearDepthf(1.0f);
gl.glEnable(GL10.GL_DEPTH_TEST);
gl.glDepthFunc(GL10.GL_LEQUAL);
gl.glHint(GL10.GL_PERSPECTIVE_CORRECTION_HINT, GL10.GL_NICEST);
gl.glDisable(GL10.GL_DITHER);
background.loadTexture(gl,BHEngine.BACKGROUND, BHEngine.context);
}
}
At this point, you are probably wondering where the big differences are between using OpenGL ES for 2-D and 3-D, because so far, all of the code that you have used has been from the 2-D Star Fighter project.
The major difference between how OpenGL deals with 2-D and how it deals with 3-D boils down to how you tell the system to render your world. In the Star Fighter game, you told Open GL to render your world as a flattened 2-D environment using the glOrthof() method.
The glOrthof() method discards the meaning of the z axis value. That is, when you're using glOrthof(), everything is rendered the same size, regardless of its distance from the player.
To render your objects in 3-D, you are going to use gluPerspective(), which is discussed next.
Using gluPerspective()
The gluPerspective() method will take into account the object's distance from the player on the z axis and then render the object with the correct size and perspective relative to its position.
The parameters for the gluPerspective() method are slightly different from those of glOrthof(). To call gluPerspective(), you need to pass it a valid instance of GL10, a viewing angle, an aspect, and a near and a far z axis clipping plane.
gluPerspective(gl10, angle, aspect, nearz, farz)
The angle that is passed to gluPerspective() specifies the viewing angle that you want OpenGL to render; anything that falls outside that viewing angle will not be seen. The aspect parameter is a float of width / height. Finally, the near and far z clipping planes tell OpenGL where to stop rendering. Anything closer than the near z plane or farther away than the far z plane will be clipped from the rendering.
In the onSurfaceChanged() method of BHGameRender, you are going to add the call to gluPerspective().
package com.proandroidgames;


import javax.microedition.khronos.egl.EGLConfig;

import javax.microedition.khronos.opengles.GL10;


import android.opengl.GLSurfaceView.Renderer;


public class BHGameRenderer implements Renderer{

        private BHWalls background = new BHWalls();

        private float rotateAngle = .25f;

        private float rotateIncrement = .25f;


        private long loopStart = 0;

        private long loopEnd = 0;

        private long loopRunTime = 0 ;


        @Override

        public void onDrawFrame(GL10 gl) {

                loopStart = System.currentTimeMillis();

                try {

                        if (loopRunTime < BHEngine.GAME_THREAD_FPS_SLEEP){
Thread.sleep(BHEngine.GAME_THREAD_FPS_SLEEP - loopRunTime);
}
} catch (InterruptedException e) {
e.printStackTrace();
}
gl.glClear(GL10.GL_COLOR_BUFFER_BIT | GL10.GL_DEPTH_BUFFER_BIT);
gl.glLoadIdentity();
loopEnd = System.currentTimeMillis();
loopRunTime = ((loopEnd - loopStart));
}
@Override
public void onSurfaceChanged(GL10 gl, int width, int height) {
gl.glViewport(0, 0, width,height);
gl.glMatrixMode(GL10.GL_PROJECTION);
gl.glLoadIdentity();
GLU.gluPerspective(gl, 45.0f, (float) width / height, .1f, 100.f);
gl.glMatrixMode(GL10.GL_MODELVIEW);
gl.glLoadIdentity();
}
@Override
public void onSurfaceCreated(GL10 gl, EGLConfig config) {
gl.glEnable(GL10.GL_TEXTURE_2D);
gl.glClearDepthf(1.0f);
gl.glEnable(GL10.GL_DEPTH_TEST);
gl.glDepthFunc(GL10.GL_LEQUAL);
gl.glHint(GL10.GL_PERSPECTIVE_CORRECTION_HINT, GL10.GL_NICEST);
gl.glDisable(GL10.GL_DITHER);
background.loadTexture(gl,BHEngine.BACKGROUND, BHEngine.context);
}
}
In the next section, you will draw the background plane using a method called drawBackground().
Creating the drawBackground() Method
You need a new method that will draw the BHWalls vertices to the screen and move them around to show off the 3-D rendering of OpenGL. Now, create a drawBackground() method that will use the glRotatef() method to rotate the image of the scout around the player on the z axis.
The OpenGL method glRotatef() takes four parameters. The first specifies the angle of rotation. The second, third, and fourth parameters are flags for the x, y, and z axes, indicating to which axis you want to apply the angle of rotation.
The following code shows the drawBackground() method in context:
package com.proandroidgames;


import javax.microedition.khronos.egl.EGLConfig;

import javax.microedition.khronos.opengles.GL10;


import android.opengl.GLSurfaceView.Renderer;


public class BHGameRenderer implements Renderer{

        private BHWalls background = new BHWalls();

        private float rotateAngle = .25f;

        private float rotateIncrement = .25f;


        private long loopStart = 0;

        private long loopEnd = 0;

        private long loopRunTime = 0 ;
@Override
public void onDrawFrame(GL10 gl) {
loopStart = System.currentTimeMillis();
try {
if (loopRunTime < BHEngine.GAME_THREAD_FPS_SLEEP){
Thread.sleep(BHEngine.GAME_THREAD_FPS_SLEEP - loopRunTime);
}
} catch (InterruptedException e) {
e.printStackTrace();
}
gl.glClear(GL10.GL_COLOR_BUFFER_BIT | GL10.GL_DEPTH_BUFFER_BIT);
gl.glLoadIdentity();
loopEnd = System.currentTimeMillis();
loopRunTime = ((loopEnd - loopStart));
}
private void drawBackground(GL10 gl){
GLU.gluLookAt(gl, 0f, 0f, 5f, 0f, 0f, 0f, 0f, 1f, 0f);
gl.glRotatef(rotateAngle, 0.0f, 1.0f, 0.0f);
gl.glTranslatef(0.0f, 0.0f, -3f);
background.draw(gl);
rotateAngle += rotateIncrement;
}
@Override
public void onSurfaceChanged(GL10 gl, int width, int height) {
gl.glViewport(0, 0, width,height);
gl.glMatrixMode(GL10.GL_PROJECTION);
gl.glLoadIdentity();
GLU.gluPerspective(gl, 45.0f, (float) width / height, .1f, 100.f);
gl.glMatrixMode(GL10.GL_MODELVIEW);
gl.glLoadIdentity();
}
@Override
public void onSurfaceCreated(GL10 gl, EGLConfig config) {
gl.glEnable(GL10.GL_TEXTURE_2D);
gl.glClearDepthf(1.0f);
gl.glEnable(GL10.GL_DEPTH_TEST);
gl.glDepthFunc(GL10.GL_LEQUAL);
gl.glHint(GL10.GL_PERSPECTIVE_CORRECTION_HINT, GL10.GL_NICEST);
gl.glDisable(GL10.GL_DITHER);
background.loadTexture(gl,BHEngine.BACKGROUND, BHEngine.context);
}
}
Notice that there is a new method call in this example. The gluLookAt() call tells the "camera" where to look in the world. If you have ever worked with 3-D rendering software such as Maya or 3-D Studio Max, you may be familiar with the concept having a camera that acts as the viewer of the scene when it is rendered. OpenGL does not really have a camera as a separate object. However, the gluLookAt() method serves as a way to point the rendering to look at a specific location in the world.
The gluLookAt() method takes a valid GL10 object plus three sets of three parameters. These three sets of three parameters are the x, y, and z values for the eye (where the renderer is looking); the x, y, and z values for the center of "camera" (where the renderer is located in the world); and the x, y, and z positions indicating which axis is up. As written in this example, you are telling the "camera" to look at a point that is located at 0x, 0y, and 5z, to center itself on the 0x, 0y, and 0z point, and that the direction up is toward 1y.
Adding the Finishing Touches
Now, just call the drawBackground() method, and compile your game. You should see an image of a scout ship rotate in front of and then behind you in perspective.
package com.proandroidgames;


import javax.microedition.khronos.egl.EGLConfig;

import javax.microedition.khronos.opengles.GL10;


import android.opengl.GLSurfaceView.Renderer;


public class BHGameRenderer implements Renderer{

        private BHWalls background = new BHWalls();

        private float rotateAngle = .25f;

        private float rotateIncrement = .25f;


        private long loopStart = 0;
private long loopEnd = 0;
private long loopRunTime = 0 ;
@Override
public void onDrawFrame(GL10 gl) {
loopStart = System.currentTimeMillis();
try {
if (loopRunTime < BHEngine.GAME_THREAD_FPS_SLEEP){
Thread.sleep(BHEngine.GAME_THREAD_FPS_SLEEP - loopRunTime);
}
} catch (InterruptedException e) {
e.printStackTrace();
}
gl.glClear(GL10.GL_COLOR_BUFFER_BIT | GL10.GL_DEPTH_BUFFER_BIT);
gl.glLoadIdentity();
drawBackground(gl);
loopEnd = System.currentTimeMillis(); loopRunTime = ((loopEnd - loopStart));
}
private void drawBackground(GL10 gl){
GLU.gluLookAt(gl, 0f, 0f, 5f, 0f, 0f, 0f, 0f, 1f, 0f);
gl.glRotatef(rotateAngle, 0.0f, 1.0f, 0.0f);
gl.glTranslatef(0.0f, 0.0f, -3f);
background.draw(gl);
rotateAngle += rotateIncrement;
}
@Override
public void onSurfaceChanged(GL10 gl, int width, int height) {
gl.glViewport(0, 0, width,height);
gl.glMatrixMode(GL10.GL_PROJECTION);
gl.glLoadIdentity();
GLU.gluPerspective(gl, 45.0f, (float) width / height, .1f, 100.f);
gl.glMatrixMode(GL10.GL_MODELVIEW);
gl.glLoadIdentity();
}
@Override
public void onSurfaceCreated(GL10 gl, EGLConfig config) {
gl.glEnable(GL10.GL_TEXTURE_2D);
gl.glClearDepthf(1.0f);
gl.glEnable(GL10.GL_DEPTH_TEST);
gl.glDepthFunc(GL10.GL_LEQUAL);
gl.glHint(GL10.GL_PERSPECTIVE_CORRECTION_HINT, GL10.GL_NICEST);
gl.glDisable(GL10.GL_DITHER);
background.loadTexture(gl,BHEngine.BACKGROUND, BHEngine.context);
}
}
In the next chapter, you are going to create the 3-D environment for Blob Hunter. It will be a corridor-based environment, much like the early Doom and Quake FPS games.
Summary
In this chapter, you created the project for the Blob Hunter 3-D game. You also learned the differences in how OpenGL ES renders 2-D versus 3-D environments. The key to creating a 3-D environment from a 2-D one is all in the way you tell OpenGL to render your objects. OpenGL make the process of moving from 2-D to 3-D gaming very easy for you by allowing you to use the same vertices and textures and only change a few lines of code. This process was clarified when you created the quick demonstration of an object rotating in 3-D space.