
Chapter 2: Setting Up the Development Environment
In this chapter, you will install the tools that you'll need to use Node-RED. This extends not only to Node-RED itself, but to its runtime, Node.js, and how to update both Node-RED and Node.js.
Node-RED released its 1.0 milestone version in September 2019. This reflects the maturity of the project, as it is already being widely used in production environments. It continues to be developed and keeps up to date by making changes to the underlying Node.js runtime. You can check the latest status of Node-RED's installation at https://nodered.org/docs/getting-started/.
There are a number of installation guides on the Node-RED official website, such as local, Raspberry Pi, Docker, and major cloud platforms.
In this chapter, you will learn how to install Node-RED on your local computer, whether you are running it on Windows, Mac, or on a Raspberry Pi. We will cover the following topics:
- Installing npm and Node.js for Windows
- Installing npm and Node.js for Mac
- Installing npm and Node.js for Raspberry Pi
- Installing Node-RED for Windows
- Installing Node-RED for Mac
- Installing Node-RED for Raspberry Pi
By the end of this chapter, we'll have all the necessary tools installed and be ready to move on to building some basic flows with Node-RED.
For reference, the author's test operation environment is Windows 10 2004 18363.476, macOS Mojave 10.14.6 (18G5033), and Raspberry Pi OS 9.4 stretch.
Technical requirements
You will need to install the following for this chapter:
- Node.js (v12.18.1)*
- npm (v6.14.5)*
*LTS version at the time of writing for both.
Installing npm and Node.js for Windows
If you want to use Node-RED on Windows, you must install npm and Node.js via the following website:
https://nodejs.org/en/#home-downloadhead.
You can get the Windows Installer of Node.js directly there. After that, follow these steps:
- Access the original Node.js website and download the installer.
You can choose both versions – Recommended or Latest Features – but in this book, you should use the Recommended version:

Figure 2.1 – Choosing a Recommended version installer
- Click the msi file you downloaded to start installing Node.js. It includes the current version of npm. Node-RED is running on the Node.js runtime, so it is needed.
- Simply click the buttons of the dialog windows according to the installation wizard, though there are some points to bear in mind during the install.
- Next, you need to accept the End-User License Agreement:
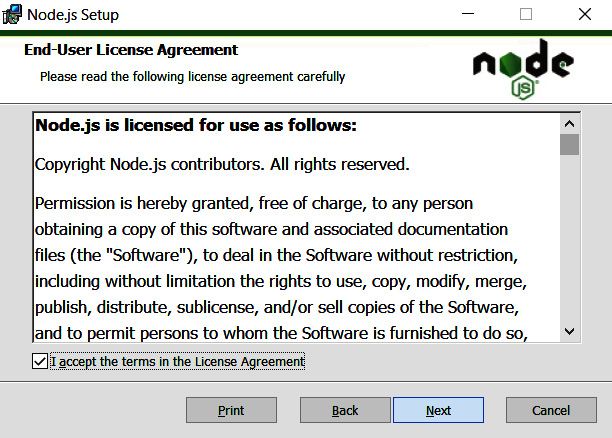
Figure 2.2 – End-User License Agreement window
You can also change the install destination folder. In this book, the default folder (C:/Program Files/nodejs/) will be used:
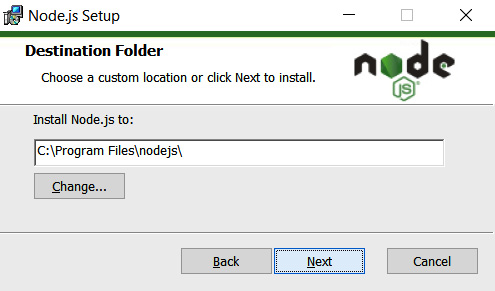
Figure 2.3 – Installing the destination folder
- No custom setup is needed on the next screen. You can select Next with only the default features selected:
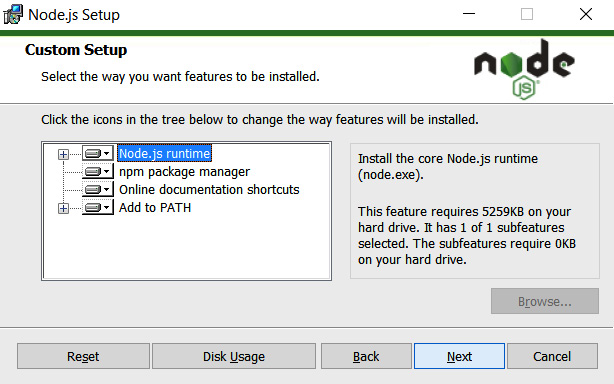
Figure 2.4 – No custom setup is needed
- On the following screen, you can click Next without checking anything. However, it's OK to install the tools that can be selected here. This includes the installations and settings the path of these environments (Visual C++, windows-build-tools, and Python):
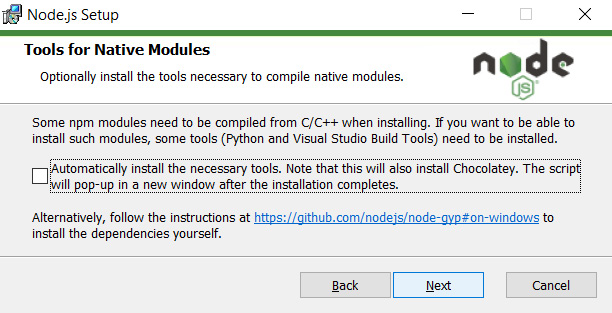
Figure 2.5 – Tools for Native Modules window
- Check the versions of your tools with the following commands when the installation for Node.js has finished:
$ node --version
v12.18.1
$ npm –version
6.14.5
When the installations of Node.js and npm are complete, you can check their version numbers. With this, you are prepared to install Node-RED.
Important note
Depending on the project, it is common for the operation to be stable with the old Node.js version but for it not to work if you use a different version of Node.js. However, uninstalling your current version of Node.js and installing the desired version of Node.js every time you switch projects takes time. So, if you're using Windows, I recommend using a Node.js version management tool such as nodist (https://github.com/nullivex/nodist). There are other kinds of version control tools for Node.js, so please try to find one that is easy for you to use.
Installing npm and Node.js for Mac
If you want to use Node-RED on macOS, you must install npm and Node.js via the following website:
https://nodejs.org/en/#home-downloadhead
You can get the Mac Installer for Node.js directly there.
Access the original Node.js website and download the installer. You can choose either the recommended or latest features version, but for this book, you should use the recommended version:
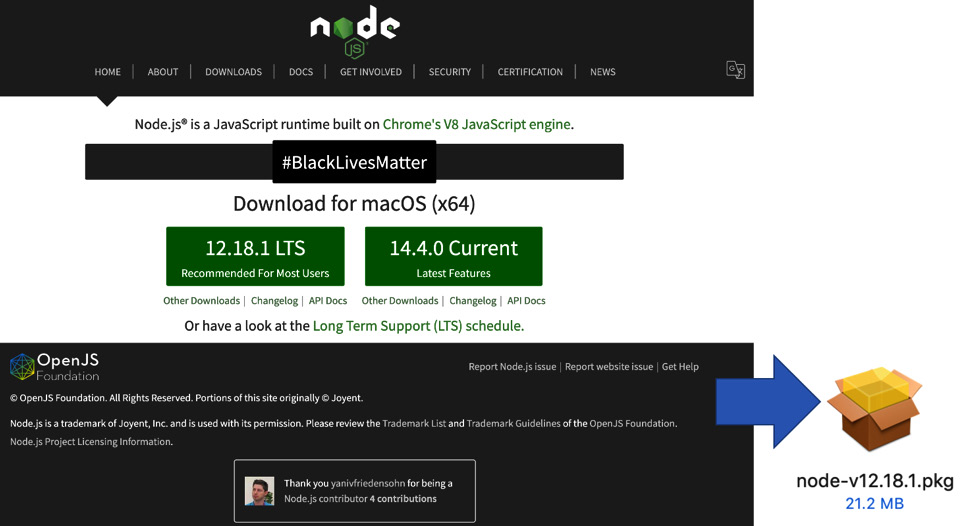
Figure 2.6 – Choosing a recommended version installer
Click the .pkg file you downloaded to start installing Node.js. It includes the current version of npm. Node-RED is running on the Node.js runtime, so it is needed. Simply click according to the installation wizard, though there are some points in the installation to pay attention to.
You need to accept the End-User License Agreement:
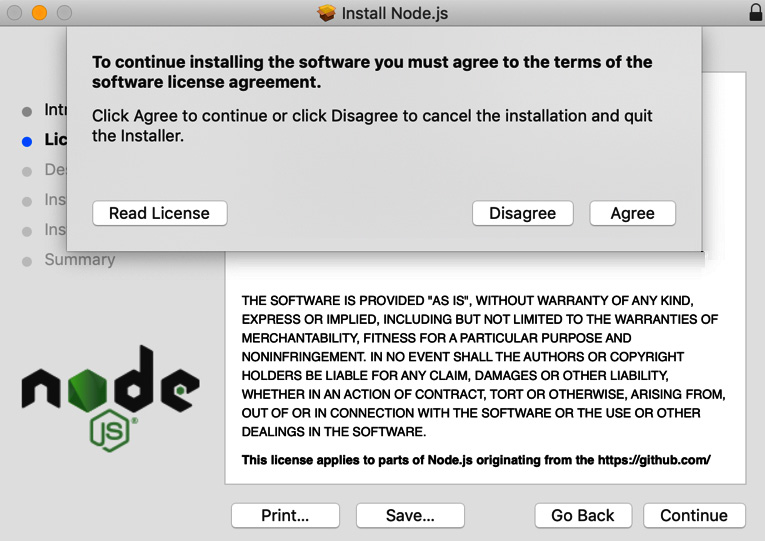
Figure 2.7 – End-User License Agreement window
You can change the installation location. In this book, the default location (Macintosh HD) will be used:

Figure 2.8 – Install location
You can check the versions of your tools with the following commands when the installation for Node.js has finished. Once you have finished installing Node.js and npm, you can check their version numbers. You have already prepared to install Node-RED:
$ node --version
v12.18.1
$ npm –version
6.14.5
Note
Depending on the project, it is common for the operation to be stable with the old Node.js version, and that it will not work if you use a different version of Node.js. However, uninstalling the current Node.js version and installing the desired version of Node.js every time you switch projects takes time. So, if you're using macOS, I recommend using a Node.js version management tool such as Nodebrew (https://github.com/hokaccha/nodebrew). There are other kinds of version control tools for Node.js, so please try to find one that is easy for you to use.
Now that we have covered the installation processes for both Windows and Mac, let's learn how to install npm and Node.js for Raspberry Pi.
Installing npm and Node.js for Raspberry Pi
If you want to use Node-RED on Raspberry Pi, congratulations – you are already prepared to install Node-RED. This is because Node.js and npm are installed by default. You can use the existing installation script to install Node-RED, including Node.js and npm. This script will be described later in this chapter, in the Installing Node-RED for Raspberry Pi section, so you can skip this operation for now.
However, you should check your Node.js and npm versions on your Raspberry Pi. Please type in the following commands:
$ node --version
v12.18.1
$ npm –version
6.14.5
If it is not the LTS version or stable version, you can update it via the CLI. Please type in and run the following commands to do this. In this command, on the last line, lts has been used, but you can also put stable instead of lts if you want to install the stable version:
$ sudo apt-get update
$ sudo apt-get install -y nodejs npm
$ sudo npm install npm n -g
$ sudo n lts
Now that we have successfully checked the versions of Node.js and npm on our Raspberry Pi and updated them (if applicable), we will move on to installing Node-RED for Windows.
Important note
The script the Node-RED project provides takes care of installing Node.js and npm. It is not generally recommended to use the versions that are provided by Raspberry Pi OS due to the strange ways they package them.
Installing Node-RED for Windows
In this section, we will explain how to set up Node-RED in a Windows environment. This procedure is for Windows 10, but it will work for Windows 7 and Windows Server 2008 R2 and above as well. Windows 7 or earlier versions of Windows Server 2008 R2 are not currently supported and are not recommended.
For Windows, installing Node-RED as a global module adds the node-red command to your system path. Run the following command in Command Prompt:
$ npm install -g --unsafe-perm node-red
Once you have finished installing Node-RED, you can use Node-RED straight away. Please run the following command. After running this command, you will recognize the URL being used to access the Node-RED flow editor. Usually, localhost (127.0.0.1) with the default port 1880 will be allocated:
$ node-red
Welcome to Node-RED
===================
…
[info] Starting flows
[info] Started flows
[info] Server now running at http://127.0.0.1:1880/
Let's access Node-RED on a browser. For this, type in the URL you received from Command Prompt. I strongly recommend using Chrome or Firefox for running Node-RED:
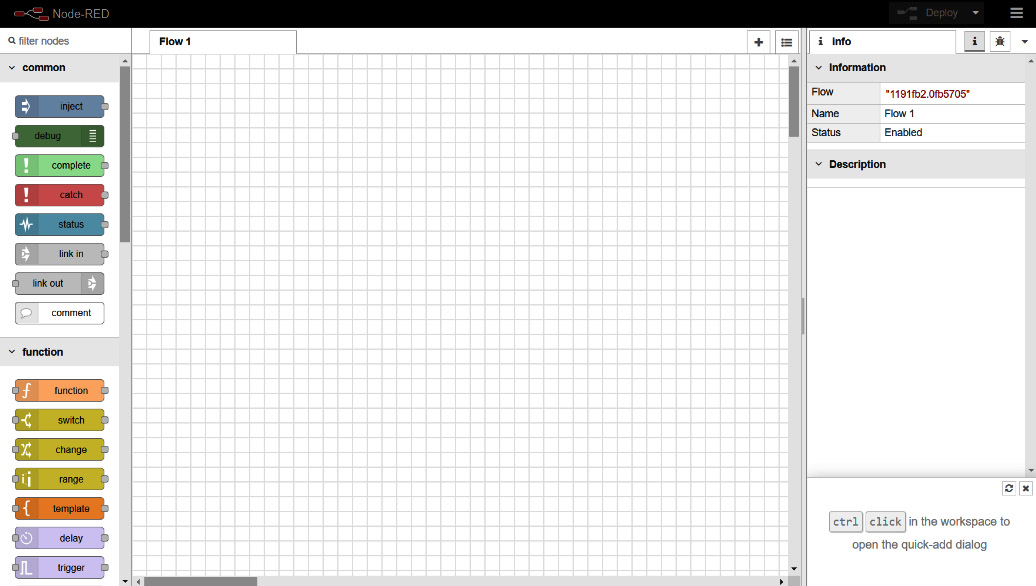
Figure 2.9 – Node-RED flow editor
Now, you are ready to program in Node-RED. From Chapter 3, Understanding Node-RED Characteristics by Creating Basic Flows, onward, we will learn how to actually build an application using Node-RED.
For now, let's move on to installing Node-RED in macOS.
Installing Node-RED for Mac
In this section, we will explain how to set up Node-RED in a macOS environment. This procedure is for macOS Mojave. It will likely work for all versions of Mac OS X, but I strongly recommend that you use the current version of macOS.
For macOS, installing Node-RED as a global module adds the node-red command to your system path. Run the following command in the Terminal. You may need to add sudo at the front of the command, depending on your local settings:
$ sudo npm install -g --unsafe-perm node-red
You can also install Node-RED with other tools. This is mainly for Mac/Linux or the kinds of OS that support the following tools:
- Docker (https://www.docker.com/), if you have the environment for running Docker.
The current Node-RED 1.x repository on Docker Hub has been renamed "nodered/node-red".
Versions up to 0.20.x are available from https://hub.docker.com/r/nodered/node-red-docker.
Important note
When running Node-RED with Docker, you need to ensure that the added nodes and flows will not be lost if the container breaks. This user data can be persisted by mounting the data directory to a volume outside the container. You can also do this by using a bound mount or a named data volume.
Run the following command to install Node-RED with Docker:
$ docker run -it -p 1880:1880 --name mynodered nodered/node-red
- Snap (https://snapcraft.io/docs/installing-snapd) if your OS supports it.
If you install it as a Snap package, you can run it in a secure container that doesn't have access to the external features you have to use, such as the following:
- Access main system storage (only read/write to local home directory is allowed).
- Gcc: Required to compile the binary components for the node you want to install.
- Git: Required if you want to take advantage of project features.
- Direct access to GPIO hardware.
- Access to external commands, such as flows executed in Exec nodes.
There's less security for containers, but you can also run them in classic mode, which gives you more access.
Run the following command to install Node-RED with Snap:
$ sudo snap install node-red
Once you have finished installing Node-RED, you can use Node-RED immediately. Please run the following command. After running this command, you can find the URL for accessing the Node-RED flow editor. Usually, localhost (127.0.0.1) with the default port 1880 will be allocated:
$ node-red
Welcome to Node-RED
===================
…
[info] Server now running at http://127.0.0.1:1880/
[info] Starting flows
[info] Started flows
Let's access Node-RED on a browser. Type in the URL you received from Command Prompt. I strongly recommend using Chrome or Firefox for running Node-RED:
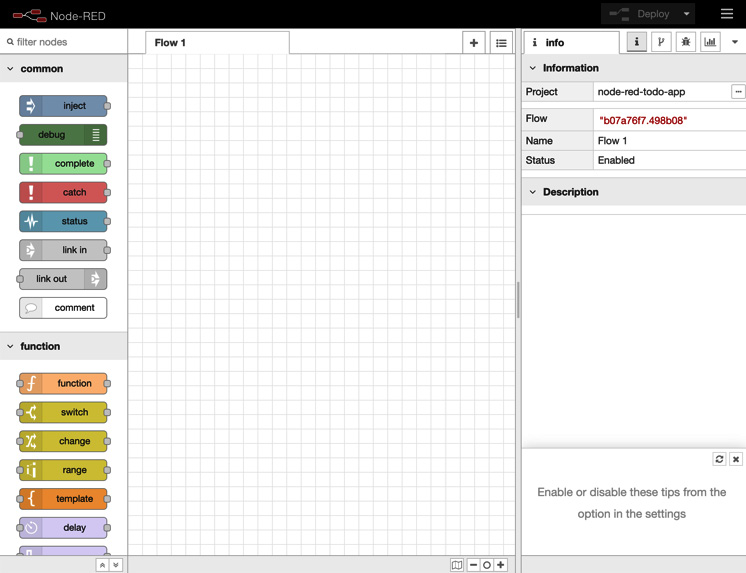
Figure 2.10 – Node-RED flow editor
Now, you are ready to program in Node-RED. In Chapter 3, Understanding Node-RED Characteristics by Creating Basic Flows, we will learn how to actually build an application using Node-RED.
Our final installation will be for Node-RED on Raspberry Pi.
Installing Node-RED for Raspberry Pi
In this section, we will explain how to set up Node-RED in a Raspberry environment. This procedure is for Raspberry Pi OS Buster (Debian 10.x), but it will work for Raspberry Pi OS Jessie (Debian 8.x) and above.
You can check your version of Raspberry Pi OS easily. Just run the following command on your Terminal:
$ lsb_release -a
If you want to also check the version of Debian you have, please run the following command:
$ cat /etc/debian_version
You have now prepared to install Node-RED. The following script installs Node-RED, including Node.js and npm. This script can also be used for upgrading your application, which you have already installed.
Note
This instruction is subject to change, so it is recommended that you refer to the official documentation as needed.
This script works on Debian-based operating systems, including Ubuntu and Diet-Pi:
$ bash <(curl -sL https://raw.githubusercontent.com/node-red/linux-installers/master/deb/update-nodejs-and-nodered)
You may need to run sudo apt install build-essential git to ensure that npm can build the binary components that need to be installed.
Node-RED is already packaged as a Raspberry Pi OS repository and is included in the Recommended Software list. It can be installed with the apt-get install Node-RED command, and it also contains a Raspberry Pi OS packaged version of Node.js, but npm is not included.
While using these packages may seem convenient at first glance, it is highly recommended to use the installation script instead.
After the installation, you can start Node-RED and access the Node-RED flow editor. We have two ways to start it, as follows:
- Run with the CLI: If you want to run Node-RED locally, you can start Node-RED by using the node-red command in your Terminal. Then, you can stop it by pressing Ctrl + C or closing the Terminal window:
$ node-red
- Run via Programming menu: Once Node-RED has been installed, you can start it from the Raspberry Pi menu. Click Menu | Programming | Node-RED to open the Terminal and launch Node-RED. Once Node-RED has been launched, you can access the Node-RED flow editor from your browser, just as you would in the CLI:
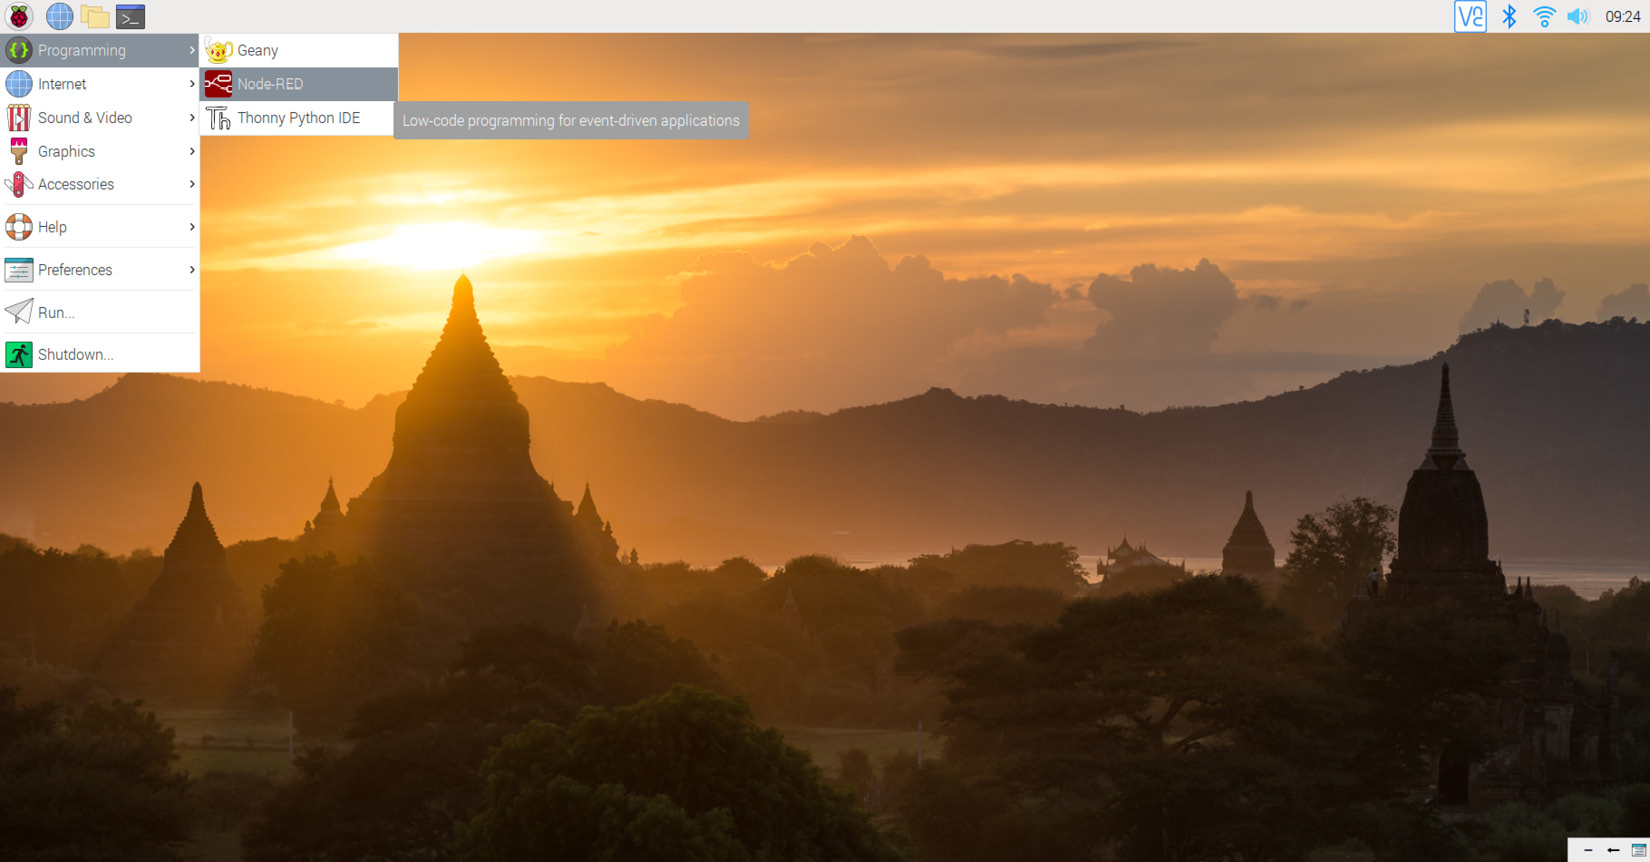
Figure 2.11 – Accessing Node-RED via the Raspberry Pi menu
After launching Node-RED from the menu, you should check the Node-RED running process on your Terminal and find the URL of the Node-RED flow editor. It is usually the same URL as the one that can be launched via the CLI directly:

Figure 2.12 – Checking the URL to access the Node-RED flow editor
Let's access Node-RED on a browser. You can type in the URL you received from the Command Prompt to do this. If your Raspberry Pi default web browser is Chromium, then there should be no problems with using Node-RED. However, if you wish to use another browser, I strongly recommend installing Chromium for running Node-RED:
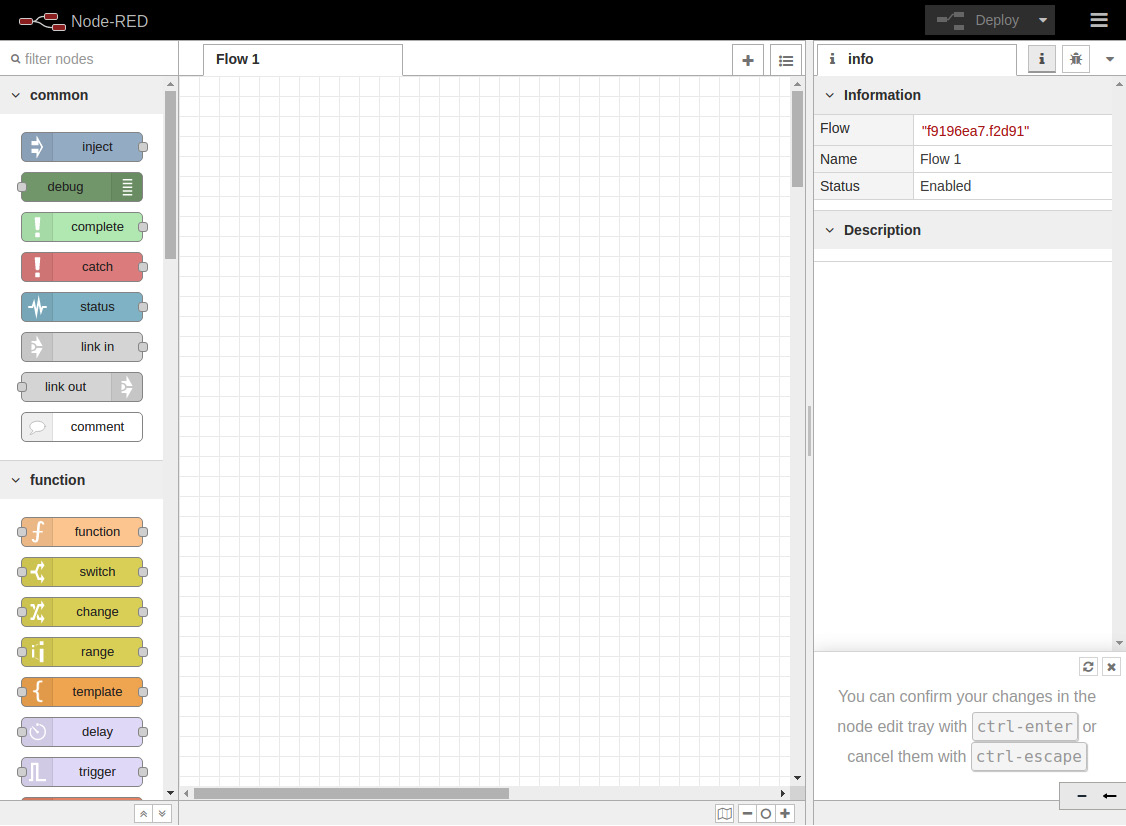
Figure 2.13 – Node-RED flow editor
And that's it! We have now covered all the installation options for each tool we'll need in order to start using Node-RED.
Summary
In this chapter, you've gotten your environment ready so that you can use the Node-RED flow editor. At this point, I believe that you can already access the Node-RED flow editor, so you'll want to learn how to use it. In the next chapter, we'll make a sample flow on it and learn about the major features of the Node-RED flow editor.