
What do you need to have to get your own Smart Device journey under way? While that is obviously a highly subjective question, I have tried to get the basic sort of starter kit and options together in this chapter to get you ready and going with a basic home workbench. The options I have cited will also be required to complete the labs “as built,” but as I will point out throughout the process, half the fun of the smart device world is experimentation with new devices and options! So, in this chapter then, a quick look at the rise of the availability of smart device components, and then a “shopping list” if you will to get your lab in order.
Instant Gratification
There have always been the home-brew crowd that was pushing the boundaries of what computing could do. The emergence of homebuilt and self-programmable computers in the 1970s and 1980s is evidence of this and progresses through the 1990s to the early 2000s when the first Ultra-Portable computing devices emerge. It is easiest to describe them as the now familiar “Arduino” devices and others like them – small, single-board computers with limited capabilities that were designed to support a single objective of allowing the device to interface with sensors and actuators. These immediately became the controller of choice for many industrial systems and were copied and cloned in thousands of different configurations. The inclusion of wireless, Bluetooth, Bluetooth/Mesh, and an increase in the reliability and availability of these units has created an opportunity for anyone who wants to make and control devices and elements with these powerful and small computers. The possibilities for wearable, personal, home control and automation, manufacturing, agriculture, medicine, city management, indeed just about anything you interact with could be instrumented and managed with these types of devices.
The DIY era of the smart device has benefited from this rapid proliferation of hardware and software, to be sure, but without a distribution mechanism to get that hardware into your hands, there is no DIY smart revolution. No history of the smart device can, therefore, be complete without mentioning Amazon, Alibaba, MicroCenter, Fry’s, and every other mega retailer that handles technology components. It is not far off to make an argument that the ability to buy literally anything under the sun and have it sent directly to your door in a minimum amount of time has done more for DIY smart devices than any single other technology. Certainly, this is a grossly over-simplified way of saying that the global supply and manufacturing system, the advances in shipping and logistics, combined with the development of large-scale warehousing and fulfilment logistics are all the foundation on which the DIY movement depends, but the most visible and ubiquitous face of that series of developments is the retail engine that supports this marketplace, and the endless supply of parts and tools for building smart devices.
Recognizing this market trend, there are also many vendors that have responded by creating “ready to go” kits with an MCU/Computer and sensors allowing the DIYer to get up and running in a matter of a few minutes from the time they crack open the box to the time their first LED blinks. The need to potentially go to multiple stores to get breadboards, wires, sensors, MCU or computer, soldering gear, and other tools and parts requires time and effort, and that creates a logical barrier to entry for smart devices; if I have to spend a long time gathering the parts, I lose time building. Rapid fulfilment is something that makes the DIY movement more mainstream, and the response is a market that is well stocked with the tools needed for the assembly of nearly any smart device you can conceive.
While by no means conclusive, the following is a basic shopping list for you as you prepare to build your own devices. This is not an endorsement of any specific manufacturer, or even a recommendation except that I have used these devices myself and know that they will work in the projects in the book. The items on the list will give you the basics needed for all of the projects in this book, as well as many others. Once you get started building smart devices, I am sure you will find as I do that there is always that “one more/better/newer sensor/chip/MCU” you need to build the next thing you dream up. This book will lay the foundation for you to incorporate any type of sensor or Computer/MCU into your devices, but this list will give you the bare minimum to get a lab running without a lot of effort or expense!
The Minimum DIY Lab
A minimal lab for your own prototype projects should not be a barrier to entry for you to get started with smart devices. There are a variety of all-in-one kits that will let you build with a specific MCU and a variety of sensors that are already included in the kit. There are also many, many sensor kits with a variety of sensors. I have avoided putting a price on these as I was mildly surprised when I compared them from 2016/2017 to 2019 when I looked again at how much they had gone up in price. Because prices can and do change rapidly, I did not want to put a price here that might be inaccurate, but I have tried to focus on keeping a total kit an under $100 investment. (Also if you type the first few words of the BOLD description into the search, you should find the referenced item at the top of the results list in an Amazon search.)
MCU Kits
Elegoo EL-KIT-001 UNO R3 Project Complete Starter Kit with Tutorial for Arduino
A very good kit for Arduino, with a massive sensor selection for a starter kit, including some uncommon ones like a display screen and radio-frequency identification (RFID) sensor.
CanaKit Raspberry Pi 3 B+ (B Plus) Ultimate Starter Kit (32 GB Edition, Clear Case)
Cana Kits are the “gold standard” for Raspberry-Pi all-in-one kits as they give you all the parts to make the Pi immediately useful, such as a case, SD card, and power supply. The Pi starter kits are at a premium however, and as such there are no sensors in this kit, only LEDs and buttons. Adding a small sensor starter kit is an inexpensive way to make this kit more useful.
OSOYOO NodeMCU IOT Starter Kit 2018 Open Source Programming Learning with NodeMCU ESP8266 Wi-Fi Development Board and Free Tutorial for MQTT Broker
A nice little kit for the NodeMCU (ESP8266–based MCU) with an emphasis on servos and motors, but with a couple of regular environmental sensors as well.
Sensor Kits
KOOKYE 16 in 1 Smart Home Sensor Modules Kit for Arduino Raspberry Pi DIY Professional (Smart Home Kit)
ELEGOO Upgraded 37 in 1 Sensor Modules Kit with Tutorial for Arduino UNO R3 MEGA 2560 Nano
HiLetgo 37 Sensors Assortment Kit 37 Sensors Kit Sensor Starter Kit Arduino Raspberry pi Sensor kit 37 in 1 Robot Projects Starter Kits for Arduino Raspberry Pi
All of these kits have a good variety of sensors and a couple of unique ones here and there that might make you want one or the other. I have tried to focus on kits that are affordable, but still offer enough sensors to make the kit worthwhile. The reality is that, if you get started on building smart devices and really start to invest, you will spend the bulk of the money on sensors and devices to connect to your MCU in the long run. These kits are all designed to give you something to get going with quickly as you get the basics down and begin to embark on building out your project(s).
Build Your Own
Double A or “AA” battery boxes (see Figure 2-1) – No kit is ever complete without one!
Breadboard(s) – Covered in detail in Chapter 4; they are indispensable! (See Figure 2-2.)
Resistors – Also covered in Chapter 4, you can never have enough! (See Figure 2-3.)
LEDs – Again, you can never have enough or enough variety. (See Figure 2-4.)
The MCU of your choice – The kits I recommended earlier have one of each of the “big 3” for DIY use, but there are many others. See Figure 2-5 for images and Chapter 5 for more detail.
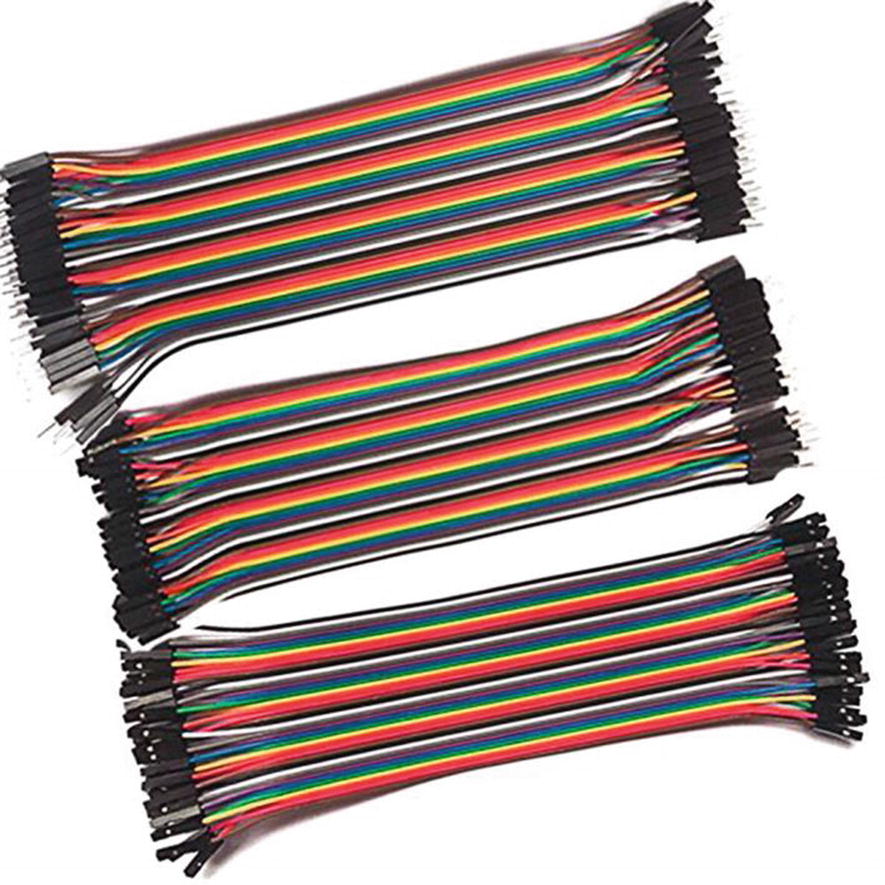
Wires – There are many, and you will need them for prototypes. (See Figure 2-6.)
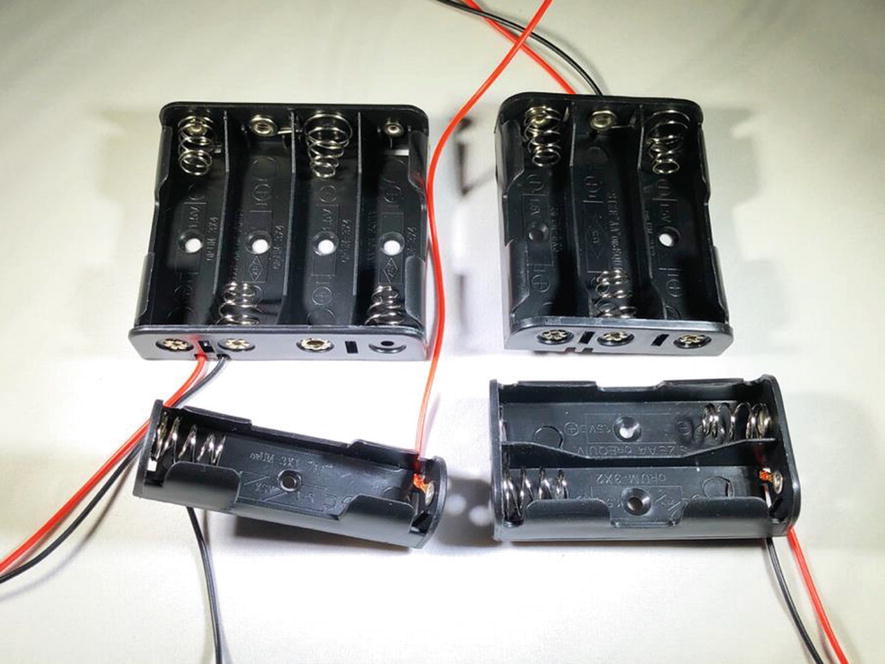
Various “AA” battery holders (1, 2, 3, and 4 battery versions)

Various breadboards (full-length, half, and solderable perfboard style)

Various resistors and a resistor kit
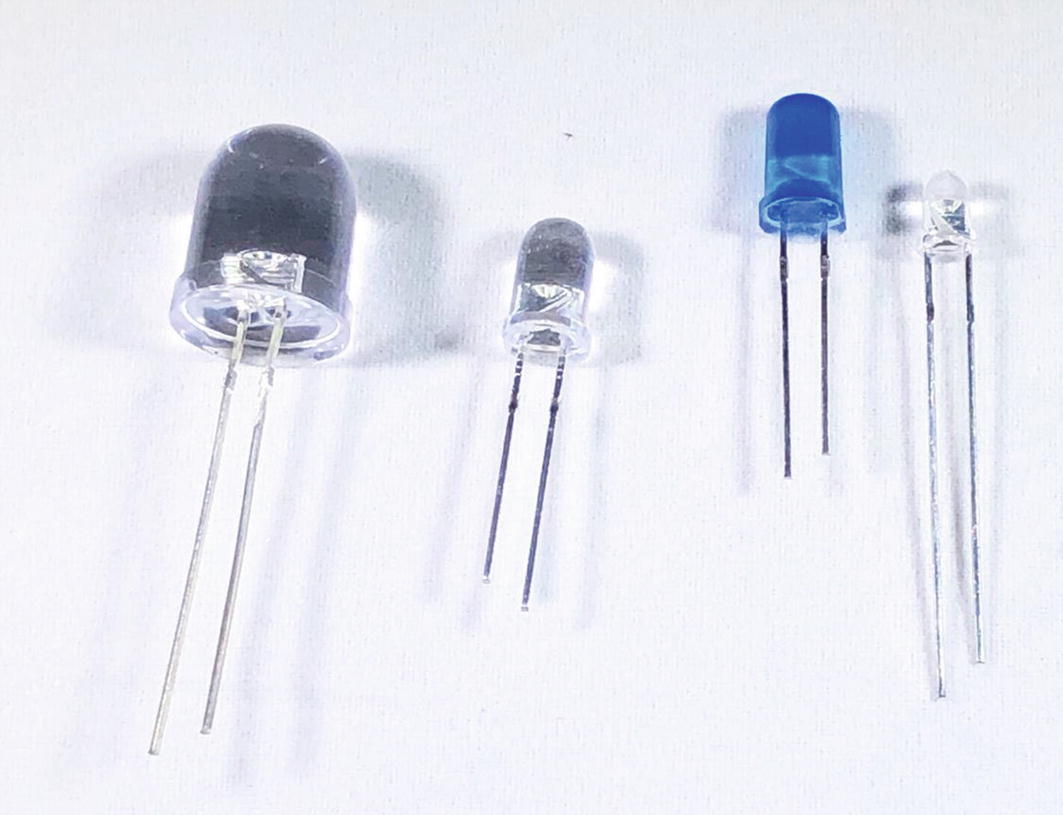
A variety of LED sizes and colors – don’t let the clear dome fool you, they can be different colors as well!
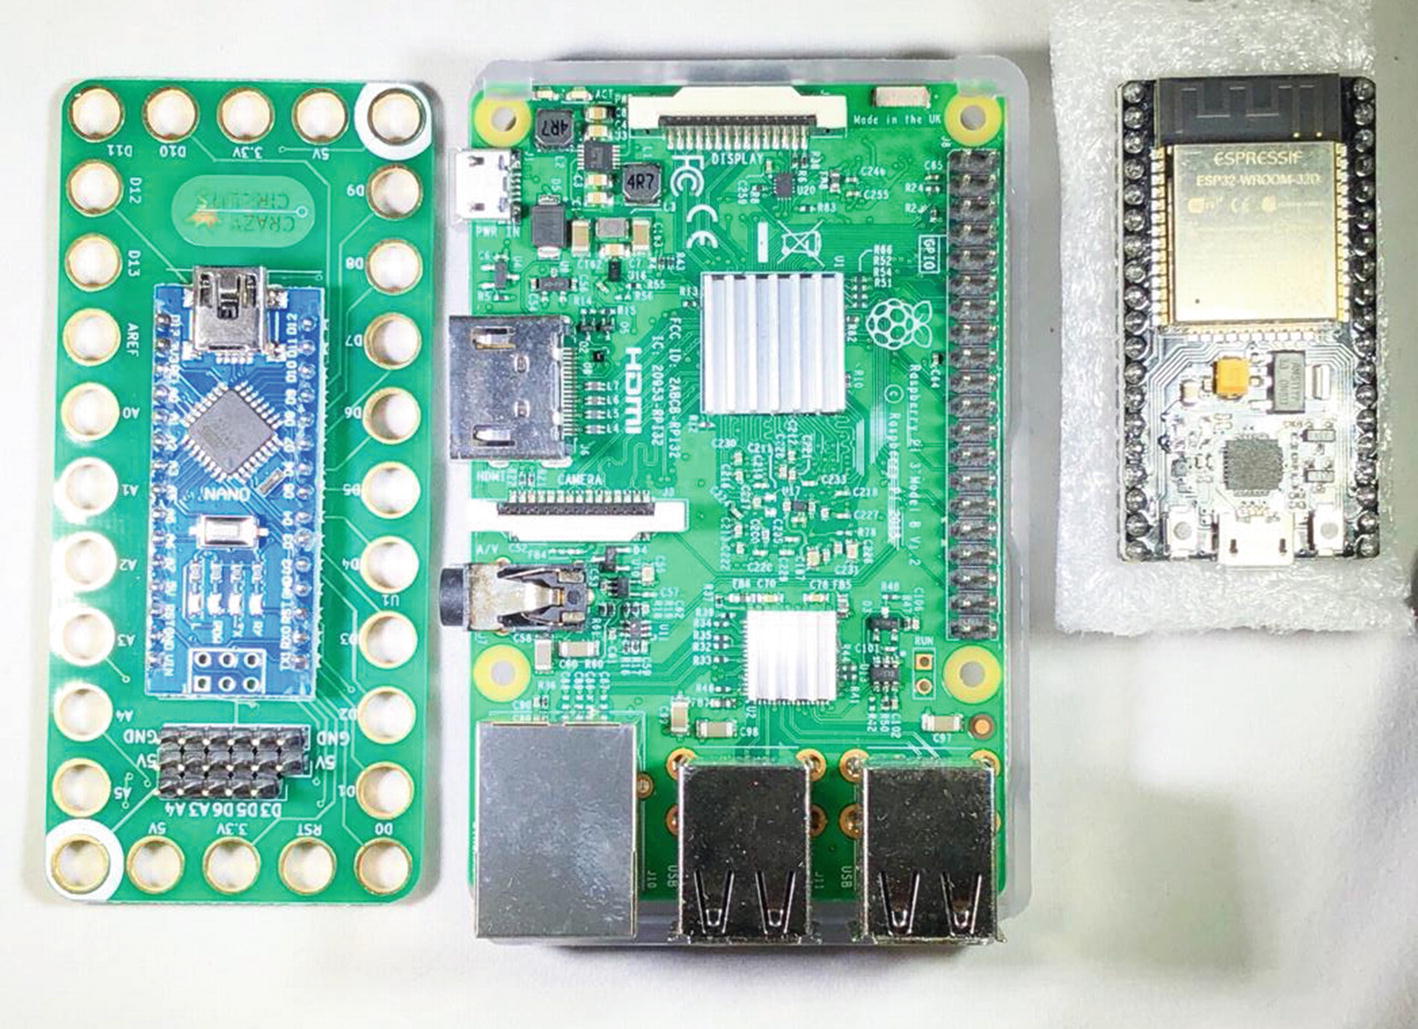
Various MCU options (L-R Arduino Nano, Raspberry PI 3B+, ESP32 NodeMCU)

Various wires (L-R pre-cut “breadboard wires,” M-F wires in a bundle)
As for sensors, minus the fact that like LEDs, you can probably never really have enough, you are going to need the following basic devices to complete the lab builds. I have focused on using relatively inexpensive sensors and devices here, not top of the line sensors, but for experimenting and lab prototypes, these devices are functional if not exactly “commercial grade.” Note: You can of course use your own sensor(s), but the associated code may not work without modifications. I will try and call out any places where this could be an issue.
To Complete the “Build It” Exercises As Written
4 Pcs Radial Electrolytic Capacitor 25V 10000UF 105C
OK, so these are optional strictly speaking, because other than providing a ridiculous amount of capacitance for the lab build, they are probably not super useful. You will find smaller (physically and capacitance wise) versions in many of the other kits, and do not need this one, but your build will not match the pictures in the lab guide without it, so I included it for completeness. They look like Figure 2-7 for reference.
LAMPVPATH (Pack of 8) AA Battery Holder Bundle 2Pcs Single AA Battery Holder, 2Pcs 2X 1.5V AA Battery Holder with Leads, 2Pcs 3X 1.5V 3 AA Battery Holder with Wire, 2Pcs 4X 1.5V 6 Volt Battery Holder
I used this exact kit in the labs, but really any type of basic battery holders will work. This kit is nice, and inexpensive, with a couple of each type of holder to provide some flexibility for your projects as you see in Figure 2-8.
LANDZO 120pcs Multicolored 40pin Male to Female, 40pin Male to Male, 40pin Female to Female Breadboard Jumper Wires Ribbon Cables Kit for Raspberry Pi and Arduino
You will probably get some wires of this type with a kit, but again, for completeness I included this set here. Wires like these for prototyping have two types of connectors: Male and Female. The Male to Male. or MM, style has a male connector on both ends and is useful for connecting the holes on a breadboard together. The Male to Female version, or MF, is often used to connect from the header on a small computer header (like the ones on the Raspberry Pi) to a breadboard. Figure 2-9 is a nice kit of wires, and there are packages for just MM and FF as well as this type of combo kit.
AUSTOR 560 Pieces Jumper Wire Kit 14 Lengths Assorted Preformed Breadboard Jumper Wire with Free Box
Again, probably a bit of a “nice to have” item, but these Breadboard wires are nice to use in complex prototypes as they can help keep the wiring mess a little more controllable. Plus, Free Box! The kit looks like Figure 2-10 for reference.
Hilitchi 675-Piece 15 Values 2N2222-S9018 NPN PNP Power General Purpose Transistors Assortment Kit
This one is for sure overkill only because you need one for the lab, but again, this is the kit I used the transistor from for it. There are transistors in the other kits I mentioned as well, so check before you buy the one you see here in Figure 2-11 as you may not need it. (It won’t hurt, just trying to save you a few $$.)
Chanzon Fast Switching/Schottky/Rectifier Diode Assorted Kit (200pcs 14 Values 1N4001 1N4004 1N4007 RL207 1N5404 1N5406 1N5408 UF4007 FR107 FR207 1N5817 1N5819 1N5822 1N4148) Electronic Assortment
I am sensing a theme of giving you overkill items, but this is the kit I got the diodes from for the lab build, and just wanted to be complete. Again, check your other kits as there are usually one or two mixed into a few of the starter kits, but if not, then Figure 2-12 is the kit I got with a big selection of them for future projects as well.
DAOKI 5PCS High Sensitivity Sound Microphone Sensor Detection Module for Arduino AVR PIC
You only need one, but I got them in this 5 pack for a reasonable price. The sound sensor that comes with the Elegoo kit is similar and works with the same code. See Figure 2-13.
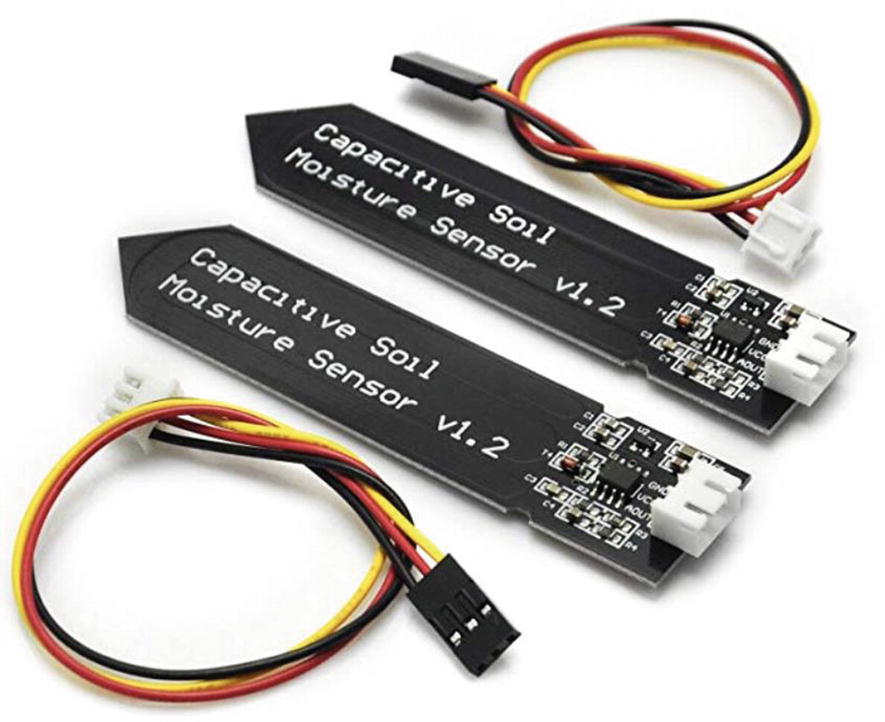
Gikfun Capacitive Soil Moisture Sensor Corrosion Resistant for Arduino Moisture Detection Garden Watering DIY (Pack of 2PCS) EK1940
Again, you will only need one of these for the lab, but it is a great sensor that is really sensitive and provides a nice analogue output (I will cover outputs later). Soil moisture sensors that come with the other kits are similar but may require tweaking your code. See Figure 2-14.
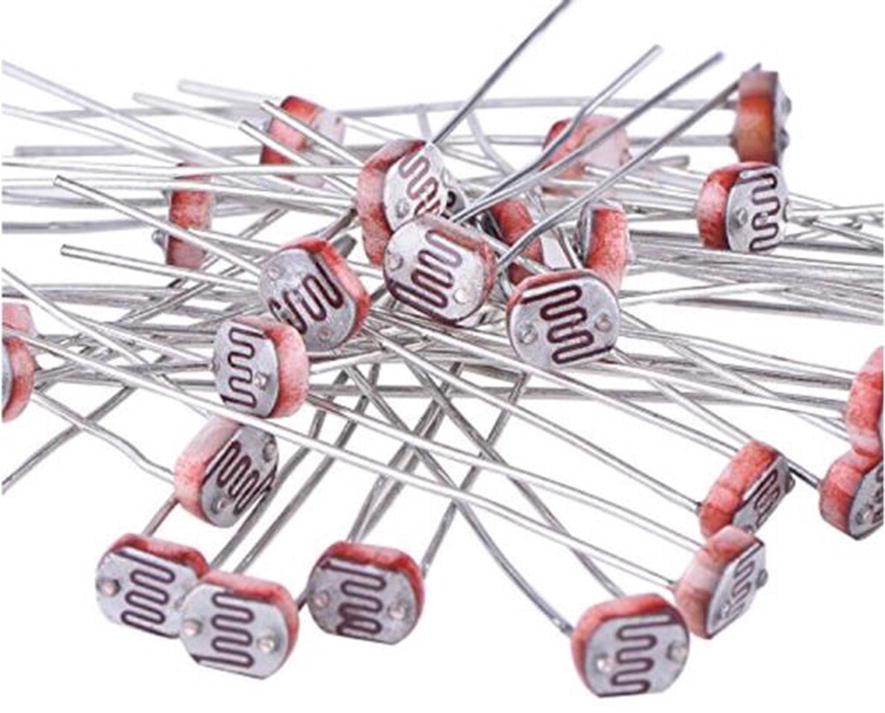
eBoot 30 Pieces Photoresistor Photo Light Sensitive Resistor Light Dependent Resistor 5 mm GM5539 5539
Last bit of overkill I promise, but this was the smallest/least expensive kit I could find the Light Dependent Resistors for the smart system build later. It never hurts to have a few of these on hand, so it’s not wasted to get the bigger kit that you see in Figure 2-15, but like the others, check the starter kit as it may have one already to save a few bucks.

10,000 Microfarad Capacitor – OVERKILL is thy name!

Battery holders for a variety of voltage levels
Wire kit

Breadboard wires are a nice wiring convenience

Transistor kit with way too many transistors

Diode kit, with way too many diodes

DAOKI sound sensors (there are lots that are identical sold under different names)
Gikfun capacitive moisture sensor – there are also similar variants for less money, but quality varies widely!
Light Dependent Resistors in the kit
Pretty much everything else used in the labs came from one of the starter kits I mentioned earlier, or was from other stuff I had lying around. There are a lot of buttons in one starter kit, as well as LEDs, but both can also be ordered in a larger “bulk” package for a few dollars each via a quick search.
I did a quick add up and all in, with all the overkill kits included, I spent just over roughly $120 for everything that shows up in the labs (including the MCU and RPi). You can easily spend a lot on the kit over time, and as your needs/wants grow, you probably will, since you will likely want to purchase increasingly sensitive, powerful, and complex sensors and gear, as well as just needing additional bits and pieces like transistors, diodes, and capacitors for your circuits. You do not have to do so of course, and you will find that even the inexpensive sensors and components are useful for smaller and less demanding projects.
Software Considerations
The other major thing you are going to need to decide on is the language(s) you want to code in. As mentioned before, there are a myriad of software tools and languages for you to choose from, but I would advise anyone just starting in smart devices to get a solid foundation in at least C/C++ and Python. Those two languages are the most common to find examples for and are also the most functional depending on the platform you choose. Most Arduino compatible MCU platforms will use some variant of C/C++ and the Raspberry Pi is very easy to program using Python and its massive collection of libraries that will allow you to get running quickly. In Chapter 8, I will go into some specifics of both languages for smart devices, but it is by no means a comprehensive education in either. There are countless tutorials and guides for both languages in books and online that will get you through the basics and help you get going with confidence.
It is also obvious, but should be mentioned now, that you will need some sort of computer for programming your MCU. I am a Mac user, but there are specific limitations with using the latest gen Mac and Mac OS to program ESP8266-based MCUs in particular, which I found out after a great deal of pain while preparing for a workshop. My recommendation is to have at least a basic Windows machine for the programming of the Arduino and compatible MCUs, if not the development element of the code. You will need to be able to work with, save, and load code to your MCU to complete all but the most basic “build it” exercises in this book. You do not need something powerful to program the devices themselves, just something capable of an Internet connection, and running the IDE for passing the code, generally over USB.
One other incredibly important note – you will be using A LOT of standard 5v USB cables, like the kind you use for charging various devices around your house. However, it is critically important that you know that there are actually two types of those cables, one that is just for power and another that actually is for data transmission. The ones that come in the kits mentioned earlier are the latter, but if you buy the MCU outside a kit, or you just grab a random USB cable that you have around the house, you will very likely NOT have the right cable. I recommend these only because I have validated personally that they work:
Rankie Micro USB Cable High Speed Data and Charging, Nylon Braided, 3-Pack 3FT
They are very inexpensive and will save you a massive headache later when you cannot understand why your computer cannot connect to the device!
Software Used in the Book
Visual Studio Code – Microsoft’s free IDE – A very good tool for developing code
Arduino IDE – Required for deploying to both Arduino and NodeMCU devices
GitHub – An account is free, and it is a very useful too beyond just what I show you in the book
Node-Red – Node-Red is a graphical programming tool that is included on the Raspberry Pi
Mosquitto – Mosquitto is a very lightweight message broker server that you can run on an RPi or your own computer for using MQTT messaging
Keep in mind that versions change, and so the screenshots and processes I show in the book may have changed from the time I documented them until now. Fundamentally though, the tools and programs used should be pretty much the same from version to version. One place this is also a factor is in the code itself. The code I have provided as a companion to the book, via a repository on GitHub, is written using the common version of the languages (Python and C++) that were in use at the time of writing. However, a great example of the change that could occur is that the Python code had some version 2.x elements, and that version is set to be discontinued for version 3 this year (2020), and so my exceptional reviewer noted it during one of the editing rounds, and I updated it accordingly. This is not to say that it won’t change again, so if you are looking at this book in the future, it is possible that the code may have changed again, the UI of a tool might be different, and even whole lines of computers, MCUs, and sensors may not exist anymore. The good news is there is lots of backward compatible consideration given to this phenomenon and so mostly things just work when moving from version to version, but it is worth considering as you begin building your own projects.
Summary
You’ve now got the basic ingredients to get through this book and also to expand beyond what you learn here and branch out to your own projects. The introductory kits found here will help you build out a great many projects and give you lots of room to experiment as you learn more and develop your skills. Even if you don’t have something you need, it is always close at hand with the ability to get parts and kit quickly via the global supply chain that has evolved alongside the expansion of smart device capabilities. One last stop before you dig into the theories and foundations of basic electronic engineering concepts, and then on to working with sensors and building smart device. Smart Devices are inextricably linked to the concept of the IoT, or Internet of Things, but I want to spend a little time talking through the IoT, and why smart devices and the IoT are not the same and do not have to be, before you get into the building.