3
Planning a Presentation

Learning Objectives
By the end of this chapter, you should be able to:
• Evaluate your audience.
• Define your objectives.
• Determine what presentation methods to use.
• Decide what information to include and organize it effectively.
• Identify where to use presentation aids.
In Chapter 2, you learned that one way to overcome anxiety about making a presentation is to plan it thoroughly. A well-planned presentation gives you confidence. Careful planning also makes it far more likely that you’ll meet the audience’s needs and achieve your objectives.
In this chapter, you’ll learn a step-by-step process for planning a presentation that will engage, inform, and, when appropriate, persuade your audience. The result of this process is a working outline that describes your objectives, the presentation methods you’ll use to achieve the objectives, the content you’ll include, and the points you’ll clarify, explain, illustrate, or reinforce through the use of presentation aids.
PLAN FOR SUCCESS
Thorough planning is essential for success in most activities. Planning is the process of thinking carefully about what you want to achieve and developing a realistic series of actions for reaching your objectives.
Here’s an example. Imagine that you have decided to expand your consulting business. First, you need to determine your objectives—attract 100 new clients? Attract different types of clients? Then you need to determine how to achieve your objectives: What actions will you take? What’s your timetable? Your budget?
The same principle applies to making presentations. You may have several objectives; you need to decide which are the most important and determine how to achieve them in the time you have available. You need to identify the most effective presentation methods for the subject and the audience. You need to make key decisions about what information to include and how to organize it. Finally, you need to determine where presentation aids will help you clarify and explain points and hold the audience’s interest.
Just as it takes time to plan a successful business expansion, it takes time to plan a successful presentation. To use your planning time efficiently, follow the step-by-step process you’ll learn in this chapter.
THE PLANNING STEPS
Below is an overview of the five key steps for planning a presentation. This process lays the groundwork needed for a presentation that achieves your objectives and meets your audience’s needs.
Read the overview. Then you’ll examine each step in detail and follow them to plan a presentation of your own.
NOTE: The steps are presented in the sequence that works best for most situations. But following the steps in sequence is less important than doing them all.
• Step 1. Evaluate the audience. Think about the people who will be attending your presentation. How many people do you expect? Who are they? Are they a cohesive or diverse group? What are their reasons for attending? How much do they already know about the subject you’re addressing?
• Step 2. Define the presentation objectives. Do you want to engage your audience in a discussion? Explain how something works? Get help solving a problem? Inform people about an upcoming event? Teach people how to do something? Move people to action? If you have several objectives, which one is the most important?
• Step 3. Determine what presentation methods to use. What levels and types of interaction would be most effective, given the available time, the subject, and the audience? Would the best approach be a speech? A demonstration? With or without a question and answer session? Do you want to encourage group discussion? Would experiential activities help people understand and remember the information?
• Step 4. Select the information to include and organize it effectively. What is the most important message you hope to convey? What questions are people likely to have? If you want to influence people to do something, what information will persuade them? What’s the best order in which to present the key points?
• Step 5. Identify where to use presentation aids. What points can you communicate more quickly, clarify, or reinforce through the use of flip charts, videos, slides, or other presentation aids? Will the audience need handouts to follow or remember certain points? You do not need to select the specific presentation aids at this point, but your plan should indicate where various presentation aids would be useful.
Step 1. Evaluate the Audience
Understanding the characteristics, needs and expectations of the audience is crucial to making a successful presentation. You’ll use a different approach and presentation style for an informal group meeting in a conference room than for a large audience at a formal dinner. You’ll include different details for sales managers than for clients. You’ll use a different method to describe a technical process for engineers than for executives. You’ll have different objectives for a half-hour presentation to managers than for a full-day presentation to line supervisors.
Here’s an example. Imagine that you are giving half-hour presentations on financial planning to two different audiences: a mandatory assembly of 100 college freshmen and an optional meeting of 16 manufacturing supervisors who are five years from retirement.
![]() Think About It…
Think About It…
Instructions: You can make certain assumptions about these groups from the brief descriptions you have of them. What are some of those assumptions? List them below.

Here are some of the assumptions you might have listed:
• Information needs. Each group needs different information about the topic. For example, the college freshmen need to know how to obtain and manage a credit card, the benefits and uses of various savings plans, etc. The supervisors need to know how to build retirement savings quickly and safely and how to manage their retirement income.
• Best presentation method. Each group might need a different presentation method. For example, you can expect and plan for more interaction with the smaller group.
• Reasons for attending. The reasons for attending might differ sharply between, and even within, groups. The students are attending because they have been told to come. The supervisors have chosen to be there. As you’ll see, people’s reasons for attending affect the information you include and the way you present it.
• Level of interest. The levels of interest in the topic will differ between, and even within, groups. Some students might be very interested in the subject, while others might not be interested at all. The supervisors’ level of interest could vary from mild to intense.
• Knowledge base. Within each group, people will have differing levels of knowledge about the subject. Some of the students may already have credit cards, savings accounts, and even investment accounts, while others may never have managed more than a weekly allowance. Some of the supervisors may have put substantial amounts into a retirement plan, while others are only beginning to save for retirement.
It’s important to begin the presentation planning process by thinking about your audience. There are six key questions to ask. Some questions are more relevant for some presentations than for others, but consider each question whenever you begin the planning process.
How Large Is the Audience?
The audience size is an important factor in determining the presentation method to use, the amount of information to include, and how to present information. The size also affects the types of presentation aids you can use and the space and equipment you’ll need—you’ll learn more about those elements in later chapters.
Think about our financial planning presentation example. The small size of the supervisors’ group lends itself to an informal presentation in which people can ask questions and discuss issues. You might plan a “brown-bag” lunch, using the first 15 minutes to present information about retirement planning options and the last 15 minutes to answer questions.
The larger group of students will be more diverse in terms of its needs, interests, and concerns, making it more difficult to determine what information to include. The presentation needs to be carefully structured to engage and hold everyone’s attention, and any discussion or question and answer session will have to be planned and managed carefully.
What Are Audience Members’ Relevant Characteristics?
“Characteristics” refers to such factors as the audience members’ ages and genders; educational and cultural backgrounds; jobs, roles, and positions; and relationships.
Although it’s always important to consider the characteristics of the people who will comprise your audience, certain characteristics are more relevant for some presentations than for others. For example, you would approach the subject of sexual harassment differently for an audience of teenage girls than for a group of male office managers, and you’d probably use a more formal style to make a sales pitch to an audience of overseas clients than to a group of local customers.
When planning the financial planning seminars, you would need to consider the fact that the people in one audience are very young, while those in the other audience are nearing retirement age. The students are less likely to know what information they need and why they need the information, while the supervisors already know the value of learning about financial planning. The supervisors may also be older than you and need assurance that you are an authority on the subject.
Why Are People Attending?
The ideal, of course, is a group of people who can’t wait to hear what you have to say; the phrase, “Attendance is mandatory,” evokes images of sullen faces and crossed arms that all but shout, “You can have my body but not my mind.”
Most presentations fall midway between the two extremes. People usually have some interest in or need for the information, even if they have been required to attend. Some might be mildly curious, others intensely interested. Some might need the information to make a decision or to do their jobs. Some might be attending so they can argue against your position.
Thinking about why people are attending helps you build a successful presentation. Knowing that the students’ attendance at the financial planning presentation is mandatory indicates that you will have to find ways to engage, interest, and involve those who might prefer not to be there. For example, you might begin by illustrating the short-term and long-term benefits of learning to manage money while people are young. Knowing that the supervisors are five years’ from retirement tells you to focus on ways to build retirement savings quickly.
What Are the Audience’s Specific Needs, Interests, and Concerns?
The members of your audience might need the same level of detail about your topic, or the level of detail they need might differ. Some people might already know a lot about the situation you’re discussing, and others may be completely unfamiliar with it. Some might have a stake in a decision that is to be made and some might not care one way or another.
A good understanding of your audience’s needs, interests, and concerns helps you decide not only how to achieve your objectives but even what those objectives are. You can’t expect people to understand a technical explanation of how a new product works if they have limited technical knowledge and little interest in that information; perhaps their primary interest is in the production schedule and the marketing plan.
Think about the groups for the two financial planning presentations. Although they need different information and will use it differently, both groups need the concepts explained in plain English. They need enough information so they can make decisions and take action, but not so much that they feel overwhelmed.
How Much Do People Already Know?
People might know nothing or very little about your subject, or they might be very familiar with the subject but know little or nothing about the specific topics you’ll be addressing. What’s their starting point? Are they all on the same page vis-à-vis the subject? Answering those questions helps you determine how much background information to include and what level of technical language to use.
In the financial planning example, the presenter can assume that many of the students may be unfamiliar with the terminology associated with money management and investing. Even the term “mutual fund” might be unfamiliar to them. The supervisors are probably familiar with mutual funds but they might not know much about the different types of funds available.
How Are People Likely to Respond to Your Message?
It’s important to consider whether anyone is likely to be uncomfortable with your message or disagree with your ideas. If so, you might need to acknowledge the issue right away. For example, you might give people a few minutes at the beginning to express their concerns and record them on a flip chart page, explaining that you will try to address all the concerns during the presentation.
In our financial planning example, you need to consider the fact that some students might prefer not to know the consequences of using a credit card too freely. The supervisors might find it uncomfortable to realize that they have waited too long to start planning for retirement.
![]() Apply What You Learn
Apply What You Learn
Instructions: In Chapter 1, you were asked to think about a topic for a 10-20 minute presentation. It’s time to begin planning that presentation. To help you, we’ve provided a Presentation Planning Worksheet. This worksheet is a tool that walks you through the planning process.
At the back of this course, in the section called “Appendix A: Presentation Worksheets,” you will find two blank Presentation Planning Worksheets. Remove one now.
At the end of this chapter, you’ll find an example of a completed worksheet (Exhibit 3–1). Use it as a guide while you complete a worksheet for your presentation. First, complete the top part of the worksheet:
• Briefly describe the topic (e.g., “Financial Planning and Money Management”)
• Briefly describe your audience (e.g., “college freshmen”)
• Enter your presentation date and time available (in this case, 10-20 minutes)
Now complete Step 1 on the worksheet, Evaluating Your Audience. Refer to the earlier discussion of the key questions and to the sample worksheet (Exhibit 3–1) at the end of this chapter.
When you finish Step 1, set the worksheet aside and continue with the lesson by learning how to define your objectives.
NOTE: As we mentioned earlier, the order in which you do the planning steps are not as important as doing them all. Sometimes you will define your objectives before you evaluate your audience. But to plan your practice presentation, we suggest doing the steps in the order they are discussed in the lesson and presented on the worksheet.
Step 2. Define the Presentation Objectives
Suppose you are setting up a new office. One way to do it is to bring in furniture and shelving and try different layouts until one feels right. But you’ll do a better job of finding the best layout if you define your objectives first. Why do you want to reorganize the space? Do you want things you use often close to your desk? Do you need a flat work space near your computer? A comfortable area in which to meet with clients? A way to track ongoing projects? What’s most important?
Clearly defined objectives are like the destination on a map. Knowing where you are going is the first step in figuring out the best route. So an important part of planning a presentation is deciding where you are going. Is your primary purpose to inform or to influence your audience? Do you want to tell people about something? Move them to action? Help them understand why something is being done? Teach them how to do something? Keep them amused for an hour?
Primary and Secondary Objectives
For every presentation, you will have one overall, or primary, objective, which is the most important objective you want to accomplish. For example, your primary objective might be to inform people about their health plan options. Or it might be to influence people to select your company’s HMO.
You often have secondary objectives as well. In additional to informing people about their health plan options, you might want to encourage them to select a health plan before the open enrollment period expires.
To keep your presentation focused and dynamic, be sure to discriminate between your primary objective and any secondary objectives. Understanding exactly what you want to achieve—and what’s most important—helps you decide what information to include and how to present that information. Eileen had to make just these choices.
Eileen’s new job includes making a monthly presentation to other team leaders about the status of her team’s projects. She has set aside a day to plan her first presentation. She wants to tell the team leaders that her team is ahead of deadline on two projects but has run into problems with the third, and she wants to enlist the team leaders’ help in solving the problems. Also, because this is her first presentation as a team leader, she wants to build respect for her abilities among the members of this group.
Eileen wants to accomplish a lot in one presentation. If you were advising her, what would you say is her primary objective? What are her secondary objectives? What can Eileen do to decide?
![]() Think About It…
Think About It…
Instructions: Brainstorm at least five objectives for your presentation.
1._________________________________________________
2._________________________________________________
3._________________________________________________
4._________________________________________________
5._________________________________________________
To identify her primary and secondary objectives, Eileen needs to decide what’s most important: To inform the team leaders about the status of her projects, enlist their help in solving the problems, or earn their respect as a peer.
One way for Eileen to identify her primary objective is to ask, “If I could only accomplish one of these objectives, which would it be?”
In this case, the presentation offers an excellent opportunity for Eileen to get help with solving problems that could ultimately affect the entire group. If enlisting the team leaders’ help in solving the problems is the focus of the presentation, she is left with two secondary objectives: Informing the group about the status of all three projects, which she can do when she introduces the main issue, and earning the group’s respect, which should come automatically if she handles the presentation well.
To Inform or to Influence?
Each of your objectives, primary and secondary, falls into one of two categories. You want to influence your audience to do something or inform your audience about something.
Because the primary objective drives the presentation, determining its focus and style, make sure you know whether your primary objective is to influence or to inform.
Here’s the difference: When your primary objective is to influence, your most important purpose for making the presentation is to move your audience to action of some kind. You might want to convince them to vote for your candidate, encourage them to buy your product, ask them to approve an increased budget, or motivate them to participate in volunteer activities.
When your primary objective is to inform, your most important purpose is to give the audience information they need about something. You might want to demonstrate a new product, describe the company’s organizational structure, or teach people how to process a loan application.
It can be difficult to decide whether your primary objective is to influence or to inform. Think about Eileen’s presentation. Her primary objective is to enlist the team leaders’ help in solving the problems with the third project. What’s her primary objective?
![]() to inform
to inform ![]() to influence
to influence
Clearly, Eileen needs to inform and influence the team leaders. They need to understand the problems before they can help. But there is something Eileen she wants from them—their ideas for solving the problems. That’s the most important objective, so her primary purpose is to influence; to get their help, she needs to convince them that the problems need to be solved.
There are two more points to keep in mind when you are determining your primary purpose. First, if what’s most important is to move your audience to action, your primary purpose is to influence. Let that purpose guide your presentation. Too often, presenters think that by informing an audiences carefully, the audience will take the “right” position or action. They would be more successful by taking full advantage of the opportunity a presentation provides to persuade, convince, encourage, and motivate people.
![]() Apply What You Learn
Apply What You Learn
Instructions: Refer back to the Think About It on page 32. Then, on your Presentation Planning Worksheet, complete Step 2.
Check the box to indicate your most important, or primary, objective. Write a brief description of what you want people in your audience to do or to know. Then describe any secondary objectives you may have.
Step 3. Determine What Presentation Methods to Use
There are many different ways to communicate information and ideas to a group. You might give a speech, with little or no audience participation, or an informal talk during which people can ask questions. You might facilitate a group discussion or problem-solving session, in which your role is more to introduce, clarify, and summarize than to speak. You might lead a class in which you guide people through experiential activities that help them learn. You might combine presentation types—i.e., follow an informal talk or speech with a facilitated discussion of the concepts presented.
Often, the type of presentation is determined in advance. You might have been asked to make a speech to kick off an annual fund drive or lead a class for new employees or facilitate a monthly managers’ meeting. Even then, you usually have some choices—for example, whether to include question and answer sessions, discussions, or experiential activities.
The type of presentation and specific methods depend on such factors as the amount of presentation time available, the presentation objectives, the subject matter, and the size and composition of the audience.
Here is an overview of the most common types of presentations:
• Speech. A speech has little or no interaction between you and audience members or between audience members themselves. Some speakers use visual aids such as slides to illustrate points; others do not. A speech might or might not include a question and answer session at the end. Speeches are most appropriate for large audiences on formal occasions.
• Informal talk. Informal talks usually include some interaction between the presenter and audience members, as well as among the audience members themselves. For example, you might encourage people to ask questions and discuss points throughout the presentation. Informal talks are most effective for audiences of fewer than 30 people.
• Facilitated discussion. As a facilitator, your role is to present, explain, and clarify points, keep discussions on track, make sure everyone has a chance to participate, and summarize discussion points. Facilitated discussions can be part of another type of presentation, such as a speech or informal talk.
Facilitated discussions are most useful when the group needs to make a decision or solve a problem. They are also excellent ways to encourage understanding and help people learn. You can use facilitated discussions with groups of any size; the larger the group, however, the more carefully you’ll need to plan and manage the discussion. A facilitated discussion also requires more time than a speech or informal talk.
• Demonstration. Sometimes the purpose of a speech or informal talk is to demonstrate the way something works. For example, you might show an audience of corporate managers how your company’s new performance appraisal software can help them write performance evaluations. In that situation, you might provide computers and let people try the software out themselves.
A demonstration might be the focus of the presentation, or it might simply be one part of a speech, talk, or class. Demonstrations can work for audiences of almost any size as long as everyone can see, hear and, perhaps, touch what you’re demonstrating. Most demonstrations include questions and answers.
• Class. Some presentations are designed to do more than communicate information and ideas; they are intended to teach something. In a class you do more than explain and illustrate concepts and processes and answer people’s questions. You include activities that help people learn and apply what they learn: facilitated discussions; experiential activities, such as simulations and role plays; and practice exercises.
Classes can be any size, but groups of fewer than 25 are easier to manage and allow more interaction. You’ll need more time for a class than for almost any other type of presentation.
Instructions: Now that you’ve read about some different types of presentations, what type will you make for your practice situation?

Now, complete Step 3 on your Presentation Planning Worksheet.
HINT: Think about your subject and your audience and remember that you only have 10-20 minutes of presentation time available.
Step 4. Select the Information to Include and Organize It Effectively
Have you ever attended a presentation that went overtime or one in which the presenter speeded up the delivery as the time grew short? One in which you felt overwhelmed by the amount of information or had trouble following the presenter’s points? Those problems occur when presenters include too much information and fail to organize it effectively.
Typically, presenters tend to include too much, rather than too little, information. Perhaps they misjudge the amount of information that can be covered successfully in a given amount of time, or they are so fascinated by the topic that they hate to leave anything out. But too much information will only confuse and frustrate your audience, especially if it’s poorly organized.
Key Factors for Selecting and Organizing Information
To decide what information to include, first consider several key factors: the time you have available, your objectives for the presentation, what your audience already knows, and what people need to know.
Read the following discussion of those key factors. Then you’ll learn a step-by-step process for deciding what information to include and how to organize it effectively.
• How much time do you have available? It would seem to be common sense for a presenter to carefully assess the amount of time available before deciding how much information to include. Unfortunately, many presenters first decide what information they want to cover and then try to squeeze it into the available time.
The effect of time is easy to see if you imagine giving two presentations on the topic, “Buying a House.” The audience for both presentations is essentially the same—first-time home buyers in their late twenties and early thirties, with limited budgets. The first presentation can be no more than 15 minutes long. The second can be as long as an hour. In what ways might the presentation content differ?
Fifteen minutes is only enough time for an overview of home buying process, along with some cautions for first-time home buyers. In an hour, you could include additional details about the process, a more comprehensive list of cautions, and a Q&A session.
Here’s an important point about time: Always calculate the actual presentation time you’ll have available and limit the information you include to what you can realistically cover in that amount of time. Consider how long it will take for people to get settled, whether you’ll need breaks (essential for presentations of two hours or more), and how long you’ll need to answer questions.
If the subject is technical or complicated, you can include fewer key points because you’ll need more time for explanation and illustration. If your objective is to teach people to do something, you can present fewer key points because you’ll need time for discussion and activities.
• What are your objectives? No matter how interesting it might be, information that is not related to your objectives wastes valuable time. It can also distract and confuse your audience.
Suppose your objective in a half-hour presentation is to convince a client’s executive committee to hire your public relations firm to conduct a campaign. In that limited time, you must select only the details most likely to convince the audience that your firm is superbly qualified to meet their needs. Which of the following points would be most convincing: (1) Your firm’s success with similar projects and your ideas for their public relations campaign, or (2) details about your company’s mission statement and how the company was founded?
The audience needs information that will help them decide whether you’re qualified for the job. Thus, they will be interested mostly in point (1), your success with similar projects and your ideas for their campaign. Information about the mission statement and company history can be included in a handout—if at all.
• What does your audience already know, and what do they need to know? Instead of including information because you find it interesting or useful, focus on information people actually need. What information they need depends partly on what they already know and partly on the objective for your presentation.
Suppose your company has recently added new health plans to the employee benefits package. You’re planning two 40-minute presentations to employees about their health plan options. Your objective is to make people aware of their options and guide them through the process of selecting the right option.
You will conduct the presentation for two separate groups: Group A, people who are already covered under one of the company’s health plans, and Group B, new employees who have not yet selected their coverage. How might the information you include differ for the two audiences?
The people in Group A are already covered, so they do not need detailed explanations about the company’s existing health plans. They need information about the new plans and how those plans differ from the one in which they are currently enrolled. The new employees in Group B need information about all the health plans so they can make an informed decision about which option to select.
![]() Think About It…
Think About It…
Instructions: Keeping in mind your objectives, brainstorm ideas about what your audience already knows and what they need to know.

A Step-by-Step Process for Selecting and Organizing Information
To decide what information to include in the body of your presentation and organize that information into a logical sequence, follow these steps.
• Write a statement that expresses your primary message.
• List the facts and ideas that support your primary message.
• Identify the key points.
• Summarize the key points and put them in order.
• List the subpoints that support each key point.
NOTE: The order in which you do the steps is not as important as doing them all.
This process is illustrated in Step 4 on the sample worksheet (Exhibit 3–1). You can see from that example that the process results in an outline showing your primary message, your key points, and your subpoints. You can then use the outline to prepare your presentation. You’ll learn more about that in the next chapter.
1. Write a statement that expresses your primary message.
If you only had 30 seconds with your audience to deliver your most important message, what would it be? The primary message is what you would say in that 30 seconds. Exhibit 3–1 shows that the primary message for the sample presentation is, “The Literacy Project needs your help. Please volunteer or make a donation today.”
Here are some more examples—the primary message from several different presentations. Notice that each primary message is expressed in a single statement that is no more than three sentences long. Also notice that each primary message statement tells you clearly what the presentation is about.
Examples of primary message statements:
“Our new widget performs 50 percent faster, takes up 20 percent less space, and costs no more than the original.”
“Next March, the company will move its offices to a new facility in the North Bay, with twice the space, our own cafeteria and exercise room, and an entire floor for research laboratories. For the next two months, H.R. will meet with every employee to discuss concerns about this move.”
“During this session, you’ll learn how to use the new Performance Evaluation Form for your upcoming performance reviews.”
“Our firm has the experience and qualifications to develop a successful marketing plan for your new product, and we can do the job for a reasonable price.”
![]() Think About It…
Think About It…
Instructions: To come up with your primary message, think about your purpose and your audience. If you want people to take action, what action do you want them to take? If you want people to understand something, what’s the most important thing they need to know? Brainstorm several phrases you could use to describe your message.
___________________________________________________
___________________________________________________
___________________________________________________
Once you’ve come up with your primary message, write it into a statement that is at least one and no more than three sentences long. That statement will “drive” your presentation. It provides the focus and helps you come up with the details—facts and ideas—to include.
![]() Apply What You Learn
Apply What You Learn
Instructions: What’s the primary message for your own presentation? Combine several of the phrases you brainstormed into a statement of one to three sentences that expresses your primary message. Keep in mind that the primary message is what you would say if you had only 30 seconds to get the most important message across. Try out one or more sentences, then transfer the final one to your worksheet.
___________________________________________________
___________________________________________________
2. List the facts and ideas that support your primary message.
Now that you’ve focused on your primary message, you are ready to decide what information to include and organize that information in the most effective way. What’s important is to make sure that every fact and idea in your presentation supports, explains, expands on, or illustrates your primary message.
For example, in the sample presentation (Exhibit 3–1), notice how every point relates directly to the primary message:
The Literacy Project needs your help because:
—teach 50 adults to read each year
—all teaching done by volunteers
—shortage of volunteers
—have to put people on waiting list
—short of $$ for materials
—worthwhile
—many students unable to pay
—give students materials to keep, so always need to replenish stock
—very rewarding
—helps people help themselves
To come up with the points to include, look at your primary message from your audience’s point of view. Then ask a key question such as:
• “What do people need to know about this topic?”
• “What questions are people likely to have about this subject?”
• “Why should people do what I want them to do?”
• “What are the benefits of following the course of action I propose?”
Instructions: Brainstorm at least three answers to each of these questions in light of your topic. After asking the key question, write down every point that comes to mind—facts from your research, ideas, and so on.
Avoid stopping the flow of points by evaluating points or putting them in order. Just keep asking and answering your key question until you think you have listed enough points to support, explain, expand on, or illustrate your primary message.
What do people need to know about this topic?
___________________________________________________
___________________________________________________
___________________________________________________
___________________________________________________
What questions are people likely to have about this subject?
___________________________________________________
___________________________________________________
___________________________________________________
___________________________________________________
Why should people do what I want them to do?
___________________________________________________
___________________________________________________
___________________________________________________
___________________________________________________
What are the benefits of following the course of action I propose?
___________________________________________________
___________________________________________________
___________________________________________________
Instructions: Continue with Step 4 on your worksheet. List the facts and ideas that support, explain, expand on, or illustrate the primary message for your presentation. Verify that each fact or idea actually does this by checking the appropriate column.
Primary Message __________________________________

HINT: Write each point on a 3×5 card or Post-it™ note. Then you can easily move the notes around and try out different organizational schemes.
HINT: If you have trouble coming up with enough points, take a break. When you come back, ask the key question again and see if more points occur to you.
3. Identify the key points and write key point summary statements.
Just as you focused on the primary message for the entire presentation, you need to focus on the key points you will cover. Again, it helps to imagine that you only have enough time to deliver the most important points. What would they be?
Begin by reviewing your list of points. Cross out any points that are not needed to convince or inform your audience and any points that are not related to your primary message.
Next, identify the most important points, or “key” points. They might be points on the list. Or they might be categories, or topics, that represent a group of points on the list.
For the sample presentation in Exhibit 3–1, the writer identified three key points:
• Key point: Teach 50 adults to read each year
• Key point: Shortage of volunteers
• Key point: Short of $$ for materials
Instructions: Identify a list of possible key points for your presentation.
_________________________ _________________________
_________________________ _________________________
After identifying the key points, expand each key point into a summary statement of one to three sentences.
The summary statements provide the structure for the presentation. They’re rather like the beams that hold up the roof of a house. If they’re strong and in the right place, the roof won’t collapse. For your presentation, clear, strong summary statements provide a strong, dynamic, logical structure that helps you communicate clearly and achieve your objectives.
There are two types of summary statements. One type expresses the most important information for that subtopic. The other type introduces the details that are to come. Here’s an example of each type:
Key Point—summary of most important information: Although the original plan was to introduce the new product in May, field tests indicate that we need to make modifications that will take at least three months to complete. We now hope to introduce the product in October.
Key Point—introduction of details that are to come: Next, I’ll explain the details of each benefits package, including eligibility criteria and enrollment procedures.
Here’s how it was done for the sample presentation in Exhibit 3–1:
Key point: Teach 50 adults to read each year
Summary statement: We teach 50 adults to read each year
Key point: Shortage of volunteers
Summary statement: We have a shortage of volunteer teachers
Key point: Short of $$ for material
Summary statement: We need money for materials
![]() Apply What You Learn
Apply What You Learn
Instructions: Now that you have identified the key points for your presentation, write a key point summary statement for each one. Then transfer the final statements to your worksheet.
___________________________________________________
___________________________________________________
4. List the subpoints that will support each key point.
Once you’ve identified the key points and written the key point summary statements, you’ve essentially identified the segments of your presentation. Now you need to decide what details to include in each segment.
Work with one key point at a time. Copy the key point summary statement to the top of a sheet of paper or your computer screen. (If you prefer, write it on a large Post-it note.) Under the summary statement, list the facts and ideas you’ve already listed. Then add any others you can think of that are needed to support, illustrate, explain, or expand on that key point.
As you did when you came up with the primary message, it’s helpful to begin by asking a question, such as, “What does my audience need to know about…” or “Why should my audience …”
Here’s an example. Suppose your presentation includes this key point: “I’ll explain the details of each benefits package, including eligibility criteria and enrollment procedures.” You might ask, “What does my audience need to know about the benefits packages?” Then you’d use a brainstorming process to list the points to include.
Here’s how it looks for the first key point on the sample presentation (Exhibit 3–1):
(Key point) We teach 50 adults to read each year
(Subpoints) Match volunteer teachers with students
Work one-to-one
Help people help themselves
Worthwhile and rewarding program
Repeat the process for each key point. When you’re finished, you’ll have a working outline for the body of your presentation.
![]() Apply What You Learn
Apply What You Learn
Instructions: Beneath each of the key points for your practice presentation, list the subpoints that explain, illustrate, support, or expand on that key point. Then put the key point/subpoint sets in order.
When you’re done, you will have a working outline for the body of your presentation that resembles the working outline in Exhibit 3–1. In the next chapter, you’ll learn to finish the outline by adding an introduction, transitions, and a closing.
Step 5. Identify Where to Use Presentation Aids
There’s only one thing left to do: Determine where to use presentation aids. Used effectively, presentation aids liven up a presentation, hold people’s attention, and illustrate concepts in a way that words alone seldom do. Although you might not be ready to decide exactly which presentation aids to use, you can still identify concepts, facts, or ideas that could he communicated more effectively through the use of some type of presentation aid.
A presentation aid is anything that will help communicate and reinforce your message. Presentation aids include handouts, such as information packets and workbooks; visual aids such as flip charts, videos, slides, and computer-aided slide projection systems; and objects, such as models or props. In Chapter 6, you’ll find details about various types of presentation aids and learn strategies for using them effectively.
![]() Think About It…
Think About It…
Instructions: Consider the following list of presentation aids. Which ones are you familiar with? Comfortable with? Want to know more about?
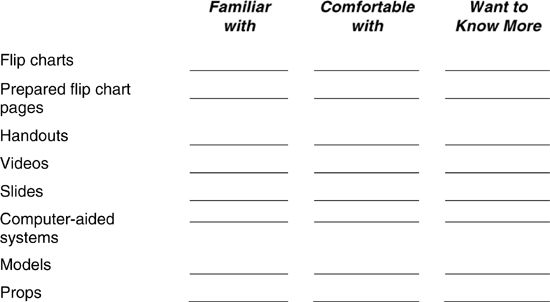
During the planning process, try to identify where some type of presentation aid can help you communicate more effectively and hold audience interest. For example, are you comparing one year’s sales figures with another? If so, a slide with a chart or graph can help people see the comparison at a glance. Are you presenting details about the various benefits packages available to new employees? Overhead transparencies that summarize the key points of each package can help people follow the presentation; they could use handouts with details for reference when the presentation is over.
On your presentation outline, you can simply indicate which presentation aids you plan to use, as shown on the sample (Exhibit 3–1).
Instructions: Review the outline for your practice presentation. As shown on Exhibit 3–1, indicate where a presentation aid might clarify, illustrate, explain, or reinforce points. (If you wish, read Chapter 6 before completing this activity.) Even if you are unfamiliar with certain presentation aids, mark your outline with ideas. You can always rethink them later.

Following a step-by-step process to plan your presentation helps you in several ways. For one thing, it reduces anxiety by giving you more confidence that your presentation will achieve your objectives and meet the audience’s needs. The first step in planning a presentation is evaluating the audience to identify their needs. Next, you will identify your objectives and develop a primary message statement, which is the most important message you hope to communicate. Then you will decide what presentation method or combination of methods to use—speech, formal presentation, informal talk, etc. Finally, you will select and organize the information to include and decide where presentation aids can help clarify, explain, illustrate, and reinforce your message. When you’re finished, you’ll have a working outline for your presentation.
![]() xhibit 3-1
xhibit 3-1
Sample Presentation Planning Worksheet
TOPIC: Literacy Program
AUDIENCE (brief description): Company employees
DATE (if known): March 3 TIME AVAILABLE (if known): 45 minutes
STEP 1. EVALUATE THE AUDIENCE
No. of people I expect: 35-50
Relevant characteristics: Mostly middle managers and below: different ages: exempt and non-exempt
Primary reasons for attending: Interested in subject: looking for volunteer opportunities; want a free brown-bag lunch
Specific needs, interests, and concerns: Need enough information to decide whether to participate: need benefits of participation to themselves, company, community: concerned about how much time, whether they’re qualified, what they would be asked to do
What people already know about topic: Little on nothing
How people are likely to respond to message: Positively on with indifference
STEP 2. DEFINE YOUR OBJECTIVES
PRIMARY OBJECTIVES:
To inform (briefly describe what people need to know):
Why they should participate: benefit to self & community
To influence (briefly describe what you want people to do):
Volunteer as literary coaches
SECONDARY OBJECTIVES (briefly describe):
Tell people what the program is and how it works: get people to donate money if they can’t volunteer as coaches
STEP 3. TYPE OF PRESENTATION (Check all that apply)
![]() Speech
Speech
![]() Informal talk
Informal talk
![]() Facilitated discussion
Facilitated discussion
![]() Class
Class
![]() Demonstration
Demonstration
![]() Q&A
Q&A
![]() Experiential activities
Experiential activities
Other:
STEP 4. SELECT THE INFORMATION TO INCLUDE AND ORGANIZE IT EFFECTIVELY PRIMARY MESSAGE (A statement of one to three sentences):
“The Literacy Project needs your help. Please volunteer or make a donation today.”
FACTS AND IDEAS TO INCLUDE: List the points that explain, illustrate, support, or expand on your primary message
The Literacy Project needs your help because:
• teach 50 adults to read each year
• all teaching done by volunteers
• shortage of volunteers
• have to put people on waiting list
• short of $$ for materials
• worthwhile
• many student unable to pay
• give student materials to keep, is always need to replenish stock
• very rewarding
• helps people help themselves
KEY POINTS AND KEY POINT SUMMARY STATEMENTS: List your key points. Then write a summary statement of one to three sentences for each key point.
Key points: Teach 50 adults to read each year
Summary statement: We teach 50 adults to read each year
Key point: Shortage of volunteers
Summary statement: We have a shortage of volunteer teachers
Key point: Short of $$ for material
Summary statement: We need money for materials
SUBPOINTS: Beneath each key point, list the subpoints that explain, illustrate, support, or expand on that key point. Then put the key point/subpoint sets in order to complete your working outline.
WORKING OUTLINE:
(Key point) We teach 50 adults to read each yean
(Subpoints) Match volunteer teachers with students
Work one-to-one
Helps people help themselves
Worthwhile and rewarding program
(Key point) We have a shortage of volunteer teachers
(Subpoints) Have 7 students on waiting list
People on waiting list lose motivation
(Key point) We need money for materials
(Subpoints) Many students unable to pay
Give students materials to keep, is always need to replenish stock
STEP 5. DECIDE WHERE TO USE PRESENTATION AIDS
On your presentation outline, mark places where you might use presentation aids to explain, illustrate, clarify, or reinforce information.
(Primary message) The Literacy Project needs your help. Please volunteer on make a donation today (because):
(Key point) We teach 50 adults to need each year
(subpoints) Match volunteer teachers with students
Helps people help themselves
Worthwhile and rewarding program
*Slides showing volunteers with students
*Student testimonials
(Key point) We have a shortage of volunteer teachers
(Subpoints) Have 7 students on waiting list
People on waiting list lose motivation
*Overhead with statistics
(Key point) We need money for materials
(Subpoint) Many students unable to pay
Give student materials to keep, as always need to replenish stock
*Handout with budget
*Sample of program materials