In this chapter, I describe the tools that Angular provides for unit testing components and directives. Some Angular building blocks, such as pipes and services, can be readily tested in isolation using the basic testing tools that I set up at the start of the chapter. Components (and, to a lesser extent, directives) have complex interactions with their host elements and with their template content and require special features. Table 29-1 puts Angular unit testing in context.
Table 29-1.
Putting Angular Unit Testing Context
Question
Answer
What is it?
Angular components and directives require special support for testing so that their interactions with other parts of the application infrastructure can be isolated and inspected.
Why is it useful?
Isolated unit tests are able to assess the basic logic provided by the class that implements a component or directive but do not capture the interactions with host elements, services, templates, and other important Angular features.
How is it used?
Angular provides a test bed that allows a realistic application environment to be created and then used to perform unit tests.
Are there any pitfalls or limitations?
Like much of Angular, the unit testing tools are complex. It can take some time and effort to get to the point where unit tests are easily written and run and you are sure that you have isolated the correct part of the application for testing.
Are there any alternatives?
As noted, you don’t have to unit test your projects. But if you do want to unit testing, then you will need to use the Angular features described in this chapter.
Deciding Whether to Unit Test
Unit testing is a contentious topic. This chapter assumes you do want to do unit testing and shows you how to set up the tools and apply them to Angular components and directives. It isn’t an introduction to unit testing, and I make no effort to persuade skeptical readers that unit testing is worthwhile. If you would like an introduction to unit testing, then there is a good article here: https://en.wikipedia.org/wiki/Unit_testing.
I like unit testing, and I use it in my own projects—but not all of them and not as consistently as you might expect. I tend to focus on writing unit tests for features and functions that I know will be hard to write and that are likely to be the source of bugs in deployment. In these situations, unit testing helps structure my thoughts about how to best implement what I need. I find that just thinking about what I need to test helps produce ideas about potential problems, and that’s before I start dealing with actual bugs and defects.
That said, unit testing is a tool and not a religion, and only you know how much testing you require. If you don’t find unit testing useful or if you have a different methodology that suits you better, then don’t feel you need to unit test just because it is fashionable. (However, if you don’t have a better methodology and you are not testing at all, then you are probably letting users find your bugs, which is rarely ideal.)
Initialize a test module and create an instance of the component. If the component has an external template, an additional compilation step must be performed.
1–9, 11–13
Testing a component’s data bindings
Use the DebugElement class to query the component’s template.
10
Testing a component’s response to events
Trigger the events using the debug element.
14–16
Testing a component’s output properties
Subscribe to the EventEmitter created by the component.
17, 18
Testing a component’s input properties
Create a test component whose template applies the component under test.
19, 20
Performing a test that relies on an asynchronous operation
Use the whenStable method to defer the test until the effect of the operation has been processed.
21, 22
Testing a directive
Create a test component whose template applies the directive under test.
23, 24
Preparing the Example Project
I continue to use the exampleApp project from earlier chapters. I need a simple target to focus on for unit testing, so Listing 29-1 changes the routing configuration so that the ondemand feature module is loaded by default.
Tip
You can download the example project for this chapter—and for all the other chapters in this book—from https://github.com/Apress/pro-angular-9. See Chapter 1 for how to get help if you have problems running the examples.
import { Routes, RouterModule } from "@angular/router";
import { TableComponent } from "./core/table.component";
import { FormComponent } from "./core/form.component";
import { NotFoundComponent } from "./core/notFound.component";
import { ProductCountComponent } from "./core/productCount.component";
import { CategoryCountComponent } from "./core/categoryCount.component";
import { ModelResolver } from "./model/model.resolver";
import { TermsGuard } from "./terms.guard";
import { UnsavedGuard } from "./core/unsaved.guard";
Changing the Routing Configuration in the app.routing.ts File in the src/app Folder
This module contains some simple components that I will use to demonstrate different unit testing features. To keep the content shown by the application simple, Listing 29-2 tidies up the template displayed by the top-level component in the feature module.
Simplifying the ondemand.component.html File in the src/app/ondemand Folder
Open a new command prompt, navigate to the exampleApp folder, and run the following command to start the server that provides the RESTful web server:
npm run json
The RESTful web service isn’t used directly in this chapter, but running it prevents errors. Open a separate command prompt, navigate to the exampleApp folder, and run the following command to start the Angular development tools:
ng serve
Open a new browser window and navigate to http://localhost:4200 to see the content shown in Figure 29-1.
Figure 29-1.
Running the example application
Running a Simple Unit Test
When a new project is created using the ng new command, all the packages and tools required for unit testing are installed, based on the Jasmine test framework. To create a simple unit test to confirm that everything is working, I created the src/app/tests folder and added to it a file named app.component.spec.ts with the contents shown in Listing 29-3. The naming convention for unit tests makes it obvious which file the tests apply to.
describe("Jasmine Test Environment", () => {
it("is working", () => expect(true).toBe(true));
});
Listing 29-3.
Replacing the Contents of the app.component.spec.ts File in the src/app/tests Folder
I explain the basics of working with the Jasmine API shortly, and you can ignore the syntax for the moment. Using a new command prompt, navigate to the exampleApp folder, and run the following command:
ng test
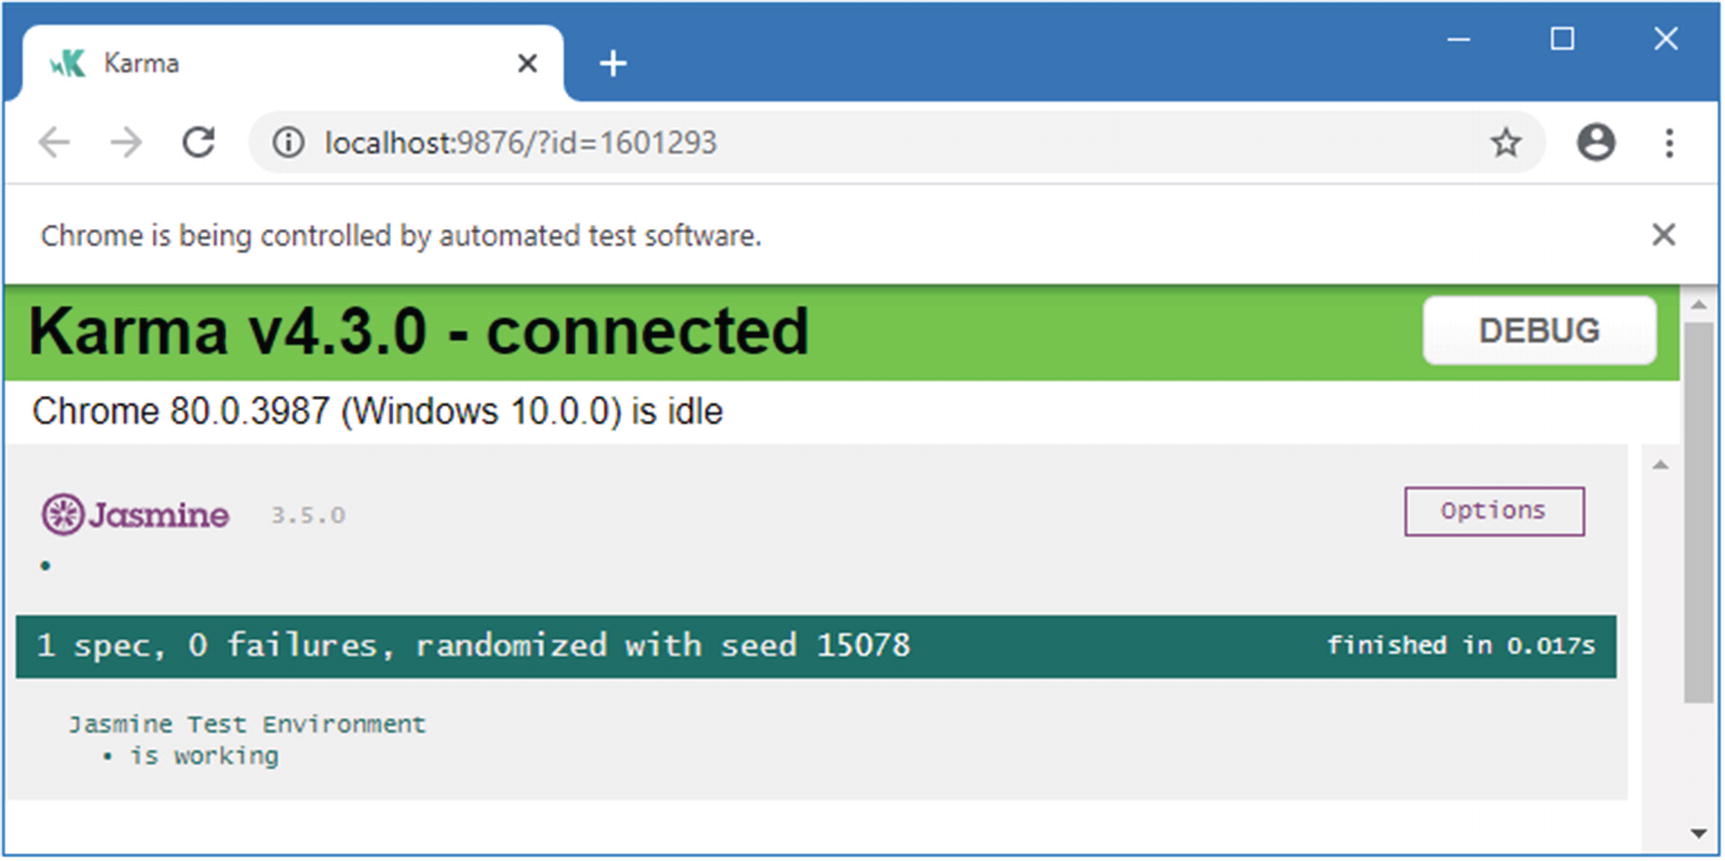
This command starts the Karma test runner, which opens a new browser tab with the content shown in Figure 29-2.
Figure 29-2.
Starting the Karma test runner
The browser window is used to run the tests, but the important information is written out to the command prompt used to start the test tools, where you will see a message like this:
This shows that the single unit test in the project has been located and executed successfully. Whenever you make a change that updates one of the JavaScript files in the project, the unit tests will be located and executed, and any problems will be written to the command prompt. To show what an error looks like, Listing 29-4 changes the unit test so that it will fail.
describe("Jasmine Test Environment", () => {
it("is working", () => expect(true).toBe(false));
});
Listing 29-4.
Making a Unit Test Fail in the app.component.spec.ts File in the src/app/tests Folder
This test will fail and will result in the following output, which indicates the test that has failed and what went wrong:
Chrome 80.0.3987 (Windows 10.0.0) Jasmine Test Environment is working FAILED
The API that Jasmine provides chains together JavaScript methods to define unit tests. You can find the full documentation for Jasmine at http://jasmine.github.io, but Table 29-3 describes the most useful functions for Angular testing.
Table 29-3.
Useful Jasmine Methods
Name
Description
describe(description, function)
This method is used to group a set of related tests.
beforeEach(function)
This method is used to specify a task that is performed before each unit test.
afterEach(function)
This method is used to specify a test that is performed after each unit test.
it(description, function)
This method is used to perform the test action.
expect(value)
This method is used to identify the result of the test.
toBe(value)
This method specifies the expected value of the test.
You can see how the methods in Table 29-3 were used to create the unit test in Listing 29-4.
...
describe("Jasmine Test Environment", () => {
it("is working", () => expect(true).toBe(false));
});
...
You can also see why the test has failed since the expect and toBe methods have been used to check that true and false are equal. Since this cannot be the case, the test fails.
The toBe method isn’t the only way to evaluate the result of a unit test. Table 29-4 shows other evaluation methods provided by Angular.
Table 29-4.
Useful Jasmine Evaluation Methods
Name
Description
toBe(value)
This method asserts that a result is the same as the specified value (but need not be the same object).
toEqual(object)
This method asserts that a result is the same object as the specified value.
toMatch(regexp)
This method asserts that a result matches the specified regular expression.
toBeDefined()
This method asserts that the result has been defined.
toBeUndefined()
This method asserts that the result has not been defined.
toBeNull()
This method asserts that the result is null.
toBeTruthy()
This method asserts that the result is truthy, as described in Chapter 12.
toBeFalsy()
This method asserts that the result is falsy, as described in Chapter 12.
toContain(substring)
This method asserts that the result contains the specified substring.
toBeLessThan(value)
This method asserts that the result is less than the specified value.
toBeGreaterThan(value)
This method asserts that the result is more than the specified value.
Listing 29-5 shows how these evaluation methods can be used in tests, replacing the failing test from the previous section.
Replacing the Unit Test in the app.component.spec.ts File in the src/app/tests Folder
When you save the changes to the file, the tests will be executed, and the results will be shown in the command prompt.
Testing an Angular Component
The building blocks of an Angular application can’t be tested in isolation because they depend on the underlying features provided by Angular and by the other parts of the project, including the services, directives, templates, and modules it contains. As a consequence, testing a building block such as a component means using testing utilities that are provided by Angular to re-create enough of the application to let the component function so that tests can be performed against it. In this section, I walk through the process of performing a unit test on the FirstComponent class in the OnDemand feature module, which was added to the project in Chapter 27. As a reminder, here is the definition of the component:
This component is so simple that it doesn’t have functionality of its own to test, but it is enough to demonstrate how the test process is applied.
Working with the TestBed Class
At the heart of Angular unit testing is a class called TestBed, which is responsible for simulating the Angular application environment so that tests can be performed. Table 29-5 describes the most useful methods provided by the TestBed method, all of which are static, as described in Chapter 6.
Table 29-5.
Useful TestBed Methods
Name
Description
configureTestingModule
This method is used to configure the Angular testing module.
createComponent
This method is used to create an instance of the component.
compileComponents
This method is used to compile components, as described in the “Testing a Component with an External Template” section.
The configureTestingModule method is used to configure the Angular module that is used in testing, using the same properties supported by the @NgModel decorator. Just like in a real application, a component cannot be used in a unit test unless it has been added to the declarations property of the module. This means that the first step in most unit tests is to configure the testing module. To demonstrate, I added a file named first.component.spec.ts to the src/app/tests folder with the content shown in Listing 29-6.
import { TestBed } from "@angular/core/testing";
import { FirstComponent } from "../ondemand/first.component";
describe("FirstComponent", () => {
beforeEach(() => {
TestBed.configureTestingModule({
declarations: [FirstComponent]
});
});
});
Listing 29-6.
The Contents of the first.component.spec.ts File in the src/app/tests Folder
The TestBed class is defined in the @angular/core/testing module, and the configureTestingModule accepts an object whose declarations property tells the test module that the FirstComponent class is going to be used.
Tip
Notice that the TestBed class is used within the beforeEach function. If you try to use the TestBed outside of this function, you will see an error about using Promises.
The next step is to create a new instance of the component so that it can be used in tests. This is done using the createComponent method, as shown in Listing 29-7.
import { TestBed, ComponentFixture} from "@angular/core/testing";
import { FirstComponent } from "../ondemand/first.component";
Creating a Component in the first.component.spec.ts File in the src/app/tests Folder
The argument to the createComponent method tells the test bed which component type it should instantiate, which is FirstComponent in this case. The result is a ComponentFixture<FirstComponent> object, which provides features for testing a component, using the methods and properties described in Table 29-6.
Table 29-6.
Useful ComponentFixture Methods and Properties
Name
Description
componentInstance
This property returns the component object.
debugElement
This property returns the test host element for the component.
nativeElement
This property returns the DOM object representing the host element for the component.
detectChanges()
This method causes the test bed to detect state changes and reflect them in the component’s template.
whenStable()
This method returns a Promise that is resolved when the effect of an operation has been fully applied. See the “Testing with Asynchronous Operations” section for details.
In the listing, I use the componentInstance property to get the FirstComponent object that has been created by the test bed and perform a simple test to ensure that it has been created by using the expect method to select the component object as the target of the test and the toBeDefined method to perform the test. I demonstrate the other methods and properties in the sections that follow.
Configuring the Test Bed for Dependencies
One of the most important features of Angular applications is dependency injection, which allows components and other building blocks to receive services by declaring dependencies on them using constructor parameters. Listing 29-8 adds a dependency on the data model repository service to the FirstComponent class.
import { Component } from "@angular/core";
import { Product } from "../model/product.model";
import { Model } from "../model/repository.model";
Adding a Service Dependency in the first.component.ts File in the src/app/ondemand Folder
The component uses the repository to provide a filtered collection of Product objects, which are exposed through a method called getProducts and filtered using a category property. The inline template has a corresponding data binding that displays the number of products that the getProducts method returns.
Being able to unit test the component means providing it with a repository service. The Angular test bed will take care of resolving dependencies as long as they are configured through the test module. Effective unit testing generally requires components to be isolated from the rest of the application, which means that mock or fake objects (also known as test doubles) are used as substitutes for real services in unit tests. Listing 29-9 configures the test bed so that a fake repository is used to provide the component with its service.
import { TestBed, ComponentFixture} from "@angular/core/testing";
import { FirstComponent } from "../ondemand/first.component";
import { Product } from "..//model/product.model";
import { Model } from "../model/repository.model";
Providing a Service in the first.component.spec.ts File in the src/app/tests Folder
The mockRepository variable is assigned an object that provides a getProducts method that returns fixed data that can be used to test for known outcomes. To provide the component with the service, the providers property for the object passed to the TestBed.configureTestingModule method is configured in the same way as a real Angular module, using the value provider to resolve dependencies on the Model class using the mockRepository variable. The test invokes the component’s getProducts method and compares the results with the expected outcome, changing the value of the category property to check different filters.
Testing Data Bindings
The previous example showed how a component’s properties and methods can be used in a unit test. This is a good start, but many components will also include small fragments of functionality in the data binding expressions contained in their templates, and these should be tested as well. Listing 29-10 checks that the data binding in the component’s template correctly displays the number of products in the mock data model.
import { TestBed, ComponentFixture} from "@angular/core/testing";
import { FirstComponent } from "../ondemand/first.component";
import { Product } from "../model/product.model";
import { Model } from "../model/repository.model";
Unit Testing a Data Binding in the first.component.spec.ts File in the src/app/tests Folder
The ComponentFixture.debugElement property returns a DebugElement object that represents the root element from the component’s template, and Table 29-7 lists the most useful methods and properties described by the DebugElement class.
Table 29-7.
Useful DebugElement Properties and Methods
Name
Description
nativeElement
This property returns the object that represents the HTML element in the DOM.
children
This property returns an array of DebugElement objects representing the children of this element.
query(selectorFunction)
The selectorFunction is passed a DebugElement object for each HTML element in the component’s template, and this method returns the first DebugElement for which the function returns true.
queryAll(selectorFunction)
This is similar to the query method, except the result is all the DebugElement objects for which the function returns true.
triggerEventHandler(name, event)
This method triggers an event. See the “Testing Component Events” section for details.
Locating elements is done through the query and queryAll methods, which accept functions that inspect DebugElement objects and return true if they should be included in the results. The By class, defined in the @angular/platform-browser module, makes it easier to locate elements in the component’s template through the static methods described in Table 29-8.
Table 29-8.
The By Methods
Name
Description
By.all()
This method returns a function that matches any element.
By.css(selector)
This method returns a function that uses a CSS selector to match elements.
By.directive(type)
This method returns a function that matches elements to which the specified directive class has been applied, as demonstrated in the “Testing Input Properties” section.
In the listing, I use the By.css method to locate the first span element in the template and access the DOM object that represents it through the nativeElement property so that I can check the value of the textContent property in the unit tests.
Notice that after each change to the component’s category property, I call the ComponentFixture object’s detectChanges method, like this:
This method tells the Angular testing environment to process any changes and evaluate the data binding expressions in the template. Without this method call, the change to the value of the category component would not be reflected in the template, and the test would fail.
Testing a Component with an External Template
Angular components are compiled into factory classes, either within the browser or by the ahead-of-time compiler that I demonstrated in Chapter 10. As part of this process, Angular processes any external templates and includes them as text in the JavaScript code that is generated similar to an inline template. When unit testing a component with an external template, the compilation step must be performed explicitly. In Listing 29-11, I changed the @Component decorator applied to the FirstComponent class so that it specifies an external template.
import { Component } from "@angular/core";
import { Product } from "../model/product.model";
import { Model } from "../model/repository.model";
@Component({
selector: "first",
templateUrl: "first.component.html"
})
export class FirstComponent {
constructor(private repository: Model) {}
category: string = "Soccer";
getProducts(): Product[] {
return this.repository.getProducts()
.filter(p => p.category == this.category);
}
}
Listing 29-11.
Specifying a Template in the first.component.ts File in the src/app/ondemand Folder
To provide the template, I created a file called first.component.html in the exampleApp/app/ondemand folder and added the elements shown in Listing 29-12.
The first.component.html File in the exampleApp/app/ondemand Folder
This is the same content that was previously defined inline. Listing 29-13 updates the unit test for the component to deal with the external template by explicitly compiling the component.
import { TestBed, ComponentFixture, async } from "@angular/core/testing";
import { FirstComponent } from "../ondemand/first.component";
import { Product } from "../model/product.model";
import { Model } from "../model/repository.model";
Compiling a Component in the first.component.spec.ts File in the src/app/tests Folder
Components are compiled using the TestBed.compileComponents method. The compilation process is asynchronous, and the compileComponents method returns a Promise, which must be used to complete the test setup when the compilation is complete. To make it easier to work with asynchronous operations in unit tests, the @angular/core/testing module contains a function called async, which is used with the beforeEach method.
Testing Component Events
To demonstrate how to test for a component’s response to events, I defined a new property in the FirstComponent class and added a method to which the @HostBinding decorator has been applied, as shown in Listing 29-14.
import { Component, HostListener} from "@angular/core";
import { Product } from "../model/product.model";
import { Model } from "../model/repository.model";
@Component({
selector: "first",
templateUrl: "first.component.html"
})
export class FirstComponent {
constructor(private repository: Model) {}
category: string = "Soccer";
highlighted: boolean = false;
getProducts(): Product[] {
return this.repository.getProducts()
.filter(p => p.category == this.category);
}
@HostListener("mouseenter", ["$event.type"])
@HostListener("mouseleave", ["$event.type"])
setHighlight(type: string) {
this.highlighted = type == "mouseenter";
}
}
Listing 29-14.
Adding Event Handling in the first.component.ts File in the src/app/ondemand Folder
The setHighlight method has been configured so that it will be invoked when the host element’s mouseenter and mouseleave events are triggered. Listing 29-15 updates the component’s template so that it uses the new property in a data binding.
Triggering Events in the first.component.spec.ts File in the src/app/tests Folder
The test in this listing checks the initial state of the component and the template and then triggers the mouseenter and mouseleave events, checking the effect that each has.
Testing Output Properties
Testing output properties is a simple process because the EventEmitter objects used to implement them are Observable objects that can be subscribed to in unit tests. Listing 29-17 adds an output property to the component under test.
import { Component, HostListener, Output, EventEmitter} from "@angular/core";
import { Product } from "../model/product.model";
import { Model } from "../model/repository.model";
@Component({
selector: "first",
templateUrl: "first.component.html"
})
export class FirstComponent {
constructor(private repository: Model) {}
category: string = "Soccer";
highlighted: boolean = false;
@Output("pa-highlight")
change = new EventEmitter<boolean>();
getProducts(): Product[] {
return this.repository.getProducts()
.filter(p => p.category == this.category);
}
@HostListener("mouseenter", ["$event.type"])
@HostListener("mouseleave", ["$event.type"])
setHighlight(type: string) {
this.highlighted = type == "mouseenter";
this.change.emit(this.highlighted);
}
}
Listing 29-17.
Adding an Output Property in the first.component.ts File in the src/app/ondemand Folder
The component defines an output property called change, which is used to emit an event when the setHighlight method is called. Listing 29-18 shows a unit test that targets the output property.
import { TestBed, ComponentFixture, async } from "@angular/core/testing";
import { FirstComponent } from "../ondemand/first.component";
import { Product } from "../model/product.model";
import { Model } from "../model/repository.model";
debugElement.triggerEventHandler("mouseenter", new Event("mouseenter"));
expect(highlighted).toBeTruthy();
debugElement.triggerEventHandler("mouseleave", new Event("mouseleave"));
expect(highlighted).toBeFalsy();
});
});
Listing 29-18.
Testing an Output Property in the first.component.spec.ts File in the src/app/tests Folder
I could have invoked the component’s setHighlight method directly in the unit test, but instead I have chosen to trigger the mouseenter and mouseleave events, which will activate the output property indirectly. Before triggering the events, I use the subscribe method to receive the event from the output property, which is then used to check for the expected outcomes.
Testing Input Properties
The process for testing input properties requires a little extra work. To get started, I added an input property to the FirstComponent class that is used to receive the data model repository, replacing the service that was received by the constructor, as shown in Listing 29-19. I have also removed the host event bindings and the output property to keep the example simple.
import { Component, HostListener, Input } from "@angular/core";
import { Product } from "../model/product.model";
import { Model } from "../model/repository.model";
Adding an Input Property in the first.component.ts File in the src/app/ondemand Folder
The input property is set using an attribute called pa-model and is used within the getProducts method. Listing 29-20 shows how to write a unit test that targets the input property.
import { TestBed, ComponentFixture, async } from "@angular/core/testing";
import { FirstComponent } from "../ondemand/first.component";
import { Product } from "../model/product.model";
import { Model } from "../model/repository.model";
import { DebugElement } from "@angular/core";
import { By } from "@angular/platform-browser";
import { Component, ViewChild } from "@angular/core";
Testing an Input Property in the first.component.spec.ts File in the src/app/tests Folder
The trick here is to define a component that is only required to set up the test and whose template contains an element that matches the selector of the component you want to target. In this example, I defined a component class called TestComponent with an inline template defined in the @Component decorator that contains a first element with a pa-model attribute, which corresponds to the @Input decorator applied to the FirstComponent class.
The test component class is added to the declarations array for the testing module, and an instance is created using the TestBed.createComponent method. I used the @ViewChild decorator in the TestComponent class so that I can get hold of the FirstComponent instance I require for the test. To get the FirstComponent root element, I used the DebugElement.query method with the By.directive method.
The result is that I am able to access both the component and its root element for the test, which sets the category property and then validates the results both from the component and via the data binding in its template.
Testing with Asynchronous Operations
Another area that requires special measures is dealing with asynchronous operations. To demonstrate how this is done, Listing 29-21 modifies the component under test so that it uses the RestDataSource class, defined in Chapter 24, to get its data. This isn’t a class that was intended for use outside of the model feature module, but it provides a useful set of asynchronous methods that return Observable objects, so I have broken through the intended structure of the application so that I can demonstrate the test technique.
import { Component, HostListener, Input } from "@angular/core";
import { Product } from "../model/product.model";
import { Model } from "../model/repository.model";
import { RestDataSource } from "../model/rest.datasource";
@Component({
selector: "first",
templateUrl: "first.component.html"
})
export class FirstComponent {
_category: string = "Soccer";
_products: Product[] = [];
highlighted: boolean = false;
constructor(public datasource: RestDataSource) {}
ngOnInit() {
this.updateData();
}
getProducts(): Product[] {
return this._products;
}
set category(newValue: string) {
this._category;
this.updateData();
}
updateData() {
this.datasource.getData()
.subscribe(data => this._products = data
.filter(p => p.category == this._category));
}
}
Listing 29-21.
An Async Operation in the first.component.ts File in the src/app/ondemand Folder
The component gets its data through the data source’s getData method, which returns an Observable object. The component subscribes to the Observable and updates its _product property with the data objects, which is exposed to the template through the getProducts method.
Listing 29-22 shows how this kind of component can be tested using the tools Angular provides for working with asynchronous operations in unit tests.
import { TestBed, ComponentFixture, async, fakeAsync, tick } from "@angular/core/testing";
import { FirstComponent } from "../ondemand/first.component";
import { Product } from "../model/product.model";
import { Model } from "../model/repository.model";
import { DebugElement } from "@angular/core";
import { By } from "@angular/platform-browser";
import { Component, ViewChild } from "@angular/core";
import { RestDataSource } from "../model/rest.datasource";
Testing an Async Operation in the first.component.spec.ts File in the src/app/tests Folder
The mock object in this example is more fully formed than the one I created previously, just to show different ways of achieving the same goal. The important point to note is that the getData method it implements introduces a one-second delay before it returns the sample data.
This delay is important because it means that the effect of calling the detectChanges method in the unit test won’t affect the component immediately. To simulate the passage of time, I use the fakeAsync and tick methods, and to deal with the asynchronous changes, I call the whenStable method defined by the ComponentFixture class, which returns a Promise that resolves when all the changes have been fully processed. This allows me to defer the assessment of the outcome of the test until the Observable returned by the mock data source has delivered its data to the component.
Testing an Angular Directive
The process for testing directives is similar to the one required to test input properties, in that a test component and template are used to create an environment for testing in which the directive can be applied. To have a directive to test, I added a file called attr.directive.ts to the src/app/ondemand folder and added the code shown in Listing 29-23.
Note
I have shown an attribute directive in this example, but the technique in this section can be used to test structural directives equally well.
let classList = this.element.nativeElement.classList;
if (!change.isFirstChange() && classList.contains(change.previousValue)) {
classList.remove(change.previousValue);
}
if (!classList.contains(change.currentValue)) {
classList.add(change.currentValue);
}
}
}
Listing 29-23.
The Contents of the attr.directive.ts File in the src/app/ondemand Folder
This is an attribute directive based on an example from Chapter 15. To create a unit test that targets the directive, I added a file called attr.directive.spec.ts to the src/app/tests folder and added the code shown in Listing 29-24.
import { TestBed, ComponentFixture } from "@angular/core/testing";
import { Component, DebugElement, ViewChild } from "@angular/core";
import { By } from "@angular/platform-browser";
import { PaAttrDirective } from "../ondemand/attr.directive";
The Contents of the attr.directive.spec.ts File in the src/app/tests Folder
The text component has an inline template that applies the directive and a property that is referred to in the data binding. The @ViewChild decorator provides access to the directive object that Angular creates when it processes the template, and the unit test is able to check that changing the value used by the data binding has an effect on the directive object and the element it has been applied to.
Summary
In this chapter, I demonstrated the different ways in which Angular components and directives can be unit tested. I explained the process of installing the test framework and tools and how to create the testbed through which tests are applied. I demonstrated how to test the different aspects of components and how the same techniques can be applied to directives as well.
That is all I have to teach you about Angular. I started by creating a simple application and then took you on a comprehensive tour of the different building blocks in the framework, showing you how they can be created, configured, and applied to create web applications.
I wish you every success in your Angular projects, and I can only hope that you have enjoyed reading this book as much as I enjoyed writing it.