
C H A P T E R 10
Using the Web Workers API
JavaScript is single-threaded. As a result, long-lasting computations (not necessarily due to poorly written code) will block the UI thread and make it impossible to add text to text boxes, click buttons, use CSS effects, and, in most browsers, open new tabs until control has returned. As an answer to that problem, HTML5 Web Workers provide background-processing capabilities to web applications and typically run on separate threads so that JavaScript applications using Web Workers can take advantage of multicore CPUs. Separating long-running tasks into Web Workers also avoids the dreaded slow-script warnings, shown in Figure 10-1, that display when JavaScript loops continue for several seconds.
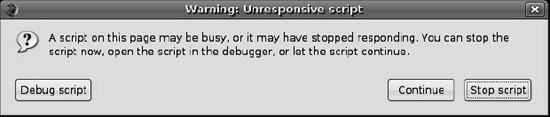
Figure 10-1. Slow script warning in Firefox
As powerful as Web Workers are, there are also certain things they cannot do. For example, when a script is executing inside a Web Worker it cannot access the web page's window object (window.document), which means that Web Workers don't have direct access to the web page and the DOM API. Although Web Workers cannot block the browser UI, they can still consume CPU cycles and make the system less responsive.
Let's say you want to create a web application that has to perform some background number crunching, but you do not want those tasks to interfere with the interactivity of the web page itself. Using Web Workers, you can spawn a Web Worker to perform the tasks and add an event listener to listen to messages from the Web Worker as they are sent.
Another use case for Web Workers could be an application that listens for broadcast news messages from a back-end server, posting messages to the main web page as they are received from the back-end server. This Web Worker might use Web Sockets or Server-Sent Events to talk to the back-end server.
In this chapter, we'll explore what you can do with Web Workers. First, we'll discuss how Web Workers work and the level of browser support available at the time of this writing. Then, we'll discuss how you can use the APIs to create new workers and how to communicate between a worker and the context that spawned it. Finally, we'll show you how you can build an application with Web Workers.
Browser Support for Web Workers
The majority of the modern web browsers support Web Workers. Check the web site http://caniuse.com (search for Web Workers) for the most up-to-date support matrix. While there are polyfill (emulation) libraries available for most other APIs—for example, for HTML5 Canvas there are libraries such as excanvas.js and flashcanvas.js that provide an emulation of the Canvas APIs (using Flash under the covers)—an emulation for Web Workers does not make a lot of sense, however. You can either call your worker code as a worker, or run the same code inline in your page, blocking the UI thread. The improved responsiveness of the worker-based page may just be enough to have people upgrade to a more modern browser (at least we hope it will).
Using the Web Workers API
In this section, we'll explore the use of the Web Workers API in more detail. For the sake of illustration, we've created a simple browser page: echo.html. Using Web Workers is fairly straightforward—you create a Web Worker object and pass in a JavaScript file to be executed. Inside the page you set up an event listener to listen to incoming messages and errors that are posted by the Web Worker and if you want to communicate from the page to the Web Worker, you call postMessage to pass in the required data. The same is true for the code in the Web Worker JavaScript file—event handlers must be set up to process incoming messages and errors, and communication with the page is handled with a call to postMessage.
Checking for Browser Support
Before you call the Web Workers API functions, you will want to make sure there is support in the browser for what you're about to do. This way, you can provide some alternate text, prompting the users of your application to use a more up-to-date browser. Listing 10-1 shows the code you can use to test for browser support.
Listing 10-1. Checking for Browser Support
function loadDemo() {

  if (typeof(Worker) !== "undefined") {

    document.getElementById("support").innerHTML =

            "Excellent! Your browser supports Web Workers";

  }

}
In this example, you test for browser support in the loadDemo function, which might be called when the page is loaded. A call to typeof(Worker) will return the window's global Worker property, which will be undefined if the browser doesn't support the Web Workers API. In this example, the page is updated to reflect whether there is browser support by updating a previously defined support element on the page with a suitable message, as shown at the top of Figure 10-2.
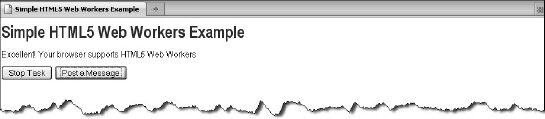
Figure 10-2. Example of showing whether Web Workers is supported
Creating Web Workers
Web Workers are initialized with the URL of a JavaScript file, which contains the code the worker will execute. This code sets event listeners and communicates with the script that spawned it. The URL for the JavaScript file can be a relative or absolute URL with the same origin (the same scheme, host, and port) as the main page:
worker = new Worker("echoWorker.js");
Inline Workers
To start a worker you need to point to a file. You may have seen some examples of script elements that have the type javascript/worker, as shown in the following example:
<script id="myWorker" type="javascript/worker">
Don't let this fool you into thinking that you can simply set the type of a script element to run the JavaScript code as a Web Worker. In this case, the type information is used to signal the browser and its JavaScript engine not to parse and run the script. In fact, the type may as well have been anything other than text/javascript. The script example shown is a building block for inline Web Workers—a feature that can be used only if your browser also supports the File System API (Blob Builder or File Writer). In that case you can programmatically find the script block (in the previous case, the element with the myWorker id) and write the Web Worker JavaScript file to disk. After that, you can call the inline Web Worker in your code.
Shared Workers
There is yet another type of worker, which is not widely supported at the time of this writing: the shared Web Worker. A shared Web Worker is like a normal Web Worker, but it can be shared across multiple pages on the same origin. Shared Web Workers introduce the notion of ports that are used for PostMessage communication. Shared Web Workers can be useful for data synchronization among multiple pages (or tabs) on the same origin or to share a long-lived resource (like a WebSocket) among several tabs.
The syntax for starting a shared Web Worker is as follows:
sharedWorker = new SharedWorker(sharedEchoWorker.js'),
Loading and Executing Additional JavaScript
An application composed of several JavaScript files can contain <script> elements that synchronously load JavaScript files as the page loads. However, because Web Workers do not have access to the document object, there is an alternative mechanism for synchronously importing additional JavaScript files from within workers—importScripts:
importScripts("helper.js");
Importing a JavaScript file simply loads and executes JavaScript into an existing worker. Multiple scripts can be imported by the same call to importScripts. They are executed in the order specified:
importScripts("helper.js", "anotherHelper.js");
Communicating with Web Workers
Once the Web Worker is spawned, you can use the postMessage API to send data to and from Web Workers. This is the same postMessage API that is used for cross-frame and cross-window communication. postMessage can be used to send most JavaScript objects, but not functions or objects with cyclic references.
Let's say that you want to build a simple Web Worker example that allows users to send a message to a worker, which in turn echoes back the message. This example may not be very useful in real life, but it's useful enough to explain the concepts you need to build more complex examples. Figure 10-3 shows this example web page and its Web Worker in action. The code for this simple page is listed at the end of this section.
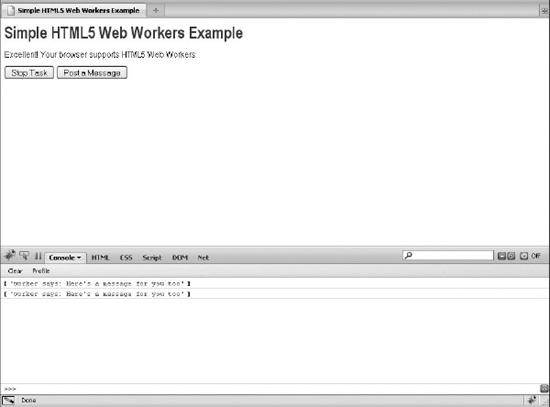
Figure 10-3. A simple web page that uses Web Workers
To set up proper communication with your Web Worker, code has to be added to the main page (the page that calls the Web Worker) as well as the worker JavaScript file.
Coding the Main Page
To communicate from the page to the Web Worker, you call postMessage to pass in the required data. To listen to incoming messages and errors that are sent by the Web Worker to the page, you set up an event listener.
To set up communication between the main page and the Web Worker, first add the call to postMessage to the main page, as follows:
document.getElementById("helloButton").onclick = function() {

    worker.postMessage("Here's a message for you");

}
In the preceding example, a message is sent to the Web Worker when the user clicks the Post a Message button. Next, add an event listener to the page that listens for messages from the Web Worker:
worker.addEventListener("message", messageHandler, true);
function messageHandler(e) {

    // process message from worker

}
Coding the Web Worker JavaScript File
You must now add similar code to the Web Worker JavaScript file—event handlers must be set up to process incoming messages and errors, and communication with the page is handled with a call to postMessage.
To complete the communication between the page and the Web Worker, first, add the call to postMessage; for example, inside a messageHandler function:
function messageHandler(e) {

    postMessage("worker says: " + e.data + " too");

}
Next, add an event listener to the Web Worker JavaScript file that handles messages coming from the main page:
addEventListener("message", messageHandler, true);
In this example, the messageHandler function is called immediately when the message is received so that the message can be echoed back.
Note that if this was a shared worker, you would use a slightly different syntax (using a port):
sharedWorker.port.addEventListener("message", messageHandler, true);

sharedWorker.port.postMessage("Hello HTML5");
In addition, the worker can listen to a connect event for incoming connections. You can use this to count active connections.
Handling Errors
Unhandled errors in a Web Worker script fire error events on the Web Worker object. Listening for these error events is especially important when you are debugging scripts that make use of Web Workers. The following shows an example of an error handling function in a Web Worker JavaScript file that logs errors to the console:
function errorHandler(e) {

    console.log(e.message, e);

}
To handle the errors, you must add an event listener to the main page:
worker.addEventListener("error", errorHandler, true);
Most browsers don't have a great way to step through Web Worker code yet, but Google Chrome offers Web Worker debugging capabilities in its Chrome Developer Tools (in the Scripts tab, look for Worker inspectors), as shown in Figure 10-4.
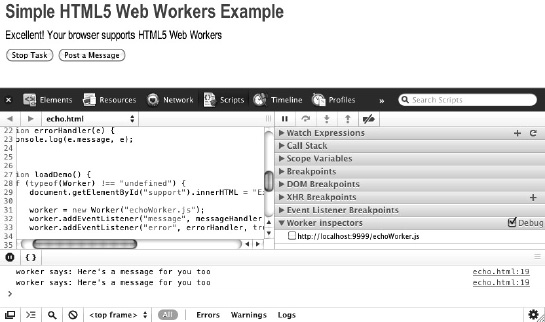
Figure 10-4. Web Worker debugging options in Chrome Developer Tools
Stopping Web Workers
Web Workers don't stop by themselves; but the page that started them can stop them. If the page is closed, Web Workers will be garbage-collected, so rest assured you won't have any zombie workers hanging around performing background tasks. However, you may want to reclaim resources when a Web Worker is no longer needed―perhaps when the main page is notified that the Web Worker has finished its tasks. You may also wish to cancel a long-running task in response to user actions. Calling terminate stops the Web Worker. A terminated Web Worker will no longer respond to messages or perform any additional computations. You cannot restart a worker; instead, you can create a new worker using the same URL:
worker.terminate();
Using Web Workers within Web Workers
The Worker API can be used inside Web Worker scripts to create subworkers:
var subWorker = new Worker("subWorker.js");
Peter says: “If you spawn a Worker that recursively spawns subworker with the same JavaScript source file, you will see some interesting results, to say the least.”
Using Timers
Although Web Workers cannot access the window object, they can make use of the full JavaScript timing API, typically found on the global window:
var t = setTimeout(postMessage, 2000, "delayed message");
Example Code
For completeness, Listings 10-2 and 10-3 show the code for the simple page and the Web Worker JavaScript file.
Listing 10-2. Simple HTML Page That Calls a Web Worker
<!DOCTYPE html>

<title>Simple Web Workers Example</title>

<link rel="stylesheet" href="styles.css">


<h1>Simple Web Workers Example</h1>

<p id="support">Your browser does not support Web Workers.</p>


<button id="stopButton" >Stop Task</button>

<button id="helloButton" >Post a Message</button>


<script>

   function stopWorker() {

       worker.terminate();

   }


   function messageHandler(e) {

       console.log(e.data);

   }


   function errorHandler(e) {

       console.warn(e.message, e);

   }


   function loadDemo() {

       if (typeof(Worker) !== "undefined") {

           document.getElementById("support").innerHTML =


               "Excellent! Your browser supports Web Workers";


           worker = new Worker("echoWorker.js");

           worker.addEventListener("message", messageHandler, true);

           worker.addEventListener("error", errorHandler, true);


           document.getElementById("helloButton").onclick = function() {

               worker.postMessage("Here's a message for you");

       }


          document.getElementById("stopButton").onclick = stopWorker;

    }

}


window.addEventListener("load", loadDemo, true);

</script>
Listing 10-3. Simple Web Worker JavaScript File
function messageHandler(e) {

    postMessage("worker says: " + e.data + " too");

}

addEventListener("message", messageHandler, true);
Building an Application with Web Workers
So far, we've focused on using the different Web Worker APIs. Let's see how powerful the Web Workers API can really be by building an application: a web page with an image-blurring filter, parallelized to run on multiple Web Workers. Figure 10-5 shows what this application looks like when you start it.
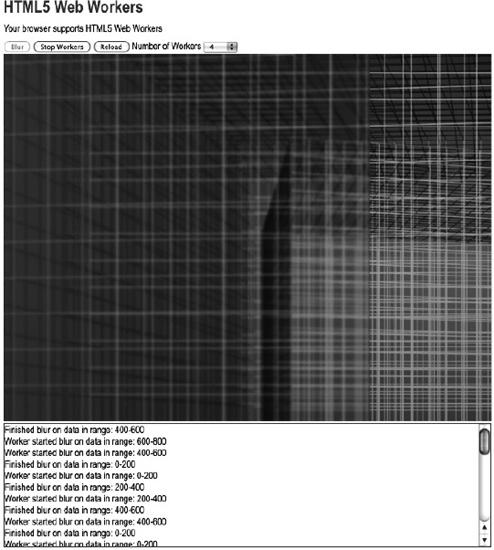
Figure 10-5. Web Worker–based web page with image-blurring filter
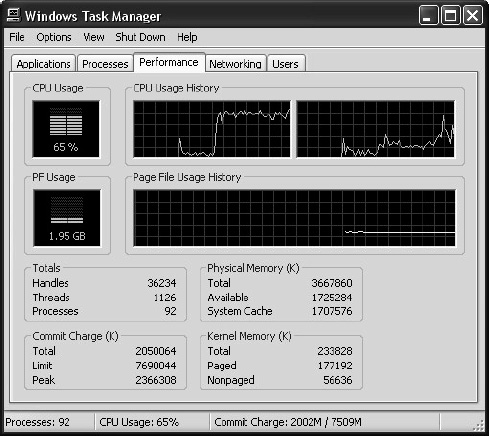
This application sends image data from a canvas to several Web Workers (you can specify how many). The Web Workers then process the image with a simple box-blur filter. This may take several seconds, depending on the size of the image and the computational resources available (even machines with fast CPUs may have load from other processes, causing JavaScript execution to take more wall-clock time to complete). Figure 10-6 shows the same page after running the blur filtering process for a while.

Figure 10-6. Image-blurring web page after running for a while
However, because the heavy lifting takes place in Web Workers, there is no danger of slow-script warnings and, therefore, no need to manually partition the task into scheduled slices—something you would have to consider if you could not use Web Workers.
Coding the blur.js Helper Script
Inside the blur.js application page, we can use a straightforward implementation of a blur filter that loops until it has completely processed its input, as shown in Listing 10-4.
Listing 10-4. A JavaScript Box-blur Implementation in the File blur.js
function inRange(i, width, height) {

    return ((i>=0) && (i < width*height*4));

}


function averageNeighbors(imageData, width, height, i) {

    var v = imageData[i];


    // cardinal directions


    var north = inRange(i-width*4, width, height) ? imageData[i-width*4] : v;

    var south = inRange(i+width*4, width, height) ? imageData[i+width*4] : v;

    var west = inRange(i-4, width, height) ? imageData[i-4] : v;

    var east = inRange(i+4, width, height) ? imageData[i+4] : v;


    // diagonal neighbors

    var ne = inRange(i-width*4+4, width, height) ? imageData[i-width*4+4] : v;

    var nw = inRange(i-width*4-4, width, height) ? imageData[i-width*4-4] : v;

    var se = inRange(i+width*4+4, width, height) ? imageData[i+width*4+4] : v;

    var sw = inRange(i+width*4-4, width, height) ? imageData[i+width*4-4] : v;


    // average

    var newVal = Math.floor((north + south + east + west + se + sw + ne + nw + v)/9);


    if (isNaN(newVal)) {

        sendStatus("bad value " + i + " for height " + height);

        throw new Error("NaN");

    }

    return newVal;

}


function boxBlur(imageData, width, height) {

    var data = [];

    var val = 0;

    for (var i=0; i<width*height*4; i++) {

        val = averageNeighbors(imageData, width, height, i);

        data[i] = val;

    }


    return data;

}
In brief, this algorithm blurs an image by averaging nearby pixel values. For a large image with millions of pixels, this takes a substantial amount of time. It is very undesirable to run a loop such as this in the UI thread. Even if a slow-script warning did not appear, the page UI would be unresponsive until the loop terminated. For this reason, it makes a good example of background computation in Web Workers.
Coding the blur.html Application Page
Listing 10-5 shows the code for the HTML page that calls the Web Worker. The HTML for this example is kept simple for reasons of clarity. The purpose here is not to build a beautiful interface, but to provide a simple skeleton that can control the Web Workers and demonstrate them in action. In this application, a canvas element that displays the input image is injected into the page. We have buttons to start blurring the image, stop blurring, reset the image, and specify the number of workers to spawn.
Listing 10-5. Code for the Page blur.html
<!DOCTYPE html>

<title>Web Workers</title>

<link rel="stylesheet" href = "styles.css">


<h1>Web Workers</h1>


<p id="status">Your browser does not support Web Workers.</p>


<button id="startBlurButton" disabled>Blur</button>

<button id="stopButton" disabled>Stop Workers</button>

<button onclick="document.location = document.location;">Reload</button>


<label for="workerCount">Number of Workers</label>

<select id="workerCount">

    <option>1</option>

    <option selected>2</option>

    <option>4</option>

    <option>8</option>

    <option>16</option>

</select>


<div id="imageContainer"></div>

<div id="logOutput"></div>
Next, let's add the code to create workers to the file blur.html. We instantiate a worker object, passing in a URL of a JavaScript file. Each instantiated worker will run the same code but be responsible for processing different parts of the input image:
function initWorker(src) {

    var worker = new Worker(src);

    worker.addEventListener("message", messageHandler, true);

    worker.addEventListener("error", errorHandler, true);

    return worker;

}
Let's add the error handling code to the file blur.html, as follows. In the event of an error in the worker, the page will be able to display an error message instead of continuing unaware. Our example shouldn't encounter any trouble, but listening for error events is generally a good practice and is invaluable for debugging.
Coding the blurWorker.js Web Worker Script
Next, we add the code that our workers use to communicate with the page to the file blurWorker.js (see Listing 10-6). As the Web Workers finish blocks of computation, they can use postMessage to inform the page that they have made progress. We will use this information to update the image displayed on the main page. After creation, our Web Workers wait for a message containing image data and the instruction to commence blurring. This message is a JavaScript object containing the type of message and the image data represented as an array of Numbers.
Listing 10-6. Sending and Handling Image Data in the File blurWorker.js
function sendStatus(statusText) {
postMessage({"type" : "status",
"statusText" : statusText}
);
}
function messageHandler(e) {
var messageType = e.data.type;
switch (messageType) {
case ("blur"):
sendStatus("Worker started blur on data in range: " +
e.data.startX + "-" + (e.data.startX+e.data.width));
var imageData = e.data.imageData;
imageData = boxBlur(imageData, e.data.width, e.data.height, e.data.startX);
postMessage({"type" : "progress",
"imageData" : imageData,
"width" : e.data.width,
"height" : e.data.height,
"startX" : e.data.startX
});
sendStatus("Finished blur on data in range: " +
e.data.startX + "-" + (e.data.width+e.data.startX));
break;
default:
sendStatus("Worker got message: " + e.data);
}
}
addEventListener("message", messageHandler, true);
Communicating with the Web Workers
In the file blur.html, we can use our workers by sending them some data and arguments that represent a blur task. This is done by using postMessage to send a JavaScript object containing the Array of RGBA image data, the dimensions of the source image, and the range of pixels for which the worker is responsible. Each worker processes a different section of the image based on the message it receives:
function sendBlurTask(worker, i, chunkWidth) {
var chunkHeight = image.height;
var chunkStartX = i * chunkWidth;
var chunkStartY = 0;
var data = ctx.getImageData(chunkStartX, chunkStartY,
chunkWidth, chunkHeight).data;
worker.postMessage({'type' : 'blur',
'imageData' : data,
'width' : chunkWidth,
'height' : chunkHeight,
'startX' : chunkStartX});
}
Canvas Image Data
On the HTML page side, a message handler consumes this data and uses it to update the canvas with the new pixel values. As processed image data comes in, the result is immediately visible. We now have a sample application that can process images while potentially taking advantage of multiple CPU cores. Moreover, we didn't lock up the UI and make it unresponsive while the Web Workers were active. Figure 10-7 shows the application in action.
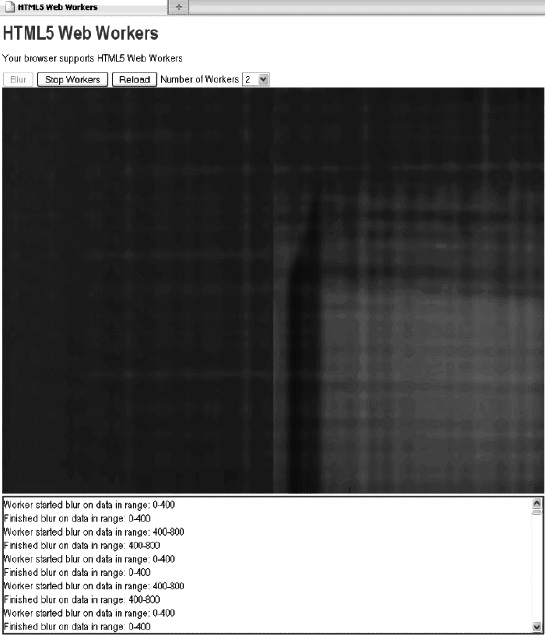
Figure 10-7. The blur application in action
The Application in Action
To see this example in action, the page blur.html has to be served up by a web server (for example, Apache or Python's SimpleHTTPServer). To following steps show how you can use Python SimpleHTTPServer to run the application:
- Install Python.
- Navigate to the directory that contains the example file (blur.html).
- Start Python as follows:
python -m SimpleHTTPServer 9999 - Open a browser and navigate to
http://localhost:9999/blur.html. You should now see the page shown in Figure 10-7. - If you leave it running for a while, you will see the different quadrants of the image blur slowly. The number of quadrants that blur at the same time depends on the number of workers you started.
Example Code
For completeness, Listings 10-7, 10-8, and 10-9 contain the full code for the example application.
Listing 10-7. Content of the File blur.html
<!DOCTYPE html>
<title>Web Workers</title>
<link rel="stylesheet" href = "styles.css">
<h1>Web Workers</h1>
<p id="status">Your browser does not support Web Workers.</p>
<button id="startBlurButton" disabled>Blur</button>
<button id="stopButton" disabled>Stop Workers</button>
<button onclick="document.location = document.location;">Reload</button>
<label for="workerCount">Number of Workers</label>
<select id="workerCount">
<option>1</option>
<option selected>2</option>
<option>4</option>
<option>8</option>
<option>16</option>
</select>
<div id="imageContainer"></div>
<div id="logOutput"></div>
<script>
var imageURL = "example2.png";
var image;
var ctx;
var workers = [];
function log(s) {
var logOutput = document.getElementById("logOutput");
logOutput.innerHTML = s + "<br>" + logOutput.innerHTML;
}
function setRunningState(p) {
// while running, the stop button is enabled and the start button is not
document.getElementById("startBlurButton").disabled = p;
document.getElementById("stopButton").disabled = !p;
}
function initWorker(src) {
var worker = new Worker(src);
worker.addEventListener("message", messageHandler, true);
worker.addEventListener("error", errorHandler, true);
return worker;
}
function startBlur() {
var workerCount = parseInt(document.getElementById("workerCount").value);
var width = image.width/workerCount;
for (var i=0; i<workerCount; i++) {
var worker = initWorker("blurWorker.js");
worker.index = i;
worker.width = width;
workers[i] = worker;
sendBlurTask(worker, i, width);
}
setRunningState(true);
}
function sendBlurTask(worker, i, chunkWidth) {
var chunkHeight = image.height;
var chunkStartX = i * chunkWidth;
var chunkStartY = 0;
var data = ctx.getImageData(chunkStartX, chunkStartY,
chunkWidth, chunkHeight).data;
worker.postMessage({'type' : 'blur',
'imageData' : data,
'width' : chunkWidth,
'height' : chunkHeight,
'startX' : chunkStartX});
}
function stopBlur() {
for (var i=0; i<workers.length; i++) {
workers[i].terminate();
}
setRunningState(false);
}
function messageHandler(e) {
var messageType = e.data.type;
switch (messageType) {
case ("status"):
log(e.data.statusText);
break;
case ("progress"):
var imageData = ctx.createImageData(e.data.width, e.data.height);
for (var i = 0; i<imageData.data.length; i++) {
var val = e.data.imageData[i];
if (val === null || val > 255 || val < 0) {
log("illegal value: " + val + " at " + i);
return;
}
imageData.data[i] = val;
}
ctx.putImageData(imageData, e.data.startX, 0);
// blur the same tile again
sendBlurTask(e.target, e.target.index, e.target.width);
break;
default:
break;
}
}
function errorHandler(e) {
    log("error: " + e.message);

}
function loadImageData(url) {
var canvas = document.createElement('canvas'),
ctx = canvas.getContext('2d'),
image = new Image();
image.src = url;
document.getElementById("imageContainer").appendChild(canvas);
image.onload = function(){
canvas.width = image.width;
canvas.height = image.height;
ctx.drawImage(image, 0, 0);
window.imgdata = ctx.getImageData(0, 0, image.width, image.height);
n = ctx.createImageData(image.width, image.height);
setRunningState(false);
log("Image loaded: " + image.width + "x" + image.height + " pixels");
};
}
function loadDemo() {
log("Loading image data");
if (typeof(Worker) !== "undefined") {
document.getElementById("status").innerHTML = "Your browser supports Web Workers";
document.getElementById("stopButton").onclick = stopBlur;
document.getElementById("startBlurButton").onclick = startBlur;
loadImageData(imageURL);
document.getElementById("startBlurButton").disabled = true;
document.getElementById("stopButton").disabled = true;
}
}
window.addEventListener("load", loadDemo, true);
</script>
Listing 10-8. Content of the File blurWorker.js
importScripts("blur.js");
function sendStatus(statusText) {

    postMessage({"type" : "status",

                 "statusText" : statusText}

                );

}


function messageHandler(e) {

    var messageType = e.data.type;

    switch (messageType) {

        case ("blur"):

            sendStatus("Worker started blur on data in range: " +

                            e.data.startX + "-" + (e.data.startX+e.data.width));

            var imageData = e.data.imageData;

            imageData = boxBlur(imageData, e.data.width, e.data.height, e.data.startX);


            postMessage({"type" : "progress",

                         "imageData" : imageData,

                         "width" : e.data.width,

                         "height" : e.data.height,

                         "startX" : e.data.startX

                        });

            sendStatus("Finished blur on data in range: " +

                            e.data.startX + "-" + (e.data.width+e.data.startX));

            break;

        default:

            sendStatus("Worker got message: " + e.data);

    }

}

addEventListener("message", messageHandler, true);
Listing 10-9. Content of the File blur.js
function inRange(i, width, height) {

    return ((i>=0) && (i < width*height*4));

}


function averageNeighbors(imageData, width, height, i) {

    var v = imageData[i];


    // cardinal directions

    var north = inRange(i-width*4, width, height) ? imageData[i-width*4] : v;

    var south = inRange(i+width*4, width, height) ? imageData[i+width*4] : v;

    var west = inRange(i-4, width, height) ? imageData[i-4] : v;

    var east = inRange(i+4, width, height) ? imageData[i+4] : v;


    // diagonal neighbors

    var ne = inRange(i-width*4+4, width, height) ? imageData[i-width*4+4] : v;

    var nw = inRange(i-width*4-4, width, height) ? imageData[i-width*4-4] : v;

    var se = inRange(i+width*4+4, width, height) ? imageData[i+width*4+4] : v;

    var sw = inRange(i+width*4-4, width, height) ? imageData[i+width*4-4] : v;


    // average

    var newVal = Math.floor((north + south + east + west + se + sw + ne + nw + v)/9);


    if (isNaN(newVal)) {

        sendStatus("bad value " + i + " for height " + height);

        throw new Error("NaN");

    }

    return newVal;

}


function boxBlur(imageData, width, height) {

    var data = [];

    var val = 0;


    for (var i=0; i<width*height*4; i++) {

        val = averageNeighbors(imageData, width, height, i);

        data[i] = val;

    }


    return data;

}
Summary
In this chapter, you have seen how Web Workers can be used to create web applications with background processing. This chapter showed you how Web Workers (and inline and shared Web Workers) work. We discussed how you can use the APIs to create new workers and how you communicate between a worker and the context that spawned it. Finally, we showed you how you can build an application with Web Workers. In the next chapter, we'll demonstrate more ways that HTML5 lets you keep local copies of data and reduce the amount of network overhead in your applications.