
![]()
Using WebRTC for Video Chat
Recent years have seen browser manufacturers push the boundaries of what was previously considered possible in native JavaScript code, adding APIs to support a number of new features, including pixel-based drawing, as we saw in the previous chapter, and now, finally, a way to stream multimedia data (video and audio) from one browser to another across the Internet using an API known as the Web Real Time Communication (WebRTC) API, all without using plugins. Although support is, at the time of writing, only currently present in desktop versions of Chrome, Firefox, and Opera, making up just over 50 percent of the worldwide web usage (source: http://bit.ly/caniuse_webrtc), I feel this technology is so important to the future of Internet communication that, as developers, we need to know and understand this API while it is still in its adoption phase.
In this chapter, we will cover the basics of the WebRTC specification, including how to transmit and receive data from a webcam and microphone attached to a device using peer-to-peer networking, to build a simple video chat client within the browser using JavaScript.
The WebRTC specifiation was started by Google initially for inclusion in their Chrome browser and promises an API that allows developers to:
- Detect device capabilities, including support for video and/or audio based on the presence of a camera and/or microphone attached to the device
- Capture media data from the device’s attached hardware
- Encode and stream that media across a network
- Establish direction peer-to-peer connections between browsers, handling any complications with firewalls or Network Address Translation (NAT) automatically
- Decode the media stream, presenting it to the end user with both audio and video synchronized and any audio echos cancelled out
The WebRTC project page can be found online via http://www.webrtc.org and includes the current status of the specification, and contains notes on cross-browser interoperability as well as demos and links to other sites covering the subject.
Accessing the Webcam and Microphone
If we want to use the WebRTC specification to create a video chat application, we need to establish how to access data from the webcam and microphone attached to the device running the application. The JavaScript API method navigator.getUserMedia()is the key to this. We call it by passing three parameters: an object detailing which type of media we wish to access (video and audio are the only property options available at present), a callback function to execute when the connection to the webcam and/or microphone is successfully established, and a callback function to execute if the connection to the webcam and/or microphone is not successfully established. When executing this method, the user is prompted in the browser that the current web page is attempting to access their webcam and/or microphone and they are offered whether to allow or deny access, as shown in Figure 12-1. If they deny access, or the user had no webcam or microphone to connect to, then the second callback function is executed, indicating that the multimedia data could not be accessed; otherwise, the first callback function is executed.

Figure 12-1. The user must allow or deny access to their webcam and microphone before we can access them
The getUserMedia() method is, at the time of writing, accessed via a prefixed method name in certain browsers, yet has the same input parameter sequence in all browsers. We can therefore write a small polyfill to enable access to this API in all supported browsers so that we can access it via the getUserMedia() method name throughout our code. The code in Listing 12-1 shows a simple polyfill for allowing access to the webcam and microphone through the same method calls in all supported web browsers.
Listing 12-1. A simple polyfill for the getUserMedia() API
// Expose the browser-specific versions of the getUserMedia() method through the standard
// method name. If the standard name is already supported in the browser (as it is in Opera),
// use that, otherwise fall back to Mozilla's, Google's or Microsoft's implementations as
// appropriate for the current browser
navigator.getUserMedia = navigator.getUserMedia || navigator.mozGetUserMedia ||
    navigator.webkitGetUserMedia || navigator.msGetUserMedia;
For security reasons, WebRTC only works when files trying to use it are accessed using a web server, rather than running the code directly from local files loaded in the browser. There are numerous ways that you can spin up a web server locally to run the code listings in this chapter, although the simplest is probably to download and run Apache web server software on your machine from http://httpd.apache.org. If you’re feeling more adventurous, jump ahead to Chapter 14, where I explain how to create and run a local web server using the Node.js application platform.
We can use the polyfill from Listing 12-1 to call the getUserMedia() method to attempt to get access to the user’s webcam and microphone as shown in Listing 12-2.
Listing 12-2. Accessing the webcam and microphone
// Define a function to execute if we are successfully able to access the user's webcam and
// microphone
function onSuccess() {
    alert("Successful connection made to access webcam and microphone");
}

// Define a function to execute if we are unable to access the user's webcam and microphone -
// either because the user denied access or because of a technical error
function onError() {
    throw new Error("There has been a problem accessing the webcam and microphone");
}

// Using the polyfill from Listing 12-1, we know the getUserMedia() method is supported in the
// browser if the method exists
if (navigator.getUserMedia) {

    // We can now execute the getUserMedia() method, passing in an object telling the browser
    // which form of media we wish to access ("video" for the webcam, "audio" for the
    // microphone). We pass in a reference to the onSuccess() and onError() functions which
    // will be executed based on whether the user grants us access to the requested media types
    navigator.getUserMedia({
        video: true,
        audio: true
    }, onSuccess, onError);
} else {

    // Throw an error if the getUserMedia() method is unsupported by the user's browser
    throw new Error("Sorry, getUserMedia() is not supported in your browser");
}
When running the code in Listing 12-2, if you find that you are not prompted to allow access to the webcam and microphone, check to ensure that you are running your code within the context of a HTML page hosted on a web server, whether local to your computer or over a network connection. If your browser shows that you are browsing a URL using the file:/// protocol, then you will need to run it instead using a web server over http:// instead. The browser will visually indicate that it is currently recording your audio and/or video through the use of a red circle icon next to the page name displayed in the browser tab in both Chrome and Opera, whereas Firefox shows a green camera icon in the address bar to indicate this fact.
Now that we’re able to access the user’s webcam and microphone, we need to be able to do something with the data returned by them. The onSuccess() callback method fired by the getUserMedia() method is passed a parameter representing the raw stream of data provided by the devices for use within your application. We could take this stream and pass it straight into the input of a HTML5 <video> element on the page, allowing the user to have the data from their own webcam and microphone relayed back to them. The code in Listing 12-3 shows how this can be done using the browser’s window.URL.createObjectURL() method, which creates a specific local URL that can be used to access data provided by a multimedia stream in this way.
Listing 12-3. Relaying the webcam and microphone back to the user
// Use the getUserMedia() polyfill from Listing 12-1 for best cross-browser support

// Define a function to execute if we are successfully able to access the user's webcam and
// microphone, taking the stream of data provided and passing it as the "src" attribute of a
// new <video> element, which is then placed onto the current HTML page, relaying back to the
// user the output from theirwebcam and microphone
function onSuccess(stream) {

    // Create a new <video> element
    var video = document.createElement("video"),

        // Get the browser to create a unique URL to reference the binary data directly from
        // the provided stream, as it is not a file with a fixed URL
        videoSource = window.URL.createObjectURL(stream);

    // Ensure the <video> element start playing the video immediately
    video.autoplay = true;

    // Point the "src" attribute of the <video> element to the generated stream URL, to relay
    // the data from the webcam and microphone back to the user
    video.src = videoSource;

    // Add the <video> element to the end of the current page
    document.body.appendChild(video);
}

function onError() {
    throw new Error("There has been a problem accessing the webcam and microphone");
}

if (navigator.getUserMedia) {
    navigator.getUserMedia({
        video: true,
        audio: true
    }, onSuccess, onError);
} else {
    throw new Error("Sorry, getUserMedia() is not supported in your browser");
}
Now that we’ve the ability to access the user’s webcam and microphone and relay their inputs back to the user, we have the beginnings of what will become a simple two-way video chat application running entirely within the browser.
Creating a Simple Video Chat Web Application
Let’s learn the important parts of the WebRTC specifiation by creating an in-browser video chat web application.
The essentials of a video chat application are that we capture the video and audio from two users’ devices that are browsing the same web server and that we transmit the captured video and audio streams from one to the other, and vice versa. We’ve already covered how to capture the streams from the users’ devices using the getUserMedia() API method, so let’s investigate how to set up a call and how to transmit and receive the data streams in order to build our video chat application.
We need a means of connecting one device directly to another and maintaining an open data connection between the two. We want a direct, or peer-to-peer, connection between the two devices without the need for an intermediary server relaying data so as to keep the connection speed, and therefore video and audio quality, to its best possible level. That connection must also be possible regardless of whether either device is directly connected to the Internet with a public IP address, is behind a firewall, or is behind a router device that adopts Network Address Translation (NAT) to share a limited set of public IP addresses with a larger number of devices on a local network.
WebRTC relies on the Interactive Connectivity Establishment (ICE) framework, which is a specification that allows two devices to establish a peer-to-peer connection directly to each other regadless of whether one or both devices are connected directly to a public IP address, behind a firewall, or on a network adopting NAT. It simplifies the whole connection process so we that don’t have to concern ourselves with that, and it’s available for use in supported browsers using the RTCPeerConnection “class” interface.
The process of setting up a peer-to-peer connection involves creating an instance of this RTCPeerConnection “class,” passing in an object that containing details of one or more servers capable of helping establish the connection between devices. There are two server protocols these servers can adopt that help in different ways to establish this connection: Session Traversal Utilities for NAT (STUN) and Traversal Using Relays around NAT (TURN).
A STUN server maps a device’s internal IP address together with an unused local port number to its externally visible IP address and unused external-facing port number (outside of the local network) so that traffic can be routed directly to the local device using that port. This is a fast and effective system as the server is only required for the initial connection and can move onto other tasks once established, yet only works on fairly simple NAT configurations where only one device, the client, is actually behind a NAT. Any setup that supports multiple NAT devices or other large enterprise systems won’t be able to establish a peer-to-peer connection using this type of server. That is where the alternative, TURN, steps in.
A TURN server uses a relay IP address on the public Internet, most usually the IP address of the public TURN server itself, to connect one device to another where both are behind NATs. Because it acts as a relay, it must relay all data between the two parties involved in the communication as direct connection is not possible. This means that data bandwidth is effectively reduced and the server must be active throughout the video call to relay the data, making it a less attractive solution, albeit one that still allows a video call to take place even within such complicated NAT setups.
The ICE framework establishes the connection between both parties in the video chat, using a STUN or TURN server as appropriate for the devices being connected. ICE is configured by passing a list of servers, known as candidates, which it then prioritizes and orders. It uses a Session Description Protocol (SDP) to inform the remote user of the connection details of the local user, which is known as an offer, and the remote user does the same when it identifies an offer, known as an answer. Once both parties have the other party’s details, the peer-to-peer connection between them is established and the call can begin. Though it may seem like a lot of steps, it all happens very quickly.
There are many public STUN servers available for use from within your applications, including a number run and operated by Google, of which you can find a list online at http://bit.ly/stun_list. Public TURN servers are less common as they relay data and hence require a great deal of available bandwidth, which can be costly; however, a service is available via http://numb.viagenie.ca, which will allow you to set up a free account to run your own STUN/TURN server via their servers.
An example configuration object containing the ICE server details for establishing peer-to-connection with the RTCPeerConnection “class” might look like the following:
{
    iceServers: [{

        // Mozilla's public STUN server
        url: "stun:23.21.150.121"
    }, {

        // Google's public STUN server
        url: "stun:stun.l.google.com:19302"
    }, {

        // Create your own TURN server at http://numb.viagenie.ca - don’t forget to
        // escape any extended characters in the username, e.g. the @ character becomes %40
        url: "turn:numb.viagenie.ca",
        username: "denodell%40gmail.com",
        credential: "password"
    }]
}
Now if you were reading carefully, you might have noticed a confusing situation regarding the setup of our peer-to-peer connection, namely: how can we set up a connection between two peers through an intermediary if we don’t yet know who we’re connecting to? The answer, of course, is we can’t, and that leads us onto the next part of understanding how to set up our video call – the signaling channel.
What we need to do is provide a mechanism to send messages between the connected parties before and during call setup. Each party needs to be listening for messages sent from the other party and to send messages as and when required. This messaging could be handled using Ajax, although that would be inefficient as both parties would have to frequently ask an intermediary server whether the other party has sent any messages—and most of the time the answer will be “no.” A better solution would be the newer EventSource API (read more at http://bit.ly/eventsource_basics) or WebSockets technologies (read more at http://bit.ly/websockets_basics), both of which allow a server to “push” a message to a connected client as and when a message is there to transmit, resulting in a much more efficient realtime data signalling system. The benefit of the latter approach is that it is supported in all the same browsers that WebRTC is supported in, so there’s no need for polyfills or workarounds to use this approach.
Using the Firebase Service for Simple Signalling
Rather than build our own server to support WebSocket connections, we can take advantage of preexisting cloud-based solutions to store and transmit data between connected parties on our behalf. One such solution is Firebase (available at http://firebase.com, shown in Figure 12-2) that provides a simple online database and a small JavaScript API for accessing data over the web using WebSockets (it actually falls back to other solutions if WebSockets is not supported by the browser it is running in). Its free, basic solution is enough for our needs as a signaling service to connect and configure our video chat clients.

Figure 12-2. Firebase provides a data-access API perfect for realtime communication between devices
Visit the Firebase website and sign up for a free account. You will then be emailed access details for your newly created online database. Each has its own unique URL and details of the <script> tag to use on your page to load the Firebase API for use within your code. The <script> tag will always be the same regardless of the URL created:
<script src="https://cdn.firebase.com/v0/firebase.js"></script>
For a URL created with the given name https://glaring-fire-9593.firebaseio.com/, the following JavaScript code can then be used to set up the connection in your code and to save data in the database:
var dataRef = new Firebase("https://glaring-fire-9593.firebaseio.com");
dataRef.set("I am now writing data into Firebase!");
Data within Firebase is stored as nested objects in a similar way to a JavaScript object. In fact, when you visit your unique URL, you are able to view your data in a pseudo-JSON format that should look very familiar to you. Data can be added to the database using the Firebase API’s set() method, and we are able to detect when data has been added by any connected client using the API’s on() method. This means that in our video chat, both parties can inform each other once their connection has been made using the ICE framework, and when both parties have received the required information from the other, the video call can begin.
Now, if we’re hosting our video chat client on a public web server that anyone can access, we’re going to need a way to limit which people can chat to each other, otherwise we risk complete strangers establishing a call with each other simply because they are the first two users to connect to the server—we’re not building Chat Roulette here! We need a way for specific users to be able to connect to each other, and one simple technique to do this is to allow connected users to create chat “rooms” and to allow connected clients the ability to either create or join one of these chat rooms. When two users have joined a room, we can limit our signaling to occur only between the users in that room so that only the designated parties can communicate with each other. We will allow the first party in the video chat, the initiator, to name their chat room. They can then inform their calling partner of this room name that they will then specify when they visit the chat client web page. We will then associate the offer and answer messages sent and received between parties to the chat room name, along with the ICE candidate details to connect the two parties directly, so that we can connect multiple parties to each other in this way. This results in a database structure within Firebase that can be represented in JSON in a similar format to the following:
{
    "chatRooms": {
        "room-001": {
            "offer": "...",
            "answer": "...",
            "candidate": "..."
        },
        "room-002": {
            ...
        }
    }
}
The simplicity of Firebase for use in applications that require client and server to push messages to each other is its advantage for use with a video chat client, providing the signaling channel required to connect both parties together in the same chat.
Building the Video Chat Client
We’ve reached the point at which we can bring together everything we’ve learned and build a video chat client, which we’ll build to look like the example shown in Figure 12-3. We can access the local user’s webcam and microphone, we can set up a signaling channel, locked to a known chat room name, to share information about how to connect both parties in the chat to each other, and we can then establish a peer-to-peer connection between the two parties using the ICE framework, streaming the video and audio data across this connection to be shown within the remote party’s browser window.
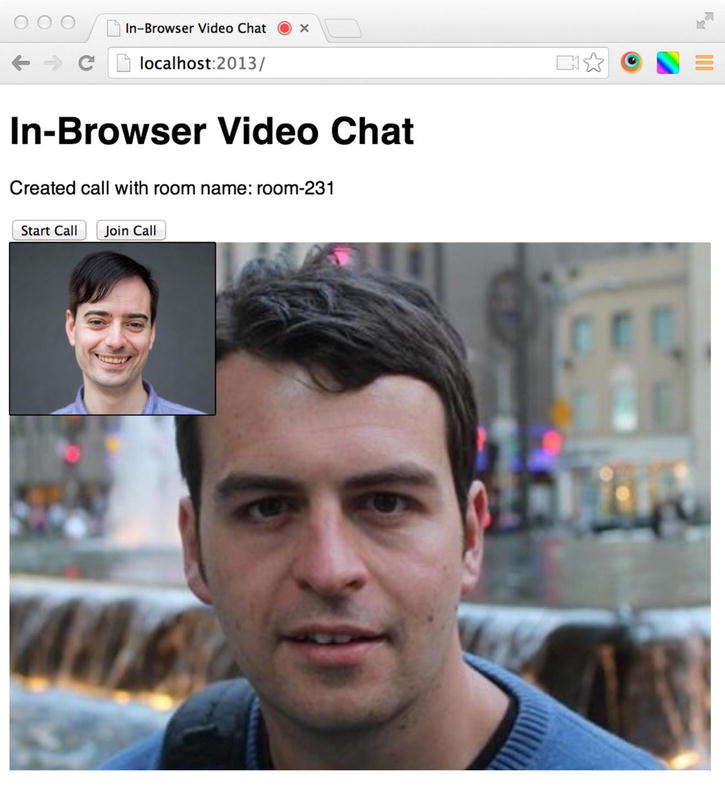
Figure 12-3. Example video call using our simple chat client
We will divide our code into three files, the first an HTML page containing two HTML5 <video> tags, one to display the local video back to the user and the other to display the remote party’s video—the audio is output through this tag also. This page also contains Start Call and Join Call buttons—the former will generate a chat room name at random, which can then be passed onto the remote party, and the latter will allow the user to enter a chat room name to join, connecting both parties through the use of the same room name. The second and third files are JavaScript files, the former to configure a reusable “class” for creating the code necessary to support a video chat and the latter the specific usage example, configured according to the needs of the current application itself displayed within the HTML web page.
We first need to set up a web server as the getUserMedia() API will only work within the context of a HTML page running over the http or http protocol. There are numerous products to use; however, the simplest way is probably to download, install, and configure Apache from http://httpd.apache.org.
Once you have a web server up and running, either locally or using a hosted solution online, you will create a HTML page into which the video and audio from the remote user will be presented, using the HTML5 <video> tag. An example of such a HTML page is shown in Listing 12-4.
Listing 12-4. A simple HTML page to present the captured video and audio from the remote party
<!DOCTYPE html>
<html>
<head>
    <title>In-Browser Video Chat</title>
    <meta charset="utf-8">

    <style>
    body {
        font-family: Helvetica, Arial, sans-serif;
    }

    .videos {
        position: relative;
    }

    .video {
        display: block;
        position: absolute;
        top: 0;
        left: 0;
    }

    .local-video {
        z-index: 1;
        border: 1px solid black;
    }
    </style>

</head>

<body>
    <h1>In-Browser Video Chat</h1>

    <!-- Display the video chat room name at the top of the page -->
    <p id="room-name"></p>

    <!-- Create buttons which start a new video call or join an existing video call -->
    <button id="start-call">Start Call</button>
    <button id="join-call">Join Call</button>

    <!-- Display the local and remote video streams, with the former displayed smaller
    and layered above to the top left corner of the other -->
    <div class="videos">
        <video class="video local-video" id="local-video" width="200" autoplay muted></video>
        <video class="video" id="remote-video" width="600" autoplay></video>
    </div>

    <!-- Load the script to enable Firebase support within this application -->
    <script src="https://cdn.firebase.com/v0/firebase.js"></script>

    <!-- Load the VideoChat "class" definition -->
    <script src="Listing12-5.js"></script>

    <!-- Load the code to instantiate the VideoChat "class" and connect it to this page -->
    <script src="Listing12-6.js"></script>
</body>
</html>
The code in Listing 12-5 shows how to create the VideoChat “class,” which creates the necessary code to handle the communications between the local browser and the remote, streaming the video and audio between the two.
Listing 12-5. A VideoChat “class” to support in-browser video chat
// Define a "class" that can be used to create a peer-to-peer video chat in the browser. We
// have a dependency on Firebase, whose client API script should be loaded in the browser
// before this script executes
var VideoChat = (function(Firebase) {

    // Polyfill the required browser features to support video chat as some are still using
    // prefixed method and "class" names

    // The PeerConnection "class" allows the configuration of a peer to peer connection
    // between the current web page running on this device and the same running on another,
    // allowing the addition of data streams to be passed from one to another, allowing for
    // video chat-style appliations to be built
    var PeerConnection = window.mozRTCPeerConnection || window.webkitRTCPeerConnection,

        // The RTCSessionDescription "class" works together with the RTCPeerConnection to
        // initialize the peer to peer data stream using the Session Description Protocol (SDP)
        SessionDescription = window.mozRTCSessionDescription || window.RTCSessionDescription,

        // The IceCandidate "class" allows instances of peer to peer "candidates" to be created
        //  - a candidate provides the details of the connection directly to our calling
        // partner, allowing the two browsers to chat
        IceCandidate = window.mozRTCIceCandidate || window.RTCIceCandidate,

        // Define the two types of participant in a call, the person who initiated it and the
        // person who responded
        _participantType = {
            INITIATOR: "initiator",
            RESPONDER: "responder"
        },

        // Define an object containing the settings we will use to create our PeerConnection
        // object, allowing the two participants in the chat to locate each other's IP
        // addresses over the internet
        _peerConnectionSettings = {

            // Define the set of ICE servers to use to attempt to locate the IP addresses
            // of each of the devices participating in the chat. For best chances of
            // success, we include at least one server supporting the two different
            // protocols, STUN and TURN, which provide this IP lookup mechanism
            server: {
                iceServers: [{

                    // Mozilla's public STUN server
                    url: "stun:23.21.150.121"
                }, {

                    // Google's public STUN server
                    url: "stun:stun.l.google.com:19302"
                }, {

                    // Create your own TURN server at http://numb.viagenie.ca
                    url: "turn:numb.viagenie.ca",
                    username: "denodell%40gmail.com",
                    credential: "password"
                }]
            },

            // For interoperability between different browser manufacturers' code, we set
            // this DTLS/SRTP property to "true" as it is "true" by default in Firefox
            options: {
                optional: [{
                    DtlsSrtpKeyAgreement: true
                }]
            }
        };

    // Polyfill the getUserMedia() method, which allows us to access a stream of data provided
    // by the user's webcam and/or microphone
    navigator.getUserMedia = navigator.getUserMedia || navigator.mozGetUserMedia ||
    navigator.webkitGetUserMedia || navigator.msGetUserMedia;

    // If the current browser does not support the "classes" and methods required for video
    // chat, throw an error - at the time of writing, Google Chrome, Mozilla Firefox and
    // Opera are the only browsers supporting the features required to support video chat
    if (!navigator.getUserMedia && !window.RTCPeerConnection) {
        throw new Error("Your browser does not support video chat");
    }

    // Define a generic error handler function which will throw an error in the browser
    function onError(error) {
        throw new Error(error);
    }

    // Define the VideoChat "class" to use to create a new video chat on a web page
    function VideoChat(options) {
        options = options || {};

        // Allow two callback functions, onLocalStream() and onRemoteStream() to be passed in.
        // The former is executed once a connection has been made to the local webcam and
        // microphone, and the latter is executed once a connection has been made to the remote
        // user's webcam and microphone. Both pass along a stream URL which can be used to
        // display the contents of the stream inside a <video> tag within the HTML page
        if (typeof options.onLocalStream === "function") {
            this.onLocalStream = options.onLocalStream;
        }

        if (typeof options.onRemoteStream === "function") {
            this.onRemoteStream = options.onRemoteStream;
        }

        // Initialize Firebase data storage using the provided URL
        this.initializeDatabase(options.firebaseUrl || "");

        // Set up the peer-to-peer connection for streaming video and audio between two devices
        this.setupPeerConnection();
    }

    VideoChat.prototype = {

        // Define the participant type for the current user in this chat - the "initiator", the
        // one starting the call
        participantType: _participantType.INITIATOR,

        // Define the participant type for the remote user in this chat - the "responder", the
        // one responding to a request for a call
        remoteParticipantType: _participantType.RESPONDER,

        // Create a property to store the name for the chat room in which the video call will
        // take place - defined later
        chatRoomName: "",

        // Define a property to allow loading and saving of data to the Firebase database
        database: null,

        // Define a method to be called when a local data stream has been initiated
        onLocalStream: function() {},

        // Define a method to be called when a remote data stream has been connected
        onRemoteStream: function() {},

        // Define a method to initialize the Firebase database
        initializeDatabase: function(firebaseUrl) {

            // Connect to our Firebase database using the provided URL
            var firebase = new Firebase(firebaseUrl);

            // Define and store the data object to hold all the details of our chat room
            // connections
            this.database = firebase.child("chatRooms");
        },

        // Define a method to save a given name-value pair to Firebase, stored against the
        // chat room name given for this call
        saveData: function(chatRoomName, name, value) {
            if (this.database) {
                this.database.child(chatRoomName).child(name).set(value);
            }
        },

        // Define a method to load stored data from Firebase by its name and chat room name,
        // executing a callback function when that data is found - the connection will wait
        // until that data is found, even if it is generated at a later time
        loadData: function(chatRoomName, name, callback) {
            if (this.database) {

                // Make a request for the data asynchronously and execute a callback function once

                // the data has been located
                this.database.child(chatRoomName).child(name).on("value", function(data) {

                    // Extract the value we're after from the response
                    var value = data.val();

                    // If a callback function was provided to this method, execute it, passing
                    // along the located value
                    if (value && typeof callback === "function") {
                        callback(value);
                    }
                });
            }
        },

        // Define a method to set up a peer-to-peer connection between two devices and stream
        // data between the two
        setupPeerConnection: function() {
            var that = this;

            // Create a PeerConnection instance using the STUN and TURN servers defined
            // earlier to establish a peer-to-peer connection even across firewalls and NAT
            this.peerConnection = new PeerConnection(_peerConnectionSettings.server,
         _peerConnectionSettings.options);

            // When a remote stream has been added to the peer-to-peer connection, get the
            // URL of the stream and pass this to the onRemoteStream() method to allow the
            // remote video and audio to be presented within the page inside a <video> tag
            this.peerConnection.onaddstream = function(event) {

                // Get a URL that represents the stream object
                var streamURL = window.URL.createObjectURL(event.stream);

                // Pass this URL to the onRemoteStream() method, passed in on instantiation
                // of this VideoChat instance
                that.onRemoteStream(streamURL);
            };

            // Define a function to execute when the ICE framework finds a suitable candidate
            // for allowing a peer-to-peer data connection
            this.peerConnection.onicecandidate = function(event) {
                if (event.candidate) {

                    // Google Chrome often finds multiple candidates, so let's ensure we only
                    // ever get the first it supplies by removing the event handler once a
                    // candidate has been found
                    that.peerConnection.onicecandidate = null;

                    // Read out the remote party's ICE candidate connection details
                    that.loadData(that.chatRoomName, "candidate:" + that.remoteParticipantType, function(candidate) {

                        // Connect the remote party's ICE candidate to this connection forming
                        // the peer-to-peer connection
                        that.peerConnection.addIceCandidate(new IceCandidate(JSON.parse(candidate)));
                    });

                    // Save our ICE candidate connection details for connection by the remote
                    // party
                    that.saveData(that.chatRoomName, "candidate:" + that.participantType, JSON.stringify(event.candidate));
                }
            };
        },

        // Define a method to get the local device's webcam and microphone stream and handle
        // the handshake between the local device and the remote party's device to set up the
        // video chat call
        call: function() {
            var that = this,

                // Set the constraints on our peer-to-peer chat connection. We want to be
                // able to support both audio and video so we set the appropriate properties
                _constraints = {
                    mandatory: {
                        OfferToReceiveAudio: true,
                        OfferToReceiveVideo: true
                    }
                };

            // Get the local device's webcam and microphone stream - prompts the user to
            // authorize the use of these
            navigator.getUserMedia({
                video: true,
                audio: true
            }, function(stream) {

                // Add the local video and audio data stream to the peer connection, making
                // it available to the remote party connected to that same peer-to-peer
                // connection
                that.peerConnection.addStream(stream);

                // Execute the onLocalStream() method, passing the URL of the local stream,
                // allowing the webcam and microphone data to be presented to the local
                // user within a <video> tag on the current HTML page
                that.onLocalStream(window.URL.createObjectURL(stream));

                // If we are the initiator of the call, we create an offer to any connected
                // peer to join our video chat
                if (that.participantType === _participantType.INITIATOR) {

                    // Create an offer of a video call in this chat room and wait for an
                    // answer from any connected peers
                    that.peerConnection.createOffer(function(offer) {

                        // Store the generated local offer in the peer connection object
                        that.peerConnection.setLocalDescription(offer);

                        // Save the offer details for connected peers to access
                        that.saveData(that.chatRoomName, "offer", JSON.stringify(offer));

                        // If a connected peer responds with an "answer" to our offer, store
                        // their details in the peer connection object, opening the channels
                        // of communication between the two
                        that.loadData(that.chatRoomName, "answer", function(answer) {
                            that.peerConnection.setRemoteDescription(
                                new SessionDescription(JSON.parse(answer))
                            );
                        });
                    }, onError, _constraints);

                // If we are the one joining an existing call, we answer an offer to set up
                // a peer-to-peer connection
                } else {

                    // Load an offer provided by the other party - waits until an offer is
                    // provided if one is not immediately present
                    that.loadData(that.chatRoomName, "offer", function(offer) {

                        // Store the offer details of the remote party, using the supplied
                        // data
                        that.peerConnection.setRemoteDescription(
                            new SessionDescription(JSON.parse(offer))
                        );

                        // Generate an "answer" in response to the offer, enabling the
                        // two-way peer-to-peer connection we need for the video chat call
                        that.peerConnection.createAnswer(function(answer) {

                            // Store the generated answer as the local connection details
                            that.peerConnection.setLocalDescription(answer);

                            // Save the answer details, making them available to the initiating
                            // party, opening the channels of communication between the two
                            that.saveData(that.chatRoomName, "answer", JSON.stringify(answer));
                        }, onError, _constraints);
                    });
                }
            }, onError);
        },

        // Define a method which initiates a video chat call, returning the generated chat
        // room name which can then be given to the remote user to use to connect to
        startCall: function() {

            // Generate a random 3-digit number with padded zeros
            var randomNumber = Math.round(Math.random() * 999);

            if (randomNumber < 10) {
                randomNumber = "00" + randomNumber;
            } else if (randomNumber < 100) {
                randomNumber = "0" + randomNumber;
            }

            // Create a simple chat room name based on the generated random number
            this.chatRoomName = "room-" + randomNumber;

            // Execute the call() method to start transmitting and receiving video and audio
            // using this chat room name
            this.call();

            // Return the generated chat room name so it can be provided to the remote party
            // for connection
            return this.chatRoomName;
        },

        // Define a method to join an existing video chat call using a specific room name
        joinCall: function(chatRoomName) {

            // Store the provided chat room name
            this.chatRoomName = chatRoomName;

            // If we are joining an existing call, we must be the responder, rather than
            // initiator, so update the properties accordingly to reflect this
            this.participantType = _participantType.RESPONDER;
            this.remoteParticipantType = _participantType.INITIATOR;

            // Execute the call() method to start transmitting and receiving video and audio
            // using the provided chat room name
            this.call();
        }
    };

    // Return the VideoChat "class" for use throughout the rest of the code
    return VideoChat;
}(Firebase));
The code from Listing 12-5 could then be used as shown in Listing 12-6 to create a simple video chat application within the browser, working together with the HTML page created in Listing 12-4.
Listing 12-6. Using the VideoChat “class” to create an in-browser video chat
// Get a reference to the <video id="local-video"> element on the page
var localVideoElement = document.getElementById("local-video"),

    // Get a reference to the <video id="remote-video"> element on the page
    remoteVideoElement = document.getElementById("remote-video"),

    // Get a reference to the <button id="start-call"> element on the page
    startCallButton = document.getElementById("start-call"),

    // Get a reference to the <button id="join-call"> element on the page
    joinCallButton = document.getElementById("join-call"),

    // Get a reference to the <p id="room-name"> element on the page
    roomNameElement = document.getElementById("room-name"),

    // Create an instance of the Video Chat "class"
    videoChat = new VideoChat({

        // The Firebase database URL for use when loading and saving data to the cloud - create
        // your own personal URL at http://firebase.com
        firebaseUrl: "https://glaring-fire-9593.firebaseio.com/",

        // When the local webcam and microphone stream is running, set the "src" attribute
        // of the <div id="local-video"> element to display the stream on the page
        onLocalStream: function(streamSrc) {
            localVideoElement.src = streamSrc;
        },

        // When the remote webcam and microphone stream is running, set the "src" attribute
        // of the <div id="remote-video"> element to display the stream on the page
        onRemoteStream: function(streamSrc) {
            remoteVideoElement.src = streamSrc;
        }
    });

// When the <button id="start-call"> button is clicked, start a new video call and
// display the generated room name on the page for providing to the remote user
startCallButton.addEventListener("click", function() {

    // Start the call and get the chat room name
    var roomName = videoChat.startCall();

    // Display the chat room name on the page
    roomNameElement.innerHTML = "Created call with room name: " + roomName;
}, false);

// When the <button id="join-call"> button is clicked, join an existing call by
// entering the room name to join at the prompt
joinCallButton.addEventListener("click", function() {

    // Ask the user for the chat room name to join
    var roomName = prompt("What is the name of the chat room you would like to join?");

    // Join the chat by the provided room name - as long as this room name matches the
    // other, the two will be connected over a peer-to-peer connection and video streaming
    // will take place between the two
    videoChat.joinCall(roomName);

    // Display the room name on the page
    roomNameElement.innerHTML = "Joined call with room name: " + roomName;
}, false);
And so we have created a simple but functional in-browser video chat client. You can extend the idea further by replacing the concept of chat room names with specific logged-in user IDs, connected users to each other through an interface that lists your “friends,” such as that offered by Skype and the like, but with the added benefit of running within the browser rather than needing to download any special applications or plugins to support this.
As browser support improves for the APIs covered in this chapter, so will the possibilities of the applications that can be built. Keep up to date with the current level of browser support for WebRTC via http://bit.ly/caniuse_webrtc and experiment with your own ideas for peer-to-peer chat in the browser.
Summary
During this tutorial, I have explained what WebRTC is and demonstrated how to access the webcam and microphone from your user's machine via this API. I have then explained the basics of streams, peer-to-peer connections, and the signaling channel that, when used together, help to support the build of a simple video chat client in the browser.
In the next chapter, I will look at HTML templating within JavaScript and its potential to simplify the amount of data returned by the server within a web-based application.