
![]()
Using Client-Side Templates
JavaScript-based single page web applications, in which parts of the page update dynamically in place in response to server-side data updates or user actions, provide the user with an experience that closely matches that once reserved solely for native desktop and mobile apps, avoiding the need for full page refreshes to update individual parts of a page or append new user interface components to the current page. In this chapter, we will look into options for updating the current page while maintaining a distinct separation between the data to be displayed and the DOM structure within which to present it.
Dynamically Updating Page Content
We know that to update or create HTML content on our page through JavaScript, we use the Document Object Model (DOM) to alter attributes and the element tree in order to affect the desired content change. This works fine for simple and small page updates but does not scale well, as it requires a fair amount of JavaScript code per element and can require complicated and time-consuming lookups to locate the exact elements to be updated. Should the HTML page structure update without the JavaScript code being aware, we also run the risk of failing to find the required element to update.
Rather than manipulating the DOM tree node-by-node, we can manipulate larger chunks of HTML using an element’s innerHTML property to dynamically access and update the HTML within that element as if it were a normal text string. The only issue with this is that the code to insert dynamic strings and other data within a complex HTML structure when it is represented as a string can be difficult to understand, making maintenance and development more difficult, something that the professional JavaScript developer seeks to avoid at all costs. An example of this, where text is inserted within a long string of HTML before being added to the page, is shown in Listing 13-1.
Listing 13-1. Combining JavaScript data with a string of HTML
var firstName = "Den",
    lastName = "Odell",
    company = "AKQA",
    city = "London",
    email = "[email protected]",
    divElem = document.createElement("div");

// Applying data and strings to HTML structures results in a complicated mess of difficult to
// maintain code
divElem.innerHTML = "<p>Name: <a href="mailto:" + email + "">" + firstName + " " + lastName +
    "</a><br>Company: " + company + "</p><p>City: " + city + "</p>";

// Add the new <div> DOM element to the end of the current HTML page once loaded
window.addEventListener("load", function() {
    document.body.appendChild(divElem);
}, false);
Despite the complications with this approach, there is a definite need to combine JavaScript data, which may or may not be loaded via Ajax, with a string of HTML text to be dynamically displayed on a page. In this chapter, we will cover the acceptable solutions available to us to solve this problem, focusing largely on client-side HTML templating solutions that allow a page to be updated dynamically while keeping the data we wish to present separate from the HTML used to mark it up appropriately. As professional JavaScript developers, this separation of concerns is important to us, as it is scalable as our application grows and results in the least confusion for ourselves and other project team members.
Loading HTML Dynamically Via Ajax
The simplest solution to dynamically updating page content is to perform the combination of data with HTML code on the server-side, returning the combined HTML code as a string via a simple Ajax call that we can simply place on the page, perhaps replacing the contents of an existing element. This, of course, does not solve the problem, per se; we’re just moving the problem from the client-side to the server-side where an appropriate solution is then required to exist. There are many such server-side templating solutions, such as Smarty (for PHP, http://bit.ly/smarty_template), Liquid (for Ruby, http://bit.ly/liquid_template), Apache Velocity (for Java, http://bit.ly/velocity_template), and Spark (for ASP.NET, http://bit.ly/spark_template). We merely need to hit a specific web service URL provided by the server and be returned a string of HTML to drop directly into an element on our page using that element’s innerHTML property.
The clear advantage with this technique is that it requires very little code running in JavaScript within the browser. We simply need a function to load the required HTML from the server and place it within a designated element on the page. An example of one such function to request a string of HTML and append it to the current page is shown in Listing 13-2.
Listing 13-2. Loading HTML dynamically via Ajax and populating the current page with the response
// Define a method to load a string of HTML from a specific URL and place this within a given
// element on the current page
function loadHTMLAndReplace(url, element) {

    // Perform an Ajax request to the given URL and populate the given element with the response
    var xhr = new XMLHttpRequest(),
        LOADED_STATE = 4,
        OK_STATUS = 200;

    xhr.onreadystatechange = function() {
        if (xhr.readyState !== LOADED_STATE) {
            return;
        }

        if (xhr.status === OK_STATUS) {
            // Populate the given element with the returned HTML
            element.innerHTML = xhr.responseText;
        }
    };

    xhr.open("GET", url);
    xhr.send();
}

// Load the HTML from two specific URLs and populate the given elements with the returned markup
loadHTMLAndReplace("/ajax/ticket-form.html", document.getElementById("ticket-form"));
loadHTMLAndReplace("/ajax/business-card.html", document.getElementById("business-card"));
The disadvantage with this technique is that applications requiring frequent visual updates in response to changing data would end up downloading a lot of superfluous information from the server, as it reflects the updated data and the markup surrounding it, whereas all we really want to display is the data that has changed. Clearly, if the markup surrounding the data remains the same each time, there is redundant data being downloaded, which will result in a larger download each time and is likely to therefore be slower. Depending on your application, this may or may not be a large issue for you, but always consider your users and particularly those on traditionally slower mobile connections who may pay by the megabyte of data downloaded and may suffer as a result of such a decision.
It would be much more efficient to have a single block of HTML to act as a template, with the Ajax request to the server providing just the raw data, perhaps in JSON format, to populate that template with in the relevant places to produce the resulting page structure to update the display. This is where the idea of client-side templating comes into play and finds its prime use case.
Client-Side Templating
A template is simply a text string containing specific placeholder text markers within it that should be replaced with appropriate data before the results are outputted to the current page. Consider the following simple template, which uses a double braces marker pattern {{ and }}, uncommonly used in any other type of text string, to denote both the position of the text to be replaced, and the name of the data variable whose value should be used to replace the marker:
Template:
    <p>
        Name: <a href="mailto:{{email}}">{{firstName}} {{lastName}}</a><br>
        Company: {{company}}
    </p>
    <p>City: {{city}}</p>
By combining this template with values stored in a JavaScript data object resembling the following:
Data:
    {
        "firstName": "Den",
        "lastName": "Odell",
        "email": "[email protected]",
        "company": "AKQA",
        "city": "London"
    }
we will produce a string that we can then output to our page, containing the text we wish to display. By storing the template locally in our page and only needing to update the data via Ajax, we reduce the need to download superfluous, or repeated, data:
Output:
    <p>
        Name: <a href="mailto:[email protected]">Den Odell</a><br>
        Company: AKQA
    </p>
    <p>City: London</p>
Different templating solutions use different marker text patterns to denote the points at which the data should be provided. Although any marker could be used in theory, it’s important to ensure that your markers are sufficiently distinct such that they wouldn’t normally be present in any other text within your template that you wish to display, otherwise these will be accidentally replaced.
In the remainder of this chapter, we will look at a selection of solutions for client-side templating within your web applications, including some popular third-party open templating libraries used by other professional JavaScript developers.
Client-Side Templating without a Library
Because client-side templating is achieved through string replacement, we can write a very basic implementation in just a few lines of JavaScript built around a regular expression used to perform the replacement, appending the resulting HTML or text string to our page using a DOM element’s innerHTML property. Listing 13-3 shows an example of such a templating solution that replaces specially formatted markers in a template string with property values from a JavaScript object to produce a string of HTML that is then added to the current page.
Listing 13-3. Basic client-side templating through string replacement
// Define the HTML template to apply data to, using {{ ... }} to denote the data property name
// to be replaced with real data
var template = "<p>Name: <a href="mailto:{{email}}">{{firstName}} {{lastName}}</a><br>Company: {{company}}</p><p>City: {{city}}</p>",

    // Define two data objects containing properties to be inserted into the HTML template using
    // the property name as key
    me = {
        firstName: "Den",
        lastName: "Odell",
        email: "[email protected]",
        company: "AKQA",
        city: "London"
    },
    bill = {
        firstName: "Bill",
        lastName: "Gates",
        email: "[email protected]",
        company: "Microsoft",
        city: "Seattle"
    };

// Define a simple function to apply data from a JavaScript object into a HTML template,
// represented as a string
function applyDataToTemplate(templateString, dataObject) {
    var key,
        value,
        regex;

    // Loop through each property name in the supplied data object, replacing all instances of
    // that name surrounded by {{ and }} with the value from the data object
    for (key in dataObject) {
        regex = new RegExp("{{" + key + "}}", "g");
        value = dataObject[key];

        // Perform the replace
        templateString = templateString.replace(regex, value);
    }

    // Return the new, replaced HTML string
    return templateString;
}

// Outputs:
// <p>Name: <a href="mailto:[email protected]">Den Odell</a><br>Company: AKQA</p>
//     <p>City: London</p>
alert(applyDataToTemplate(template, me));

// Outputs:
// <p>Name: <a href="mailto:[email protected]">Bill Gates</a><br>Company: Microsoft</p>
//     <p>City: Seattle</p>
alert(applyDataToTemplate(template, bill));
This solution works fine for simple templates and JavaScript data; however, if there is a need to iterate over arrays or objects of data, or add logic to show or hide different sections based on the value of certain data properties, this solution falls short and would need to be extended considerably to support this. In this case, it’s best to hand over to prewritten and well-established third-party open source JavaScript client-side templating libraries to do the job.
Client-Side Templating with Mustache.js
Mustache is a logic-less templating language developed by Chris Wanstrath in 2009 and features implementations in most popular programming languages; Mustache.js is its JavaScript implementation. It was originally derived from Google Templates (later known as cTemplates), which was used as the templating system for generating Google’s search results page. The term logic-less refers to the fact that the defined templating structure contains no if, then, else, or for loop statements; it does, however, contain a generic structure called tags, which allow the ability to perform this kind of behavior dependent on the value type stored in the referenced JavaScript data, referred to as the data hash. Each tag is denoted by double braces {{ and }} that, when viewed at right angles, look rather like mustaches, hence the name. You can download Mustache.js from its Github project page via http://bit.ly/mustache_github. The library weighs in at just 1.8KB once minified and served with gzip compression enabled.
Let us begin looking into Mustache.js by using it to perform the templating of our initial example to render the same HTML output as in Listing 13-3. We will split this into two code listings: one HTML page, shown in Listing 13-4, containing the template itself written out within a specially configured <script> tag and referencing the Mustache.js library, and one JavaScript file, the contents of which are shown in Listing 13-5, containing the data to apply to the template and making the call to Mustache.js to perform the rendering of the resulting HTML from this template.
Listing 13-4. HTML page containing a client-side template for use with Mustache.js
<!doctype html>
<html>
<head>
    <meta charset="utf-8">
    <title>Mustache.js Example</title>
</head>
<body>
    <h1>Mustache.js Example</h1>

    <!-- Define the template we wish to apply our data to. The "type" attribute
        needs to be any non-standard MIME type in order for the element's contents
        to be interpreted as plain text rather than executed -->
    <script id="template" type="x-tmpl-mustache">
        <p>
            Name: <a href="mailto:{{email}}">{{firstName}} {{lastName}}</a><br>
            Company: {{company}}
        </p>
        <p>
            City: {{city}}
        </p>
    </script>

    <!-- Load the Mustache.js library -->
    <script src="lib/mustache.min.js"></script>

    <!-- Execute our script to combine the template with our data -->
    <script src="Listing13-5.js"></script>
</body>
</html>
The <script> tag containing the template in Listing 13-4 is given a type attribute that will be unrecognized by the browser as a standard MIME type. This will cause the browser to treat its contents as plain text rather than something to be executed, yet without writing the tag’s contents visibly out to the page. The tag’s contents can then be referenced through JavaScript by locating the element by its id attribute value and grabbing the contents of its innerHTML property. The HTML page represented in Listing 13-4 references the JavaScript code in Listing 13-5, shown below, producing the result shown in Figure 13-1 when run in a browser. Note the use of the Mustache.render() method used to produce the output string based on two input parameters: the template string and the JavaScript data hash object.
Listing 13-5. Combine data with a HTML template using Mustache.js
// Locate and store a reference to the <script id="template"> element from our HTML page
var templateElement = document.getElementById("template"),

    // Extract the template as a string from within the template element
    template = templateElement.innerHTML,

    // Create two elements to store our resulting HTML in once our template is
    // combined with our data
    meElement = document.createElement("div"),
    billElement = document.createElement("div"),

    // Define two objects containing data to apply to the stored template
    meData = {
        firstName: "Den",
        lastName: "Odell",
        email: "[email protected]",
        company: "AKQA",
        city: "London"
    },
    billData = {
        firstName: "Bill",
        lastName: "Gates",
        email: "[email protected]",
        company: "Microsoft",
        city: "Seattle"
    };

// Use Mustache.js to apply the data to the template and store the result within the
// newly created elements
meElement.innerHTML = Mustache.render(template, meData);
billElement.innerHTML = Mustache.render(template, billData);

// Add the new elements, populated with HTML, to the current page once loaded
window.addEventListener("load", function() {
    document.body.appendChild(meElement);
    document.body.appendChild(billElement);
}, false);
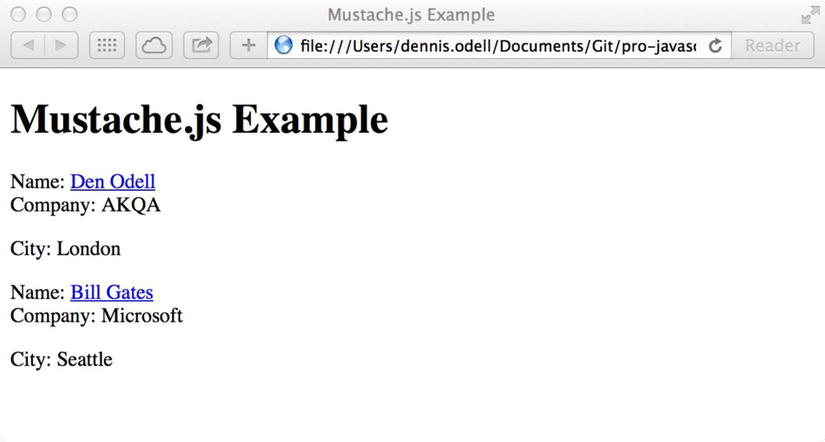
Figure 13-1. An example HTML page with data populated into templates with Mustache.js
The full detailed documentation of the Mustache templating format can be viewed online via http://bit.ly/mustache_docs. The format breaks down into four distinct types of data representation: variables, sections, comments, and partials.
The Mustache templating format allows for the substitution of any text token surrounded by double braces {{ and }} with an associated data property of the same name, as we’ve seen in the template we created within the HTML page in Listing 13-4. In Mustache’s parlance, the name within the double braces is known as a variable, or key.
All variables are replaced as HTML-escaped strings, meaning that any HTML within the data string being placed into the variable will be written out as text rather than interpreted as HTML elements. Should you wish the text to be interpreted as HTML, you should surround your key name with the triple brackets marker {{{ and }}}, as shown here. Should you need to render the value of a JavaScript object property, you can use the standard dot notation to navigate object hierarchies.
Template:
{{name}}
{{{name}}}
From {{address.country}}
Data Hash:
{
name: "Den <strong>Odell</strong>",
address: {
country: "UK"
}
}
Output:
Den <strong>Odell</strong>
Den <strong>Odell</strong>
From UK
In the case in which the key name denoted in the template tag does not exist in the provided data hash object, an empty string will replace the tag in the output. This differs from our original semantic templating example from Listing 13-3, which would leave the tag intact in the resulting output if the associated data value did not exist.
Sections
A section in a Mustache template has start and end tags surrounding a block of the template. The contents of the template block between these tags is then repeated one or more times in the resulting output depending on the type of data stored in the associated data key value for that tag. The key name used in the tag is preceeded by a hash (#) character to denote the start tag of the section, and is preceeded by a slash (/) character to denote the end tag of a section, for example, {{#section}}{{/section}}. There are four types of section – conditional, iterator, functional, and inverted – that are declared similarly but perform different functionality based on the type of data passed to them.
If the data value of the referenced tag key is of Boolean type true, the contents of the section block are displayed; if false, the section is not displayed. The same applies for falsy values, such as empty strings or empty arrays – the section will not be displayed in these cases. This behavior provides us the ability to perform the equivalent of conditional if statements, as demonstrated here. The string YES will only be included in the output if the value of the isAvailable data property is truthy.
Template:
    Available:
    {{#isAvailable}}
        YES
    {{/isAvailable}}

Data Hash:
    {
        isAvailable: true
    }

Output:
    Available: YES
If the format of the data property referenced by a section tag is an array list containing one or more items, the contents of the section between the start and end tags will be repeated once for each item in the list, with each individual item’s data passed into the section for each interation. This provides us the ability to perform the equivalent of iterative data loops, equivalent to JavaScript for loops, as demonstrated here:
Template:
    <h1>People</h1>
    {{#people}}
        <p>Name: {{name}}</p>
    {{/people}}

Data Hash:
    {
        people: [
            {name: "Den Odell"},
            {name: "Bill Gates"}
        ]
    }

Output:
    <h1>People</h1>
    <p>Name: Den Odell</p>
    <p>Name: Bill Gates</p>
Functional Sections
If the data format referenced by the section tag is a function, then things start to get really interesting. The function will be executed immediately by Mustache.js and should return a function that will then be executed each time the function’s name is referenced by a section tag, with two parameters passed in: the literal text contents of the template section block as a string (before any template replacement has taken place), and a function that is a direct reference to Mustache.js’s internal render() method to allow the value in the first parameter to be manipulated in some way before then outputting its contents together with the applied data. This makes it possible to create filters, apply caching, or perform other string-based template manipulation based on the input data. An example of this behavior is demonstrated here:
Template:
    {{#strongLastWord}}
        My name is {{name}}
    {{/strongLastWord}}

Data Hash:
    {
        name: "Den Odell",
        strongLastWord: function() {
            return function(text, render) {

                // Use the supplied Mustache.js render() function to apply the data to the
                // supplied template text
                var renderedText = render(text),

                    // Split the resulting text into an array of words
                    wordArray = renderedText.split(" "),
                    wordArrayLength = wordArray.length,

                    // Extract the final word from the array
                    finalWord = wordArray[wordArrayLength - 1];

                // Replace the last entry in the array of words with the final word wrapped
                // in a HTML <strong> tag
                wordArray[wordArrayLength - 1] = "<strong>" + finalWord + "</strong>";

                // Join together the word array into a single string and return this
                return wordArray.join(" ");
            }
        }
    }

Output:
    My name is Den <strong>Odell</strong>
When you start using Mustache templates in earnest, you will discover the need to display text or blocks of HTML based on inverted conditions. If a data value represents a truthy value or contains items to iterate over, you wish to display one section block. If the value is falsy or contains no items to iterate over, you wish to display another block. Inverted sections allow this behavior and are denoted by the use of the caret (^) character in place of the hash (#) character preceeding the tag key name, as demonstrated here:
Template:
    Available:
    {{#isAvailable}}
        YES
    {{/isAvailable}}
    {{^isAvailable}}
        NO
    {{/isAvailable}}

    {{#people}}
        <p>Name: {{name}}</p>
    {{/people}}
    {{^people}}
        <p>No names found</p>
    {{/people}}

Data Hash:
    {
        isAvailable: false,
        people: []
    }

Output:
    Available: NO
    <p>No names found</p>
Comments
Should you wish to include development notes or comments within your Mustache template that you do not wish to be output to the resulting string, simply create a tag beginning with double braces and an exclamation point (!) character, and ending with double closing braces, as shown here:
Template:
    <h1>People</h1>
    {{! This section will contain a list of names}}

    {{^people}}
        <p>No names found</p>
    {{/people}}

Data Hash:
    {
        people: []
    }

Output:
    <h1>People</h1>
    <p>No names found</p>
Mustache supports the ability to separate templates across multiple <script> tags or even separate files that can be combined together at runtime to produce the final result. This allows reusable snippets to be created and stored separately for use across several templates. Such a file that contains a snippet of code for use in a larger template is known as a partial template or, simply, a partial.
Partials are referenced by a given name within a standard tag, with the name preceeded by the greater-than (>) character to indicate it as a partial template. Imagine a HTML page containing the following two templates contained within <script> tags labeled with id attribute values of template and people, respectively:
<script id="template" type="x-tmpl-mustache">
    <h1>People</h1>
    {{>people}}
</script>

<script id="people" type="x-tmpl-mustache">
    {{#people}}
        <p>Name: {{name}}</p>
    {{/people}}
</script>
Note the reference in the first template to a partial named people. Although this name matches the id attribute given to the second template, the reference is not made automatically between the two, this needs to be configured within Mustache.js. To do this, you must pass any partials you wish to use in a JavaScript object to the third parameter of the Mustache.render() method, as shown in Listing 13-6. The first parameter is the master template and the second is the data to apply to the template. The property names in the partials JavaScript object (the third parameter) correlate to the tag names used in the template to reference any partials. Note that the data is made available to the combined template as if both templates were combined into a single file before the data is applied to it.
Listing 13-6. Referencing partial templates with Mustache.js
// Locate and store a reference to the <script id="template"> element from our HTML page
var templateElement = document.getElementById("template"),

    // Locate and store a reference to the <script id="people"> element
    peopleTemplateElement = document.getElementById("people"),

    // Extract the template as a string from within the template element
    template = templateElement.innerHTML,

    // Extract the "people" template as a string from within the <script> element
    peopleTemplate = peopleTemplateElement.innerHTML,

    // Create an element to store our resulting HTML in once our template is
    // combined with the partial and our data
    outputElement = document.createElement("div"),

    // Define an object containing data to apply to the stored template
    data = {
        people: [{
            name: "Den Odell"
        }, {
            name: "Bill Gates"
        }]
    };

// Use Mustache.js to apply the data to the template, and allow access to the named partial
// templates and store the result within the newly created element
outputElement.innerHTML = Mustache.render(template, data, {
    people: peopleTemplate
});

// Add the new element, populated with HTML, to the current page once loaded
window.addEventListener("load", function() {
    document.body.appendChild(outputElement);
}, false);

// The resulting HTML will be:
/*
People</h1>
<p>Name: Den Odell</p>
<p>Name: Bill Gates</p>
 */
Using partials in this way allows for larger applications to be created with shared components, navigation, headers and footers, and reusable code snippets, as partial files can inherit code from other partials. This reduces duplication of code and allows efficient templates to be produced and maintained. The only thing to remember is that all your partial templates must be ready to use by the time the main template that references them is rendered. This means that should you choose to load in your template files via Ajax rather than store them locally within the current HTML page, all must be loaded by the point of rendering so that they can be passed to the single Mustache.render() method against the main template.
Mustache.js is a small and incredibly useful library for taking client-side templating beyond simple variable replacement, allowing for conditional and iterative sections, and supporting external partial templates.
Client-Side Templating with Handlebars.js
Handlebars a client-side templating format designed to extend the abilities of the Mustache format. Handlebars is backwards compatible with Mustache templates but supports extra features including block helpers, an extension to the principle of Mustache sections to clarify and improve the behavior of each template block’s display logic.
The Handlebars.js library that supports these templates can be downloaded directly from its homepage at http://handlebarsjs.com, shown in Figure 13-2, and the library weighs in at 13KB when minified and served with gzip compression, so compared to Mustache.js, a fair amount larger. As we’ll see later on in this section, however, there is a technique for precompiling templates such that they can be used with a cutdown version of the Handlebars library, resulting in more comparable file sizes.
Figure 13-2. Handlebars.js home page
Handlebars is used very much like Mustache, the library is referenced from within your HTML page and templates are combined with a JavaScript data hash object to produce the desired output string to insert into the current page. Templates can be stored within <script> tags on the page itself, as we saw with Mustache, or loaded in via separate files using Ajax. The data object, likewise, can be stored directly within the JavaScript file, or loaded in dynamically via Ajax.
The library’s global Handlebars object contains methods to assist in the rendering of templates; the Handlebars.compile() method takes a template string as an argument and returns a function. That function can then be executed, passing it the data hash object to use to render the template with, and it will return the resulting string combining the two for use within your page. A simple example of the compile() method used with a basic in-page template and local JavaScript data is shown in Listing 13-7.
Listing 13-7. HTML page containing a simple Handlebars template
<!doctype html>
<html>
<head>
    <meta charset="utf-8">
    <title>Handlebars.js Example</title>
</head>
<body>
    <h1>Handlebars.js Example</h1>

    <div id="result"></div>

    <!-- Define the template we wish to apply our data to. The "type" attribute
        needs to be any non-standard MIME type in order for the element's contents
        to be interpreted as plain text rather than executed -->
    <script id="template" type="x-tmpl-handlebars">
        <p>
            Name: <a href="mailto:{{email}}">{{firstName}} {{lastName}}</a><br>
            Company: {{company}}
        </p>
        <p>
            City: {{city}}
        </p>
    </script>

    <!-- Load the Handlebars.js library -->
    <script src="lib/handlebars.min.js"></script>

    <!-- Execute our script to combine the template with our data. Included
        here for brevity, move to an external JavaScript file for production -->
    <script>
        // Get a reference to the template element and result element on the page
        var templateElem = document.getElementById("template"),
            resultElem = document.getElementById("result"),

            // Get the string representation of the Handlebars template from the template
            // element
            template = templateElem.innerHTML,

            // Define the data object to apply to the template
            data = {
                firstName: "Den",
                lastName: "Odell",
                email: "[email protected]",
                company: "AKQA",
                city: "London"
            },

            // The compile() method returns a function which the data object can be passed to
            // in order to produce the desired output string
            compiledTemplate = Handlebars.compile(template);

        // Combine the data with the compiled template function and add the result to the page
        resultElem.innerHTML = compiledTemplate(data);
    </script>
</body>
</html>
Let’s look through some of the features of Handlebars templates and the Handlebars.js library together now, including partials, helpers, and template precompilation for improved performance.
Partials
A partial template in a Handlebars template looks identical to that in a Mustache template, but the two differ in the way the details of the partial template is provided to the library for rendering. The Handlebars.registerPartial() method allows a partial to be registered with Handlebars using two parameters: the name of the partial and the string representation of that partial template. This must be called before the partial is referenced from the template being rendered. Multiple partials can be registered by calling the registerPartial() method multiple times. Just as with Mustache.js, all partials must be loaded and registered before the main template can be rendered.
Helpers
Handlebars extends the concept of Mustache’s sections with its own feature-filled handlers, known as helpers. These enable you to iterate over lists of data, or execute conditional expressions, using helpers with clear names that make the templates easier to read and understand—important, particularly as your templates become more complex, and a marked difference from Mustache. With Mustache, without knowing the type of data being passed to the template, you can’t be sure whether a section is to be used as a conditional block, an iteration, or something else; here, the difference is made clear by the helper’s name. There are a few built-in helpers, and Handlebars offers you the ability to create your own with ease, which can be reused simply across all your templates. The helper’s name is preceded by a hash (#) character within its tag and followed by the name of the data key to apply to the helper. In this section, we will look at some common helpers and I will explain how you can easily create your own for your specific template’s needs.
The with Helper
The with helper allows you to apply a different data context to the template block it surrounds. This provides an alternative to repetitive use of dot notation to navigate the specific data property hierarchy passed to the helper. To navigate back to the parent context from within a section, the ../ token can be used before the variable name. A simple example of the with helper that should make everything clear is shown here.
Template:
    <h1>{{name}}</h1>
    {{#with address}}
        <p>{{../name}} lives at: {{street}}, {{city}}, {{region}}, {{country}}</p>
    {{/with}}

Data Hash:
    {
        name: "Den Odell",
        address: {
            street: "1 Main Street",
            city: "Hometown",
            region: "Homeshire",
            country: "United Kingdom"
        }
    }

Output:
    <h1>Den Odell</h1>
    <p>Den Odell lives at: 1 Main Street, Hometown, Homeshire, United Kingdom</p>
The each Helper
The each helper allows you to iterate over a data list, such as an array or object. The value of the array item, if not an object or array itself, can be accessed by using the reserved variable name {{this}}. When looping over an array, the index of the current item in the original array is provided by the reserved variable name {{@index}}. When iterating over an object, the name of the key for the current property is provided by the reserved variable name {{@key}}. An optional {{else}} section can be added to allow you to provide a section block to be rendered if the provided data list is empty, as you can see demonstrated in this example:
Template:
    <h1>People</h1>
    {{#each people}}
        <p>Item {{@index}}: {{this}}</p>
    {{else}}
        <p>No names found</p>
    {{/each}}

Data Hash:
    {
        people: [
            "Den Odell",
            "Bill Gates"
        ]
    }

Output:
    <h1>People</h1>
    <p>Item 0: Den Odell</p>
    <p>Item 1: Bill Gates</p>
The if And unless Helpers
Template section blocks can be displayed conditionally based on the value of certain data properties using the if and unless Handlebars helpers. The if helper will display the associated section block provided the value passed to it is a truthy value (any value except false, undefined, null, an empty string or an empty array), whereas the unless helper will display the associated block only if the data value is falsy. In either case, an optional {{else}} section can be added to capture the inverted case, as demonstrated in the example here:
Template:
    <h1>People</h1>
    {{#if people}}
        <p>Item {{@index}}: {{this}}</p>
    {{else}}
        <p>No names found</p>
    {{/if}}

    {{#unless isAvailable}}
        <p>Not available</p>
    {{/unless}}

Data Hash:
    {
        isAvailable: false,
        people: []
    }

Output:
    <h1>People</h1>
    <p>No names found</p>
    <p>Not available</p>
If you’re providing a large, multilevel data object to your template, it can occasionally become confusing, when using multiple helpers throughout your template, to know where in the data hierarchy you are, or what data you have available to you, at any specific point. Thankfully, Handlebars provides a log debug helper that allows you to view the state of the data available to you at any point in your template. Simply pass the name of the data object variable you wish to view, or use {{log this}} to show the data available in the current context. Rather than being written out to the generated page itself, the data is then written out to the command line if final page generation is handled via a command line tool, or into the browser’s developer console window if the generation occurs live within the browser.
Along with the built-in helpers, Handlebars offers the ability to create your own custom helpers to allow you to provide the exact functionality you require in your templates. These can work at a block level, to perform an operation on a section of a template, or at an individual data item level, such as to format a specific piece of data for display.
A custom helper can be created by using the Handlebars.registerHelper() method, passing it two parameters: a unique name for the helper, and a function to execute when the helper is encountered in the template upon rendering, which performs the desired behavior to the data passed to it in the template. Listing 13-8 shows a selection of simple custom helpers that you may find useful for your own templates.
Listing 13-8. Example custom Handlebars helpers
// The registerHelper() method accepts two arguments - the name of the helper, as it will
// be used within the template, and a function which will be executed whenever the
// helper is encountered within the template. The function is always passed at least one
// parameter, an object containing, amongst others, a fn() method which performs the same
// operation as Handlebars' own render ability. This method takes a data object and
// returns a string combining the template within the block helper with the data in
// this object

// Define a block helper which does nothing other than pass through the data in the
// current context and combine it with the template section within the block
Handlebars.registerHelper("doNothing", function(options) {

    // To use the current data context with the template within the block, simply use
    // the 'this' keyword
    return options.fn(this);
});

// The helper can be passed parameters, if required, listed one by one after the helper
// name within double braces. These are then made available within the function as
// separate input parameters. The final parameter is always the options object, as before
Handlebars.registerHelper("ifTruthy", function(conditional, options) {
    return conditional ? options.fn(this) : options.inverse(this);
});

// If more than one or two parameters need to be passed into the helper, named parameters
// can be used. These are listed as name/value pairs in the template when the helper is
// called, and are made available within the options.hash property as a standard
// JavaScript object ready to pass to the options.fn() method and used to render the
// data within
Handlebars.registerHelper("data", function(options) {

    // The options.hash property contains a JavaScript object representing the name/value
    // pairs supplied to the helper within the template. Rather than pass through the
    // data context value 'this', here we pass through the supplied data object to the
    // template section within the helper instead
    return options.fn(options.hash);
});

// Create a simple inline helper for converting simple URLs into HTML links. Inline helpers
// can be used without being preceded by a hash (#) character in the template.
Handlebars.registerHelper("link", function(url) {

    // The SafeString() method keeps HTML content intact when rendered in a template
    return new Handlebars.SafeString("<a href="" + url + "">" + url + "</a>");
});
The custom helpers given in Listing 13-8 can be used as demonstrated in the following example template:
Base Template:
    {{#doNothing}}
        <h1>Dictionary</h1>
    {{/doNothing}}

    {{#ifTruthy isApiAvailable}}
        <p>An API is available</p>
    {{/ifTruthy}}

    {{#ifTruthy words}}
        <p>We have preloaded words</p>
    {{else}}
        <p>We have no preloaded words</p>
    {{/ifTruthy}}

    <dl>
    {{#data term="vastitude" definition="vastness; immensity" url=" http://dictionary.com/browse/vastitude"}}
        {{>definition}}
    {{/data}}

    {{#data term="achromic" definition="colorless; without coloring matter" url="http://dictionary.com/browse/achromic"}}
        {{>definition}}
    {{/data}}
    </dl>

Partial "definition" Template
    <dt>{{term}} {{link url}}</dt>
    <dd>{{definition}}</dd>

Data hash:
    {
        isApiAvailable: true,
        words: []
    }

Output:
    <h1>Dictionary</h1>

    <p>An API is available</p>

    <p>We have no preloaded words</p>

    <dl>
        <dt>vastitude <a href="http://dictionary.com/browse/vastitude">http://dictionary.com/browse/vastitude</a></dt>
        <dd>vastness; immensity</dd>
        <dt>achromic <a href="http://dictionary.com/browse/achromic">http://dictionary.com/browse/achromic</a></dt>
        <dd>colorless; without coloring matter</dd>
    </dl>
Precompiling Templates for Best Performance
As we’ve seen, the Handlebars.js compile() method takes a template string and converts it into a function, which can then be executed, passing in the data to apply to the template. The result is the final markup string for displaying on the page. If you know your template won’t change during the runtime of your application, you can take advantage of Handlebars.js’ precompilation feature, which allows you to perform this template-to-function conversion in advance, delivering a smaller JavaScript file to your application containing just the template function to which to apply your data. The file sizes are much smaller, as they can take advantage of a number of optimizations that otherwise wouldn’t be possible at runtime, and they require only a cutdown runtime version of Handlebars.js running within your HTML page. This special version of the library removes functions made redundant through the precompilation process. The runtime version of Handlebars can be downloaded from the homepage at http://handlebarsjs.com and weighs in at a more svelte 2.3 KB after minification and when served using gzip compression. This is comparable in size to the Mustache library yet contains the extra benefits and simplicity of Handlebars, so it is a great solution to using templates in your code without sacrificing on file size and, therefore, download time. If you are looking for a solution for serving gzip compressed versions of the libraries mentioned in this chapter, visit http://cdnjs.com to locate a reference to a Content Delivery Network-hosted version of the desired file.
The precompilation step needs to happen in advance, before the template is used on the page, and we can take advantage of the command line tool provided by Handlebars.js to perform this step. The tool runs on the Node.js application framework, which we will cover in detail in the following chapter. For now, you can install the framework on your machine by downloading it from http://bit.ly/node_js and following the instructions. The Node Package Manager (NPM) tool is installed at the same time and allows the ability to easily install applications to run within the framework, including the Handlebars.js precompiler application. Enter the following command on the command line to install version 1.3.0 of the Handlebars.js precompiler (Mac and Linux users may need to precede the command with sudo to grant the necessary permissions to install the tool for access across any folder on their machine):
npm install –g [email protected]
We explicitly state the version number of the tool that matches the version of the library available for download on the Handlebars.js homepage. Without the two versions matching, we cannot guarantee any precompiled template will function correctly.
Navigate on the command line to the directory containing your template file(s) and execute the following command to precompile the template, replacing templatefile.handlebars with the name of the template file to precompile:
handlebars templatefile.handlebars
You will notice that the generated precompiled template function is written straight out to the command line rather than saved to a file, which is not exactly what we need. To save the generated template to a new file, add the --output option on the command line and specify a file name with a .js extension (since we are returning a JavaScript function for use in our page). If we also add the --min option, the generated JavaScript file will be produced minified, saving us an optimization task later. The final command will therefore be as follows, with templatefile.handlebars replaced with the name of the template to be precompiled, and templatefile.js replaced with the name of the precompiled output JavaScript template file:
handlebars templatefile.handlebars --output templatefile.js --min
Let’s create a real example to show how to use a precompiled template. Consider the template file shown in Listing 13-9.
Listing 13-9. A Handlebars template to be precompiled
<dl>
    {{#each words}}
        <dt>{{term}} <a href="{{url}}">{{url}}</a></dt>
        <dd>{{definition}}</dd>
    {{else}}
        <p>No words supplied</p>
    {{/each}}
</dl>
Let’s take the template in Listing 13-9 and precompile it using the handlebars command line tool. We’ll use the following command, which generates the minified JavaScript code shown in Listing 13-10, representing our precompiled template:
handlebars Listing13-9.handlebars --output Listing13-10.js --min
Listing 13-10. The precompiled version of the template in Listing 13-9
!function(){var a=Handlebars.template,t=Handlebars.templates=Handlebars.templates||{};t["Listing13-9"]=a(function(a,t,e,l,n){function r(a,t){var l,n,r="";return r+="
        <dt>",(n=e.term)?l=n.call(a,{hash:{},data:t}):(n=a&&a.term,l=typeof n===i?n.call(a,{hash:{},data:t}):n),r+=o(l)+' <a href="',(n=e.url)?l=n.call(a,{hash:{},data:t}):(n=a&&a.url,l=typeof n===i?n.call(a,{hash:{},data:t}):n),r+=o(l)+'">',(n=e.url)?l=n.call(a,{hash:{},data:t}):(n=a&&a.url,l=typeof n===i?n.call(a,{hash:{},data:t}):n),r+=o(l)+"</a></dt>
        <dd>",(n=e.definition)?l=n.call(a,{hash:{},data:t}):(n=a&&a.definition,l=typeof n===i?n.call(a,{hash:{},data:t}):n),r+=o(l)+"</dd>
    "}function s(){return"
        <p>No words supplied</p>
    "}this.compilerInfo=[4,">=1.0.0"],e=this.merge(e,a.helpers),n=n||{};var d,h="",i="function",o=this.escapeExpression,c=this;return h+="<dl>
    ",d=e.each.call(t,t&&t.words,{hash:{},inverse:c.program(3,s,n),fn:c.program(1,r,n),data:n}),(d||0===d)&&(h+=d),h+="
</dl>"})}();
Once precompiled, the template can be referenced for use within our HTML page. Because the compilation stage no longer needs to occur directly in the browser, we get a performance improvement over in-browser compilation. Combine this with the smaller download sizes required for this solution and you can see how useful this technique can be for ensuring good performance within larger web applications.
The code in Listing 13-11 shows an example HTML page we could use to plug our JavaScript data object into the precompiled template, and write the resulting HTML string out to the current page.
Listing 13-11. HTML page referencing a precompiled template and the runtime version of the Handlebars.js library
<!doctype html>
<html>
<head>
    <meta charset="utf-8">
    <title>Handlebars.js Example</title>
</head>
<body>
    <h1>Handlebars.js Example</h1>

    <!-- Create an element to store the result of applying the template to the data -->
    <div id="result"></div>

    <!-- Load the Handlebars.js runtime library, which should be used with
        precompliled templates only -->
    <script src="lib/handlebars.runtime.min.js"></script>

    <!-- Load our precompiled template -->
    <script src="Listing13-10.js"></script>

    <!-- Plug the data into the template and render onto the page -->
    <script>
        // Precompiled templates are added as properties to the Handlebars.templates object
        // using their original template name as the key (this name was set by the command line
        // tool and stored in the Listing13-10.js file)
        var template = Handlebars.templates["Listing13-9"],

            // The template is a function, which should be passed the data to render within the
            // template. The result is the combination of the two, as a String.
            result = template({
                words: [{
                    term: "vastitude",
                    url: "http://dictionary.com/browse/vastitude",
                    definition: "vastness; immensity"
                }, {
                    term: "achromic",
                    url: "http://dictionary.com/browse/achromic",
                    definition: "colorless; without coloring matter"
                }]
            });

        // Write the resulting string onto the current page within the <div id="result">
        // element. Produces the following result:
        /*
        <dl>
            <dt>vastitude
                <a href="http://dictionary.com/browse/vastitude<http://dictionary.com/browse/vastitude</a>
            </dt>
            <dd>vastness; immensity</dd>

            <dt>achromic
                <a href="http://dictionary.com/browse/achromichttp://dictionary.com/browse/achromic</a>
            </dt>
            <dd>colorless; without coloring matter</dd>
        </dl>
        */
        document.getElementById("result").innerHTML = result;
    </script>
</body>
</html>
Running the code from Listing 13-11 produces the result shown in Figure 13-3.
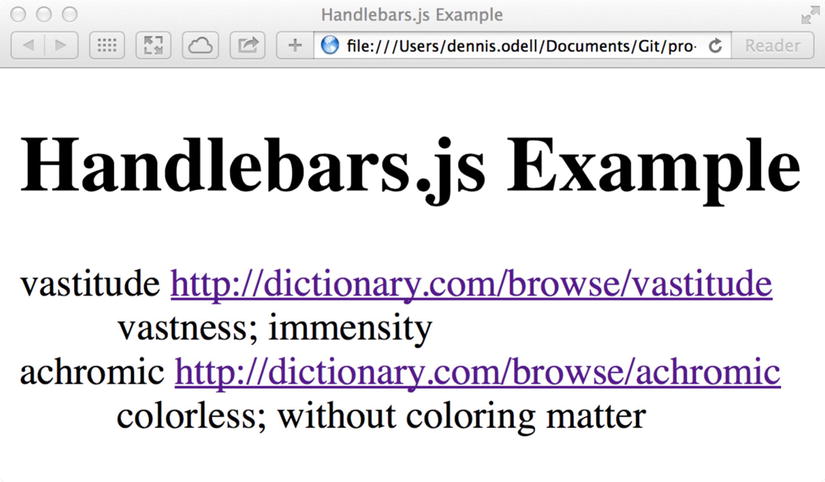
Figure 13-3. The resulting page from running the code in Listing 13-9 to combine data with a precompiled template
Handlebars offers a more descriptive templating language over Mustache, and allows for extensibility through its custom helpers functionality. To overcome the extra size of the library required to process such a template, it offers the ability to precompile templates for use with a cutdown version of the library to offer improved performance and a similar data footprint size to the tiny Mustache.js library. It is for these reasons that Handlebars is so widely used in large web applications.
Alternative Client-Side Templating Libraries
We’ve looked in some detail at Mustache and Handlebars templating, which many, including myself, accept to be the most popular and well-supported JavaScript templating solutions available. These aren’t the only options available to you, however, and libraries including Embedded JavaScript (EJS) and Underscore.js, also offer similar templating functionality, as I will explain in this section.
Client-Side Templating with Embedded JavaScript (EJS)
Embedded JavaScript (EJS) is an open source JavaScript templating language designed for those who are most comfortable with the JavaScript language and prefer to encode their template logic in a familiar code-friendly way. It allows the use of simple JavaScript-format if statements, for loops, and array indices to output a desired text string from a set of input data. The EJS library can be downloaded from the homepage via http://bit.ly/ejs-template and weighs in at just 2.4 KB when minified and served with gzip compression. The library has broad browser support reaching back all the way to Firefox 1.5 and Internet Explorer 6.
Within an EJS template, code to execute is contained within a section starting with <% and ending with %>, a style used by Ruby language developers for templating, and variables to output are wrapped in <%= and %> - note the additional equals (=) sign.
EJS supports the ability to add view helpers that simplify the creation of common types of output, such as HTML links, which can be created using the command <%= link_to("link text", "/url") %> to create the following output: <a href="/url">link text</a>. The full list of available helpers can be found on the EJS Wiki site at http://bit.ly/ejs_wiki.
A simple EJS example template is shown here:
Template:
    <h1><%= title %></h1>
    <dl>
        <% for (var index = 0; index < words.length; index++) { %>
            <dt><%= link_to(words[index].term, words[index].url) %></dt>
            <dd><%= words[index].definition %></dd>
        <% }

        if (!words) { %>
            <p>No words supplied</p>
        <% } %>
    </dl>


Data Hash:
    {
        title: "EJS Example",
        words: [{
            term: "vastitude",
            url: "http://dictionary.com/browse/vastitude",
            definition: "vastness; immensity"
        }, {
            term: "achromic",
            url: "http://dictionary.com/browse/achromic",
            definition: "colorless; without coloring matter"
        }]
    }

Output:
    <h1>EJS Example</h1>
    <dl>
        <dt><a href="http://dictionary.com/browse/vastitude">vastitude</a></dt>
        <dd>vastness; immensity</dd>

        <dt><a href="http://dictionary.com/browse/achromic">achromic</a></dt>
        <dd>colorless; without coloring matter</dd>
    </dl>
One advantage of EJS over Mustache.js and Handlebars.js is that out of the box it requires no special code to apply JavaScript data from a remote JSON file to a template stored in another remote file, something that requires additional Ajax code with Mustache.js and Handlebars.js.
The EJS “class” is typically instantiated by passing it a URL to an external template file to load asynchronously, and then executing either its render() or update() method, depending on whether the data to apply to the template is already present and loaded within JavaScript, in which case the render() method is passed the data object and returns the output string. The update() method is passed two parameters, the id of a HTML page element to render the resulting template within and the URL of the JSON data file to load asynchronously before applying its data to the template.
new EJS({url: "/templatefile.ejs"}).render(dataObject);
new EJS({url: "/templatefile.ejs"}).update("pageElementId", "/datafile.json");
If you prefer to work with templates whose logic closely resembles that you’re familiar with in JavaScript files, then EJS may be the best templating solution for your needs.
Underscore.js is a JavaScript library containing over eighty useful helper functions for working with data collections, arrays, objects, and functions in your code, and a selection of utility functions, one of which is specifically targeted toward basic templating. The library can be downloaded from its homepage via http://bit.ly/u-js and weighs in at 5 KB minified and served with gzip encoding. When included on your page, it offers access to its methods through the underscore (_) global variable. You may recognize Underscore.js if you’ve used the Backbone.js MVC library (http://bit.ly/backbone_mvp) in your code as it has a dependency on this library.
Templating is achieved through the Underscore.js _.template() method, which is passed a template string and returns a function that can then be executed, passing in the data to use to render the template with as a JavaScript object, much the way templating is achieved through Handlebars.js. In a similar way to EJS, the <% and %> delimiters denote code to be executed and the <%= and %> delimiters denote variables to be written out to the resulting string. As well as JavaScript commands such as if and for, you can also set variables and access the entire Underscore.js library to utilize its other utility methods within your templates.
A simple Underscore template might look like the following, using the Underscore.js _.each() method for iterating over a data list rather than using a for loop:
Template:
    <h1><%= title %></h1>
    <dl>
        <% _.each(words, function(word) { %>
            <dt><a href="<%= word.url %>"><%= word.term %></a></dt>
            <dd><%= word.definition %></dd>
        <% }

        if (!words) { %>
            <p>No words supplied</p>
        <% } %>
    </dl>


Data Hash:
    {
        title: "Underscore.js Example",
        words: [{
            term: "vastitude",
            url: "http://dictionary.com/browse/vastitude",
            definition: "vastness; immensity"
        }, {
            term: "achromic",
            url: "http://dictionary.com/browse/achromic",
            definition: "colorless; without coloring matter"
        }]
    }

Output:
    <h1>Underscore.js Example</h1>
    <dl>
        <dt><a href="http://dictionary.com/browse/vastitude">vastitude</a></dt>
        <dd>vastness; immensity</dd>

        <dt><a href="http://dictionary.com/browse/achromic">achromic</a></dt>
        <dd>colorless; without coloring matter</dd>
    </dl>
To use Underscore templates on your HTML page, reference the library and your template, which you will have to load manually via Ajax or reference directly from your HTML page or a JavaScript variable. Then execute the _.template() method to compile a template string to a function, which can then be called with data.
var template = _.template(templateString),
    output = template(data);
If you require additional familiar-looking helper methods in your templates, or you are already using the Backbone.js MVC library in your application, you may find Underscore.js the best templating solution for your needs.
Consider Progressive Enhancement
In this chapter, we’ve looked at client-side templating solutions that allow you to dynamically load in specially formatted templates, combine them with JavaScript data, and then append the resulting output to the current HTML page. This allows for a web application user experience devoid of page refreshes to fetch and display new content, much like that of desktop applications. With dynamic content loading comes a warning, however: building a web application whose display renders and updates entirely via JavaScript means an accidental page refresh could reset the entire application back to its initial view state, and that search engines may struggle to crawl the content represented through the application as not all can process JavaScript. It also goes somewhat against the principle of URLs on the web: a URL represents an object or piece of content rather than a full application.
Build your web application using the principle of progressive enhancement, where HTML links and forms go to separate and distinct URLs when followed, with JavaScript used to prevent those links and forms from causing page refreshes and layering on an improved user experience instead. Execute Ajax calls and load templates and data dynamically, using the HTML5 History API (http://bit.ly/historyapi) to update the URL in the address bar to match the URL representing the new data loaded or page section displayed. If the user then accidentally refreshes the page in their browser, they’ll be taken to the content represented by the updated URL in their address bar, keeping them in the same place in the application they had previously reached. When JavaScript is disabled, as it is for most search engine crawlers, the links still work, allowing content and site data to be spidered as you would want them to, creating links directly into your application at key points.
Summary
In this chapter, I have covered client-side templating as a solution for building large web applications with dynamically updating page content, combining specially marked-up templates with JavaScript data to generate HTML for inclusion on the current page. I have covered the popular Mustache and Handlebars templating languages, and their associated JavaScript libraries, as well as some alternatives such as Embedded JavaScript (EJS) and Underscore.js.
In the next chapter, I will introduce Node.js, an application framework built for the JavaScript language that allows professional JavaScript developers the opportunity to write server-side code and server software to support their web applications, bringing the full development stack within the realm of the JavaScript developer.