
After looking at the Linux distribution included with a board or sold by the board vendor, it may make sense to start your project with a Linux distribution created by an open source project or from a commercial vendor. Commercial vendors offer deep support for certain use cases (like graphics on consumer electronics devices or Linux certified for use in telecommunications), and open source projects also focus on certain uses cases along the same lines.
Before you build a Linux distribution from scratch (that's the next chapter—skip ahead if you're so inclined), it makes sense to see what's available elsewhere. As Linux has become more common, many projects have sprung into existence to build Linux in one form or another. This chapter looks at build systems that you can use to create an embedded Linux distribution and the offerings of commercial vendors that supply ready-to-use Linux distributions with training and support.
Although Linux is an open source project and the source code is generally available, having somebody else handle the engineering details particular to the selected board make sense because it relieves your schedule of some tasks in exchange for money. Even very technically adept engineers choose to make this trade-off, because frequently time is more valuable than the amount of money required to get a completed Linux platform in the can. Toward that end, this chapter examines the commercial alternatives for Linux so that if you're interested in purchasing, you can approach the transaction as an informed customer. Some commercial embedded products track closely to what's available in open source, whereas others are quite different. For projects that have strict requirements around hardware or software support, the commercial product meeting the requirements is the best choice.
You can obtain a Linux distribution three primary ways:
From company that sold the board: There's a feeling of confidence when you purchase from a board vendor. Chances are overwhelming in favor of the Linux distribution working for the board in question. The cost is usually much less than it would be from a commercial vendor. On the downside, many hardware companies aren't in the software business and don't have the expertise or motivation to support a software product.
Via an open source distribution build: Several open source projects exist to build Linux. The software necessary to build something as complex as a Linux isn't a simple undertaking. Because these projects are open source, the processor support is usually narrow; and the likelihood that the build will work for a specific board (that is, your board) is dicey. Plus, you must overcome a learning curve to use the distribution building software, on top of any learning curve involved in building the software.
From a commercial vendor: A variety of companies offer Linux products and services. These companies do much the same job as the first two alternatives but offer support and mean less risk than trying to build on your own. In addition, these companies offer Linux features like graphics, quick boot-up, and realtime, which the board vendor may not. The support offered by a commercial vendor is also usually more attentive and focused that that available via open source.
Board vendors frequently include a Linux distribution with a board so that users can start up the board and see that it works, exercise critical peripherals, and otherwise make sure the board performs as expected. Embedded projects frequently start on a development board that's a proxy for the production board that hardware designers are creating for the device. The completeness of a Linux distribution supplied with the board varies greatly from vendor to vendor and sometimes from board to board.
A development board contains every peripheral possible and has ports that make it easy to attach off-the-shelf components to the board when you're doing development. The development board contains LEDs and sometimes a small LCD to report on the internal board state. During the hardware design process, another team creates a board that fits the industrial design of the device, with the connectors in the right places and the subset of peripherals for the device. This board operates just like the development board from a software perspective, but it doesn't resemble the development board from a physical perspective.
Note
Many board vendors have been switching to established Linux distribution building projects or commercial partners as a way of providing Linux. They've realized that creating, maintaining, and supporting a Linux distribution for their customers is more difficult and time consuming than anticipated.
This section outlines what you need to know to decide about the usefulness of the distribution bundled with the board. In many cases, engineers use the Linux included with the board out of a combination of complacency and fear: complacency because the software works, and fear that getting some other Linux kernel or distribution working would be a waste of time and effort. With that in mind, let's jump in.
The point of these questions is both to assess whether the product offered by the vendor is good enough for the project and to see how committed the vendor is to creating providing a complete solution that will be supported throughout the project:
What devices does the kernel support? You'd think that the devices on the board would be supported, but that isn't always the case! Make a checklist of the devices that will be on the production board so you don't forget any when querying the board vendor. Some board vendors support the most commonly used devices, like network or serial ports, but don't have proper support for a video-out port or audio device.
Where are the source code and patches for the kernel? Open source means you're entitled to the source code, any patches, and instructions explaining how to use those patches. Patches sometimes need to be applied in a certain order, because one patch makes changes on the assumption that some other patch has been applied first. The fact that patches are interrelated isn't indicative of poor engineering, but rather that the company has been carefully tracking the changes it makes to the main kernel.
If you're aware of other patches that need to be applied, you should test to be sure they're compatible with what the vendor has supplied. For example, the patches for a project like Linux-tiny[12] may make changes throughout the kernel, and those changes may collide with other changes from the vendor. Not all of these issues can be identified or solved before purchasing, but you should address as many that are known.
How compatible are patches with the current Linux kernel? This is important. In the Linux project, changes happen to the head of line (old-school speak for the version that will be released next) and are rarely back ported. That means if there's a change to the kernel—say, to address a security issue—that change is made to the current kernel and not to the one included with the board, unless that kernel happens to be the head of line.
The answer to this question is a function of how old the patches are in combination with how many other changes they contain. For some boards, the changes, although extensive, are limited to the parts of the kernel that deal specifically with the hardware and can be transferred easily to a newer version of the kernel if necessary. Even if patches can't be applied to the newest kernel, you many never need to switch to a newer kernel, making this a moot point.
What level of testing has been performed? One of the things a commercial vendor knows is the state of the software being delivered. Sometimes, the answer is that no testing has occurred. Depending on the project, that may or may not be sufficient. The internal testing done by your company may trump what ever testing the board vendor has or hasn't done.
Where's the toolchain? Getting the sources with the binaries is part of the GPL. There's no provision to ensure that the tools and software necessary to transform those sources into binaries are part of that equation. The toolchain supplied should be the same one used to build the kernel and the root file system (see the next item), and the supplier should include instructions on how to rebuild the toolchain as well.
The GNU toolchain is a group of related projects: a compiler, libraries, linker, utilities, and a debugger. The vendor should understand this notion and be able to describe the version and patches applied to each. As a user, the chances of rebuilding the toolchain completely are fairly low, but you're likely to need to add libraries or use a newer version of the debugger. Knowing how the toolchain is configured helps you determine compatibility with any additional or updated software.
In addition, getting the answer to this question serves as a way to gauge the competency and level of engagement of the vendor with respect to their Linux efforts. Some board vendors put a great deal of care and effort into supplying a top-notch distribution, whereas others do the minimum to claim Linux support.
What's in the root file system? This is a deliberately broad question, mostly because it's a broad topic. A root file system, as explained later in the book, is a complex project that involves several related projects coming together. A root file system can be anything from one file to the contents of an enterprise Linux server. The vendor should be able to describe the version for each software component used in the root file system.
If you plan to use shared libraries, make sure the shared libraries in the root file system match those in the toolchain. This is a critical detail! When you're crosscompiling applications that use shared libraries on the desktop, those binaries dynamically link to the shared libraries with the toolchain; however, when those same binaries are put in the root file system on the board, they attempt to link with those shared libraries. If there's a mismatch between the libraries used for the compilation and those used for execution, the software may refuse to load or, even worse, may fail unpredictably. If you're linking statically, the shared libraries aren't important, because the code that would reside in the shared library is included in the compiled binary.
Do the devices supported on the board have their complementary userland supporting packages? This is another semi-trick question to gauge the level of care that went into creating the root file system. Devices have become more complex and, for lack of a better word, interactive. For example, supporting USB devices requires support in the kernel and complementary packages in the root file system. The Linux USB software stack includes programs in the root file system that are executed when a user plugs in or unplugs a USB device.
Where are the root file system sources and patches, and how do I build it? Like the toolchain, the root file system is a confederation of packages that work together. Packages included in the root file system are typically licensed under the GPL, so you're due the source under that license agreement along with the build instructions. The build instructions need to explain how to apply any patches along with the information necessary for compilation.
Because the root file system is a collection of packages, the vendor should explain how to assemble all the packages into something that you can use for booting the board. (This isn't part of the GPL, but it's knowledge you're paying for as part of the purchase.)
How often does the company plan to upgrade the kernel? The Linux project (both the kernel and the collection of projects that make up the root file system) doesn't rest: changes are continually occurring, and that's certainly a good thing. As a customer, understanding how the board vendor reacts to this change helps you understand how you'll be kept up-to-date with the changes in the open source community. Will the software be updated as kernel and package updates occur? Is there a regular release cycle during which the vendor collects changes and validates and tests them before release? Or is the Linux distribution a snap-shot of the current state of the projects and never updated, leaving updates to you? All of these are valid approaches, and as the buyer, it's important for you to know what the board vendor is supplying.
What support do you provide? What sort of questions will you answer? The answer to these questions reveals the amount of in-house expertise the vendor has at its disposal; in general, the more resources the vendor has, the more they're willing to share those resources with their customers.
You should also ask yourself what level of support required. If this is the first embedded Linux project undertaken at your company, the type and level of support required will be different than if the company already has a high degree of Linux expertise. Some support agreements explicitly say that consulting services aren't offered, where consulting means providing advice related to how to use the software. From the vendor's perspective, the support contract exists to limit the support offered, so the vendor doesn't make a commitment it can't fulfill.
After signing the check and taking delivery of a Linux distribution included with the board, it's important to assess what was delivered. Plan to spend at least a working week to do the following:
Build the kernel.
Build the root file system.
Boot the board with the newly built root file system and kernel.
Compile and debug a small application on the board.
The first three tasks on the list should be done with the tools and advice offered by the vendor. The goal of this exercise is to immediately perform the tasks that will eventually happen in the project, to validate the quality of the delivered software. Even though the distribution includes a kernel that's ready to boot for the board, rebuilding a kernel or re-creating the root file system shouldn't be tasks you approach with trepidation, but rather as a natural part of the project.
At a minimum, if the binaries (kernel and root file system) delivered by the vendor can't be reproduced, the distribution is defective and should be returned for a refund. Likewise, if you can't build and debug a small application, the vendor hasn't supplied you with a set of tools adequate for a project.
An ever-increasing number of projects build Linux distributions, to the point that building a Linux distribution is a rite of passage for engineers, like building a text editor was in years past. Linux distribution builders all work on the same basic principles: a kernel and group of packages are built according to a specification into a completed set of binaries suitable for deployment. Some distribution builders create a toolchain as part of the process, and others download a binary toolchain from a known location.
When you're classifying these systems, the type of packaging system is a good first-order differentiator, because no matter how the system tries to shield you from the particulars, you eventually need to get familiar with this underlying technology. The most common packing system is a compressed tar file; that's fortunate because this packaging technology is the lowest common denominator and is familiar to most engineers, Linux and otherwise.
These distribution-building tools exist due to a catalyst such as supporting a particular usage scenario (for example, as small as possible or rescue disks) or a certain hardware platform (such as a cell phone). These aren't mutually exclusive concepts, because cell phone Linux distributions are frequently small— resource consumption is very important for that hardware platform. The concept of a distribution builder isn't limited to embedded Linux; the same concept exists for desktop Linux systems, the output being an ISO and collection of packages (think RPMs or debs)
In the case of hardware platform-specific distribution builders, the vendor isn't interested in selling the Linux distribution, but rather sees the Linux distribution as an enabler for hardware sales and also as a way to potentially harm the revenue stream of a competitor that sells a Linux distribution as an add-on product. Linux is a way to help sell hardware, plain and simple. As time progresses, the distributionbuilder project begins to support a larger variety of hardware, because adapting an existing code base makes for smart engineering.
Several embedded distributions are package system based. The distributions are embedded in terms of the packages, target platform, and size that use an underlying packaging technology to achieve this aim. Although some projects use the same packaging system but have a focus on a particular technology or hardware, these projects are focused on the packaging system.
You should certainly try! If the hardware is close to what you'll be using, or you need the technology supported by the distribution, there's little to lose by getting the software and giving it a try. Due to the open nature of the projects, plenty of documentation is available, and probably someone has tried to solve a problem similar to yours and has posted a question or five.
These distribution-building systems build (most) of their components from scratch. That's both an asset and a liability, in that frequently a great deal of configuration is required in order to have the build work successfully. However, as distribution-building projects have improved, they do a better job of detecting and sometimes even fixing configuration-related problems before building starts. But in writing this book, I encountered problems with all the distribution-building projects: none "just worked." LTIB (Linux Target Image Builder) required the least amount of cajoling and twiddling with the machine configuration.
Distribution-building software works by layering software over a packaging system. This layer of software allows configuration settings, among other things, to be placed in a centralized place so that all the software is built using the same general settings. For instance, if the distribution is built without dynamic linking, that is set once and the software then communicates that information to each package as it's built. This means you encounter a learning curve while learning how this works—and that learning curve can be steep, because the software that controls the build process is typically nontrivial. Distribution systems that use make files have a learning curve in that you need to understand the structure of the files and macros. Given the obtuse nature of make, this curve can be larger than you expect. All distribution-building system include a known working configuration that is used to create a build; that configuration serves as the best learning aid when you're modifying the build to fit the needs of your project.
Following, in no particular order, is an inventory of popular distributions designed for embedded projects. All of these distributions are targeted for embedded engineers, but each may be worth a try for the project at hand.
The Linux Target Image Builder (LTIB) user interface is much like the kernel configuration tool, which, although familiar to systems-level engineers, can be confusing if you're new to Linux. LTIB is accommodating in that it does its best to verify the environment before starting a build and lets you know about corrective actions before starting a 3-hour build process.
One of the complaints about LTIB is that the first time it runs, it downloads the entire set of packages that it could use in a distribution. This is a mixed blessing in that after the packages are on the system, the host doesn't need to be attached to the network in order to get a build running. Another advantage of the big download is that you can put the entire directory into a code librarian and check it out on a build machine for easy platform scripting.
The second complaint is that the software doesn't build toolchains but downloads the binaries and installs them on the system. This is also somewhat advantageous in that building a toolchain requires at least an hour on a very fast computer and, due to the patches and configuration dependencies, is an operation that frequently fails. LTIB provides the sources for the toolchain it downloads; it just doesn't build the toolchain during the build process running on the host machine.
One great advantage of LTIB is that it builds a JFFS2 image containing the root file system, ready to be burned on to a flash partition, as part of the build. Along with the self-contained nature of the project, LTIB is a great tool if you want or need to automate your platform build.
Note
The examples in this chapter are run from the command-line prompt of a terminal. All Linux systems have a terminal program where you can get to a shell prompt. In Ubuntu, that program is under the Applications
LTIB is an RPM-based system. This means it uses source RPM files to do the build, and integrating a package into LTIB means learning how to create RPM packages. Creating a source RPM build for an application isn't difficult; but for some reason, it scares some users away from fully taking advantage of LTIB. Instead of having the software build your application from an RPM as part of the LTIB build, you can post-process the file system, adding the application and making any final changes.
If you're running a Debian-based system, you need the RPM tools. Open a command shell; Ubuntu users, look for the Terminal program under the Accessories menu. The following commands install the RPM package manager, fetch a release of LTIB, and run it:
$ sudo apt-get install rpm
$
$ tar xzf ltib-8-1-2a-sv.tar.gz
$ cd ltib-8-1-2-sv
$ ./ltib
When this book was written, the current version of LTIB was 8.1.2a, but by the time the book makes it to press, the version number will likely be different. You'll probably see this error message complaining that the current user doesn't have proper sudo user permissions to run RPM without asking for a password. To configure this, use the command
$ sudo /usr/sbin/visudo
Add the following line in the User privilege section:
<username> ALL = NOPASSWD: /usr/bin/rpm, /opt/ltib/usr/bin/rpm<username> is your login name on the system. Follow the instructions, and update the sudo file as requested. Running ltib again produces the following message:
Installing host support packages.
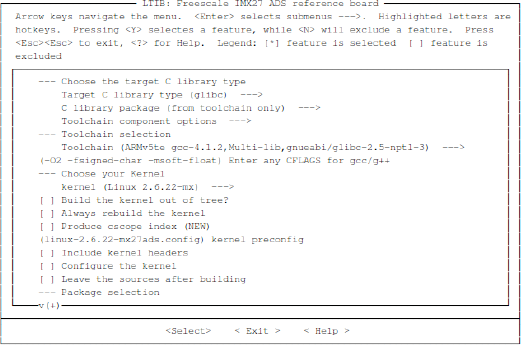
You only need to do this once per host, but it may take up to an hour to complete. This is a frustrating aspect of LTIB for new users. It's a slow process, even if you have a fast connection to the Internet, because of the volume of data being downloaded. If an error occurs, you can find a log file with the full output in /ltib-8-1-2-sv/host_config.log in the directory where LTIB was unpacked. The LTIB directory matches the version you used, which is likely to be different than the one in this book. After this process completes, a menu appears with the options for the build (see Figure 5-1).

It's a matter of picking the platform (pressing Enter opens in a menu you can choose from) and some additional tools. The LTIB project is the vehicle Freescale uses to distribute Linux, explaining why you're free to pick any platform as long as it's Freescale's.
After you selecting the target platform, the software asks to save the current configuration. Another configuration program is launched, containing the options to set for the build. LTIB does a great job of selecting a minimal system from the start. To create something quickly, change the Options under Target Image Generation to produce a RAM disk. This is the easiest output to manipulate after the build.
The LTIB program provides options to prune the root file system of directories that typically aren't necessary for an embedded system (see Figure 5-2). Without sounding sappy, that's a great feature and tells you the project was designed by a company that knows what embedded Linux engineers do on a daily basis.
After you exit, the build starts. A few hours later, the software will have produced the files and directories listed in Table 5-1, in the directory when LTIB ran.
Table 5.1. LTIB directory contents after the build
Contents | |
|---|---|
| The directory created as a result of installing the RPM package created during the build process. |
rootfs.ext2.gz rootfs.ext2.gz.uboot | The compressed ext2 image of the |
| The collection of RPM files used to create the build. |
| The kernel that's ready for the boot loader. This file is a link to another file in the same directory. Copy the file that this points to into the |
| The kernel configuration file. To later rebuild just the kernel, you can use this file as the configuration. |
/opt/freescale/usr/local/gcc- 4.1.2-glibc-2.5-nptl-3/armnone- linux-gnueabi/bin/ | The location of the toolchain (for this build). Depending on the selected board, the directory varies slightly but resides under |
LTIB is incredibly powerful and easy to use. One of its thoughtful features is the reporting built into LTIB. When LTIB first starts, it downloads a set of packages. To see a nicely formatted listing of those packages, use
$ ./ltib -m listpkgs
This command produces the following output (snipped)
-----------------------  ----------------         ------- -------     -------------
----------------------------
Package                  Spec file                Enabled License     Summary
-----------------------  ----------------         ------- -------     -------------
----------------------------
DirectFB-1.1.0-1         DirectFB                    n    LGPL        DirectFB is a
graphics
library for embedded syst
alsa-lib-1.0.11rc2-0     alsa-lib                    n    LGPL        A libraries
for ALSA
(Advanced Linux Sound Architecture)
alsa-utils-1.0.11rc2-0   alsa-utils                  n    GPL         Utilities for
ALSA
(Advanced Linux Sound Architecture)
apptrk-1.37-1            apptrk-ppcbin               n    Freescale E Userspace
debug
agent for Codewarrior
This output shows the version, spec file (what RPM uses for a build), and license for the file along with a brief summary. You can pipe this information to a file and keep it as a basis of comparison when the packages are updated.
The next useful feature is the dry-run mode. This works exactly like the dry-run feature in patch and make (use the -dry-run parameter for both): all the commands are echoed to the console, but nothing is executed. Because some operations take a while, having the system print out what it would be doing is very helpful in deciding whether the configuration changes have the desired effect before you wait several hours to find out they didn't work as expected.
Try the dry run with the -m clean parameter to see what the software will do for this command:
$ ltib -m clean -dry-run
The LTIB project is hosted on a site that's the GNU equivalent of SourceForge. It has mailing lists (and archives) and a bug-tracking system. The mailing list is more heavily trafficked than the bug-tracking system, so a mailing list posting is the fastest way to get help. To subscribe to the mailing list, visit the page http://savannah.nongnu.org/mail/?group=ltib. This page has a link to the mailing-list archives so you can see if another user has posted a similar question.
Buildroot is a project that helps you create root file systems and toolchains that use uClibc and BusyBox, a small C Library, and basic set of root file system tools. Buildroot grew out of the BusyBox and uClibc projects, two of the most commonly used pieces of software for embedded projects. Because this tool integrated both of these projects, it serves as a great starting point for creating a Linux distribution for a project.
Like LTIB, Buildroot uses an interface that's similar the tool used to configure the kernel. Although this is comforting for a system-level engineer, the tool can be confusing if you're a new engineer. The primary problem with this tool is that you have to keep track of where you are; after you use the software for a few minutes, nearly every page looks the same, and picking the correct options becomes tedious.
Buildroot configures an entire development environment—kernel, root file system, and toolchain— which means you need to configure the options for these complex projects before starting a build. There are literally hundreds of options to configure, and the sheer number of items makes the process mildly tedious. For some boards, default configuration files configure the build with the right settings. Unfortunately, there aren't many of these default configuration files, so the chances of one matching the board you're using are fairly low.
Buildroot uses tar files as its package system and uses a collection of make files to configure the software before building. This implementation is easy to understand if you've used make in the past for moderately complex projects. Each package has a .mk file containing the make rules necessary to download, configure, build, and clean the package and a Config.in that is used by the configuration tool.
After you select the configuration options, you invoke make, and the build process starts running.
Buildroot is packaged as a tar file. Download the file from the downloads page at http://buildroot.uclibc.org/download.html, and uncompress it. The following example code fetches a version using wget that will likely be out of date when this book is published. After the file is uncompressed, change directories, and run the configuration program (see Figure 5-3):
$ wget http://buildroot.uclibc.org/downloads/buildroot-2009.02-rc1.tar.bz2
$ tar xjf buildroot-2009.02-rc1.tar.bz2
$ make menuconfig

It's worth pointing out that the configuration tool supports rudimentary searching: press the / key, and a search dialog appears (see Figure 5-4). The dialog asks for a CONFIG_ symbol, but it searches for both the CONFIG_ symbol and the corresponding prompt text that appears in the dialog. If you're new to this configuration program, the output is a series of lines defining the value of variables, all of which start with CONFIG_. If you're familiar with the content and structure of the output file, you know the config var to be changed. But if you're just get starting, the search on the prompt string is more useful.

The output of the search is a list of the items that match. Unfortunately, it's just a list—you can't go to one of the items in the list. The best way to use the output is to scan the list for potential matches and record the location of the desired items on a scratch pad, unless your memory is good enough to recall the menu paths of the interesting items.
The easiest way to quickly start a build is to use one of the default configurations stored under the ./target/device directory. To get a quick listing of the configurations, do the following:
# find ./target -name "*_defconfig"
./target/device/x86/i386/i686_defconfig
./target/device/KwikByte/kb9202/kb9202_defconfig
./target/device/Atmel/atngw100/atngw100_defconfig
./target/device/Atmel/atstk100x/atstk100x_defconfig
./target/device/Atmel/atstk100x/atstk1002-no-mplayer_defconfig
./target/device/Atmel/at91sam9260dfc/at91sam9260dfc_defconfig
./target/device/Atmel/at91sam9g20dfc/at91sam9g20dfc_defconfig
./target/device/Atmel/atngw100-expanded/atngw100-expanded_defconfig
./target/device/Atmel/atngw100-base/atngw100-base_defconfig
./target/device/Atmel/at91sam9260pf/at91sam9260pf_defconfig
./target/device/Atmel/at91rm9200df/at91rm9200df_defconfig
./target/device/Atmel/at91sam9263ek/at91sam9263ek_defconfig
./target/device/Atmel/at91sam9261ek/at91sam9261ek_defconfig
There are several default configurations under this directory for a variety of boards. Try using a basic ARM processor configuration to test things:
# make at91sam9261ek_defconfig
Several hundred lines scroll by in the terminal window as the configuration program reports what is being set as a result of using this configuration file. You may be prompted to press Enter a few times to accept the default options. All that output offers reassurance that the system is busily working to configure the project as requested. Next, kick off the make process:
$ make
The build now runs. This process takes a while as the software downloads what's necessary for the build and starts the compilation process. At the end, the system will have built a kernel, a root file system, and a toolchain. Table 5-2 lists the locations of the key files and directories. These examples are specific to the choices used to create the configuration in the example; following each is an example with some placeholders so you can see how the files would look for your configuration.
Table 5.2. Files and Directories Crucial for the Build
File or Directory/ | Contents |
|---|---|
./project_build_arm/at91sam9261ek/root/ ./project_build_<architecture>/<board>/root/ | The root file system created as a result of the build. This is the layout of the file system before it's processed into the image requested during the build. |
./binaries/at91sam9261ek/at91bootstrap.bin ./binaries/< | The ready-to-boot kernel. This file is a symlink to another file in the same directory whose name contains additional information about how the kernel was built. |
./binaries/at91sam9261ek/ rootfs.arm- 20090310.ext2 ./binaries/< | The root file system image that's been processed into the requested image format. In this case, the format was ext2. If another format was selected, the extension would reflect that choice. |
./build_arm/staging_dir/usr/bin
./build_<
| The directory in which the toolchain resides. |
| The directory to which the files used to build the software have been downloaded. This directory contains the packages in compressed (either gz or bz2 format) tar files for each of the packages used in the toolchain and root file system build. |
Curious about the contents of the root file system created by the build? You can mount the root file system image via a loopback:
# mkdir -p /mnt/arm-rfs
# mount -t ext2 -o loop rootfs.arm-20090310.ext2 /mnt/arm-rfs
Note
Loopback mounts work by associating a block device with a file. A block device has semantics that allow random access to the underlying data and reads and writes in terms of a fixed-size data unit. The -o loop option in mount is shorthand for the command necessary to associate the file with the loopback device. After you mount the file system, if you're curious, you can do a losetup -a to see what mount did behind the scenes.
Listing this directory shows what appears to be a regular root file system. Check that the files are appropriate for the ARM processor by doing the following:
# file /mnt/arm-rfs/lib/libc.so.0 /mnt/arm-rfs/lib/libc.so.0: symbolic link to `libuClibc-0.9.30.so' # file /mnt/arm-rfs/lib/libuClibc-0.9.30.so /mnt/arm-rfs/lib/libuClibc-0.9.30.so: ELF 32-bit LSB shared object, ARM, version 1, stripped # file /mnt/arm-rfs/bin/busybox /mnt/arm-rfs/bin/busybox: setuid ELF 32-bit LSB executable, ARM, version 1, dynamicallylinked (uses shared libs), stripped
To run the toolchain, change directories into the ./build_arm/staging_dir/usr/bin folder, and get a directory listing to see what files have been built. The files follow one of two patterns:
arm-linux-*: These are the tools that use the glibc libraries.arm-linux-uclibc-*: These tools use the uClibc libraries.
In practice, the only difference between these files is that they use different C libraries when linking. To use one of these compilers in a project, you can add this directory to the path or copy the parent directory build_arm/staging_dir/usr to another location.
Buildroot has the concept of a project that contains all the settings necessary to build the packages into a distribution. After you go through the effort of configuring the kernel and root file system exactly as desired, you can save this information so that you can check it into a version control system or send it to a customer or another party to reproduce the output. To save the state of the project, use the following command from the Buildroot directory:
$ make saveconfig
This creates a local/<project name> directory containing the configuration files.
Buildroot downloads files when necessary as part of the build process. Some users, due to security restrictions or rules regarding how software is built, can't download from the Internet during the build process. Buildroot offers a target that results in the packages necessary for the build being downloaded to the local cache of packages:
$ make source
After this command runs, the ./dl directory is populated with all the packages necessary for the build process.
Buildroot, like most embedded projects, conducts support through a mailing list. The page http://buildroot.uclibc.org/lists.html has a subscription link and a handy search box so you can look through the history. The mailing list is active, with postings daily, and has a mix of newbie and superuser messages, so there's no need to be shy about asking a question (or lending a hand). You can find well-written documentation at http://buildroot.uclibc.org/docs.html. The same documentation is in the docs directory in the project, if connecting to the Internet is difficult.
The OpenEmbedded project got started as the build infrastructure for the Sharp Zaurus hand-held computer that ran Linux. The OpenEmbedded system uses the BitBake (more on that later) system for describing packages patches and their interrelationships. Formally, the project views the BitBake system as the build infrastructure for metadata supplied by the OpenEmbedded project.
OpenEmbedded, like the other distribution builders, builds a kernel, toolchain, and root file system. The BitBake software has the notion of recipes that it uses to download and cross-build packages; you can use this software to build other software as well.
Unlike many project, OpenEmbedded recommends that you check out the project from a source code repository. To get updates, refresh the project's files from source control. You may find this disorienting; or it may leave you with the impression that the software isn't "done." Because of the rapid changes to OpenEmbedded and the fact that it's implemented in Python plus shell scripts (meaning there's no separate compilation step for you to perform), this model works well.
The BitBake model requires an earnest learning commitment. The software ships with an example configuration file that you can use to create a simple build. However, the software doesn't have a UI, so figuring out what it can do requires that you read the documentation. The OpenEmbedded site contains quite a bit of information, but it seems to operate under the assumption that you're already familiar with the technology.
The OpenEmbedded software models the software build into the following parts:
Distribution: This distribution contains a list of packages for the root file system and the kernel to use for the build. It also contains the settings for the root file system type.
Machine: The machine data describes the hardwarethe distribution will be running on: for example, the size of the flash partitions or the name device for the serial console. The machine also has an associated set of packages that address features specific to that machine.
Package recipe: The metadata part of the OpenEmbedded project is a library of BitBake recipes. A recipe specifies where to download a package, what patches to apply, and when and how to install the package in the target machine's root file system.
OpenEmbedded is very different from other build systems since it's object-oriented in nature. At its core, BitBake uses the recipe to instantiate the appropriate class necessary to build a package. The object-oriented approach makes sense when you're building packages because the overall steps are the same for every package, but the particulars for any step for a given package may be unique. By using classes intelligently, the authors don't repeat code when a group of packages all have the same processing for certain steps in the process.
The notion of inheritance is also writ large on the configuration files used by OpenEmbedded. A file for a distribution likely includes many other files shared by other distributions. This structure has benefits in that one change can be easily applied to many distributions, but it also means the details are hidden if you're a novice user. If you've slogged through other class libraries, you'll have the same feeling when learning the ins and outs of OpenEmbedded's data files.
Note
Open Embedded uses two different source-control systems, which are sometimes called code librarians: Subversion (SVN) and Git (no known aliases). Both of these systems provide the same sort of functionality, keeping track of code changes from developers over time, but in very different ways. OpenEmbedded is actually two projects that work together, and each project is selected a different source-control system; that's OK, but it may be a little disorienting to new users.
The first step in using this software is to obtain the BitBake software. The recommended method is to download the software from the Subversion archive. Subversion may not be installed on your system, so the first command installs it on an Ubuntu system. If you're using an RPM-based system, substitute yum for apt-get:
$ sudo apt-get install subversion
$ mkdir -p ˜/oe/conf
$ cd ˜/oe
$ svn co svn://svn.berlios.de/bitbake/branches/bitbake-1.8/ bitbake
Lots of data scrolls past, showing the data that's being downloaded from the Subversion repository. Next, use Git to fetch the OpenEmbedded metadata. When you run this command, there is an uncomfortable delay before data appears on the terminal; be prepared to wait a minute or two, which can seem like an eternity. Be patient:
$ git clone git://git.openembedded.net/openembedded
Initialized empty Git repository in /home/gene/oe/openembedded/.git/
remote: Counting objects: 274805, done.
remote: Compressing objects: 100% (85039/85039), done.
Add OpenEmbedded's tools to the path, and the system will be ready:
$ export BBPATH=˜/oe/build:˜/oe/openembedded
$ export PATH=˜/oe/bitbake/bin:$PATH
The documentation recommends doing the following:[13]
echo 0 > /proc/sys/vm/mmap_min_addr
If you're running an Ubuntu system, you may need to install these packages as well:
$ sudo apt-get install diffstat texi2html cvs gawk
If you're running an RPM-based system, use this command:
$ sudo yum install diffstat texi2html cvs gawk
OpenEmbedded includes an example file that you can use to start a build of the software at openembedded/conf/local.conf.sample. This file contains an explanation of many of the options you can set to configure an OpenEmbedded build. You can use this file as the basis for starting a project by making a copy of it like so:
cp openembedded/conf/local.conf.sample build/conf/local.conf
Open build/conf/local.conf, and read it. A warning at the top of the file says to read everything and includes a passive-aggressive requirement that you delete the last line (otherwise an error is generated), to prove that you at least read the header of the file. Sigh.
This file is complex. For learning purposes, create a much smaller build/conf/local.conf containing just the following:
BBFILES = "<install dir>/oe/openembedded/recipes/*/*.bb"
DISTRO = "minimal"
MACHINE = "qemuarm"
ASSUME_PROVIDED += "gcc3-native"
ENABLE_BINARY_LOCALE_GENERATION = "0"
ASSUME_PROVIDED += "qemu-native"
Make the <install dir> in BBFILES equal to the directory where OpenEmbedded was installed. The last three lines are critically important. On several systems, the QEMU package refuses to build due to system compiler configuration problems. The last line tells BitBake that QEMU is present, even though it may not be; thus this package isn't built, thereby avoiding the problem. You can do this because QEMU isn't used during the build, but the set of rules says it's necessary. By telling the build process not to check for QEMU, it doesn't try to build it and therefore doesn't cause the build to fail. Yes, this is a little bit of a hack.
Next, kick off the build by doing the following from the oe directory:
bitbake bootstrap-image
The target bootstrap-image builds the minimal set of packages to get the machine up and running. The software automatically finds the local.conf file, reads the distro and machine files, and starts the build process.
The distributions defined by OpenEmbedded also define the targets listed in Table 5-3. Not all distributions define all of these targets. The easiest way to determine whether the target is supported is to try it out and see if an error message appears. This seems clunky, but this approach is easer than digging through the distribution and machine configuration files.
Table 5.3. Build Targets Defined by OpenEmbedded
Purpose | |
|---|---|
| A distribution without any of the graphics libraries or X11 |
| Contains a complete X Window environment and supporting libraries |
| Open Palmtop Integrated Environment (OPIE), which has the tools and graphics environment for a palm-top computer like a PDA |
| Builds only the kernel; doesn't build any of the user packages |
The BitBake software downloads the source files necessary for the build according to the instructions in the recipe file as the builds run. The downloaded files are stored in a local cache for reuse. When the build completes, the following appears:
NOTE: build 200903122216: completed
As you can see, the build serial number is the current date and time. The process puts the build into the ./tmp directory. Table 5-4 lists the locations of the critical build components.
Table 5.4. Locations of Critical OpenEmbedded Build Componentsn
File or Directory/ | Contents |
|---|---|
| The cross-compiler for the project. Add this directory to your path to easily invoke the cross-compiler. |
| The root file system before it was put into the final image. This is the layout of the file system before it's processed into the image requested during the build. |
| The kernel and root file system image suitable for booting the board. |
| The source files used in the build. Each file has an md5 sum file (same file name with an |
The OpenEmbedded project has several mailing lists that you can view at http://wiki.openembedded.net/index.php/Mailing_lists. If you're trying to use OpenEmbedded to build a distribution, the openembedded-users list is the most appropriate mailing list for questions. OpenEmbedded also keeps an archive of messages, using a nice forum-style manager to keep them organized. If you prefer Internet Relay Chat (IRC), the project has several channels at freenode; a complete list is at http://wiki.openembedded.net/index.php/IRC. Like mailing lists, the OpenEmbedded project keeps a log of the IRC traffic.
You can find the user manuals for both OpenEmbedded and BitBake at http://docs.openembedded.org/usermanual/usermanual.html and in the openembedded/docs directory. The OpenEmbedded site is a wiki; however, the user manual is the best source of information to learn about and understand the project.
Commercial vendors and consultants are different from board vendors in that they make Linux solutions for several different board vendors or processor manufacturers. Chances are, the distribution being sold or supplied with the board was created by one of these consultants under a contract arrangement.
There's nothing wrong with deciding to turn a technical problem (some portion of getting Linux up and running for a target board) into a financial problem. Often, because open source software is available for the taking, people believe they can get it working for a project if the resources are available. Just like any other mutually beneficial exchange, buying from a vendor is the right choice if the product delivered is at the right price and clears your schedule for higher-valued activities.
Vendors in the commercial Linux space focus on creating Linux distributions from a functional level. Customers come to these vendors looking for higher-level features such as quick boot-time, realtime, or graphics, and expect the vendors to get these components up and running on one or more target boards being considered for the project.
Many companies that examine their budgets, time lines, and resources decide that even though Linux could be built in-house, it makes sense to purchase. The driving element behind many embedded vendors is how the companies view working with Linux: is the operating system part of the core product value?
For example, a company that creates point-of-sale (POS) terminals has core product features like the user interface that increase user productivity or improved ways of capturing signatures that require less storage. This is very different than a company that makes a network-attachable device that aids in system backup. The POS company may be almost indifferent to the operating system used in the product, and people buying their products may care even less. In this case, purchasing Linux is probably the right choice because it allows the company to focus on features that matter to its customers.
Contrast this with the storage device company, for example. This type of device is purchased by very technical people who need to integrate the device into an existing network structure; for them, knowing what operating system the device is running is essential. Some of the work done by engineering at the storage company may give it an edge over its competitors, and the company's management may be reluctant to help those changes make their way back to the main kernel project. In this sense, Linux is a feature of the product and part of its value proposition. This company should consider building Linux from scratch in order to have the greatest amount of control over this critical aspect of the product.
Note
Some software engineers, knowing that Linux is available in open source, bristle at the idea of purchasing it. The thinking is as follows: the source is available for everything that's being sold. With some effort, what the vendor is selling can be produced at zero cost. However, that thinking doesn't account for the cost of the engineering time required to build and create the distribution. In short, without being a shill for the embedded Linux industry, purchasing embedded Linux isn't an unqualified bad decision.
Or, consider a company that builds industrial machinery. In this company, realtime performance is a requirement that must be met. Customers who purchase the machinery may program units in the field, so having an open operating system like Linux is important. This company is another candidate where contracting with a vendor that is responsible for monitoring and understanding realtime on Linux has much to offer.
Getting a Linux environment up and running can also be a research as well as an engineering project. Some products must get to market or be delivered by a certain date, and variance isn't acceptable. In this case, going the route of getting something ready out of the box makes perfect sense, because certainty has higher value than money.
Finally, a vendor does system configuration work that can be of very high value. Some vendors specialize in certain industry hardware protocols, like CANBus, and can supply a Linux distribution that has these drivers in working order for the project.
Commercial vendors come in two basic flavors: product-oriented and service-oriented. Productoriented vendors sell a base product along with additional services. Service-oriented vendors do work on a time and materials basis; after an interview, the vendor returns to you with a price for the services that match your requirements. The product-oriented vendors also include a set of tools wrapped in an Integrated Development Environment (IDE) that work with the software provided. Service-oriented vendors don't have an IDE product or toolset; rather, they expect the customer to use open source tools for development work.
The development tools offered by product-oriented companies are all based on the (admittedly open source) Eclipse IDE project and are much more advanced than what is available for free in open source. For example, the hardware debugger integration in Wind River's toolset is an excellent piece of software engineering that makes low-level debugging much easier. However, this feature isn't valuable if your project schedule doesn't include that sort of work.
Service-oriented vendors have newer versions of the Linux kernel and root file system packages and toolchains. This is a side-effect of how they do business: for each customer, the vendor picks what's available from open source and uses it as the basis of the work the company delivers. When you're working with this type of vendor, it's essential that the changes made to the delivered software be delivered as patches so that you can make additional updates with less difficulty.
Independent of the type of vendor, the software delivered is a Board Support Package (BSP). Unfortunately, vendors have all adopted a different name for this deliverable, but it's still a kernel, root file systemm and toolchain. Along with the BSP, the sources for all of the GPL software delivered must be included. Many vendors also include detailed instructions on how to rebuild the kernel and root file system but don't provide the same level of detail for the toolchain. With a little prying, you can get this from the vendor; but for reasons unknown, some are less than forthcoming with this information.
The following, in no particular order, is a list of vendors and consultancies for embedded Linux and a summary of what the companies provide. The Linux market is both dynamic and growing, so by the time this book makes it onto the shelf, there are likely to be additions and updates.
Wind River is what's called the incumbent vendor in marketing speak. Wind River has been in the embedded business since before Linux existed and has a business built on delivering everything necessary for embedded development. In this case, "everything" means software, training, services, legal advice for open source, professional services, development tools for Linux, as well as the company's other embedded operating system, VxWorks.
Wind River's Linux business model consists of supplying a version of Linux and the root file system that have been thoroughly tested and verified for the target boards, along with packages for supporting use cases like consumer electronics and industrial control. Wind River's strong suit is its development tools: Workbench. Workbench is a soup-to-nuts development environment that has excellent debugging and system-building tools to help with development.
To provide a Linux distribution that's been tested and validated, the distributions from Wind River usually run a year or so behind the head of line development of the kernel or patches. But not all projects need the latest Linux.
Wind River's product offerings are the most expensive of the lot. For budget-constrained companies, the pricing may take this company out of the running, the value of the services notwithstanding.
Because Linux competes with Wind River's closed source VxWorks operating system, the company has had a mixed view of Linux and open source, to the point of running a "seven levels of open source hell" campaign complete with gargoyles. Over the years, Wind River has warmed to Linux, but it's still viewed as a secondary offering to VxWorks.
MontaVista's Linux operating system started as Hard Hat Linux that offered realtime performance. The company has branched out into serving the general embedded Linux market and has extended its product offerings through the addition of an IDE and other tools.
MontaVista's value proposition is around delivering a well-tested Linux distribution paired with support and tools. MontaVista has two targeted distributions: one for carrier grade for telecommunications applications, and the other Mobilinux for handsets. The company also markets a general-purpose Linux distribution, Professional Edition.
Unlike Wind River, MontaVista's focus is entirely on embedded Linux, and the company has embraced open source from its inception. The company regularly contributes to the Linux kernel (and, using number of changes contributed as a metric, is one of the top contributors to the Linux kernel project) and other open source initiatives, such as power management and special-purpose file systems. Although the software offered by MontaVista may lag behind that of the general Linux community by a year to 18 months so it can be tested and validated, the company has proven that it's always working on the next version of Linux for its customers.
A transaction with the company involves purchasing a subscription that gives you the right to a certain number of software updates, the use of tools, and support during the length of the engagement. During the sales process, it's typical for MontaVista to sell services and training as well.
Embedded Alley is a Linux consultancy house that supplies customers with a mix of off-the-shelf software and services. The typical engagement with Embedded Alley begins with an interview during which the company finds out what you need; it then produces the software that matches your requirements along with support and training services.
Embedded Alley doesn't offer IDE tools like MontaVista or Wind River. Instead, the company expects that customers will use open source tools for their development process.
DENX is a Linux consultancy based in Germany that does business worldwide and focuses on PowerPC architecture. The company's deep knowledge in kernel engineering for emerging hardware means that people seek out DENX for hardware-related development.
The company got its start by doing boot loader work, creating a widely used boot loader for embedded systems called U-Boot. Getting a boot loader up and running on a system is a tricky bit of engineering that's essential to making the board able to run an operating system. In addition to creating the boot loader, DENX also does the early boot-time work necessary to get Linux running after the boot loader hands execution off to the kernel.
This deep knowledge of the Linux kernel means that DENX distributions frequently support new hardware sooner that what's available in the general Linux kernel. DENX isn't withholding code from the open source community; rather, it takes time for a patch to wend its way through the process for inclusion in the main Linux kernel.
Unlike many companies, DENX makes available its commercial product through the Embedded Linux Development Kit (ELDK). The ELDK is a remarkably complete embedded Linux distribution that includes a root file system, kernel, and tool chain. Because DENX is focused on PowerPC, the company's web site lists only PowerPC processors as supported; however, there are builds that aren't officially supported by DENX for other architectures.
Free Electrons started as a Linux training house by providing some of the best training materials freely available for embedded Linux engineers. The company has since branched out into providing embedded Linux consulting and training, along the lines of Embedded Alley. With its training heritage, Free Electrons focuses on helping its customers be good embedded Linux engineers, providing additional services where necessary.
Free Electrons is very aggressive about making material and development work available to the open source community. Most of the training materials offered by the company are available for download free of charge. The materials include slides with comments and lab practice sessions. This wealth of information is offered without registration, which is refreshing and relieves you from using a throwaway e-mail address and fake phone number.
Another interesting service that Free Electrons offers is taking the changes that your company may have made to Linux and supporting projects and getting them in shape for submission into the main development projects. Getting changes into the mainline of projects means that code will be supported with future releases of the software, so you won't have to figure out how to get patches to apply when the base software has updated. This reduces the time and efforts involved in keeping patches synchronized with the larger open source community.
Code Sourcery's genesis was writing the low-level code to get toolchains running for new hardware architectures. Hardware vendors contracted with this company to create or patch GCC and GDB so that it would work with the new features offered by these processors. Several other commercial embedded Linux vendors use Code Sourcery toolchains in their product offerings; most don't reveal this information, and Code Sourcery is tightlipped about its customer list.
Branching out from toolchains, this company offers an IDE based on Eclipse that works with its toolchains and debuggers. But Code Sourcery remains focused on toolchains and doesn't offer the complete line of services and products that other companies do. If all you require of a vendor is a toolchain, then this company has the right product.
This chapter talked about ways to obtain Linux through projects that build Linux through a series of scripts that as a user you influence through configuration files and picking options from menus. This is a fine way to get a Linux system up and running. You may find that what Buildroot produces is perfect, with no further changes or adjustments necessary. However, not all users fall into that category; you may need to make so many changes to the prepackaged scripts that they're more of a hindrance than a help.
In that case, Chapter 6 covers building Linux from scratch, starting with source files and working your way to a complete Linux distribution. This process is the best way to have the most control over the project and fully understand how all the different parts of the project work together. The process starts with a toolchain and then progresses to build the kernel and root file system. Not only do you learn about how to get an embedded system running, but the chapter also demystifies how your desktop system works.
[12] More on this later in the book. Linux-tiny is a set of patches for reducing the size and memory footprint of the kernel.
[13] This sets the minimum physical memory address the kernel will accept when mapping memory. It's more a security setting than anything else, because a program that can map into such an address could gain access to kernel data or control structures.