
Now that your app can display event data without a page refresh, you can see the added convenience provided by AJAX in web applications. Historically, one of the biggest pitfalls of using web apps has been the fact that each action, no matter how small, usually required waiting for the page to refresh while the setting was saved. Web apps were convenient when a user needed access to his information on a shared computer, but the slow workflow was usually enough to make users lean toward desktop applications whenever possible.
However, with mainstream acceptance and use of AJAX, users can now make changes rapidly without constantly waiting for a page to reload. This makes web apps feel more like desktop apps, which also makes them much more appealing to users.
In this chapter, you'll learn to add scripts that make the editing controls for administrators function smoothly without requiring a page refresh for each action. The only action that will require a page refresh is the login, since that requires changes to the session.
Note
Before starting the exercises in this chapter, please log in to the calendar application. The default login relies on a username of testuser and a password of admin.
To start, you'll modify the script to let administrators add new events without a page refresh. Open init.js and select the button to add new events by its class (admin). Add a click event handler that prevents the default action and (for now) logs a message to confirm it fired properly:
jQuery(function($){

var processFile = "assets/inc/ajax.inc.php",
    fx = {
        "initModal" : function() {...},
        "boxin" : function(data, modal) {...},
        "boxout" : function(event) {...}
    }

$("li>a").live("click", function(event){...});
// Displays the edit form as a modal window$(".admin").live("click", function(event){// Prevents the form from submittingevent.preventDefault();// Logs a message to prove the handler was triggeredconsole.log( "Add a New Event button clicked!" );});});
Note
For the sake of brevity, all unchanged functions have been abbreviated, and comments have been omitted from code samples in this chapter. You can find the code at the book's Apress page: http://apress.com/book/view/1430228474.
Save this code and refresh http://localhost/. Click the Add a New Event button, and you'll see the following result logged to the console:
Add a New Event button clicked!
Next, create a variable to store an action that will be sent to the processing file. You're loading the editing and creation form, so set the action to event_edit.
Now you can call the $.ajax() function. This function will be similar to the script for loading event data into the modal window; in fact, the only difference will be in the data submitted and the way the return value is handled.
On a successful load, you hide the form and store a reference to it in the variable form. Next, you check for a modal window using fx.initModal() and fade it in using fx.boxin() with a null first argument. Finally, you append the form to the modal window, fade it in, and assign to it the class edit-form for easy selection later.
Add the following bold code to init.js to carry out these steps:
jQuery(function($){

var processFile = "assets/inc/ajax.inc.php",
    fx = {
        "initModal" : function() {...},
        "boxin" : function(data, modal) {...},
        "boxout" : function(event) {...}
    }
$("li>a").live("click", function(event){...});
// Displays the edit form as a modal window
$(".admin").live("click", function(event){
// Prevents the form from submitting
event.preventDefault();
// Loads the action for the processing file
var action = "edit_event";
// Loads the editing form and displays it
$.ajax({
type: "POST",
url: processFile,
data: "action="+action,
success: function(data){
// Hides the form
var form = $(data).hide(),
// Make sure the modal window exists
modal = fx.initModal();
// Call the boxin function to create
// the modal overlay and fade it in
fx.boxin(null, modal);
// Load the form into the window,
// fades in the content, and adds
// a class to the form
form
.appendTo(modal)
.addClass("edit-form")
.fadeIn("slow");
},
error: function(msg){
alert(msg);
}
});
});
});Before the preceding AJAX call will work, you need to modify the ajax.inc.php lookup array. Add a new array element that tells the script to create a new Calendar object, and then call the displayForm() method with the code shown in bold:
<?php

/*
 * Enable sessions
 */
session_start();

/*
 * Include necessary files
 */
include_once '../../../sys/config/db-cred.inc.php';

/*
 * Define constants for config info
 */
foreach ( $C as $name => $val )
{
    define($name, $val);
}

/*
 * Create a lookup array for form actions
 */
$actions = array(
        'event_view' => array(
                'object' => 'Calendar',
                'method' => 'displayEvent'
            ),
        'edit_event' => array(
                'object' => 'Calendar',
                'method' => 'displayForm'
            )
    );

/*
 * Make sure the anti-CSRF token was passed and that the
 * requested action exists in the lookup array
 */
if ( isset($actions[$_POST['action']]) )
{
    $use_array = $actions[$_POST['action']];
    $obj = new $use_array['object']($dbo);

    /*
     * Check for an ID and sanitize it if found
     */
    if ( isset($_POST['event_id']) )
    {
        $id = (int) $_POST['event_id'];
    }
else { $id = NULL; }
echo $obj->$use_array['method']($id);
}
function __autoload($class_name)
{
$filename = '../../../sys/class/class.'
. strtolower($class_name) . '.inc.php';
if ( file_exists($filename) )
{
include_once $filename;
}
}
?>Now save the file, load http://localhost/, and click the Add a New Event button. A new modal window will fade in with the edit form inside (see Figure 8-1).
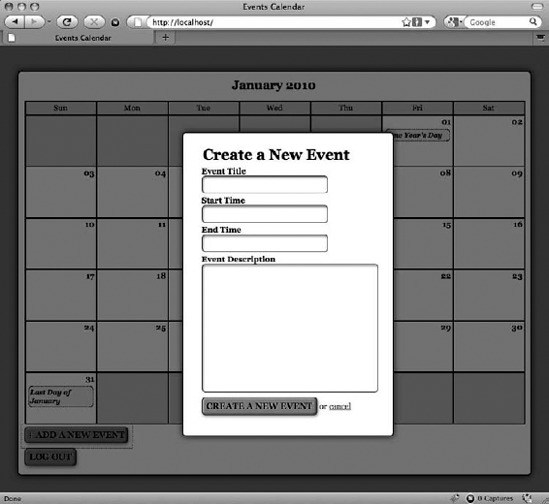
You may have noticed that the modal window doesn't contain a Close button when the form is displayed. However, the modal window does include a Cancel button that will refresh the page when clicked. Instead of adding more buttons to the window, you're simply going to make the Cancel button call the fx.boxout() method to close the window.
To accomplish this, use .live() to bind a click event handler to any link containing the word cancel inside a form with the edit-form class:
jQuery(function($){
var processFile = "assets/inc/ajax.inc.php",
fx = {
"initModal" : function() {...},"boxin" : function(data, modal) {...},
"boxout" : function(event) {...}
}
$("li>a").live("click", function(event){...});
$(".admin").live("click", function(event){...});
// Make the cancel button on editing forms behave like the
// close button and fade out modal windows and overlays
$(".edit-form a:contains(cancel)").live("click", function(event){
fx.boxout(event);
});
});Save the file, reload http://localhost/, and click the Add a New Event button. After the modal window has loaded, click the Cancel link in the form. The modal window and overlay will fade out, just as they do when the Close button is clicked.
To make the form work properly, you must now add a click event handler to the Submit button on the form. This handler will prevent the default form submission, then use .serialize() to create a query string from the form inputs. It then uses the serialized data to submit the form via POST to ajax.inc.php.
Start by adding a new click handler to any inputs of type submit that exist in a form with the edit-form class. Using .live() ensures that dynamically created inputs will still be targeted by the handler. You can prevent the default action using event.preventDefault().
Do this by inserting the bold code into init.js:
jQuery(function($){
var processFile = "assets/inc/ajax.inc.php",
fx = {
"initModal" : function() {...},
"boxin" : function(data, modal) {...},
"boxout" : function(event) {...}
}
$("li>a").live("click", function(event){...});
$(".admin").live("click", function(event){...});
// Edits events without reloading
$(".edit-form input[type=submit]").live("click", function(event){
// Prevents the default form action from executing
event.preventDefault();
// Logs a message to indicate the script is workingconsole.log( "Form submission triggered!" );});$(".edit-form a:contains(cancel)") .live("click", function(event){...}); });
Next, save and reload the calendar in your browser. Click the Add a New Event button to bring up the modal window, and then click the Create a New Event button to submit the form. This outputs the following result to the console:
Form submission triggered!
To send the event data to the processing file, you need to convert the data to a query string. Fortunately, jQuery has a built-in method to do this called .serialize(). It will convert form inputs into a string of name-value pairs, separated by an ampersand (&).
Modify init.js to serialize the form data by selecting the parent form of the clicked input, and then serialize its data. Next, log the output to the console for now:
// Edits events without reloading
$(".edit-form input[type=submit]").live("click", function(event){
// Prevents the default form action from executing
event.preventDefault();
// Serializes the form data for use with $.ajax()
var formData = $(this).parents("form").serialize();
// Logs a message to indicate the script is working
console.log( formData );
});Save the preceding code and bring up the event creation form in your browser. Now enter the following test data:
Event Title: Test Event
Event Start: 2010-01-04 08:00:00
Event End: 2010-01-04 10:00:00
Event Description: This is a test description.
Click the Create a New Event button to submit the form and output the following to your console (the token value will vary):
event_title=Test+Event&event_start=2010-01-04+08%3A00%3A00&event_end=2010-01-04+10%3A00%3A00&event_description=This+is+a+test+description.&event_id=&token=a52412c2e7bfb9938440dc9d4e0867370e350134&action=event_edit
Now that the form data is serialized, you're ready use $.ajax() to send the data to the processing file.
Use the POST method to submit the serialized data to ajax.inc.php, and then fade out the modal window and overlay using fx.boxout() on a successful submission. Also, log a confirmation message in the Firebug console and append the following bold code to init.js:
// Edits events without reloading
$(".edit-form input[type=submit]").live("click", function(event){
// Prevents the default form action from executing
event.preventDefault();
// Serializes the form data for use with $.ajax()
var formData = $(this).parents("form").serialize();
// Sends the data to the processing file
$.ajax({
type: "POST",
url: processFile,
data: formData,
success: function(data) {
// Fades out the modal window
fx.boxout();
// Logs a message to the console
console.log( "Event saved!" );
},
error: function(msg) {
alert(msg);
}
});
});At this point, the script is ready to save new events. First, however, you need to modify ajax.inc.php to accept this data.
Getting ajax.inc.php ready to accept submissions from the event editing form is as easy as adding a new element to the lookup array:
<?php
/*
* Enable sessions
*/
session_start();
/*
* Include necessary files
*/
include_once '../../../sys/config/db-cred.inc.php';
/*
* Define constants for config info
*/
foreach ( $C as $name => $val )
{
define($name, $val);
}
/*
* Create a lookup array for form actions
*/
$actions = array(
'event_view' => array(
'object' => 'Calendar',
'method' => 'displayEvent'
),
'edit_event' => array(
'object' => 'Calendar',
'method' => 'displayForm'
),
'event_edit' => array(
'object' => 'Calendar',
'method' => 'processForm'
)
);
/*
* Make sure the anti-CSRF token was passed and that the
* requested action exists in the lookup array
*/
if ( isset($actions[$_POST['action']]) )
{
$use_array = $actions[$_POST['action']];
$obj = new $use_array['object']($dbo);
/*
* Check for an ID and sanitize it if found
*/
if ( isset($_POST['event_id']) ){
$id = (int) $_POST['event_id'];
}
else { $id = NULL; }

    echo $obj->$use_array['method']($id);
}

function __autoload($class_name)
{
    $filename = '../../../sys/class/class.'
        . strtolower($class_name) . '.inc.php';
    if ( file_exists($filename) )
    {
        include_once $filename;
    }
}

?>Save this file and reload http://localhost/. Next, click the Add a New Event button to bring up the form in a modal window, and then enter a new event with the following information:
Event Title: Test Event
Event Start: 2010-01-04 08:00:00
Event End: 2010-01-04 10:00:00
Event Description: This is a test description.
Now click the Create a New Event button; the modal window will fade out, and the following message will be logged into the console:
Event saved!
Note that the new event does not appear in the calendar unless the page is refreshed. This may confuse users, so in the next section you'll modify the app to add newly created events into the calendar after a successful save.
Adding the new events to the calendar is fairly involved; after the event is saved, you need to take the following steps:
Deserialize the form data.
Create date objects for both the currently displayed month and the new event.
Make sure the month and year match up for the new event.
Determine on what day of the month the event falls.
Generate a new link with the proper event data and insert it into the corresponding calendar day.
This functionality will be enclosed in a new addition to the fx object literal called addevent, which will accept the returned data from ajax.inc.php (data), as well as the serialized form data (formData).
To begin, modify the fx object literal in init.js by inserting the following bold code:
jQuery(function($){

var processFile = "assets/inc/ajax.inc.php",
    fx = {
        "initModal" : function() {...},
"boxin" : function(data, modal) {...},
"boxout" : function(event) {...},
// Adds a new event to the markup after saving
"addevent" : function(data, formData){
// Code to add the event goes here
}
};
$("li>a").live("click", function(event){...});
$(".admin").live("click", function(event){...});
$(".edit-form input[type=submit]")
.live("click", function(event){...});
$(".edit-form a:contains(cancel)")
.live("click", function(event){...});
});The first step when adding a new event is to deserialize the form data. Because this action can stand alone, you'll handle this step by creating an additional function in the fx object literal called deserialize that accepts a string (str):
fx = {
    "initModal" : function() {...},
    "boxin" : function(data, modal) {...},
    "boxout" : function(event) {...},

    // Adds a new event to the markup after saving
    "addevent" : function(data, formData){
// Code to add the event goes here},// Deserializes the query string and returns// an event object"deserialize" : function(str){// Deserialize data here}};
As you learned earlier in this book, a serialized string is a series of name-value pairs connected by an equals sign (=) and separated by ampersands (&). An example of two serialized name-value pairs might look like this:
name1=value1&name2=value2
To deserialize these values, start by splitting the string at each ampersand using the native JavaScript function, .split(). This function breaks the string into an array of name-value pairs:
Array
(
    0 => "name1=value1",
    1 => "name2=value2"
)
Next, you need to loop through the array of name-value pairs. Inside this loop, split the pairs at the equals sign and store the array in a variable called pairs. This means each name-value pair is split into an array, with the first index containing the name and the second index containing the value. The array follows this format:
Array
(
    0 => "name1",
    1 => "value1"
)
Store these values in variables called key and val, respectively, and then store them in a new object called entry as properties.
When the loop is completed, return the deserialized data object.
Next, add the following bold code inside fx.deserialize:
fx = {
    "initModal" : function() {...},
    "boxin" : function(data, modal) {...},
    "boxout" : function(event) {...},

    // Adds a new event to the markup after saving
    "addevent" : function(data, formData){
            // Code to add the event goes here
        },

    // Deserializes the query string and returns
// an event object
"deserialize" : function(str){
// Breaks apart each name-value pair
var data = str.split("&"),
// Declares variables for use in the loop
pairs=[], entry={}, key, val;
// Loops through each name-value pair
for ( x in data )
{
// Splits each pair into an array
pairs = data[x].split("=");
// The first element is the name
key = pairs[0];
// Second element is the value
val = pairs[1];
// Stores each value as an object property
entry[key] = val;
}
return entry;
}
};Before fx.deserialize is officially ready for use, you must first modify it to decode any URL-encoded entities. When data is serialized, string values are encoded so that they can be passed in the query string. This means that the string "I'm testing & logging!" will be converted to the following when it is serialized:
I'm+testing+%26+logging!
To reverse this, replace all plus signs (+) with spaces using the regular expression /+/g; this expression matches only plus signs. The g following the expression's closing delimiter makes the regular expression search globally, so more than one match will be replaced.
Next, you need to use the native, stand-alone JavaScript function, decodeURIComponent(). You will create a new function in fx called urldecode and insert the following code:
fx = {
    "initModal" : function() {...},
    "boxin" : function(data, modal) {...},
    "boxout" : function(event) {...},

    // Adds a new event to the markup after saving
    "addevent" : function(data, formData){
// Code to add the event goes here
},
// Deserializes the query string and returns
// an event object
"deserialize" : function(str){
// Breaks apart each name-value pair
var data = str.split("&"),
// Declares variables for use in the loop
pairs=[], entry={}, key, val;
// Loops through each name-value pair
for ( x in data )
{
// Splits each pair into an array
pairs = data[x].split("=");
// The first element is the name
key = pairs[0];
// Second element is the value
val = pairs[1];
// Stores each value as an object property
entry[key] = val;
}
return entry;
},
// Decodes a query string value
"urldecode" : function(str) {
// Converts plus signs to spaces
var converted = str.replace(/+/g, ' '),
// Converts any encoded entities back
return decodeURIComponent(converted);
}
};Next, you implement fx.urldecode in fx.deserialize by adding the following code in bold:
fx = {
     "initModal" : function() {...},
     "boxin" : function(data, modal) {...},
     "boxout" : function(event) {...},

     // Adds a new event to the markup after saving
     "addevent" : function(data, formData){
             // Code to add the event goes here
         },
// Deserializes the query string and returns
// an event object
"deserialize" : function(str){
// Breaks apart each name-value pair
var data = str.split("&"),
// Declares variables for use in the loop
pairs=[], entry={}, key, val;
// Loops through each name-value pair
for ( x in data )
{
// Splits each pair into an array
pairs = data[x].split("=");
// The first element is the name
key = pairs[0];
// Second element is the value
val = pairs[1];
// Reverses the URL encoding and stores
// each value as an object property
entry[key] = fx.urldecode(val);
}
return entry;
},
"urldecode" : function(str) {...}
};With fx.deserialize and fx.urldecode in place, you can now modify fx.addevent by adding a variable (entry) to store the deserialized event data:
fx = {
    "initModal" : function() {...},
    "boxin" : function(data, modal) {...},
    "boxout" : function(event) {...},

    // Adds a new event to the markup after saving
    "addevent" : function(data, formData){
            // Converts the query string to an object
            var entry = fx.deserialize(formData);
        },
"deserialize" : function(str){...},
"urldecode" : function(str) {...}
};Because only events created for the month being displayed should be added to the calendar, you need to determine what month and year is being displayed, as well as the month and year that the event occurs.
Note
For this step you'll take advantage of JavaScript's built-in Date object, which provides methods to simplify many date-related operations. For a full explanation of all available methods associated with the Date object, visit http://w3schools.com/jsref/jsref_obj_date.asp.
To generate a Date object for the currently displayed month, you need to add an ID to the h2 element that displays the month above the calendar. To ensure cross-browser compatibility, modify the buildCalendar() method in the Calendar class with the following bold code:
public function buildCalendar()
{
/*
* Determine the calendar month and create an array of
* weekday abbreviations to label the calendar columns
*/
$cal_month = date('F Y', strtotime($this->_useDate));
$cal_id = date('Y-m', strtotime($this->_useDate));
$weekdays = array('Sun', 'Mon', 'Tue',
'Wed', 'Thu', 'Fri', 'Sat'),
/*
* Add a header to the calendar markup
*/
$html = "
<h2 id="month-$cal_id">$cal_month</h2>";
for ( $d=0, $labels=NULL; $d<7; ++$d )
{
$labels .= "
<li>" . $weekdays[$d] . "</li>";
}
$html .= "
<ul class="weekdays">"
. $labels . "
</ul>";
// For brevity, the remainder of this method has been omitted
}To ensure that the new event falls within the current month, create two empty Date objects: one for the current month and one for the new event.
To set the value of the current month's Date object, retrieve the ID attribute from the H2 element using the .attr() method, split it at the hyphens, and store it in the cdata variable.
For the new event, split the value of entry.event_start at the spaces and take the first array element (which is the date in the format of YYYY-MM-DD) and store it in a variable called date. Next, split the information at the hyphens and store the array in a variable called edata.
To set the Date objects, use the data from cdata and edata to set the date in cal and event, respectively.
Finally, modify fx.addevent with the following bold code:
fx = {
"initModal" : function() {...},
"boxin" : function(data, modal) {...},
"boxout" : function(event) {...},
// Adds a new event to the markup after saving
"addevent" : function(data, formData){
// Converts the query string to an object
var entry = fx.deserialize(formData),
// Makes a date object for current month
cal = new Date(NaN),
// Makes a date object for the new event
event = new Date(NaN),
// Extracts the calendar month from the H2 ID
cdata = $("h2").attr("id").split('-'),
// Extracts the event day, month, and year
date = entry.event_start.split(' ')[0],
// Splits the event data into pieces
edata = date.split('-'),
// Sets the date for the calendar date object
cal.setFullYear(cdata[1], cdata[2], 1);
// Sets the date for the event date object
event.setFullYear(edata[0], edata[1], edata[2]);
},"deserialize" : function(str){...},
"urldecode" : function(str) {...}
};You aren't passing a time or timezone to the Date object, so that object will default to midnight Greenwich Mean Time (00:00:00 GMT). This can cause your dates to behave unexpectedly for users in different timezones. To address this problem, you'll need to adjust the date by the timezone offset using two built-in Date object methods: .setMinutes() and .getTimezoneOffset().
The return value of .getTimezoneOffset() is the difference in the number of minutes between GMT and the user's timezone. For instance, the return value of .getTimezoneOffset() in Mountain Standard Time (−0700) is 420.
Using .setMinutes(), you can add the value of the timezone offset to the Date object, which will return the date to midnight on the given day, no matter what timezone the user is in.
You can make that adjustment using the following bold code:
fx = {
"initModal" : function() {...},
"boxin" : function(data, modal) {...},
"boxout" : function(event) {...},
// Adds a new event to the markup after saving
"addevent" : function(data, formData){
// Converts the query string to an object
var entry = fx.deserialize(formData),
// Makes a date object for current month
cal = new Date(NaN),
// Makes a date object for the new event
event = new Date(NaN),
// Extracts the event day, month, and year
date = entry.event_start.split(' ')[0],
// Splits the event data into pieces
edata = date.split('-'),
// Extracts the calendar month from the H2 ID
cdata = $("h2").attr("id").split('-'),
// Sets the date for the calendar date object
cal.setFullYear(cdata[1], cdata[2], 1);
// Sets the date for the event date object
event.setFullYear(edata[0], edata[1], edata[2]);
// Since the date object is created using// GMT, then adjusted for the local timezone,// adjust the offset to ensure a proper dateevent.setMinutes(event.getTimezoneOffset());}, "deserialize" : function(str){...}, "urldecode" : function(str) {...} };
Your next step is to set up a conditional statement that ensures that only events that belong on the calendar are appended. If both the year and month match between the current calendar month and the event date, you can extract the day of the month using the Date object's .getDay() method. To work properly with the next step, which adds leading zeroes to single-digit dates, you also need to convert this value to a string, which is accomplished by passing the value to String().
The day of the month needs to have a leading zero to properly match the calendar. For example, if the returned date is only one digit, you prepend a leading zero to the date.
Do this by inserting the following bold code:
fx = {
"initModal" : function() {...},
"boxin" : function(data, modal) {...},
"boxout" : function(event) {...},
// Adds a new event to the markup after saving
"addevent" : function(data, formData){
// Converts the query string to an object
var entry = fx.deserialize(formData),
// Makes a date object for current month
cal = new Date(NaN),
// Makes a date object for the new event
event = new Date(NaN),
// Extracts the event day, month, and year
date = entry.event_start.split(' ')[0],
// Splits the event data into pieces
edata = date.split('-'),
// Extracts the calendar month from the H2 ID
cdata = $("h2").attr("id").split('-'),
// Sets the date for the calendar date object
cal.setFullYear(cdata[1], cdata[2], 1);
// Sets the date for the event date object
event.setFullYear(edata[0], edata[1], edata[2]);// Since the date object is created using
// GMT, then adjusted for the local timezone,
// adjust the offset to ensure a proper date
event.setMinutes(event.getTimezoneOffset());
// If the year and month match, start the process
// of adding the new event to the calendar
if ( cal.getFullYear()==event.getFullYear()
&& cal.getMonth()==event.getMonth() )
{
// Gets the day of the month for event
var day = String(event.getDate());
// Adds a leading zero to 1-digit days
day = day.length==1 ? "0"+day : day;
}
},
"deserialize" : function(str){...},
    "urldecode" : function(str) {...}
};You're finally ready to append the new event to the calendar. To do so, create a new anchor element, hide it, set its href attribute, and use the title of the event as the link text.
Next, set a one-second delay using .delay(1000) and fade in the new event.
You can implement this by adding the following code shown in bold:
fx = {
        "initModal" : function() {...},
        "boxin" : function(data, modal) {...},
        "boxout" : function(event) {...},

        // Adds a new event to the markup after saving
        "addevent" : function(data, formData){
                // Converts the query string to an object
                var entry = fx.deserialize(formData),

                // Makes a date object for current month
                    cal = new Date(NaN),

                // Makes a date object for the new event
                    event = new Date(NaN),

                // Extracts the event day, month, and year
                    date = entry.event_start.split(' ')[0],

                // Splits the event data into pieces
edata = date.split('-'),
// Extracts the calendar month from the H2 ID
cdata = $("h2").attr("id").split('-'),
// Sets the date for the calendar date object
cal.setFullYear(cdata[1], cdata[2], 1);
// Sets the date for the event date object
event.setFullYear(edata[0], edata[1], edata[2]);
// Since the date object is created using
// GMT, then adjusted for the local timezone,
// adjust the offset to ensure a proper date
event.setMinutes(event.getTimezoneOffset());
// If the year and month match, start the process
// of adding the new event to the calendar
if ( cal.getFullYear()==event.getFullYear()
&& cal.getMonth()==event.getMonth() )
{
// Gets the day of the month for event
var day = String(event.getDate());
// Adds a leading zero to 1-digit days
day = day.length==1 ? "0"+day : day;
// Adds the new date link
$("<a>")
.hide()
.attr("href", "view.php?event_id="+data)
.text(entry.event_title)
.insertAfter($("strong:contains("+day+")"))
.delay(1000)
.fadeIn("slow");
}
},
"deserialize" : function(str){...},
"urldecode" : function(str) {...}
}Now, back in the click event handler for the Submit button, modify the success callback of the $.ajax() function to execute fx.addevent() by using the following bold code:
// Edits events without reloading
$(".edit-form input[type=submit]").live("click", function(event){
// Prevents the default form action from executing
event.preventDefault();
// Serializes the form data for use with $.ajax()
var formData = $(this).parents("form").serialize();
// Sends the data to the processing file
$.ajax({
type: "POST",
url: processFile,
data: formData,
success: function(data) {
// Fades out the modal window
fx.boxout();
// Adds the event to the calendar
fx.addevent(data, formData);
},
error: function(msg) {
alert(msg);
}
});
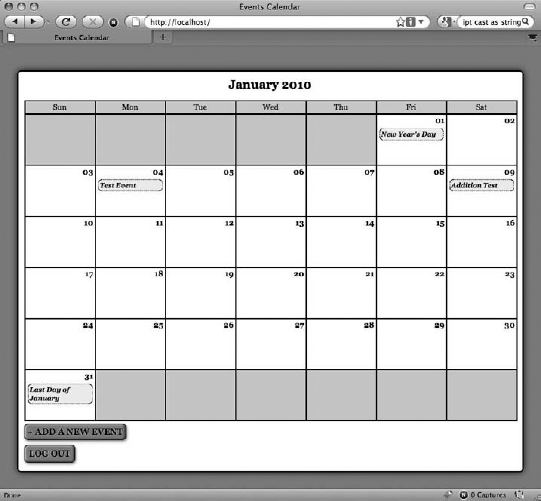
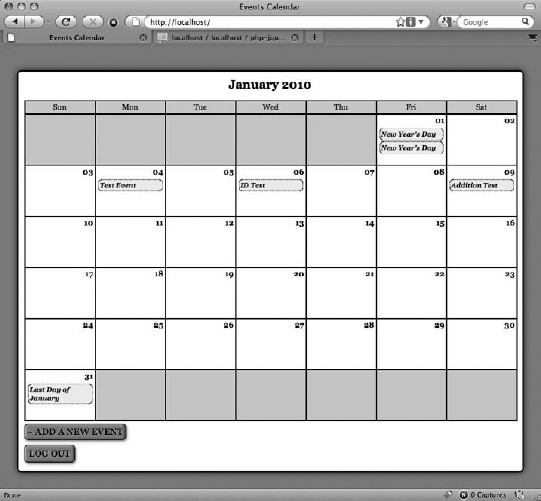
});Save this file and reload http://localhost/. Bring up the event creation form and create a new event with the following information:
Event Title: Addition Test
Event Start: 2010-01-09 12:00:00
Event End: 2010-01-09 14:00:00
Event Description: This is a test of the dynamic addition of new events to the calendar.
Submitting the form causes the modal window to fade out; a second later, the new event title will fade in on the calendar in the proper place (see Figure 8-2).
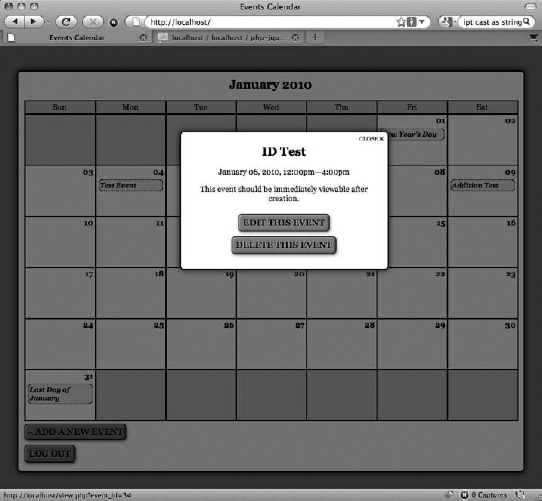
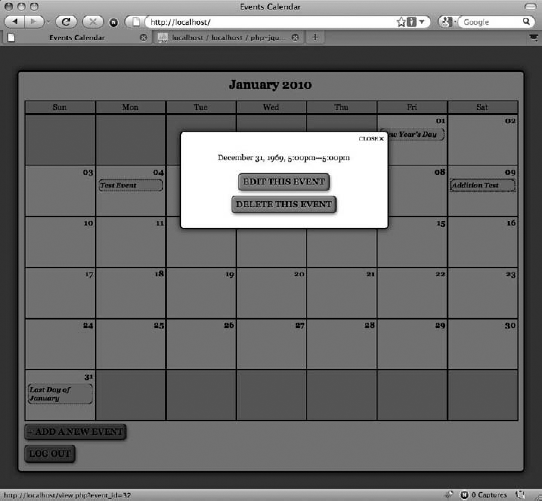
Currently, a new event is not viewable without a page refresh after it is created. Because the event ID is absent (nothing is returned from a successful event addition), clicking the generated link results in an empty modal window (see Figure 8-3).

To make the event immediately viewable, you only need to make one small adjustment in the Calendar class. Open the file (/sys/class/class.calendar.inc.php) and locate the processForm() method.
Inside this method, modify the return command to output the ID of the last inserted row using PDO's lastInsertId() method:
public function processForm()
    {
        /*
         * Exit if the action isn't set properly
         */
        if ( $_POST['action']!='event_edit' )
        {
            return "The method processForm was accessed incorrectly";
        }
/*
* Escape data from the form
*/
$title = htmlentities($_POST['event_title'], ENT_QUOTES);
$desc = htmlentities($_POST['event_description'], ENT_QUOTES);
$start = htmlentities($_POST['event_start'], ENT_QUOTES);
$end = htmlentities($_POST['event_end'], ENT_QUOTES);
/*
* If no event ID passed, create a new event
*/
if ( empty($_POST['event_id']) )
{
$sql = "INSERT INTO `events`
(`event_title`, `event_desc`, `event_start`,
`event_end`)
VALUES
(:title, :description, :start, :end)";
}
/*
* Update the event if it's being edited
*/
else
{
/*
* Cast the event ID as an integer for security
*/
$id = (int) $_POST['event_id'];
$sql = "UPDATE `events`
SET
`event_title`=:title,
`event_desc`=:description,
`event_start`=:start,
`event_end`=:end
WHERE `event_id`=$id";
}
/*
* Execute the create or edit query after binding the data
*/
try
{
$stmt = $this->db->prepare($sql);
$stmt->bindParam(":title", $title, PDO::PARAM_STR);
$stmt->bindParam(":description", $desc, PDO::PARAM_STR);
$stmt->bindParam(":start", $start, PDO::PARAM_STR);
$stmt->bindParam(":end", $end, PDO::PARAM_STR);
$stmt->execute();
$stmt->closeCursor();
/** Returns the ID of the event*/return $this->db->lastInsertId();} catch ( Exception $e ) { return $e->getMessage(); } }
After making the preceding change, save this file and reload http://localhost/ in your browser. Next, create a new event with the following information:
Event Title: ID Test
Event Start: 2010-01-06 12:00:00
Event End: 2010-01-06 16:00:00
Event Description: This event should be immediately viewable after creation.
Now save the event, and the title will appear on the calendar. Click the title, and the event will load in a modal window (see Figure 8-4).
In its current state, your app is only a short ways away from allowing users to edit events from the modal window, as well. The existing click event handler for loading the event creation form will also work for event editing with only a little modification.
To start, expand the selector to include any element with a class admin; you can accomplish this by including the following bold code:
// Displays the edit form as a modal window
$(".admin-options form,.admin").live("click", function(event){

        // Prevents the form from submitting
        event.preventDefault();

        // Loads the action for the processing file
var action = "edit_event";
// Loads the editing form and displays it
$.ajax({
type: "POST",
url: processFile,
data: "action="+action,
success: function(data){
// Hides the form
var form = $(data).hide(),
// Make sure the modal window exists
modal = fx.initModal();
// Call the boxin function to create
// the modal overlay and fade it in
fx.boxin(null, modal);
// Load the form into the window,
// fades in the content, and adds
// a class to the form
form
.appendTo(modal)
.addClass("edit-form")
.fadeIn("slow");
},
error: function(msg){
alert(msg);
}
});
});In the editing controls displayed for individual events, the button names describe the action taken by the button (e.g., edit_event for the Edit This Event button and delete_event for the Delete This Event button). These buttons will be used by ajax.inc.php as the action for the submission.
Because the event creation button doesn't have a button name, you need to keep a default value (edit_event).
To access the name of the clicked button, you'll use a property of the event object called target. This property contains a reference to the element that triggered the event. Use jQuery to select the event target and use .attr() to retrieve its name.
Now modify the event handler using the following bold code:
// Displays the edit form as a modal window
$(".admin-options form,.admin").live("click", function(event){

        // Prevents the form from submitting
        event.preventDefault();
// Sets the action for the form submissionvar action = $(event.target).attr("name") || "edit_event";// Loads the editing form and displays it $.ajax({ type: "POST", url: processFile, data: "action="+action, success: function(data){ // Hides the form var form = $(data).hide(), // Make sure the modal window exists modal = fx.initModal(); // Call the boxin function to create // the modal overlay and fade it in fx.boxin(null, modal); // Load the form into the window, // fades in the content, and adds // a class to the form form .appendTo(modal) .addClass("edit-form") .fadeIn("slow"); }, error: function(msg){ alert(msg); } }); });
Next, the event ID needs to be extracted, assuming it's available. To find this value, use the event.target property again, but this time look for the sibling element with the name, event_id, and then store the value of this in a variable called id.
You add this to the event handler using the following bold code:
// Displays the edit form as a modal window
$(".admin-options form,.admin").live("click", function(event){

        // Prevents the form from submitting
        event.preventDefault();

        // Sets the action for the form submission
        var action = $(event.target).attr("name") || "edit_event",

        // Saves the value of the event_id input
id = $(event.target).siblings("input[name=event_id]").val();// Loads the editing form and displays it $.ajax({ type: "POST", url: processFile, data: "action="+action, success: function(data){ // Hides the form var form = $(data).hide(), // Make sure the modal window exists modal = fx.initModal(); // Call the boxin function to create // the modal overlay and fade it in fx.boxin(null, modal); // Load the form into the window, // fades in the content, and adds // a class to the form form .appendTo(modal) .addClass("edit-form") .fadeIn("slow"); }, error: function(msg){ alert(msg); } }); });
With the ID stored in the id variable, you can now append the value to the query string for submission to ajax.inc.php.
Check whether id is undefined first, and then create an event_id name-value pair. Next, attach the data to the query string using the following bold code:
// Displays the edit form as a modal window
$(".admin-options form,.admin").live("click", function(event){

        // Prevents the form from submitting
        event.preventDefault();

        // Sets the action for the form submission
        var action = $(event.target).attr("name") || "edit_event",
// Saves the value of the event_id input
id = $(event.target)
.siblings("input[name=event_id]")
.val();
// Creates an additional param for the ID if set
id = ( id!=undefined ) ? "&event_id="+id : "";
// Loads the editing form and displays it
$.ajax({
type: "POST",
url: processFile,
data: "action="+action+id,
success: function(data){
// Hides the form
var form = $(data).hide(),
// Make sure the modal window exists
modal = fx.initModal();
// Call the boxin function to create
// the modal overlay and fade it in
fx.boxin(null, modal);
// Load the form into the window,
// fades in the content, and adds
// a class to the form
form
.appendTo(modal)
.addClass("edit-form")
.fadeIn("slow");
},
error: function(msg){
alert(msg);
}
});
});To replace the content of the modal window with the editing form, you must first remove the event display information.
Where you've called fx.initModal() in the success handler, select all children that are not the Close button and remove them. After removing them, call .end() to revert back to the original selection of the modal window. (After calling children, the jQuery object only references the child elements you just removed.)
You can accomplish this by adding the following bold code:
// Displays the edit form as a modal window
$(".admin-options form,.admin").live("click", function(event){
// Prevents the form from submitting
event.preventDefault();
// Sets the action for the form submission
var action = $(event.target).attr("name") || "edit_event",
// Saves the value of the event_id input
id = $(event.target)
.siblings("input[name=event_id]")
.val();
// Creates an additional param for the ID if set
id = ( id!=undefined ) ? "&event_id="+id : "";
// Loads the editing form and displays it
$.ajax({
type: "POST",
url: processFile,
data: "action="+action+id,
success: function(data){
// Hides the form
var form = $(data).hide(),
// Make sure the modal window exists
modal = fx.initModal()
.children(":not(.modal-close-btn)")
.remove()
.end();
// Call the boxin function to create
// the modal overlay and fade it in
fx.boxin(null, modal);
// Load the form into the window,
// fades in the content, and adds
// a class to the form
form
.appendTo(modal)
.addClass("edit-form")
.fadeIn("slow");
},
error: function(msg){
alert(msg);
}
});
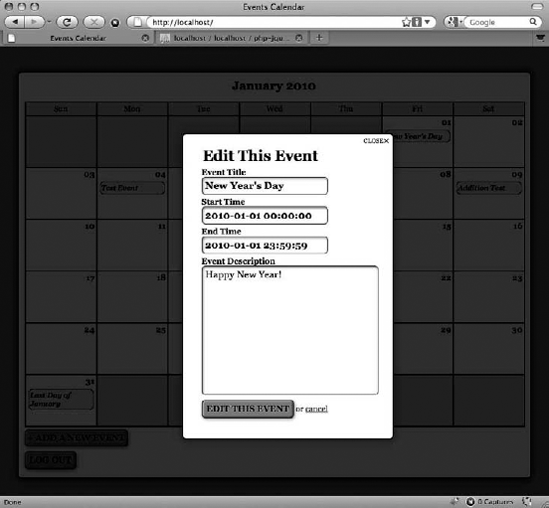
});After saving this file and reloading http://localhost/ in your browser, click the New Year's Day event title to bring up the event description. Inside the modal window, click the Edit This Event button; this causes the event description to disappear, and the editing form will fade in with the data for the entry loaded into the form for editing (see Figure 8-5).
If you make an edit to the New Year's Day event and save it, an extra event title will be appended to the calendar (see Figure 8-6).
To avoid this, you need to add an additional tweak to the form submission click handler. Because events being edited will have their ID loaded in the editing form's hidden input named event_id, you can check for a length in the input's value. If the length is not zero, don't call fx.addevent().
Insert the following bold code to make this check:
// Edits events without reloading
$(".edit-form input[type=submit]").live("click", function(event){

        // Prevents the default form action from executing
        event.preventDefault();

        // Serializes the form data for use with $.ajax()
        var formData = $(this).parents("form").serialize();

        // Sends the data to the processing file
        $.ajax({
                type: "POST",
url: processFile,
data: formData,
success: function(data) {
// Fades out the modal window
fx.boxout();
// If this is a new event, adds it to
// the calendar
if ( $("[name=event_id]").val().length==0 )
{
fx.addevent(data, formData);
}
},
error: function(msg) {
alert(msg);
}
});
});With this change in place, your users can now edit events without seeing potentially confusing duplicate titles.
To round out your application, you're also going to allow users to delete entries without a page refresh. A good portion of the script you need to do this is already in place, so adding this functionality will mostly require tweaks to your existing code.
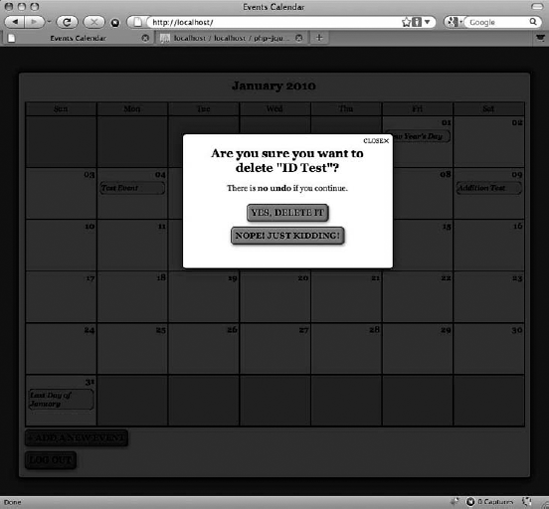
To display the confirmation dialog for event deletion when the Delete This Event button is clicked, you need to add an additional element to the lookup array in ajax.inc.php:
<?php

/*
 * Enable sessions
 */
session_start();

/*
 * Include necessary files
 */
include_once '../../../sys/config/db-cred.inc.php';

/*
 * Define constants for config info
 */
foreach ( $C as $name => $val )
{
    define($name, $val);
}

/*
 * Create a lookup array for form actions
 */
$actions = array(
        'event_view' => array(
                'object' => 'Calendar',
                'method' => 'displayEvent'
            ),
        'edit_event' => array(
                'object' => 'Calendar',
                'method' => 'displayForm'
            ),
        'event_edit' => array(
                'object' => 'Calendar',
                'method' => 'processForm'
            ),
        'delete_event' => array(
                'object' => 'Calendar',
                'method' => 'confirmDelete'
            )
    );

/*
 * Make sure the anti-CSRF token was passed and that the
 * requested action exists in the lookup array
 */
if ( isset($actions[$_POST['action']]) )
{
    $use_array = $actions[$_POST['action']];
    $obj = new $use_array['object']($dbo);

    /*
     * Check for an ID and sanitize it if found
     */
    if ( isset($_POST['event_id']) )
    {
        $id = (int) $_POST['event_id'];
    }
    else { $id = NULL; }

    echo $obj->$use_array['method']($id);
}

function __autoload($class_name)
{
    $filename = '../../../sys/class/class.'
. strtolower($class_name) . '.inc.php';
if ( file_exists($filename) )
{
include_once $filename;
}
}
?>Clicking the Delete This Event button from a modal window at this point now causes the confirmation dialog to appear (see Figure 8-7).
Confirming event deletion requires a little more modification to init.js. To execute properly, the value of the Submit button needs to be stored and passed to the processing file. This is because the form can be submitted with either Yes, Delete It or Nope! Just Kidding! as values; the script checks which button was clicked to determine what action to take.
To store the button's value, use the this keyword as the jQuery selector, and then store the returned string from .val() as a variable called submitVal. Next, check whether the button's name attribute is confirm_delete. If so, append the action confirm_delete and the value of the button to the query string before submitting it.
Insert the following code shown in bold to accomplish this:
// Edits events without reloading
$(".edit-form input[type=submit]").live("click", function(event){

        // Prevents the default form action from executing
        event.preventDefault();

        // Serializes the form data for use with $.ajax()
        var formData = $(this).parents("form").serialize(),

        // Stores the value of the submit button
            submitVal = $(this).val();

        // If this is the deletion form, appends an action
        if ( $(this).attr("name")=="confirm_delete" )
        {
            // Adds necessary info to the query string
            formData += "&action=confirm_delete"
                + "&confirm_delete="+submitVal;
        }

        // Sends the data to the processing file
        $.ajax({
                type: "POST",
                url: processFile,
                data: formData,
                success: function(data) {
                    // Fades out the modal window
                    fx.boxout();

                    // If this is a new event, adds it to
                    // the calendar
                    if ( $("[name=event_id]").val().length==0 )
                    {
                        fx.addevent(data, formData);
                    }
                },
                error: function(msg) {
                    alert(msg);
                }
});
});Finally, you need to add an additional element to the lookup array in ajax.inc.php to make the Delete button work:
<?php

/*
 * Enable sessions
 */
session_start();

/*
 * Include necessary files
 */
include_once '../../../sys/config/db-cred.inc.php';

/*
 * Define constants for config info
 */
foreach ( $C as $name => $val )
{
    define($name, $val);
}

/*
 * Create a lookup array for form actions
 */
$actions = array(
        'event_view' => array(
                'object' => 'Calendar',
                'method' => 'displayEvent'
            ),
        'edit_event' => array(
                'object' => 'Calendar',
                'method' => 'displayForm'
            ),
        'event_edit' => array(
                'object' => 'Calendar',
                'method' => 'processForm'
            ),
        'delete_event' => array(
                'object' => 'Calendar',
                'method' => 'confirmDelete'
            ),
        'confirm_delete' => array(
'object' => 'Calendar','method' => 'confirmDelete')); /* * Make sure the anti-CSRF token was passed and that the * requested action exists in the lookup array */ if ( isset($actions[$_POST['action']]) ) { $use_array = $actions[$_POST['action']]; $obj = new $use_array['object']($dbo); /* * Check for an ID and sanitize it if found */ if ( isset($_POST['event_id']) ) { $id = (int) $_POST['event_id']; } else { $id = NULL; } echo $obj->$use_array['method']($id); } function __autoload($class_name) { $filename = '../../../sys/class/class.' . strtolower($class_name) . '.inc.php'; if ( file_exists($filename) ) { include_once $filename; } } ?>
You can test the preceding code by deleting the ID Test event from the calendar. After the modal window fades out, the event title is still present and clickable; however, if you try to view the event's details, its information is unavailable, and it doesn't make sense (see Figure 8-8).
You want to avoid the confusion caused by having non-existent events on the calendar after a user deletes them, so you need to add functionality to remove events from the calendar once this occurs.
To do this, you'll add a new function to the fx object literal called removeevent. This function will use the active class applied to events when they're brought up in the modal window to fade them out and remove them from the DOM. You can add this function to fx using the following bold code:
fx = {
        "initModal" : function() {...},
        "boxin" : function(data, modal) {...},
        "boxout" : function(event) {...},
        "addevent" : function(data, formData){...},

        // Removes an event from the markup after deletion
"removeevent" : function(){// Removes any event with the class "active"$(".active").fadeOut("slow", function(){$(this).remove();});},"deserialize" : function(str){...}, "urldecode" : function(str) {...} };
To remove events after they are deleted, add a new variable called remove to the form submission event handler. This will store a boolean value that tells the script whether to remove an event. By default, this value will be set to false, which means the event should not be removed.
The only condition under which an event should be removed is if the Yes, Delete It button is clicked from the confirmation dialog. Add a check for this text in the Submit button and set remove to true if a match is made.
Inside the success handler, set up a conditional that checks whether remove is true and fires fx.removeevent() if it is.
Finally, to prevent empty elements from being added to the calendar, modify the conditional that fires fx.addevent() to ensure that remove is false before executing.
You can make these changes by adding the code shown in bold:
// Edits events without reloading
$(".edit-form input[type=submit]").live("click", function(event){

        // Prevents the default form action from executing
        event.preventDefault();

        // Serializes the form data for use with $.ajax()
        var formData = $(this).parents("form").serialize(),

        // Stores the value of the submit button
            submitVal = $(this).val(),

        // Determines if the event should be removed
            remove = false;

        // If this is the deletion form, appends an action
        if ( $(this).attr("name")=="confirm_delete" )
        {
            // Adds necessary info to the query string
            formData += "&action=confirm_delete"
                + "&confirm_delete="+submitVal;

            // If the event is really being deleted, sets
// a flag to remove it from the markupif ( submitVal=="Yes, Delete It" ){remove = true;}} // Sends the data to the processing file $.ajax({ type: "POST", url: processFile, data: formData, success: function(data) {// If this is a deleted event, removes// it from the markupif ( remove===true ){fx.removeevent();}// Fades out the modal window fx.boxout(); // If this is a new event, adds it to // the calendarif ( $("[name=event_id]").val().length==0&& remove===false ){ fx.addevent(data, formData); } }, error: function(msg) { alert(msg); } }); });
Save these changes, then reload http://localhost/ and pull up the Test Event description. Delete the event; after you click the Yes, Delete It button, the modal box and event title will fade out, effectively eliminating the event from the calendar and eliminating any potential confusion for your users (see Figure 8-9).

In this chapter, you implemented controls that allow your users to quickly create, edit, and delete events without being required to refresh the page. This makes the application feel much more streamlined and user-friendly.
In the next chapter, you'll learn how to use regular expressions to ensure that the data entered in the editing forms is valid, ensuring that your app won't allow data that could potentially break it to be entered into the database.