12 Things You Need to Know Now to Make Your Retouching Easier
I know you want to get to retouching, but I promise you—if you take just a few minutes to read these 12 things, you’ll better understand what you’ll be doing, why you’re doing it, and you’ll get better results faster from your retouching. Really. I promise.
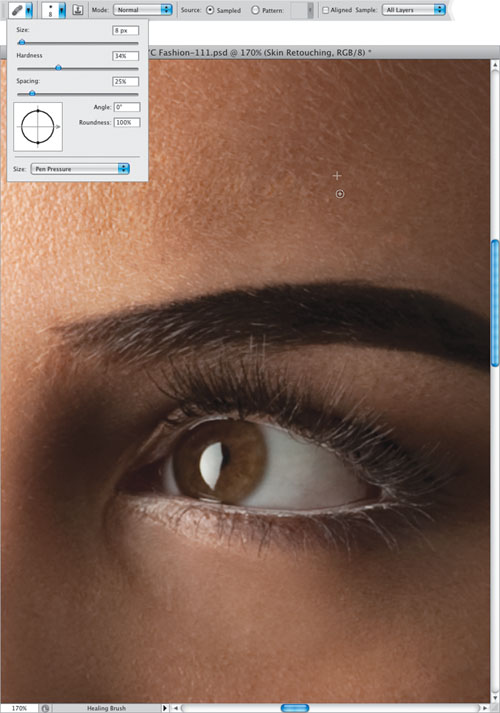
#1 Think Small
If I could only give you one piece of advice, one secret about successful retouching, it would be to work with a small brush as much as possible. Of course, as photographers, most of us just want to get the job done as quickly as possible, so we use a large brush, which does get things done faster, but often picks up a repeating pattern (repeats a speck, or hair, or blemish from the area where you sampled), or it smudges an area when you’ve brushed over it a few times, and generally it’s one of the big causes for a retouch looking shabby. Stick with small- or medium-sized brushes as much as possible, and I promise you, your retouching will look more professional. Also, to get more control, work at low Opacity settings with your brushes (between 10% and 30%), and gradually build up your strokes, one on top of another. You can’t do this every time you use a brush, but when you can, it makes a big difference.
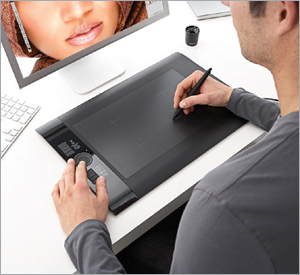
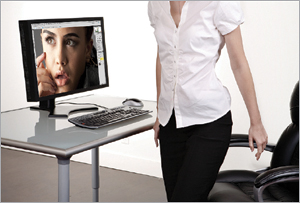
#2 Use a Pen and Tablet
If you decided to become a professional house painter, one of the first things you’d buy is a roller brush, because it makes your work easier, and you’d get more done in less time. Then, you’d probably buy a small edge brush to get the corner details. These are the tools of the trade, and about any pro you meet would have these. Well, it’s kind of the same with retouching. I don’t know a single professional retoucher that doesn’t use a Wacom pen and tablet. It’s the retoucher’s tool-of-the-trade, because it makes your retouching tasks so much easier, and you’ll get more work done in less time. Plus, it will let you do the detail work (like an edge brush for painters) that makes all the difference in the final image. I don’t get a kickback or payout whether you buy a tablet or not, but this is the tool we all use (I use the Intuos4 medium-sized tablet myself). That being said, you do not need a tablet to do any of the techniques in this book—you can tough it out with a mouse. ;-)
COURTESY OF WACOM; IMAGE WITHIN MONITOR © SCOTT KELBY
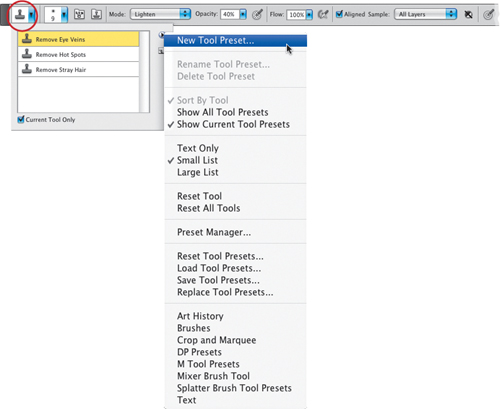
#3 Save Time with Tool Presets
You’ll wind up using the same tools, with the same custom settings, pretty often, and you can save yourself a lot of time by using tool presets, which remember all those settings. For example, let’s say you use the Clone Stamp tool for removing stubble, and you have the tool’s Mode set to Lighten, the Sample pop-up menu set to All Layers, the Opacity at 40%, and you use a medium-sized, soft-edged brush. Once all that’s in place, click on the Clone Stamp tool icon up at the left end of the Options Bar (shown circled here in red), and then in the Tool Preset Picker, click on the right-facing arrow in the top-right corner and, from that menu, choose New Tool Preset. Give your tool preset a descriptive name (like the ones I’ve already added to the Picker here) and click OK. Now, anytime you need to remove stubble, you don’t have to enter (or remember) all those settings, just click on that icon, then click on your tool preset, and it’s all set up and ready to go.
#4 Walk Away After a While
If you’ve been retouching for a while, you start seeing everything as a problem to be retouched, and after about an hour, most folks start to over-retouch and not realize it. That’s why, after an hour of retouching, you need to take a break, do something else for five or ten minutes, and then return to retouching with a fresh view. I know this one might sound silly as you’re reading this right up front, but an hour from now, it will make total sense. This is a more important point than it sounds right now.
©ISTOCKPHOTO/CONSTINT; IMAGE WITHIN MONITOR ©SCOTT KELBY
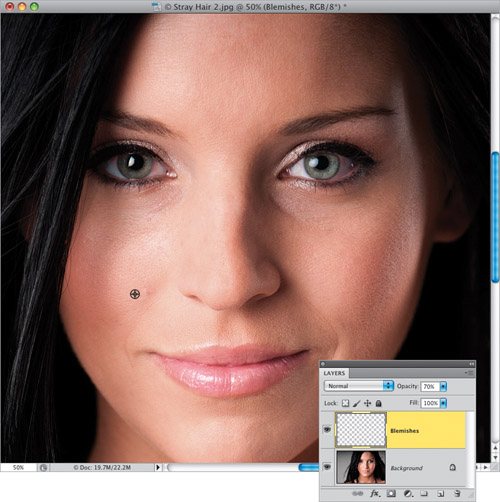
#5 Why We Work on a Layer
We do most of our retouching on a separate layer (or a copy of the Background layer, if necessary) for a few reasons: (1) We can lower the intensity of any retouch by lowering the opacity of the layer we did our retouching on, and we do this a lot throughout the book. (2) It lets us have a quick before/after anytime by just hiding the layer from view, and then turning it back on (just click the Eye icon to the left of the layer’s name in the Layers panel). And, (3) it protects the original background image, so we can always go back to it if we need to (so, basically, our edits are non-destructive). This is a guideline, but it isn’t a rule, because when you’ve got five minutes to do a retouch, you can’t be working with 10 layers, but for the most part, we always try to keep our retouches on one or more separate layers.
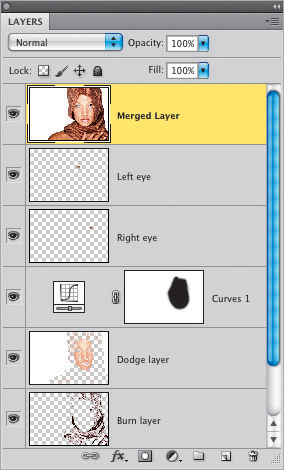
#6 Learn This Keyboard Shortcut
Command-Option-Shift-E (PC: Ctrl-Alt-Shift-E) is the shortcut for creating a merged layer, and what this does is it creates a brand new layer with a flattened version of your multi-layered document (as seen at the top of the layer stack here). That way, you can keep lots of your earlier retouching layers intact while you work on a flattened version of the file. Then, if you need to go back and fix something, you still have the original layers. If this sounds confusing, it will totally make sense in just a few minutes. Another handy keyboard shortcut to know is Command-H (PC: Ctrl-H). If you have a selection around something, pressing that shortcut hides the “marching ants” selection border, so you can more easily see what you’re working on. Just don’t forget to press it again when you’re done retouching that area.
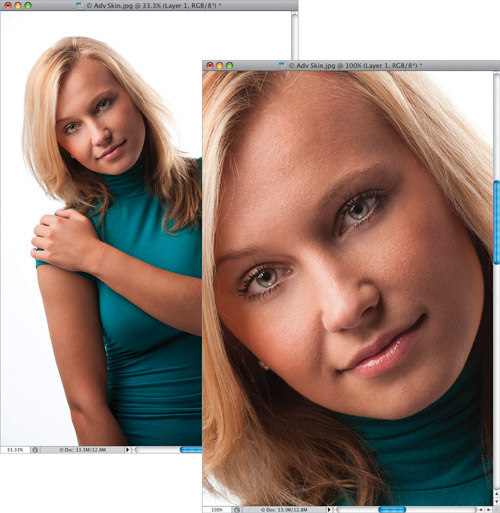
#7 Don’t Retouch Zoomed Out
If you work with your image zoomed out at 66.7%, or 50%, or 33.3%, or smaller, you’re gonna get burned by some little area you missed. It might be a small piece of skin that you didn’t brush over when smoothing, or a tiny part of the image you missed when you changed its hue, but unless you do most of your retouching at 100% size or larger, I guarantee you something is going to slip by and embarrass you—or worse yet, your client. In the book, you’ll see me use different zoom sizes to make things fit better for you, the reader, but when I’m retouching, I’m always working at 100%. It’s important to zoom out every so often, because it’s easy to do too much to a small area, and you’ll only realize it has been over-retouched when you zoom out, but when I’m working, I zoom in to 100% if at all possible.
#8 The Direction of Your Strokes Matters
Whenever you can make out a direction of the texture of something (like skin), or the angle of something (like hair), try to make your brush strokes go in that same direction. I know you’re probably thinking, “Well, duh!” but I see people cloning up and down on a forehead area all the time. If you look at the direction of the skin texture there, it goes from left to right (well, it goes horizontal anyway), and if you want your retouches to look more natural, just be aware of which direction to make your strokes so they blend in with what you’re brushing on—it makes a difference.

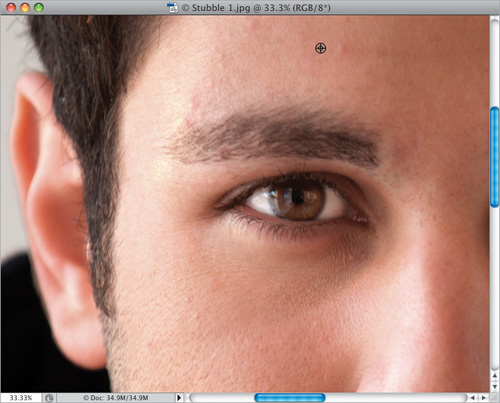
#9 Applying These Retouches to Men
As much as I hate to admit it, retouching men is pretty easy (well, compared to retouching women, anyway), because you don’t have to make their skin silky smooth, or make the eyelashes long and lustrous, or adjust their makeup, or lipstick, and so on. Because of that, you don’t see a lot of guys in this book, but many of the retouches on women here in the book also apply to men (like removing blemishes, or stray hairs, or making their eyes symmetrical), so don’t worry—you’re covered.
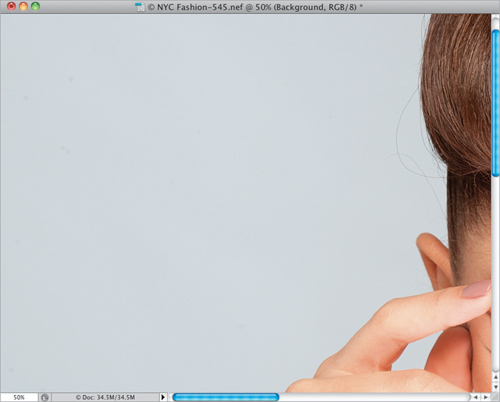
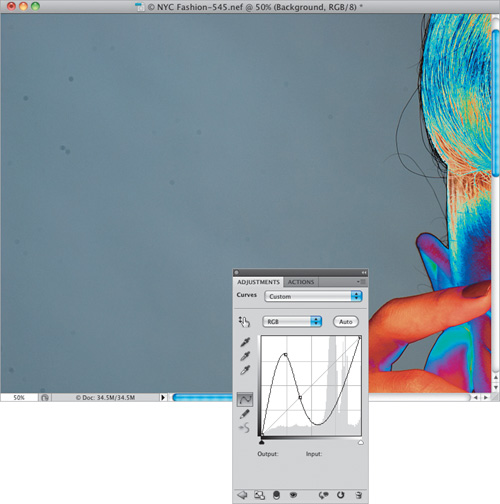
#10 Use a B&W or Curves Adjustment Layer to See If You Missed Anything
When you’re removing dust or specks from a background or sky, or removing blemishes or spots on clothing, because you’re working on a color image, it’s easy to miss a spot here or there. It happens to all of us, but it can really be a mess when a big one sneaks by us and we get a call from the client. That’s why a lot of professional retouchers use a couple of temporary layers that they toggle on/off, just to help them see the spots, stray hairs, and blemishes much more clearly. One is a simple Black & White adjustment layer. This works great on skin, and you can keep it hidden until you’re about to finish up an area—then you make it visible and see if you missed anything. The second one is a two-hill Curves adjustment layer (like the one shown here. To add points to the curve, just click anywhere along the line and then drag the point where you want it). This one does an amazing job of finding specks, spots, and stray hairs (try it on a solid studio background, like you see here—it’s amazing!). Again, you’ll only use it to check your work, but it can really save your butt by catching those things you might have missed. And if you get something crazy in your cloning or healing cursor while fixing those things you missed, make sure you’re working on the image layer and your brush is set to sample only the current layer.
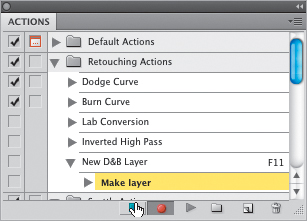
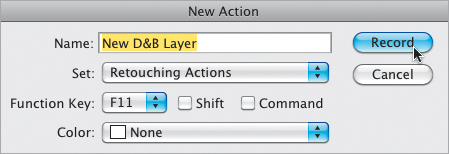
#11 Use Actions to Work Even Faster
When retouching, you’ll wind up doing the same thing again and again, which is why you need actions (Photoshop’s built-in recorder, which remembers your steps, and plays them back by hitting just one key—no matter how many steps it took—faster than you could ever do it). For example, in Chapter 3, we learn how to create a special new layer for dodging and burning, where you have to choose New Layer from the Layers panel’s flyout menu, then set the layer’s blend mode to Soft Light, and then turn on the checkbox for Fill with Soft-Light-Neutral Color (50% Gray). You can have it do all this in just one click of an F-key on your keyboard. Open the Actions panel (go under the Window menu and choose Actions), and click the Create New Action icon at the bottom of the panel (it looks like the Create a New Layer icon). Give your action a name (New D&B layer), choose which function key you want to use for playback, then hit the Record button. Now, go make your Soft Light layer. When you’re done, hit the red Stop button at the bottom of the panel. To play it back, at super-speed, just press that F-key.
#12 How Long You Should Spend Retouching a Particular Image
I hate to give you, “Well, that depends,” but, “Well, that depends.” When you do the shoot, you probably know how the image you’re creating is going to be used (it’s for a website, for a print ad, for a model’s online portfolio, etc.), and because of that, you need to make a realistic decision about how much time you, as a photographer, can commit to the retouch. If this image is going to be used on the cover of the local bridal magazine, you’d better invest 30 or more minutes (a long retouch for a photographer). If it’s going to be a 2×4″ image in the clients’ wedding book, on a page with six other photos, this image gets five minutes max! Another consideration is how tight the image is cropped. Is the image a close-up? Then you need to consider every little detail, from stray hair to red eye veins. However, if your subject is farther away, like a ¾-length view or full-length shot, you probably won’t need to be nearly as detailed (if their eyes wind up only being ![]() of an inch high in the image, how much time do you really need to spend retouching their eyes)? In short, you have to make realistic decisions about how much time to spend retouching.
of an inch high in the image, how much time do you really need to spend retouching their eyes)? In short, you have to make realistic decisions about how much time to spend retouching.