
9.4. Configuring Enterprise Search
Before exploring the search capabilities of Microsoft Office SharePoint Server 2007, first you must configure it. Begin by navigating to SharePoint 3.0 Central Administration and clicking on the link to Shared Services Administration, as illustrated in Figure 9-1.
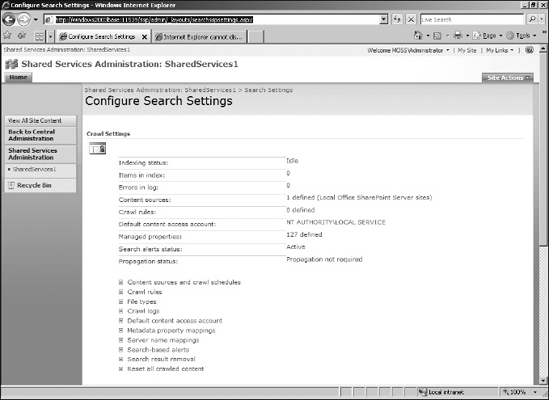
Now that you have navigated to the Shared Services Administration page, click on the Search Settings link, as illustrated in Figure 9-2.
Figure 9.1. Select Shared Services from the Central Administration Page

Figure 9.2. Selecting Search Settings from Shared Services Administration Page

There are seven steps involved in configuring Search Settings. They are:
Monitor the crawl status.
Map the properties.
Add a custom tab.
Add search pages.
Recrawl the content source.
Query the content source.
The following sections detail each step for you.
9.4.1. Adding a Content Source
You first need to tell Enterprise Search where it should crawl for content. This is known as the content source.
After clicking the Search Settings link, you are presented with several choices. Click on Content Sources and Crawl Schedules to manage existing content sources or to add a new one, as illustrated in Figure 9-3.
The next step is to decide what content source you are going to pull from. To assist in that process, you can consider the following questions:
Can the content be crawled through an existing ContentSource type? If the answer is yes, you can choose from the list of the currently installed content sources.
Have you determined the scope of your content? If the answer is no, you'll want to determine scope before proceeding, as this can greatly impact the amount of time the crawl will take. For example, you'll most likely want to limit your search based on file attributes (a particular location or given file type) or on a rule or set of rules (all sales documents created between April 2006 and June 2006) in order to make the search queries as relevant as possible.
Have you determined the properties that you will map to? This is important, as it allows you to link the query and the crawl results.
Answering these questions beforehand will assist you in accurately planning your content source.
In this case, simply point this content source at a web site and then crawl a subset of the content, as illustrated in Figure 9-4.
Now, select the type of content to be used. In this example, choose Web Site.
Following that, you need to configure the starting URL of the web site that you want to have crawled by Enterprise Search.
You can add multiple URLs in this pane to be crawled simply by pressing the Return key while inside the pane. Keep in mind when adding multiple web addresses that you are limited to one per line.
Enter http://www.wrox.com in the Starting Addresses field.
In addition to entering the general information about the content source, you can also specify the crawling behavior, page depth, and server hop configuration. This information section of the Add Content Source page is available at the bottom portion of the page, as illustrated in Figure 9-5. All of this information gives you significant control over not just what content you crawl but also the level and location of that content.
Figure 9.4. Adding a Content Source

Figure 9.5. Bottom Half of Add Content Source Page

You also can determine at this point whether or not to do a full crawl by selecting the Start full crawl of this content source check box.
When would you want to do an incremental crawl rather than a full crawl? In order to do an incremental crawl, you first must do a full crawl of the content source. Incremental crawls may then be scheduled independently of full crawls and consume much fewer resources than a full crawl. Therefore, you want to schedule an incremental crawl at a time when demand on that particular content source is at a low point.
After entering the content source information, press the OK button located at the bottom of the Add Content Source page.
9.4.2. Monitoring Crawl Status
After clicking the OK button on the Add Content Source, you are redirected to the Manage Content Sources page, as illustrated in Figure 9-6. From this page, you can see the status of the current registered content sources and also access the Crawl Log.
Figure 9.6. Managing Content Sources

Once you've mapped your properties, create a place for the content source results. You don't have to do this, as SearchCenter displays the results in the default location, but it will assist in organization, especially if you have multiple content sources.
9.4.3. Mapping Properties
In order to search, you need to know what to search. This is accomplished by mapping crawlable properties for the content source. To do so, execute the following steps:
Navigate back to the Search Settings page, as illustrated previously in Figure 9-3, and click on the Metadata Property Mappings link. This is the repository for Administrator configured properties (metadata) and crawler discovered properties (crawled). As you are crawling a web page, you want to map some crawled properties.
Click the Crawled Properties button, as illustrated in Figure 9-7. This takes you to the Metadata Property Mappings Crawled Properties View page. This page lists the available content sources and property counts for each.
You are then taken to the Edit Crawled Property: DESCRIPTION page, as illustrated in Figure 9-8. Click the Add Mapping button and scroll down to find the Descriptionmanaged property. Click on the property and click OK.


9.4.4. Adding a Custom Tab for Search Results
Once you've mapped your properties, the next thing to do is to create a place for the content source results. You don't have to do this, as SearchCenter displays the results in the default location, but it will assist in organization especially if you have multiple content sources.
Navigate to http://<site>/SearchCenter/Pages/default.aspx.
Click Site Actions to access the command menu, as illustrated in Figure 9-9.
Click Edit Page on the Site Actions menu.
Click Add New Tab to navigate to the page illustrated in Figure 9-10.
Next, in the Page field, type P2P.aspx.
Click the OK button to create the custom tab.


You also need to create a tab for the results as well. Repeat steps 3 through 6 with the following exceptions. For step 4, type p2p Results.aspx in the Tab Name field. For step 5, type p2presults.aspx in the Page field.
9.4.5. Adding Search Pages to Custom Tabs
In order to be able to view the pages that you added in the fields of the custom search tabs, you need to create them. Navigate back to the Search Center to get started.
Click Site Actions to access the command menu again.
Click Edit Page on the Site Settings menu.
In the URL Name field, type p2p.
In the Title field, type P2P Search.
Select (Welcome Page) Search Page in the Page Layout list.
Click Create to create the new page referenced in the P2P.
You're getting close to the fruits of your labor. Next, you need to create the page for Search Results. Navigate back to the Search Center to get started.
Click Site Actions to access the command menu again.
Click Edit Page from the Site Settings menu.
In the URL Name field, type p2presults.
In the Title field, type P2P Results.
Select (Welcome Page) Search Page in the Page Layout list.
Click Create to create the new page referenced in the P2P Results.
9.4.6. Recrawling the Content Source
In order to pick up the changes of your new mapped properties, you need to recrawl the content source.
To recrawl, navigate to the Manage Content Sources page.
Click on the P2P content source, and click the Open Menu button.
Select Start Full Crawl to recrawl the web content source.
9.4.7. Querying the Content Source
Now navigate back to the Search Center and click on the Wrox P2P tab.
Type ASP.NET in the Search Box, and click Enter. Your results should be as illustrated in Figure 9-11.
Figure 9.11. Search Results Page
