Chapter 7. Shipping Controllers and Operators
Now that you’re familiar with the development of custom controllers, let’s move on to the topic of how to make your custom controllers and operators production-ready. In this chapter we’ll discuss the operational aspects of controllers and operators, showing you how to package them, walking you through best practices for running controllers in production, and making sure that your extension points don’t break your Kubernetes cluster, security, or performance-wise.
Lifecycle Management and Packaging
In this section we consider the lifecycle management of operators. That is, we will discuss how to package and ship your controller or operator, as well as how to handle upgrades. When you’re ready to ship your operator to users, you’ll need a way for them to install it. For this, you need to package the respective artifacts, such as YAML manifests that define the controller binary (typically as a Kubernetes deployment), along with the CRDs and security-related resources, such as service accounts and the necessary RBAC permissions. Once your targeted users have a certain version of the operator running, you will also want to have a mechanism in place for upgrading the controller, considering versioning and potentially zero-downtime upgrades.
Let’s start with the low-hanging fruit: packaging and delivering your controllers so that a user can install it in a straightforward manner.
Packaging: The Challenge
While Kubernetes defines resources with manifests, typically written in YAML, a low-level interface to declare the state of resources, these manifest files have shortcomings. Most importantly in the context of packaging containerized apps, the YAML manifests are static; that is, all values in a YAML manifest are fixed. This means that if you want to change the container image in a deployment manifest, for example, you have to create a new manifest.
Let’s look at a concrete example. Assume you have the following Kubernetes deployment encoded in a YAML manifest called mycontroller.yaml, representing the custom controller you’d like users to install:
apiVersion:apps/v1beta1kind:Deploymentmetadata:name:mycustomcontrollerspec:replicas:1template:metadata:labels:app:customcontrollerspec:containers:-name:thecontrollerimage:example/controller:0.1.0ports:-containerPort:9999env:-name:REGIONvalue:eu-west-1
Imagine the environment variable REGION defines certain runtime properties of your controller, such as the availability of other services like a managed service mesh. In other words, while the default value of eu-west-1 might be a sensible one, users can and likely will overwrite it, based on their own preferences or policies.
Now, given that the YAML manifest mycontroller.yaml itself is a static file with all values defined at the time of writing—and clients such as kubectl don’t inherently support variable parts in the manifest—how do you enable users to supply variable values or overwrite existing values at runtime? That is, how in the preceding example can a user set REGION to, say, us-east-2 when they’re installing it, using (for example) kubectl apply?
To overcome these limitations of build-time, static YAML manifests in Kubernetes, there are a few options to templatize the manifests (Helm, for example) or otherwise enable variable input (Kustomize), depending on user-provided values or runtime properties.
Helm
Helm, which touts itself as the package manager for Kubernetes, was originally developed by Deis and is now a Cloud Native Computing Foundation (CNCF) project with major contributors from Microsoft, Google, and Bitnami (now part of VMware).
Helm helps you to install and upgrade Kubernetes applications by defining and applying so-called charts, effectively parameterized YAML manifests. Here is an excerpt of an example chart template:
apiVersion:apps/v1kind:Deploymentmetadata:name:{{include "flagger.fullname" .}}...spec:replicas:1strategy:type:Recreateselector:matchLabels:app.kubernetes.io/name:{{template "flagger.name" .}}app.kubernetes.io/instance:{{.Release.Name}}template:metadata:labels:app.kubernetes.io/name:{{template "flagger.name" .}}app.kubernetes.io/instance:{{.Release.Name}}spec:serviceAccountName:{{template "flagger.serviceAccountName" .}}containers:-name:flaggersecurityContext:readOnlyRootFilesystem:truerunAsUser:10001image:"{{.Values.image.repository}}:{{.Values.image.tag}}"
As you can see, variables are encoded in {{ ._Some.value.here_ }} format, which happens to be Go templates.
To install a chart, you can run the helm install command. While Helm has several ways to find and install charts, the easiest is to use one of the official stable charts:
# get the latest list of charts:$helm repo update# install MySQL:$helm install stable/mysql Released smiling-penguin# list running apps:$helm ls NAME VERSION UPDATED STATUS CHART smiling-penguin1Wed Sep2812:59:462016DEPLOYED mysql-0.1.0# remove it:$helm delete smiling-penguin Removed smiling-penguin
In order to package your controller, you will need to create a Helm chart for it and publish it somewhere, by default to a public repository indexed and accessible through the Helm Hub, as depicted in Figure 7-1.
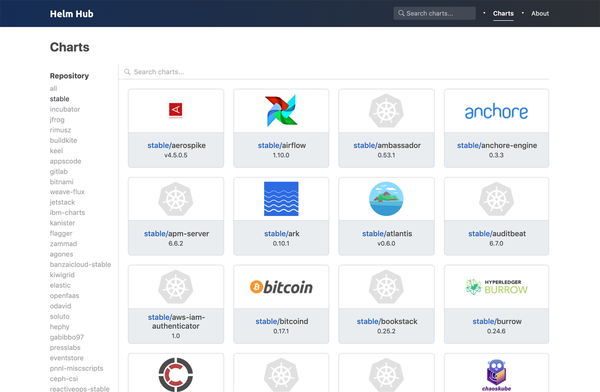
Figure 7-1. Helm Hub screenshot showing publicly available Helm charts
For further guidance on how to create Helm charts, peruse the following resources at your leisure:
-
Bitnami’s excellent article “How to Create Your First Helm Chart”.
-
“Using S3 as a Helm Repository”, if you want to keep the charts in your own organization.
-
The official Helm docs: “The Chart Best Practices Guide”.
Helm is popular, partly because of its ease of use for end users. However, some argue that the current Helm architecture introduces security risks. The good news is that the community is actively working on addressing those.
Kustomize
Kustomize provides a declarative approach to configuration customization of Kubernetes manifest files, adhering to the familiar Kubernetes API. It was introduced in mid-2018 and is now a Kubernetes SIG CLI project.
You can install Kustomize on your machine, as a standalone, or, if you have a more recent kubectl version (newer than 1.14), it is shipped with kubectl and activated with the -k command-line flag.
So, Kustomize lets you customize the raw YAML manifest files, without touching the original manifest. But how does this work in practice? Let’s assume you want to package our cnat custom controller; you’d define a file called kustomize.yaml that looks something like:
imageTags:-name:quay.io/programming-kubernetes/cnat-operatornewTag:0.1.0resources:-cnat-controller.yaml
Now you can apply this to the cnat-controller.yaml file, say, with the following content:
apiVersion:apps/v1beta1kind:Deploymentmetadata:name:cnat-controllerspec:replicas:1template:metadata:labels:app:cnatspec:containers:-name:custom-controllerimage:quay.io/programming-kubernetes/cnat-operator
Use kustomize build and—leaving the cnat-controller.yaml file unchanged!—the output is then:
apiVersion:apps/v1beta1kind:Deploymentmetadata:name:cnat-controllerspec:replicas:1template:metadata:labels:app:cnatspec:containers:-name:custom-controllerimage:quay.io/programming-kubernetes/cnat-operator:0.1.0
The output of kustomize build can then, for example, be used in a kubectl apply command, with all the customizations applied for you, automatically.
For a more detailed walk-through of Kustomize and how to use it, check out the following resources:
-
Sébastien Goasguen’s blog post “Configuring Kubernetes Applications with kustomize".
-
Kevin Davin’s post “Kustomize—The right way to do templating in Kubernetes”.
-
The video “TGI Kubernetes 072: Kustomize and friends”, where you can watch Joe Beda apply it.
Given the native support of Kustomize in kubectl, it’s likely that an increasing number of users will adopt it. Note that while it solves some problems (customization), there are other areas of the lifecycle management, such as validations and upgrades, that may require you to use Kustomize together with languages such as Google’s CUE.
To wrap up this packaging topic, let’s review some other solutions practitioners use.
Other Packaging Options
Some notable alternatives to the aforementioned packaging options—and the many others in the wild—are:
- UNIX tooling
-
In order to customize values of raw Kubernetes manifests, you can use a range of CLI tools such as
sed,awk, orjqin shell scripts. This is a popular solution and, at least until the arrival of Helm, likely the most widely used option—not least because it minimizes dependencies and is rather portable across *nix environments. - Traditional configuration management systems
-
You can use any of the traditional configuration management systems, such as Ansible, Puppet, Chef, or Salt, to package and deliver your operator.
- Cloud-native languages
-
A new generation of so-called cloud-native programming languages, such as Pulumi and Ballerina, allows for, among other things, packaging and lifecycle management of Kubernetes-native apps.
- ytt
-
With
yttyou have another option for a YAML templating tool using a language that is itself a modified version of Google’s configuration language Starlark. It operates semantically on the YAML structures and focuses on reusability. - Ksonnet
-
A configuration management tool for Kubernetes manifests, originally developed by Heptio (now VMware), Ksonnet has been deprecated and is not actively worked on anymore, so use it at your own risk.
Read more about the options discussed here in Jesse Suen’s post “The State of Kubernetes Configuration Management: An Unsolved Problem”.
Now that we’ve discussed the packaging options in general, let’s look at best practices for packaging and shipping controllers and operators.
Packaging Best Practices
When packaging and publishing your operator, make sure you are aware of the following best practices. These apply regardless of which mechanism you choose (Helm, Kustomize, shell scripts, etc.):
-
Provide a proper access control setup: this means defining a dedicated service account for the controller along with the RBAC permissions on a least-privileges basis; see “Getting the Permissions Right” for further details.
-
Consider the scope of your custom controller: will it look after CRs in one namespace or more than one namespace? Check out Alex Ellis’s Twitter conversation about the pros and cons of the different approaches.
-
Test and profile your controller so that you have an idea of its footprint and scalability. For example, Red Hat has put together a detailed set of requirements with instructions in the OperatorHub contribution guide.
-
Make sure the CRDs and controller are well documented, ideally with the inline docs available on godoc.org and a set of usage examples; see Banzai Cloud’s bank-vaults operator for inspiration.
Lifecycle Management
A broader and more holistic approach, compared to package/ship, is that of lifecycle management. The basic idea is to consider the entire supply chain, from development to shipping to upgrades, and automate as much as possible. In this area, CoreOS (and later Red Hat) was again a trailblazer: applying the same logic that led to operators to their lifecycle management. In other words: in order to install and later upgrade the custom controller of an operator, you’d have a dedicated operator that knows how to, well, handle operators. And indeed, part of the Operator Framework—which also provides the Operator SDK, as discussed in “The Operator SDK”—is the so-called Operator Lifecycle Manager (OLM).
Jimmy Zelinskie, one of the main people behind OLM, phrased it as follows:
OLM does a lot for Operator authors, but it also solves an important problem that not many people have thought about yet: how do you effectively manage first-class extensions to Kubernetes over time?
In a nutshell, OLM provides a declarative way to install and upgrade operators and their dependencies, complementary packaging solutions such as Helm. It’s up to you if you want to buy into the full-blown OLM solution or create an ad hoc solution for the versioning and upgrading challenge; however, you should have some strategy in place here. For certain areas—for example, the certification process for the Operator Hub by Red Hat—it’s not only recommended but mandatory for any nontrivial deployment scenario, even if you don’t aim at the Hub.
Production-Ready Deployments
In this section we review and discuss how to make your custom controllers and operators production-ready. The following is a high-level checklist:
-
Use Kubernetes deployments or DaemonSets to supervise your custom controller so that they are restarted automatically when they fail—and fail they will.
-
Implement health checks through dedicated endpoints for liveness and readiness probes. This, together with the previous step, makes your operations more resilient.
-
Consider a leader-follower/standby model to make sure that even when your controller pod crashes, someone else can take over. Note, however, that synchronizing state is a nontrivial task.
-
Provide access control resources, such as service account and roles, applying the least-privileges principle; see “Getting the Permissions Right” for details.
-
Consider automated builds, including testing. Some more tips are available in “Automated Builds and Testing”.
-
Proactively tackle monitoring and logging; see “Custom Controllers and Observability” for the what and how.
We also suggest that you peruse the aforementioned article “Kubernetes Operator Development Guidelines for Improved Usability” to learn more.
Getting the Permissions Right
Your custom controller is part of the Kubernetes control plane. It needs to read the state of resources, create resources inside as well as (potentially) outside Kubernetes, and communicate the state of its own resources. For all of this, the custom controller needs the right set of permissions, expressed through a set of role-based access control (RBAC)–related settings. Getting this right is the topic of this section.
First things first: always create a dedicated service account to run your controller. In other words: never use the default service account in a namespace.1
To make your life easier, you can define a ClusterRole with the necessary RBAC rules along with a RoleBinding to bind it to a specific namespace, effectively reusing the role across namespaces, as explained in the Using RBAC Authorization entry.
Following the least-privileges principle, assign only the permissions necessary for the controller to carry out its work. For example, if a controller only manages pods, there is no need to provide it with the permissions to list or create deployments or services. Also, make sure that the controller does not install the CRDs and/or the admission webhooks. In other words, the controller should not have permissions to manage CRDs and webhooks.
Common tooling for creating custom controllers, as discussed in Chapter 6, typically provides functionality for generating RBAC rules out-of-the-box. For example, Kubebuilder generates the following RBAC assets, along with an operator:
$ls -al rbac/ total 40 drwx------7mhausenblas staff22412Apr 09:52 . drwx------7mhausenblas staff22412Apr 09:55 .. -rw-------1mhausenblas staff28012Apr 09:49 auth_proxy_role.yaml -rw-------1mhausenblas staff25712Apr 09:49 auth_proxy_role_binding.yaml -rw-------1mhausenblas staff44912Apr 09:49 auth_proxy_service.yaml -rw-r--r--1mhausenblas staff104412Apr 10:50 rbac_role.yaml -rw-r--r--1mhausenblas staff28712Apr 10:50 rbac_role_binding.yaml
Looking at the autogenerated RBAC roles and bindings reveals a fine-grained setup. In rbac_role.yaml you can find:
apiVersion:rbac.authorization.k8s.io/v1kind:ClusterRolemetadata:creationTimestamp:nullname:manager-rolerules:-apiGroups:-appsresources:-deploymentsverbs:["get","list","watch","create","update","patch","delete"]-apiGroups:-appsresources:-deployments/statusverbs:["get","update","patch"]-apiGroups:-cnat.programming-kubernetes.inforesources:-atsverbs:["get","list","watch","create","update","patch","delete"]-apiGroups:-cnat.programming-kubernetes.inforesources:-ats/statusverbs:["get","update","patch"]-apiGroups:-admissionregistration.k8s.ioresources:-mutatingwebhookconfigurations-validatingwebhookconfigurationsverbs:["get","list","watch","create","update","patch","delete"]-apiGroups:-""resources:-secretsverbs:["get","list","watch","create","update","patch","delete"]-apiGroups:-""resources:-servicesverbs:["get","list","watch","create","update","patch","delete"]
Looking at these permissions that Kubebuilder generates in v1, you’ll likely be a little taken aback.2 We certainly were: best practice tells us that a controller, if it does not have very good reasons for doing so, should not be able to:
-
Write resources that are only read in the code, generally. For example, if you only watch services and deployments, do remove the
create,update,patch, anddeleteverbs in the role. -
Access all secrets; that is, always restrict this to the most minimal set of secrets necessary.
-
Write
MutatingWebhookConfigurationsorValidatingWebhookConfigurations. This is equivalent to getting access to any resource in the cluster. -
Write
CustomResourceDefinitions. Note that this is not allowed in the cluster role just shown, but it’s important to mention here, nevertheless: CRD creation should be done by a separate process, not by the controller itself. -
Write the /status subresource (see “Subresources”) of foreign resources that it is not managing. For example, deployments here are not managed by the
cnatcontroller and should not be in scope.
Kubebuilder, of course, is not really able to understand what your controller code is actually doing. So it’s not surprising that the generated RBAC rules are far too relaxed. We recommend double-checking the permissions and reducing them to the absolute minimum, following the preceding checklist.
Warning
Having read access to all secrets in the system gives a controller access to all service account tokens. This is equivalent to having access to all passwords in the cluster. Having write access to MutatingWebhookConfigurations or ValidatingWebhookConfigurations allows you to intercept and manipulate
every API request in the system. This opens the door to rootkits in a Kubernetes cluster. Both are obviously highly dangerous and considered antipatterns, so it’s best to avoid them.
To avoid having too much power—that is, to restrict access rights to those that are absolutely necessary—consider using audit2rbac. This tool uses audit logs to generate an appropriate set of permissions, leading to more secure setups and fewer headaches down the road.
From rbac_role_binding.yaml you can learn:
apiVersion:rbac.authorization.k8s.io/v1kind:ClusterRoleBindingmetadata:creationTimestamp:nullname:manager-rolebindingroleRef:apiGroup:rbac.authorization.k8s.iokind:ClusterRolename:manager-rolesubjects:-kind:ServiceAccountname:defaultnamespace:system
For more best practices on RBAC and tooling around it, check out RBAC.dev, a website dedicated to RBAC in Kubernetes. Let’s move on now to testing and performance considerations for custom controllers.
Automated Builds and Testing
As a best practice in cloud-native land, consider an automated build of your custom controller. This is usually called continuous build or continuous integration (CI) and comprises unit tests, integration tests, building the container image, and potentially even sanity or smoke tests. The Cloud Native Computing Foundation (CNCF) maintains an interactive listing of the many open source CI tools available.
When building your controller, keep in mind that it should consume as few compute resources as possible, while at the same time serving as many clients as possible. Each CR, based on the CRD(s) you define, is a proxy for a client. But how do you know how much it consumes, if and where it leaks memory, and how well it scales?
You can and indeed should carry out a number of tests, once the development of your custom controller stabilizes. These can include the following, but may not be limited to them:
-
Performance-related tests, as found in Kubernetes itself as well as the kboom tool, can provide you with data around scaling and resource footprints.
-
Soak tests—for example, the ones used in Kubernetes—aim at long-term usage, from several hours to days, with the goal of unveiling any leaking of resources, like files or main memory.
As a best practice, these tests should be part of your CI pipeline. In other words, automate the building of the custom controller, testing, and packaging from day one. For a concrete example setup we encourage you to check out Marko Mudrinić’s excellent post “Spawning Kubernetes Clusters in CI for Integration and E2E tests”.
Next, we’ll look at best practices that provide the basis for effective troubleshooting: built-in support for observability.
Custom Controllers and Observability
In this section we look at observability aspects of your custom controllers, specifically logging and monitoring.
Logging
Make sure you provide enough logging information to aid troubleshooting (in production). As usual in a containerized setup, log information is sent to stdout, where it can be consumed either on a per-pod basis with the kubectl logs command or in an aggregated form. Aggregates can be provided using cloud-provider-specific solutions, such as Stackdriver in Google Cloud or CloudWatch in AWS, or bespoke solutions like the Elasticsearch-Logstash-Kibana/Elasticsearch-Fluentd-Kibana stack. See also Kubernetes Cookbook by Sébastien Goasguen and Michael Hausenblas (O’Reilly) for recipes on this topic.
Let’s look at an example excerpt of our cnat custom controller log:
{"level":"info","ts":1555063927.492718,"logger":"controller","msg":"=== Reconciling At"}{"level":"info","ts":1555063927.49283,"logger":"controller","msg":"Phase: PENDING"}{"level":"info","ts":1555063927.492857,"logger":"controller","msg":"Checking schedule"}{"level":"info","ts":1555063927.492915,"logger":"controller","msg":"Schedule parsing done"}
The how of logging: in general, we prefer structured logging and adjustable log levels, at least debug and info. There are two methods widely used across the Kubernetes code base, and unless you have good reasons not to, you should consider using those:
-
The
loggerinterface—for example, as found in httplog.go, along with a concrete type (respLogger)—captures things like the status and errors. -
klog, a fork of Google’sglog, is a structured logger used throughout Kubernetes, and while it has its idiosyncrasies, it’s worth knowing.
The what of logging: make sure to have detailed log information for the normal case of your business logic operation. For example, from our Operator SDK implementation of the cnat controller, in at_controller.go, set up the logger like so:
reqLogger:=log.WithValues("namespace",request.Namespace,"at",request.Name)
And then in the business logic, in the Reconcile(request reconcile.Request) function:
casecnatv1alpha1.PhasePending:reqLogger.Info("Phase: PENDING")// As long as we haven't executed the command yet, we need to check if it's// already time to act:reqLogger.Info("Checking schedule","Target",instance.Spec.Schedule)// Check if it's already time to execute the command with a tolerance of// 2 seconds:d,err:=timeUntilSchedule(instance.Spec.Schedule)iferr!=nil{reqLogger.Error(err,"Schedule parsing failure")// Error reading the schedule. Wait until it is fixed.returnreconcile.Result{},err}reqLogger.Info("Schedule parsing done","Result","diff",fmt.Sprintf("%v",d))ifd>0{// Not yet time to execute the command, wait until the scheduled timereturnreconcile.Result{RequeueAfter:d},nil}reqLogger.Info("It's time!","Ready to execute",instance.Spec.Command)instance.Status.Phase=cnatv1alpha1.PhaseRunning
This Go snippet gives you a good idea of what to log, and especially when to use reqLogger.Info and reqLogger.Error.
With Logging 101 out of the way, let’s move on to a related topic: metrics!
Monitoring, instrumentation, and auditing
A great open source, container-ready monitoring solution you can use across environments (on-premises and in the cloud) is Prometheus. Alerting on each event is not practical, so you might want to think about who needs to be informed about what kind of event. For example, you could have a policy that node-related or namespace-related events are handled by infrastructure admins, and namespace admins or developers are paged for pod-level events. In this context, in order to visualize the metrics you’ve gathered, the most popular solution is certainly Grafana; see Figure 7-2 for an example of Prometheus metrics visualized in Grafana, taken from the Prometheus documentation.
If you are using a service mesh—for example, based on the Envoy proxy (like Istio or App Mesh), or Linkerd—then instrumentation typically comes for free or is achievable with minimal (configuration) effort. Otherwise, you will have to use the respective libraries, such as those provided by Prometheus, to expose the relevant metrics in your code yourself. In this context, you might also want to check out the fledgling Service Mesh Interface (SMI) project, introduced in early 2019, which aims to provide a standardized interface for service meshes, based on CRs and controllers.
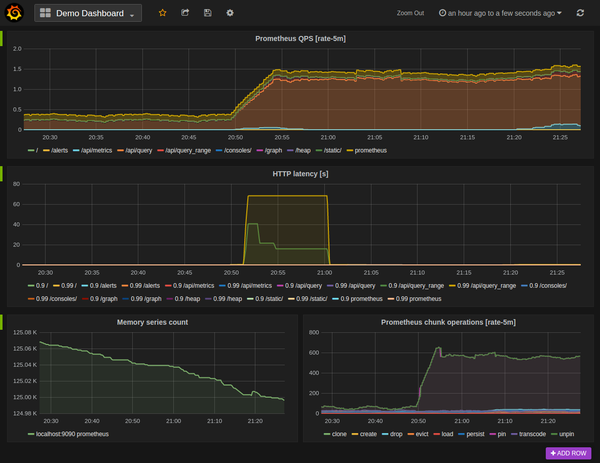
Figure 7-2. Prometheus metrics visualized in Grafana
Another useful feature Kubernetes offers via the API server is auditing, which allows you to record a sequence of activities affecting the cluster. Different strategies are available in the auditing policy, from no logging to logging event metadata, request bodies, and response bodies. You can choose between a simple log backend and using a webhook for integrating with third-party systems.
Summary
This chapter focused on how to make your operators production-ready by discussing operational aspects of controllers and operators, including packaging, security, and performance.
With this we’ve covered the basics of writing and using custom Kubernetes controllers and operators, so now we move on to another way to extend Kubernetes: developing a custom API server.
1 See also Luc Juggery’s post “Kubernetes Tips: Using a ServiceAccount” for a detailed discussion of service account usage.
2 We did, however, raise Issue 748 against the Kubebuilder project.