The form view is useful when you want to traverse the records one-by-one and perform some modifications to it. In this section, we will see how to create a dialog form that displays the records one-by-one and also learn about how to add, edit, and delete records using the form dialog. We will use the same employee table created in our previous example.
We will not discuss the layout used in this program as our main aim is to discuss the form view. The model is created using QSqlTableModel and set the sort factor with the column first_name in the ascending order:
self.model = QSqlTableModel(self)
self.model.setTable("employee")
self.model.setSort(FIRST_NAME, Qt.AscendingOrder)
self.model.select()
Next, we set the mapping of the form values with the column using the QDataWidgetMapper class. This class is used to provide mapping between sections of a data model to widgets. The addMapping(widget, section) function maps the widget to the section from the model. The section represents a column if the orientation is "Horizontal", otherwise represents a row. Finally, the toFirst() function populates the widget from the data from the first row of the model if the orientation is "Horizontal", otherwise from the first column.
self.mapper = QDataWidgetMapper(self)
self.mapper.setSubmitPolicy(QDataWidgetMapper.ManualSubmit)
self.mapper.setModel(self.model)
self.mapper.addMapping(firstNameEdit, FIRST_NAME)
self.mapper.addMapping(lastNameEdit, LAST_NAME)
self.mapper.addMapping(ageEdit, AGE)
self.mapper.addMapping(genderEdit, SEX)
self.mapper.addMapping(incomeEdit, INCOME)
self.mapper.toFirst()
Then, we connect the buttons to their respective slots:
self.connect(firstButton, SIGNAL("clicked()"),
           lambda: self.saveRecord(EmployeeForm.FIRST))
self.connect(previousButton, SIGNAL("clicked()"),
           lambda: self.saveRecord(EmployeeForm.PREV))
self.connect(nextButton, SIGNAL("clicked()"),
           lambda: self.saveRecord(EmployeeForm.NEXT))
self.connect(lastButton, SIGNAL("clicked()"),
           lambda: self.saveRecord(EmployeeForm.LAST))
self.connect(addButton, SIGNAL("clicked()"), self.addRecord)
self.connect(deleteButton, SIGNAL("clicked()"),
           self.deleteRecord)
self.connect(quitButton, SIGNAL("clicked()"), self.done)
The slots are defined as follows:
def done(self, result=None):
self.mapper.submit()
QDialog.done(self, True)
def addRecord(self):
row = self.model.rowCount()
self.mapper.submit()
self.model.insertRow(row)
self.mapper.setCurrentIndex(row)
def deleteRecord(self):
row = self.mapper.currentIndex()
self.model.removeRow(row)
self.model.submitAll()
if row + 1 >= self.model.rowCount():
row = self.model.rowCount() - 1
self.mapper.setCurrentIndex(row)
def saveRecord(self, where):
row = self.mapper.currentIndex()
self.mapper.submit()
if where == EmployeeForm.FIRST:
row = 0
elif where == EmployeeForm.PREV:
row = 0 if row <= 1 else row - 1
elif where == EmployeeForm.NEXT:
row += 1
if row >= self.model.rowCount():
row = self.model.rowCount() - 1
elif where == EmployeeForm.LAST:
row = self.model.rowCount() - 1
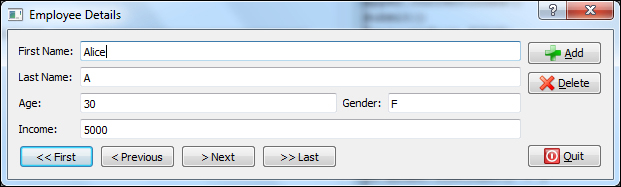
self.mapper.setCurrentIndex(row)The complete program can be downloaded from the code snippets that come along with this book. On execution, we will be presented with a dialog box as shown, with which we can add, edit, or delete records: