
Configuring a RED ONE camera package can be a challenging prospect because of the sheer variety of choices. Hundreds of accessories are available from a number of manufacturers, including RED, such as batteries, mounting hardware, onboard monitors, an electronic viewfinder (EVF), and two sizes of camera-mountable LCD monitors. RED also offers its own branded set of prime and zoom lenses designed for the camera. The camera is also compatible with many preexisting 35mm optics and accessories as well as new products designed by third-party manufacturers especially for the camera system.
So, what do you really need in a RED package—and what’s nice to have if you can afford it? In this chapter, we’ll look at the major categories of equipment and accessories and I’ll offer my own personal recommendations. Then you’ll learn about assembling RED packages at specific price points and for specific purposes.
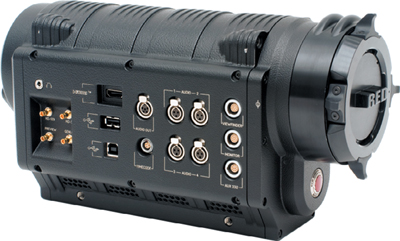
The most important item to purchase is, of course, the RED ONE camera body (currently $17,500). The body is a very sophisticated digital camera and user-upgradeable computer surrounding a CMOS image sensor (see the “What’s a CMOS?” sidebar). It’s also a highly customizable platform for connecting video and audio input and output devices, and it accepts lenses and many photographic accessories needed to effectively capture motion pictures. Just about every piece of equipment I covered in this chapter mounts directly onto the body (Figure 4.1)—and of course you’ll need a lot more than just the body to shoot footage.
I recommend the base production pack ($1,250) for a starter kit. This set includes handles and rod mounts for use with a tripod as well as a battery cradle. You may choose to forgo the base production pack and purchase these necessary pieces, such as the ARRI Base, from manufacturers such as Element Technica.
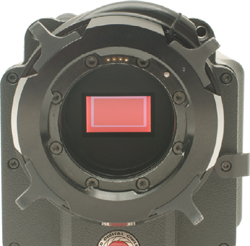
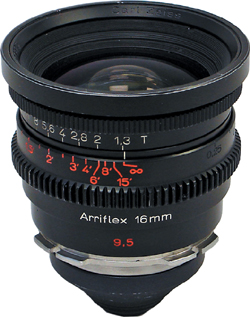
What gets cinematographers most excited about working with RED is its ability to work with their very familiar motion-picture lenses in both 35mm and 16mm PL-mount cinema lenses (Figure 4.2). The new and used market for these lenses is large. You can easily spend anywhere from less than $1,000 (for a used 16mm) to upwards of $100,000 (for a new 35mm zoom) on a single PL-mount lens. (Note that 16mm lenses cannot be used to shoot 4K because of their smaller image size.)
Note
Positive lock (PL) is a lens-mounting system invented in 1980 by ARRI, the motion-picture camera and lens company. PL is a very simple, four-prong mechanical mount with a friction lock that makes lenses easy to attach and very secure once mounted.
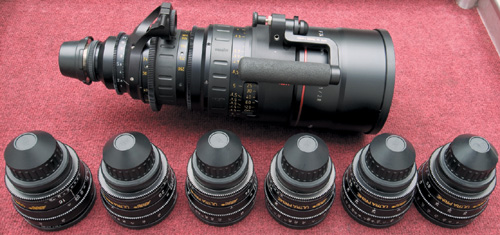
Because every project is different and every shot has different technical and aesthetic requirements, you need a variety of lenses to complete your package. Having the flexibility of a zoom lens combined with the sharpness and sensitivity of prime lenses is ideal—if you can afford to have both. For my tastes, the ultimate RED optics kit includes a full-range zoom lens along with primes covering wide angles down to, say, 14mm and up to at least 85mm or more on the telephoto end (Figure 4.3).
Many filmmakers use Canon and Nikon still camera lenses for their packages. Still lenses are a good way to save a lot of money on optics, but you might find a still lens to be too limited for extensive motion-picture work. Focusing in the middle of a take with a still lens can be very difficult because they are typically not well geared or marked for this purpose. Also, most still lenses exhibit visible breathing (where the image wobbles on the edges) when focusing during a shot. For that reason, we’ll look at cinema lenses first.
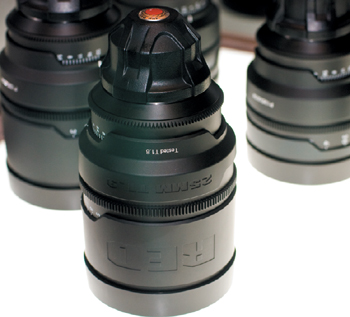
RED offers very reasonably priced zoom and prime lenses specifically designed for the RED ONE. The zoom lenses include an 18–85mm T2.9 ($9,975) and an 18–50mm T3 ($6,500—see Figure 4.4). RED’s Pro Prime Set consists of five lenses ranging from 25mm to 100mm, all at a highly sensitive T1.8 stop and at a package price of around $19,000 (or the cost of a single lens from some of the other brands). The Pro Prime Set is also optically optimized for 5K imagery, meaning you can migrate to an EPIC kit down the road.
Note
T-stop refers to the aperture setting of a lens—that is, the amount of light coming into the lens. It’s the same concept as an f-stop on a still camera, just a different term.
For third-party lenses, many major cinema lens makers have honed their glass throughout the long history of cinema. My personal favorites include ARRI and Cooke, which both manufacture PL-mount prime lenses. Neither is cheap, but the optical quality and sensitivity are unmatched, and I can almost guarantee you’ve already watched many 35mm Hollywood features shot on ARRI and Cooke lenses. Cooke even offers a combo prime/zoom kit specially selected for the RED, though any of its regular 35mm PL lenses will do the trick.
The Cooke S4/i kit I personally use includes 14mm, 21mm, 25mm, 32mm, 50mm, and 75 mm primes, all at T2. The lenses aren’t cheap at about $18,000–20,000 each but these are flawless pieces of glass that reproduce perfect colors and razor-sharp images on-screen.
On the ARRI side, I like to shoot with a similarly outfitted kit of ARRI Ultra Primes at T1.9. The set includes 16mm, 20mm, 24mm, 32mm, 50mm, and 85mm primes. As with the Cookes, these are expensive and very high end in terms of performance. You’re paying for speed, smooth focusing throughout the focal range, and freedom from image artifacts (Figure 4.5) such as chromatic aberration (when the colors of the spectrum don’t quite align in a lens, producing what appears to be soft rainbows) and vignetting (dark edges around the edges of the frame).
Tip
One way to defray the costs of a very high-end prime kit is to consign it out to a local camera rental house. They will list your kit in their rental inventory and share the rental profits with you whenever your kit goes out—and you retain access to the lenses whenever they aren’t rented. Alternatively, as with anything else, you can also rent a high-end set when you really need it and rely on lower-cost optics for day-to-day shooting.
The optical quality of a zoom lens is critically important because a low-quality zoom can cause so much softness in an image that it can visually offset the benefits of the RED’s 4K frame resolution. In other words, your final image taken with a low-quality zoom may look no sharper than a regular high-definition or even standard-definition image, depending on the lens.
Note
Some lower-cost cinema lenses are still camera lenses rehoused in cinema mechanics, which means they can have issues with distortion and breathing like still lenses. You can usually find out from the manufacturer whether this is the case.
The zoom lens I recommend and use is an Angenieux Optimo T2.8 24–290mm. This lens is pretty fast for a zoom, and its focal range is quite staggering, especially on the telephoto end. Lots of sports networks use this lens for its long reach. Again, at almost $100,000 this is not an inexpensive lens, but it is amazing to shoot with, which is a reason why it can be found on many big movie sets.. The Optimo is not lightweight either, weighing in at 25 pounds. It needs extra support just to keep it steady in the mount, and you need to be pretty strong to consider handheld shooting with it. Remember, this lens is at the very high end of optics; don’t feel like you must have this sort expensive gear to make pretty pictures with your RED. Angeniuex and other companies such as Cooke make nice zooms at much lower price points.
16mm lenses are often higher quality than still camera lenses, more suitable for production, and also less expensive than 35mm lenses. You should have no problem finding new, used, and rental 16mm PL-mount lenses.
The chief drawback to 16mm lenses is that they cannot be used to shoot in full 4K resolution because the images they generate don’t fill the whole image sensor. The image size for most 16mm lenses, depending on focal length, is more likely to work for 2K or possibly 3K resolution. By checking the amount of coverage on a monitor, you’ll quickly see vignetting on the edges of your frame once you’ve chosen a resolution that’s too big for the lens (Figure 4.6). That said, even at 2K you’re shooting at a much higher resolution than standard definition and with more control over your depth of field.

Note
Lens vignetting is also called portholing because the image cropping effect is similar to peering through a porthole window on a ship.
Some good 16mm lens brands to look at include Angenieux, Zeiss (Figure 4.7), Century, and Nikkor. 16mm lenses offer a good compromise between 35mm cinema lenses and still camera lenses.
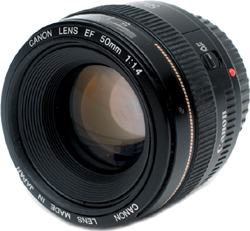
Still optics are typically not as sensitive to light as their cinema cousins and, because their focusing mechanics are optimized for still work, can exhibit noticeable breathing. That said, real bargains exist in the still lens market, if you understand the potential limitations. I happen to be a huge fan of Nikon and Canon 35mm still lenses (Figure 4.8). They look great and are certainly affordable compared to cinema lenses. They’re also readily available in sufficient quantity worldwide.
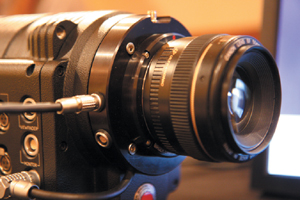
One caveat is that they don’t just work out of the box with the RED. You need a lens adaptor to convert the RED’s native PL-mount lens to the mount of your Canon or Nikon (covered next).
Many third-party lens mount adaptors are available for the RED because making them is a matter of traditional machining and engineering without a lot of electronics or software development necessary. Birger Engineering (www.birger.com) offers a $1,300 lens adaptor mount for use with Canon EOS still lenses (Figure 4.9). Birger entered into a special arrangement with RED to ensure that the modifications to the camera required by the mount retain RED’s full factory warranty. So, you can use this product without any fear of damaging your camera.
Nikon mounts are a little more complicated. RED offers a $500 Nikon adaptor mount on its online store (www.red.com/store). This mount is optimized primarily for Nikon lenses with manual aperture control. On newer DX-series and G-series Nikon lenses, the mount can’t alter the aperture settings. For more control, you can send the mount to be modified by Long Valley Equipment (www.longvalleyequip.com), makers of the original mount later adopted for sale by RED. For $295 you get a Nikon GDX mount with full aperture control for G and DX series lenses (Figure 4.10).

Storage is a critical concern for your RED ONE camera. You have three basic options: RED CF cards, RED-DRIVE, and RED-RAM. All of these items are available directly from RED.
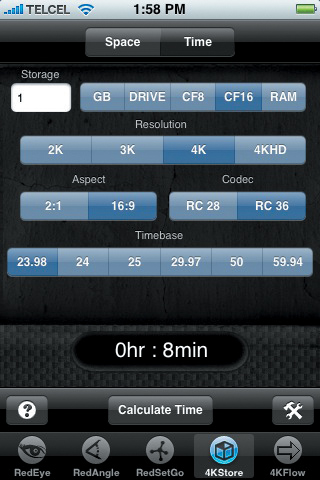
The RED CF cards are currently available in 8 GB ($165) and 16 GB ($495) capacities. You need the REDFLASH CF Module ($500) in order to use the cards. Record times are modest, because of the high data rate of REDCODE. You can expect about 4 minutes of 4K, 16:9 REDCODE 36 at 24 frames per second on an 8 GB CF, and about 8 minutes of the same settings on an 8 GB card.
Commercial shooters are likely to be fine with these record times. For many situations requiring long record times, such as unscripted interviews, they are too limiting, which means moving up to the drive units.
The RED-DRIVE ($900) and RED-RAM ($4,500) are your options for longer record times. Both drives offer FireWire 800 and USB 2.0 connections for downloading footage to your editorial and postproduction system.
The RED-DRIVE provides 320 GB of storage space on a RAID 0 hard drive that connects directly to the camera and can be mounted with the RED cradle (also included with the base production pack). The drive gives you almost 3 hours of recording time in 4K, 16:9 REDCODE 36 at 24 frames per second. You also need a special RED cable for either drive unit, sold separately.
Tip
If you happen to have an iPhone, grab the iSee4K application (www.isee4k.com). It offers several useful calculations for RED users, including lens field of view, maximum frame rate, and maximum available recording time per media type (Figure 4.11).
I recommend getting two RED-DRIVEs per camera body if you can afford them. That way, you can download from one drive while continuing to shoot with the other. Also, if you happen to be in a remote location and your RED-DRIVE is damaged or fails, you always have a backup ready to go. If you can’t budget for two RED-DRIVEs, grab one drive and a couple of 8 GB or 16 GB CF cards. You’ll be able to download footage off the RED-DRIVE and continue to shoot on the CF cards until the drive is ready to shoot again. Keep in mind that the RED-DRIVEs is sensitive to vibration, so having CF cards and a RED-RAM is wise if you’re planning a shoot with lots of vibration. You can only get these custom drive cables directly from RED, so stock up on a few spares just in case.
The RED-RAM unit is approximately four times as expensive as the RED-DRIVE, but it brings some nice benefits. With no internal moving parts, the RED-RAM is nearly impervious to moderate vibration and impact. So if you’re shooting a concert or an action film, you don’t have to worry (in contrast to the RED-DRIVE) about the drive skipping and dropping frames.
The capacity of the RED-RAM is currently limited to 128GB because of the internal solid-state drive (SSD) used in the unit. This works out to a little more than an hour of 4K, 16:9 REDCODE 36 at 24 frames per second. The ultimate decision between the RED-DRIVE and RED-RAM should be determined by the types of projects you’re doing. Of course, you can always get both for more flexibility.
If you’ve ever watched behind-the-scenes footage from a Hollywood film, you’ve probably seen a camera with an elaborate matte box mounted on it. The matte box is an important tool for creative control over your imagery. It protects your lens and shields it, to a certain extent, from sunlight and reflected light that can cause undesired flaring on your image.
A matte box also offers customizable trays for all your lens filters, which are essential; the RED camera has no built-in neutral-density filter wheel, so you must use glass filters to control exposure and depth of field. Those accustomed to working with traditional video cameras must be prepared for the extra time required to change filters. The filters must be removed, inspected, cleaned if necessary, and then inserted in the matte box, which any experienced cinematographer will tell you is essential. Even if you want to save creative color effects until post, you’ll almost certainly need to work with basic neutral-density (ND) and polarizing filters to control light (you’ll learn more about filters later in the “Filters” section).
Which matte box to get depends on your needs and budget. I use an ARRI MB-20 II compact matte box with 4 × 5.65mm filter trays (see Figure 4.12). You can also add trays and lighting shades as needed. By the time you read this, ARRI will also have an MB-28 model that looks like a great match for the RED.

The Vocas (www.vocas.com) MB-450 and the Chrosziel (www.chrosziel.com) 840 (both about $3,000) are other good potential options for the RED. Matte boxes come with a variety of accessories—such as support rods, swing-away brackets, and bellows rings—to fit onto the camera body and work with a variety of prime and zoom lenses. A dealer can help you select the best parts to work with the lenses you plan to use.
Filters have always been important to photographers and cinematographers. They can be used both for creative effects and technical control over exposure (Figure 4.13). Filters are available for every conceivable effect, and experimenting with them is a lot of fun.
I believe there are only a few filters that you must have to work with RED: neutral-density filters, an infrared filter (Figure 4.14), and a polarizer. The brand I like best is Tiffen (www.tiffen.com); I use 5 × 5-inch and 6 × 6-inch sizes to cover a variety of lens types. Schneider (www.schneideroptics.com) and Formatt (www.formatt.co.uk) are also excellent filter brands.
If you’re coming from a DV or HD camera background, you’re accustomed to the idea of an f-stop being important mainly for setting the correct exposure. You typically have so much depth of field with a small-sensor camera that it really doesn’t matter where the f-stop is, because the depth of field will be similar. But with the RED’s 35mm-sized sensor, you can profoundly affect the depth or shallowness of field via ND filters.
An ND filter simply blocks visible wavelengths of light by a very specific amount, forcing you to open up the aperture to another setting and giving a different depth-of-field characteristic. The more you open the aperture, the shallower the depth of field becomes. ND filters are typically notated as .3, .6, and .9, or as 2, 4, 6. With either counting method, you are usually decreasing one stop for each step. So, an ND .3 (or 2) is one stop, a .6 (or 4) is two stops, and so on. You can also get graduated ND filters in which only a portion of the filter halts light. Those can be very useful for balancing landscape shots where you want to reduce the exposure of a bright sky while maintaining the exposure of the foreground and below the horizon. A set of three ND filters will get you through just about any possible lighting situation, because they can be combined for greater strength as needed (Figure 4.15).

Because of its CMOS chip, the RED camera has increased sensitivity to infrared light. This can cause unexpected color rendition, especially when shooting outdoors in strong direct sunlight with ND filters. The effect is something like a black light, except in this case colors that should read as black turn magenta. Infrared (IR) and Hot Mirror filters correct for this issue by reflecting away infrared light, while allowing visible light to pass through unaffected. For best results with the RED, use Tiffen or Schneider Hot Mirror IR filters with their stronger dichroic (layer of light-absorbing film) coatings.
Polarizing filters (Figure 4.16) are also very important for dealing with skies and reflections. In general, polarizers work to enhance contrast and reduce reflections, depending on your camera angle. You can rotate a polarizer to dial in the effect’s strength. If the polarizer doesn’t seem to be doing anything, try changing your camera position slightly.
Diffusion and softening filters are designed to soften harsh edges and enhance beauty. However, I think these are effects better left to post, because they decrease apparent resolution and take away from the advantage of shooting 4K in the first place. The same goes for special effects such as star filters that produce flaring around bright objects. These are easy filters to emulate in postproduction, but once you shoot with them, you’re locked into that look.
Color-correction filters are not a 100 percent necessity either, because the RED’s RAW sensor has no native color mode. It’s technically balanced to daylight, but you can easily alter this in the RAW files. This doesn’t mean you won’t have to worry about color temperature. For example, if you’re shooting indoors with windows looking outside, you’ll have mixed color temperatures. To make that scene look natural, you’ll need to either gel your lights for daylight balance or gel your windows for tungsten (artificial lighting) balance.
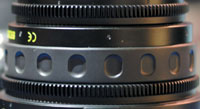
If you’re accustomed to working in the video world with autofocus-assisted cameras and their deeper depth of field, optics operation on the RED will be a big change. Focusing on the RED is completely manual, as it is on all professional film cameras. Manual focus means total creative control, but it also presents the challenge of keeping the image you want to see in focus. A lens is pretty difficult to manually operate, which is why all professional lenses have geared teeth along their diameters (Figure 4.17) to enable the attachment of manual and motorized follow-focus kits and whips. In this section, we’ll start with the simplest, least expensive types and work upward.
The basic follow-focus kit consists of a gear that connects to the lens and a set of interconnecting hardware to control everything with a focus wheel. I use an ARRI FF4 double-sided follow-focus kit (about $3,000) with a 19mm rod adapter (about $500). It’s nice and lightweight while offering precise control for most lenses. Sometimes it’s not comfortable or physically possible to focus from directly alongside the camera—say, from a dolly or fast-moving handheld shot. Adding a nice flexible focus whip like the ARRI 13.5-inch can help alleviate this limitation. A focus whip is a mechanical cable that connects to the focus gears of a lens, allowing you to operate it from a distance (usually a couple of feet).
Tip
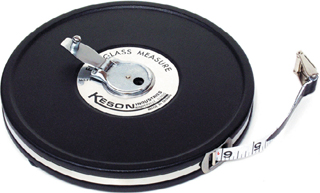
A tape measure is an important tool for pulling focus. You can quickly measure the distance to a subject and make corresponding marks on your camera’s lens. I like the Keson 50-foot fiberglass tape measure (about $15—see Figure 4.18). It has a hook to mount to the camera and a roller to reel in the line.
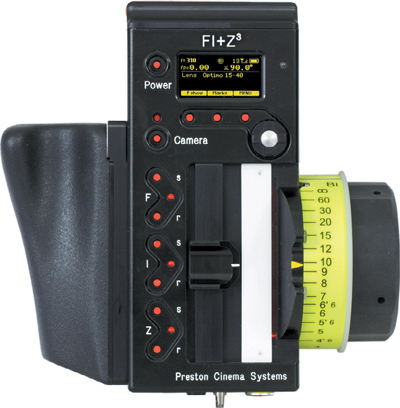
Sometimes even a focus whip doesn’t have sufficient physical reach to permit focusing, such as when the camera is mounted on a remote head high up on a crane. It’s difficult to get anywhere near the lens to focus. For those situations, you need a remote focus (Figure 4.19). These can be wired or wireless, with the wireless usually being more expensive. The pros use gear such as the Preston FI+Z wireless system (www.prestoncinema.com), which can go for upward of $14,000 depending on the options you pick, but is worth every penny (Rodney Charters, ASC, uses these on 24). C-Motion (www.cmotion.eu) offers an even more elegant and sophisticated wireless system called the C3 for higher-end budgets.
Moving down a few dollars but retaining plenty of functionality and quality is the Bartech (www.bartechengineering.com) BFD wireless focus unit for about $2,100. Bartech also offers wired units that are even cheaper. ARRI offers a simple wired remote follow-focus system. Whether you decide to include a remote focus system or not, you’ll definitely want at least a regular mechanical follow-focus system to pull focus properly with cinema style lenses on the RED.
A tripod is another must-have, because it’s hard to imagine a project where you won’t want the camera to be nice and steady at least some of the time. It’s also a good way to keep the camera safe and protected as you mount accessories and change lenses. Compared to high-end HD and 35mm film cameras, the RED is about on par for weight, but next to DV and prosumer HD cameras it’s quite heavy. The body alone weighs 10 pounds, and completely loaded with a big zoom lens, matte box, follow focus, LCD, EVF, battery, and drive, the RED can tip the scales at a hefty 50 pounds or so. That means you need more than a standard-issue video tripod to support it, especially when you’re adding a heavy-duty zoom lens, matte box, batteries, monitors, and so on.
I use an O’Connor (www.ocon.com) Heavy Duty 150mm tripod with an Ultimate 2060 head and a Mitchell base mount. This is a very stable and fluid platform for the RED. You can find a complete 2060 package including case for just less than $10,000. That may sound like a lot for just a tripod if you’re coming from the video world, but it makes all the difference in the world. If you splurge on the tripod now, you’ll thank me every day you shoot with it.
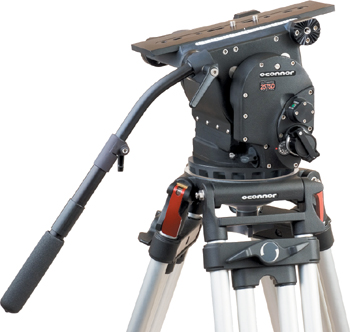
The O’Connor 2575 is also a good choice (Figure 4.20), though it’s a bit heavier than the 2060. O’Connor is very popular these days, but if I wanted another tripod brand for less money, I’d look into Sachtler (www.sachtler.us) or Ronford Baker (www.ronfordbaker.co.uk). They all make tripods for much less than $10,000; just make sure to get one rated to hold the weight of your intended package. More examples are the Miller Arrow 55 System 1726 (about $6,000). You can also scan eBay for a used tripod, because they can last for decades with good care.
I’ll get right to the point on batteries: You can never have too many. On a typical shoot day, I turn on the RED at 7 in the morning and turn it off when the sun goes down. That can mean anywhere from three to five battery changes per day. When a battery comes off the camera, it immediately joins its brothers on a plugged-in charger when we’re in the studio or a location that offers AC power, which isn’t always the case. Don’t wind up having your shoot day curtailed by the last battery going out.
I suggest getting at least two, if not four, RED Brick batteries ($450) per camera body. Or grab a RED Power Pack ($1,450), which is great because it includes two batteries and simultaneous charging capability for both. With two RED Power Packs and a RED cradle ($750) to mount onto the camera, you’ll be all set.
If you happen to have a stock of Anton Bauer camcorder Hytron 140 batteries (www.antonbauer.com), you’ll want to get its special adapter that fits onto the RED. RED also offers a 12V DC charger ($85) to connect to a car or boat DC power outlet. It can come in handy if you expect to be away from available AC power for most of the shoot.
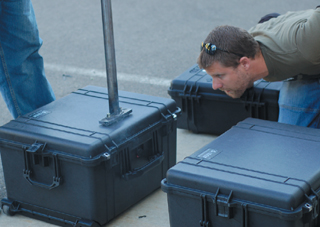
There are a zillion equipment cases out there, and you can mix and match types and configurations to your heart’s content. I prefer to have the camera body and a few accessories in one case, the tripod in another, lenses in a third, and so on. If you go that way, RED’s custom camera case ($600) is a solid investment (Figure 4.21). It’s an off-the-shelf Pelican 1620, which already is one of my favorite cases, and it features a laser-cut foam insert designed to hold the RED ONE and a good number of accessories.
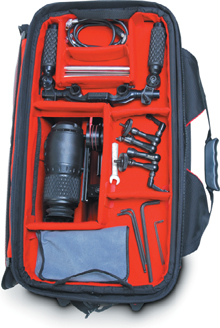
If you prefer a soft case, try the Petrol (www.petrolbags.com) PRB-15 ($499), which is designed to hold the camera, viewfinder, and handheld-mode accessories (Figure 4.22).
I use Tuffpack (www.tuffpak.com) cases for my tripods, which go for less than $500 and can be configured with or without wheels. For optics and other accessories, I use A&J DI (www.ajcases.com) cases, which can be custom-fitted for specific accessories. They are designed to meet or exceed the Air Transportation Association specification 300, Category 1 requirements (meaning they will likely survive an overzealous baggage handler).
I also like Anvil ATA (www.anvilcase.com) cases, which meet the airline standards and can be custom-fitted as well.
The RED Cart ($1,290) features a standard tripod ball base so you can mount your tripod head directly on it. It’s very durable and yet collapses to a compact size for shipping. It weighs a lot (about 70 pounds), but you want something built tough to hold your camera while you mount optics and all the necessary accessories. This is a lot better than just having it on the floor or perched on a case. (The RED cart also has wheels, so you can even use it as a dolly in an extreme pinch, but I wouldn’t recommend this.)
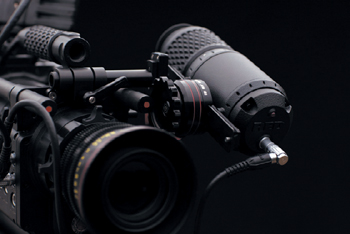
You have two primary reasons to monitor your RED footage while on a shoot: operating the camera and critically evaluating images, including for exposure, color balance, and focus. With onboard HDMI and a 4:4:4 playback signal, you have a lot of potential for high-quality viewing. You typically use a smaller monitor and/or the EVF for framing and operating the camera during a take. Then you can use a higher-quality and typically larger outboard monitor for evaluating exposure, focus, and color temperature. I think it’s important to have all three kinds: EVF, onboard, and studio (production) monitor. That way, you really have a good idea what you’re shooting on the set rather than waiting for surprises when you get into postproduction.
RED’s EVF ($2,950—see Figure 4.23) should be another must-have on your list. It has a very sharp 720p (1280 × 720 lines progressive, high-definition resolution) display and offers user-programmable camera control buttons. The EVF also has a diopter adjustment to accommodate variations in operator eyesight.
The EVF comes with a customizable mount. However, you might want more flexibility to place your viewfinder. I recommend the Element Technica (www.elementtechnica.com) EVF mount ($1,190—see Figure 4.24), which lets you position the EVF in a wider variety of places on the camera and virtually eliminates the risk of damage that can occur if the standard mount loosens.
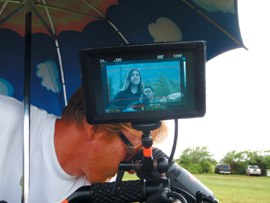
The EVF is excellent for the person operating the camera, but a second onboard monitor is also critical. This lets the director and the camera assistant see what’s being photographed as they stand next to the camera, and it can be used to communicate framing intentions (Figure 4.25). RED makes two models: a 5.6-inch LCD ($1,700) and a 7-inch Pro LCD ($2,500). They’re lightweight, affordable, and perfectly matched to the camera.
Other nice onboard production monitors you can try include the Panasonic (www.panasonic.com) BT-LH900A (about $4,000) and LS Designs’ Carrion (about $2,000). Just don’t get completely lulled into using an onboard monitor to gauge exposure and color balance. These monitors can give you a rough indication, but you’re better off leaving the really critical image judgment to a larger and higher-quality production monitor.
Usually when you set up a scene, you place the camera and then run the cabling and power off to the side where you can mount your studio (or production) monitor out of the way. A large studio monitor can be very helpful for judging image quality details and can also serve as a client monitor (a viewing monitor a production client can watch from). Also, if you’re using a remote camera and a wireless follow-focus system, the camera assistant might use the studio monitor to gauge focus as the shot is made.
I use the Panasonic BT-LH1760 17-inch LCD monitor (less than $4,000) as the main studio monitor. It’s big enough to show what you’re shooting clearly, with lots of definition, but it’s not so heavy as to prevent it from being carried into the field. The BT-LH1760 includes a Histogram and waveform monitor for more accurate evaluation of a shot. You can also power it via standard Anton Bauer camcorder batteries for use in remote locations. I also recommend the hood accessory to shield the monitor for easier viewing outdoors. Some other suggestions for studio monitors are Tamuz (www.tamuz.tv), Cinetal (www.cine-tal.com), JVC, and Sony.
Note
Even though the RED has a built-in exposure meter, a handheld cinematographer’s light meter to set exposure can be a huge help. For more details, refer to Chapter 6.
Depending on which monitors and accessories you get, you’ll need cabling to route those signals. I recommend having both short and long cables to allow you to connect to monitors right next to the camera or a good distance away. The RED ONE camera uses mini-coaxial connectors, for which you need special cables to connect to most third-party monitors. Most of the cables you need are available through RED’s Web site.
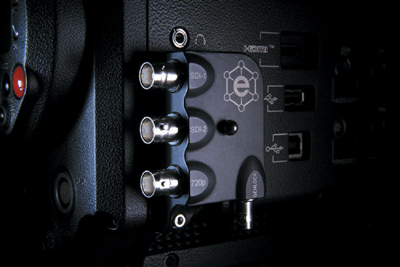
Alternatively, you can get the Element Technica RED Video Break Out Box ($580) to convert the onboard connectors to standard HD-SDI BNC connectors. This gives you more flexibility and ease of use with outboard monitoring, and I highly recommend this accessory (Figure 4.26).
Along with all the camera accessories, you also need some peripheral gear to download footage from the camera. This is a job your digital imaging technician (DIT) or (possibly you) might do, depending on the size of the crew. (We’ll look at on-set data management in more depth in Chapters 9 and 14.)
You will use a computer to transfer footage from CF cards or RED-DRIVEs. Try to match the transfer computer type to your editing system. If you’re working on a Mac editing system, for example, use a Mac to transfer footage; conversely, if you’re cutting on a Windows machine, transfer with a Windows machine. This saves you some initial challenges involved in transferring from Mac to Windows systems. I like to carry a 17-inch MacBook Pro with a FireWire 800 port. When I know there will be available AC power, I use a MacPro desktop with an eSATA card and eSATA drive.
You need sufficient hard drive space to hold all the footage you intend to shoot, along with enough for a backup, too. If you’re shooting CF cards, you also need a card reader. (For more workflow details, see the section “Archiving in the Field” in Chapter 14.)
Note
Sound equipment is also a very important part of your RED package—so important that it gets its own chapter (Chapter 5).
Now that you’ve been introduced to the major kinds of gear, you’re probably asking, “But what do I really need?” Ultimately, that depends on two factors: how much you have to spend and what kinds of projects you want to do with your camera.
If you’re simply buying the RED for personal projects that may not see a major release, you can get away with a very minimal package. You need the body and an EVF or a monitor (you can get away with having one or the other). You could hook up an inexpensive HDMI-equipped prosumer HD monitor for your viewing—of course, you’ll give up accuracy, but it’s better than nothing. You can find less expensive tripods, but be certain they are rated for at least 40 pounds so you don’t have problems balancing the RED. For optics, try the RED zooms and/or primes. Or grab the Canon or Nikon mount, and go with still lenses. You need a set of batteries, a charger, and either CF cards or a RED-DRIVE to record to. You could be set up for less than $30,000, excluding a postproduction/editorial system.
Moving up a few notches, I’d first look at monitors. Spring for the secondary onboard monitor and then grab a good studio monitor with waveform and vectorscope, which are useful for getting a proper exposure (covered in more detail in Chapter 6). Next, upgrade your tripod and work in some focusing and mounting accessories.
Optics are probably the most expensive investment you can make. A complete set of professional cinema primes with a matching quality zoom can run you upwards of $200,000. Remember, you can always rent lenses on a per-job basis. If you’re not using your camera regularly on paid jobs, the price of cinema lenses may be too great to ever recoup. As with everything, plan and look before you leap into a full RED package.
Although the RED ONE is the focus of this book, the company has announced that more cameras are on the way. These include the prosumer-leaning Scarlet and the high-end EPIC. The Scarlet is aimed at the under-$10,000 market, where prosumer high-definition cameras such as the Panasonic HVX200 and Sony EX1 and EX3 have become very popular. The EPIC is intended as a high-end cinema replacement for the RED ONE, with 5K resolution. Here I take a quick look at each of these cameras with a reminder of RED’s unofficial motto, “Everything in life changes... including our camera specs and delivery dates.”
Note
Check the companion Web site at www.peachpit.com/RED for updates on Scarlet and EPIC.
The Scarlet (Figure 4.27) takes the RED’s modular design concept and runs with it. To put together a Scarlet system, you first start with a brain unit (same concept as the RED’s body) with a sensor size ranging from a standard 2/3-inch chip all the way up to full-frame 35mm. The rest of the modules give you battery power, monitoring and EVF, recording media, and I/O options. There’s a nice wireless remote control unit as well. RED also plans to offer prime lenses designed for the 2/3-inch chip and for the full-frame 35mm camera. The Scarlet’s entry-level price is planned to be about $3,000.
The EPIC (Figure 4.28) lies at the opposite end of the spectrum from the Scarlet. EPIC’s sensor options start at Super 35mm size all the way up to a massive 168 × 56mm “Monstro” sensor, capable of shooting considerably more massive frame sizes than any other motion-picture camera ever released. Prices for the EPIC brain modules are expected to start at about $28,000 (or about 40 percent more than the original RED ONE). RED plans to extend a full-price trade-in credit to RED ONE owners who want to upgrade to the EPIC, which should make the transition easier. Many of the original RED ONE accessories are expected to work with the EPIC as well.
Note
RED envisions a 3D configuration for the EPIC, enabling moviemakers to create new forms of digital content.
Both the Scarlet and EPIC are intended as part of RED’s Digital Stills and Motion Camera (DSMC) concept. Though both are designed primarily as digital motion-picture cameras, RED hopes they will be accepted as digital still cameras as well, because of their very high resolution. This reasoning makes a lot of sense, because the digital still and motion-picture camera worlds have been rapidly converging ever since the release of DSLRs such as the Canon EOS 5D Mark II and the Nikon D90, which offered HD video modes in addition to standard still-photography capabilities.
COFOUNDER, OFFHOLLYWOOD
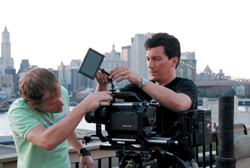
As the owner of RED ONE serial numbers 6 and 7, Mark L. Pederson is one of the most knowledgeable people about the camera outside of RED staff. Pederson runs the New York–based production and postproduction company Offhollywood. He cofounded the company with Aldey Sanchez in 2003 using one Mac and one license of Final Cut Pro. “We didn’t have a business model at first, but we knew technology was going to change the filmmaking process,” Pederson recalls. “Production and post were merging together as we tracked a lot of technology and did desktop finishing. For a while we were the low-budget indie option for finishing projects shot with the Panasonic VariCam in New York.”
“When we began, filmmakers were shooting indie features with the VariCam and the Sony F-900,” Pederson continues. “The consensus was that you had to hire video engineers from post houses. As experts in HD and scopes, they saw a huge opportunity. Part of it was perpetuated by the fact that everyone wants to be an expert, but I didn’t think it was rocket science. Today I don’t know of any DP in New York City who doesn’t know their way around the menu of a VariCam or an F-900.”
As Pederson continued working with VariCam productions, Offhollywood also constructed a postproduction facility to support its high-definition features. “We built our company on AJA products, so we knew Ted Schilowitz [who later went on from AJA to RED],” Pederson reveals. “In 2006, Ted told me he was going to leave AJA and build a camera with Jim Jannard from Oakley. I didn’t think they could do everything they planned, but if they did half, it would be good enough. I was invited to help out in the NAB booth in 2006 when RED decided to tell the world their plans and price point. During a conference call they decided they were going to take reservations at the next NAB, and I asked if anyone objected to my reserving the first two cameras, serial numbers 6 and 7 [the first five were slated for Jannard]. The ensuing hype astounded me, and a year and a half later, we got our cameras.”
Pederson sees his work as not only technical but also educational, as the camera was initially met with skepticism. “Every week we’re working with someone who’s never shot with the RED before, but that’s certainly changing,” he observes. “I’m in this business because I like features, and we always try to have at least one indie going. We’re making inroads into the ad market so we can earn our keep. We are also building a next-generation production and post-production facility in Manhattan based entirely on shooting and finishing with RED camera systems.”
Offhollywood beta-tested early builds of the camera as it was being developed and provided constant feedback while utilizing it in daily production. “It feels like 20 years ago since we got the first cameras,” says Pederson. “Now we have eight cameras, and this week we’ll have all eight on seven different productions. It’s completely changed our business model. At this point I think that RED delivers for the money—the picture is just much better than anything near its range, and Jim is just getting started.”
One of the most important areas in which Pederson’s techs help production crews is on-set data management. “We do it a couple of different ways, whether it’s a small project or a feature,” he says. “We try to use the CF cards as much as possible instead of the RED-DRIVEs because they are RAID 0. Someday one of them will fail, and all of the media could be lost. So, we always make productions take two drives and hot swap the drives as often as possible during a shoot day. That way, if one of those drives dies, there’s only so much material at risk. That’s going to change in the future with the solid-state RED-RAM drives.”
Production on the East Coast has always shared a (mostly) friendly rivalry with Hollywood, and Pederson is quick to take note of the differences in approach with regard to RED. “L.A. is more of a tape-driven post market, while we want to push files because the future is tapeless,” Pederson says. “It’s kind of a joke to make tapes because they become digital files again once they get digitized into an Avid or other system. RED has accelerated things that were already happening with respect to tapeless workflows.”
Pressed for more specifics, Pederson points to the world of digital intermediates. “Pre-DI you had your film printer lights. You could say cooler or warmer and push/pull process your developing, which sounds like a zillion years ago. Now there’s barely a single feature that hasn’t gone through a DI. This isn’t just a RED-specific thing but definitely something RED is really accelerating.”
Pederson also sees other parts of the production workflow with room for technological innovation. “RED has a whole bunch of metadata in every frame. I want to attach more to the media and really put it to work. Instead, you’ve got a $60 million dollar movie where the sound recordist and assistant camera technicians are still putting handwritten reports on carbon copy forms that get photocopied and eventually make their way into a binder. Then the editor picks up the binder and puts it up on a shelf. Well, there’s no GUI [graphical user interface] for a 5-inch binder.
“We will see, in the ‘never-near’ future, new ways of collecting that metadata on set and using it throughout the postproduction process,” he adds. “Adobe now has speech-to-text translation in CS4, which lets you search your media for a word or phrase, and Avid has a script-based editing tool. The media with the most tags wins. Google is looking in your e-mail and serving you ads based on personal keywords, and sites like YouTube and Netflix have search engines that display media based on tags.”
With RED cameras now much easier to acquire than in the early days of the company, Pederson believes optics will be the next area of major activity. “The real war is going to be over glass—there aren’t enough high-quality cinema lenses in existence,” he observes. “Jim’s making new high-end glass, but he can’t make it fast enough. The demand is tremendous. Making good glass at a low price point appears to be harder than making the camera itself.”
Surveying the impact of the first few years of RED in the industry, Pederson believes change is just getting started. “RED’s technology has completely transformed our business,” he says. “Our early adoption of the camera system allowed us to leap our company forward. We are anxiously awaiting the new DSMC camera systems from RED to take everything up to the next level.”
Mark Pederson’s Web site is www.OffhollywoodNY.com.