
Chapter 4: Building a Server-Side-Rendered Community Feed Using Next.js
So far, you've learned how React applications are typically Single-Page Applications (SPAs) and can be kickstarted using Create React App. This means the application is rendered on the client side, making it load in the browser when the user visits your application. But did you know React also supports Server-Side Rendering (SSR), as you might remember from back in the old days when code only rendered from a server?
In this chapter, you'll learn how to create an application that has components dynamically loaded from the server instead of the browser. To enable SSR, we'll be using Next.js instead of Create React App. Next.js is a framework for React applications and adds additional features to React. If you're interested in Search Engine Optimization (SEO), SSR comes with the advantage that we can add metadata to the application so it can be better indexed by search engines.
The following topics will be covered in this chapter:
- Setting up Next.js
- Server-side rendering
- SEO in React
Project overview
In this chapter, we will create a community feed application using Next.js that supports SSR and therefore is loaded from the server rather than the browser. Also, the application is optimized for search engines.
The build time is 2 hours.
Getting started
The complete source code can also be found on GitHub: https://github.com/PacktPublishing/React-Projects-Second-Edition/tree/main/Chapter04. Also, this project uses the publicly available Stack Overflow API to fill the application with data. This is done by fetching questions that are posted to Stack Overflow. More information about this API can be found at: https://api.stackexchange.com/docs/.
Community feed application
In this section, you'll build a community feed application with Next.js that supports SSR. Next.js goes beyond the functionalities of Create React App, by delivering a framework to build React applications quickly. It has built-in features for routing, SEO, SSR, and much more, as you'll learn in this chapter. In this community feed, you can see an overview of recent questions on Stack Overflow that have the reactjs tag, and you can click on them to see more information and the answers.
Setting up Next.js
In previous chapters, we used Create React App to run a React application. Although Create React App is a good starting point for most React applications, it doesn't support SSR. Luckily, Next.js does offer this feature as it's considered a framework for React. In this chapter, we'll be using the latest stable version of Next.js, which is version 12.
Installing Next.js
To set up Next.js, we run the following command:
npx create-next-app chapter-4
You'll be asked to select a template, which is either the default starter app or a template that is created by the community. After selecting the default template, the react, react-dom, and next libraries will be installed, among others.
After the installation is finished, we can move into the new chapter-4 directory and run the following command:
npm run dev
This will start the new Next.js application that will become available at http://localhost:3000. The default starter app will look something like the following application:

Figure 4.1 – The initial Next.js application
In this application, you can not only see what a Next.js application looks like but also find useful links to more sources to learn about Next.js and examples of how to deploy it.
The application structure for a Next.js project is slightly different from how we structured our Create React App in the preceding chapters:
chapter-4
|- package.json
|- node_modules
|- public
|- pages
|- api
|- hello.js
|- _app.js
|- index.js
|- styles
|- globals.css
|- Home.module.css
In the preceding structure, you can see that there is again a directory called pages that will contain React components that will serve as a page. But different from Create React App, we don't need to set up react-router to serve the pages. Instead, Next.js automatically renders every component in that directory as a page. In this directory, we also find the hello.js file in the api directory. Next.js can also be used to create API endpoints, which we'll explore more in Chapter 7, Build a Full Stack E-Commerce Application with Next.js and GraphQL. Also, the CSS files for our components are put in the styles directory, where you'll find the globals.css file with global styling and Home.module.css with styling for a specific component.
Adding styled-components
Before we set up the routing, let's add styled-components to the project, which we've also used in the previous chapters. For this, we need to install styled-components by running the following commands:
npm install styled-components
This will add the packages to our project so we can use them to create and style reusable components.
Note
Next.js uses the styles directory to store global and component-specific CSS files for styling. As we're using styled-components for styling instead, we don't have to add any new CSS files to this directory. If you're not using a library for styling with CSS-in-JS, you can place both global and component-level styling files in the styles directory instead.
Setting up styled-components in Next.js is done slightly differently in comparison to Create React App:
- In Next.js, a Document component wraps the html, body, and head tags and runs them through a so-called renderPage method to allow for SSR. We need to overwrite this Document component from a new file called _document.js in the pages folder:
import Document from 'next/document';
import { ServerStyleSheet } from 'styled-components';
export default class MyDocument extends Document {
static async getInitialProps(ctx) {
const sheet = new ServerStyleSheet();
const originalRenderPage = ctx.renderPage;
try {
ctx.renderPage = () =>
originalRenderPage({
enhanceApp: (App) => (props) =>
sheet.collectStyles(<App {...props} />),
});
const initialProps =
await Document.getInitialProps(ctx);
return {
...initialProps,
styles: (
<>
{initialProps.styles}
{sheet.getStyleElement()}
</>
),
};
} finally {
sheet.seal();
}
}
}
The preceding code creates an instance of ServerStyleSheet, which styled-components uses to retrieve any styles found in all the components in our application. This is needed to create a stylesheet that can be injected into our server-side-rendered application later on. The sheets.collectStyles method collects all of the styles from our components, while sheets.getElement() generates the style tag, which we'll need to return as a prop called styles.
- To support SSR for styled-components, we also need to configure the next.config.json file in the root of the project. This file needs to hold the following configuration:
const nextConfig = {
reactStrictMode: true,
+ compiler: {
+ styledComponents: true
+ }
}
module.exports = nextConfig
- As with Next.js, we don't have a global entry file for the application. We need a different place to add our global styling and components that we want to display on all pages, such as a header. These styling and component must be added to _app.js in our pages directory, which returns the component for the page that we're currently visiting and any other component or styling that we return:
- import '../styles/globals.css';
+ import { createGlobalStyle } from 'styled-components';
+ const GlobalStyle = createGlobalStyle'
+ body {
+ margin: 0;
+ padding: 0;
+ font-family: -apple-system, BlinkMacSystemFont,
"Segoe UI", "Roboto", "Oxygen","Ubuntu",
"Cantarell", "Fira Sans", "Droid Sans",
"Helvetica Neue", sans-serif;
+ -webkit-font-smoothing: antialiased;
+ -moz-osx-font-smoothing: grayscale;
+ }
+ ';
function MyApp({ Component, pageProps }) {
- return <Component {...pageProps} />;
+ return (
+ <>
+ <GlobalStyle />
+ <Component {...pageProps} />
+ </>
+ );
}
export default MyApp;
In the preceding file, we've deleted the line that imports the styles/globals.css file and replaced it with styling in styled-components. This means you can also safely delete the globals.css file from the styles directory.
- This global styling is now present on all pages that we'll create later in this Next.js application. But for starters, let's create a Header component by adding a file called Header.js in a new directory called components:
import styled from 'styled-components';
const HeaderWrapper = styled.div'
background-color: orange;
height: 100%;
display: flex;
flex-direction: column;
align-items: center;
justify-content: center;
font-size: calc(10px + 2vmin);
color: white;
';
const Title = styled.h1'
height: 64px;
pointer-events: none;
';
function Header() {
return (
<HeaderWrapper>
<Title>Community Feed</Title>
</HeaderWrapper>
);
}
export default Header;
- This component will return a header that will be used on every page, but we also need to add it to _app.js to be effective:
import { createGlobalStyle } from
'styled-components';
+ import Header from '../components/Header';
// ...
function MyApp({ Component, pageProps }) {
return (
<>
<GlobalStyle />
+ <Header />
<Component {...pageProps} />
</>
);
}
export default MyApp;
You'll see what the headers look like in the next section when we add our first route to the application.
We've added multiple new files that have global styling with styled-components, which supports SSR, and also a directory that holds reusable components.
With both Next.js and styled-components set up, we are ready to start developing with Next.js in the next section of this chapter.
Routing with Next.js
With the react-router package, we can add declarative routing to any React application, but you need to set up components that define which routes you want to add. With Next.js, the filesystem is being used for routing, starting at the pages directory. Every file and directory in pages can represent a route. You can check this by visiting the project at http://localhost:3000, where the contents of index.js are being rendered.
If we, for example, wanted to add the new /questions route to the application, we'd need to create either a new file called questions.js or a directory called questions with an index.js file in pages. Let's go with the second option and add the following code to this file:
import styled from 'styled-components';
const QuestionsContainer = styled.div'
display: flex;
justify-content: space-between;
flex-direction: column;
margin: 5%;
';
function Questions() {
return (
<QuestionsContainer>
<h2>Questions</h2>
</QuestionsContainer>
);
}
export default Questions;
This new route has now become available at http://localhost:3000/questions where only a title is being rendered. As mentioned in the introduction of this chapter, we'll be using the Stack Overflow API to get the data for this application.
Before retrieving the data from the endpoint, we also need to create a component to render this data in. To do so, we need to create a new component that will be used to display a question. This new component can be created in a file called Card.js in the components directory with the following contents:
import styled from 'styled-components';
const CardWrapper = styled.div'
text-align: left;
padding: 1%;
background: lightGray;
border-radius: 5px;
margin-bottom: 2%;
';
const Title = styled.h2'
width: 100%;
padding-bottom: 10px;
text-align: center;
border-bottom: 1px solid darkGray;
color: black;
';
const Count = styled.span'
color: darkGray;
';
function Card({ title, views, answers }) {
return (
<CardWrapper>
<Title>{title}</Title>
<Count>{
'Views: ${views} | Answers: ${answers}'}
</Count>
</CardWrapper>
);
}
export default Card;
With this component in place, let's retrieve the data from the Stack Overflow API. From this API, we want to retrieve all the questions that are posted with the reactjs tag, using the following endpoint:
https://api.stackexchange.com/2.2/questions?order=desc&sort=hot&tagged=reactjs&site=stackoverflow
You can find more information on this at https://api.stackexchange.com/docs/questions#order=desc&sort=hot&tagged=reactjs&filter=default&site=stackoverflow&run=true.
This returns an array of objects under the items field, and from every object, we can get information about a question, such as the title and the number of answers.
We can retrieve the data from this endpoint and display it on the /questions route by making some additions to the index.js file in the questions directory in pages:
- First, we need to add local state variables to the Questions component and add a useEffect Hook to fetch the data from the Stack Overflow API:
+ import { useState, useEffect } from 'react';
import styled from 'styled-components';
+ import Card from '../ ../ components/Card';
function Questions() {
+ const [loading, setLoading] = useState(false);
+ const [questions, setQuestions] = useState([]);
+ useEffect(() => {
+ async function fetchData() {
+ const data = await fetch(
'https://api.stackexchange.com/2.2/questions?
order=desc&sort=hot&tagged=reactjs&
site=stackoverflow');
+ const result = await data.json();
+ if (result) {
+ setQuestions(result.items);
+ setLoading(false);
+ }
+ }
+ fetchData();
+ }, []);
return (
// ...
- After adding the data fetching logic, we need to add some more code to display the fields from the API on our page. We're passing this data to our Card component to render it on the page:
// ...
return (
<QuestionsContainer>
<h2>Questions</h2>
+ {loading ? (
+ <span>Loading...</span>
+ ) : (
+ <div>
+ {questions.map((question) => (
+ <Card
+ key={question.question_id}
+ title={question.title}
+ views={question.view_count}
+ answers={question.answer_count}
+ />
+ ))}
+ </div>
+ )}
</QuestionsContainer>
);
}
export default Questions;
If you now visit the /questions route on http://localhost:3000/questions, you can see that a list of questions is being rendered together with the Header component, as you can see in the following screenshot:
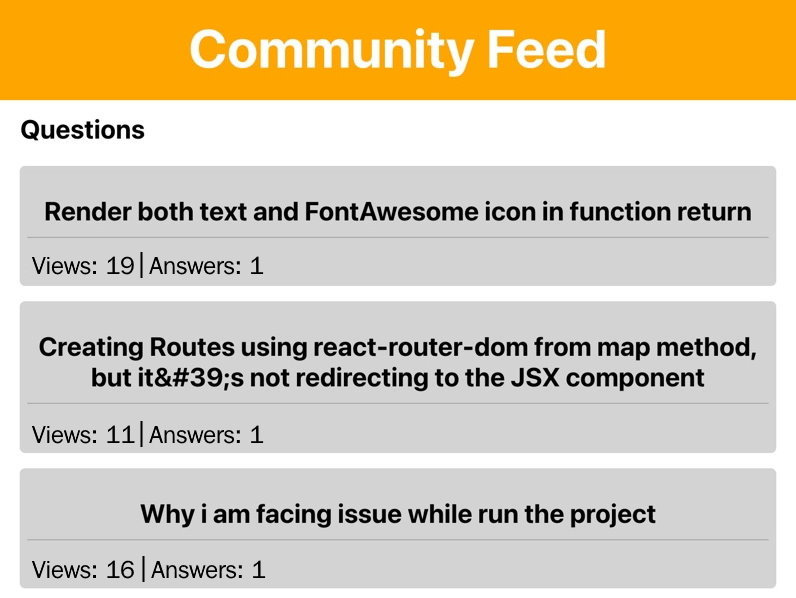
Figure 4.2 – Our application with Stack Overflow data
We'll be handling SSR later, but before that, we need to add routes that support parameters. To create a route that supports a parameter, we need to create a file created in the same manner as the Questions component. The new route will display a specific question, information that we can also get from the Stack Overflow API. Again, the filesystem will be leading in creating the route:
- To create a new route with a parameter, we need to create a file called [id].js inside the questions directory. This file has the parameter name inside square brackets, and in this file, we can use a Hook from the Next.js routing library to get this parameter value:
import { useRouter } from 'next/router';
import styled from 'styled-components';
const QuestionDetailContainer = styled.div'
display: flex;
justify-content: space-between;
flex-direction: column;
margin: 5%;
';
function QuestionDetail() {
const router = useRouter();
const { id } = router.query;
return (
<QuestionDetailContainer>
<h2>Question: {id}</h2>
</QuestionDetailContainer>
);
}
export default QuestionDetail;
By visiting http://localhost:3000/questions/123, you can see that the parameter that we've added has become visible on the screen.
- In the QuestionDetail component, we can import the Card component and we can use the Stack Overflow API to fetch data for a specific question. For this, we need to add both data fetching logic and elements to render the data to the [id].js file in the questions directory that we created in the previous step:
+ import { useState, useEffect } from 'react';
import { useRouter } from 'next/router';
import styled from 'styled-components';
+ import Card from '../../components/Card';
// ...
function QuestionDetail() {
const router = useRouter();
const { id } = router.query;
+ const [loading, setLoading] = useState(false);
+ const [question, setQuestion] = useState({});
+ useEffect(() => {
+ async function fetchData() {
+ const data = await fetch(
'https://api.stackexchange.com/2.2/questions
/${id}?site=stackoverflow');
+ const result = await data.json();
+ if (result) {
+ setQuestion(result.items[0]);
+ setLoading(false);
+ }
+ }
+ id && fetchData();
+ }, [id]);
// ...
- After adding the data fetching logic, the Card component can be returned with the question information passed to it as props:
// ...
return (
<QuestionDetailContainer>
- <h2>Question: {id}</h2>
+ {loading ? (
+ <span>Loading...</span>
+ ) : (
+ <Card
+ title={question.title}
+ views={question.view_count}
+ answers={question.answers_count}
+ />
+ )}
</QuestionDetailContainer>
);
}
export default QuestionDetail;
The API endpoint that gets a question by its identifier returns an array, as it expects multiple IDs at once. Therefore, we need to get the first item that's returned by the endpoint as we only provide one ID.
- To get to a specific question, you need to have the ID of the question. This is best done from the Questions component where we can import a Link component from the routing library of Next.js. Every Link component needs to wrap a component that's able to do routing, so we'll add a styled a element inside it. Also, the elements used to display the questions will be replaced by the Card component that we created before:
import { useState, useEffect } from 'react';
import styled from 'styled-components';
+ import Link from 'next/link';
import Card from '../../components/Card';
// ...
+ const CardLink = styled.a'
+ text-decoration: none;
+ ';
function Questions() {
// ...
return (
<QuestionsContainer>
// ...
{questions.map((question) => (
+ <Link
+ key={question.question_id}
+ href={'/questions/${question.question_id}'}
+ passHref
+ >
+ <CardLink>
<Card
- key={question.question_id}
title={question.title}
views={question.view_count}
answers={question.answer_count}
/>
+ </CardLink>
+ </Link>
))}
// ...
As you might notice when visiting http://localhost:3000/questions, the Card components are now clickable and link to a new page showing the question you've just clicked on.
- Finally, we want the basic / route to also show the Questions component. We can do this by importing this component inside /pages/index.js and having it returned from there:
import Questions from './questions';
export default function Home() {
return <Questions />;
}
The application will now return a list of questions on both the / and /questions routes, and is able to display a specific question when you click on any of the questions from these routes:

Figure 4.3 – Our application with basic styling and dynamic routes
Besides routing using parameters, we can also add routing using a query string for features such as pagination. This will be shown in the next part of this section, about routing with Next.js.
Handling query strings
Being able to navigate to individual questions is only one piece of the cake when you want to add routing to a project, and pagination could be another one.
The Stack Overflow API already has support for pagination, which you can see if you look at the API response. The object that is being returned when you call the endpoint that is described on https://api.stackexchange.com/docs/questions#order=desc&sort=hot&tagged=reactjs&filter=default&site=stackoverflow&run=true has a field called has_more. If this field has the true value, you can request more questions by adding the page query string to the API request.
Just as we got the parameters from the URL with the useRouter Hook from Next.js, we can also get the query strings with this Hook. To add pagination to the Questions component, we need to make the following changes:
- In the Questions page component in pages/questions/index.js, we need to import the useRouter Hook and get the query strings from the URL:
import { useState, useEffect } from 'react';
import styled from 'styled-components';
import Link from 'next/link';
+ import { useRouter } from 'next/router';
import Card from '../components/Card';
// ...
function Questions() {
const [loading, setLoading] = useState(false);
const [questions, setQuestions] = useState([]);
+ const router = useRouter();
+ const { page } = router.query;
useEffect(() => {
// ...
- The page constant can then be appended to the endpoint to retrieve the questions from the Stack Overflow API:
// ...
useEffect(() => {
async function fetchData() {
- const data = await fetch(
'https://api.stackexchange.com/2.2/questions
?order=desc&sort=hot&tagged=reactjs&site=
stackoverflow');
+ const data = await fetch(
'https://api.stackexchange.com/2.2/questions
?${page ? 'page=${page}&' : ''}order=
desc&sort=hot&tagged=reactjs&site=
stackoverflow');
const result = await data.json();
if (result) {
setQuestions(result.items);
setLoading(false);
}
}
fetchData();
- }, []);
+ }, [page]);
return (
// ...
Note
In the preceding code, we've also added page to the dependency array of the useEffect Hook to do the data fetching. When the application first renders, the value for page is not set as the query string should still be retrieved from the API. This is causing the API to be called twice, something that we won't optimize now but will do later once we add SSR to the application.
You can test whether this is working by changing the query string for page to different numbers, such as http://localhost:3000/questions?page=1 or http://localhost:3000/questions?page=3. To make the application more user-friendly, let's add pagination buttons to the bottom of the page.
- Create the Pagination component inside the components directory, which holds two Link components from Next.js. The component will display a link to the previous page if the current page number is above 1 and will also show a link to the next page if more pages are available:
import styled from 'styled-components';
import Link from 'next/link';
const PaginationContainer = styled.div'
display: flex;
justify-content: center;
';
const PaginationLink = styled.a'
padding: 2%;
margin: 1%;
background: orange;
cursor: pointer;
color: white;
text-decoration: none;
border-radius: 5px;
';
function Pagination({ currentPage, hasMore }) {
return (
<PaginationContainer>
<Link
href={'?page=${parseInt(currentPage) - 1}'}>
<PaginationLink>Previous</PaginationLink>
</Link>
<Link
href={'?page=${parseInt(currentPage) + 1}'}>
<PaginationLink>Next</PaginationLink>
</Link>
</PaginationContainer>
);
}
export default Pagination;
- We need to import this new Pagination component inside the Questions page component, but we also need to retrieve the value for hasMore from the Stack Overflow API:
import { useState, useEffect } from 'react';
import Link from 'next/link';
import { useRouter } from 'next/router';
import styled from 'styled-components';
import Card from '../../components/Card';
+ import Pagination from
'../../components/Pagination';
// ...
function Questions() {
const [loading, setLoading] = useState(false);
const [questions, setQuestions] = useState([]);
+ const [hasMore, setHasMore] = useState(false);
const router = useRouter();
const { page } = router.query;
useEffect(() => {
async function fetchData() {
const data = await fetch(
'https://api.stackexchange.com/2.2/questions
?${page ? 'page=${page}&' : ''}order=
desc&sort=hot&tagged=reactjs&site=
stackoverflow');
const result = await data.json();
if (result) {
setQuestions(result.items);
+ setHasMore(result.has_more);
setLoading(false);
}
}
fetchData();
}, [page]);
// ...
- Also, the Pagination component must be rendered at the end of the Questions component. Make sure to also pass the currentPage and hasMore props to the component:
// ...
return (
<QuestionsContainer>
<h2>Questions</h2>
{loading ? (
<span>Loading...</span>
) : (
+ <>
<div>
{questions.map((question) => (
// ...
))}
</div>
+ <Pagination currentPage={parseInt(page) ||
1} hasMore={hasMore} />
+ </>
)}
</QuestionsContainer>
);
}
export default Questions;
- Finally, we want the user to not be able to navigate to a page that doesn't exist. So, in the Pagination component, make the following changes to disable the previous or next button if there is no page available:
// ...
const PaginationLink = styled.a'
padding: 2%;
margin: 1%;
+ background: ${(props) =>
(!props.disabled ? 'orange' : 'lightGrey')};
+ pointer-events: ${(props) =>
(!props.disabled ? 'all' : 'none')};
+ cursor: ${(props) =>
(!props.disabled ? 'pointer' : 'not-allowed')};
color: white;
text-decoration: none;
border-radius: 5px;
';
function Pagination({ currentPage, hasMore }) {
return (
<PaginationContainer>
<Link href={'?page=${parseInt(currentPage) - 1}'}>
- <PaginationLink>Previous</PaginationLink>
+ <PaginationLink disabled={currentPage <= 1}>
Previous
</PaginationLink>
</Link>
<Link href={'?page=${parseInt(currentPage) + 1}'}>
- <PaginationLink>Next</PaginationLink>
+ <PaginationLink disabled={!hasMore}>
Next
</PaginationLink>
</Link>
</PaginationContainer>
);
}
export default Pagination;
You have now implemented the parsing of the query string to dynamically change the route for your application. With the addition of the Pagination component, both the / and /questions routes will look something like this:
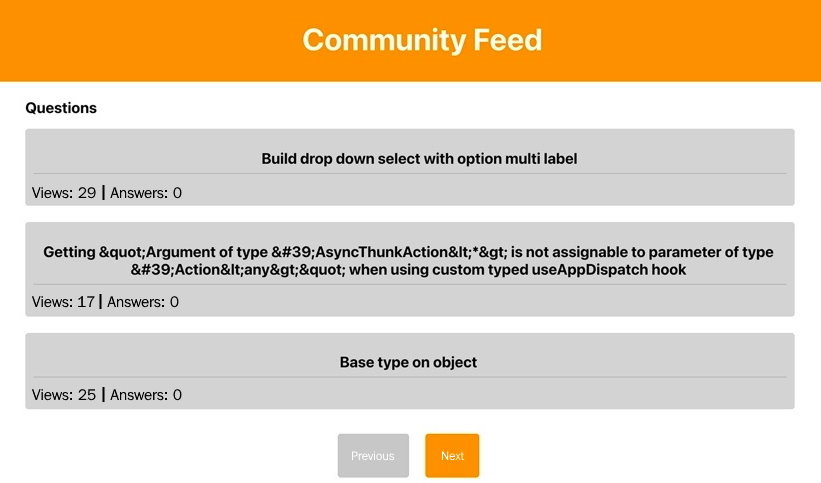
Figure 4.4 – The application after adding pagination
In the next section, you'll explore another thing you can do with React in combination with Next.js, SRR, which enables you to serve your application from the server instead of rendering it at runtime.
Enabling SSR
Using SSR can be helpful if you're building an application that needs to render very quickly or when you want certain information to be loaded before the web page is visible. Although most search engines are now able to render SPAs, this can still be an improvement, for example, if you want users to share your page on social media or when you want to enhance the performance of your application.
Fetching data server side with Next.js
There is no standard pattern to enable SSR for your React application, but luckily, Next.js supports multiple ways to do data fetching, such as dynamically from the client, server side on every request, or statically during build time. The first way is what we've done in this chapter so far and in this section, we'll be requesting our data server side on every request. For this, the Next.js getServerSideProps method will be used.
Note
Next.js also offers the getStaticProps and getStaticPaths methods to generate the content of your application statically at build time. This is especially useful if your content doesn't change that often and you want to serve your website as fast as possible.
At the beginning of this chapter, we already set up styled-components in such a way that it will support SSR, so we just have to alter how we do data fetching to enable it for the entire application. Therefore, we need to refactor our Questions component so that it will get the data from the Stack Overflow API on the server side instead of dynamically from the client:
- In the Questions page component, we no longer have to import the useState and useEffect Hooks to set up state management and data fetching, so these can be removed. The useRouter Hook from Next.js can also be deleted:
- import { useState, useEffect } from 'react';
import styled from 'styled-components';
import Link from 'next/link';
- import { useRouter } from 'next/router';
import Card from '../../components/Card';
import Pagination from '../../components/Pagination';
// ...
function Questions() {
- const [loading, setLoading] = useState(false);
- const [questions, setQuestions] = useState([]);
- const [hasMore, setHasMore] = useState(false);
- const router = useRouter();
- const { page } = router.query;
- useEffect(() => {
- async function fetchData() {
- const data = await fetch(
'https://api.stackexchange.com/2.2/questions
?${page ? 'page=${page}&' : ''}order=
desc&sort=hot&tagged=reactjs&site
=stackoverflow');
- const result = await data.json();
- if (result) {
- setQuestions(result.items);
- setHasMore(result.has_more);
- setLoading(false);
- }
- }
- fetchData();
- }, [page]);
return (
// ...
- Instead, the getServerSideProps method needs to be used to do the data fetching on the server side. As the data is then not retrieved by the client, we no longer need to set local state variables or life cycles to keep track of changes in the data. The data will already be there once we load our React application in the browser:
// ...
+ export async function getServerSideProps(context) {
+ const { page } = context.query;
+ const data = await fetch(
+ 'https://api.stackexchange.com/2.2/questions?${
+ page ? 'page=${page}&' : ''
+ }order=desc&sort=hot&tagged=reactjs&site=
stackoverflow',
+ );
+ const result = await data.json();
+ return {
+ props: {
+ questions: result.items,
+ hasMore: result.has_more,
+ page: page || 1,
+ }
+ };
+ }
export default Questions;
In this method, the value for page is retrieved from a constant called context, which is passed to getServerSideProps by Next.js and gets the page from the router. Using this value, we can do the data fetching in the same way as we did before in the life cycle. Instead of storing the data in local state variables, we're now passing it as props to the Questions component by returning it from the method we created.
- Our Questions page component can use these props to render our list of questions in the browser. As the data is retrieved from the server side before passing the application to the client, we no longer have to set a loading indicator to wait for the data to be fetched:
// ...
- function Questions() {
+ function Questions({ questions, hasMore, page }) {
return (
<QuestionsContainer>
<h2>Questions</h2>
- {loading ? (
- <span>Loading...</span>
- ) : (
- <>
<div>
{questions &&
questions.map((question) => (
// ...
))}
</div>
<Pagination currentPage={parseInt(page) || 1}
hasMore={hasMore} />
- </>
- )}
</QuestionsContainer>
);
}
// ...
You can check this by going to http://localhost:3000/questions and seeing that the questions are no longer being retrieved on the client side but on the server side. In the Network tab, there's no request made to the Stack Overflow API, while the questions are being rendered in the browsers. You can also verify this by inspecting the page source:

Figure 4.5 – SSR application using Next.js
However, the Questions page component is also imported in pages/index.js and returned there. But opening our main / route at http://localhost:3000/ doesn't show any questions. This is because this file doesn't have a getServerSideProps to get the data. Therefore, we need to create this method in pages/index.js as well and have it return the method that we can import from pages/questions/index.js so that we don't have to duplicate the data fetching logic. The Home component in this file can then get the data from the props and pass it to the Questions component:
- import Questions from './questions';
+ import Questions, {
+ getServerSideProps as getServerSidePropsQuestions,
+ } from './questions';
+ export function getServerSideProps(context) {
+ return getServerSidePropsQuestions(context);
+ }
- export default function Home() {
- return <Questions />;
+ export default function Home(props) {
+ return <Questions {...props} />;
}
After making this change, both the / and /questions routes will have SSR enabled. Another advantage of SSR is that your application can be discovered by search engines more effectively. In the next part of this section, you'll add the tags that make your application discoverable by these engines.
Adding head tags for SEO
Assuming you want your application to be indexed by search engines, you need to set head tags for the crawlers to identify the content on your page. This is something you want to do dynamically for each route, as each route will have different content.
Next.js can define the head tags in any component that is rendered by your application by importing Head from next/head. If nested, the lowest definition of a Head component in the component tree will be used. That's why we can create a Head component in our Header component for all routes and in each of the components that is being rendered on a route:
- Import the Head component in the components/Header.js file, and create a Head component that sets title and a meta description:
import styled from 'styled-components';
+ import Head from 'next/head';
// ...
const Header = () => (
+ <>
+ <Head>
+ <title>Community Feed</title>
+ <meta name='description' content='This is a
Community Feed project build with React' />
+ </Head>
<HeaderWrapper>
<Title>Community Feed</Title>
</HeaderWrapper>
+ </>
);
export default Header;
- Also, create a Head component in pages/questions/index.js that only sets a title for this route, so it will use the meta description of the Header component:
import styled from 'styled-components';
import Link from 'next/link';
+ import Head from 'next/head';
import Card from '../../components/Card';
import Pagination from
'../../components/Pagination';
// ...
function Questions({ questions, hasMore, page }) {
return (
+ <>
+ <Head>
+ <title>Questions</title>
+ </Head>
<QuestionsContainer>
// ...
</QuestionsContainer>
+ </>
);
}
// ...
- Do the same for the pages/questions/[id].js file, where you can also take the title of the question to make the page title more dynamic:
import { useState, useEffect } from 'react';
import { useRouter } from 'next/router';
+ import Head from 'next/head';
import styled from 'styled-components';
import Card from '../../components/Card';
// ...
function QuestionDetail() {
// ...
return (
<QuestionDetailContainer>
{loading ? (
<span>Loading...</span>
) : (
+ <>
+ <Head>
+ <title>{question.title}</title>
+ </Head>
<Card
title={question.title}
views={question.view_count}
answers={question.answer_count}
/>
+ </>
)}
</QuestionDetailContainer>
);
}
export default QuestionDetail;
These head tags will now be used when you're running your application on both the server and the client side, making your application more suitable for being indexed by search engines, which improves your SEO.
Summary
In this chapter, you've learned how to use Next.js as an alternative to Create React App. Next.js is a framework to create React applications, without having to add configuration for compiling and building your code or to handle features such as routing and data fetching. The project you created in this chapter supports SSR, as this is built in by Next.js. Also, we've added dynamic head tags to the application for SEO purposes.
After completing this chapter, you must already feel like an expert with React! The next chapter will take your skill to the next level as you'll learn how to handle state management using the context API. With the context API, you can share the state and data between multiple components in your application, no matter whether they're direct children of the parent component or not.
Further reading
For more information on Next.js, you can refer to https://nextjs.org/docs/.