
Chapter 5: Building a Personal Shopping List Application Using Context and Hooks
State management is a very important part of modern web and mobile applications and is something that React is very good at. Handling state management in React applications can be quite confusing, as there are multiple ways you can handle the current state of your application. The projects you created in the first four chapters of this book didn't focus on state management too much, something that will be investigated much more in this chapter.
This chapter will show how you can handle state management in React by creating an application state that is accessible from every component. Before React v16.3, you needed third-party packages to handle state in React, but with the renewed version of the context API, this is no longer mandatory. Also, with the release of React Hooks, more ways to mutate this Context were introduced. Using an example application, the methods for handling state management for your application are demonstrated.
The following topics will be covered in this chapter:
- Using the context API for state management
- Mutating Context with Hooks
- Code splitting with React Suspense
Project overview
In this chapter, we will build a personal shopping list by adding state management using Context and Hooks. We will advance upon a boilerplate application that has been created with Create React App and has declarative routing using react-router. Also, code splitting of the bundle is added with React Suspense.
The build time is 2.5 hours.
Getting started
The project that we'll create in this chapter builds upon an initial version that you can find on GitHub: https://github.com/PacktPublishing/React-Projects-Second-Edition/tree/main/Chapter05-initial. The complete source code can also be found on GitHub: https://github.com/PacktPublishing/React-Projects-Second-Edition/tree/main/Chapter05.
After downloading the initial application, make sure that you run npm install from the project's root directory. This project is created using Create React App and installs the react, react-dom, react-scripts, styled-components, and react-router-dom packages, which you've already seen in previous chapters. After finishing the installation process, you can run npm start from the same tab in Terminal and view the project in your browser (http://localhost:3000).
The initial application for this section is created with Create React App and has routing and data fetching already implemented. When you open the application, a screen displaying a header, a navigation bar, and two lists are being rendered. If, for example, you click on the first list that is displayed here, a new page will open that displays the items of this list. On this page, you can click on the Add Item button in the top-right corner to open a new page, which has a form to add a new list and looks like this:
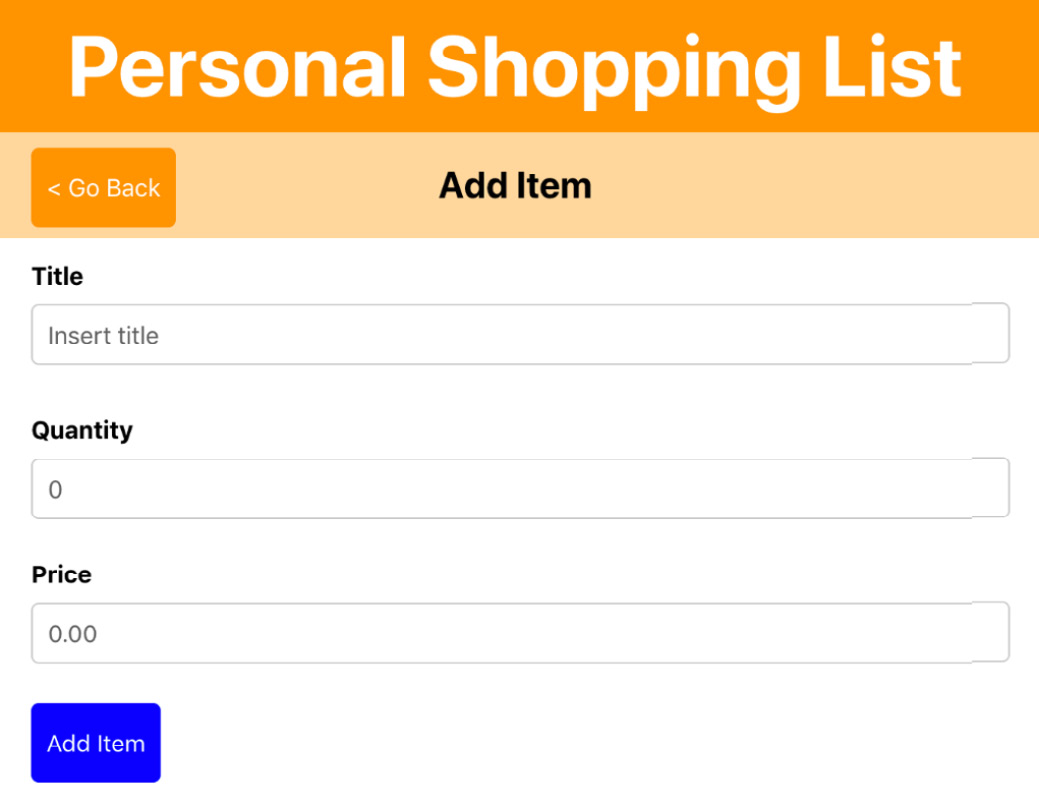
Figure 5.1 – The initial application
This form is rendered by the ListForm component and has no functionality yet, as you'll add this later on. When you click on the left button, it redirects you to the previously visited page, using the navigate method from react-router-dom.
Note
When you try to submit the form to either add a new list or add a new item to a list, nothing happens yet. The functionality of these forms will be added in this section later on, for which you'll use the Context API and React Hooks.
The project is structured in the same manner as the applications you've created before. A distinction is made, however, between reusable function components in the components directory and components that represent a route in the pages directory. The page components are using the useDataFetching Hook, which we saw earlier in Chapter 3, Building a Dynamic Project Management Board, which adds data fetching.
The following is an overview of the complete structure of the project:
chapter-5-initial
|- /node_modules
|- /public
|- /src
|- /components
|- /Button
|- Button.js
|- /FormItem
|- FormItem.js
|- /Header
|- Header.js
|- /NavBar
|- NavBar.js
|- /ListItem
|- ListItem.js
|- /hooks
|- useDataFetching.js
|- /pages
|- ListDetail.js
|- ListForm.js
|- Lists.js
|- App.js
|- index.js
package.json
The entry point of this application is the src/index.js file that renders the App component, which sets up routing using a Router component from react-router-dom. The App component contains a Header component and a Switch router component that defines four routes. These routes are as follows:
- /: Renders Lists, with an overview of all of the lists
- /list/:listId: Renders ListDetail, with an overview of all items from a specific list
- /list/:listId/new: Renders ListForm, with a form to add new items to a specific list
The data is fetched from a mock server that was created using the free service, My JSON Server, which creates a server from the db.json file in the root directory of your project in GitHub. This file consists of a JSON object that has two fields, items and lists, which creates multiple endpoints on a mock server. The ones you'll be using in this chapter are as follows:
- https://my-json-server.typicode.com/PacktPublishing/React-Projects-Second-Edition/items
- https://my-json-server.typicode.com/PacktPublishing/React-Projects-Second-Edition/lists
Note
The db.json file must be present in the master branch (or default branch) of your GitHub repository for My JSON Server to work. Otherwise, you'll receive a 404 Not Found message when trying to request the API endpoints.
Personal shopping list
In this section, you'll build a personal shopping list application that has state management using Context and Hooks. With this application, you can create shopping lists that you can add items to, along with their quantities and prices. The starting point of this section is an initial application that has routing and local state management already enabled.
Using the Context API for state management
State management is very important, as the current state of the application holds data that is valuable to the user. In previous chapters, you've already used local state management by using useState and useEffect Hooks. This pattern is very useful when the data in the state is only of importance to the components you're setting the state in. As passing down the state as props through several components can become confusing, you'd need a way to access props throughout your application even when you're not specifically passing them as props. For this, you can use the Context API from React, which is also used by packages you've already used in previous chapters such as styled-components and react-router-dom.
To share state across multiple components, a React feature called Context will be explored, starting in the first part of this section.
Creating Context
When you want to add Context to your React application, you can do this by creating a new Context with the createContext method from React. This creates a Context object that consists of two React components, called Provider and Consumer. The Provider is where the initial (and subsequently current) value of the Context is placed, which can be accessed by components that are present within the Consumer.
This is done in the App component in src/App.js, as you want the Context for the lists to be available in every component that is rendered by Route:
- Let's start by creating a Context for the lists and making it exportable so that the list data can be used everywhere. For this, you can create a new file called ListsContext.js inside a new directory, src/context. In this file, you can add the following code:
import { createContext } from 'react';
import useDataFetching from
'../hooks/useDataFetching';
export const ListsContext = createContext();
export const ListsContextProvider = ({ children }) => {
const [loading, error, data] = useDataFetching(
'https://my-json-server.typicode.com/
PacktPublishing/React-Projects-Second-Edition/
lists',
);
return (
<ListsContext.Provider value=
{{ lists: data, loading, error }}>
{children}
</ListsContext.Provider>
);
};
export default ListsContext;
The previous code creates a Provider based on a Context object that is passed as a prop and sets a value based on the return from the useDataFetching Hook that is fetching all of the lists. Using the children prop, all of the components that will be wrapped inside the ListsContextProvider component can retrieve the data for the value from a Consumer.
- This ListsContextProvider component can be imported inside your App component to wrap the Router component that is wrapping all the routes for our application:
import styled, { createGlobalStyle } from
'styled-components';
import { Route, Routes, BrowserRouter } from
'react-router-dom';
+ import { ListsContextProvider } from
'./context/ListsContext';
// ...
function App() {
return (
<>
<GlobalStyle />
<AppWrapper>
<BrowserRouter>
<Header />
+ <ListsContextProvider>
<Routes>
// ...
</Routes>
+ </ListsContextProvider>
</BrowserRouter>
</AppWrapper>
</>
);
}
export default App;
- This way, you're now able to consume the value from the Provider for ListsContext, from all the components wrapped within ListsContextProvider. In the Lists component, this data can be retrieved using the useContext Hook from React by passing the ListsContext object to it. This data can then be used to render the lists, and the useDataFetching Hook can be removed from src/pages/Lists.js:
+ import { useContext } from 'react';
import styled from 'styled-components';
import { Link, useNavigate } from
'react-router-dom';
- import useDataFetching from
'../hooks/useDataFetching';
import NavBar from '../components/NavBar/NavBar';
+ import ListsContext from '../context/ListsContext';
// ...
const Lists = () => {
let navigate = useNavigate();
- const [loading, error, data] =
useDataFetching('https://my-json-server.
typicode.com/PacktPublishing/React-Projects-
Second-Edition/lists');
+ const { loading, error, lists } =
useContext(ListsContext);
return (
<>
{navigate && <NavBar title='Your Lists' />}
<ListWrapper>
{loading || error ? (
<span>{error || 'Loading...'}</span>
) : (
- data.map((list) => (
+ lists.map((list) => (
<ListLink key={list.id}
to={`list/${list.id}`}>
// ...
Now that you've removed the useDataFetching Hook from Lists, no requests to the API are sent directly from this component anymore. The data for the lists is instead fetched from ListsContextProvider and is passed by ListsContext, which is used by the useContext Hook in Lists. If you open the application in the browser by going to http://localhost:3000/, you can see the lists are being rendered just as before.
In the next section, you'll also add a Context object for the items, so the items are also available to all of the components within the Routes component from react-router.
Nesting Context
Just as for the list data, the item data could also be stored in Context and passed to the components that need this data. That way, data is no longer fetched from any of the rendered components but from the Context only:
- Again, start by creating a new file where both a Context and Provider are created. This time, it's called ItemsContext.js, which can also be added to the src/context directory:
import { createContext } from 'react';
import useDataFetching from
'../hooks/useDataFetching';
export const ItemsContext = createContext();
export const ItemsContextProvider = ({ children }) => {
const [loading, error, data] = useDataFetching(
'https://my-json-server.typicode.com/
PacktPublishing/React-Projects-Second-
Edition/items',
);
return (
<ItemsContext.Provider value=
{{ items: data, loading, error }}>
{children}
</ItemsContext.Provider>
);
};
export default ItemsContext;
- Next, import this new Context and Provider in src/App.js, where you can nest this below the ListsContextProvider component:
// ...
import { ListsContextProvider } from
'./context/ListsContext';
+ import { ItemsContextProvider } from
'./context/ItemsContext';
// ...
function App() {
return (
<>
<GlobalStyle />
<AppWrapper>
<BrowserRouter>
<Header />
<ListsContextProvider>
+ <ItemsContextProvider>
<Routes>
// ...
</Routes>
+ </ItemsContextProvider>
</ListsContextProvider>
</BrowserRouter>
</AppWrapper>
</>
);
}
export default App;
- The ListDetail component can now get the item from ItemsContext, meaning we no longer have to use the useDataFetching Hook in this component. To accomplish this, you need to make the following changes to src/pages/ListDetail.js:
- import { useState, useEffect } from 'react';
+ import { useState, useEffect, useContext } from
'react';
import styled from 'styled-components';
import { useNavigate, useParams } from
'react-router-dom';
- import useDataFetching from
'../hooks/useDataFetching';
import NavBar from '../components/NavBar/NavBar';
import ListItem from
'../components/ListItem/ListItem';
+ import ItemsContext from '../context/ItemsContext';
// ...
function ListDetail() {
let navigate = useNavigate();
const { listId } = useParams();
- const [loading, error, data] =
useDataFetching('https://my-json-server.
typicode.com/PacktPublishing/React-Projects-
Second-Edition/items/');
+ const { loading, error, items: data } =
useContext(ItemsContext);
// ...
All of the data fetching is now no longer by the List and Lists components. By nesting these Context Providers, the return values can be consumed by multiple components. But this still isn't ideal, as you're now loading all of the lists and all of the items when starting your application.
The downside of this approach is that once we open a detail page for a list, it will retrieve all items, even if they are not for this list. In the next section, you'll see how to get only the data you need by combining Context with custom Hooks.
Mutating Context with Hooks
There are multiple ways in which you can get data conditionally from the Context; one of these is placing the data from the Context in the local state. That could be a solution for a smaller application, but can be inefficient for larger applications, as you'd still need to pass this state down your component tree. Another solution is to use React Hooks to create a function that is added to the value of your Context and can be invoked from any of the components that are nested in this Context. Also, this method of getting the data lets you efficiently load only the data that you'd need.
How this can be used together with React life cycles and state management using Hooks is demonstrated in the first part of this section.
Using life cycles in functional components
Previously, we used the useDataFetching Hook to do the data fetching for us, but this doesn't let us control when the data will be fetched exactly. From the components that are consuming our Context data, we want to be able to initiate the data fetching. Therefore we need to add life cycles to them, which invoke a function to do the data fetching inside our Context components. Follow these steps to implement this:
- The first step in achieving this is by adding logic to do data fetching in the src/context/ItemsContext.js file. This logic will replace the usage of the useDataFetching Hook, starting with adding local state variables for the data fetching state:
- import { createContext } from 'react';
- import useDataFetching from
'../hooks/useDataFetching';
+ import { createContext, useCallback, useState } from
'react';
export const ItemsContext = createContext();
export const ItemsContextProvider = ({ children })
=> {
- const [loading, error, data] =
useDataFetching('https://my-json-server.
typicode.com/PacktPublishing/React-Projects-
Second-Edition/items);
+ const [loading, setLoading] = useState(true);
+ const [items, setItems] = useState([]);
+ const [error, setError] = useState('');
// ...
- After this, we can add a function called fetchItems that we pass to ItemsContextProvider, meaning it will be added to the Context. This function is wrapped in a useCallback Hook to prevent unneeded (re)renders of your component:
// ...
const [error, setError] = useState('');
+ const fetchItems = useCallback(async (listId) => {
+ try {
+ const data = await fetch(`https://my-json-
server.typicode.com/PacktPublishing/
React-Projects-Second-Edition/lists/
${listId}/items`);
+ const result = await data.json();
+ if (result) {
+ setItems(result);
+ setLoading(false);
+ }
+ } catch (e) {
+ setLoading(false);
+ setError(e.message);
+ }
+ }, [])
return (
- <ItemsContext.Provider value={{ data: items,
loading, error }}>
+ <ItemsContext.Provider value={{ items, loading,
error, fetchItems }}>
// ...
- With this function in place, the next step would be to invoke it with a value for listId from the ListDetail component. This would mean that we no longer retrieve all the items once we load this component, but use the params from the URL to determine what data should be fetched and added to the Context:
- import { useState, useEffect, useContext } from
'react';
+ import { useEffect, useContext } from 'react';
import styled from 'styled-components';
// ...
function ListDetail() {
let navigate = useNavigate();
const { listId } = useParams();
- const { loading, error, items: data } =
useContext(ItemsContext);
+ const { loading, error, items, fetchItems } =
useContext(ItemsContext);
- const [items, setItems] = useState([]);
- useEffect(() => {
- data && listId && setItems(data.filter((item) =>
item.listId === parseInt(listId)));
- }, [data, listId]);
+ useEffect(() => {
+ listId && !items.length && fetchItems(listId);
+ }, [fetchItems, items, listId]);
return (
// ...
The preceding useEffect Hooks call the fetchItems function when there's a listId present in the URL of the page, and when the value for items is an empty array. This prevents us from fetching the items again if they already exist in ItemsContext.
By creating a function to do data fetching in our Context, we can now control when the data should be fetched, so there will no longer be unnecessary requests to the API. But other Hooks can also directly pass data to the Provider without having to duplicate useState Hooks. This will be demonstrated in the next part of this section.
Using advanced state with useReducer
Another way to use actions for adding data to the Provider is by using a pattern similar to Flux, which was introduced by Facebook. The Flux pattern describes a data flow where actions are being dispatched that retrieve data from a store and return it to the view. This would mean that actions need to be described somewhere; there should be a central place where data is stored and this data can be read by the view. To accomplish this pattern with the Context API, you can use another Hook, called useReducer. This Hook can be used to return data not from a local state, but from any data variable:
- Just as with the useState Hook, the useReducer Hook needs to be added to the component that is using it. useReducer will take an initial state and a function that determines which data should be returned. This initial value needs to be added to the src/context/ListsContext.js file before adding the Hook:
- import { createContext } from 'react';
+ import { createContext, useCallback, useReducer }
from 'react';
const ListsContext = createContext();
+ const initialState = {
+ lists: [],
+ loading: true,
+ error: '',
+ };
// ...
- Next to an initial value, the useReducer Hook also takes a function that's called reducer. This reducer function should also be created and is a function that updates initialState, which was passed and returns the current value, based on the action that was sent to it. If the action that was dispatched doesn't match any of those defined in reducer, the reducer will just return the current value without any changes:
import { createContext, useReducer } from 'react';
const ListsContext = createContext();
// ...
+ const reducer = (state, action) => {
+ switch (action.type) {
+ case 'GET_LISTS_SUCCESS':
+ return {
+ ...state,
+ lists: action.payload,
+ loading: false,
+ };
+ case 'GET_LISTS_ERROR':
+ return {
+ ...state,
+ lists: [],
+ loading: false,
+ error: action.payload,
+ };
+ default:
+ return state;
+ }
+ };
export const ListsContextProvider = ({ children }) => {
// ...
- The two parameters for the useReducer Hook are now added to the file, so you need to add the actual Hook and pass initialState and reducer to it. The useDataFetching Hook can be removed, as this will be replaced with a new function that has data fetching logic:
// ...
const ListsContextProvider = ({ children }) => {
- const [loading, error, data] =
useDataFetching('https://my-json-server.
typicode.com/PacktPublishing/React-Projects-
Second-Edition/lists');
+ const [state, dispatch] =
useReducer(reducer, initialState);
// ...
- As you can see, reducer changes the value it returns when the GET_LISTS_SUCCESS or GET_LISTS_ERROR action is sent to it. Before it was mentioned, you can call this reducer by using the dispatch function that was returned by the useReducer Hook. However, as you also have to deal with the asynchronous fetching of the data, you can't invoke this function directly. Instead, you need to create an async/await function that calls the fetchData function and dispatches the correct action afterward:
// ...
export const ListsContextProvider = ({ children })
=> {
const [state, dispatch] =
useReducer(reducer, initialState);
+ const fetchLists = useCallback(async () => {
+ try {
+ const data = await fetch(`https://my-json-
server.typicode.com/PacktPublishing/React-
Projects-Second-Edition/lists`);
+ const result = await data.json();
+ if (result) {
+ dispatch({ type: 'GET_LISTS_SUCCESS',
payload: result });
+ }
+ } catch (e) {
+ dispatch({ type: 'GET_LISTS_ERROR',
payload: e.message });
+ }
+ }, [])
return (
// ...
- The preceding fetchLists function calls the API and if there is a result, the GET_LISTS_SUCCESS action will be dispatched to the reducer using the dispatch function from the useReducer Hook. If not, the GET_LISTS_ERROR action will be dispatched, which returns an error message.
- The values from the state and the fetchLists function must be added to the Provider so that we can access them from other components through the Context:
// ...
return (
- <ListsContext.Provider value=
{{ loading, error, data: lists }}>
+ <ListsContext.Provider value=
{{ ...state, fetchLists }}>
{children}
</ListsContext.Provider>
);
};
export default ListsContext;
- This getLists function can now be invoked from the useEffect Hook in the component where the lists are displayed, the Lists component, on the first render. The lists should only be retrieved when there aren't any lists available yet:
- import { useContext } from 'react';
+ import { useContext, useEffect } from 'react';
import styled from 'styled-components';
import { Link, useNavigate } from
'react-router-dom';
import NavBar from '../components/NavBar/NavBar';
import ListsContext from '../context/ListsContext';
// ...
function Lists() {
let navigate = useNavigate();
- const { loading, error, lists } =
useContext(ListsContext);
+ const { loading, error, lists, fetchLists } =
useContext(ListsContext);
+ useEffect(() => {
+ !lists.length && fetchLists()
+ }, [fetchLists, lists])
return (
// ...
If you now visit the project in the browser again, you can see the data from the lists is loaded just as before. The big difference is that the data is fetched using a Flux pattern, meaning this can be extended to fetch the data in other instances as well. The same can be done for ItemsContext as well, in the src/context/ItemsContext.js file:
- First, import the useReducer Hook, and add the initial value for the items and the reducer function that we use with this Hook later:
- import { createContext, useState } from 'react';
+ import { createContext, useReducer } from 'react';
export const ItemsContext = createContext();
+ const initialState = {
+ items: [],
+ loading: true,
+ error: '',
+ };
+ const reducer = (state, action) => {
+ switch (action.type) {
+ case 'GET_ITEMS_SUCCESS':
+ return {
+ ...state,
+ items: action.payload,
+ loading: false,
+ };
+ case 'GET_ITEMS_ERROR':
+ return {
+ ...state,
+ items: [],
+ loading: false,
+ error: action.payload,
+ };
+ default:
+ return state;
+ }
+ };
export const ItemsContextProvider =
({ children }) => {
// ...
- After this, you can add the initial state and reducer to the useReducer Hook. The fetchItems function that already exists in this file must be changed so that it will use the dispatch function from useReducer instead of the update functions from the useState Hooks:
// ...
export const ItemsContextProvider =
({ children }) => {
- const [loading, setLoading] = useState(true);
- const [items, setItems] = useState([]);
- const [error, setError] = useState('');
+ const [state, dispatch] =
useReducer(reducer, initialState);
const fetchItems = useCallback(async (listId) => {
try {
const data = await fetch(`https://my-json-
server.typicode.com/PacktPublishing/React-
Projects-Second-Edition/lists/${listId}/
items`);
const result = await data.json();
if (result) {
- setItems(result);
- setLoading(false);
+ dispatch({ type: 'GET_ITEMS_SUCCESS',
payload: result });
}
} catch (e) {
- setLoading(false);
- setError(e.message);
+ dispatch({ type: 'GET_ITEMS_ERROR',
payload: e.message });
}
}, [])
return (
// ...
- Also, add the state and the fetchItems function to ListsContextProvider:
// ...
return (
- <ItemsContext.Provider value={{ items, loading,
error, fetchItems }}>
+ <ItemsContext.Provider value=
{{ ...state, fetchItems }}>
{children}
</ItemsContext.Provider>
);
};
export default ItemsContext;
If you were to open a specific list on the /lists/:listId route, for example, http://localhost:3000/list/1, you would see that nothing has changed and that the items for the list are still displayed.
You might notice that the title of the list isn't displayed here. The information for the lists is only fetched when the Lists component is first rendered, so you'd need to create a new function to always fetch the information for the list that you're currently displaying in the List component:
- In the src/context/ListsContextProvider.js file, you need to extend initialState to also have a field called list:
import { createContext, useReducer } from 'react';
export const ListsContext = createContext();
const initialState = {
lists: [],
+ list: {},
loading: true,
error: '',
};
const reducer = (state, action) => {
// ...
- In reducer, you also now have to check for two new actions that either add the data about a list to the context or add an error message:
// ...
const reducer = (state, action) => {
switch (action.type) {
case 'GET_LISTS_SUCCESS':
// ...
case 'GET_LISTS_ERROR':
// ...
+ case 'GET_LIST_SUCCESS':
+ return {
+ ...state,
+ list: action.payload,
+ loading: false,
+ };
+ case 'GET_LIST_ERROR':
+ return {
+ ...state,
+ list: {},
+ loading: false,
+ error: action.payload,
+ };
default:
return state;
}
};
export const ListsContextProvider =
({ children }) => {
// ...
- These actions will be dispatched from a new fetchList function that takes the specific ID of a list to call the API. If successful, the GET_LIST_SUCCESS action will be dispatched; otherwise, the GET_LIST_ERROR action is dispatched. Also, pass the function to the Provider so that it can be used from other components:
// ...
+ const fetchList = useCallback(async (listId) => {
+ try {
+ const data = await fetch(`https://my-json-
server.typicode.com/PacktPublishing/React-
Projects-Second-Edition/lists/${listId}`);
+ const result = await data.json();
+ if (result) {
+ dispatch({ type: 'GET_LIST_SUCCESS',
payload: result });
+ }
+ } catch (e) {
+ dispatch({ type: 'GET_LIST_ERROR',
payload: e.message });
+ }
+ }, [])
return (
- <ListsContext.Provider value=
{{ ...state, fetchLists }}>
+ <ListsContext.Provider value=
{{ ...state, fetchLists, fetchList }}>
{children}
</ListsContext.Provider>
);
};
export default ListsContext;
- And, in the ListDetail component, we can get the list data from ListsContext by calling the fetchList function in a useEffect Hook. Also, pass it as a prop to the NavBar component so that it will be displayed:
import { useEffect, useCallback, useContext } from
'react';
import styled from 'styled-components';
import { useNavigate, useParams } from
'react-router-dom';
import NavBar from '../components/NavBar/NavBar';
import ListItem from
'../components/ListItem/ListItem';
import ItemsContext from '../context/ItemsContext';
+ import ListsContext from '../context/ListsContext';
// ...
function ListDetail() {
let navigate = useNavigate();
const { listId } = useParams();
const { loading, error, items, fetchItems } =
useContext(ItemsContext);
+ const { list, fetchList } =
useContext(ListsContext);
useEffect(() => {
listId && !items.length && fetchItems(listId);
}, [fetchItems, items, listId]);
+ useEffect(() => {
+ listId && fetchList(listId);
+ }, [fetchList, listId]);
return (
<>
{navigate && (
<NavBar
goBack={() => navigate(-1)}
openForm={() =>
navigate(`/list/${listId}/new`)}
+ title={list && list.title}
/>
)}
// ...
In the previous code block, we're calling the fetchList function from a different useEffect Hook than the fetchItems function. This is a good way to separate concerns to keep our code clean and concise.
All of the data in your application is now being loaded using the Providers, which means it's now detached from the views. Also, the useDataFetching Hook is completely removed, making your application structure more readable.
Not only can you use the context API with this pattern to make data available to many components, but you can also mutate the data. How to mutate this data will be shown in the next section.
Mutating data in the Provider
Not only can you retrieve data using this Flux pattern, but you can also use it to update data. The pattern remains the same: you dispatch an action that would trigger the request to the server and, based on the outcome, the reducer will mutate the data with this result. Depending on whether or not it was successful, you could display a success message or an error message.
The code already has a form for adding a new item to a list—something that is not working yet. Let's create the mechanism to add items by updating the Provider for items:
- The first step is to add new actions to the reducer in ItemsContext, which will be dispatched once we try to add a new item:
// ...
const reducer = (state, action) => {
switch (action.type) {
// ...
+ case 'ADD_ITEM_SUCCESS':
+ return {
+ ...state,
+ items: [...state.items, action.payload],
+ loading: false,
+ };
default:
return state;
}
};
export const ItemsContextProvider =
({ children }) => {
// ...
- We also need to add a new function that can handle POST requests, as this function should also set the method and a body when handling the fetch request. You can create this function in the preceding file as well, and pass it to the Provider:
// ...
+ const addItem = useCallback(async ({ listId, title,
quantity, price }) => {
+ const itemId = Math.floor(Math.random() * 100);
+ try {
+ const data = await fetch(`https://my-json-
server.typicode.com/PacktPublishing/React-
Projects-Second-Edition/items`,
+ {
+ method: 'POST',
+ body: JSON.stringify({
+ id: itemId,
+ listId,
+ title,
+ quantity,
+ price,
+ }),
+ },
+ );
+ const result = await data.json();
+ if (result) {
+ dispatch({
+ type: 'ADD_ITEM_SUCCESS',
+ payload: {
+ id: itemId,
+ listId,
+ title,
+ quantity,
+ price,
+ },
+ });
+ }
+ } catch {}
+ }, [])
return (
- <ItemsContext.Provider value=
{{ ...state, fetchItems }}>
+ <ItemsContext.Provider value=
{{ ...state, fetchItems, addItem }}>
// ...
Note
The mock API from My JSON Server doesn't persist data once it is added, updated, or deleted with a request. However, you can see whether the request was successful by checking the request in the Network tab in the Developer Tools section of your browser. That's why the input content is spread over the value for items, so this data is available from the Consumer.
- As the function to add a new item to a list is now available from the Provider, the ListForm component in src/pages/ListForm.js is now able to use the addItem function, which will dispatch the action that will call the API and add the item to the state. However, the values of the input fields in the form need to be determined first. Therefore, the input fields need to be controlled components, meaning their value is controlled by the local state that encapsulates the value. Therefore we need to import the useState Hook and also a useContext Hook, which we'll use later to get values from the Context:
+ import { useState, useContext } from 'react';
import styled from 'styled-components';
import { useNavigate, useParams } from
'react-router-dom';
import NavBar from '../components/NavBar/NavBar';
import FormItem from
'../components/FormItem/FormItem';
import Button from '../components/Button/Button';
+ import ItemsContext from '../context/ItemsContext';
// ...
function ListForm() {
let navigate = useNavigate();
const { listId } = useParams();
+ const [title, setTitle] = useState('');
+ const [quantity, setQuantity] = useState('');
+ const [price, setPrice] = useState('');
return (
// ...
For this, we used the useState Hook for every state value that we created.
- The local state values and the function that triggers an update of the local state values must be set as a prop on the FormItem components:
// ...
return (
<>
{navigate && <NavBar goBack={() =>
navigate(-1)} title={`Add Item`} />}
<FormWrapper>
<form>
<FormItem
id='title'
label='Title'
placeholder='Insert title'
+ value={title}
+ handleOnChange={(e) =>
setTitle(e.currentTarget.value)}
/>
<FormItem
id='quantity'
label='Quantity'
type='number'
placeholder='0'
+ value={quantity}
+ handleOnChange={(e) =>
setQuantity(e.currentTarget.value)}
/>
<FormItem
id='price'
label='Price'
type='number'
placeholder='0.00'
+ value={price}
+ handleOnChange={(e) =>
setPrice(e.currentTarget.value)}
/>
<SubmitButton>Add Item</SubmitButton>
</form>
</FormWrapper>
</>
);
};
export default Form;
- The last thing you need to do now is to add a function that will be dispatched when the form is submitted by clicking the submit button. This function takes value for the local state, adds information about the item, and uses this to call the addItem function. After this function is called, the navigate function from useNavigate is called to go back to the overview for this list:
// ...
+ const { addItem } = useContext(ItemsContext);
+ function onSubmit(e) {
+ e.preventDefault();
+ if (title && quantity && price) {
+ addItem({
+ title,
+ quantity,
+ price,
+ listId,
+ });
+ }
+ navigate(`/list/${listId}`);
+ }
return (
<>
{navigate && <NavBar goBack={() =>
navigate(-1)} title={`Add Item`} />}
<FormWrapper>
- <form>
+ <form onSubmit={onSubmit}>
// ...
When you now submit the form, a POST request to the mock server will be sent. You'll be sent back to the previous page where you can see the result. If successful, the GET_LIST_SUCCESS action was dispatched and the item you inserted was added to the list.
So far, the information from the Context has been used only separately by using the Providers, but this can also be combined into one application Context, as shown in the next section.
Creating an application Context
If you look at the current structure of the routes in your App component, you can imagine that this will get messy if you add more Providers and Consumers to your application. State management packages such as Redux tend to have an application state where all of the data for the application is stored. When using Context, it's possible to create an application Context that can be accessed using the useContext Hook. This Hook acts as a Consumer and can retrieve values from the Provider of the Context that was passed to it. Let's refactor the current application to have an application Context:
- Start by creating a file called AppContext.js in the src/context directory. This file will import both ListsContextProvider and ItemsContextProvider, nest them, and have them wrap any component that will be passed to it as a children prop:
import { ListsContextProvider } from './ListsContext';
import { ItemsContextProvider } from './ItemsContext';
const AppContext = ({ children }) => {
return (
<ListsContextProvider>
<ItemsContextProvider>{children}
</ItemsContextProvider>
</ListsContextProvider>
);
};
export default AppContext;
- In the src/App.js file, we can now import this AppContext file in favor of the Providers for the lists and items and replace ListsContextProvider and ItemsContextProvider with AppContext:
import styled, { createGlobalStyle } from
'styled-components';
import { Route, Routes, BrowserRouter } from
'react-router-dom';
import Header from './components/Header/Header';
import Lists from './pages/Lists';
import ListDetail from './pages/ListDetail';
import ListForm from './pages/ListForm';
- import { ListsContextProvider } from
'./context/ListsContext';
- import { ItemsContextProvider } from
'./context/ItemsContext';
+ import AppContext from './context/AppContext';
// ...
function App() {
return (
<>
<GlobalStyle />
<AppWrapper>
<BrowserRouter>
<Header />
+ <AppContext>
- <ListsContextProvider>
- <ItemsContextProvider>
<Routes>
// ...
</Routes>
- </ItemsContextProvider>
- </ListsContextProvider>
+ </AppContext>
</BrowserRouter>
</AppWrapper>
</>
);
}
export default App;
The AppContext component can be extended with all of the Context objects that you might want to add in the future. Our application now has a much cleaner structure, while the data is still being retrieved by the Providers.
Code splitting with React Suspense
So far, we've focused mostly on adding new features, such as routing or state management, to our application. But not much focus has been devoted to making our application more performant, something that we can do with code splitting. A React feature called Suspense can be used for code splitting, which means you split the compiled code (your bundle) into smaller chunks. This will prevent the browser from downloading the entire bundle with your compiled code at once, and instead load your bundle in chunks depending on the components that are rendered by the browser.
Note
In the previous chapter, we used Next.js instead of Create React App to create our React application, which has code splitting enabled by default.
Suspense lets your components wait until the component you're importing is ready to be displayed. Before React 18 it could only be used for code splitting, but since the latest version of React it serves more purposes. When you fetch data from a component that is imported with Suspense, React will also wait until the data for that component is completely fetched.
Suspense must be used together with the lazy method, which involves using JavaScript dynamic imports to load the component only when requested. Both methods can be imported from React in src/App.js, where the lazy method is used to import the components for our pages:
+ import { Suspense, lazy } from 'react';
import styled, { createGlobalStyle } from
'styled-components';
import { Route, Routes, BrowserRouter} from
'react-router-dom';
import Header from './components/Header/Header';
- import Lists from './pages/Lists';
- import ListDetail from './pages/ListDetail';
- import ListForm from './pages/ListForm';
import AppContext from './context/AppContext';
+ const Lists = lazy(() => import('./pages/Lists'));
+ const ListDetail = lazy(() =>
import('./pages/ListDetail'));
+ const ListForm = lazy(() => import('./pages/ListForm'));
// ...
function App() {
// ...
In the return statement for the App component, Suspense must be used with a fallback that will be displayed when the dynamically imported components are being loaded:
// ...
function App() {
return (
<>
<GlobalStyle />
<AppWrapper>
<BrowserRouter>
<Header />
+ <Suspense fallback={<div>Loading...</div>}>
<AppContext>
// ...
</AppContext>
+ </Suspense>
</BrowserRouter>
</AppWrapper>
</>
);
}
export default App;
When you look at the application in the browser, you don't see any changes, unless you have a slow internet connection. In that case, the fallback for Suspense will be displayed while the component is being loaded. However, when you open the Network tab in the developer console, you do see a difference. Here, all the network requests are shown, and all the downloaded JavaScript as well. For our application, we can see that multiple files are loaded, such as bundle.js and main.chunk.js. However, after applying code splitting, chunked components are also being loaded, for example, src_pages_ListDetail_js.js.
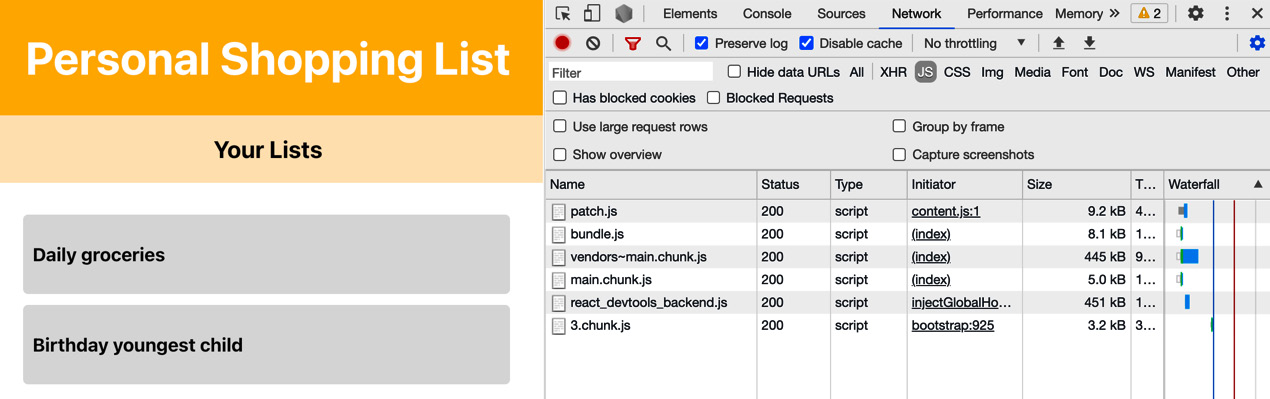
Figure 5.2 – The network requests for our application after code splitting
Looking at the main route, which is /, we can see that a chunk named 3.chunk.js is loaded. This isn't a very helpful filename, something we can change with webpackChunkName in an inline comment. With this addition, we can instruct webpack to name the file something more user friendly:
// ...
- const Lists = lazy(() => import('./pages/Lists'));
- const ListDetail = lazy(() =>
import'./pages/ListDetail'));
- const ListForm = lazy(() => import('./pages/ListForm'));
+ const Lists = lazy(() => import(/* webpackChunkName:
"Lists" */ './pages/Lists'));
+ const ListDetail = lazy(() => import(/* webpackChunkName:
"ListDetail" */ './pages/ListDetail'));
+ const ListForm = lazy(() => import(/* webpackChunkName:
"ListForm" */ './pages/ListForm'));
function App() {
// ...
This latest addition makes recognizing which chunks (or components) are loaded in our application much easier, as you can see by reloading the application in the browser and checking the Network tab again.
Summary
In this chapter, you've created a shopping list application that uses the Context API and Hooks to pass and retrieve data. Context is used to store data and Hooks are used to retrieve and mutate data. With the Context API, you can create more advanced scenarios for state management using the useReducer Hook. Context is also used to create a situation where all of the data is stored application-wide and can be accessed from any component by creating a shared Context. Finally, we've used React Suspense to apply code splitting to our bundle for improved performance.
The Context API will be used in the next chapter as well, which will show you how to build a hotel review application with automated testing using libraries such as Jest and Enzyme. It will introduce you to the multiple ways in which you can test your UI components created with React, and also show you how to test state management in your application using the Context API.
Further reading
For more information, refer to the following links:
- Consuming multiple Context objects: https://reactjs.org/docs/context.html#consuming-multiple-contexts
- React Suspense: https://reactjs.org/docs/react-api.html#reactsuspense