
Chapter 17. React on Node and Universal JavaScript
This chapter covers
- Using React on the server
- Understanding Universal JavaScript
- Using React on Node
- Working with React and Express
- Using Universal JavaScript with Express and React
React is primarily a front-end library to build full-blown, single-page applications or simple UIs on the browser. So why should we concern ourselves with using it on the server? Isn’t rendering HTML on the server the old way to do things? Well, yes and no. It turns out that when you build web apps that always render on the browser, they miss out on a few key goodies. In fact, they miss out to the point of not being able to rank high in Google search results and maybe even losing millions of dollars in revenue. Arghhh.
Read on to find out why. You can skip this chapter in only one case: if you’re oblivious to the performance of your apps (that is, if you’re a newbie developer). All others, please proceed. You’ll gain precious knowledge that you can use to build amazing apps and that will make you look smart during developers’ happy hour when you use the term Universal JavaScript. You’ll also learn how to use React with Node and build Node servers, and by the end of the chapter you’ll understand how to build Universal JavaScript apps with React.js and Express.js (the most popular Node.js framework).
Tip
If you haven’t come across Express before, check out my book Pro Express.js (Apress, 2014), which covers the current v4; it’s comprehensive and still very relevant. See also Express in Action, by Evan Hahn (Manning, 2015). You can also check out my online course Express Foundation: https://node.university/p/express-foundation. If you’re familiar with Express but need a refresher, you can find an Express.js cheatsheet in appendix c, and Express installation is covered in appendix A.
Note
The source code for the examples in this chapter is at www.manning.com/books/react-quickly and https://github.com/azat-co/react-quickly/tree/master/ch17. You can also find some demos at http://reactquickly.co/demos.
17.1. Why React on the server? And what is Universal JavaScript?
You may have heard about Universal JavaScript in relation to web development. It’s become such a buzzword that it seems as though every web tech conference in 2016 had not one but several presentations about it. There are even a few synonyms for Universal JavaScript, such as isomorphic JavaScript and full stack JavaScript. For simplicity, I’ll stick with Universal for this chapter. This section will help you understand what isomorphic/Universal JavaScript is about.
But before I define Universal JavaScript, let’s discuss some of the issues you face when building SPAs. The three main problems are these:
- No search engine optimization (SEO)—Single-page apps (SPAs) generate HTML entirely on the browser, and search crawlers don’t like that.
- Poor performance—Huge bundled files and AJAX calls slow performance (especially on the first page load, when it’s critical).
- Poor maintainability—Often, SPAs lead to duplication of code on the browser and server.
Let’s take a closer look at each of these problems.
17.1.1. Proper page indexing
SPAs built with frameworks like Backbone.js, Angular.js, Ember.js, and others are widely used for protected apps—that is, apps that require the user to enter a username and password in order to gain access (for example, see figure 17.1). Most SPAs serve protected resources and don’t need indexing, but the vast majority of websites aren’t protected behind logins.
Figure 17.1. SPA that doesn’t need SEO support because it’s behind a login screen

For such public apps, SEO is important and mandatory, because their business depends heavily on search indexing and organic traffic. The majority of websites fall in this category.
Unfortunately, when you try to use SPA architecture for public-facing websites, which should have good search engine indexing, it’s not straightforward. SPAs rely on browser rendering, so you need to either reimplement the templates on the server or pre-generate static HTML pages using headless browsers just for the search engine crawlers.
Recently, Google added a JavaScript rendering capability to its crawlers. You may think this means that browser-rendered HTML will be indexed correctly now. You may think that by using Angular with a REST API server, you don’t need server-side rendering. Unfortunately, this may not be the case.
The following comes from the Google Webmaster Central Blog post “Understanding Web Pages Better” (http://mng.bz/Yv3B): “Sometimes things don’t go perfectly during rendering, which may negatively impact search results for your site.” The gist is that Google doesn’t advocate that we rely on its indexing of SPAs. Google can’t guarantee that what’s in its cache, index, and search results is exactly what your SPA rendered. So, to be on the safe side, you need to render without JavaScript as closely as possible to the JavaScript-enabled rendering.
With Universal JavaScript and React, in particular, you can generate HTML on the server for crawlers from the same components that browsers use to generate HTML for users. No need for bulky headless browsers to generate HTML on the server. Win-win!
17.1.2. Better performance with faster loading times
Although some applications must have proper search engine indexing, others thrive on faster performance. Websites like http://mobile.walmart.com[1] and http://twitter.com[2] have done research that showed that they needed to render the first page (first load) on the server to improve performance. Companies lose millions of dollars because users will leave if the first page doesn’t load quickly enough.
Kevin Decker, “Mobile Server Side Rendering,” GitHub Gist, 2014, http://mng.bz/2B6P.
Dan Webb, “Improving Performance on twitter.com,” Twitter, May 29, 2012, http://mng.bz/2st9.
Being a web developer, and working and living with good internet connection speeds, you might forget that your website may be accessed via a slow connection. What loads in a split second for you might take half a minute in other cases. Suddenly, a bundle that’s more than 1 MB is too large. And loading the bundled file is just half the story: the SPA needs to make AJAX requests to the server to load the data, while your users patiently stare at the Loading... spinner. Yeah, right. Some of them already left, and others are frustrated.
You want to show users a functional web page as fast as you possibly can, not just some skeleton HTML and Loading.... Other code can be loaded later while the user browses the web page.
With Universal JavaScript, it’s easy to generate HTML to show the first page on the server. As a result, when users load the first page, they won’t see the obstructing Loading... message. The data is in the HTML for users to enjoy. They see a functional page and thus have a better user experience.
The performance boost comes from the fact that users don’t have to wait for AJAX calls to resolve. There are other opportunities to optimize performance as well, such as preloading data and caching it on the server before AJAX calls come to the server (that’s exactly what we did at DocuSign by implementing a data router).[3]
Ben Buckman, “The New DocuSign Experience, All in Javascript,” DocuSign Dev, March 30, 2014, http://mng.bz/4773.
17.1.3. Better code maintainability
Code is a liability. The more code you have, the more you and your team will need to support it. For these reasons, you want to avoid having different templates and logic for the same pages. Avoid duplication. Don’t repeat yourself (DRY).
Fortunately, Node.js, which is an essential part of Universal JavaScript, makes it effortless to use front-end/browser modules on the server. Many template engines, such as Handlebars.js, Mustache, Dust.js, and others, can be used on the server.
Given these problems, and knowing that Universal JavaScript can solve them, what’s a practical application?
17.1.4. Universal JavaScript with React and Node
Universal, in regard to web development, means using the same code (typically written in JavaScript) on both the server side and the client side. A narrow use case for Universal JavaScript is rendering on the server and client from the same source. Universal JavaScript often implies the use of JavaScript and Node.js, because this language and platform combination allows for the reuse of the libraries.
Browser JavaScript code can be run in the Node.js environment with few modifications. As a consequence of this interchangeability, the Node.js and JavaScript ecosystem has a wide variety of isomorphic frameworks, such as React.js (http://facebook.github.io/react), Next.js (https://github.com/zeit/next.js), Catberry (http://catberry.org/), LazoJS (https://github.com/lazojs/lazo), Rendr (https://github.com/rendrjs/rendr), Meteor (https://meteor.com), and others. Figure 17.2 shows how an universal/isomorphic stack works: isomorphic code is shared between server and client.
Figure 17.2. Universal HTML generation and code sharing between browser and server vs. no code sharing in a traditional SPA

In a practical application, Universal JavaScript architecture consists of the following:
- Client-side React code for the browser. This can be an SPA or just some simple UIs making AJAX requests.
- A Node.js server generating HTML for the first page on the server and serving browser React code with the same data. This can be implemented using Express and either a template engine or React components as a template engine.
- Webpack to compile JSX for both the server and the browser.
Figure 17.3 shows the model.
Figure 17.3. Practical application of Universal JavaScript with React, Node, and Express

You may be thinking, “Show me how to use this wonder, Universal JavaScript, already!” All right, let’s look at a hands-on example of rendering React components on the server. We’ll do so in a gradual way, because several components (as in parts, not React components) are involved in using the Universal JavaScript pattern. You’ll need to learn how to do these things:
- Generate HTML from React components—You have just React components as input and plain HTML as output: no HTTP(S) servers yet.
- Render HTML code generated from React components in Express servers—Similar to the previous item, but now you use React in a template engine for 100% server-side rendering (no browser React yet).
- Implement and serve React browser files via Express—Eventually, you’ll need an HTTP(S) server, and Express is one of the options. Until now, you’ve used node-static or Webpack Dev Server. At this point, there’s no server-side HTML generation, just serving built/compiled static assets.
In the end, you’ll use React to generate server-side HTML while loading browser React at the same time—the Holy Grail of Universal JavaScript. But before you can fly, you need to learn to walk!
17.2. React on Node
Let’s start with a basic use case: generating HTML from a Node script. This example doesn’t include servers or anything complex, just importing components and generating HTML. Make sure your Node version is at least 6 and your npm version is at least 3.
You need to learn only a handful of methods to generate HTML from React components on the server. First, you need the npm modules react and react-dom. You can install React and npm following the instructions in appendix A. This example uses React and React DOM version 15.
If you’re new to writing server-side Node code, you might wonder where this server-side code goes. It goes in a plain text file; name it index.js. The React component is in email.js (I’ll cover non-JSX plain JavaScript for now). Those two files must be in the same folder (ch17/node).
The project structure looks like this:

First, include the modules in your server-side code in node/index.js.
Listing 17.1. Server-side setup code

What’s up with createFactory()? Well, if you just imported email.js, that would be a component class; but you need a React element. Thus you can use JSX: createElement() or createFactory(). The latter gives a function that, when invoked, will give you an element.
Once you’ve imported your components, run renderToString() from ReactDOMServer:
const emailString = ReactDOMServer.renderToString(Email())
Here’s the code fragment from index.js:
const ReactDOMServer = require('react-dom/server')
const React = require('react')
const Email = React.createFactory(require('./email.js'))

const emailString = ReactDOMServer.renderToString(Email())
console.log(emailString)
// ...
Another approach to use JSX is to convert it on the fly. The babel-register library will enhance require to do just that so you can configure your require once and then import JSX like any other JS files.
To import JSX, you can use babel-register as shown here in its index.js, in addition to installing babel-register and babel-preset-react (use npm to install them):
require('babel-register')({
  presets: [ 'react' ]
})
Is email.js regular JavaScript? In this case, it has to be. You can “build” JSX into regular JS with Webpack.
Listing 17.2. Server-side Email (node/email.jsx)
const React = require('react')
const Email = (props)=> {
  return (
    <div>
      <h1>Thank you {(props.name) ? props.name: '' }
        for signing up!</h1>
      <p>If you have any questions, please contact support</p>
    </div>
  )
}
module.exports = Email
You’ll get strings rendered by React components. You can use these strings in your favorite template engine to show on a web page or somewhere else (such as HTML email). In my case, email.js (ch17/node/email.js) with a heading and a paragraph renders into the following HTML strings with Universal React attributes.
Listing 17.3. node/email.jsx rendered into strings
<div data-reactroot="" data-reactid="1" data-react-checksum="1319067066">
  <h1 data-reactid="2">
    <!-- react-text: 3 -->Thank you <!-- /react-text -->
    <!-- react-text: 4 -->
    <!-- /react-text -->
    <!-- react-text: 5 -->for signing up!<!-- /react-text -->
  </h1>
  <p data-reactid="6">If you have any questions, please contact support</p>
</div>
What’s happening with the attributes data-reactroot, data-reactid, and data-react-checksum? You didn’t put them in there; React did. Why? For browser React and Universal JavaScript (discussed in the next section).
If you won’t need the React markup that browser React needs (for example, if you’re creating an HTML email), use the ReactDOMServer.renderToStaticMarkup() method. It works similarly to renderToString() but strips out all the data-reactroot, data-reactid, and data-react-checksum attributes. In this case, React is just like any other static template engine.
For example, you can load the component from email.js and generate HTML with renderToStaticMarkup() instead of renderToString():
const emailStaticMarkup = ReactDOMServer.renderToStaticMarkup(Email())
The resulting emailStaticMarkup doesn’t have React attributes:
<div><h1>Thank you for signing up!</h1><p>If you have any questions,please contact support</p></div>
Although you won’t need the browser React for email, you use the original renderToString() for the Universal JavaScript architecture with React. Server-side React adds some secret sauce to the HTML in the form of checksums (data-react-checksum HTML attributes). Those checksums are compared by the browser React, and if they match, browser components won’t regenerate/repaint/rerender unnecessarily. There’s no flash of content (which often happens due to rerendering). The checksums will match if the data supplied to the server-side components is exactly the same as that on the browser. But how do you supply the data to the components created on the server? As properties!
If you need to pass some properties, pass them as object parameters. For example, you can provide a name (Johny Pineappleseed) to the Email component:
const emailStringWithName = ReactDOMServer.renderToString(Email({
  name: 'Johny Pineappleseed'
}))
The full ch17/node/index.js is shown next, with three ways to render HTML—static, string, and string with a property:
const ReactDOMServer = require('react-dom/server')
const React = require('react')
const Email = React.createFactory(require('./email.js'))

const emailString = ReactDOMServer.renderToString(Email())
const emailStaticMarkup = ReactDOMServer.renderToStaticMarkup(Email())
console.log(emailString)
console.log(emailStaticMarkup)

const emailStringWithName =
 ReactDOMServer.renderToString(Email({name: 'Johny Pineappleseed'}))
console.log(emailStringWithName)
That’s how you render React components into HTML in plain Node—no servers and no thrills. Next, let’s look at using React in an Express server.
17.3. React and Express: rendering on the server side from components
Express.js is one of the most popular Node.js frameworks—maybe the most popular. It’s simple yet highly configurable. There are hundreds of plug-ins called middleware that you can use with Express.js.
In a bird’s-eye view of the tech stack, Express and Node take the place of an HTTP(S) server, effectively replacing technologies like Microsoft IIS (www.iis.net) Apache httpd (https://httpd.apache.org), nginx (www.nginx.com), and Apache Tomcat (http://tomcat.apache.org). What’s unique about Express and Node is that they allow you to build highly scalable, performant systems, thanks to the non-blocking I/O nature of Node (http://github.com/azat-co/you-dont-know-node). Express’s advantages are its vast ecosystem of middleware and its mature, stable codebase.
Unfortunately, a detailed overview of the framework is out of the scope of this book, but you’ll create a small Express app and render React in it. In no way is this is a deep dive into Express.js, but it’ll get you started with the most widely used Node.js web framework. Call it an express course in Express if you wish.
Tip
As mentioned earlier, appendix A covers how to install both node.js and Express, if you want to follow along with this example.
17.3.1. Rendering simple text on the server side
Let’s build HTTP and HTTPS servers using Express and then generate HTML on the server side using React, as shown schematically in figure 17.4. The most basic example of using React in Express as a view engine is to generate an HTML string without markup (checksums) and send it as a response to the request. Listing 17.4 illustrates the /about page rendered from a React component about.js.
Figure 17.4. The Express/Node server will generate HTML and send it to the browser.

Listing 17.4. Using React on Express to show HTML on a page

This will work, but /about won’t be a complete page with <head> and <body>. It’s better to use a proper template engine (like Handlebars) for the layout and top HTML elements. You also may wonder what app.get() and app.listen() are. Let’s look at another example, and all will be revealed.
17.3.2. Rendering an HTML page
This is a more interesting example in which you’ll use some external plug-ins and a template engine. The idea for the app is the same: serve HTML generated from React using Express. The page will display some text that’s generated from about.jsx (see figure 17.5). No thrills, but it’s simple, and starting with simple is good.
Figure 17.5. Rendering from the React component on the server side

Create a folder called react-express. (This example is in ch17/react-express.) The end project structure is as follows:
/react-express
  /components
    about.jsx
  /views
    about.hbs
  index.js
  package.json
Create package.json with npm init -y, and then install Express with npm like this:
$ npm install [email protected] --save
As with any Node application, open an editor and create a file. Typically, you create a server file named index.js, app.js, or server.js, which you’ll later start with the node command. In this case, name it index.js.
The file has these parts:
- Imports—Requires dependencies such as express and its plug-ins
- Configurations—Sets certain configuration values such as what template engine to use
- Middleware—Defines common actions performed for all incoming requests, such as validation, authentication, compression, and so on
- Routes—Defines the URLs handled by this server, such as /accounts, /users, and so on, as well as their actions
- Error handlers—Show meaningful messages or web pages when errors happen
- Bootup—Starts HTTP and/or HTTPS server(s)
Here’s a high-level overview of the Express and Node server file:

Now let’s go deeper. The imports section is straightforward. In it, you require dependencies and instantiate objects. For example, to import the Express.js framework and to create an instance, write these lines:
var express = require('express')
var app = express()
Configuration
You set configurations with app.set(), where the first argument is a string and the second is a value. For example, to set the template engine to hbs (www.npmjs.com/package/hbs), use this configuration view engine:
app.set('view engine', 'hbs')
hbs (no affiliation with Harvard Business School) is an Express template (or view) engine for the Handlebars template language (http://handlebarsjs.com). You may have worked with Handlebars or a close relative of it, such as Mustache, Blaze, and so on. Ember also uses Handlebars (http://mng.bz/90Q2). It’s a common, easy-to-get-started template, which is why you’ll use it here.
One caveat: you must install the hbs package in order for Express to properly use the view engine. Do so by executing npm i hbs --save.
Middleware
The next section sets up middleware. For example, to enable the app to serve static assets, use the static middleware:
app.use(express.static(path.join(__dirname, 'public')))
The static middleware is great because it turns Express into a static HTTP(S) server that proxies requests to files in a specified folder (public in this example), just as NGINX or Apache httpd would.
Routes
Next are routes, also known as endpoints, resources, pages, and many other names. You define a URL pattern that will be matched by Express against real URLs of incoming requests. If there’s a match, Express will execute the logic associated with this URL pattern; this is called handling a request. It can involve anything from displaying static HTML for a 404 Not Found page to making a request to another service and caching the response before sending it back to the client.
Routes are the most important part of a web application because they define URL routing and in a way act as controllers in your good-old model-view-controller (MVC) pattern. In Express, you define routes using the app.NAME() pattern, where NAME is the name of an HTTP method in lowercase. For example, this is a syntax to GET the / (home page or empty URL) endpoint, which will send back the string “Hello”:
app.get('/', (request, response, next) => {
  response.send('Hello!')
})
For the /about page/route, you can change the first argument (the URL pattern). You can also render the HTML string:
app.get('/about', (req, res, next) => {
  response.send(`<div>
  <a href="https://node.university" target="_blank">Node.University</a>
   is home to top-notch Node education which brings joy to JavaScript engineers.
</div>`)
})
Layout with Handlebars
Next you want to render React HTML from the Handlebars template, because Handlebars will provide you with an overall layout including such things as <html> and <body>. In other words, you have React for UI elements and Handlebars for the layout.
Create a new views folder containing this template, called about.hbs:

Rendering the page
In the route (in the file ch17/react-express/index.js), change response.send() to response.render():

Express routes can render from Handlebars templates, with data such as the about string variable, or send a response in a string format.
It’s possible to use React for layouts, instead of Handlebars. There’s an express-react-views library to do that (www.npmjs.com/package/express-react-views). It’s only for static markup, not for browser React.
I won’t cover it here, because it requires extensive use of dangerouslySetInnerHTML,[4] doesn’t support all HTML, and often confuses beginner Express-React developers. In my humble opinion, there’s little benefit to using React for layouts.
Handling errors
Error handlers are similar to middleware. For example, they can be imported from a package such as errorhandler (www.npmjs.org/package/errorhandler):
const errorHandler = require('errorhandler')
...
app.use(errorHandler)
Or you can create them in index.js:
app.use((error, request, response, next) => {
  console.error(request.url, error)
  response.send('Wonderful, something went wrong...')
})
You trigger an error handler by invoking next(error) in a request handler or middleware. error is an error object, which you can create with new Error('Ooops'), where “Ooops” will become the error message. Here’s an example in /about:
app.get('/about', (request, response, next) => {
  // ... do weird stuff
  let somethingWeirdHappened = true
  if (somethingWeirdHappened) return next(new Error('Ooops'))
})
Don’t forget to use return. For more about error handling in Node and Express, check out the Node Patterns course (http://node.university/p/node-patterns) or my post “Node Patterns: From Callbacks to Observer” (http://webapplog.com/node-patterns).
Booting up the server
Finally, to start your app, run listen() by passing a port number and a callback (optional):
http.createServer(app).listen(portNumber, callback)
In this example, it looks like this:
http.createServer(app)
  .listen(3000)
Here’s the full server code for ch17/react-express/index.js, to make sure nothing has slipped through the cracks.
Listing 17.5. Full code for React, Express, hbs server[5]
You can look up how to generate them in my post “Easy HTTP/2 Server with Node.js and Express.js,” https://webapplog.com/http2-node.


Now everything should be ready to run the server with node index.js or its shortcut (node .) to see the server response when you navigate to http://localhost:3000/about. If something is missing or you get errors when you start the server and navigate to the address, refer to the project source code in ch17/react-express.
Warning
The SSL key and certificate are needed for SSL and HTTPS to work. The GitHub code for this example purposely doesn’t include server.key and server.crt, because sensitive information like keys shouldn’t be committed to a version-control system. You should create your own keys by following the instructions at https://webapplog.com/http2-node. If you don’t have them, then the example code will only create an HTTP server.
The end result should be a proper HTML page with a header and body. In the body should be React markup such as data-react-checksum and data-reactroot, as shown in figure 17.6.
Figure 17.6. Rendering React markup from a Handlebars layout using Express gives you an HTML page.

Why does this example use markup rendering and not static HTML strings or express-react-views? You’ll need this markup with checksums later, for the browser React; that’s the Universal JavaScript architecture.
In the next section, you’ll put together all you’ve learned about React on the browser, Express, and React on Node to implement a Universal JavaScript architecture.
17.4. Universal JavaScript with Express and React
This section combines all the skills from this chapter (and most of the book!). You’ll render component(s) on the server, plug them in the template, and enable browser React.
To learn about Universal JavaScript, you’ll build a message board with three components: Header, Footer, and MessageBoard (see figure 17.7). The Header and Footer components will have static HTML to display some text, and MessageBoard will have a form to post messages on the board and a list of messages. This app will use AJAX calls to get the list of messages and post new messages to the back-end server, which in turn will use a MongoDB NoSQL database.
Figure 17.7. Message board app with a form to post a message and a list of existing messages

Concisely, for Universal React, you’ll need to follow these steps:
- Set up the server so that it provides data to the template and renders HTML (components and properties), such as index.js.
- Create a template that outputs data (a.k.a. locals) unescaped, such as views/index.hbs.
- Include the browser React file (ReactDOM.Render) in the template for interactivity, such as client/app.jsx.
- Create the Header, Footer, and MessageBoard components.
- Set up build processes with Webpack, such as webpack.config.js.
A few parts interact with each other: server, components, data, and browser. Figure 17.8 shows a diagram of how they’re connected in the message board example. The server acts as a static-assets HTTP server and as an app that renders server-side HTML (first page load only). Browser React code enables interactivity of browser events and subsequent persistence (via HTTP requests to the server) after the initial page load.
Figure 17.8. Gist of Universal JavaScript with React and Express

Note
You also need to install and launch MongoDB in order for this example to work. You can read about installation on its website or in appendix D. After you install MongoDB, run mongod and leave it running. This will allow your Express server to connect to it using the magic URL mongodb://localhost:27017/board.
17.4.1. Project structure and configuration
The project structure is as follows:

The server dependencies include these packages (quoted from package.json):

Now you can set up the server in message-board/index.js.
I want to say a few words about the middleware used in this project, in case you’re new to Express. Express isn’t a large framework that does almost everything for you. On the contrary, it’s a base foundation layer on top of which Node engineers build custom systems that are virtually their own frameworks. They are fit precisely to the task at hand, which isn’t always the case with all-in-one frameworks. You get only what you need with Express and its ecosystem of plug-ins. Those plug-ins are called middleware because they use the middleware pattern, with Express implementing the middleware manager.
Every Express engineer has favorite middleware packages that they use from project to project. I tend to start with the following and then add more packages if and when I need them:
- compression—Automatically compresses responses using the gzip algorithm. This makes responses smaller and faster to download, which is useful.
- errorhandler—Rudimentary handler for errors such as 404 and 500.
- express-validator—Validates the payload of incoming requests. It’s always a good idea to have this.
- morgan—Logs requests on the server. Supports multiple formats.
- body-parser—Enables automatic parsing of JSON and the urlencoded data format into Node/JS objects accessible in request.body.
For information about compression, body-parser, and errorhandler, as well as a list of additional Express middleware, see appendix c, https://github.com/azatco/cheatsheets/tree/master/express4, or Pro Express.js (http://proexpressjs.com).
17.4.2. Setting up the server
Just as you did in the previous examples, you’ll implement the server side of things in index.js and then work through the five sections so you can see how it breaks down. First, the following listing shows it in full (ch17/message-board/index.js).
Listing 17.6. Server side of the message board app


Configuration
Again, you need to use babel-register to import JSX, after installing babel-register and babel-preset-react with npm:
require('babel-register')({
  presets: [ 'react' ]
})
In index.js, you implement your Express server. Let’s import the components using the relative path ./components/:
const Header = React.createFactory(require('./components/header.jsx')),
  Footer = React.createFactory(require('./components/footer.jsx')),
  MessageBoard = React.createFactory(require('./components/board.jsx'))
For the purpose of rendering React apps, you need to know that Express.js can use pretty much any template engine. Let’s consider Handlebars, which is close to regular HTML. You can enable Handlebars with this statement, assuming app is the Express.js instance:
app.set('view engine', 'hbs')
The hbs module must be installed (I have it in package.json).
Middleware
Middleware provides a lot of functionality for your server that you’d otherwise have to implement yourself. The following are the most essential for this project:

Server-side routes
In your route—let’s say, /—you call render on views/index.handlebars (res.render ('index')), because the default template folder is views:
app.get('/', (req, res, next) => {
    req.messages.find({}, {sort: {_id: -1}}).toArray((err, docs) => {
      if (err) return next(err)
      res.render('index', data)
    })
  })
The req.message.find() call is a MongoDB method to fetch documents. Although you must have MongoDB installed and running for this example to work verbatim (without any changes), I don’t like to enforce my database preference on you. It’s easy to replace calls to MongoDB with whatever you want. Most modern RDBMS and NoSQL databases have Node drivers; most of them even have ORM/ODM libraries written in Node. Therefore, you can safely ignore my DB call, if you’re not planning to use MongoDB. If you do want to use MongoDB, appendix D has a cheatsheet for you. The idea is that in the request handler, you can make a call to an external service (for example, using axios to get Facebook user information) or use a database (MongoDB, PostgreSQL, and so on). How you get the data in Node isn’t the focus of this chapter.
The most important thing here with regard to Universal React is res.render() (ch17/message-board/index.js), shown in listing 17.7. This render() method is a special Express feature for templates. It has two arguments. The first is the name of the template: index.hbs, which is in the views directory. The second argument to res.render() is the locals: data that will be used in the templates. All the data is sent (or combined with or hydrated) to the ch17/message-board/view/index.hbs template (the .hbs extension is optional).
Listing 17.7. Rendering HTML generated from React components

At this point, you have an Express server that renders a Handlebars template with three HTML strings from React components. This isn’t exciting by itself; you could have done this without React. You could have used Handlebars or Pug or Mustache or any other template engine to render everything, not just the layout. Why do you need React? Well, you’ll be using React on the browser, and browser React will take your server HTML and add all the events and states—all the magic. That’s why!
You aren’t finished with the server yet. You need to implement the two APIs for this example:
- GET /messages—Gets a list of messages from a database
- POST /messages—Creates a new message in a database
These routes will be used by browser React when it makes AJAX/XHR requests to GET and POST data. The code for the routes goes in Express, in index.js:
app.get('/messages', (req, res, next) => {
    req.messages.find({},
      {sort: {_id: -1}}).toArray((err, docs) => {
      if (err) return next(err)
      return res.json(docs)
    })
  })
The route to handle creation of messages (POST /messages) will use express-validator to make sure the incoming data is present (notEmpty()). express-validator is convenient middleware because you can set up all kinds of validation rules.
Warning
Input validation is paramount to securing your apps. Developers work with the code and the system: they wrote it, they know how it works, and they know what data it supports. Thus they unconsciously become biased about the data they feed the app, which can lead to loopholes. Always sanitize your data server-side. You should consider every user to be potentially either a malicious attacker or a negligent person who never reads your instructions and always sends weird data.
The route will also use the reference to the database from req.messages to insert a new message:

As mentioned earlier, I recommend using the nodemon tool or something similar, such as node-dev. node-dev monitors for file changes and restarts the server when changes are detected. It can save you hours of work! To install node-dev, run this command:
npm i [email protected] --save-dev
In package.json, you can add the command node-dev . to the start npm script:
...
  "scripts": {
    ...
    "start": "./node_modules/.bin/webpack && node-dev ."
  },
...
The bootup call is primitive compared to the previous section, when you used HTTPS:
app.listen(3000)
Obviously, you can add HTTPS to it and change the port number or take the port number from environment variables.
Remember, the root / route handles all the GET requests to / or to http://localhost:3000/, in this case. It’s implemented in listing 17.7 (ch17/message-board/view/index.hbs). The route uses a template called index in res.render(). Now, let’s implement the template.
17.4.3. Server-side layout templates with Handlebars
You can use any template engine on the server to render React HTML. Handlebars is a good option because it’s similar to HTML, which means little modification is needed when transitioning from HTML to this template engine. Following is the Handlebars index.hbs file:
<!DOCTYPE html>
<html lang="en">
  <head>
    <!-- meta tags and CSS -->
  </head>
  <body>
  <div class="container-fluid">
    <!-- header -->
    <!-- props -->
    <!-- messageBoard -->
    <!-- footer -->
  </div>
  <script type="text/javascript" src="/js/bundle.js"></script>
  </body>
</html>
You use triple curly braces ({{{...}}}) to output components and properties (unescaped output) such as HTML. For example, {{{props}}} will output a <script/> script tag so you can define a messages variable in it. The index.hbs code to render unescaped HTML string for props is
<div>{{{props}}}</div>
The rest of the locals (data) are outputted similarly:
<div id="header">{{{header}}}</div>
...
<div>{{{props}}}</div>
...
<div class="row-fluid"  id="message-board" />{{{messageBoard}}}</div>
...
<div id="footer">{{{footer}}}</div>
Here’s how you output an HTML string from the Header component in Handlebars (ch17/message-board/views/index.hbs).
Listing 17.8. Outputting HTML generated by React in Handlebars
...
  <div class="container-fluid">
    <div class="row-fluid">
      <div class="span12">
        <div id="header">{{{header}}}</div>
      </div>
    </div>
    ...
What about the data? In order to get the benefit of server-side React working together with browser React, you must use the same data on the browser and server when you create React elements. You can pass the data from the server to browser React without needing AJAX calls by embedding the data as a JS variable right in the HTML!
When you pass header, footer, and messageBoard, you can add props in the / Express route. In index.hbs, print the values with triple curly braces and include the js/bundle.js script, which will be generated by Webpack later (ch17/message-board/views/index.hbs).
Listing 17.9. Server-side layout to render HTML from React components


This template includes some Twitter Bootstrap styling, but it’s not essential for the project or the Universal JavaScript example. You use a few variables (a.k.a. locals: header, messageBoard, props, and footer) in your templates, which you need to provide in the render() of an Express request handler. As a reminder, this is index.js code that you implemented earlier (listing 17.7, ch17/message-board/view/index.hbs) and that uses the previous template by calling it index, which is a convention for index.hbs:
res.render('index', {
  header: ReactDOMServer.renderToString(Header()),
  footer: ReactDOMServer.renderToString(Footer()),
  messageBoard:
    ReactDOMServer.renderToString(MessageBoard({messages: docs})),
  props: '<script type="text/javascript">var messages='+JSON.stringify(docs)+
   '</script>'
})
The values will be generated from React components. This way, you’ll be using the same components on the server and on the browser. The ability to easily render on the server (with Node) is the beauty of React.
Next, let’s move on to variables: props, header, footer, and so on.
17.4.4. Composing React components on the server
You’re finally doing what you did in all the previous chapters: creating React components. Isn’t it good to get back to something familiar once in a while? Yes. But where do the components come from? They live in the components folder. As I mentioned earlier, the components will be used on the browser and the server; that’s why you’re putting them in a separate components folder and not creating them in client. (Other options for component folder names are shared and common.)
To expose these components, each of them must have module.exports, which is assigned a value of the component class or a stateless function. For example, you require React, implement the class or a function, and then export Header as follows:

The message board will use AJAX/XHR calls to get a list of messages and post a new message. The calls are in board.jsx. The file will include MessageBoard. It’s your container (smart) component, so the calls are in that component.
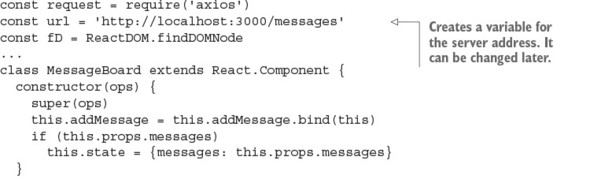
It’s interesting to look at where you make AJAX calls in MessageBoard: in componentDidMount(), because this lifecycle event will never be called on the server (ch17/message-board/components/board.jsx)!
Listing 17.10. Fetching messages and sending a message

You can look up the implementation of NewMessage and MessageList in the same file (ch17/message-board/components/board.jsx); I won’t bore you here. They’re representational components with little or no logic—just the description of the UI in the form of JSX.
You’re done with rendering React (and layout) HTML on the server. Now, let’s sync up the markup with the browser React; otherwise, no messages would be added—there would be no interactive browser JavaScript events!
17.4.5. Client-side React code
If you stopped the implementation at this point, there would be only static markup from the rendering of React components on the server. New messages wouldn’t be saved, because the onClick event for the POST button wouldn’t work. You need to plug in the browser React to take over where the server’s static markup rendering left off.
You create app.jsx as a browser-only file. It won’t be executed on the server (unlike the components). This is the place to put ReactDOM.render() calls to enable browser React:
ReactDOM.render(<MessageBoard messages={messages}/>,
  document.getElementById('message-board')
)
You also need to use the global messages as a property for MessageBoard. The messages property value will be populated by the server-side template and {{{props}}} data (see section 17.4.3). In other words, the messages array of messages will be populated from index.hbs when the template gets data (called locals) from the props variable in the Express.js route /.
Failure to provide the same messages property to MessageBoard on the server and on the browser will result in browser React repainting the entire component, because browser React will consider the views to be different. Under the hood, React will use the checksum attribute to compare the data that’s already in the DOM (from the server-side rendering) with whatever browser React comes up with. React uses checksum because it’s quicker than doing an actual tree comparison (which could take a while).
In the app.js file, you need to require some front-end libraries and then render out components in the DOM (ch17/message-board/client/app.jsx).
Listing 17.11. Rendering client React components on the browser
const React = require('react')
const ReactDOM = require('react-dom')

const Header = require('../components/header.jsx')
const Footer = require('../components/footer.jsx')
const MessageBoard = require('../components/board.jsx')

ReactDOM.render(<Header />, document.getElementById('header'))
ReactDOM.render(<Footer />, document.getElementById('footer'))
ReactDOM.render(<MessageBoard messages={messages}/>,
 document.getElementById('message-board'))
The browser code is tiny!
17.4.6. Setting up Webpack
The final step is setting up Webpack to bundle the browser code into one file, manage dependencies, and convert JSX code. First you need to configure Webpack as follows, with the entry point client/app.jsx, with output set to public/js in the project folder, and using Babel loaders. The devtool setting gets the proper source code lines in Chrome DevTools (not the lines from the compiled JS code):
module.exports = {
  entry: './client/app.jsx',
  output: {
    path: __dirname + '/public/js/',
    filename: 'bundle.js'
  },
  devtool: '#sourcemap',
  stats: {
   colors: true,
   reasons: true
  },
  module: {
    loaders: [
      {
        test: /.jsx?$/,
        exclude: /(node_modules)/,
        loader: 'babel-loader'
      }
    ]
  }
}
To convert JSX to JS, you can use babel-preset-react and specify the Babel configs in package.json:
...
  "babel": {
    "presets": [
      "react"
    ]
  },
  ...
The client-side dependencies (for browser React) like Babel and Webpack in package .json will be development dependencies, because Webpack will bundle everything that’s needed into bundle.js. Thus you won’t need them at runtime:
{
  ...
  "devDependencies": {
    "axios": "0.13.1",
    "babel-core": "6.10.4",
    "babel-jest": "13.2.2",
    "babel-loader": "6.2.4",
    "babel-preset-react": "6.5.0",
    "node-dev": "3.1.3",
    "webpack": "1.13.1"
  }
}
Tip
Be sure you use the exact versions provided here. Otherwise, all the new stuff that will come out when I’m done writing this paragraph will break the project—and I’m only half joking!
Also, while you’re in package.json, add an npm build script (it’s optional but more convenient):
  ...
  "scripts": {
    ...
    "build": "./node_modules/.bin/webpack"
  },
...
I personally love to use watch for Webpack (-w). In package.json, you can add the option -w to the npm build script:
  ...
  "scripts": {
    "build": "./node_modules/.bin/webpack -w",
    ...
  },
  ...
Consequently, every time you run npm run build, Webpack will use Babel to convert JSX into JS and stitch all the files with their dependencies into a giant ball. In this case, it will be put in /public/js/app.js.
Thanks to the include in the views/index.hbs template, right before the ending </body> tag, the browser code is working (the following line is what’s in the template):
<script type="text/javascript" src="/js/bundle.js"></script>
When I run this default task with npm run build, I see these logs:
Hash: 1d4cfcb6db55f1438550
Version: webpack 1.13.1
Time: 733ms
        Asset    Size  Chunks             Chunk Names
    bundle.js  782 kB       0  [emitted]  main
bundle.js.map  918 kB       0  [emitted]  main
    + 200 hidden modules
That’s a good sign. If you see another message or errors, compare your project with the code on at www.manning.com/books/react-quickly or https://github.com/azat-co/react-quickly/tree/master/ch17.
17.4.7. Running the app
That’s it as far as rendering React.js components in Express.js apps goes. Typically, all you need are the following (assuming you have a build process and components):
- A template that outputs locals/data unescaped
- A res.render() call to hydrate data to the template and render it (components, properties, and such)
- Inclusion of the browser React file (with ReactDOM.Render) in the template for interactivity
Are you still confused about Universal Express and React? If so, get the tested, working code for the project from www.manning.com/books/react-quickly or https://github.com/azat-co/react-quickly/tree/master/ch17/message-board and poke around. You can remove code in app.js to disable browser React (so there’s no interactivity such as mouse clicks), or remove code in index.js to disable server React (slight delay when loading a page).
To run the project, have MongoDB running ($ mongod; for more instructions see appendix D). In the project folder, run these commands:
$ npm install
$ npm start
Don’t forget to either have Webpack running builds in watch mode (npm run build) or restart the app every time you make a change to the browser code.
Open http://localhost:3000 in your browser, and you’ll see the message board (see figure 17.9). If you look closely at the way the page is loaded (Chrome DevTools), you’ll see that the first load is fast because the HTML is rendered on the server.
Figure 17.9. Universal app in action, with server and browser rendering

When you comment out the code in ch17/message-board/index.js that’s responsible for server-side rendering, you can compare the timing by looking at the Network tab. There, notice the localhost resource (first page load and server-side rendering) and the GET XHR call to /messages. My results for the localhost are much faster, as shown in figure 17.10.
Figure 17.10. Loading the server-side HTML is 10 times faster than complete loading, which is slower due to bundle.js.

Of course, the bulk of the total loading time is taken up by bundle.js. After all, it has more than 200 modules! GET /messages doesn’t take too long—just a few milliseconds. But still, users will see everything on the page when the localhost call happens. Conversely, without isomorphic/universal code, users will see fully formed HTML only after GET /messages, plus some for browser React to render the HTML client-side.
Let’s inspect the app from a different perspective by comparing Universal versus browser rendering side by side. Figure 17.11 shows the results for localhost. With the Universal approach, localhost has all the data, and it loads in a mere 20–30 ms. With browser-only React, localhost has only bare-bones, skeleton HTML. So, users will have to wait about 10 times as long. Anything greater than 150 ms is usually noticeable by humans.
Figure 17.11. Localhost (first response) for browser-only rendering (top) vs. server-side rendering (bottom)

You can play around by commenting out the rendering statements in index.js (Express.js) or app.jsx (browser React). For example, if you comment out the server-side Header but leave the browser render for Header intact, then you may not see Header for a few moments before it appears.
Also, if you comment out passing the props variable on the server or modify its value, browser React will update the DOM after getting the list of messages for axios. React will give you a warning that checksums don’t match.
Sooner or later, your application will grow, and you’ll need to use libraries such as React Router and Redux to route data (covered in chapters 13 and 14). Interestingly, these libraries already support Node, and React Router even supports Express. For example, you can pass React Router routes to Express for server-side support via match and RouterContext, to render components on the server side:

Redux has the createStore() method (chapter 14), which you can use server-side in Express middleware to provide a data store. For example, for an App component, the server-side code with Redux will look like this:

The index template looks like this:
<div id="root">${html}</div>
<script>
  window.__PRELOADED_STATE__ = ${JSON.stringify(preloadedState)}
</script>
<script src="/static/bundle.js"></script>
Redux uses the same approach that you used for the message board: rendering HTML and data in a <script> tag.
The full example with explanations is at http://mng.bz/F5pb and http://mng.bz/Edyx.
This concludes the discussion of isomorphic or Universal JavaScript. The uniformity and code reuse it provides are tremendous benefits that help developers be more productive and live happier work lives!
17.5. Quiz
What is the method used to render a React component on the server?
Rendering the first page on the server improves performance. True or false?
CommonJS and Node.js module syntax, using require() (along with Webpack), lets you “require” or import npm modules in browser code. True or false?
Which of the following is used to output unescaped strings in Handlebars? <%...%>, {{...}}, {{{...}}} or dangerouslySetInnerHTML=...
What is the best place to put AJAX/XHR calls in browser React so they won’t be triggered on the server?
17.6. Summary
- To use and render React on the server, you need react-dom/server and render-ToString().
- The data must be the same to sync server React HTML with browser React. React uses checksums for comparison.
- The difference between renderToString() and renderToStaticMarkup() is that one has checksums, which allows browser React to reuse the HTML (renderToString()), and the other doesn’t.
- For Universal JS to work, you render React on the server, supply browser React with the same data, and render browser React components.
- Use triple curly braces {{{html}}} to output unescaped HTML content in Handlebars.
17.7. Quiz answers
ReactDOMServer.renderToString(). renderToStaticMarkup() won’t render checksums.
True. You get all the data on the first page load without having to wait for bundle.js and AJAX requests.
True. You can use the require() and module.exports syntax right out of the box with Webpack. Just by setting an entry point in the webpack.config.js, you can make Webpack traverse all the dependencies from there and include only the needed ones.
{{{...}}} is the correct syntax. For escaped variables, use {{data}} to ensure safer usage.
componentDidMount(), because it will never be called on server rendering.