
TRADITIONAL STILL LIFE TEXTURES
Still life compositions allow you to have complete control: You design the composition; choose the range of textures, values, and colors; and create the ideal lighting situation. I like to set up my compositions so that there are many contrasting textures, such as a smooth piece of fruit in a coarsely woven basket. Play around with different types of fruits and cheeses to see how the light catches their textures. It’s always an added bonus to be able to share your food subject after your drawing is done!


Apple A polished red apple reflects a strong highlight, which contrasts with the skin’s dark tone. I apply carbon dust (shavings I collected from sharpening my pencils) with circular, irregular strokes (top), then lift out the highlight with an eraser (bottom).


Orange First I apply carbon dust, using strokes that follow the fruit’s form (top). I lift out the main highlight and then use an eraser to create curved strokes around the highlight, showing the bumpy texture of the orange’s skin (bottom).
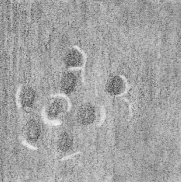

Strawberry I lay in dark tone with carbon dust and use a 4B to start establishing a dotted pattern for the strawberry (top). I continue to enhance the dimpled, seeded texture by adding thin, curved highlight lines around the darker dots (bottom).


Cantaloupe With the side of a 4B, I lay down some tone and then randomly blend the graphite. I lift out a few lines to see how the lights contrast with the dark tone (top). Because the skin is very rough, there are no highlights—just the upper veining.
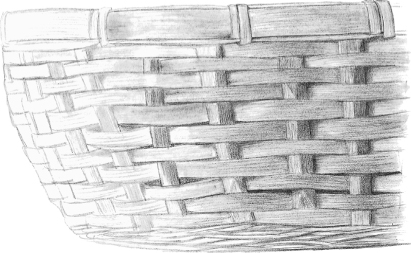
Weaves Baskets are incredibly tactile. The texture of the weave creates a three-dimensional pattern with many layers. Trying your hand at rendering a woven basket is a great way to learn about the interplay of light and shadow and how it can show the heavy texture of the basket.

Knotty Pine Zigzagged lines create the rough pattern of the grain. I use concentric ovals to draw the knots. Then I use an HB to add light, straight vertical strokes and individual shorter strokes to show the raised grain.

Ash For this fine-grained wood, I make long, inverted U shapes with a slightly uneven motion. Then I draw very long grain lines, varying their density and allowing the lines to curve naturally. I go over these lines with light, vertical lines.

Zebrawood With a 4B, I create the dark lines of this straight-grained hardwood. I group some closer together to indicate the color variation. I use a 2H to add very light tone with long, vertical strokes, adding a smooth quality.
I thought it would be a fun challenge to try to capture the coloration markings, form, and textures of these two very different food specimens.
Squash

Step 1 I start off with an outline of the pitted surface of the squash and its color markings. I use carbon dust to put in the initial tones of the darker markings.

Step 2 Using carbon dust on the point of my stump, I add some dark tone to show the heavy creases and the shadow of the stem. I put some irregular tone in the lighter areas. I use a 4B for the stem.

Step 3 I use a 4B and circular strokes to deepen the dark areas, showing the ragged surface of the skin. I go over the light areas with a 2B, then lift out highlights and the lines along the creases.
Cheese

Step 1 I outline the cheese and use the side of the pencil to shade the creamy top of the cheese with light pressure and loose, oval strokes. I use vertical strokes to shade the side, and I darken the veins and the shadows.

Step 2 I use horizontal strokes that follow the form for the rind. Then I deepen the tones of the holes and jagged veins and create the slight cast shadow under the cheese to help keep it “grounded.”
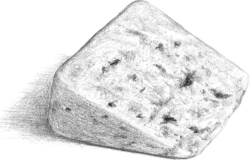
Step 3 With heavy pressure and a dull point, I deepen the holes, remembering to keep the variations in tone to show various depths. I cross hatch the cast shadow and deepen the lines around the cheese to show the heavy rind.