
Hour 19
Module Scripts
What You’ll Learn in This Hour:
 What a module script is
- How module scripts on the client and server side differ
- How to use module scripts to store information
- How to code a game loop using module scripts
When coding games, there are lots of situations where you may need to use a chunk of code in several different places or make it accessible by a number of scripts. For example, you may want to give a player items at the end of a quest or when they open a chest.
You could copy and paste code into 20 different treasure chests, but updating that would be a pain. A better way to organize your code—and avoid repeating yourself—is to use a module script. In this hour, you find out what module scripts are, when to use them, and how to put them into practice by creating a game loop.
Getting to Know the Module Script
A module script is a special type of script that exhibits special behaviors that allow functions and variables within it to be referenced and used across multiple scripts. The module script can be used by both the client and the server if it is in an area where both sides can access it.
To begin, create a module script inside ServerStorage, as shown in Figure 19.1.
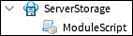
FIGURE 19.1
A module script located inside ServerStorage.
This is the most common area for storing module scripts because scripts that are inside ServerStorage are not executed when the game is run. However, you also can place module scripts inside ReplicatedStorage, which is particularly useful if you want to house variables and functions that both the client and the server can use.
Understanding the Anatomy of a Module Script
Unlike other script types, a module script does not automatically include print("Hello world!"). Instead, the generated code creates a local table, which is then returned (or sent) to the calling script. Any code in the module table, such as values, functions, other tables, and pieces, will be sent within the module table.
local module = {}  -- Local table

return module -- Returns the table to where the script was called
The first thing you should do with any module script is to rename the script, and then update the table to match, as in the following example:
Rename the script with a name that describes what the code is for. This example will be TreasureManager (Figure 19.2).
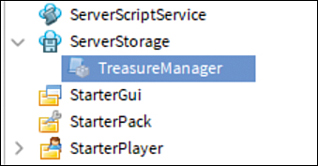
FIGURE 19.2
The TreasureManager script.Rename the table to match:
local TreasureManager = {}

return TreasureManager
If the variables and functions only need to be used by the module script, set them using the keyword
localas you normally would.Add a local value named
goldToGive:local TreasureManager = {} local goldToGive = 500 -- local variable only usable by the Module Script return TreasureManager
Adding Code That Can Be Used Anywhere
To make the code accessible from other scripts, instead of simply declaring variables and functions as you normally would, you must make sure to add it into the table so that it can be used by other scripts. To do that, reference the table using ModuleName.InsertNameHere.
Variable example
ModuleName.VariableName = 100
Function example
function ModuleName.FunctionName()
end
To continue with the example you started earlier, now you want to add a function that can be called from any treasure chest in the game by adding a function named giveGold to the table. Do not make it local:
local TreasureManager = {}
local goldToGive = 500

function TreasureManager.giveGold() -- Can be called from anywhere
       print(goldToGive .. "gold was added to inventory" )
end

return TreasureManager
Using a Module Script
Now that you have your module script filled, it’s time to use it. To access a module script from a LocalScript or a regular script, you need to use require(), which accepts one argument: the module script’s location in the Explorer. You also assign a variable to the result of the function (recall that a module script returns a table), as shown in the following code:
-- Getting the module script
local ServerStorage = game:GetService("ServerStorage")
local ModuleExample = require(ServerStorage.ModuleExampleMyModule)

To use the functions and variables inside of the module, use dot notation.
-- Function example
ModuleExample.exampleFunction()
You still need to have some code in the treasure chest to call the module script. Keeping that code as light as possible makes it less likely that you have to update it later and makes your code more resistant to hacking. Call giveGold() whenever a player touches a treasure chest. Use the following steps:
Use a simple part or a model to act as your treasure chest. Insert a script. If you use a model, the script must go into a part.
Use
require()to get the TreasureManager module script.Add code that calls
giveGold()when the player touches the treasure chest:local ServerStorage = game:GetService("ServerStorage") local TreasureManager = require(ServerStorage.TreasureManager) -- Gets module script local treasureChest = script.Parent -- Gives gold when touched by a player local function onPartTouch(otherPart) local partParent = otherPart.Parent local humanoid = partParent:FindFirstChildWhichIsA("Humanoid") if humanoid then TreasureManager.giveGold() --Calls the function from the module script end end treasureChest.Touched:Connect(onPartTouch)
Understanding Client-Side Versus Server-Side Module Scripts
Although module scripts can be accessed and used by both local and server scripts, what it can do depends on which side of the client-server model it is being executed on. Hour 18, “Multiplayer Code and the Client-Server Model,” explained the client-server model, as well as what is and isn’t replicated when code is run on the client side. Similarly, when a module script is run from a script, its interaction is dependent on what the script running it can interact with. For example, a LocalScript that runs a ModuleScript function will not be able to access ServerStorage, ServerScriptService, or other areas that are only visible to the server. However, running the same ModuleScript function within a regular script will. This allows module scripts to be used on both sides of the client-server model without a potential loophole for exploiters to use. Let’s go through an example in which you run a script from both the server and the client to demonstrate:
In ServerStorage, add a
NumberValueobject named Secret (Figure 19.3). Set the value to any number you like. ServerStorage can be accessed by only the server.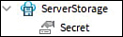
FIGURE 19.3
Place an object inside ServerStorage.Place a
ModuleScriptinside ReplicatedStorage (Figure 19.4), a container that both the client and server can access.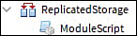
FIGURE 19.4
ModuleScript inside ReplicatedStorage.Name the module script ReplicatedModuleScript.
Rename the table to match the name of the module script:
local ReplicatedModuleScript = {}
return ReplicatedModuleScript
Add Secret to your
ModuleScriptfunction using a variable:local ReplicatedModuleScript = {} ReplicatedModuleScript.Secret = game.ServerStorage.Secret return ReplicatedModuleScript local ReplicatedModuleScript = {} ReplicatedModuleScript.Secret = game.ServerStorage.Secret return ReplicatedModuleScript
For the LocalScript and regular script, you use the same code because they can both access the module script located within ReplicatedStorage. Then you attempt to print the value of Secret after obtaining the table:
Place a script in ServerScriptService and a LocalScript in StarterPlayerScript.
Copy the following code into both scripts:
-- Get the required module script
local  ReplicatedModuleScript = require(game.ReplicatedStorage:WaitForChild
      ("ReplicatedModuleScript"))

-- Get and print the variable value
print(ReplicatedModuleScript.Secret.Value)
Once you are set up, you can playtest and observe the results. You should see both the printed value from the client side and an error message from the server side. In Figure 19.5, the server (the green line on the top) outputs the SecretKey’s value, whereas the client (the blue line on the bottom) produces an error.

FIGURE 19.5
The resulting output.
As you can see, while the server had no issue accessing and printing the Secret value, the client just couldn’t find it, and instead displays Secret is not a valid member of ServerStorage. This separation of functionality in module scripts is particularly useful when dealing with one that can be accessed by both ends of the client-server model. You wouldn’t want an exploiter to see what’s in your private ServerStorage, would you?
Using Module Scripts: Game Loop
Now that you are a bit more familiar with module scripts, how to use them, and how they differ in functionality between the client and server, you can make something with it: a game loop. A game loop is the cycle a player goes through each time they play your game. In multiplayer games, you might have a round-based game loop where players compete in some fashion to win a match. For this type of game loop, you need to account for three major states (Figure 19.6):
- Intermission: Waiting for players to join or the round to start
- Competition: Where the action occurs
- Cleanup: Where everything is reset to its original state

FIGURE 19.6
The three main components of a round-based game loop.
Establishing Control with Settings
First, create an object that other scripts can reference when they need information regarding each stage:
Create a module script inside ServerStorage. You can name it anything you want, although you preferably want something memorable like GameSettings or GameInformation (Figure 19.7).

FIGURE 19.7
Create a module script inside ServerStorage.At the top of the module script, you need to set up the variables that will control how long each part of the game loop lasts. Before doing so, ask yourself these questions:
- How long should the intermission last?
- How long should each match/round last?
- How many players do I need minimum for the game to function properly?
- How much time should I have in between each “stage”?
Add each as a variable inside the module script.
In the following code, we have filled out a module script with answers to the preceding questions and gave them appropriate names. All times are measured in seconds:
local GameSettings = {}

GameSettings.IntermissionTime = 5
GameSettings.RoundTime = 30
GameSettings.MinimumPlayers = 2
GameSettings.TransitionTime = 3

return GameSettings
Creating Reusable Round Functions
Next, work on the script that manages the matches.
Create another module script inside ServerStorage named RoundManager (Figure 19.8).

FIGURE 19.8
RoundManager module script added in ServerStorage.Inside the RoundManager module script, add the following variables and functions that will be used to send the players to the match and reset everything when the match is over. Right now, print statements are being used as placeholders and functionality can be added later.
local RoundManager = {}

local ServerStorage = game:GetService("ServerStorage")
local GameSettings = require(ServerStorage:WaitForChild("GameSettings"))
local RoundManager = {}

function RoundManager.PreparePlayers()
     print("The match is beginning...")
     wait(GameSettings.TransitionTime)
end

function RoundManager.Cleanup()
     print("The match is over. Cleaning up...")
     wait(GameSettings.TransitionTime)
end

return RoundManager
Creating the Main Engine: The Game Loop
Now it’s time to work on the main engine of the system, which is the loop itself:
Create a regular script, this time inside ServerScriptService (Figure 19.9) so that it runs as soon as the game begins.

FIGURE 19.9
A script (renamed to GameLoop) located inside ServerScriptService.Set up the environment by getting everything you need: Get both module scripts from ServerStorage, as well as some other Roblox services such as Players and RunService.
Here is the initial setup of the main loop script. Notice
WaitForChild()inside therequire()calls. This is to make sure the module scripts are loaded before the rest of the code in this script runs.-- Services local RunService = game:GetService("RunService") local ServerStorage = game:GetService("ServerStorage") local Players = game:GetService("Players") -- Module Scripts local GameSettings = require(ServerStorage:WaitForChild("GameSettings")) local RoundManager = require(ServerStorage:WaitForChild("RoundManager")) Create the infinite loop using while true do: -- Main Loop while true do -- Code inside will repeat every frame end
Check to make sure that you have enough players before you attempt to begin a match.
You can do that using an
ifstatement that compares the number of players to the minimum number of players required to start.Note the # symbol, which returns the length of a table. In this case, the # will get the length of the player list, obtained through
Players:GetPlayers():-- Main Loop while true do -- Any code in here will be repeated every frame if #Players:GetPlayers() < GameSettings.MinimumPlayers then wait() end end
Once there are enough players, you begin the round and wait for it to end:
-- Main Loop
while true do
-- Any code in here will be repeated every frame
     if #Players:GetPlayers() < GameSettings.MinimumPlayers then
          wait()
     end

     wait(GameSettings.IntermissionTime)

     RoundManager.PreparePlayers()

     wait(GameSettings.RoundTime)

     RoundManager.Cleanup()
end
And with that, you have the foundation for your game loop. Feel free to test it out on a live server with friends or use the testing tool with more players than minimally required in the Test tab at the top (Figure 19.10).
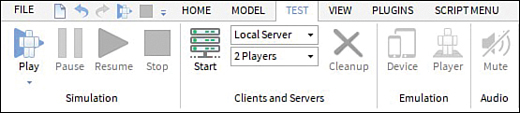
FIGURE 19.10
Use the testing tool to start a local server with up to eight players on your own machine.
Summary
In this hour, you learned about module scripts and how they can help you organize your code better and avoid repeating functions. Applying your previous knowledge of the client-server model, you learned what module scripts can do depending on which side of the model they are being used on. Finally, you learned how to apply the ideas of module scripts to a system using the game loop example.
Q&A
Q. Can module scripts require each other?
A. Yes. Having two module scripts require each other is generally OK, but more than that can lead to issues where they are all waiting for each other to load.
Q. Where can I place my module scripts?
A. Best practice is to place them in ServerStorage if they are only used by regular scripts on the server side, and ReplicatedStorage if they are used by both LocalScripts and server scripts.
Workshop
Now that you have finished, take a few moments to review to see whether you can answer the following questions.
Quiz
1. True or False: Module scripts run by themselves.
2. True or False: Module scripts can only be placed within ServerStorage.
3. For a Module script to be used, you must use _____.
4. True or False: Local variables or functions are accessible outside of the module script.
5. True or False: Module scripts run on the client side can see everything that the server sees.
6. True or False: Module script code can be used by multiple scripts.
7. A module script returns a _____, which contains a combination of variables and functions.
8. You use module scripts as a way to better ______ your code.
Answers
1. False. Module scripts must be run or accessed by another script (such as a LocalScript or Script).
2. False. Module scripts can be placed anywhere as long as they are accessible by the script trying to use them. (See the Q&A section for best practices.)
3. For a module script to be used, you must use require.
4. False. Local variables or functions can only be accessed within the module script itself.
5. False. Module scripts on the client side can only see what the client sees (no peeking at the ServerStorage).
6. True. Module scripts can be used by any number of scripts.
7. A module script returns a table.
8. You use module scripts as a way to better organize your code.
Exercises
This exercise combines things you’ve learned this hour. If you get stuck, don’t forget to refer to the previous pages in this hour. Try to make some bricks, which, when touched, will give you a different amount of currency—but run off the same module script!
Create a script inside ServerScriptService that creates a leaderstat of a currency (it can be anything you want).
Create several parts, with a script inside that runs when a player touches it.
Inside ServerStorage, create a module script and rename it to an appropriate name.
Inside the module script, create a function that gives currency based on the part that the player touches. (Hint: Use if statements to check.)
Call the function inside the script using the
requirekeyword and pass theCharacterandPartas arguments.Extra: Instead of using multiple scripts for the parts, try to use one using a
forloop!
Bonus Exercise: Create a button that says different things depending on whether you’re calling it from the client side or the server side, with one module script and only one function!
Create a module script inside ReplicatedStorage.
Inside the module script, write a function that prints text depending on whether the server or the client is running the code using the
RunService:IsClientandRunService:IsServerfunctions (you will need to insertRunServiceby creating a variable and setting the service to it).Create a script inside ServerScriptService.
Inside the script, use
requireto access and call the module script function.Create a ScreenGui and a TextButton. Feel free to change the names and the text.
Create a LocalScript inside the TextButton, which also uses
requireto access and call theModuleScriptfunction.Extra: Use a
RemoteEventfrom the previous chapter so that the LocalScript can call the server side of the module script.