We’re now at the last of our instruments, and I must tell you, there is a reason I’m telling you about this one last. The rabbit hole is deep with this instrument, also known as the Sampler.
So, what is a sampler? An assorted batch of foods that you can try out to see which one you like? No, Apple couldn’t fit this into the iPad. Instead, this Sampler records sound and then allows you to play the sound back across the piano keyboard.
And, just so you know, samplers are not some geeky idea that Apple came up with that no one’s ever heard of. Samplers are used in popular music, movies, and television shows more than probably any instrument at this moment. You may think you’re hearing a violin or an orchestra, but really, you’re probably hearing a sampler!
But this tool is better tried than explained, so let’s give it a whirl now.
If you’re in the song from the previous tutorial, go to the Arrangement page and press the + sign to create a new track. If no track is available (you get only eight), tap on the picture of the instrument that you do not want and press the Delete button that appears, as shown in Figure 7.1
Tip
Here’s a new one! If you’re in an instrument page, press the Instruments button, shown in Figure 7.2, to change which instrument you’re currently using.
In the instrument selection page, flick over to the Sampler instrument (see Figure 7.3).
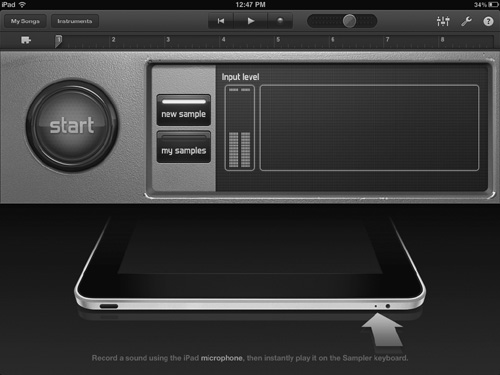
When you get to the Sampler instrument page, you may be confused to see a glowing red button labeled Start and then a yellow box labeled Input Level. There are a few other buttons, but we’ll get to those later. The big red button is the most important part of this whole venture, and the best way to get over your fear of it is to press it. So, here’s what you’ll do: After pressing the red button, speak into the area of the iPad indicated in the picture or into your microphone. When you’re finished speaking, press Stop, which is what the red button will say after you push it the first time. Try it now!
Tip
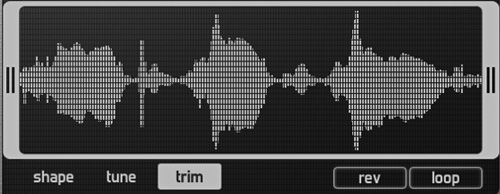
When you were recording, you probably noticed strange lines indicating a representation of the incoming signal. These lines are known as waveforms, and they are regularly seen in modern audio recording. The main thing to know is that you don’t want the line too thin, and you don’t want it too wide. You want it somewhere in the middle, as shown in Figure 7.5.
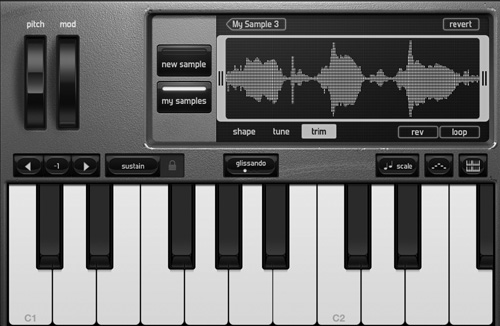
Now that you’ve finished recording, a keyboard appears at the bottom of the page where the picture used to be (see Figure 7.6). And, because this is the most amusing part of sampling, you should now try playing this keyboard. Make sure to hold down the keys and try using different keys, too. Try it now.
How does it feel to play your own voice? Neat, eh? But, imagine the possibilities with this: You can record your own voice and then play it. Imagine what it would mean if you recorded a note of your favorite old piano, a banjo, or a keyboard. You can play back any sound you want and then have the notes scale along with the keys you play. But, this may also make you consider a particular question: If I can record it, can I edit it? And the answer is...yes! First, let’s start with a fun one. Press the Rev button below your waveform (see Figure 7.7).
After you press the Rev button, which stands for Reverse, you’ll see the waveform visual reverse, as shown in Figure 7.8. But it’s not just cosmetic! Press and hold down the key labeled C3 on the keyboard—or any old key. Notice how the sound is playing backward now when you hold down a key. If you press the Rev button again, the sound will go back to playing forward. Try it now.
There’s also the Loop button (see Figure 7.9). When you press this button, you can make the recorded audio loop over and over again as long as you hold down the key. This is useful for any number of situations, but let me give you one example: You whistle into your microphone and then decide that you’d like the whistle to sustain as long as you hold down the key, instead of stopping naturally as the recording finishes. Try pressing the Loop button and then hold down the key.
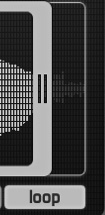
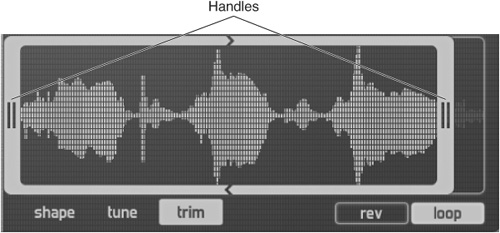
You might decide that you don’t want the loop to extend out so long. Maybe you want a smaller portion of the loop to play over and over again. Use the yellow handles on either side of your recording (see Figure 7.10) to decrease the loop time from the start or end. Simply move the yellow handle on the far right to the left, or the handle on the far left to the right. If you press and hold in the middle of the yellow box, you can move the box around the recording, too. Try it now.
Tip
Believe it or not, looping is actually a skill unto itself. There are people who pride themselves on getting loops so “tight” that you almost can’t tell where the loop occurs. When looping, try to move the yellow bars to locations and then test. Then move again until you can’t tell where the loop occurs, or where it sounds natural. This can take some time, but the end result is awesome!
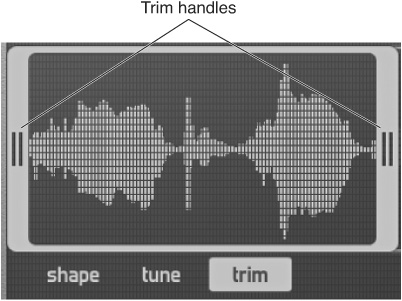
Let’s take a look at Trim now. Trim is similar to Loop, with one exception: It simply helps you shorten how long the sound actually is. For example, you want a sample that says “Happy birthday, Bobby!” But when you recorded the sample, you had a rock fall on your toe at the end. The sample is almost perfect, but there’s a problem at the end. It sounds like, “Happy birthday, Bobby...ouch!” In this case, use Trim to take off the “ouch.” Trim has yellow handles as well; just move the handle before or after the area you don’t want to hear anymore (see Figure 7.11).
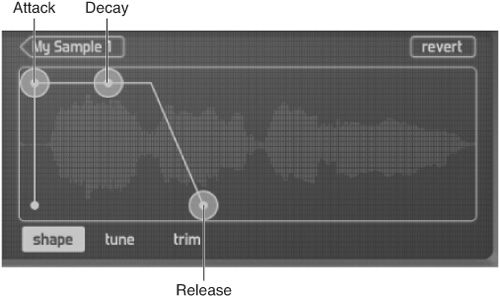
What if you’re recording a bell sound, and you actually want the sample to behave like a bell, too? For example, when you strike a bell, the bell still continues to play after a few seconds. In this case, after recording the bell, you’d like to hear the bell continue slightly after you strike the key. Like a real bell, right? Shape is really handy for this. When Shape is selected, you can edit how the sound plays as you touch a key on the keyboard. In Figure 7.12, the first dot (farthest on the left) controls that attack, or how the sound fades in when a key is struck. The dot in the middle controls how the sound sustains and decays; move this right or down to affect it. Finally, the last dot determines how long the sound plays after a key is struck—like a bell. Use this to determine how long the sound plays after you touch a key on your keyboard. Try these out now.
What if you recorded yourself whistling and wanted to use it in the song, but you’re not sure whether you’re whistling in tune or even in the right key? Use the Tune mode to get yourself in tune. The best way to experience this is to press the New Sample button and create a new recording of something like a whistle, a bell, and so on. Press New Sample and record now!
When you’ve recorded, press Tune at the bottom (see Figure 7.13).
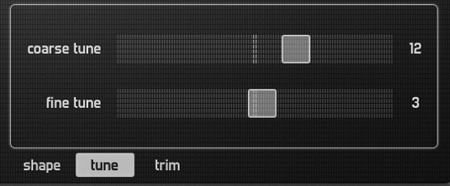
If you try playing the keys at the bottom, you’ll notice that there is a very plain sound over the top of your recording, almost like a flute sound. The goal here is to make your sound fall into the same tune as this flute sound. You do this by using the Coarse Tune and Fine Tune buttons (see Figure 7.14). Hold down a key and adjust these sliders until your sound is almost in perfect pitch with the key you’re holding.
If you go back into Shape or Trim, you’ll get rid of the flute sound. This will allow you to play your sound normally. Try this now. Notice that you have an in-tune and workable whistle or bell that will work in any project.
You might decide that you want to hold onto this sample for future projects. To do this, press the arrow that says My Sample at the top (see Figure 7.15). It will have a number after it.
Your last-used My Sample will still be highlighted after you come to this menu. Notice that you see other samples that Apple has included for you in the main library. If you want to save your sample in this library, press Add to Library at the top (see Figure 7.16).
Now, type in what you want to call the sample. It can be “Bell,” “Whistle”—anything you want. Just make sure it’s a title you will remember when you read it (see Figure 7.17).
And that is sampling—you’ve learned it! You can make your own trumpets, musical dog barks, and more!
Now it’s time to get to the last portion of the GarageBand experience: arrangement. Check it out in the next chapter.
