
Hour 7. Looking Under the Hood: Exploring HTML
What You’ll Learn in This Hour:
• How to structure the code in a web page
• How to use the Quick Tag Editor
• How to view and edit HTML code
• How to clean the HTML that Microsoft Word creates
• Which code reference books are available in Dreamweaver
Even though Dreamweaver handles HTML (Hypertext Markup Language) behind the scenes, you might occasionally want to look at the code. Dreamweaver also makes the transition easier for those stoic HTML hand-coders who are making a move to a visual HTML development tool such as Dreamweaver. You won’t be sorry! I’m a very competent HTML hand-coder, but I can get my work done much quicker by using Dreamweaver.
Dreamweaver offers several ways to access HTML code. During this hour, you will explore the HTML-editing capabilities of Dreamweaver. You’ll use Dreamweaver’s capability to clean up the code produced when saving a Word document as HTML. You’ll explore the numerous reference “books” available within Dreamweaver for you to look up tags and tag attributes. If you don’t already know HTML, you’ll find that viewing HTML while Dreamweaver creates it for you is a great way to learn.
By default, Dreamweaver creates a type of HTML called XHTML. This stands for Extensible HTML and is a slightly stricter form of HTML. The code you’ll see in Dreamweaver and in this book is XHTML, but I (and most other people) usually just call it HTML. In HTML, the code can have mistakes in it and still work, whereas XHTML requires that the code has the following attributes:
• XHTML elements (tags) must be lowercase—Tags must be written in lowercase (<p>Paragraph here</p>) and not uppercase (<P>Paragraph here</P>).
• XHTML elements must always be closed—In HTML, you can use a single break tag, <br>. In XHTML, the break tag must be closed, <br />.
• XHTML elements must be properly nested—In HTML, the browser will render the following code: <strong><em>Bold and italic text</strong></em>. But this code is not properly nested and XHTML requires it to look like this: <strong><em>Bold and italic text</em></strong>.
Exploring Code View
The Dreamweaver Document window enables you to view a web page in either Design view or Code view. You can see the Design and Code views at the same time by clicking the Split View button in the Document toolbar (or choose View, Code and Design). When you do this, it’s easy to pop back and forth between the views with just the click of a button. You’ll probably do the majority of your web page development in Design view while occasionally looking at Code or Split view to tweak the code or troubleshoot a problem.
Did you Know?: Toggle the Panels Off
You can toggle all the panels on and off by pressing the F4 key (or Window, Hide Panels). Pressing F4 again toggles the panels back on (or Window, Show Panels). This is especially useful for Mac users whose floating panel version of Dreamweaver might cause the panels to block the view of the web page design or code.
Create a new HTML page in Dreamweaver. Then click the Code View button in the toolbar to view the page’s HTML code, as shown in Figure 7.1. The first line in the code is the document type declaration, which uses the doctype tag. In Hour 4, “Dealing with Words: Adding Text and Lists,” you selected the document type in the Page Properties (Modify, Page Properties) dialog box. The document type declaration announces which version of HTML the page uses. Dreamweaver adds this line automatically, so you shouldn’t have to worry about it. After the document type declaration, HTML tags enclose the entire web page.
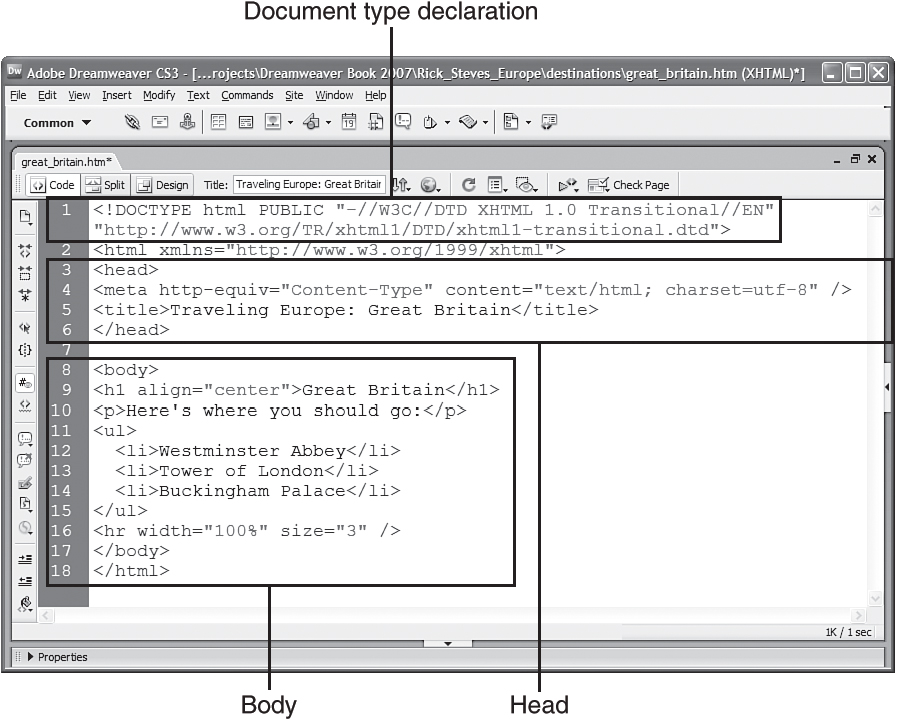
Figure 7.1. Code view displays the basic code of a new web page, including the document type declaration, head, and body.
By default, Dreamweaver creates web pages by adding XHTML tags. When you select an object from Dreamweaver’s insert bar, Dreamweaver inserts the appropriate tag or tags into your web pages. Tags have properties called attributes that Dreamweaver uses to fine-tune the way the object displays on the page. For instance, an image tag (<img>) has the src (source) attribute, which sets the files that the image tag displays. Most image tags also have height and width attributes that tell the browser the size of the image. These are just a few of the many attributes of an image tag. Here is an example of an image tag with standard attributes:
<img src="market.jpg" height="156" width="124"/>
Exploring the Head and Body of a Web Page
There are two main sections to a web page: the head and the body. You’ll see these sections in the code. Head tags surround the head, and body tags surround the body. All the content visible in a web page is in the body. The head of the document contains code that supports the web page. In the head of the document, Dreamweaver automatically adds the <title> tag because the document title is part of the head.
Right beneath the title, Dreamweaver inserts a meta tag, like this:
<meta http-equiv="Content-Type" content="text/html; charset=utf-8"/>
This meta tag specifies the character set that the browser should use to display the page. The preceding example uses the Unicode (UTF-8) encoding that safely represents all character sets. This encoding setting should work well for all languages, but you can set a different default character in the New Document category of Preferences (select Edit, Preferences), shown in Figure 7.2. You can also set the default file extension in this Preferences category.
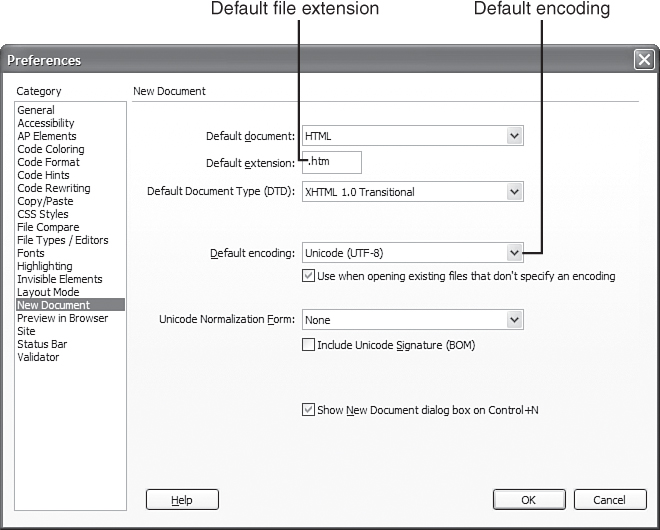
Figure 7.2. You set the default character set and the default file extension in the New Document category of the Dreamweaver Preferences dialog box.
Dreamweaver places other content into the head of the page as you create it. The head is where most JavaScript and other scripting code, CSS (Cascading Style Sheets) definitions, and other code resides. While in Design mode, if you’d like to see a visual representation of the head content, select View, Head Content. You then see icons at the top of the Document window representing the elements in the head. When you select one of the icons, its properties appear in the Property inspector, as shown in Figure 7.3.
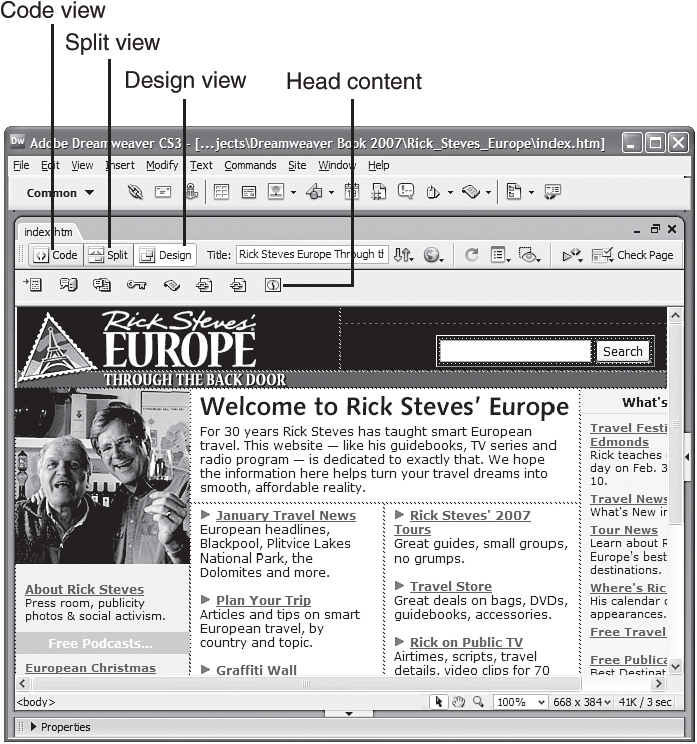
Figure 7.3. The elements in the head are represented by icons when you view the head content.
You display both Design view and Code view by clicking the middle button, the Split View button. While in Split view, place your cursor over the divider between the Design and Code views to modify the window sizes. Type some text into the Design view pane. The text is inserted into the body of the document. If you select an object in the Document window, the code for that object will be highlighted in Code view. This is a quick way to get to the code of a selected object. If your web page is large, there might be a lot of HTML to go through, and it might not be easy to find the code for which you are looking. Try displaying only Design view. Highlight a single word that you typed. When you select Code view, the word is highlighted.
Discovering Code View Options
When you are in Code view, the View Options menu, shown in Figure 7.4, enables you to change the way the code displays. These commands are also available in View, Code View Options.
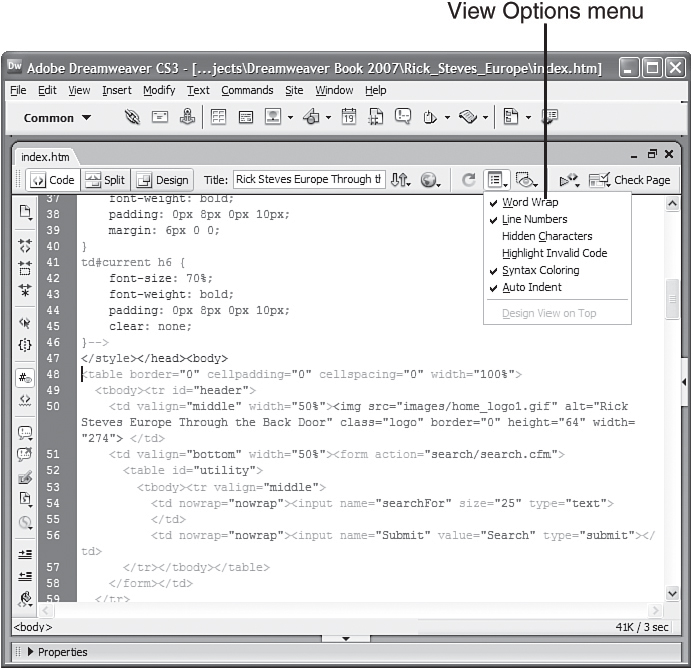
Figure 7.4. The View Options menu enables you to configure how code displays.
The following options are available in the View Options menu:
• Word Wrap—Wraps the lines of code so that you can view it all without scrolling horizontally. This setting does not change the code; it simply displays it differently.
• Line Numbers—Displays line numbers in the left margin. This is helpful when troubleshooting errors or when discussing code with colleagues.
• Hidden Characters—Shows paragraph and space characters in the code.
• Highlight Invalid HTML—Turns on highlighting of invalid code that Dreamweaver doesn’t understand.
• Syntax Coloring—Colors the code so that elements are easier to discern. You set the colors in the Code Coloring category of the Dreamweaver Preferences dialog box.
• Auto Indent—Adds an automatic indent so that your code is more readable. The indentation size is based on the settings in the Code Format category of the Preferences dialog box.
Did you Know?: JavaScript Error? Check the Line Number
If you receive a JavaScript error when previewing a web page in a browser, the error often displays the number of the code line causing the problem. You can view the code in Code view with the line numbers displayed to troubleshoot the error.
If you make changes to the code in Split view, Dreamweaver doesn’t display the changes in the Document window until you click the Refresh button in the Property inspector. If you select View Options, Highlight Invalid Code, Dreamweaver highlights all invalid tags in bright yellow in both the Code inspector and the Document window. When you select a highlighted tag, the Property inspector calls the tag invalid. It might give a reason why the tag is invalid and offer some direction on how to deal with it.
Discovering the Coding Toolbar
The Coding toolbar, shown in Figure 7.5, is visible only in the Code and Split views. The buttons in this toolbar run down the left side of the Document window. These buttons give you control over collapsing, expanding, and selecting the code within selected tags along with highlighting invalid code, adding comments, indenting, applying formatting, and other commands.

Figure 7.5. The Coding toolbar is visible on the left side of the Document window when in Code view.
The following options are available in the Coding toolbar:
• Open Documents—Lists all the documents currently open in Dreamweaver.
• Collapse Full Tag—Collapses all the code within the selected tag, displaying it as a single line with a small expand button to the left of it.
• Collapse Selection—Collapses all the selected code into a single line with a small expand button to the left of it.
• Expand All—Expands all the currently collapsed code.
• Select Parent Tag—Selects the code within the parent tag of the currently selected tag. Continuing to click this button continues to move up the tag hierarchy.
• Balance Braces—Checks your code to make sure that all tags, brackets, braces, and parentheses are balanced with two corresponding characters.
• Line Numbers—Displays line numbers in the left margin.
• Highlight Invalid Code—Turns on highlighting of invalid code that Dreamweaver doesn’t understand.
• Apply Comment drop-down menu—Enables you to add various types of comments, such as HTML, CSS, or JavaScript comments, to the code. This is useful when troubleshooting problems in the code; simply comment out some code to see whether it is causing the problems.
• Remove Comment—Removes comments from the code.
• Wrap Tag—Wraps a tag around the selected tag.
• Recent Snippets drop-down menu—Gives you a list of code snippets you’ve used recently along with a quick way to launch the Snippets panel. You’ll learn more about snippets in Hour 24, “Customizing Dreamweaver.”
• Move or Convert CSS drop-down menu—Enables you to convert inline styles (CSS styles defined in individual tags) to a CSS rule defined in the head of the document. There is also a command enabling you to move CSS rules to an external style sheet.
• Indent Code—Shifts the selected code to the right.
• Outdent Code—Shifts the selected code to the left.
• Format Source Code drop-down menu—This menu enables you to apply source formatting, which you’ll learn more about later this hour.
Using the Code Inspector
If you have a dual monitor setup, you’ll prefer to see the code in a separate window so that you can keep both Code and Design views open. You can use the Code inspector instead of Code view to accomplish this. You launch the Code inspector by selecting Window, Code Inspector. The Code inspector, shown in Figure 7.6, is similar to Code view but it launches in a separate window that you can drag to your other monitor if you are fortunate enough to work with dual monitors.
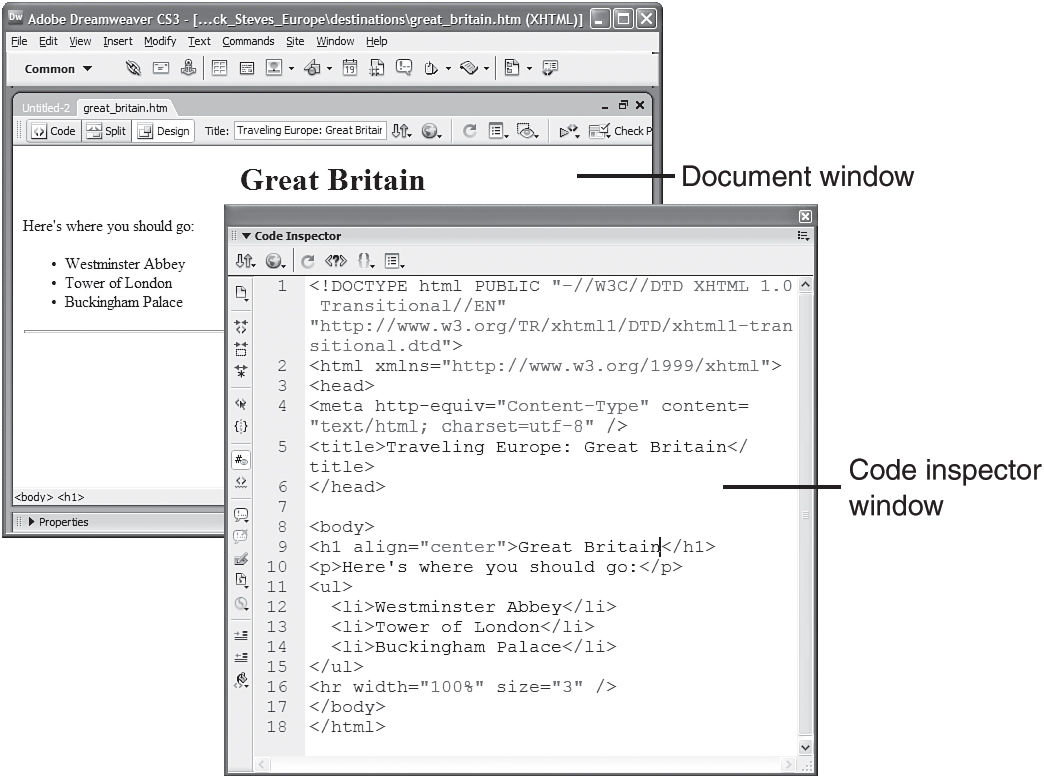
Figure 7.6. The Code inspector enables you to view the code in a separate window.
Viewing and Editing HTML Tags by Using the Quick Tag Editor
Using Dreamweaver’s Quick Tag Editor in Design view is the quickest and easiest way to look at a single HTML tag and edit it. Remember, you can always tell which tag you have selected by looking at the Tag selector at the bottom of the Document window. You can access the Quick Tag Editor in several ways:
• Click the Quick Tag Editor icon on the Property inspector, as shown in Figure 7.7
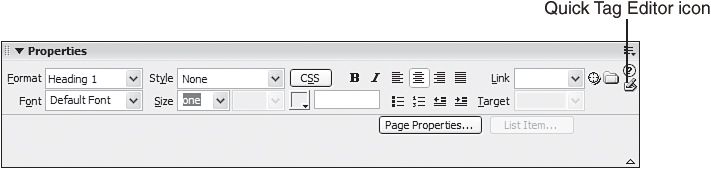
Figure 7.7. Click the Quick Tag Editor icon to view and edit the tag of the currently selected object.
• Select Modify, Quick Tag Editor
• Right-click (Control+click on the Mac) a tag in the tag selector and select the Quick Tag Editor command, as shown in Figure 7.8
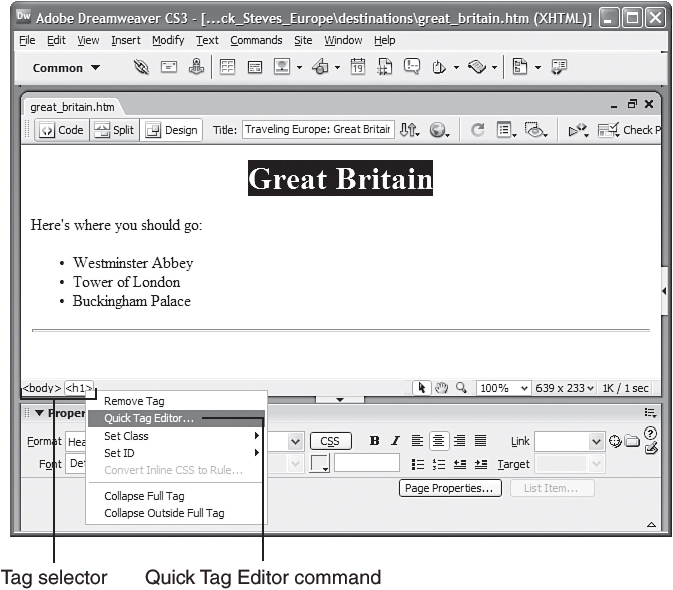
Figure 7.8. Using the Quick Tag Editor command in the tag selector launches the Quick Tag Editor.
When you select the Quick Tag Editor icon in the Property inspector, the tag pops up beside the Quick Tag Editor icon. When you open the Quick Tag Editor from the Modify menu, the tag pops up directly above the object in the Document window, and when you open it from the tag selector, it appears directly above the tag.
The Quick Tag Editor has three modes:
• Edit Tag—This mode enables you to edit the existing contents of a tag.
• Wrap Tag—This mode wraps another HTML tag around the selected tag.
• Insert HTML—This mode enables you to insert HTML in the web page.
When the Quick Tag Editor opens, you can toggle among the three modes by pressing Ctrl+T (Command+T on the Macintosh). The following sections explore each of the three modes.
Using the Edit Tag Mode
The Quick Tag Editor’s Edit Tag mode enables you to edit the HTML of an existing tag and the tag’s contents. To add attributes of the selected tag, place the insertion point at the end of the tag contents in the Quick Tag Editor and add a space. The Tag drop-down menu appears, as shown in Figure 7.9, with attributes appropriate for the tag. You select an attribute from the list and then type in the value.
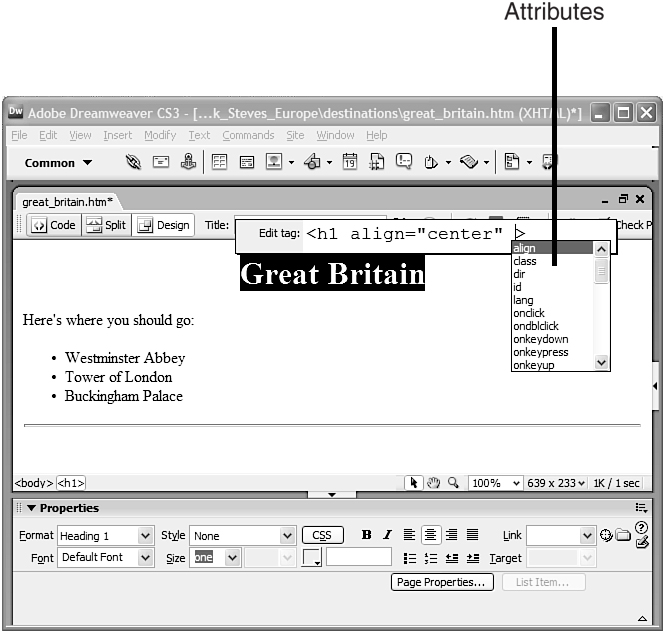
Figure 7.9. The Tag drop-down menu presents attributes appropriate for the current tag. It appears automatically after the delay that is set in the Preferences dialog box.
Using the Wrap Tag Mode
The Quick Tag Editor’s Wrap Tag mode, shown in Figure 7.10, enables you to wrap HTML around the current selection. For instance, when you have text selected, you can wrap a hyperlink (<a href></a>) or text formatting (<h1></h1>) around the text. First select the tag you’d like to wrap by choosing it from a list. Dreamweaver adds the opening tag before the selection and the closing tag after the selection. You can also add attributes to the new tag.
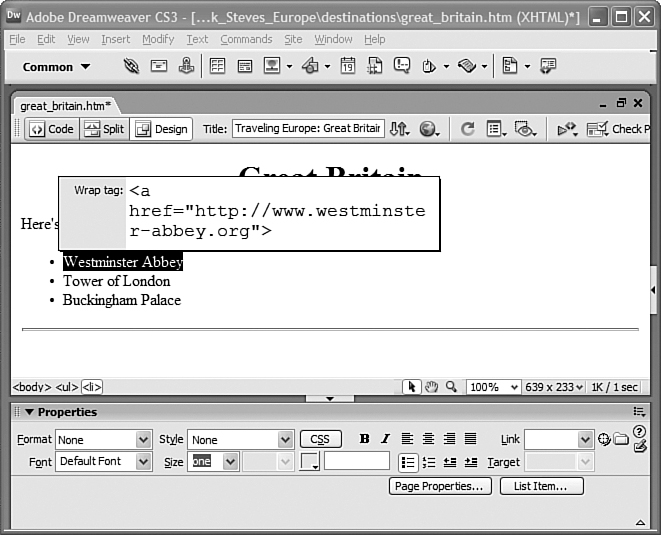
Figure 7.10. Wrap Tag mode wraps an HTML tag around the current selection.
Using the Insert HTML Mode
The Quick Tag Editor’s Insert HTML mode, shown in Figure 7.11, shows a pair of empty tag angle brackets with the insertion point between them. You can either enter text into the brackets, select from the Tag drop-down menu, or both. Dreamweaver adds the closing tag automatically. The Quick Tag Editor starts in this mode when you do not have an object selected.
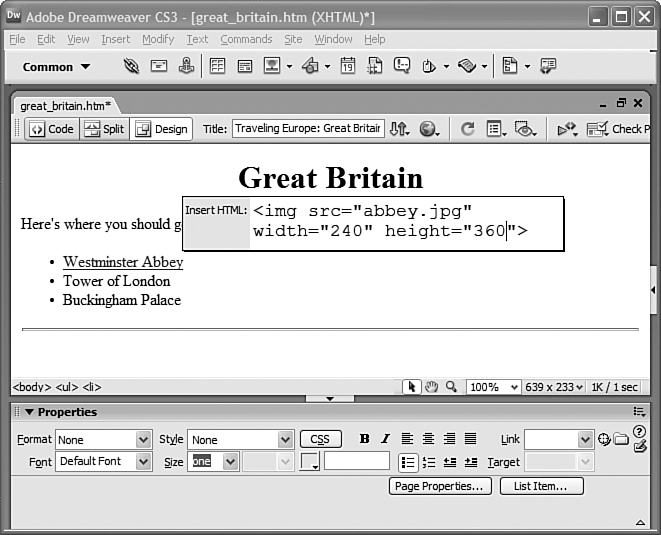
Figure 7.11. The Insert HTML mode in the Quick Tag Editor presents empty tag brackets. You can enter a tag name and attributes or select from the Tag drop-down menu.
Setting Code Preferences
You can set a number of preferences for viewing and maintaining code. The four categories in Dreamweaver preferences that apply to code—Code Coloring, Code Format, Code Hints, and Code Rewriting—help control the way Dreamweaver creates and displays the code in your web pages. If you are used to hand-coding your pages a certain way, don’t complain about the way Dreamweaver formats it—change it!
Watch Out!: Understand a Preference Before You Change It
Don’t change a setting in the Preferences dialog box if you aren’t sure what it does. Many of Dreamweaver’s default settings reflect the standard way of creating web pages. Change them if you need to, but know that you could inadvertently cause a problem if you change them blindly.
Setting Code Color Preferences
Code view colors code according to the settings in the Dreamweaver Preferences dialog box. You must have syntax coloring turned on in the View Options menu to see colored code. Select the Code Coloring category in the Preferences dialog box. You select which type of code you’d like to edit here. Also, this category enables you to set the background color for Code view. Either enter a color in hexadecimal format or use the color picker to select a color.
Select the document type from the list and click the Edit Coloring Scheme button. The left side of the dialog box enables you to select a tag and then individually set a color for it on the right. To change a tag color, select a type of tag (HTML image tags are selected in Figure 7.12), and select a new text color or background color. You can also make the text bold, italic, or underlined.
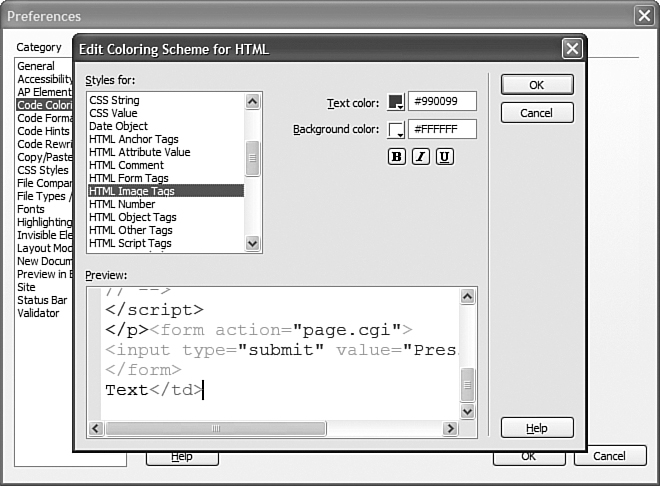
Figure 7.12. You set the tag colors displayed in Code view in the Dreamweaver Preferences dialog box.
Setting Code Format Preferences
In the Code Format category of the Dreamweaver Preferences dialog box, shown in Figure 7.13, you set how Dreamweaver will create code. Dreamweaver indents code to make it easier to read. You can change the size of the indent in the Preferences dialog box. You can also select whether Dreamweaver should indent the code for tables and frames.
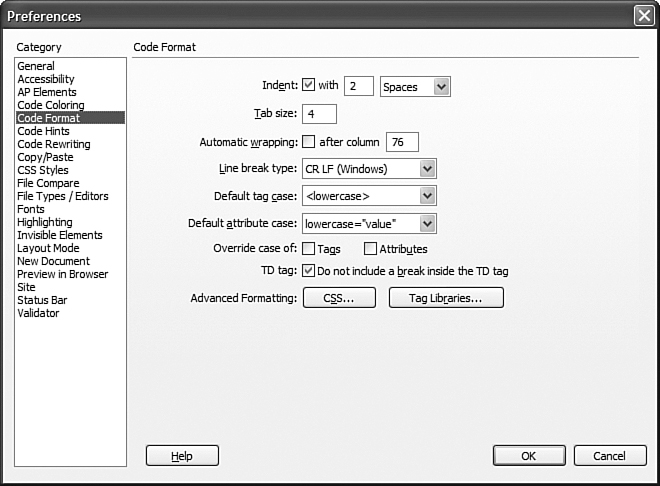
Figure 7.13. The Code Format category of the Dreamweaver Preferences dialog box enables you to set indentation, wrapping, and tag case.
Did you Know?: Apply Dreamweaver Formatting to Any Page
The Code Format category options apply only to new documents created in Dreamweaver. However, you can select Commands, Apply Source Formatting to apply the same formatting to an existing web page. This is an easy way to tidy up the code in a web page when it gets messy.
If automatic wrapping is selected, Dreamweaver will wrap a line that exceeds the column width entered in the After field in the Code Format category. Some lines might end up a little longer than that number because Dreamweaver does not wrap lines that will affect the appearance of the web page. You can also set the type of line break that Dreamweaver uses. This can affect the way your code looks in different operating systems.
Because the World Wide Web Consortium (W3C) standards specify lowercase tags, it’s a good idea to always use lowercase tags and attributes. (W3C is the group that develops web standards. Find out more at www.w3c.org.) By default, Dreamweaver uses lowercase for tags (the Default Tag Case setting) and attributes (the Default Attribute Case setting). In limited cases, you might want to override the case for tags or attributes. For instance, if you do not want Dreamweaver to change the tag or attribute case in an existing document, check the Override Case of Tags check box and the Override Case of Attributes check box, and Dreamweaver leaves the tag or attribute case as it exists.
The last setting is whether Dreamweaver will use center tags to center objects or div tags (<div align=”center”></div>). Because the HTML specification deprecates the center tag, you should leave this setting at the default setting, Use DIV Tag. You can select the link to the Tag Library Editor available at the bottom of the Preferences category to launch this editor. It enables you to edit the tags and code that Dreamweaver inserts into your page.
By the Way: You’re on Your Own When You Hand-Code
The options you set in the Code Format category of the Preferences dialog box apply only to changes made in the Document window. The automatic formatting does not occur when you edit HTML by hand using Code view. Of course, you can always select Commands, Apply Source Formatting to make everything tidy.
Setting Code Hints Preferences
As you saw in the Quick Tag Editor examples earlier this hour, Dreamweaver drops down the tag menu, displaying tag attributes for you to pick from. This is called a code hint in Dreamweaver. You can set which code hints Dreamweaver displays in the Code Hints category of the Preferences dialog box, as shown in Figure 7.14. Checking the Enable Auto Tag Completion setting makes Dreamweaver add a closing tag when you type the opening tag into Code view. You can also set the time delay for the Tag menu by dragging the time slider bar at the top of the Code Hints dialog box. If you don’t need the Tag menu because you already know the name of the attribute you’d like to type, you might want to set the time delay so that it doesn’t continue to drop down continually while you type.
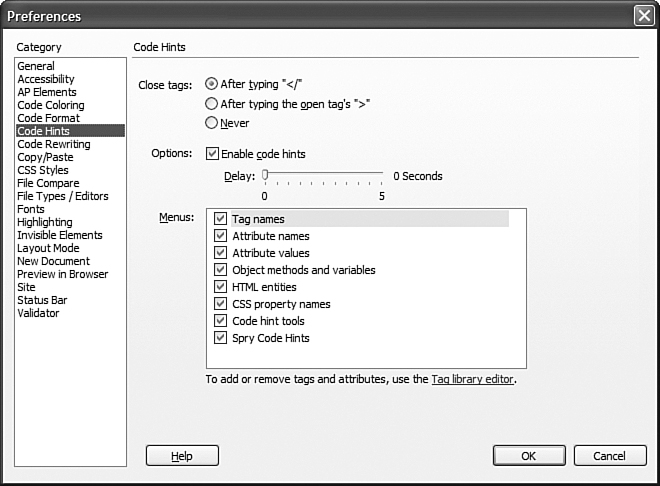
Figure 7.14. The Code Hints category enables you to set what Dreamweaver helps you with while you are coding.
Setting Code Rewriting Preferences
The code rewriting preferences, shown in Figure 7.15, set what changes Dreamweaver makes when it opens a web page. Dreamweaver automatically fixes certain code problems, but only if you want it to. If you turn off the Rewrite Code options in the Code Rewriting category, Dreamweaver will still display invalid code that you can fix yourself if you need to.
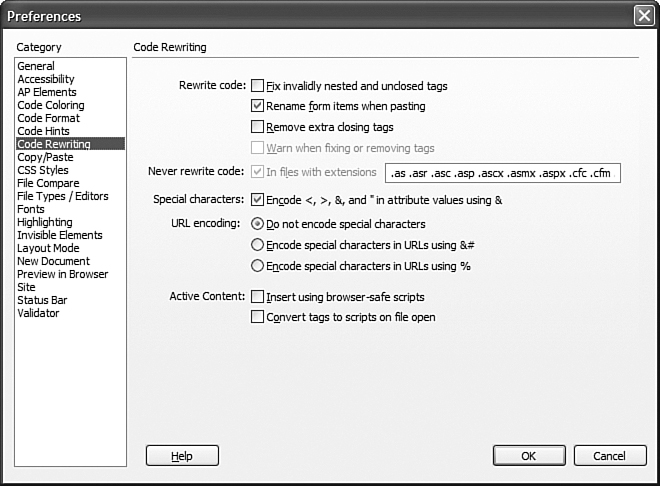
Figure 7.15. The Code Rewriting category of the Dreamweaver Preferences dialog box enables you to set the changes that Dreamweaver makes when it opens a web page.
Checking the Fix Invalidly Nested and Unclosed Tags check box tells Dreamweaver to rewrite tags that are invalidly nested. For instance, if you check this check box, Dreamweaver will rewrite <strong><em>hello</strong></em> as <strong><em>_hello</em></strong> (which is the correct way to write it). Dreamweaver also inserts missing closing tags, quotation marks, and closing angle brackets when this setting is checked. When you select the Remove Extra Closing Tags check box, Dreamweaver removes any stray closing tags left in the web page.
Cleaning Up HTML Created with Microsoft Word
It’s very convenient while working in Word to save a document as a web page. Word does a great job of creating a web page that looks very similar to the Word document and you can open and edit the web page in Word. The problem is that Word maintains a lot of extra code in the web page. If you do not need to edit the web page in Word again and you’d like to put it on the Web, you can use Dreamweaver to clean up the extra code.
To save a Word document as a web page, select File, Save as Web Page. Word prompts you to name the document and adds the .htm file extension. The resulting page has a lot of extra code; Dreamweaver knows which code is extraneous and can delete it. It’s fun to take note of the number of lines of code in the file before you run the Clean up Word HTML command.
When you save a Word document as a web page, make sure that you close it before you work on it in Dreamweaver. Dreamweaver will not be able to open and convert an HTML document that is open in Word. Apply the Clean Up Word HTML command to a web page that was created in Word and that you have opened in the Document window. To do this, select Commands, Clean Up Word HTML. This launches the Clean Up Word HTML dialog box, shown in Figure 7.16.
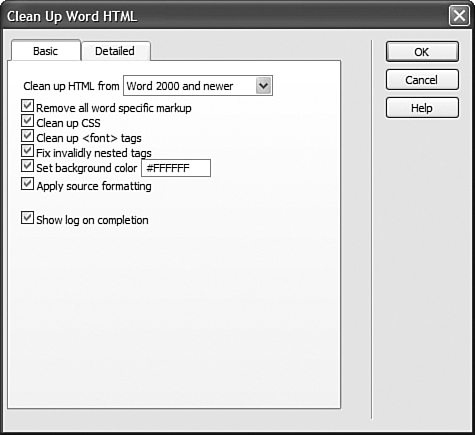
Figure 7.16. When you import a Word HTML document or select Clean Up Word HTML, the Clean Up Word HTML dialog box appears.
Dreamweaver should automatically detect which version of Word created the HTML file from tags that Word adds to the file. You can also choose the version manually by using the Clean Up HTML From drop-down menu in the Clean Up Word HTML dialog box. The Clean Up Word HTML dialog box has two tabs: Basic and Detailed. The Basic tab has the following options:
• Remove All Word Specific Markup—Removes all the unnecessary Extensible Markup Language (XML), meta tags, and link tags from the head section; it also removes all Word XML markup, all conditional tags, all empty paragraphs, and all margins. You can select each of these options individually by using the settings on the Detailed tab.
• Clean Up CSS—Removes the extra CSS styles from the document. The styles removed are inline CSS styles, style attributes that begin with mso, non-CSS style declarations, CSS styles in table rows and cells, and unused styles. You can select these options individually by using the Detailed tab.
• Clean Up <font> Tags—Removes <font> tags.
• Fix Invalidly Nested Tags—Fixes the tags, particularly font markup tags, that are in incorrect places.
• Set Background Color—Enables you to specify the background color of the web page. Dreamweaver’s default is white, #FFFFFF.
• Apply Source Formatting—Applies the code formatting options that are set in the Code Format category in the Preferences dialog box.
• Show Log on Completion—Displays a dialog box with a summary of the changes that Dreamweaver made to the web page.
You can probably just accept the default options in the Basic tab of the Clean Up Word HTML dialog box and then click OK. Dreamweaver then cleans up the web page. Your selected options will appear the next time you select the Clean Up Word HTML command. Now your file is optimized for display on the Web. Make sure that you look in Code view and see how many lines of code were removed from the original.
Exploring References
Many useful references are built right into Dreamweaver and are accessible to you via the References panel, shown in Figure 7.17. Choose Window, References to display the Reference panel beneath the Property inspector. The Book drop-down menu enables you to choose from numerous reference books. Of special interest to you might be the O’Reilly CSS, HTML, and JavaScript references. Who needs to buy the book when these references are included in Dreamweaver? There’s also UsableNet’s Accessibility reference, which helps explain how to create websites that are accessible to people who have accessibility issues, such as visual impairment.

Figure 7.17. The Reference panel provides access to several reference books, including books on CSS, HTML, and JavaScript.
To use the references, select tags, styles, or other objects from the drop-down menus and then read about the objects in the lower part of the panel. Notice that information on browser compatibility is located in the upper-right corner of the panel. When not using this panel, you might want to collapse it by selecting the arrow button in the upper-left corner of the panel, or close it by selecting the Close panel group command from the menu in the upper-right corner of the panel.
Summary
In this hour, you learned how to use the Quick Tag Editor and Code view. You learned how to set preferences for HTML tag colors, formatting, and rewriting. You also learned how to use the Clean Up Word HTML command. And you were introduced to the robust reference books that come with Dreamweaver and are available to help answer your questions about topics such as HTML, CSS, and JavaScript.
Q&A
Q. Which should I learn first—Dreamweaver or HTML?
A. It’s helpful to know HTML when you are developing web pages. I think the best way to learn HTML is to first learn to use a web-editing program, such as Dreamweaver. Continue to view the code as you work and use the Reference panel (by selecting Window, Reference) to look up tags or attributes that you are curious about. If you still need grounding in HTML after that, get a good HTML reference book or take a class. A good book about HTML and XHTML is Sams Teach Yourself HTML & XHTML in 24 Hours, 6th Edition by Dick Oliver and Michael Morrison (ISBN 0672325209).
Q. Can I add tag attributes that don’t appear in the Tag drop-down menu? I saw a tag attribute listed on a website that isn’t listed in Dreamweaver for that tag.
A. Yes. Use the Tag Library Editor by selecting Edit, Tag Libraries. This editor controls the attributes that appear in the tag drop-down menu. Dreamweaver does not list every attribute that is available, so there might be one or two that you want to add.
Q. If I hand-code, how do I know which tags go in the head of the document and which go in the body?
A. It takes experience to understand where tags go in the HTML document, but luckily Dreamweaver puts the tags into the correct place for you. A rule of thumb is that everything you see on the web page belongs in the body of the document. And the supporting elements such as CSS, JavaScript, meta tags, and the title tag are all stored in the head of the HTML document.
Workshop
Quiz
1. How do you toggle through the three Quick Tag Editor modes?
2. What are the three ways to view a web page in Dreamweaver?
3. Does Dreamweaver automatically format the HTML that you type into Code view?
Quiz Answers
1. You toggle through the Quick Tag Editor’s three modes by pressing Ctrl+T in Windows or Command+T on a Macintosh.
2. You can view a web page in Code view, Split view, or Design view in Dreamweaver.
3. No, Dreamweaver does not automatically format the HTML that you type into Code view. However, you can format it by using the Apply Source Formatting command on any web page.
Exercises
1. Experiment with using the Quick Tag Editor modes. Pay attention to how the Property inspector reflects selecting attributes in the Quick Tag Editor. You can select many of the same attributes by using the Property inspector’s radio buttons, text boxes, and check boxes.
2. Examine the HTML of a web page in Code view. First select an object in the Document window and then open Code view. Do you see the HTML for the selected object?
3. Create a new HTML page in Dreamweaver, open Code view, and briefly examine the general structure of the web page—head and body tags nested within HTML tags. Select and delete all the code and then re-create this general structure. What are the common tags that go into the head section of the page? Enter them. Notice that Dreamweaver enters closing tags for you if you’ve enabled that option in the Preferences dialog box. Press the spacebar after the tag name within any of the tags. What attributes are available for that tag? What happens when you select an attribute?