
Introducing the Start Page
Visual Studio .NET and its tools are located in the Microsoft Visual Studio .NET folder of the Program Files folder. The shortcut to Visual Studio .NET is located in the Visual Studio .NET folder on the Start menu in Windows. To get through today, open Visual Studio .NET from the Program Files, Visual Studio .NET folder. The first time the integrated development environment (hereafter referred to simply as IDE) is opened, you're presented with the Start Page, as Figure 2.1 demonstrates.
Figure 2.1. The Start Page.
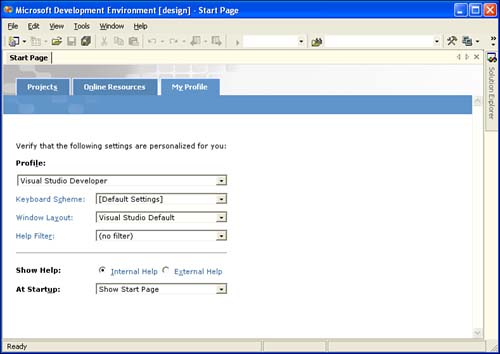
The Start Page is a tabbed HTML page with three main navigation options across the top, Projects, Online Resources and My Profile. We will look at each of the options that each page represents throughout today, but first, examine the My Profile tab, which is the first page that opens if you have never run Visual Studio .NET before.
Tip
If you're running Windows XP or Windows .NET Server, take advantage of the Pin To Start Menu ability. Because you'll use Visual Studio .NET all the time, you should right-click on the shortcut in the Start Menu, Program Files, Visual Studio .NET folder and select Pin To Start Menu from the contextual menu. Now the shortcut is a simple click, instead of navigating the Start menu tree each time you need to start Visual Studio .NET. Another useful shortcut is the Visual Studio .NET Command Line shortcut in the Visual Studio .NET Tools subfolder. You should pin that shortcut to the Start menu also.
The My Profile page enables you to set up the general settings for your IDE. By selecting a profile, you can dictate the initial settings of the toolbars and menus. For example, if you're an Active Server Pages (ASP) developer who has always used Visual InterDev, you can select Visual Studio Developer as the default profile. If you're a Visual Basic 6 developer, you should select Visual Basic 6 Developer as the default profile. When you choose a profile, you're telling Visual Studio .NET how you want windows arranged, what type of help topics you want displayed, and what the keyboard shortcuts should be set to. In Visual InterDev, the F11 key stepped through code in debug mode, but in Visual Basic 6, F8 was the Step Into shortcut. So, these types of options are set based on your profile.
Later today, you'll see how to override specific IDE settings using the Options dialog. If you're not happy with your choice or just want to see the difference, you can modify the settings by returning back to the My Profile page on the Start Page, or you can alter the settings in more detail in the Options dialog.
We'll go through the remaining items on the Start Page navigation menu from the bottom up.
Getting a Web Hosting Provider
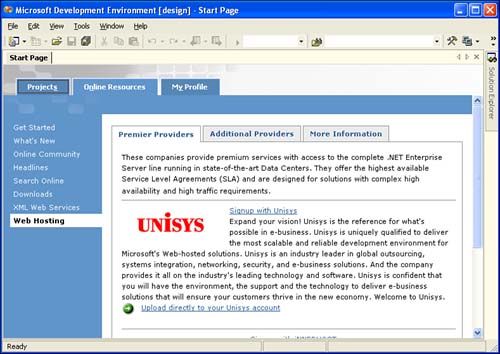
If you click the Online Resources tab, you are brought to a page with a left navigation menu that gives you access to online resources. The last option on the left navigation menu is the Web Hosting option, which gives you easy access to the Microsoft-approved Web hosting providers for ASP.NET applications. This seems like marketing at first, but the tab does more than simply list Web hosting providers. From this tab, you can sign up for a new account with a hosting provider and easily upload files to the hosting provider.
To test this out, I selected the Signup with iNNERHOST hyperlink on the Web Hosting tab, as Figure 2.2 shows.
Figure 2.2. Selecting a Web hosting provider.
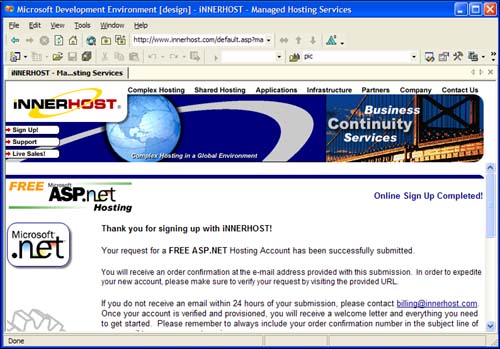
After I selected iNNERHOST, I was taken directly to a hosting options page on its corporate Web site.
iNNERHOST happens to have a bunch of options for Web hosting, but it also offers a free 90-day ASP.NET account to Visual Studio .NET users. After I filled out my information, such as email address, username, and password options, I was directed to the Thank You page shown in Figure 2.3, and within seconds I had an email confirmation with my activated iNNERHOST account information.
Figure 2.3. Registering with iNNERHOST through Visual Studio .NET.
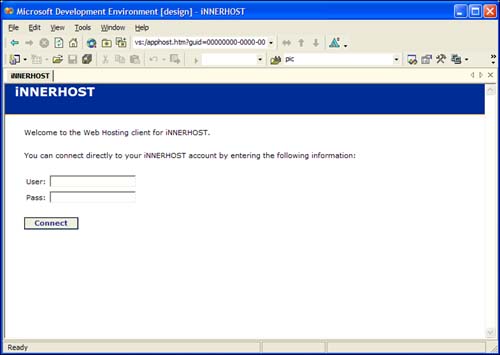
As you can see, I never had to leave the Visual Studio .NET IDE, and within literally two minutes I had a live Web account with a premiere ASP.NET Web hosting provider. Now, directly from Visual Studio .NET, I can log in to my iNNERHOST account and upload my ASP.NET Web applications, as Figure 2.4 demonstrates.
Figure 2.4. Logging into my iNNERHOST account from Visual Studio .NET.
So, you can immediately test applications you write using Visual Studio .NET on a remote server—you aren't limited to running the application only on your local machine.
XML Web Services
The XML Web Services menu item gives you a link to available extensible markup language (XML) Web services on the Web. You learn about XML Web services on Day 13, “XML Web Services in .NET,” and you'll realize how useful this menu option is when learning about XML Web services that are in use and live on the Web. The UDDI.org Web site is the worldwide central repository for XML Web services. (UDDI stands for Universal Description, Discovery, and Integration.) From that page, you can search the UDDI directory for Web services broken down by category. You can even upload your own Web services to UDDI.org from this link.
Downloads
The Downloads menu item lists free downloads and updates from download.microsoft.com. If you're a Microsoft Developers Network (MSDN) subscriber, you can also log in to your account from this page and access all MSDN subscriber downloads. The Downloads page gives you only the downloads relevant to .NET and developing applications, so it's a one-stop shop for all the latest goodies from Microsoft.
Searching Online
The Search Online menu item enables you to directly link into the millions of pages at http://msdn.microsoft.com for help and support. Using the Search Online tool gets you the information you need fast, without having to remember where to look.
MSDN Headlines
The Headlines menu item takes you directly to the MSDN home page's recent headlines. If you're new to Microsoft development tools, you'll find that MSDN is the ultimate resource for getting the latest information, samples, demos, chats, links, seminars and articles on all Microsoft development tools. This link always takes you to the most recent articles list available at MSDN.
Online Community
The Online Community menu item takes you to the most recent list of available community sites for .NET. This includes newsgroups hosted by Microsoft and third-party sites that have many useful sample code and how-tos about .NET. With the release of .NET, the online community for .NET has grown by about 10,000%. So, there's always an answer somewhere if you get in a bind, and this link is a good place to get familiar with the most popular resources online.
The What's New Page
The What's New page summarizes the new product updates for .NET and lists useful links to training partners, books, and tips for using .NET. Figure 2.5 gives you an idea of what's available on the What's New page.
Figure 2.5. The What's New link on the Online Resources tab.

The Get Started Page
The Get Started page gives you links to samples in the MSDN library that is installed as part of VS.NET. You have the option of selecting the language you are working in, and a filter by keyword or type. Once you select your filter options, the Get Started page offers you a list of links to the help file that gives you the information you need to accomplish the task you searched for.
The number of projects listed in the Recent Projects list is 10 by default. You can change this number to as high as 24 in the Options dialog. Depending on your screen resolution, you can vary what's displayed. On my computer, I have the last 24 items displayed because my screen resolution makes that easy to see.
The Projects Tab
The Projects tab is the default page that starts when you start Visual Studio .NET after the initial setup of your profile. From the Getting Started page, you can create a new Visual Studio .NET project or select from a list of recently created projects. Figure 2.6 shows you what the Getting Started page would look like after before creating any new projects. The number of projects listed in the Recent Projects list is 10 by default. You can change this number to as high as 24 in the Options dialog. Depending on your screen resolution, you can vary what's displayed. On my computer, I have the last 24 items displayed because my screen resolution makes that easy to see.
Figure 2.6. The Projects tab.

Note
All the screenshots in this chapter and throughout the book are taken at 800×600 resolution. In real life, I use 1600×1200 on my Sony laptop's 16" screen, which enables me to have many windows open and appreciate the full range of tools and windows you'll learn about today. I bought the laptop specifically because of Visual Studio .NET. You'll realize after you get used to the IDE that so many tools are available, it's nice to have them all open. But if you're using 1024×768 resolution, the window model in .NET works nicely, and that would be the minimum screen resolution for getting things effectively done in the Visual Studio .NET IDE.