
Chapter 3: Sculpting a Simple Character Head with Basic Brushes
By now, it should be no surprise to you that brushes are the main type of tool that we use while working on sculptures. Blender comes with an excellent selection of brushes that give us plenty of artistic control right out of the box.
Brushes can also be customized to behave exactly the way we want. We'll learn how to customize the brushes in Chapter 6, Using Advanced Features and Customizing the Sculpting Brushes, but for now, the basic brushes are more than enough to try sculpting a simple character head.
By the end of this chapter, you will understand how to use many of the default brushes in Blender. You will also gain experience using these brushes for several tasks related to sculpting a simple character. As this is your first time sculpting, we will focus on introducing the brushes and how they can be used, rather than trying to make the character anatomically correct or appealing. We can always refine the character design later.
The main topics in this chapter are as follows:
- Creating the large forms of the head with the Grab brush
- Using masks to add the neck and ears
- Building up the nose and brow with the Clay Strips brush
- Smoothing the lumpy and jagged surfaces of the sculpture
- Creating a bulbous nose and cheeks with the Inflate brush
- Adding basic eyes and eyelids to the character
- Adding detail to the ears with the Crease brush
- Creating the mouth with the Draw Sharp brush
- Sharpening details with the Pinch brush
Technical requirements
For general requirements, refer back to the Technical requirements laid out in Chapter 1, Exploring Blender's User Interface for Sculpting.
We will be building on the fundamental knowledge from Chapter 2, Overview of Blender's Sculpting Workflows. Throughout this chapter, we will be using the Voxel Remesher.
You can download the files to follow along with this book at the GitHub link here: https://github.com/PacktPublishing/Sculpting-the-Blender-Way.
Important Note
A major part of sculpting involves subtle adjustments and techniques that are nearly impossible to describe properly in these written step-by-step instructions. This chapter includes a Sculpting in Action video to help demonstrate the brushes in each section, which you can view online here: https://bit.ly/3y93Dt5. The video has demonstrations for each section of this chapter, as well as a bonus timelapse section showing how you can refine the shape of your character using all of the brushes we will learn about in this chapter.
Creating the large forms of the head with the Grab brush
Let's start by creating the main shape for a human head. This is an excellent time to introduce the Grab brush. In the Discovering the limitations of the basic sculpting mode section of Chapter 2, Overview of Blender's Sculpting Workflows, we tried out the Snake Hook brush, which let us pull around major forms of the model. The Grab brush is very similar, but it is less aggressive, and it does not taper in the same way.
When used with a large radius, the Grab brush is excellent for moving around the large shapes of our sculpture, which allows us to completely reshape the model. If we run the Voxel Remesher frequently in our sculpting workflow, we can turn the default sphere into nearly any shape we want. The Grab brush is the go-to method for most artists when beginning a sculpture, so we will start our character head using this brush.
Getting ready
Launch Blender, and then start a new project using the sculpting preset. If you like, you may turn on extra shading options and overlays, such as Statistics and Cavity, which we learned about in Chapter 1, Exploring Blender's User Interface for Sculpting. Many artists prefer the cavity feature turned on because it highlights sharp edges in the sculpture.
The default Quad Sphere model that comes with the sculpting preset has far more polygons than are necessary for this first stage of the sculpture. These unneeded polygons are going to make the Grab brush less responsive and difficult to use. Before we start blocking out the major forms of the head, we should reduce the poly count of the Quad Sphere by using the Voxel Remesher; a Voxel Size value of 0.2500 should be a good starting point. If you need a reminder of how to do this, refer back to the Using the Voxel Remesher in a low-to-high detail workflow section of Chapter 2, Overview of Blender's Sculpting Workflows.
Once we have a more manageable number of polygons, we can begin creating the major forms of the head with the Grab brush.
How to do it…
Before we make any changes to the model, let's turn on X-Axis Symmetry so that our sculpture stays symmetrical:
- Find the symmetry settings in the top-right corner of the 3D Viewport header next to the little butterfly icon:

Figure 3.1 – The symmetry settings
- Click the X toggle to activate X-Axis Symmetry (this option will be highlighted blue when it is active).
Perfect – now our model's left and right sides will stay symmetrical while we sculpt.
Let's think about our goal with this section before we continue. We're working from low to high detail. It's too early to add things like the ears, the nose, the eyes, or anything else like that. We're just focused on the largest shapes, such as the cranium and the jaw. Here is a simple visualization of the shapes we are trying to make in this section:

Figure 3.2 – The simplified shape of the head
Now that we know what we're trying to make, let's use the Grab brush to begin turning the sphere into a human head shape.
- Find the Grab brush on the Toolbar and click to activate the brush.
- Increase the brush Radius value to around 250 px.
We'll start by flattening out the sides of the sphere.
- Hover your pen over your tablet and align the pointer over the right side of the sphere:

Figure 3.3 – The Grab brush indicator hovering over the right side of the sphere
- Press the tip of your pen onto your graphics tablet to begin using the Grab brush.
- Pull the sides of the Quad Sphere inward to flatten them out.
You may need to do this with multiple brushstrokes; keep going until the sides of the sphere are flattened out. Our example looks like this so far:

Figure 3.4 – The sides of the sphere flattened by the Grab brush
Believe it or not, this is a good start. For the next few steps, we'll have an easier time if we work from the side view. So, let's lock the view to the side.
- Find the Navigation Gizmo in the top-right corner of the 3D Viewport and click on the red X Axis indicator to snap the 3D Viewport to the side view.
- Once the view is locked to the side, use the Grab brush to drag the bottom-left corner down and to the left to begin creating the jaw shape.
So far, our sculpture should look something like this:

Figure 3.5 – The jaw shape pulled out from the bottom-left corner of the flattened sphere
Continue to shape the head with the Grab brush, using Figure 3.2 as a reference point. Feel free to orbit the viewport around the sculpture and change the brush radius as needed. With just a few more brushstrokes, we can arrive at a shape like this:

Figure 3.6 – The head after being shaped with the Grab brush
Important Note
As you shape the head, don't forget to use the Ctrl + R hotkey to run the Voxel Remesher any time the polygons get stretched too far. This may be necessary if you decide to make a character with a very large jaw.
At this point, we've taken the head shape about as far as possible from this vantage point. For the best results, we must remember to orbit the 3D Viewport frequently while using the Grab brush so that we can adjust the shape from all angles.
Chances are your head looks pretty good from the side but is probably not the correct shape when you look at it head-on. Use several 3D Viewport angles and brushstrokes to finish shaping the head.
Our example turned out like this:

Figure 3.7 – The finished head shape as seen from the front, the side, and a three-quarters view
You don't have to make your head look exactly the same as our example. Try out different proportions and stylizations – that's part of the fun in sculpting!
This head will serve as a good base for trying other sculpting brushes throughout this chapter.
How it works…
By default, the Grab brush moves polygons around relative to our viewing angle. For instance, if we press and drag our pen upward, the polygons move upward relative to the screen. By orbiting our 3D Viewport around the sculpture, we can gain a new vantage point and push the polygons around in whichever direction we need.
The Grab brush is very similar to the Snake Hook brush that we tried in Chapter 2, Overview of Blender's Sculpting Workflows. The differences are difficult to describe, but the Snake Hook brush feels a bit gooey (like wet clay) and tapers off as we pull the polygons around. Some artists prefer the Snake Hook brush over the Grab brush; try them both for yourself.
There's more…
Many of the brushes can be accessed with hotkeys; for the Grab brush, we can use the G hotkey.
It is quite common to snap the 3D Viewport to a specific axis; we can do this by clicking on the appropriate axis in the navigation gizmo, but a faster way is to hold the Alt key while orbiting the viewport. This will snap the view to the closest viewing angle.
Using masks to add the neck and ears
There are a few utilities that we have at our disposal that can make sculpting easier; one of these utilities is a mask. A mask can be applied to parts of a sculpture to prevent our brushstrokes from affecting the masked area. This is just like using masking tape in traditional painting or using a mask layer in digital painting software.
The simplest way to apply a mask is by using the Mask brush. Instead of pushing polygons around like a regular brush, the Mask brush allows us to paint a mask onto the surface of the sculpture. This will be helpful for creating the ears and the neck of our character.
Getting ready
We will be adding ears and a neck to the head model that we started in the Creating large forms of the head with the Grab brush section of this chapter. If you would rather start this section using our example, download and open the simpleCharacterHead_02_Start.blend file here: https://github.com/PacktPublishing/Sculpting-the-Blender-Way/blob/main/Chapter03/simpleCharacterHead_02_Start.blend.
The ears are a higher-resolution detail than the rest of the head that we've sculpted so far, so let's start by decreasing our voxel size to about 0.1000 and running the Voxel Remesher. Once our head has been remeshed, we'll be ready to make masks for the ears and neck.
Important Note
Masks are only visible when our Viewport Overlays are active. Make sure you have the Viewport Overlays toggled on and check the pop-over menu to make sure that the Mask overlay is enabled under the Sculpt section.
How to do it…
We're going to paint a little ear shape on the side of the head using the Mask brush; then we can use the Grab brush to pull out an ear shape from the side of the head:
- Find the Mask brush on the Toolbar and click to activate the brush.
- Set the brush Radius value to something small, around 25 px.
- Use your graphics tablet to draw a small ear shape on the side of the head:

Figure 3.8 – The mask for the ear painted onto the side of the head
Don't worry about being precise; right now, we don't have enough polygons to be very detailed (we can refine the shape of the ear later).
Our mask is looking pretty good, but we have one small problem – it's inside out. The dark areas of the mask are the areas that won't be affected by our brushes, so we need to invert the mask.
- Find the Mask menu in the top-left corner of the 3D Viewport.
- Open the menu and choose the Invert Mask option. The light parts will become dark and the dark parts will become light, as you can see in the following screenshot:
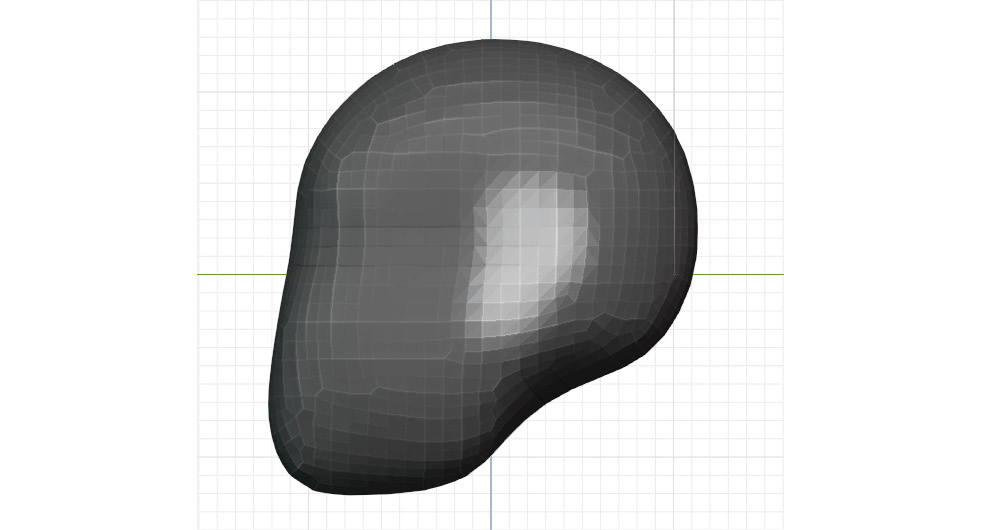
Figure 3.9 – The mask for the ear inverted
Perfect – now we can try using one of the other brushes to add the ears. We learned how to use the Draw brush in the Pushing polys with the basic sculpting mode section of Chapter 2, Overview of Blender's Sculpting Workflows. We'll use the Draw brush now to raise the ear shapes out of the masked area.
- Find the Draw brush on the Toolbar and click to activate the brush.
The great thing about using masks is that Blender will not let us make edits to the dark parts of the model. We don't have to worry about being precise with our Draw brush because we've masked out the head, leaving only our ear shape in the non-masked area.
- Use your graphics tablet to draw over the backside of the masked ear shape to raise up the polygons and begin forming the ears:

Figure 3.10 – The ear drawn on the side of the head
Once we've got the basic shape of the ears, we don't need the mask anymore, so we can remove it.
- Find the Mask menu in the top-left corner of the 3D Viewport.
- Open the menu and choose the Clear Mask option to remove the previous mask.
Let's learn one more technique for the Grab brush that we can use to create the character's neck. We'll start by making another mask for the neck.
- Activate the Mask brush.
- Set the brush Radius value to something small, around 50 px.
- Orbit the 3D Viewport so that we can see the underside of the head.
- Draw a neck-sized circle mask around the base of the cranium of the head.
- Invert the mask by choosing Mask | Invert Mask. Our example can be seen in the following screenshot:
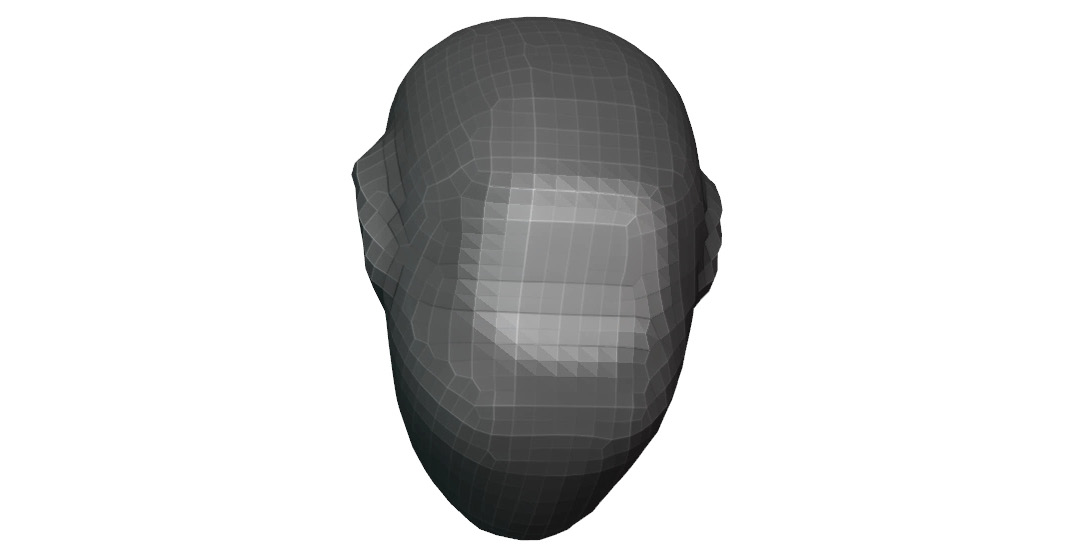
Figure 3.11 – The mask for the neck
Great! We could use the Draw brush again to raise the neck out of the masked area; however, we have a better option available. In the Pushing polys with the basic sculpting mode section of Chapter 2, Overview of Blender's Sculpting Workflows, we briefly mentioned that some of the sculpting brushes have a secondary function that can be accessed by holding the Ctrl key. The Grab brush is one of those brushes.
The secondary function of the Grab brush uses each polygon's own orientation as the direction for movement. So, we can push and pull the polygons inward and outward instead of moving them relative to the orientation of our viewport. Let's try this now:
- Find the Grab brush on the Toolbar and click to activate the brush.
- Set the brush Radius value to be larger than the masked area, around 250 px.
- Hold down the Ctrl key to engage the Grab brush's secondary function.
- While holding Ctrl, use your pen to draw over the masked area of the neck.
- Drag toward the right to pull the polygons outward:
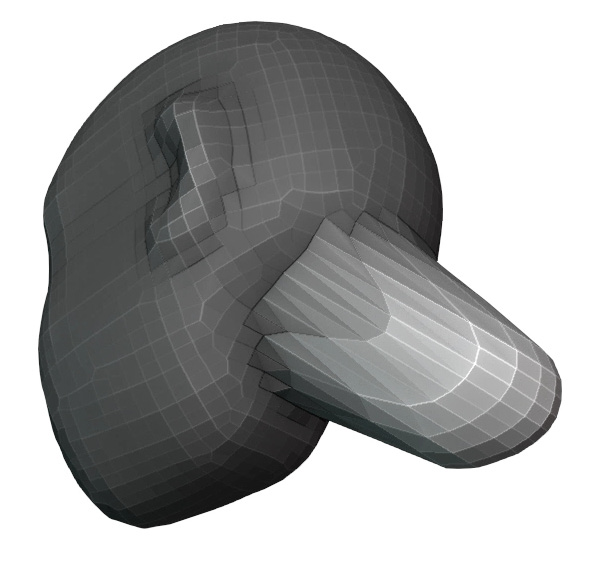
Figure 3.12 – The neck pulled out with the secondary function of the Grab brush
Perfect – this method can take some getting used to, but it's easier than trying to align the 3D Viewport to an exact angle. Once you're happy with the neck, we should clear the mask by choosing Mask | Clear Mask. Then, run the Voxel Remesher again to fix the stretched-out polygons.
Now we've got the major forms for the ears and the neck, but chances are these shapes will need to be adjusted. Take some time to look at the model from multiple angles, compare it to reference images, and keep adjusting these new features with the Grab brush until the proportions look correct. When you're finished, run the Voxel Remesher again. Our example turned out like this:
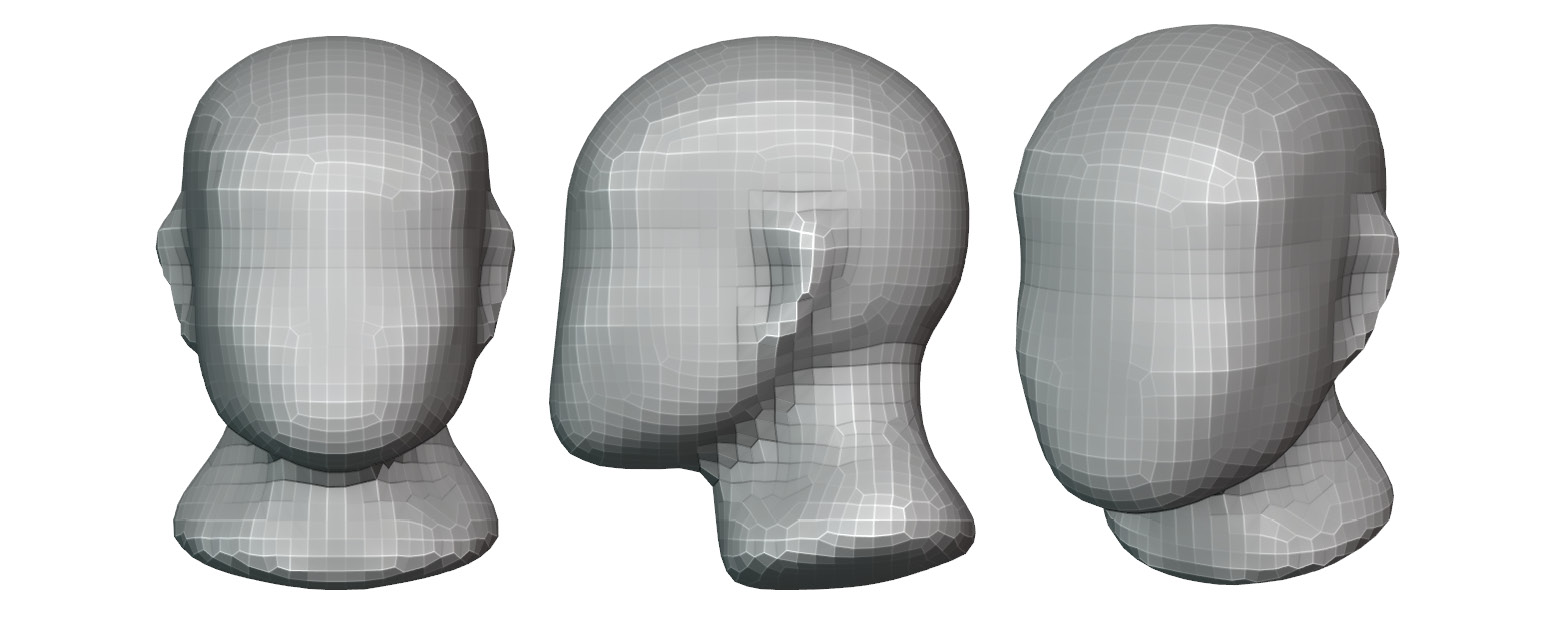
Figure 3.13 – The finished ear and neck shapes as seen from the front, the side, and a three-quarters view
So far, so good. The neck and ears will make it easier to get a sense of the proportions of the head. We can continue adjusting these forms as often as we need to as we add other facial features to the head.
How it works…
Masks are useful for limiting the areas that can be affected by our brushstrokes. We'll see other ways that masks can be used later in this book.
There are many ways to further customize the masks that we make; we can invert them, soften or sharpen them, grow or shrink them. Or we can use entirely different methods to create them, such as box selections and lassos. Explore the Mask menu for more options.
There's more…
Many of the brushes can be accessed with hotkeys; for the Mask brush, we can use the M hotkey. We can also bring up a pie menu full of Mask Edit options by pressing the A hotkey.
Building up the nose and brow with the Clay Strips brush
Our head sculpture is coming along nicely. So far in this chapter, we've made the basic shape of the head in the Creating large forms of the head with the Grab brush section, and then we followed up by adding ears and a neck in the Using masks to add the ears and neck section. At this point, we are ready to build up the nose and brow area.
In the Understanding the components of a 3D sculpture section of Chapter 2, Overview of Blender's Sculpting Workflows, we learned that 3D sculptures are made out of polygons. However, once we have enough resolution, the polygons start to visually blend together, and we can start thinking about them as a blob of clay. Several of the brushes in Blender attempt to emulate traditional techniques of clay sculpting, such as layering clay onto the sculpture to build up new forms.
For this section, we're going to try the Clay Strips brush, which will let us lay down thick tubes of clay to quickly build up the nose and brow.
Getting ready
We will continue working with our head model. If you would rather start this section using our example, download and open the simpleCharacterHead_03_Start.blend file here: https://github.com/PacktPublishing/Sculpting-the-Blender-Way/blob/main/Chapter03/simpleCharacterHead_03_Start.blend.
Once we've got our head model open in Blender, let's decrease our voxel size to about 0.0500 and run the Voxel Remesher. Now we're ready to try out the Clay Strips brush.
How to do it…
We're going to start by building up the bridge of the nose:
- Find the Clay Strips brush on the Toolbar and click to activate the brush.
- Set the brush Radius value to around 50 px.
- Set the brush Strength value to 1.000.
- Use your graphics tablet to draw the bridge of the nose.
- Redraw over the same area multiple times to build up the bridge of the nose.
- Run the Voxel Remesher as often as you need to while building up the bridge of the nose:

Figure 3.14 – The nose built up with the Clay Strips brush
Once you're happy with the shape of the nose, extend the bridge of the nose up and to the side to begin creating the brow. We will start to see the eye socket take shape underneath the brow; our example looks like this so far:

Figure 3.15 – The shape of the brow built up with the Clay Strips brush
Perfect – now, to complement the brow shape, we can start to carve away the eye socket. To do this, we will use the subtraction direction of the Clay Strips brush.
- Make sure the Clay Strips brush is still active and hold the Ctrl key to invert the direction of the brush.
- Use your graphics tablet to draw underneath the brow and begin carving out the eye socket:

Figure 3.16 – The eye socket carved with the Clay Strips brush
It's starting to look like a proper face – how exciting! Don't forget to orbit the 3D Viewport around the model and check it from multiple viewing angles. Feel free to refine the sculpture using any of the brushes we've learned about so far.
We can build up the cheekbone and add the outside bumps for the nostrils with the Clay Strips brush. After a little touch-up, our example looks like this:

Figure 3.17 – Cheekbone and outer nostrils added to the head
Important Note
Resist the temptation of adding tiny details like the holes of the nostrils, as we don't have enough resolution at our current voxel size to support these small features yet. If we try to add details that are smaller than the current voxel size, they will be erased the next time we run the Voxel Remesher. We can come back and add these small features toward the end of our low-to-high resolution workflow.
Our head is looking a bit lumpy, but overall, it's starting to take shape.
How it works…
The Clay Strips brush is an excellent choice for quickly building up and carving away large areas. It is very similar to the Draw Brush that we tried in Chapter 2, Overview of Blender's Sculpting Workflows. The Clay Strips brush is a bit more aggressive and more square-shaped than the Draw brush. Play around with both of these brushes and get a feel for them; you'll quickly come to know which brush you like better for any given task.
Smoothing the lumpy and jagged surfaces of the sculpture
At this point in our sculpture, we're starting to get some pretty lumpy and jagged surfaces. The Clay Strips brush in particular tends to make rough edges. The Voxel Remesher can also introduce rough surfaces if we increase the resolution too quickly.
It's time to make a confession – one of the most important brushes in Blender has been kept secret from you until now. In this section, we'll learn how to fix up these problem areas with the Smooth brush, along with the smooth Mesh Filter.
Getting ready
To show off the Smooth brush, we'll need a lumpy model. The head model we've been working on throughout this chapter is a perfect candidate. You can either continue with the model you've been making, or if you would rather start this section using our example, download and open the simpleCharacterHead_04_Start.blend file here: https://github.com/PacktPublishing/Sculpting-the-Blender-Way/blob/main/Chapter03/simpleCharacterHead_04_Start.blend.
Once we've got the lumpy head model open in Blender, we'll be ready to try the Smooth brush.
How to do it…
We'll start by using the Smooth brush to touch up the brow area:
- Find the Smooth brush on the Toolbar and click to activate the brush.
- Use your graphics tablet to draw over the lumpy surface of the brow.
A little smoothing goes a long way; use light pressure with your pen to make the smoothing effect more subtle. Here's how our character's brow looks after a little smoothing:

Figure 3.18 – Our character before and after smoothing the brow
Nice – the areas that we created with the Clay Strips brush were some of the most jagged parts of the model; however, the whole model is looking a bit rough. This is because we've been changing the resolution and running the Voxel Remesher. The more dramatic the shift in resolution, the more lumpy the surface will become. Speaking of which, let's set the voxel size to around 0.0250 and run the Voxel Remesher again before moving on.
If you've got the Cavity setting turned on in the Viewport Shading options, you'll notice that many little edges are being highlighted throughout the model. These highlighted edges are sharp peaks in the geometry that are causing the surface of the model to look rough, as you can see in the following screenshot:

Figure 3.19 – Our character after voxel-remeshing at a voxel size of 0.0250
A quick fix for this would be to smooth out the whole model. To do this, we can try using a smooth Mesh Filter.
- Find the Mesh Filter tool on the Toolbar and click to activate the tool (you may need to scroll down to find it).
- Find Tool Settings at the top of the 3D Viewport.
- Use the drop-down list to change Filter Type to Smooth.
Now our Mesh Filter tool is ready to use; however, this tool doesn't work exactly the same way as our brushes. We don't draw on the surface of the model with brushstrokes; rather, we can think of it more like a virtual slider. We can press our pen down on the tablet, and then slide right or left to increase or decrease the effect of the filter.
- Hover your pen over your graphics tablet near the middle of the 3D Viewport.
- Press the tip of your pen onto your graphics tablet to begin using the Mesh Filter.
- Keep your pen pressed to the tablet and drag the pen to the right to begin smoothing the whole model.
- Lift up the pen when you're happy with the amount of smoothing.
Important Note
If you accidentally smooth too much, you can drag your pen to the left to reduce the intensity of the filter. But you must do this before lifting your pen off of the tablet. Otherwise, you need to press Ctrl + Z to undo the Mesh Filter and try again.
Excellent – our model is looking a lot less rough around the edges. Be careful not to over-smooth the model; we don't want to lose the details we've sculpted so far. Here's how our example turned out:

Figure 3.20 – The head sculpture before and after smoothing
Smoothing doesn't have to be used exclusively for correcting issues; the Smooth brush is also valuable for creating smooth transitions between shapes in our sculptures. Get used to using this brush alongside the other brushes that we've learned so far.
How it works…
Smoothing is a really important part of the sculpting process. As we increase the resolution of the sculpture, the surfaces become prone to lumpiness. The best way to combat this is to smooth the sculpture while we work – sculpt a little, smooth a little, sculpt a little, smooth a little, and so on.
It is very common for artists to make brushstrokes with some of the regular brushes and then immediately follow up those brushstrokes with a little bit of smoothing. Because of this, the Smooth brush has its own special hotkey. While we are using any of the regular brushes, simply hold down the Shift key to temporarily switch to the Smooth brush. As soon as you let go of the Shift key, the previous brush will become active again.
Important Note
The Shift key will only switch to the Smooth brush if one of the regular brushes is active. For instance, Draw, Grab, and Clay Strips work with this hotkey, but Mask and Mesh Filter do not work with this hotkey.
Mesh Filters are an excellent way to make adjustments to the whole sculpture all at once. In this case, the Smooth filter was able to smooth out lumpiness across the entire model. Just be careful – the Smooth filter can come on really strong and smooth away all of the details of the sculpture.
Creating a bulbous nose and cheeks with the Inflate brush
In the Smoothing the lumpy and jagged surfaces of the sculpture section of this chapter, we removed a lot of rough surface artifacts in the character sculpture. This improved the model in a lot of ways, but it also deemphasized many of our character's facial features. Let's try to enhance some of those features by going over them with the Inflate brush.
Getting ready
You can either continue with the model you've been making so far, or if you would rather start this section using our example, download and open the simpleCharacterHead_05_Start.blend file here: https://github.com/PacktPublishing/Sculpting-the-Blender-Way/blob/main/Chapter03/simpleCharacterHead_05_Start.blend.
Once we've got our character model open in Blender, we'll be ready to try out the Inflate brush.
How to do it…
We'll start by activating the Inflate brush and enlarging the nose:
- Find the Inflate brush on the Toolbar and click to activate the brush.
- Set the brush Radius value to around 50 px.
- Set the brush Strength value to 1.000.
- Use your graphics tablet to draw over the tip of the nose.
Depending on the type of character you would like to make, you can inflate just a little or a lot by varying the pressure and going over the same area multiple times. You can also wiggle your brush around in a small circular fashion to continuously inflate the same area. We've gone with a very bulbous nose, as you can see in the following screenshot:

Figure 3.21 – The nose after using the Inflate brush
In our example, the bridge of the nose has become quite thick. We can use the subtraction direction of the Inflate brush to deflate this area to a more reasonable size:
- Make sure the Inflate brush is still active and hold the Ctrl key to invert the direction of the brush.
- While holding Ctrl, use your graphics tablet to draw along the sides of the bridge of the nose to deflate it:
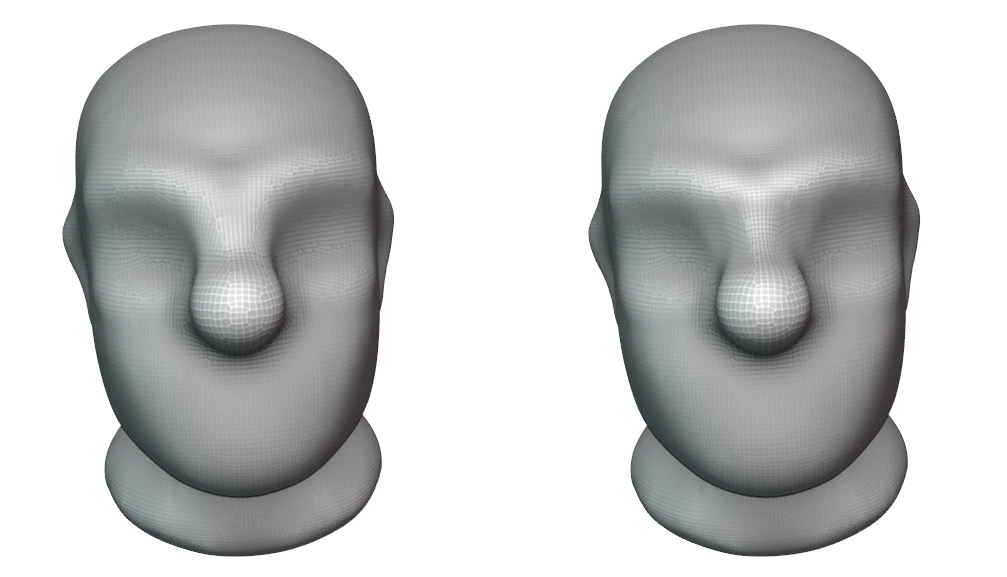
Figure 3.22 – The bridge of the nose after using the subtraction direction of the Inflate brush
Bulbous clown noses are fun, but you can make any type of nose you like.
Most noses need nostrils though, and the nostrils on this character have been almost completely smoothed away; let's fix this now.
- Decrease the brush Radius value to around 25 px.
- Release the Ctrl key to return the Inflate brush to its default direction.
- Use your graphics tablet to draw over the nostrils:
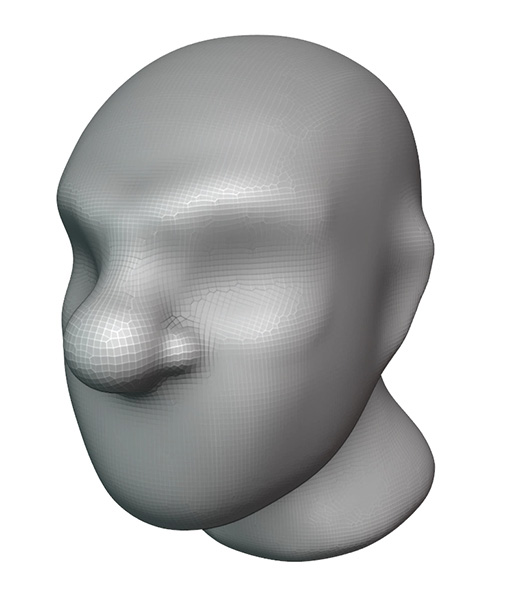
Figure 3.23 – The nostrils after using the Inflate brush
This character's cheeks would also benefit from a little inflation. Use the Inflate brush over the cheeks in a triangular pattern to make the character's cheeks look fuller, like our example here:
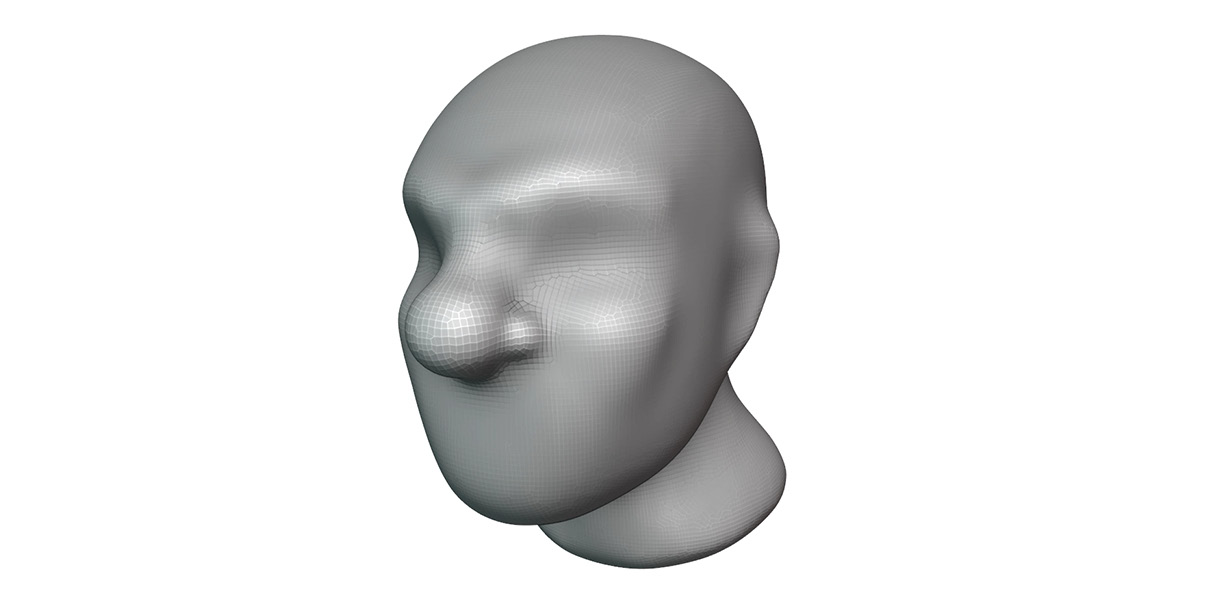
Figure 3.24 – The cheeks after using the Inflate brush
Perfect – the nose and the cheeks are looking a lot more defined thanks to the Inflate brush. If you have any areas that look lumpy, use the Smooth brush to fix up those areas before moving on.
How it works…
The Inflate brush pushes the polygons on the sculpture outward along their individual orientations. This can be used to enhance details that we've created with our other brushes.
There's more…
Many of the brushes can be accessed with hotkeys; for the Inflate brush, we can use the I hotkey.
Adding basic eyes and eyelids to the character
Our character is missing something important - eyes! Eyes are one of the most important parts of a character; they can take a lot of tweaking to get right. We'll explore how to make many different types of eyes in Chapter 7, Making Eyeballs, but for this chapter, we are going to keep it simple and provide you with a pair of eyes that you can add to your sculpture.
Eyes are typically created as a separate object instead of sculpting them directly into the character. We'll learn how to append a pair of pre-made eyes from an external .blend file. Then, we'll learn how to position the eyes with Blender's transformation tools. Once the eyes are added, we can make eyelids for the character. To make the eyelids, we can try using the Crease brush along with some of our other brushes.
Getting ready
You can either continue with the model you've been making so far, or if you would rather start this section using our example, you can download it here: https://github.com/PacktPublishing/Sculpting-the-Blender-Way/blob/main/Chapter03/simpleCharacterHead_06_Start.blend.
You will also need the pair of pre-made eyes, which you can download here: https://github.com/PacktPublishing/Sculpting-the-Blender-Way/blob/main/Chapter03/simpleEyes.blend.
Once you've downloaded the files, open your character head sculpture or open the simpleCharacterHead_06_Start.blend example file.
Once we've got our character model open in Blender, we can add the eyes to our sculpture.
How to do it…
For this project, we need to change which Interaction Mode we are using. Right now, we are in Sculpt Mode, as we can see in the top-left corner of the 3D Viewport header. Let's begin by switching to Object Mode:
- Find the Interaction Mode drop-down list in the header of the 3D Viewport.
- Click on the list and choose Object Mode.
In this mode, you'll notice that the Toolbar has changed. We no longer have our sculpting brushes; instead, we have tools for moving objects around. Now, we can add the eyes from the example file.
- Open the File menu.
- Choose Append.
- Use the file browser to locate the simpleEyes.blend file:
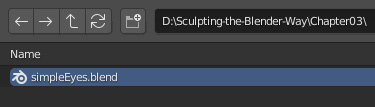
Figure 3.25 – The simpleEyes.blend file as seen from the file browser
- Double-click on the file to explore its contents.
- Double-click the Collection folder to browse the collections that belong to this .blend file.
- Double click on the Eyes collection to import the eyes into our current .blend file.
Excellent – the eyes have been added to the scene. You might not be able to see the eyes yet because they are stuck inside of the head. We learned how to use the X-ray feature in the Exploring the viewport shading modes section of Chapter 1, Exploring Blender's User Interface for Sculpting. Let's turn on the X-ray feature now (found in the top-right corner on the 3D Viewport header) so that we can see the eyes inside of the head:

Figure 3.26 – The eyes can be seen inside of the head with X-ray toggled on
Now that we can see the eyes more clearly, let's learn how to position them. To make things easier, these eyes have been pre-made in such a way that we only need to position the left eye; the right eye will copy the position, size, and rotation to match it on the other side. Now, let's move the left eye into place:
- Find the Move tool on the Toolbar and click to activate the tool.
A gizmo with colored arrows will appear on top of the left eye:

Figure 3.27 – The Move tool gizmo
It will be easiest to position the eye while our viewport is snapped to specific viewing angles.
- Use the navigation gizmo in the top-right corner of the 3D Viewport to snap to the front view by clicking on the green -Y axis indicator.
- Use the Move tool gizmo to move the eye into position by clicking and dragging on the blue and red arrows:

Figure 3.28 – The eyes before and after being positioned from the front view
- Click on the red X axis indicator on the navigation gizmo to snap the 3D Viewport to the side view.
- Click and drag on the green arrow on the Move tool gizmo to finish moving the eye into position:

Figure 3.29 – The eyes before and after being positioned from the side view
If the eyes aren't the correct size, we can adjust the scale next.
- Find the Scale tool on the Toolbar and click to activate the tool.
A gizmo with colored indicators will appear on top of the left eye. This gizmo also includes two white circles; these can be used to change the size while maintaining proportions:

Figure 3.30 – The Scale tool gizmo
- Hover your mouse inside of the large white circle (avoid the colored indicators).
- Click and drag away from the eye to increase the size of the eyes:

Figure 3.31 – The eyes before and after being scaled up
Once the eyes are in position and scaled to the correct size, we need to return to the head object and sculpt in the eyelids.
- Toggle the X-ray feature back off.
- Click on the head sculpture to select it.
- Once the sculpture is the active object, change the Interaction Mode back to Sculpt Mode.
Let's try using the Crease brush to create the eyelids. Our brushstrokes will only affect the active object, so the eyeballs will not be modified when we sculpt the eyelids:
- Zoom into the eye so we can see it in detail.
- Find the Crease brush on the Toolbar and click to activate the brush.
- Set the brush Radius value to around 50 px.
- Set the brush Strength value to around 0.750.
- Draw over the corners of the eye to give them a sharp indent:

Figure 3.32 – The first crease drawn across the eye socket will form the corners of the eye
That's a good start; now, let's build up the eyelids by using the opposite direction of the Crease brush.
- Hold the Ctrl key to invert the direction of the brush and draw around the upper part of the eye to build up the upper eyelid.
- Keep the Ctrl key held down and draw around the lower part of the eye to build up the lower eyelid:

Figure 3.33 – The upper and lower eyelids are formed using the inverted Crease brush
Once we have the basic shapes for the eyelids, we can use our other brushes to adjust the shape. The Grab brush will be particularly useful. Use the Grab brush to reposition the eyelids as needed. If necessary, you can return to Object Mode to adjust the position and size of the eyeballs. When you're finished, run the Voxel Remesher. Our example turned out like this:

Figure 3.34 – The finished eyes after making many adjustments with the Grab brush
Eyes are hard, but don't get discouraged. Find some reference images that match the style you're trying to emulate. Also, remember that the character isn't finished yet; we can continue to refine the character in the subsequent sections as we add more details. Before the end of this chapter, we'll try out some brushes that will let us sharpen the details of the sculpture, including the eyelids.
How it works…
Appending objects and collections is an easy way for us to reach into an external .blend file and copy its contents into our current file. Many sculptors save time by using pre-made pieces as starting points for their sculptures. If you stick with sculpting for a long time, you can build up a large library of your own sculpting pieces that you can append into new projects.
The Crease brush indents the sculptures, similar to the subtractive mode of the Draw brush; however, it also pulls the vertices of the polygons together in order to make the indented area sharp.
The opposite direction of the Crease brush is good for making sharp ridges, such as eyelids.
There's more…
Many of the brushes can be accessed with hotkeys; for the Crease brush, we can use the Shift + C hotkey.
See also
Try not to get discouraged in this section - eyes are hard, and they take time and practice! Any time I'm getting discouraged about my sculptures, I remember a quote from one of the top sculptors in the Blender community, Julien Kaspar. He said, "...For the longest time while sculpting on anything…your model is going to look [bad]. You'll get there eventually, it just takes a bit of time and effort."
This quote comes from a presentation at the 2019 Blender Conference, Speed Sculpting Live Session, which you can watch here: https://www.youtube.com/watch?v=YaVEJTLDD3Y&t=732.
Adding detail to the ears with the Crease brush
When we originally created the ears for the character, we were in the very early stages of the sculpting process. We have increased resolution with the Voxel Remesher several times since then as per our low-to-high detail workflow.
One of the goals with the Voxel Remesher is to create all of the major forms of the sculpture; surface details can always be added later. Most of the details of the ear can be saved for later, but at this stage, we have enough resolution that we ought to bring some definition back into the outer helix of the ear and separate it from the side of the head.
This is a relatively simple task, and we can get most of the way there with a combination of the Crease brush and the Smooth brush.
Getting ready
You can either continue with the model you've been making so far, or if you would rather start this section using our example, download and open the simpleCharacterHead_07_Start.blend file here: https://github.com/PacktPublishing/Sculpting-the-Blender-Way/blob/main/Chapter03/simpleCharacterHead_07_Start.blend.
Once we've got our character model open in Blender, we'll be ready to add detail to the ears.
How to do it…
We'll start by using the inverted direction of the Crease brush to build up the perimeter of the ear:
- Orbit the 3D Viewport so we can clearly see the ear.
- Activate the Crease brush on the Toolbar.
- Set the brush Radius value to around 50 px.
- Set the brush Strength value to around 0.750.
- Hold the Ctrl key to invert the direction of the brush.
- Draw around the perimeter of the ear to give it more definition:

Figure 3.35 – Creased helix of the ear
- Run the Voxel Remesher to create new polygons around the ear to help separate it from the side of the head.
So far, so good. Now, we need to start carving away the backside of the ear so that it's not glued to the side of the head anymore. We will have to run the Voxel Remesher several times to properly detach the helix of the ear from the side of the head.
- Orbit the 3D Viewport so that we can see the backside of the ear.
- Let go of the Ctrl key so that we can use the default direction of the Crease brush.
- Draw around the perimeter of the ear to give it more definition.
- Run the Voxel Remesher.
- Repeat these steps until the back of the ear is separated properly:

Figure 3.36 – The back of the ear separated from the side of the head
Use the Smooth brush to fix up the side of the head. Using a mask here may be helpful so that you can smooth the side of the head without smoothing the ear:
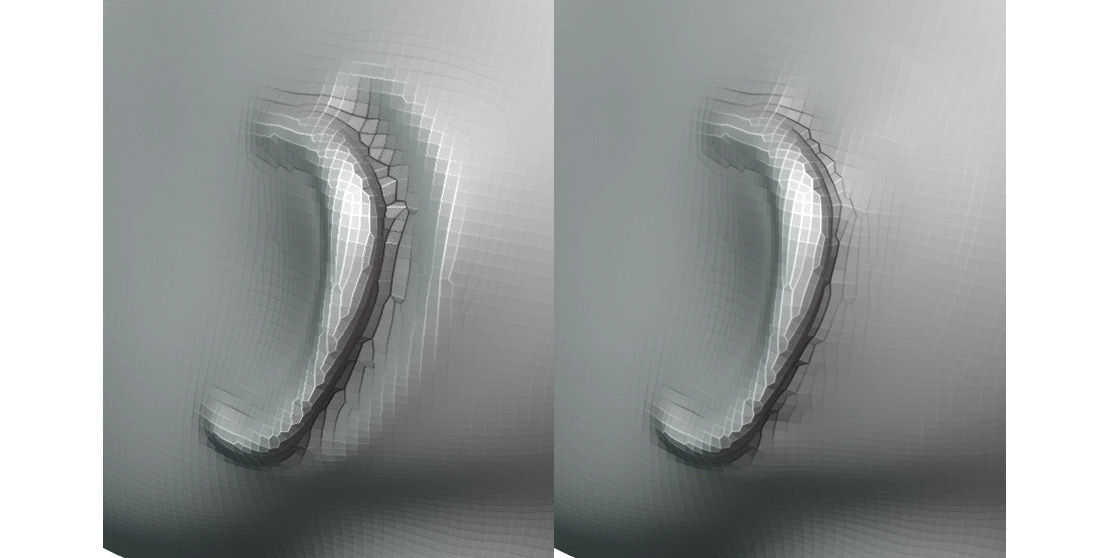
Figure 3.37 – The back of the ear before and after smoothing
Check the head from all angles; how do the ears look? If the ears look wonky, use the Grab brush to adjust them.
Important Note
Separating the back of the ear from the side of the head was the most important part of this process. This is because our current focus is to use the Voxel Remesher to create supporting geometry for the major forms of the sculpture. The details of the inner ear are optional at this stage because they can always be added and refined later in a high-resolution detail pass.
If you would like to sculpt the inner ear, the additive and subtractive directions of the Crease brush are both excellent ways to quickly add details. We've done a quick pass at ear details in the following example:

Figure 3.38 – Optional details of the ear
You may choose to style your ear in a more cartoony fashion that simplifies these details into basic shapes. Proper anatomy for the ear is something that will take a higher resolution, so our example is just a quick and dirty approximation.
How it works…
We're starting to get to the point where we've got all of our major shapes in the sculpture. Once we've finished adding major shapes, we won't need to rely on the Voxel Remesher anymore. It can be tricky to make decisions about which details we want to include at this stage; the ear details are a bit of a toss-up. A finished sculpture usually has to be touched up in the late stages anyway, so there's not much sense in trying to make the ears perfect right now. As long as we've captured the major forms, we'll be fine; that's why we focused on separating the back of the ear from the side of the head.
Creating the mouth with the Draw Sharp brush
We don't want our character to starve, so it's time to make a mouth! We're going to use a technique that creates the defining lines first, and then we can adjust the shape until it looks right. We're going to use the Draw Sharp brush to draw in a few key lines on and around the mouth. The Draw Sharp brush is closely related to the Crease brush, but it's even more aggressive and needs lots of polygons for the best results. Once we're done laying down our lines, we can use some of our other brushes to clean up the mouth shape.
Warning – this is going to look ugly at first; trust the process and we'll arrive at a proper-looking mouth by the end.
Getting ready
You can either continue with the model you've been making so far, or if you would rather start this section using our example, download and open the simpleCharacterHead_08_Start.blend file here: https://github.com/PacktPublishing/Sculpting-the-Blender-Way/blob/main/Chapter03/simpleCharacterHead_08_Start.blend.
Once we've got our character model open in Blender, we'll be ready to make a mouth.
How to do it…
Start by voxel-remeshing the character one last time so we have more polygons; a voxel size of around 0.0175 should work. If you need to, you can use the Smooth Mesh Filter to fix up any roughness that is introduced to the sculpture. Now, let's draw some lines for the mouth:
- Click on the green -Y axis indicator on the navigation gizmo to snap the 3D Viewport to the front view.
- Zoom in so that we can see the area where we're going to draw the mouth lines.
- Find the Draw Sharp brush on the Toolbar and click to activate the brush.
- Set the brush Radius value to around 20 px.
- Set the brush Strength value to 1.000.
We're going to make a set of guidelines for the mouth. Use this screenshot as a reference for the following instructions:

Figure 3.39 – The guidelines for the mouth (blue lines are grooves and orange lines are ridges)
Using the previous screenshot as a reference, let's use the Draw Sharp brush to draw the lines of the mouth.
- Draw one horizontal deep groove for the middle of the mouth where the upper and lower lips meet.
- Hold the Ctrl key to invert the direction of the brush and draw a horizontal ridge above the first line to form the ridge of the upper lip and Cupid's bow.
- Hold the Ctrl key to invert the direction of the brush and draw a small vertical line above the upper lip toward the nose to outline the philtrum.
- Hold the Ctrl key to invert the direction of the brush and draw a small, slightly rounded horizontal ridge below the middle of the mouth line to form the lower lip.
- Let go of the Ctrl key and draw a short horizontal line below the lower lip to create the indentation between the mouth and the chin.
- Finally, draw the lines that define the region between the mouth area and the cheeks. These lines cross over the top of the nostrils and angle inward near the corners of the mouth, as you can see in the preceding screenshot.
Remember how we warned you it was going to look ugly? This is that part; these lines will be our guide for sculpting the mouth. Now, we need to make it look good; we'll use several of the brushes we've learned throughout this chapter. This is going to take a lot of tweaking. Be patient and persist; we'll make it through.
We'll start by giving the lips some dimension. In a real mouth, the lips are pushed outward by the teeth underneath. Let's lift the lips away from the face by using the secondary function of the Grab brush.
- Orbit the viewport to the side so we can see the silhouette of the mouth while we work (right now, the silhouette has no definition since the lips are flat against the face).
- Activate the Grab brush from the Toolbar.
- Set the Radius value large enough to cover the lips.
- Switch to the Grab brush's secondary functionality by holding the Ctrl key.
- Tap with your pen and drag outward to pull the lips away from the face.
Lift the lips far enough away from the face that they have some dimension; you can see our example in the following screenshot:

Figure 3.40 – The mouth before and after being raised up to give the lips some dimension
Next, we can smooth some of the lines so they don't look so jarring.
- Orbit the viewport back near the front of the face.
- Hold the Shift key to use the Smooth brush.
- Smooth the indentation below the lips.
- Use very light pressure to slightly smooth out the ridges of the lips and the philtrum.
Be careful not to completely smooth away the lips. You can see how our example looks so far in the following screenshot:

Figure 3.41 – The lines of the mouth before and after being smoothed
Next, we can do some inflating to bring out the lips and the cheeks.
- Activate the Inflate brush.
- Inflate the upper and lower lip to the desired thickness.
- Inflate the cheek slightly in the area above the groove that outlines the mouth region.
- Hold shift to use the Smooth brush and smooth the groove slightly.
You can see the progress on our example in the following screenshot:
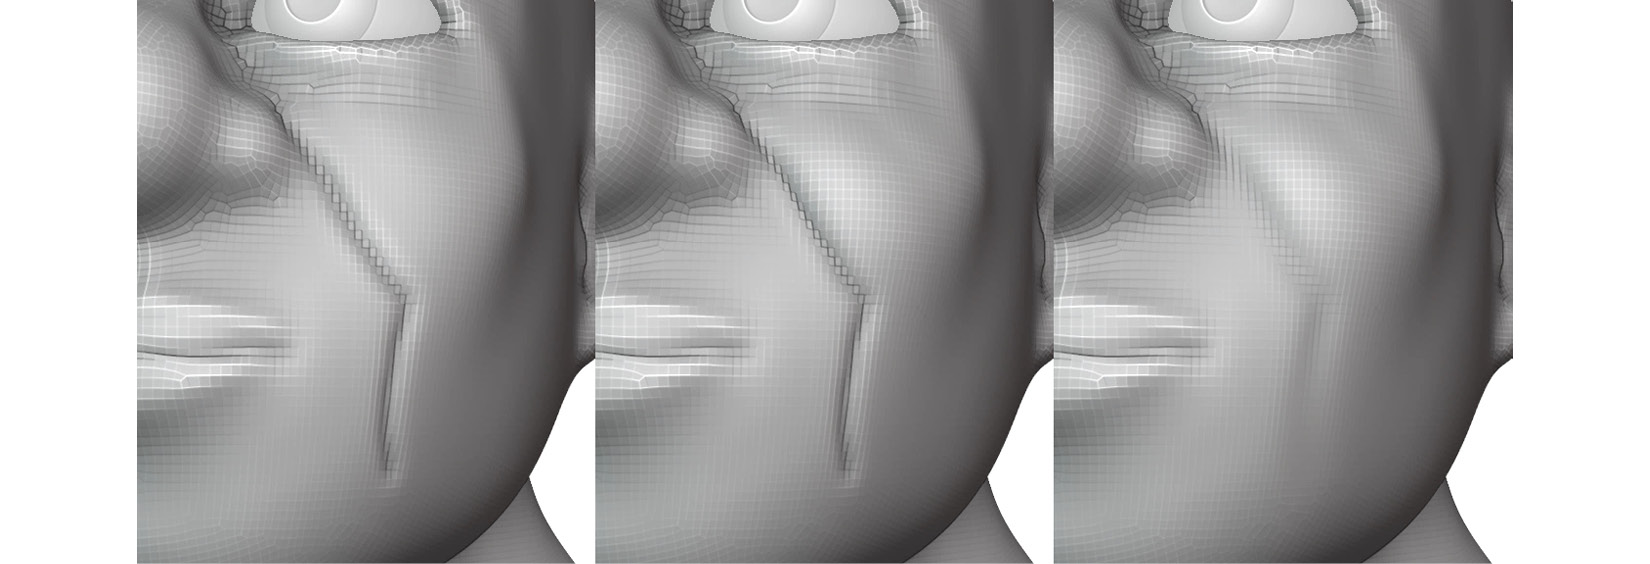
Figure 3.42 – The cheek after being inflated then smoothed
Now all of our key pieces are in place, we can use the Grab brush to reshape the philtrum, adjust the lips, bring in the cheeks a bit, and make any other necessary tweaks to the sculpture. Our example turned out like this:

Figure 3.43 – The finished mouth
We've made a lot of progress. It may take you a while to tweak the mouth into a shape you're happy with, but don't get discouraged. Use reference images to help guide you to the mouth shape you're looking for. By the end of this chapter, we'll learn how to sharpen some of the details, such as the lines of the lips. A little sharpness will help the lips look a lot nicer.
Sharpening details with the Pinch brush
In this final section, we'll try out a brush that will help us refine the high-resolution details of the character. Some of the brushes in Blender work better when we have more polygons in our sculpture. In particular, the Pinch brush is a great way to get crisp edges, but it only works if we have lots of polygons in the sculpture.
Important Note
One issue with using the Pinch brush is that the Voxel Remesher tends to erase many of the sharpened details created by the Pinch brush. We're done with the Voxel Remesher now. Do not use it past this point; otherwise, many of our pinched details will be erased.
Before we get started with sharpening details, we'll take a moment to switch our model to using smooth shading, which will make the surface look like it's made out of clay instead of polygons.
Getting ready
You can either continue with the model you've been making so far, or if you would rather start this section using our example, download and open the simpleCharacterHead_09_Start.blend file here: https://github.com/PacktPublishing/Sculpting-the-Blender-Way/blob/main/Chapter03/simpleCharacterHead_09_Start.blend.
Once we've got our character model open in Blender, we'll be ready to sharpen the details of the sculpture.
How to do it…
Up until this point, we've been using flat shading, which makes all of the polygons look flat. We'll start this section by changing to smooth shading, which will help the surface of our sculpture look smooth:
- Use the drop-down list in the header of the 3D Viewport to switch to Object Mode.
- Open the Object menu from the header of the 3D Viewport.
- Choose the Shade Smooth option.
- Use the drop-down list in the header of the 3D Viewport to switch back to Sculpt Mode.
That was easy. Many artists prefer to leave the shading set to flat during the early stages because it makes it easy to see the current resolution of the mesh. Now that we're done remeshing, we can use smooth shading to make our model look nicer.
Speaking of looking nicer, let's try out the Pinch brush to make our character's eyelids look sharp.
- Zoom in so that we can see the eyelid up close.
- Activate the Pinch brush on the Toolbar.
- Set the brush Radius value to around 100 px.
- Set the brush Strength value to around 1.000.
- Trace over the eyelids to pinch the polygons together to make the eyelids really sharp.
This may take several passes. As the polygons get closer together, the eyelids will look sharper.
Let's give the lips the same treatment.
- Trace over the upper lip with the Pinch brush.
- Trace over the lower lip with the Pinch brush.
- Trace over the groove between the lips with the Pinch brush.
Much better – as you can see in the following screenshot, our character looks a lot better after pinching the eyelids and the lips:

Figure 3.44 – Our finished character before and after pinching the eyelids and lips
If you like, you can use the Inflate brush over the lips. Inflating next to a pinched groove will intensify the groove. The Pinch brush can also be used with a large radius to sharpen the transitions between large forms; try using it to sharpen the jawline.
Pinching makes a big difference when refining details. Our sculpture is starting to look like a proper character with detailed facial features. If you like, you can keep adjusting the character with your favorite brushes.
There's more…
Many of the brushes can be accessed with hotkeys; for the Pinch brush, we can use the P hotkey.
Congratulations on getting through this chapter. We learned about lots of awesome brushes and got to try them out in a practical application for character creation. How did it go? Don't worry if you struggled with the eyes or the lips; these things take practice. Struggling your way through your first sculpture is part of the process. Stick with it and you'll get faster and better at sculpting!
If you're coming from the popular sculpting software ZBrush, you may already be familiar with some of the brushes discussed in this chapter but under different names. For reference, here is a list of the equivalent brushes between ZBrush and Blender:
- ZBrush's Move brush is equivalent to Blender's Grab brush.
- ZBrush's MaskPen brush is equivalent to Blender's Mask brush.
- ZBrush's Standard brush is equivalent to Blender's Draw brush.
- ZBrush's ClayTubes brush is equivalent to Blender's Clay Strips brush.
- ZBrush's DamStandard brush is equivalent to Blender's Draw Sharp brush.
- ZBrush doesn't have a direct equivalent to Blender's Crease brush; its functionality is somewhere between Standard and DamStandard.
- SnakeHook, Smooth, Inflate, and Pinch are all equivalent in both name and functionality between ZBrush and Blender.
- ZBrush's Deformation sub-palette is equivalent to Blender's Mesh Filters.
We've only scratched the surface of Blender's brushes. Feel free to explore the Toolbar and discover which brushes you like using. You may prefer the Clay brush over the Draw brush, or the Multi-Plane Scrape brush instead of the Pinch brush. There are so many to experiment with. Try playing around and taking your character to the next level of detail!
See also
Check out the Sculpting in Action video for this chapter for a visual demonstration of how these brushes can be used: https://bit.ly/3y93Dt5. The video for this chapter includes a bonus timelapse section at the end that demonstrates how the shape of this character can be refined using the brushes we've learned about throughout this chapter. You can see the refined version of the sculpture in the following image:

Figure 3.45 – The finished character after refining the details in the bonus timelapse video
You can read more about Blender's default brushes in the official Blender manual here: https://docs.blender.org/manual/en/latest/sculpt_paint/sculpting/tools/index.html.