Installing Software
The following sections describe how to access files from a local CD-ROM, how to set up custom installation, and how to choose an alternative location for installation.
Accessing Files from a Local CD-ROM Drive
Use the following steps to access software from a local CD-ROM.
1. |
Insert the CD in the CD-ROM drive. After a few moments, a File Manager window displays the contents of the CD-ROM. |
2. |
Start Admintool if necessary and, from the Browse menu, choose Software. The Admintool: Software window is displayed, as shown in Figure 58. |
3. |
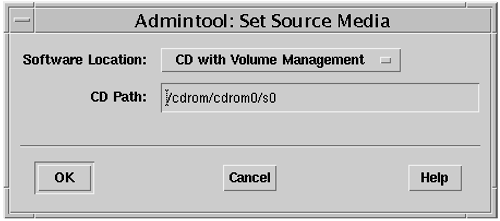
From the Admintool: Software Edit menu, choose Add. The Set Source Media window is displayed, as shown in Figure 59. Figure 59. Admintool: Set Source Media Window
|
4. |
(If necessary) From the Software Location list, choose Hard Disk or CD without Volume Management. CD with Volume Management is the default. |
5. |
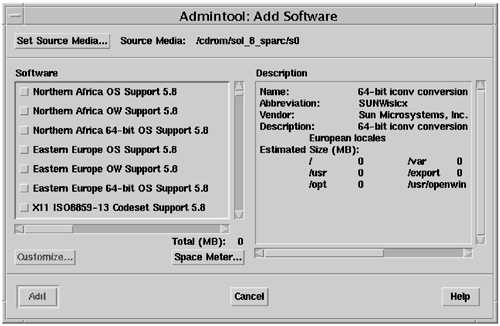
(If necessary) In the CD Path field, type the path to the subdirectory that contains the packages on the media. If volume management can read the CD-ROM and the packages are at the CD path level, the Admintool: Add Software window is displayed, as shown in Figure 60. Figure 60. Admintool: Add Software Window
|
Customizing Installation
Before you begin installing software, you can customize some of the installation parameters to minimize or maximize the amount of operator intervention required during installation.
Use the following steps to customize installation.
1. |
In the Software pane, click on the check box of the package you want to customize. The package name is highlighted and the Customize button is activated. |
2. |
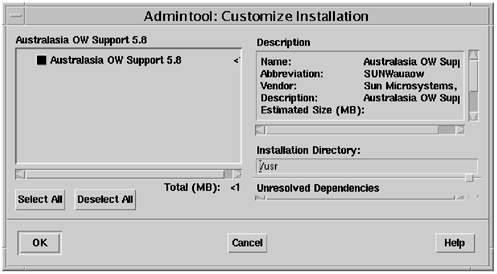
Click on the Customize button. The Admintool: Customize Installation window is displayed, as shown in Figure 61. Figure 61. Admintool: Customize Installation Window
A description of the package is displayed in the Description pane. |
3. |
By default, all packages are selected. Click individual packages to deselect them or use the Deselect All button to deselect all of the packages. |
4. |
The default location for installing packages is the /opt directory. If you want to specify an alternative location for installation, type it into the Installation Directory text field. |
5. |
When all of the settings are correct, click on the OK button. The customization settings you specified are set and the Customize Installation window closes. |
Beginning Installation
Before you follow the steps in this section, check to make sure that you have performed the following tasks.
-
Set the source media properties to the CD-ROM mount point directory or any other directory that contains packages.
-
Specify a base directory for installation (if you do not want to use the default installation directory).
After you set up all properties and specify the base directory (if desired), you are ready to install software. Use the following steps to install software.
1. |
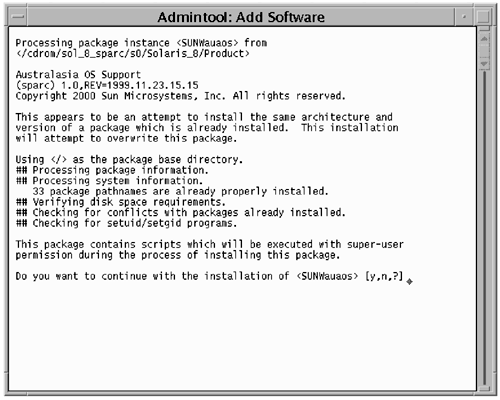
In the Admintool: Add Software window, click on the Add button. A Terminal window opens, revealing additional instructions. Figure 62 shows instructions for the SUNWsadma package. Figure 62. Admintool: Add Software Terminal Window
|
2. |
Answer the questions generated by the package you are installing. When the installation is complete, the packages are installed and listed in the Admintool: Software window. When you press Return in the Admintool: Add Software terminal window, the window closes. |
..................Content has been hidden....................
You can't read the all page of ebook, please click here login for view all page.


