As we won't be keeping this tutorial for any other purposes you can go ahead and create a new project and call it Recording.
- In your new project create an audio track on the timeline.
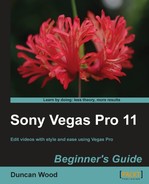
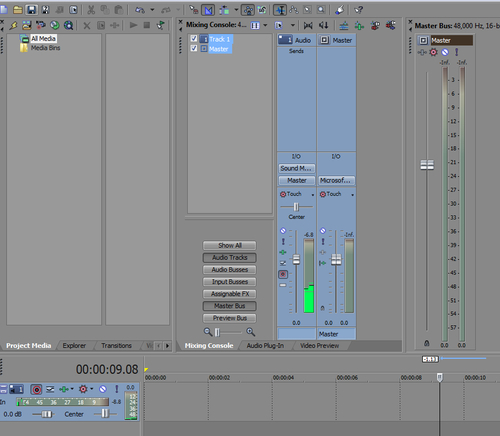
- Press Ctrl + Alt + 6 to open up the Mixing Console. The console should have just a master track and the audio track you just created. See the next screenshot:
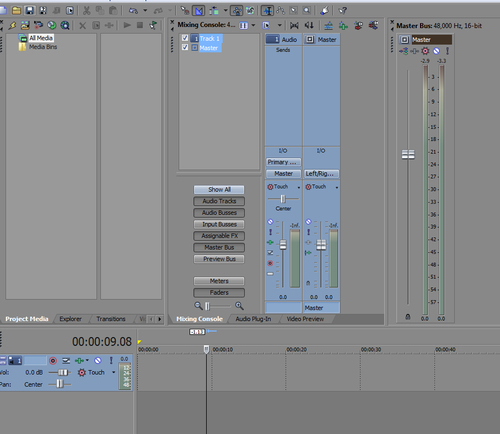
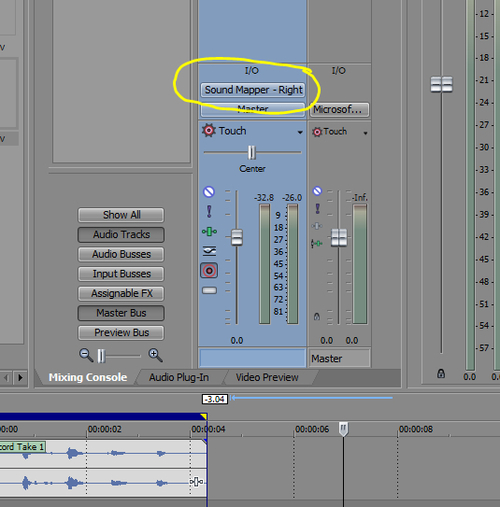
- Under the Options menu select the last heading called Preferences, select the Audio Device tab, and make sure the Audio Device Type is set to suit your computer's soundcard or audio input card. In my case I have selected Microsoft Sound Mapper as I am using the web camera's microphone for the purpose of this exercise, which is plugged into the computer via USB. Hit OK once completed:
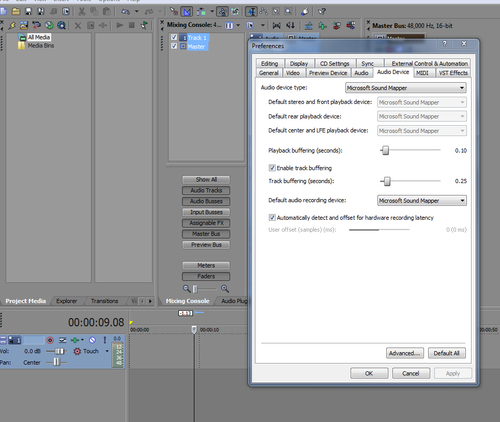
- On our audio track in both the mixer and the timeline header you will see a little red circle that looks like a target. This is your Record Arm icon which puts the track into Ready to Record mode. Make sure your speakers are turned down a bit before selecting this Record Arm button as you may get a feedback loop that could possibly damage your speakers. Ideally do this process using headphones plugged into the headphone socket of your computer. That way your voice won't come out of the speakers and back into the microphone again, creating a roomy sound on your recording. When selecting headphones for this purpose, try to use closed back headphones so that the sound of the headphones itself doesn't feed back into the microphone. The headphones will also allow you to hear yourself better when speaking.
- Once your speakers are turned down nearly all the way, or totally off if you are using headphones (in which case have the headphone volume as loud as you like to have it), click on the Record Arm button (Ctrl + Alt + R) and you should see some activity in the VU meter. Try saying something into your microphone and if it is connected correctly the VU meter should move up and down to your voice. If not, check all your settings according to how you were told to by the person you purchased the microphone from.
- Once you have level coming in, make sure it isn't peaking all the way to the top of the VU meter continuously. Occasionally is okay, but not always slammed against the top as this will result in a distorted signal.
- Play your project and once you are ready, press Ctrl + R to drop the project into record and say a few words such as Testing 1 2 3. Once finished hit stop or the spacebar.
- An audio media clip will appear on the timeline showing the waveform of what you just said. In my case you will notice that the audio has two lines of waves as my microphone in my webcam is a stereo microphone. If you are using a mono microphone, you may only see one set of waves or two sets with one being a flat line and the other being waves that will only play out of one channel. If you hit play again it will play back and you will hear yourself speaking.
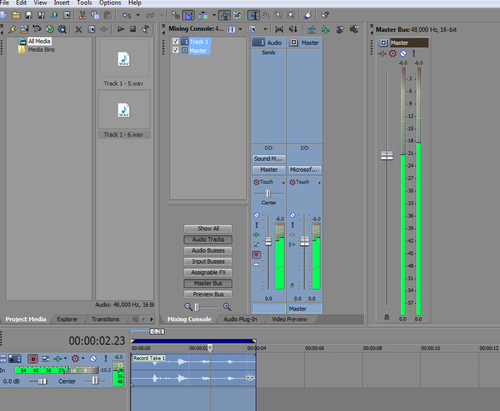
- During playback you will notice that the Master VU meter responds to your voice as the audio is now being sent to the Master Bus and out of the speakers (or headphones). If it is on one side, you can change the input of the channel to only see the left or right side by changing the I/O to either Left or Right:
- If you had video on the timeline, you could use this as your timing cues to place your voice over into the right positions, but if you get it wrong, it is easy to delete the audio clip and do it again or simply slide and adjust its position to suit your vision. You can now add Track FX plugins to EQ and/or compress the audio as discussed in our previous chapter.
We just successfully recorded some voice-over audio into Vegas Pro 11 using our microphone of choice and the mixing console within Vegas Pro 11. Armed with the knowledge you now have about microphones and the process, your video voice-over work will take your video editing projects to a whole new level of quality.
Using our current recording project, import some instrumental music to a stereo audio track. On a separate track, record your voice by reciting poetry or simply reading some text from any book you like, but read the text in a way that suits the music you have chosen. Adjusting the voice over to suit the dynamics and pace of the music is a very important technique that will add a very professional edge to any project you are working on. Better still, find a voice-over artist who can come in to your editing setup and show you how they would deliver a piece of text and you will be amazed at the difference this makes.