
3. The Right Perspective
Shooting with Short and Long Lenses
The camera is only part of the equipment you need to make a photo. Although having a good camera will help with the final quality of your pictures, the lens you use, and how you use it, is also critical. Professional photographers discuss cameras and lenses as individual elements.
I always advise beginning photographers to invest their money in good lenses. Camera bodies change constantly, but a good lens can perform perfectly for many years. I buy new cameras every couple of years but still use lenses that I bought when I started my career 30 years ago.
This chapter walks you through the different kinds of lenses and explains when to use them and why.
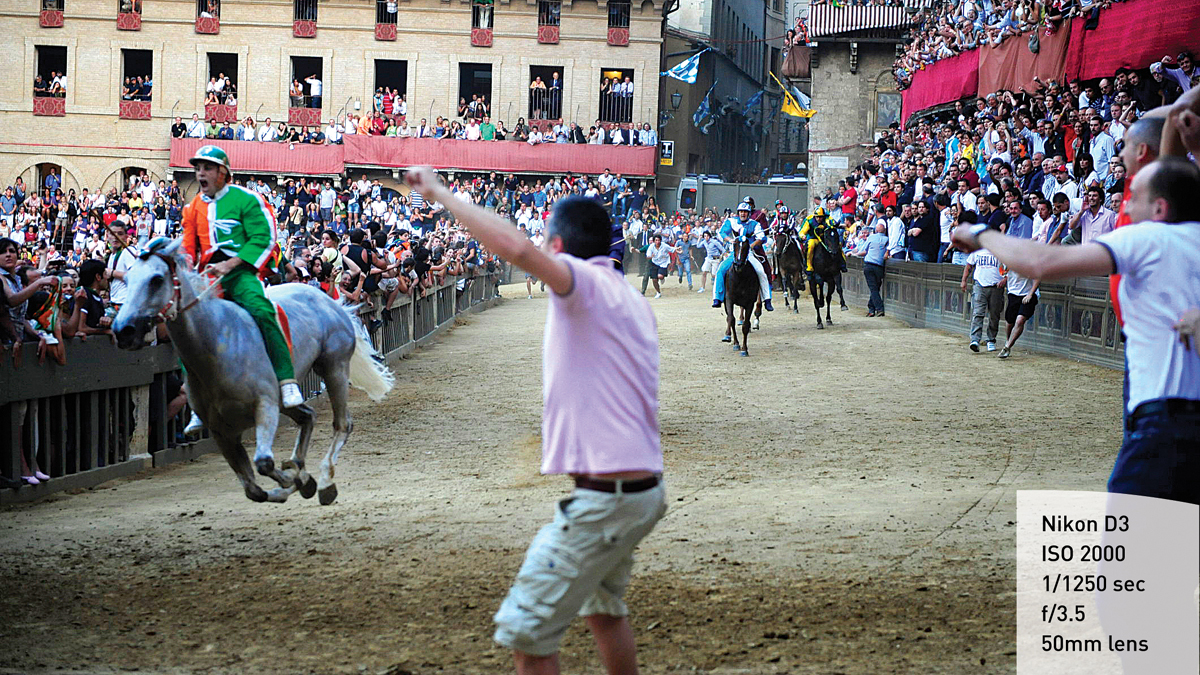
Poring Over the Picture
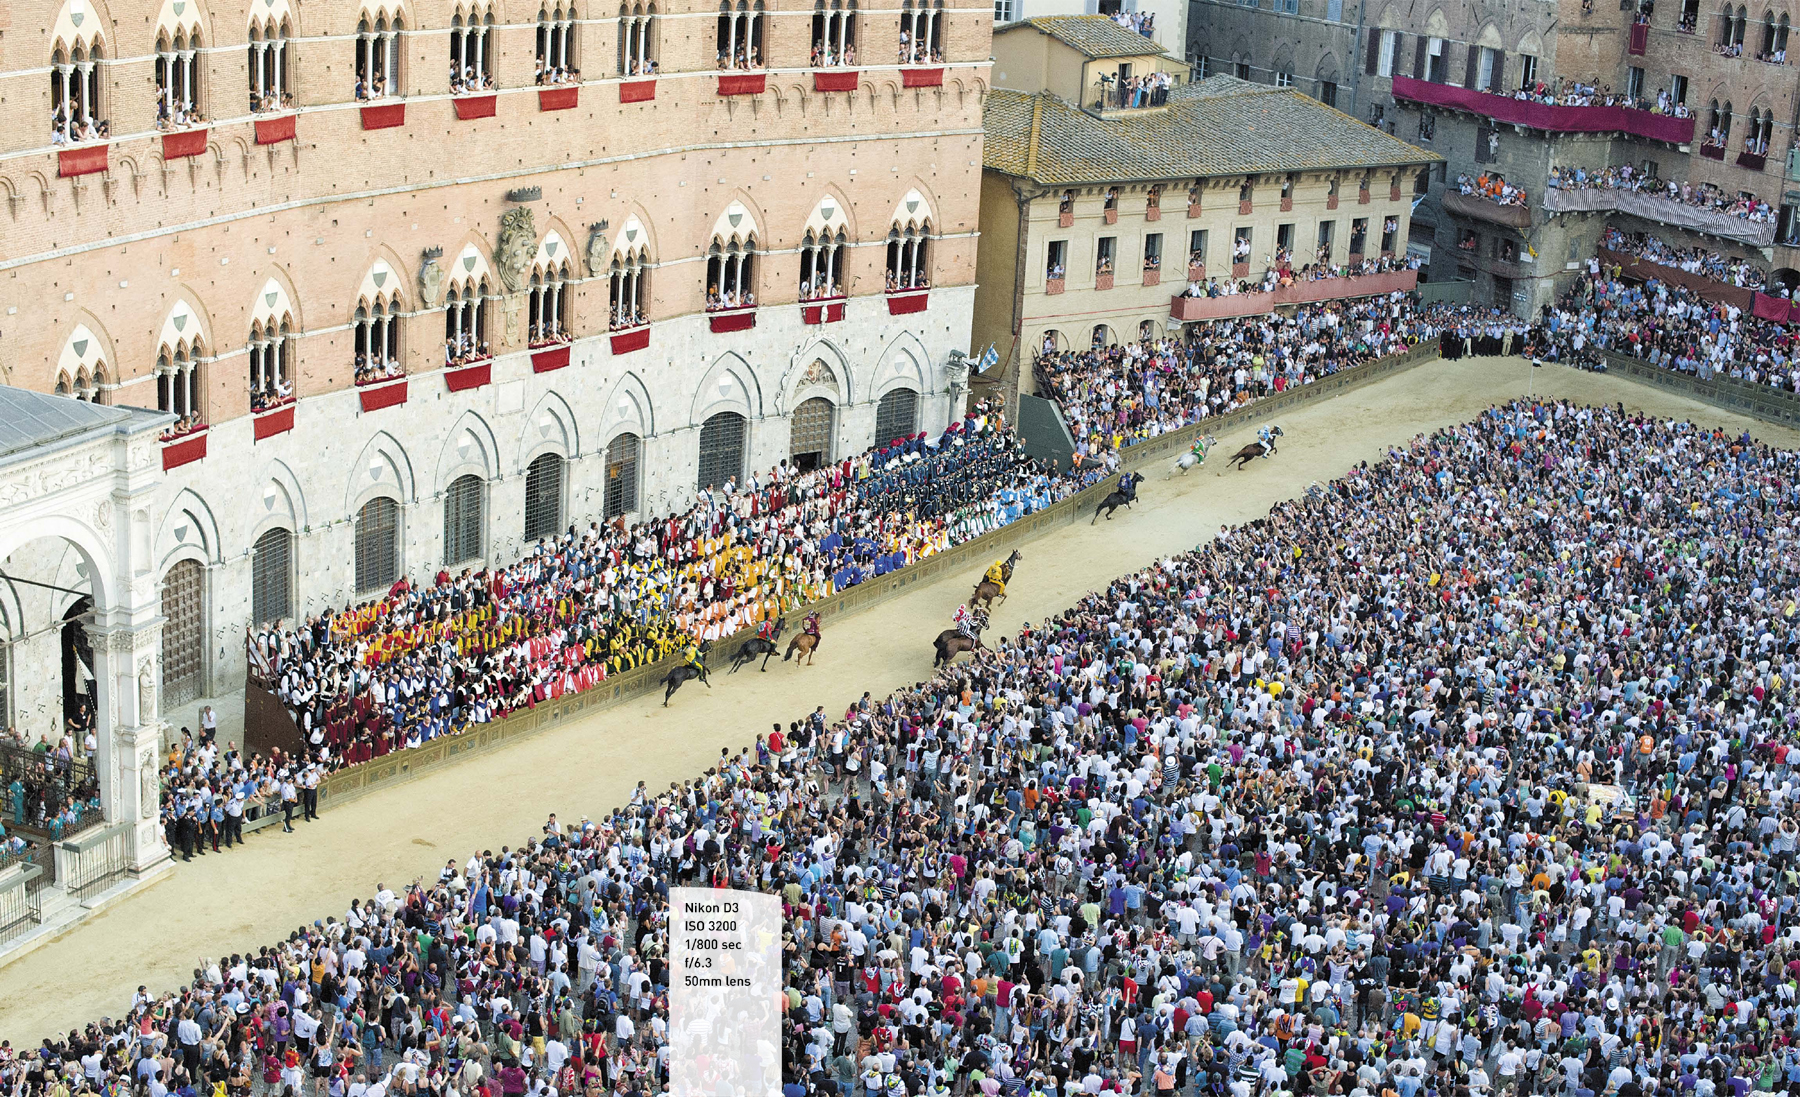
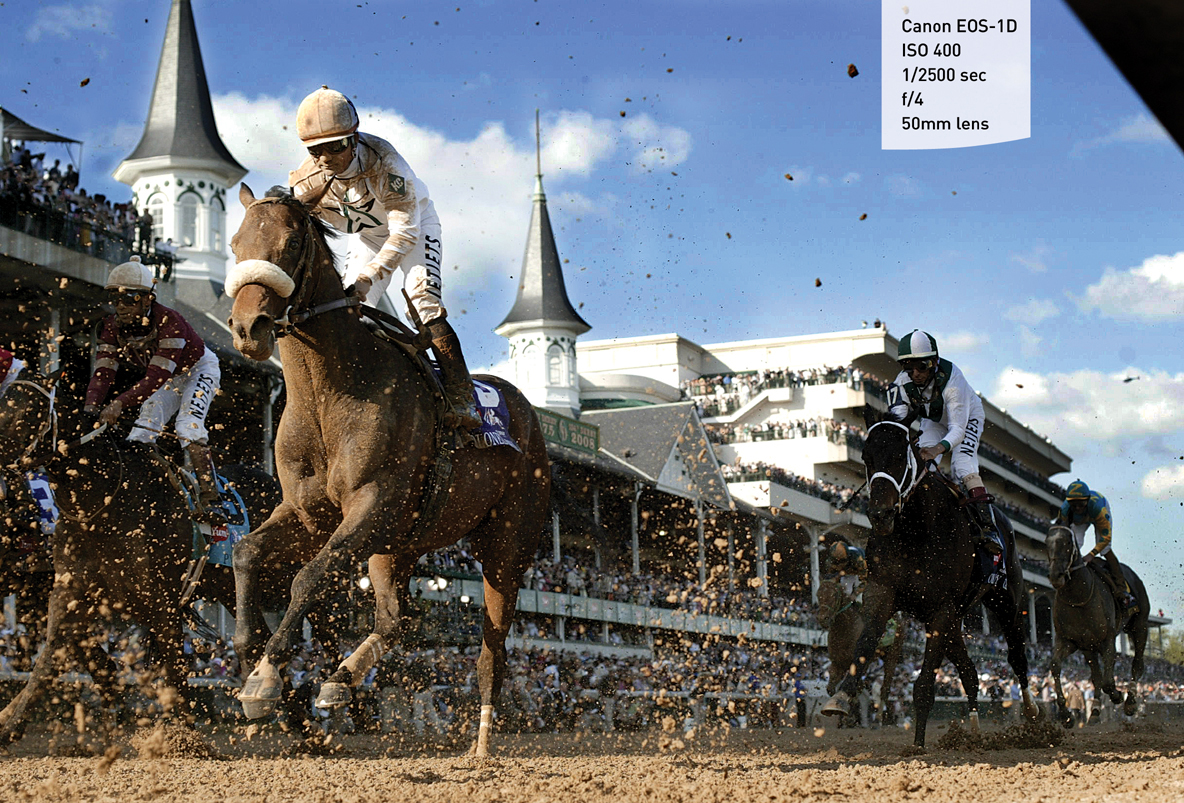
Il Palio di Sienna is a beautiful medieval tradition that takes place twice every summer in the heart of Tuscany. For the race, the town converts the main plaza into a dirt horse track. For what I wanted to capture in this race, the setting was the most important part. So I placed a Nikon D3 with a 50mm lens on top of the tallest building on the square the morning of the race, and I set it to fire at the start of the race.
To capture the essence of the event, my Nikon D3 was set to wake up and begin shooting exactly five minutes before the race began.
Using a 50mm lens allowed me to show the immensity of the event without having to worry about the distortion I would get with a wider lens, such as a 14mm.
Because I put the camera in place several hours before the start of the race, I was able to use Nikon’s ISO Sensitivity setting, which allowed me to set the shutter speed and aperture I wanted and let the camera decide the ISO at race time.
Short Lenses: From Super Wide to Normal
A short lens is any lens ranging from 6mm to 70mm. Common lenses in this range are 14mm, 24mm, 14–24mm, 16–35mm, 35mm, 24–70mm, and 50mm, although there are other, less common options as well.
Intimacy
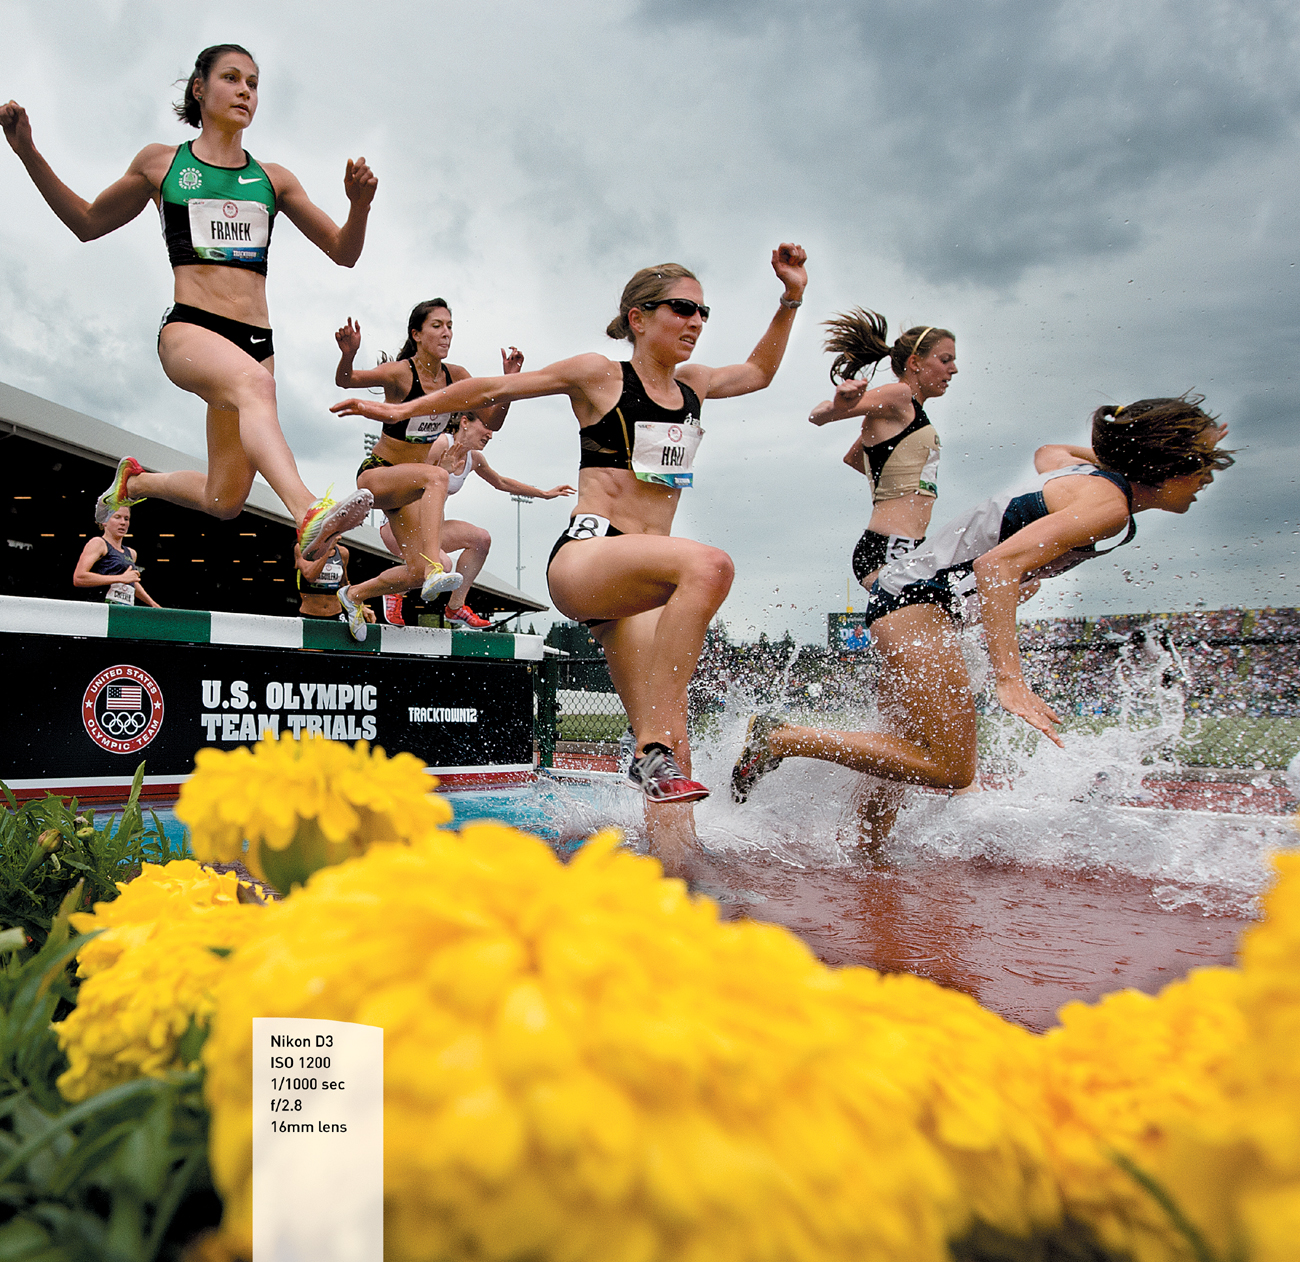
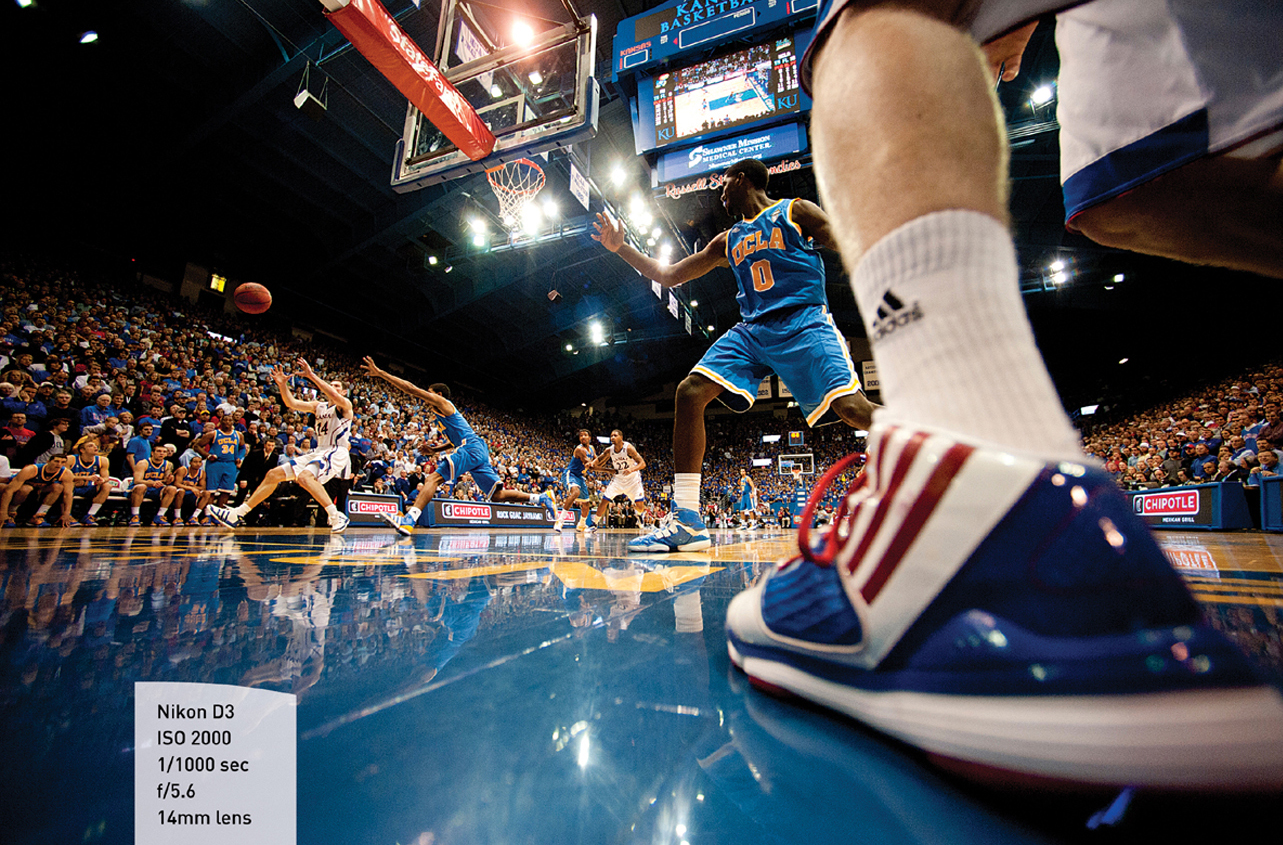
Wide-angle lenses allow a point of view that draws the viewer right into the heart of the situation. With a wide-angle lens attached, you can position the camera very close to the subject matter and still produce sweeping views of the field of play (Figure 3.1).
Tip
When you’re using a wide-angle lens, be sure to keep it level to reduce distortion. If you tilt a wide-angle lens, buildings will warp toward the center and faces will look like almonds. To change perspective, use your feet and knees; move closer or farther away, or kneel or bend down to get a different perspective.
Proximity
Wide-angle lenses allow you to work in much closer physical proximity to the subject matter, particularly people. The lenses are smaller, easier to handle, require less stabilization or support, and are much more portable than long lenses. That means that you can get closer to the subject physically (Figure 3.2).
Tip
Subjects moving across the focal plane close to the lens will require a faster shutter to stop the action.
Physical closeness also allows you to have increased communication visually, both literally and figuratively, with the subject. You can communicate with your eyes, with words, and with gestures in a way that you can’t when the subjects are not right in front of you (Figure 3.3).
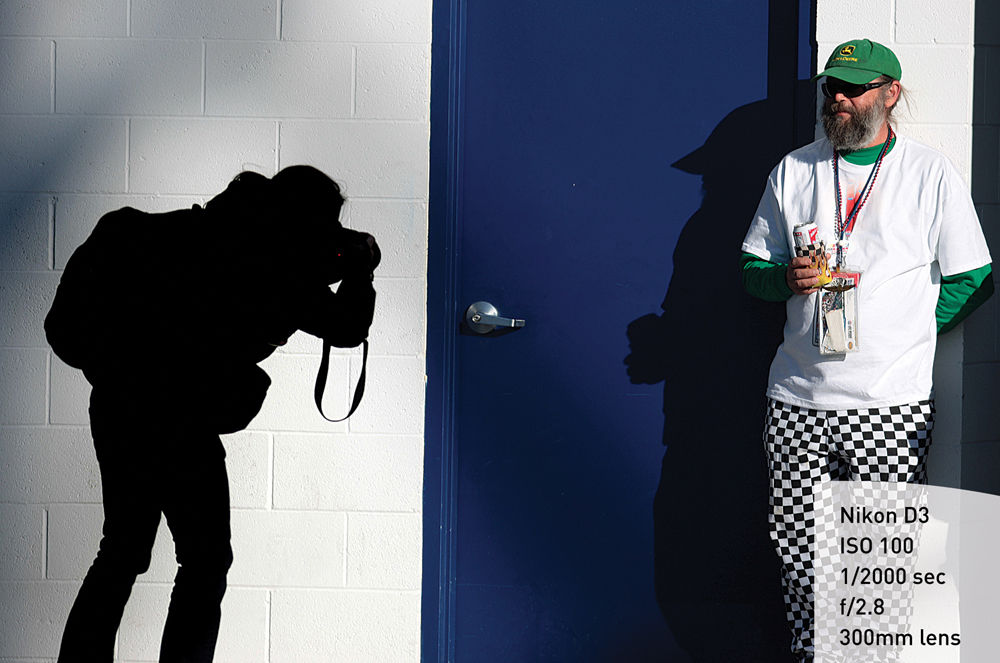
Figure 3.3 Using a wide-angle lens, photographer Laura Heald gets close to a subject during a NASCAR race in Las Vegas, Nevada.
Angle
Wide-angle lenses help you provide a different perspective of a subject than is possible with long lenses. They are best used to provide context by placing the main subject of the photograph in the overall scene (Figure 3.4).
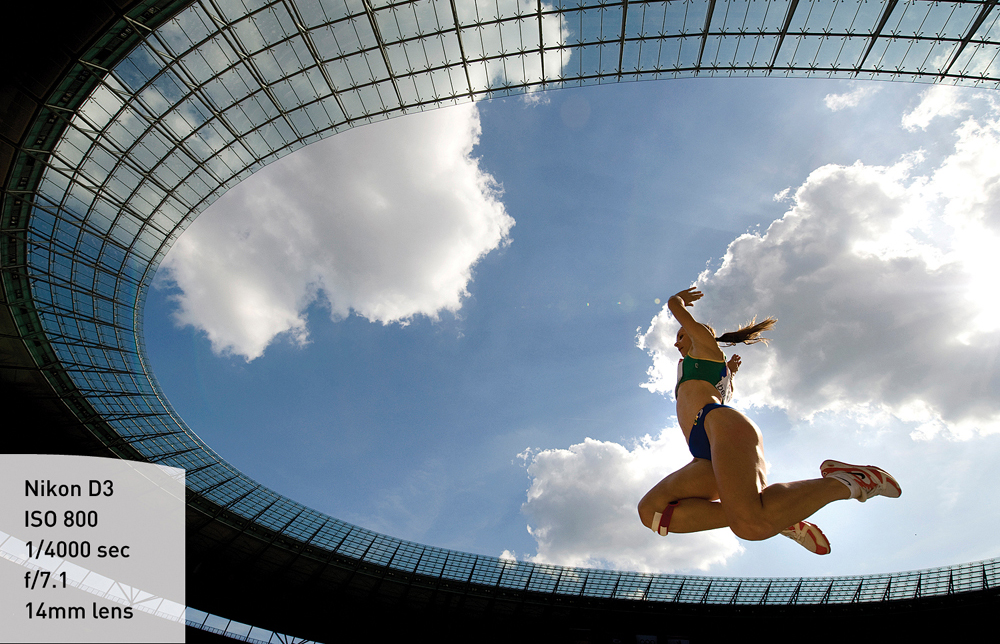
Figure 3.4 A long jumper competes in the 2010 IAAF World Athletics Championships in Berlin, Germany.
Tip
Focus is critical. It’s harder to tell what’s in sharp focus with a wide-angle lens than it is with a long lens. For this reason, many good shots are lost due to a lack of precision.
Use wide-angle lenses to do overall images, which show as much of the environment or scene as possible. A scenic or panoramic image can set the stage for a picture story or simply show readers something added, like a sunset (Figure 3.5).
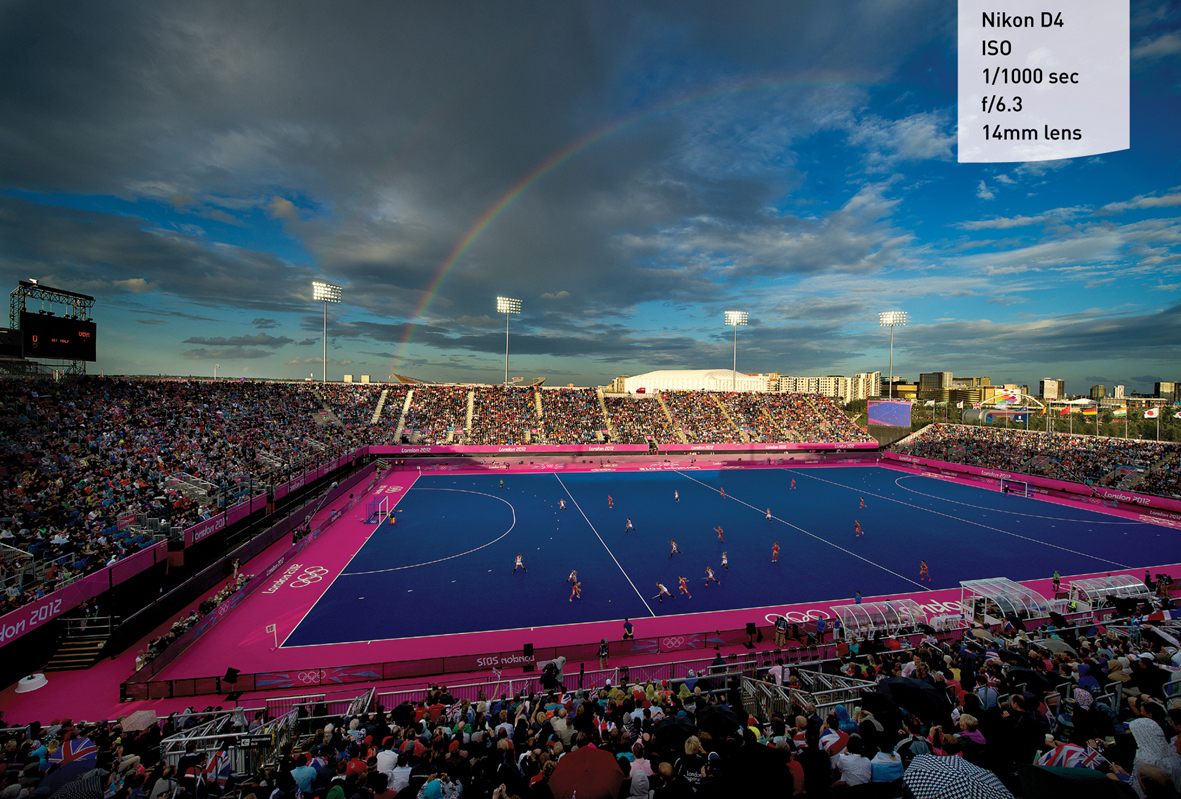
Figure 3.5 A rainbow forms over the field hockey arena at the 2012 Olympic Games in London, England.
When used wide open, the f-stop set to maximum aperture, and the front of the lens close to the subject matter, a wide-angle lens can provide a close-up view that will look much different than those produced by long lenses. Long lenses compress the background, whereas wide-angle lenses expand them, creating a very different look (Figure 3.6).
Tip
Be careful not to interfere with the action. Remember that you are there to record the game, not inadvertently become part of it.
Long Lenses
Long lenses are any lenses above 70mm. The most common lenses in this range are 70–200mm, 70–300mm, 200mm, 300mm, 400mm, 500mm, and 600mm. My personal favorite is the Nikkor 600mm f/4, because it works for my photographic style, which is bold, simple, and clean. This particular focal length affords me the opportunities to position myself in places that I prefer to work, because it is a long focal length, is fast, and is incredibly sharp when used properly. Many other more affordable and less-intrusive options are also available.
Intimacy
Long lenses allow you to reach out into the game and isolate segments of the action, making it easier to focus the viewers’ attention on a smaller part of the overall scene. You first have to decide how you want to render the action and then use one of the techniques discussed in Chapter 2, “Getting Started: The Fundamentals of Sports Photography” (Figure 3.7).
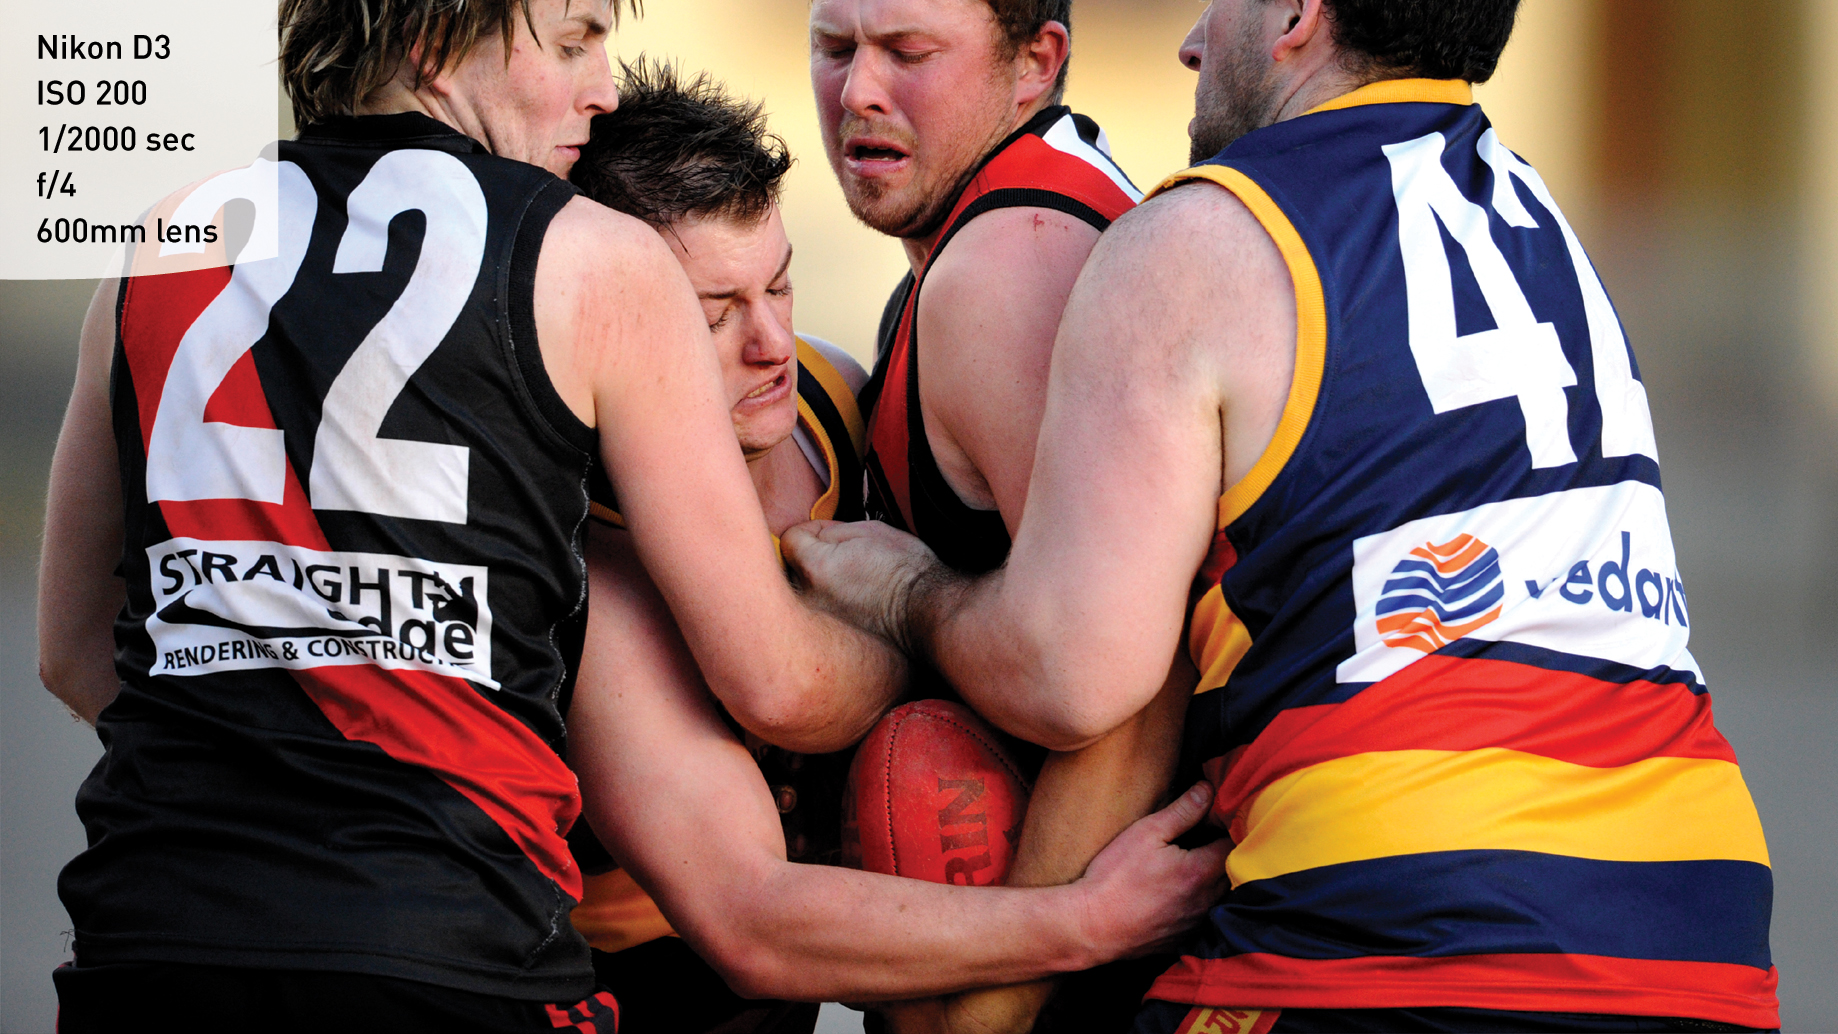
Figure 3.7 Aussie Rules football in Queenstown, Tasmania. Shooting with a long lens placed me in the center of the action while I sat in the safety of the sidelines.
Proximity
Long lenses give you the ability to remain relatively distant from the action while still placing the viewer smack in the middle of what’s happening on the field of play. Long lenses are often heavy and can be harder to balance than shorter lenses. You can use tripods or monopods to support the cameras with long lenses attached and keep them stable (refer to Chapter 2).
Athletes move quickly. Using long lenses allows you to track the action without having to move with the subject to track him or her. With long lenses, you can stay in one place and let the action come to you. For example, I can’t run alongside Usain Bolt, but with a long lens I can position myself to allow him to run to me. This keeps everyone safe and ensures that I don’t interfere with the action (Figure 3.8).
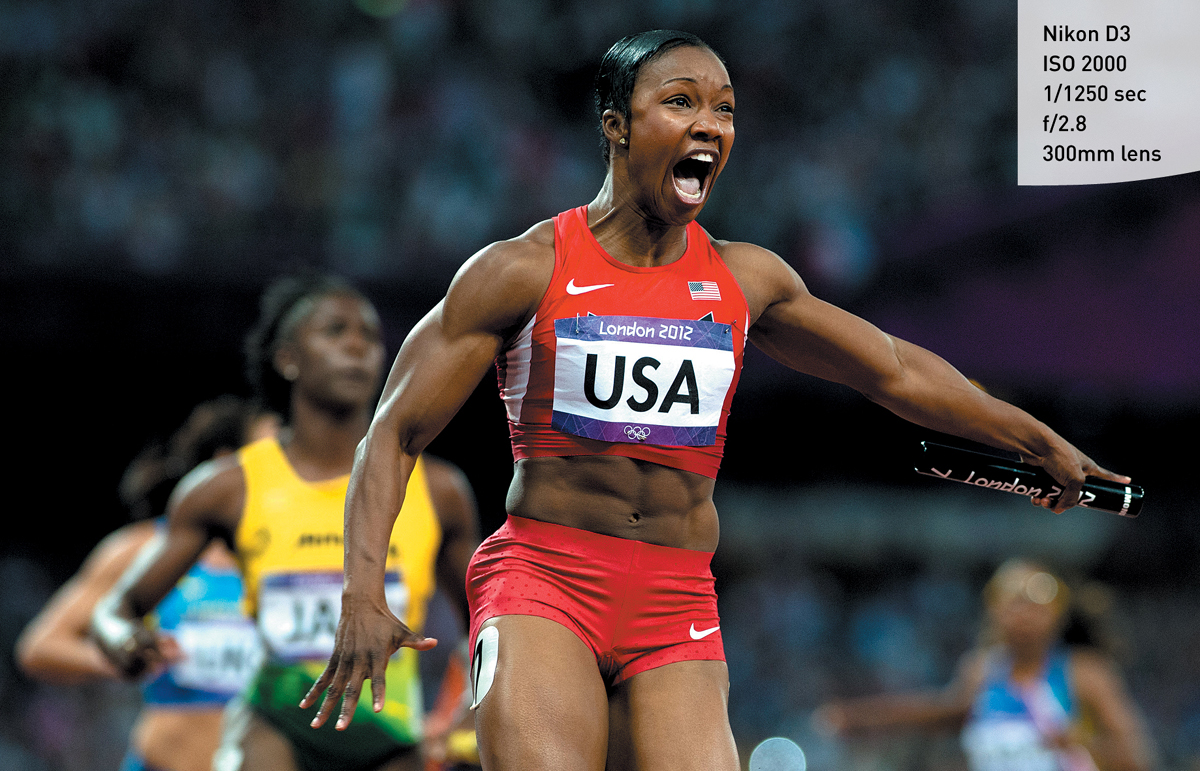
Figure 3.8 Carmelita Jeter celebrates as she crosses the finish line in the women’s 4x100 meter relays during the 2012 Olympic Games in London. Jeter, along with Allyson Felix, Tianna Madison, and Bianca Knight, won the relay and shattered the existing world record.
Angle
Because you are isolating segments of the action by using a long lens and the decreased depth of field that goes along with using it, you can gain greater control of the angle of your shots. Showing only pieces of the playing surface affords you much more opportunity to configure your shots tightly without needing to worry about the horizon or nonessential subject matter. It also gives you the chance to make images from many different, slightly askew positions (Figure 3.9).

You can use a long lens and carefully monitor the depth of field. Increase the depth of field as necessary to keep enough elements in focus to allow you to shoot overalls of the action, resulting in isolation while offering context.
Tip
Use increased depth of field with long lenses to increase the amount of the image that will be sharp while still benefiting from the compression that goes along with using a long lens.
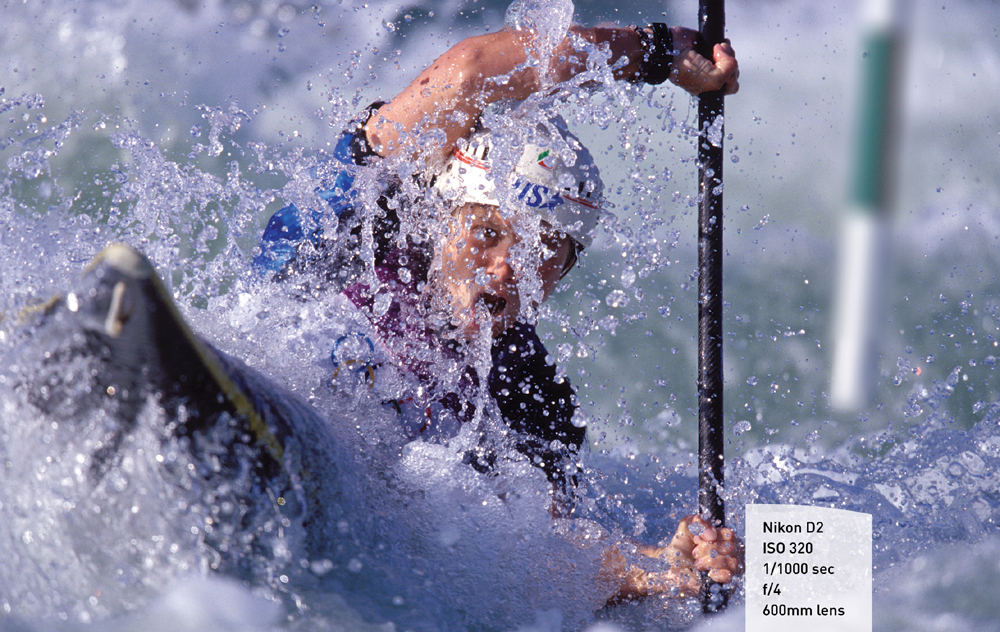
One of the main benefits of using longer lenses is cleaner, simpler backgrounds, which make the action you want to emphasize pop. The image in Figure 3.10 was taken during the Olympic kayaking competition in Greece. I waited for the kayaker to be positioned where I wanted him, used a long lens wide open to isolate him from the background and foreground clutter, calculated the exposure, and used a shutter speed that would freeze the splashing water.
Tip
Use long lenses to eliminate messy, cluttered backgrounds, drawing the viewer’s interest directly to the subject you want to showcase.
Chapter 3 Assignments
There is no better way to understand the differences in focal length than to see them for yourself. Just like practicing a perfect curve ball or spiral, you also need to hone your photo skills. The following exercises will get you out in the action and allow you to contrast and compare situations.
Try each exercise using a wide-angle lens and then a long lens. Compare the advantages and disadvantages of each lens.
Shooting Action with a Wide-angle Lens
Find a basketball game in progress, perhaps at a local playground or gym. Sitting a safe distance behind the hoop along the baseline, photograph players driving to the basket using a wide-angle lens. Use shallow depth of field and as fast a shutter speed as possible. Then use medium depth (f/16 or f/22) and a fast shutter speed. A slow shutter speed will probably not yield an image you can use, but to see the difference, try using a slow shutter speed at medium depth of field as well.
When you review the images, pay close attention to distortion, the ability of the shutter to stop the action, and clutter—in the action and in the background.
Shooting Action with a Long Lens
When the players are on the other end of the court, use a long lens to try to isolate action. Do the same thing as they race down the court toward you. For this exercise, use shallow depth of field and a fast shutter speed. Then try using greater depth of field and a fast shutter speed. Compare the results.
Creating Short and Long Lens Portraits
At the conclusion of the game, make portraits with the short and long lenses, respectively. Pay attention to how you are able to place the players in context differently with each lens.
Share your results with the book’s Flickr group!
Join the group here: flickr.com/groups/sportsphotographyfromsnapshotstogreatshots.