
2. Getting Started
The Fundamentals of Sports Photography
It’s passion for images that pushes me to excel and makes me work harder, longer, and more creatively. I use technology not just to make my life easier, but to make my images better and to do something that I couldn’t do before.
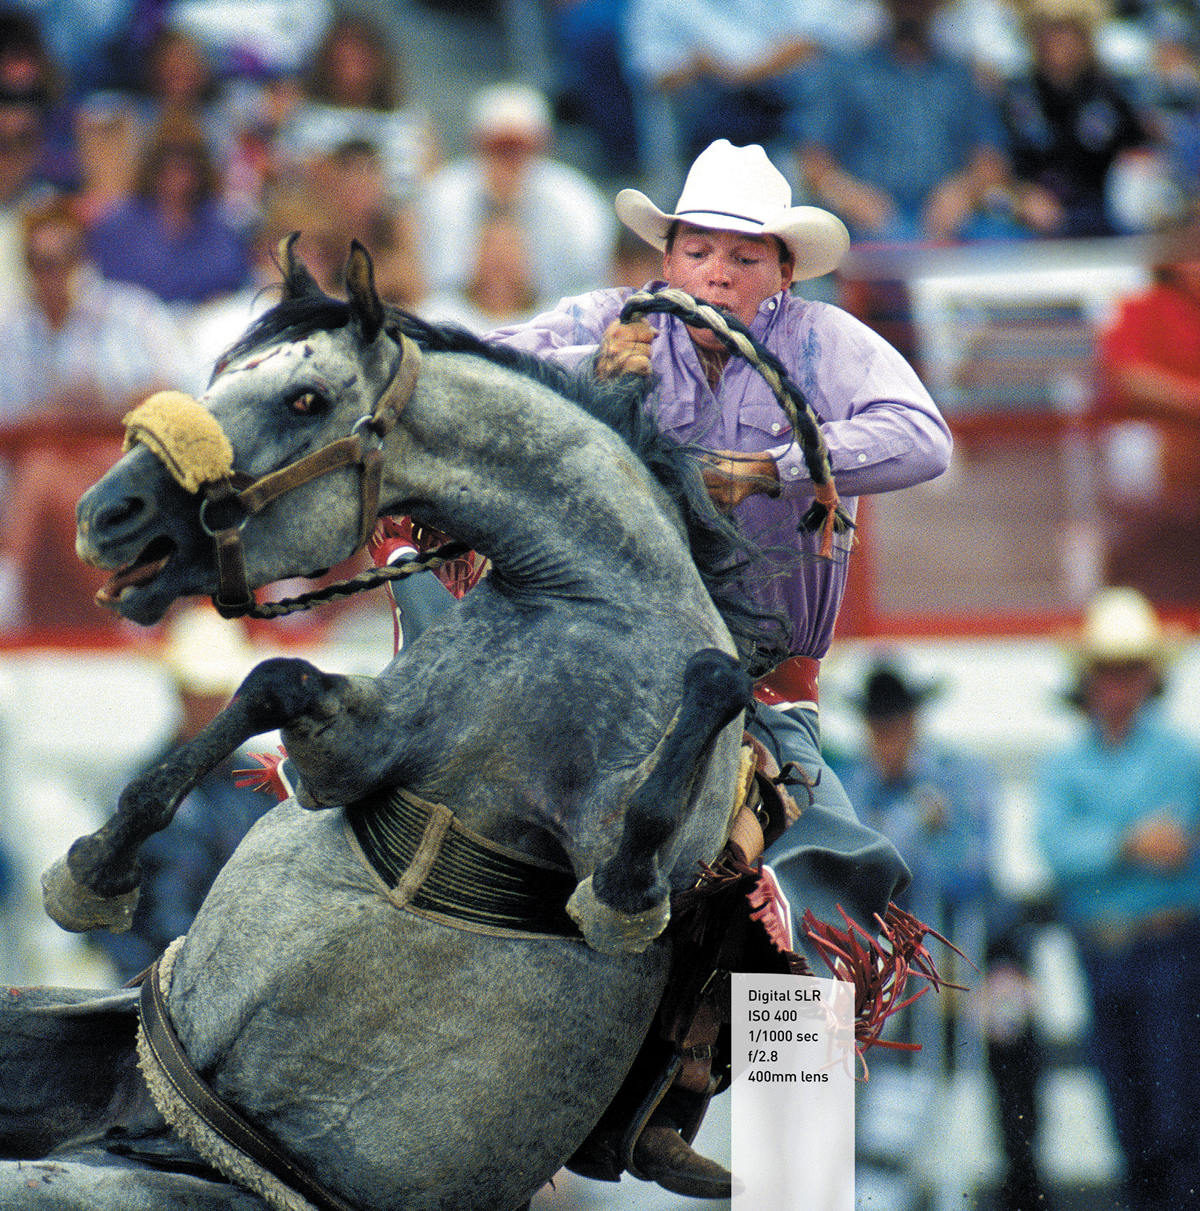
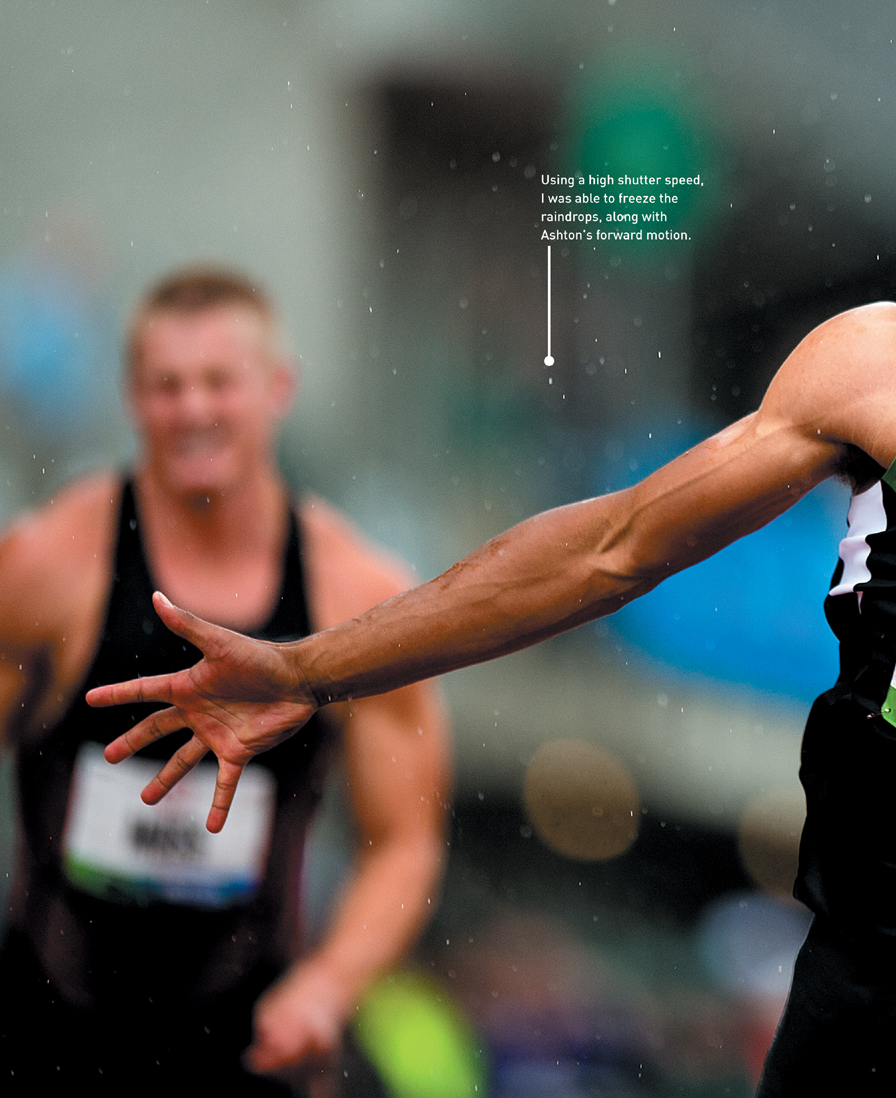
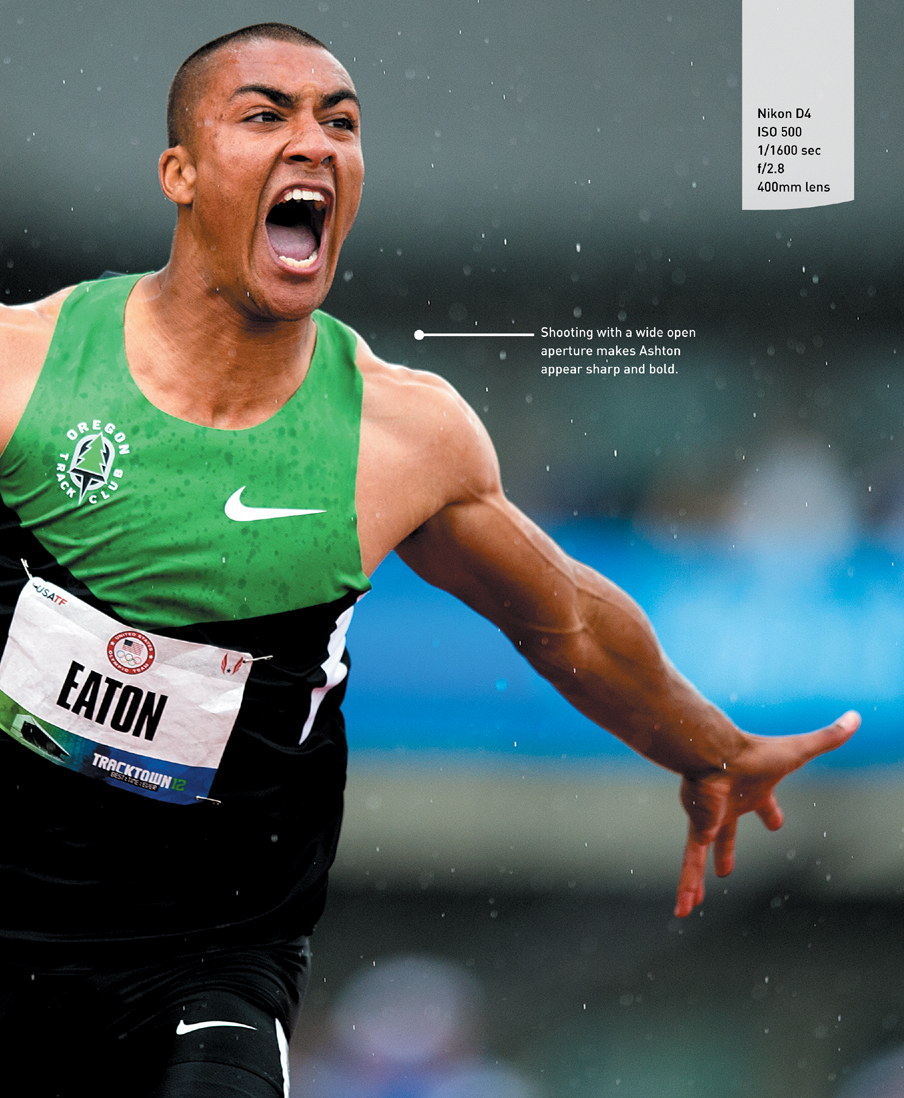
Poring Over the Picture
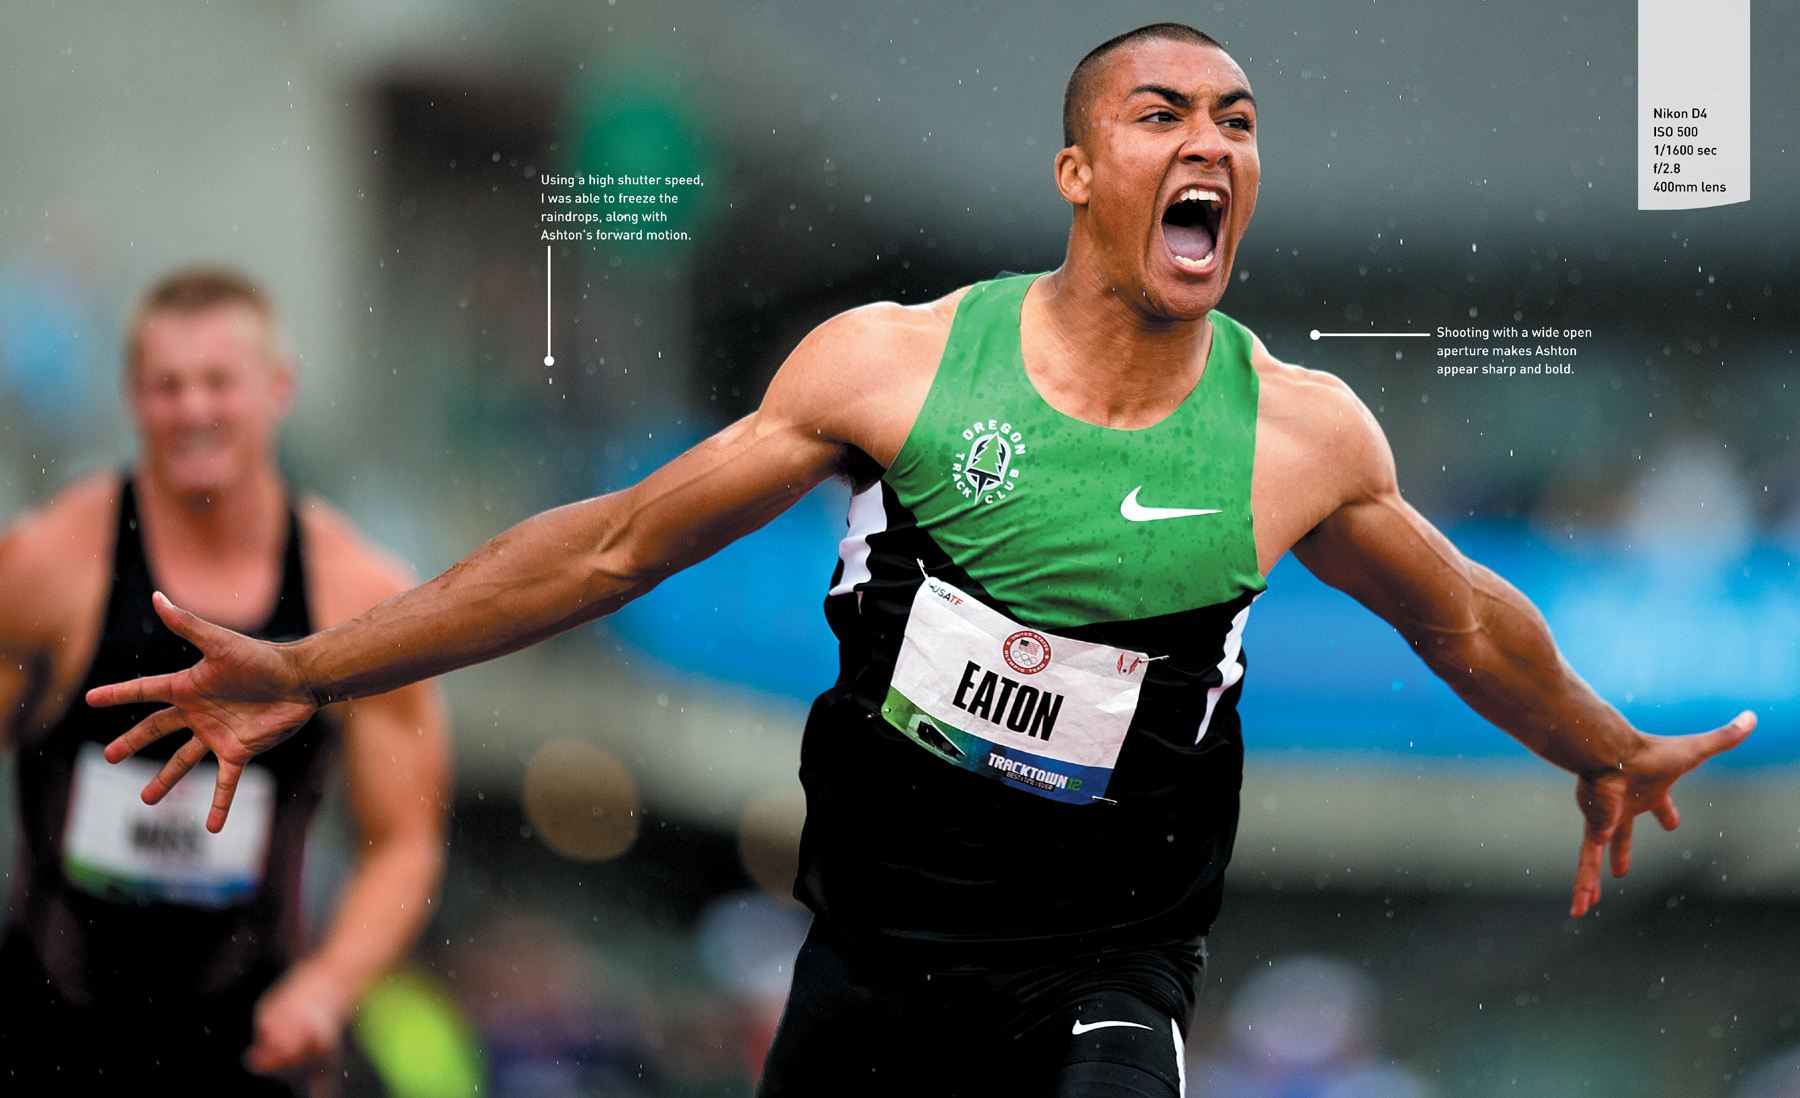
Ashton Eaton wins the 110-meter hurdles in the men’s decathlon during the United States Track and Field Olympic Trials in Eugene, Oregon. He went on to break the decathlon world record, earning 9,039 points.
Getting Started
To be successful on any level, it’s important to identify what you are trying to say with your images and how to physically make that happen. Therefore, you need to understand light and composition, your image content, how to access the subject matter you want to photograph, and technical considerations relating to running cameras, lenses, lights, supports, and post-processing devices.
You’ll learn about all of these aspects of sports photography throughout this chapter and the book. Although the learning curve initially sounds intimidating, the skills you need to achieve your goals are approachable and can easily be learned.
Simple as it sounds, practice and hard work are the key ingredients to success as a sports photographer. So much of what is necessary to make great sports images is having the knowledge to anticipate the action. Thereafter, timing and reflexes take over. Practice, quite literally, makes perfect.
Learning to see is a combination of inherent talent, personal discipline, and passion for the subject. Learning to run the camera is similar to how athletes learn the games bit by bit, beginning as children and mastering the mechanics and the strategies as they grow.
The technical parts of the process are not as difficult as they initially might seem. Running the camera is basically simple math. Each camera has advantages and liabilities. You need to learn and understand how to use them to your advantage. There is no secret formula for making great images, but there are a lot of guidelines and techniques that can help.
The toughest skill to learn is how to critique your own work accurately. If you are too easy on yourself, you won’t grow. If you are too hard on yourself, you can stifle your own growth.
Learning to see is the first step and involves a few essential components: recognizing what is important to include and what is necessary to exclude in terms of subject matter, deciding what looks attractive, and combining these elements to tell the story in the best way.
Camera Basics
Understanding the camera is important but only to the extent you need to be able to communicate your ideas about the image. The primary elements to think about are shutter speed, aperture, white balance, and depth of field.
Shutter Speed
Shutter speed is the key to controlling motion. It’s simple: The higher the shutter speed, the greater the ability of the camera to stop motion. Experimentation is the best way to really understand how shutter speed works. You first have to consider how you want the final image to appear. Do you want to freeze the action? Blur it? Do a combination of blur and frozen motion using a panning technique? Or, do you want to combine the blur and frozen motion using a panning technique and then add a flash to stop the action at the right moment, making the subject stand out even more?
These are all ways of rendering action images. But you first need to decide how you want to render the action and then use the appropriate technique.
Using a Fast Shutter Speed
You can freeze the action by using a fast enough shutter speed to literally stop the action perfectly (Figure 2.1).
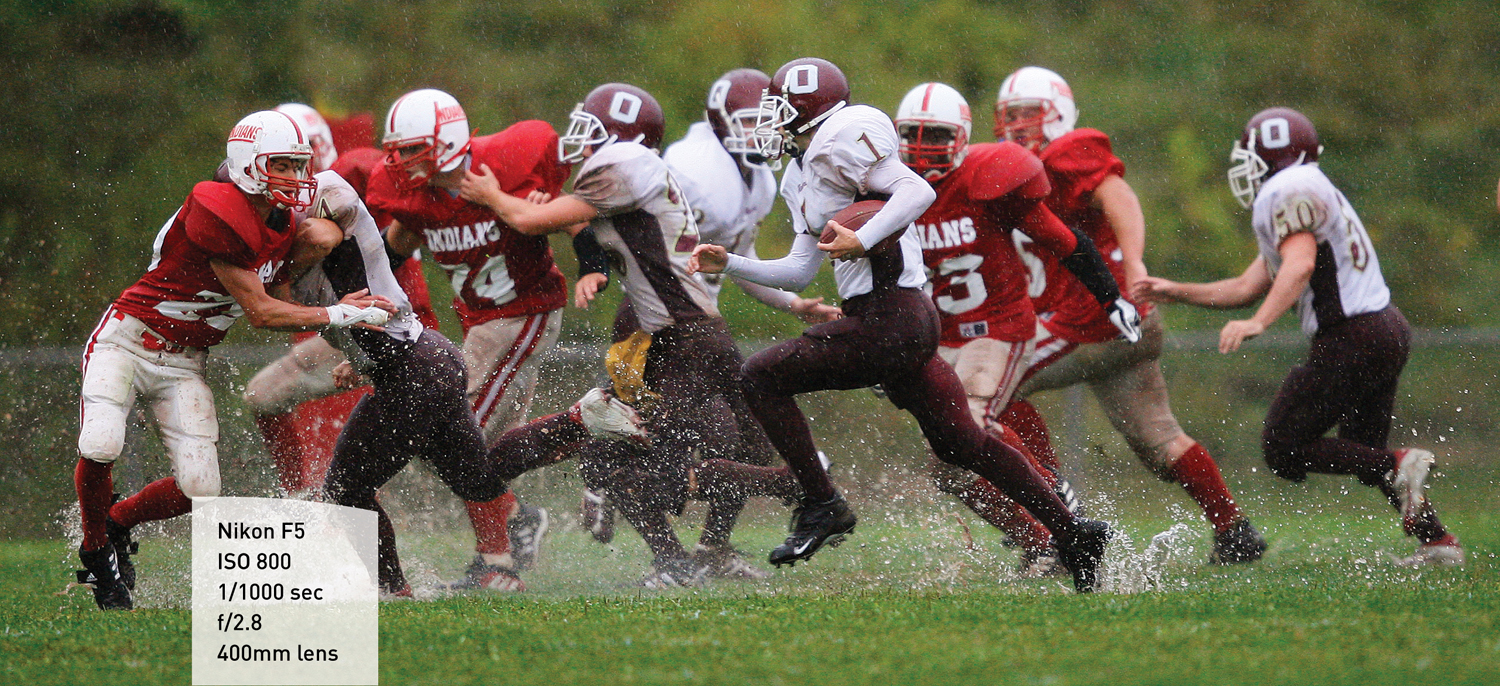
Figure 2.1 High school football in the rain. Using a high shutter speed and a telephoto lens, I was able to freeze the action and the water.
A faster shutter speed is necessary to stop action moving parallel to the camera. The closer the subject is to the lens as it moves parallel to the front of the lens, the faster the shutter speed will need to be to freeze the action.
Movement captured, especially with a long lens, as it moves directly toward the camera can be frozen with a significantly slower shutter speed.
Blurring the Action
Blurring the action is the easiest motion to achieve in an image and the toughest to make look good. Blurring involves using a slow enough shutter speed that the motion of the subject is rendered as a blur. The camera can be stationary or in motion during the exposure. If the camera is in motion, the speed at which the camera is moving has to be different than the speed at which the subject is moving.
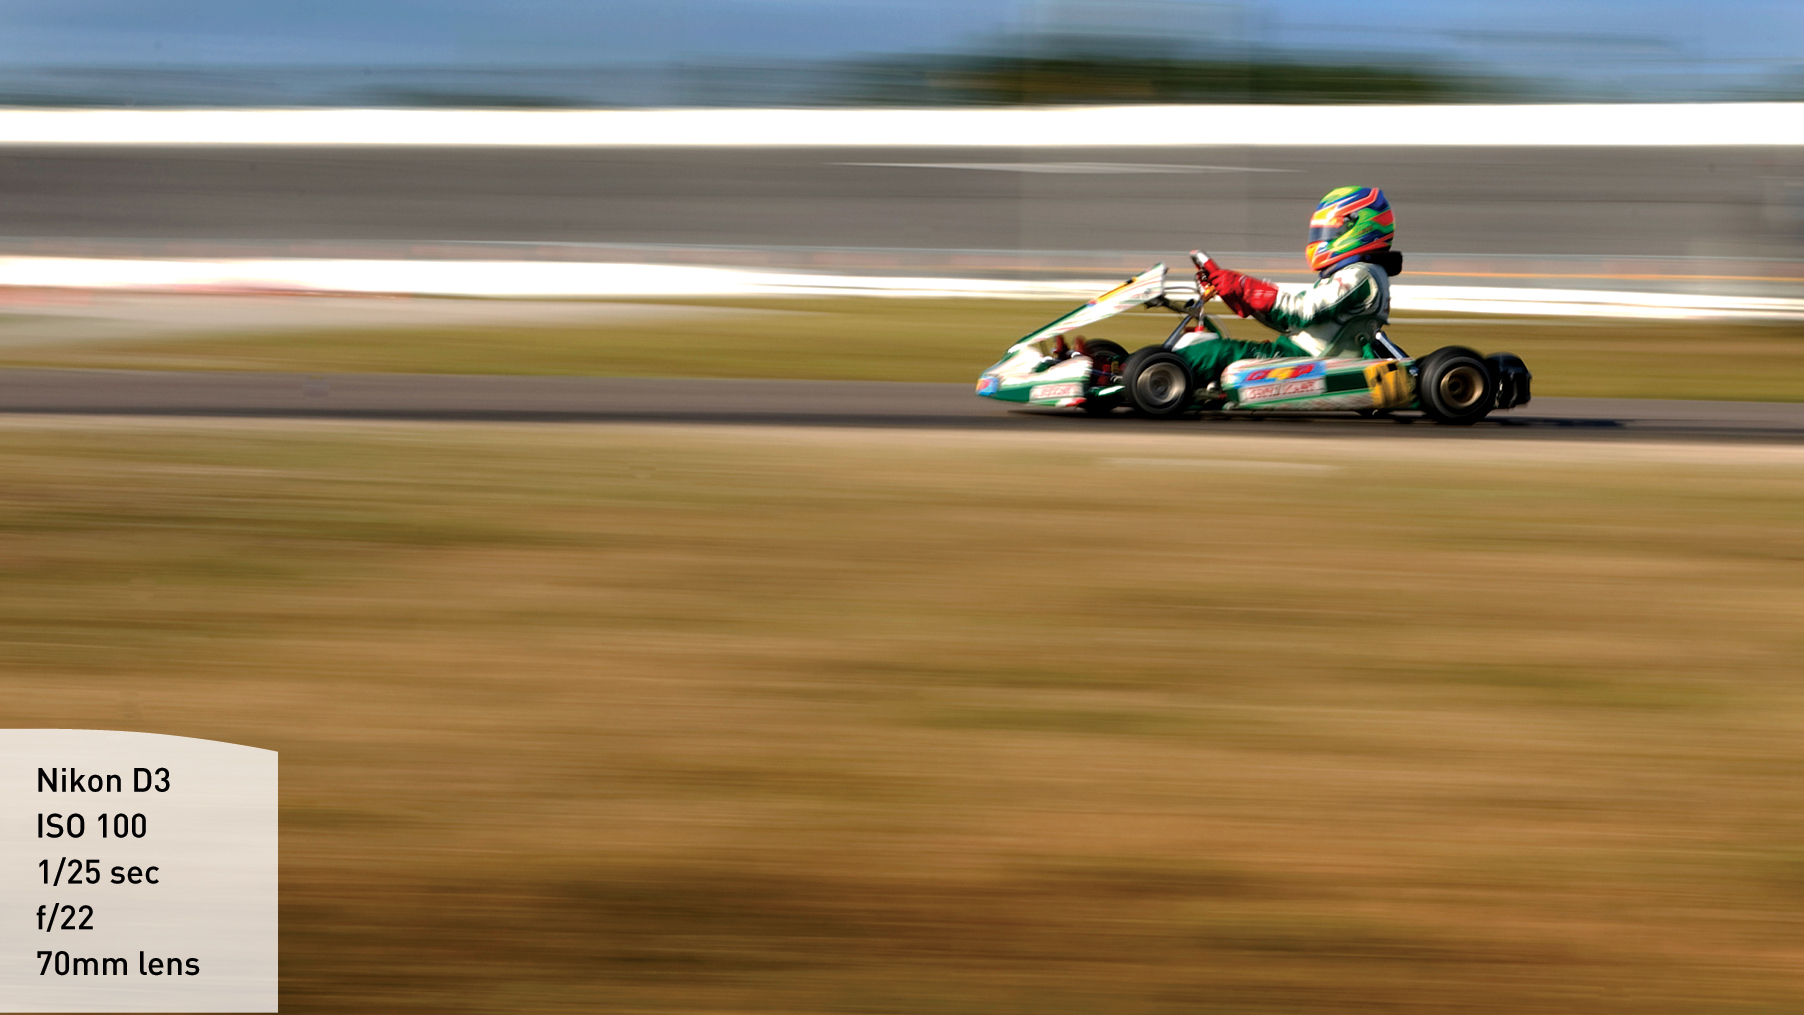
Panning the Action
Panning is a technique that involves moving the camera in parallel to the action being photographed. It is achieved by keeping the subject in the same position of the frame for the duration of the exposure. The duration of the exposure must be long enough to allow the background to blur due to the movement of the camera. Simply put, it is necessary to focus the camera on the action you want to freeze using a slow enough shutter speed and then moving the camera in an even motion, keeping the camera level at the same speed as the moving subject you want to freeze. Again, this is easier than it sounds and is a very basic and necessary skill you need to master (Figure 2.2).
By setting the camera to rear curtain sync, you can do a pan and fire the flash while panning. This will illuminate the subject and help freeze the motion.
Each sport has different, important considerations relative to how to capture the various forms of action, and these will be discussed in later chapters.
Note
Rear curtain sync is a setting on the camera whereby the camera fires the flash just before the shutter shuts. This causes anything in motion to appear to be a streak until the light from the flash illuminates it, rendering it sharp, provided that the lens is focused properly. It’s a technique used to demonstrate speed in still images.
Aperture
Used in combination with shutter speed, the aperture controls how much light reaches the film/imaging plane. The aperture is normally called an F stop. The greater the F stop, the more light it will allow to reach the film or image sensor, which allows a faster shutter speed or a lower ISO to be used.
Note
The imaging plane is the exact place the image is captured, whether it is film or a sensor.
Aperture is also an important part of focus considerations. How much of the image do you want in focus? The larger the opening of the aperture (lower numbers enlarge the opening), the less that will be in focus—every time with every lens. With longer lenses you can see the change in depth of field faster, but the same rules apply for wide-angle lenses as well.
White Balance
Digital cameras make setting the white balance easy. Auto white balance is so good that the camera will get you close to the ideal setting almost every time. As long as you shoot RAW you will be able to make perfect final corrections during postproduction.
I always want very tight control over the technical part of the photographic process. I want every camera set to very tight technical tolerances. This is particularly important when I’m using multiple cameras (remotes) to capture images simultaneously. It helps with quality control, and that not only makes the images better but allows me to work much faster on deadline because I spend very little time in postproduction.
Tip
I use a Sekonic color temperature meter to determine the Kelvin number and then dial in the precise color temperature I want in every situation.
Depth of Field
Entire books have been written about depth of field. What you need to know is that it greatly affects the look of a photograph.
Depth of field is the amount of the image that is in sharp focus, from the nearest to the farthest element in the image. Three factors control this critical part of composition:
• Aperture. The wider the aperture, the smaller the amount of the image that will be in focus.
• Distance from the lens to the subject. The closer to the lens the subject is, the smaller the amount of the image that will be in focus.
• Lens length. The longer the lens is, the smaller the amount of the image that will be in focus.
The combination of these three elements controls the amount of the image that will be in focus.
Camera Supports
Auxiliary equipment can also be helpful in making photographs in an efficient, comfortable, and accurate manner. Tripod use is extremely important and is always undervalued. People tend to use tripods only in slow shutter speed situations. However, they are important not only for stability but for consistency of composition. I also use them for remote cameras.
Monopods are a must when you’re shooting sports. For many major sports, access is tightly regulated, and for security reasons, tripods are not allowed. I always have either a Nikkor 400mm f/2.8 or 600mm f/4 over my shoulder with a Gitzo Series 5 6X monopod with G-lock. It is big and strong but lightweight at the same time. It gives me better control over composition and stability, which is important when I’m using telephoto lenses. Having a long lens helps me get close to the action without physically putting myself in the middle of the action.
Tip
Many photographers make the mistake of trying to find the lightest tripod possible. Although that makes the tripod easier to carry, it makes it less stable with longer lenses or in windy conditions. Sand bags can be added to the tripod to help provide additional weight.
Sports Photography as a Teaching Tool
Many collegiate and professional sports teams hire photographers and videographers to provide images to athletes and coaches to use for critical analysis of the athletes’ performance. Prior to the shoot, the photographer needs to talk with the coaches and athletes to determine what kind of angles and sequences need to be shot so that afterwards the participants can analyze the images and help improve their performance by using the information in the photographs to alter their body movements.
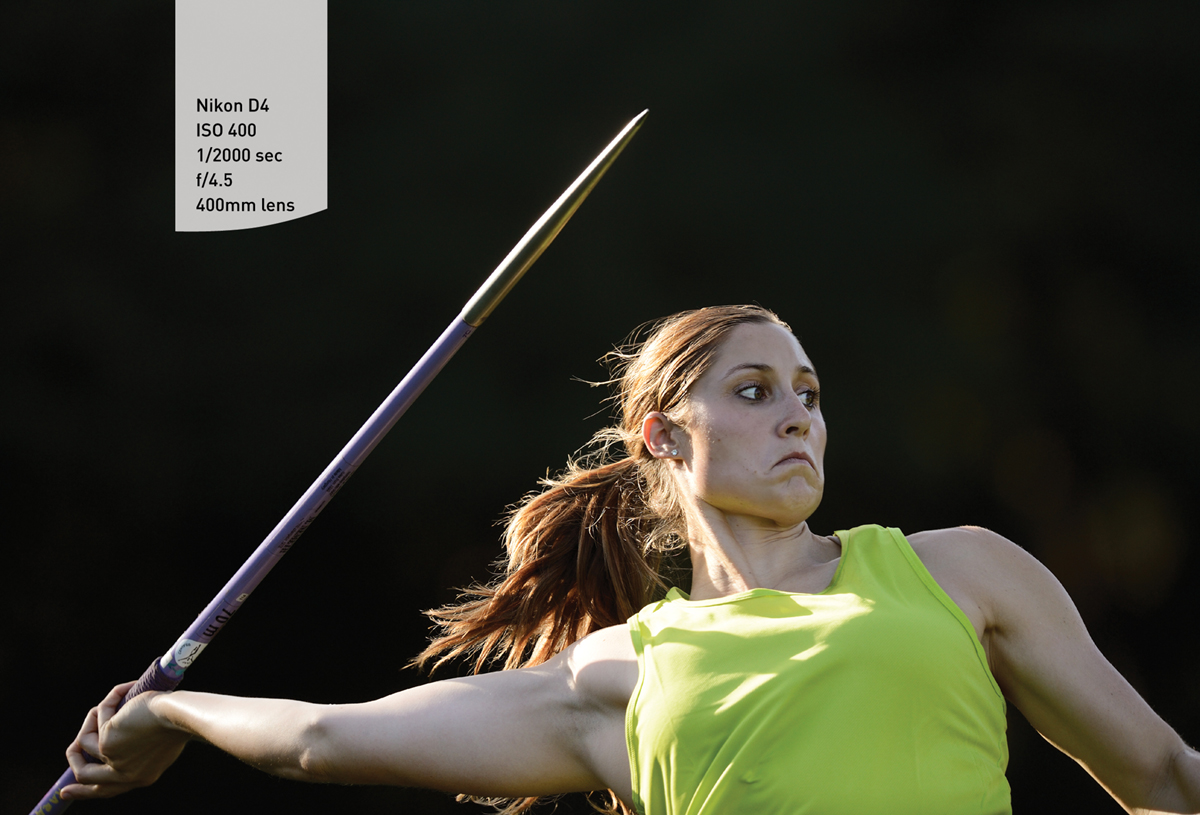
Sports Photography for Advertising and Promotional Purposes
Sports photographs made for advertising and promotional purposes are normally done as controlled shoots where the athletes perform for the camera and the photographs produced are used to sell or endorse products.
For the release of the Nikon D4, I photographed Kara Patterson, the USATF National Champion in women’s javelin at the time, to demonstrate various camera functions (Figure 2.3). For the shoot, Kara acted as a model. She stood where I asked her to stand and threw where I asked her to throw. This situation is similar to a portrait because I had control over access and timing.
Sports Photography as Journalism
Providing images to publications for editorial use is often done in combination with a written story. In these situations, most publications want the photographs and words to work together to support each other. At a minimum, a caption is normally attached to the photograph to provide additional information. One of Life magazine’s great picture editors, Wilson Hicks, was quoted as saying, “No photograph should need a caption, but every photograph must have one.”
Finding the Story
Finding the story can mean a literal story consisting of a combination of words and pictures or a single storytelling image.
Sports photography isn’t just about big events. But when I am covering big events, often my goal is to tell a specific story about a team or athlete. Many of my favorite images do not include major athletes and were not taken at major events. Finding lower-profile stories generally allows for greater access to subjects, and better access usually allows for better photos.
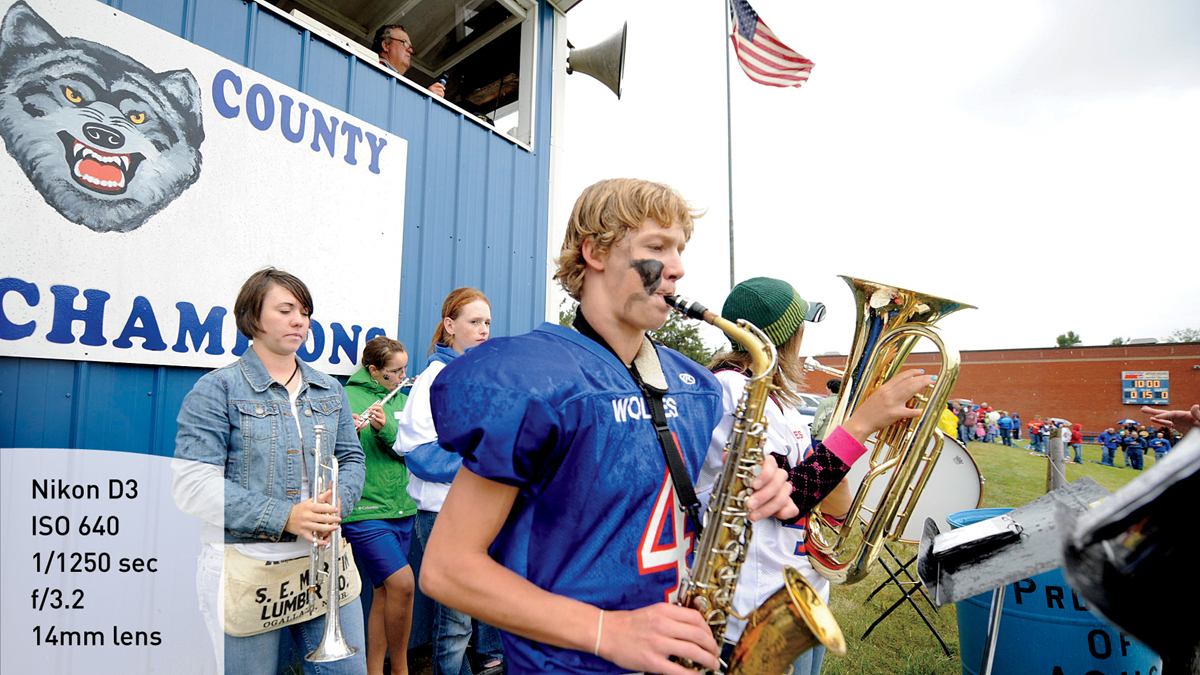
One of my favorite sports stories, shot at Arthur High School in Arthur, Nebraska, is about a six-man football team—the Arthur Wolves (Figure 2.4). It wasn’t fancy. It was just a simple story about the love of football and community.

Arthur is deep in the sand hills of western Nebraska. The population of the town is 145 people, and the high school consisted of 28 students that year. Every boy but one was on the football team, and the quarterback also played in the band. I was in town for homecoming week and the story ran in SI for Kids (Figure 2.5 and Figure 2.6).

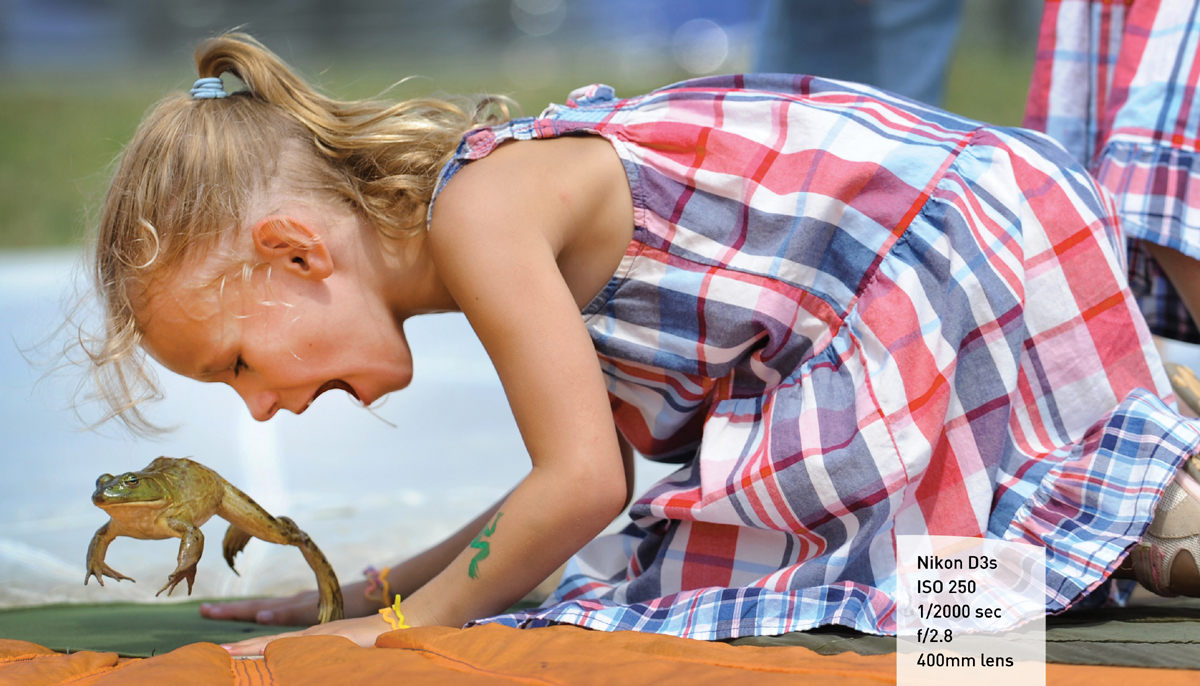
Stories similar to the one I shot in Arthur are everywhere. People do seek me out if they have a story they think Sports Illustrated should feature, but most often I find stories on my own. Community calendars are extremely helpful in this regard. In fact, I covered a frog jumping festival in Ohio after picking up a community calendar in the Cincinnati airport (Figure 2.7).
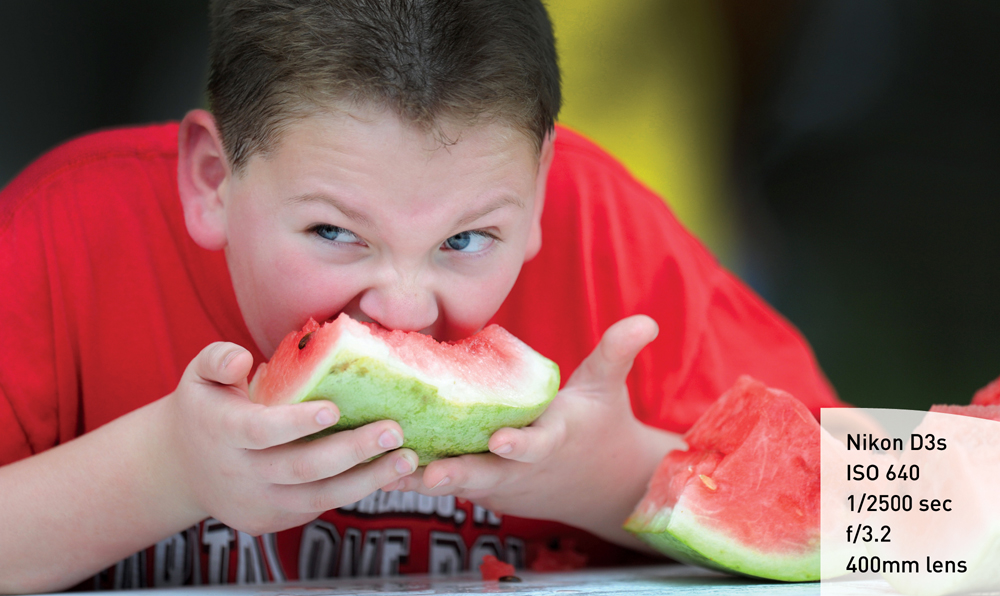
Internet search engines are also a good place to look for local events. In the summer of 2010, I wanted to find something fun to run on SI.com and in the digital edition of Sports Illustrated before football season started. I was fortunate to find a watermelon festival in Georgia, just a couple hours from my home in Jacksonville (Figure 2.8). SI.com and digital publishing in general have provided me with many more opportunities to show my work.
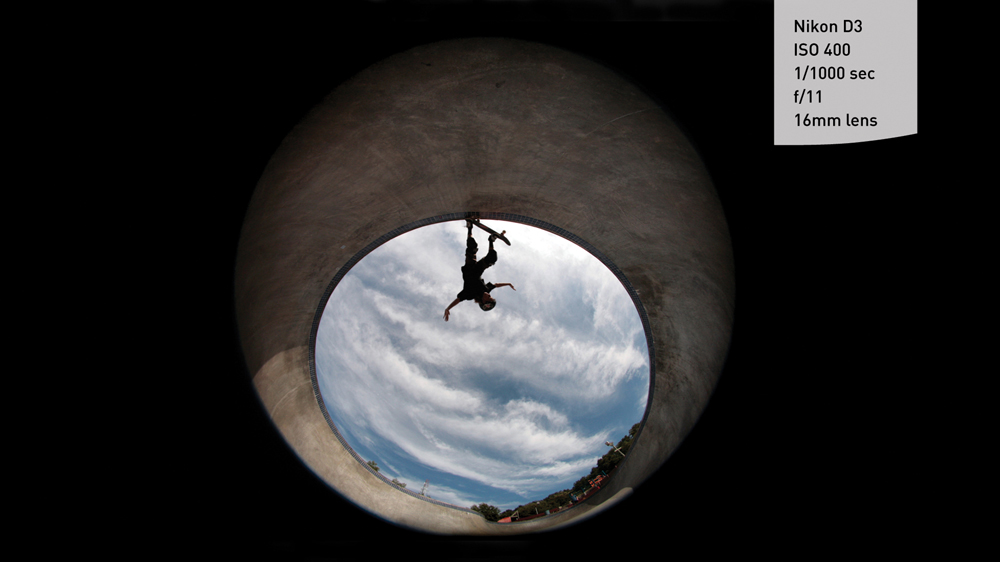
Often, great stories are right in your backyard. Five years ago I met a 12-year-old local skater named Cason Kirk. We did a story on skateboarding at the famous Kona Skate Park in Jacksonville, Florida. Since then, I’ve had the joy of watching Cason grow into one of the world’s best young skaters (Figure 2.9).
Events and stories like these are fun to shoot and generally allow a lot of access, which brings us to the next important subject.
Gaining Access
For journalism, and also strictly as a fan, access is the hardest part of covering sports. Certain events are simply off limits if you are not a member of the credentialed media. Access is determined by two main factors: the safety of the athletes and spectators, and the rules of various athletic departments/federations and television broadcast.
Every situation will be slightly different, and it is very important to ask the right questions. If you don’t, you won’t be prepared and you’ll make costly mistakes, which will put you and those around you at risk. Here are a few questions I ask in every situation:
• What can and can’t I do?
• Where can I physically be?
• What can I use the images for?
Action and Feature Portraits
Not all sports photography is pure action. Much of my time is spent planning and executing high-quality portraits.
Features, the action away from the action, is another very important element of sports photography. These images define the culture of the sport.
Whether a portrait is environmental, showing the person you are photographing in a setting that helps define who they are, is action based, or is against a backdrop, proper lighting is critical when you’re shooting a portrait.
Lighting
Light shapes a photograph. In a controlled portrait situation you can use light however you see fit; you are less at the mercy of natural elements than you are when you’re shooting an event. Sometimes you introduce light through strobes or continuous light sources; sometimes mother nature offers a far superior option.
Highlighting Power and Grace
Candace Parker is one of the best athletes I’ve ever photographed. When she was the star of the Tennessee women’s basketball team, I photographed her for a cover story in Time magazine (Figure 2.10).
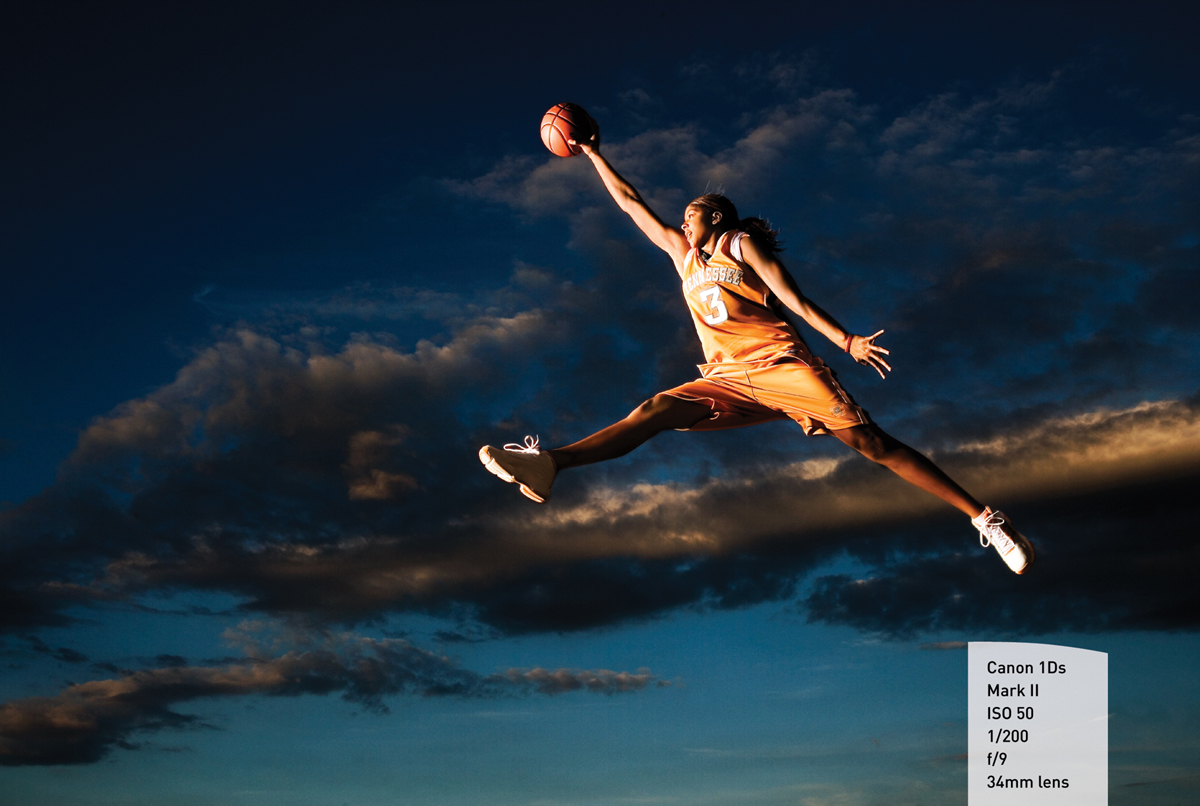
Candace is strong and powerful but also graceful and elegant at the same time. To show this, I wanted the light to accentuate her beauty and her body to emphasize her strength. I lit this portrait with two Elinchrome 2400 watt/second strobe heads and softened that light with two large Elinchrome octabox light diffusers. I stacked the lights—one at 10 feet above the ground and one at 18 feet—using huge Avenger light stands.
Candace was jumping on a trampoline and palming the ball effortlessly. I waited for sunset so that the orange and blue sky would complement her uniform colors and make a lovely image. By pumping in a lot of light, I was able to make the sky go a little darker and make her stand out.
Tip
Adding extra light to your principal subject allows you to expose your subject normally, and if you keep the extra light from spilling onto anything in the background, it allows you to let the background go darker, which adds drama to the image.
Anticipating the Hit
Jevon Kearse’s nickname is “The Freak.” He was a dominant defensive figure throughout his career in the NFL. When I was assigned to shoot him for the cover of Sports Illustrated, I wanted to show viewers what a quarterback sees when Jevon is coming at him (Figure 2.11).
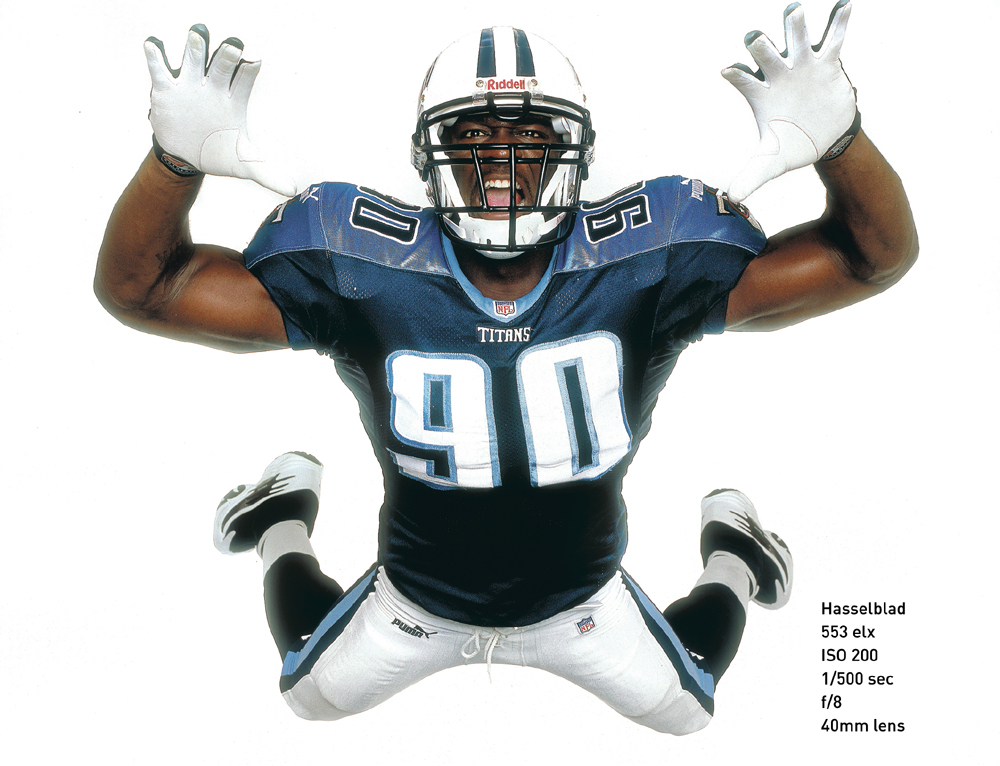
Figure 2.11 Jevon Kearse in tackle mode. I used 6 Speedotron black line strobes with quad heads to shorten the flash duration.
To do this, I put gymnastic pads on the floor, stretched out flat on my back, and let Jevon jump over me. To keep it simple and to make sure Jevon was the only focus of the photo, I shot him against a pure white backdrop in a sound stage.
Because he needed to be moving very fast in close proximity to me, I decided to shoot him with a wide-angle lens. That meant I needed to be able to shoot at a fast shutter speed, even with strobe, in order to freeze the action.
Showcasing the Other Side
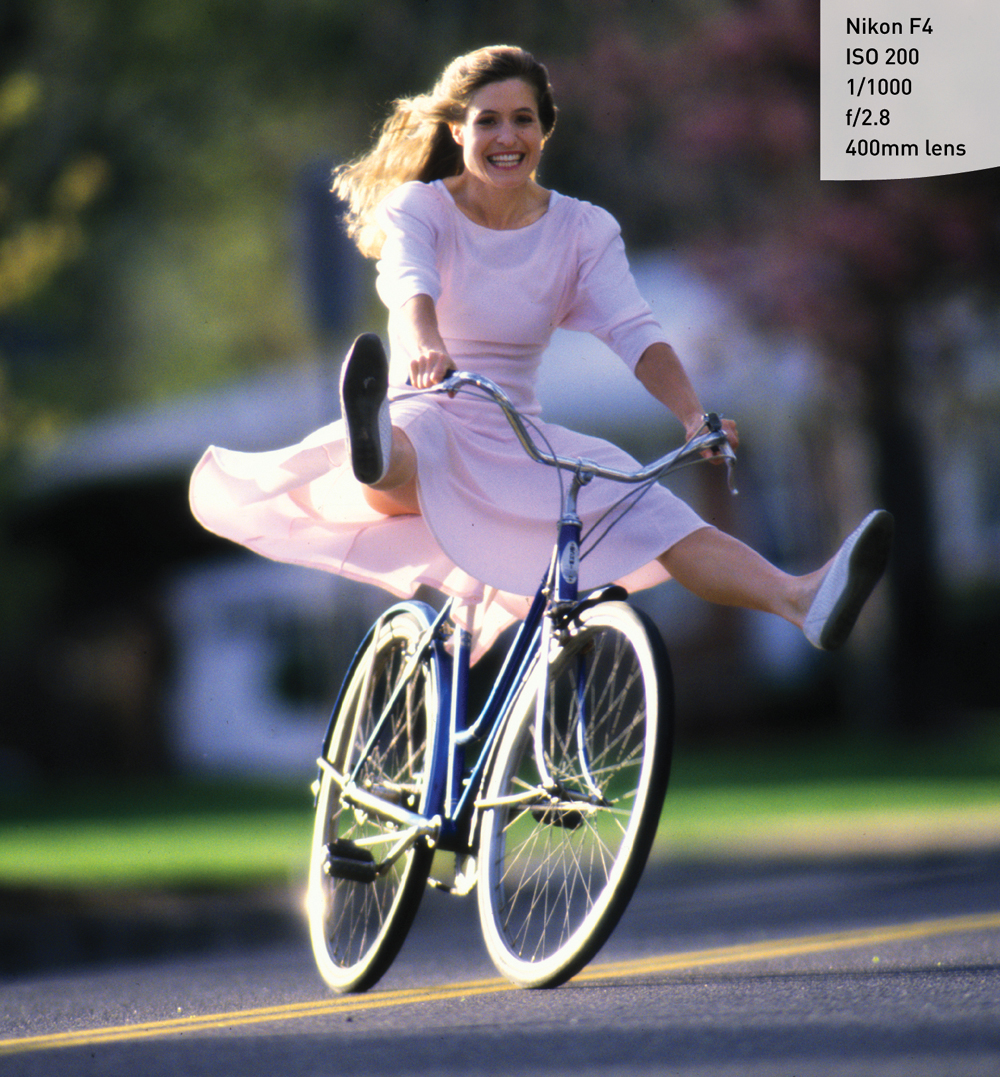
For an Olympic preview story, I traveled to Colorado Springs to photograph Rebecca Twigg, a six time world track cycling champion and Olympic medalist. She is an incredibly fit, strong, and tough athlete. So tough in fact that she won a world championship with a broken collarbone. For this feature, I chose to photograph her in a pink dress on a low-tech, old-school bicycle to emphasis her upbeat personality and happy demeanor (Figure 2.12).
Chapter 2 Assignments
The following assignments will help you gain technical control of your camera.
White Balance and Mixed Light
Find a game being played under artificial light. Set your white balance on automatic, and then try each of the other white balance settings. Compare the results. Look especially at how the different white balance settings affect skin tones.
Distance and Depth of Field
Take a portrait of someone who will cooperate with you and let you take your time making photographs. You will need that person to stay relatively still so you can make accurate comparisons. Take one portrait two feet away from your subject and one from ten feet away. Make sure your camera settings are the same for both portraits. Look at the difference your proximity to the subject makes on depth of field. Using a person as the subject has the added bonus of seeing what effect depth of field has on people; it’s important to not distort or overly compress a person’s features.
Repeat the exercise on an inanimate object. This time take five pictures from two feet away using different aperture settings, from the widest to the narrowest aperture your lens allows. Then do the same thing from ten feet away. Compare the differences.
Being able to know how to use depth of field to predict what will be in focus in your compositions is a major part of being able to control your photographic vision.
Practice Panning
Stand safely on the side of a road where traffic is constantly flowing. Practice panning at different speeds as the cars pass by you. Pay attention to the different effects you get by changing the speed at which you pan the camera. Making smooth pans is a combination of keeping the camera/lens moving at a constant speed and level. If you have a tripod with a head that allows panning, try doing the pan on the tripod, and then try panning using a handheld method. Compare the differences.
Share your results with the book’s Flickr group!
Join the group here: flickr.com/groups/sportsphotographyfromsnapshotstogreatshots.