
11. Golf and Tennis
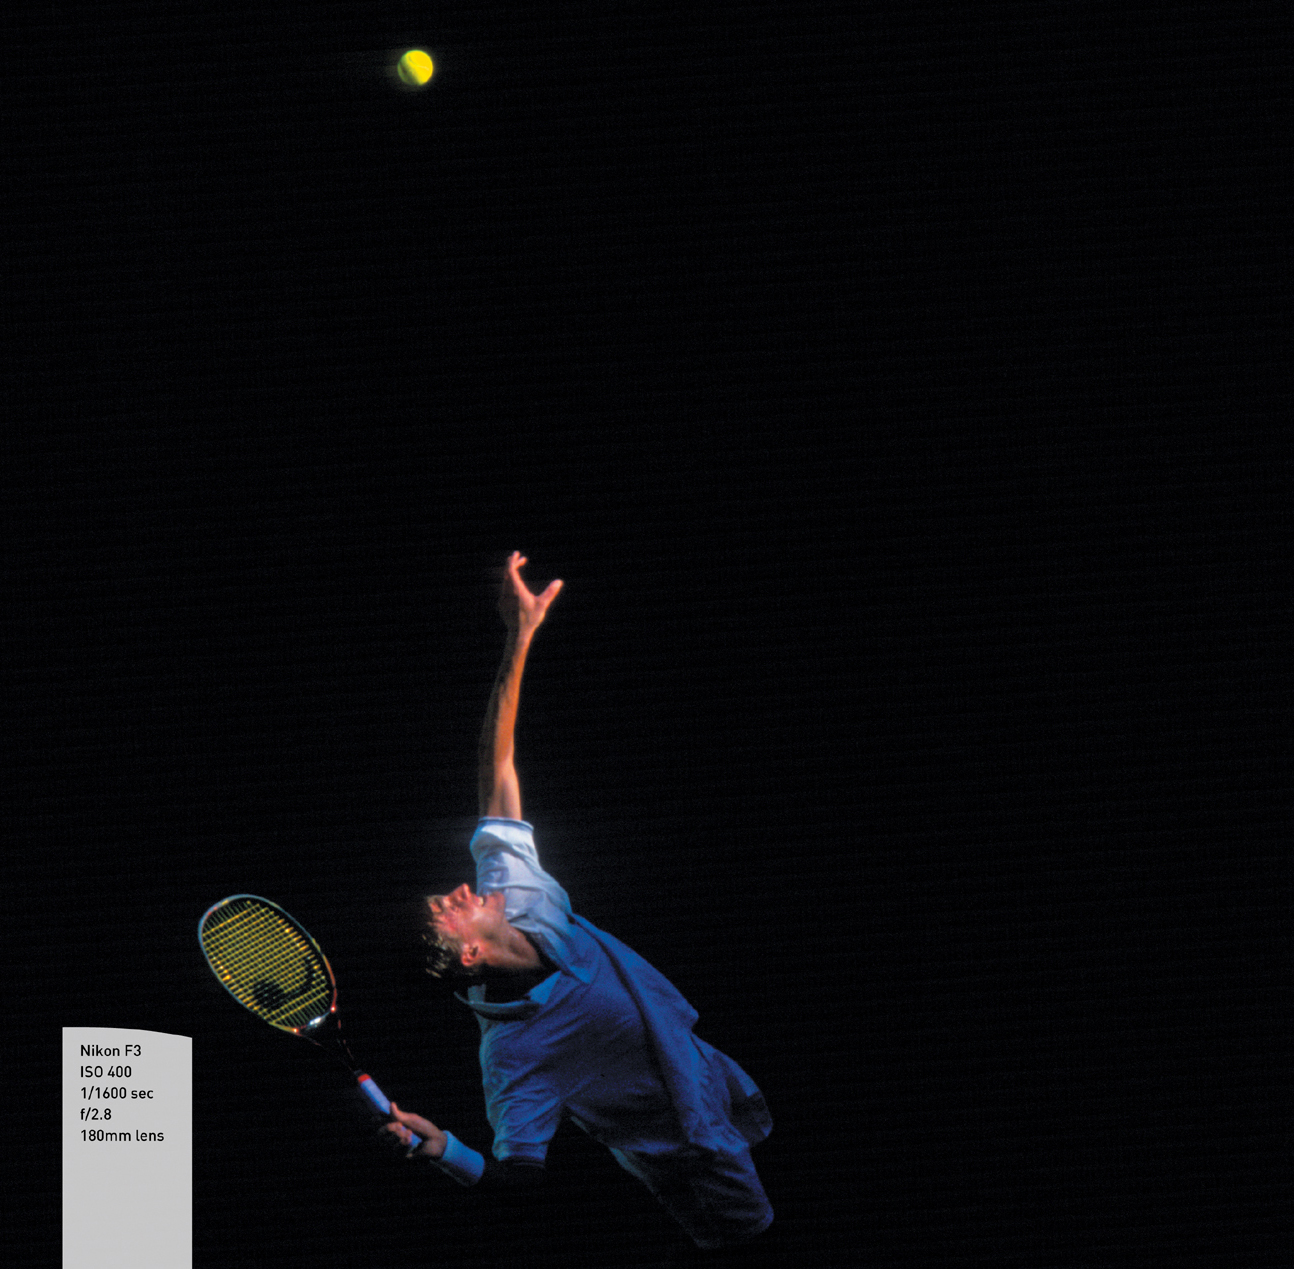
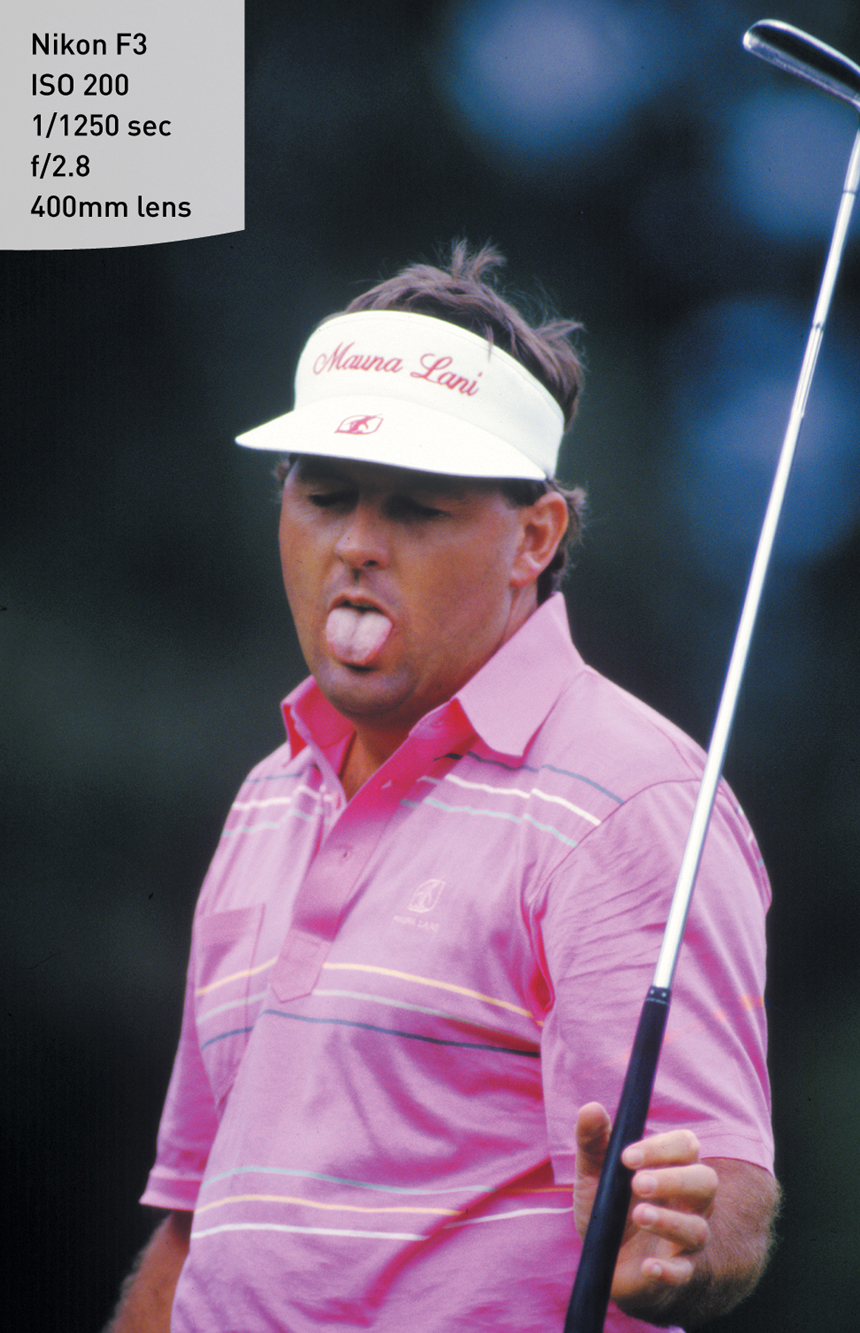
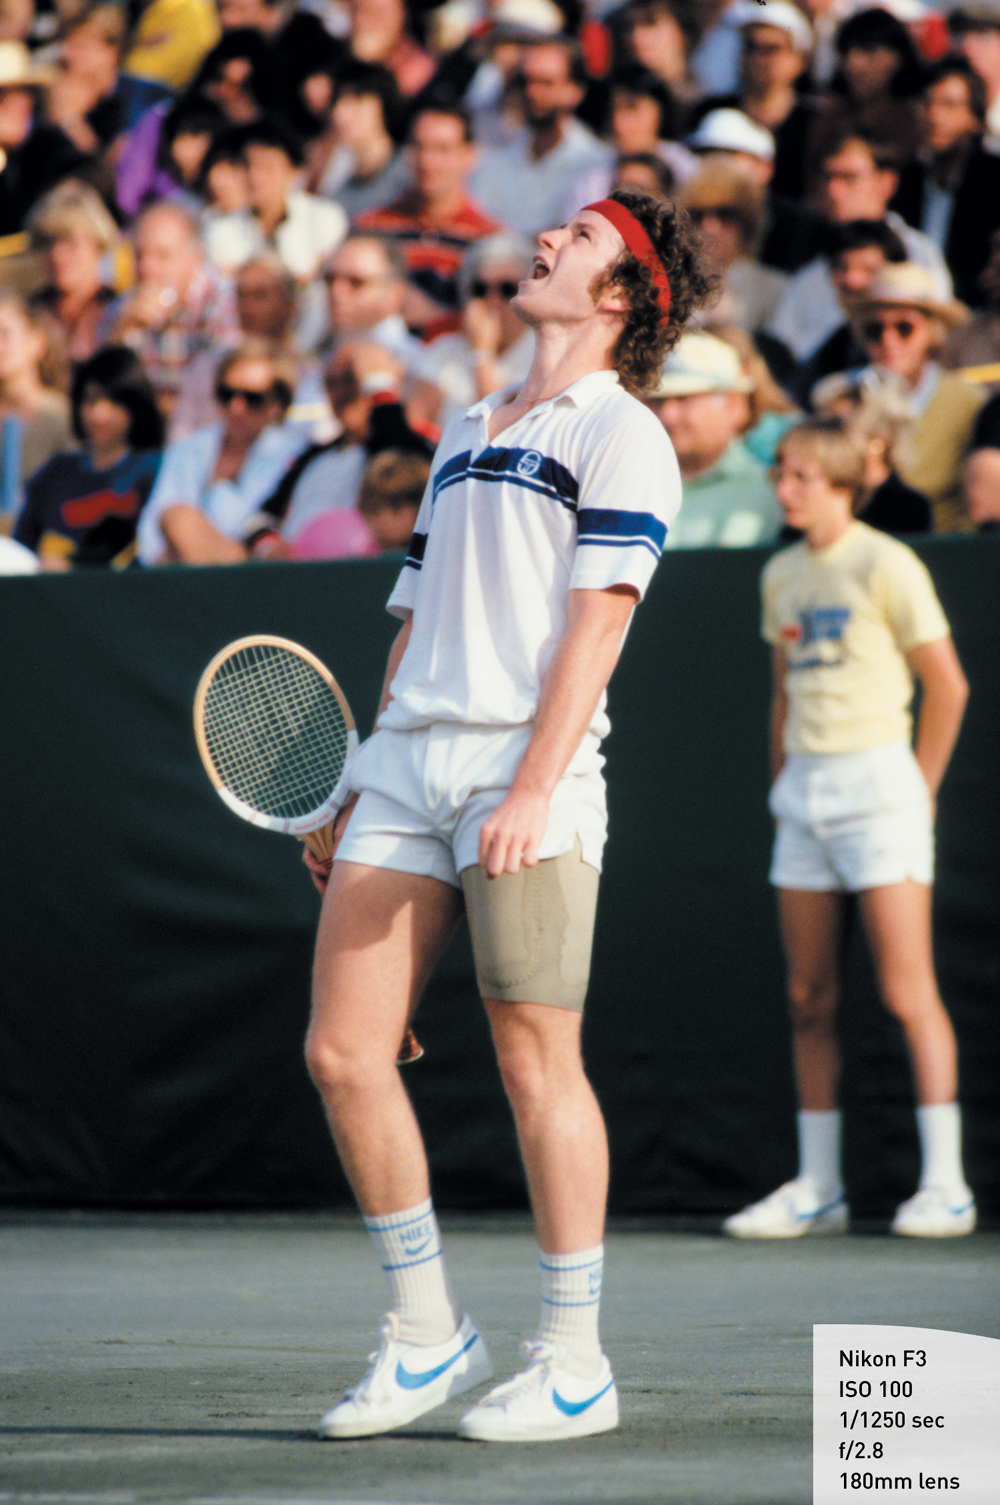
Shooting from an elevated position allowed me to capture this athlete with only the court behind him. Because this image was shot at sunset, I was able to expose so that he would pop out of the background.
The Silent Sports
Golf and tennis are hugely popular, especially as leisurely or amateur sports. For the most part, they are played during the day in beautiful areas. Therefore, shooting these sports is very different than shooting other sports. Golf is played on a wide open field; tennis is played on an enclosed court.
In this chapter I’ll discuss how to cover each sport to make great shots.
Poring Over the Picture
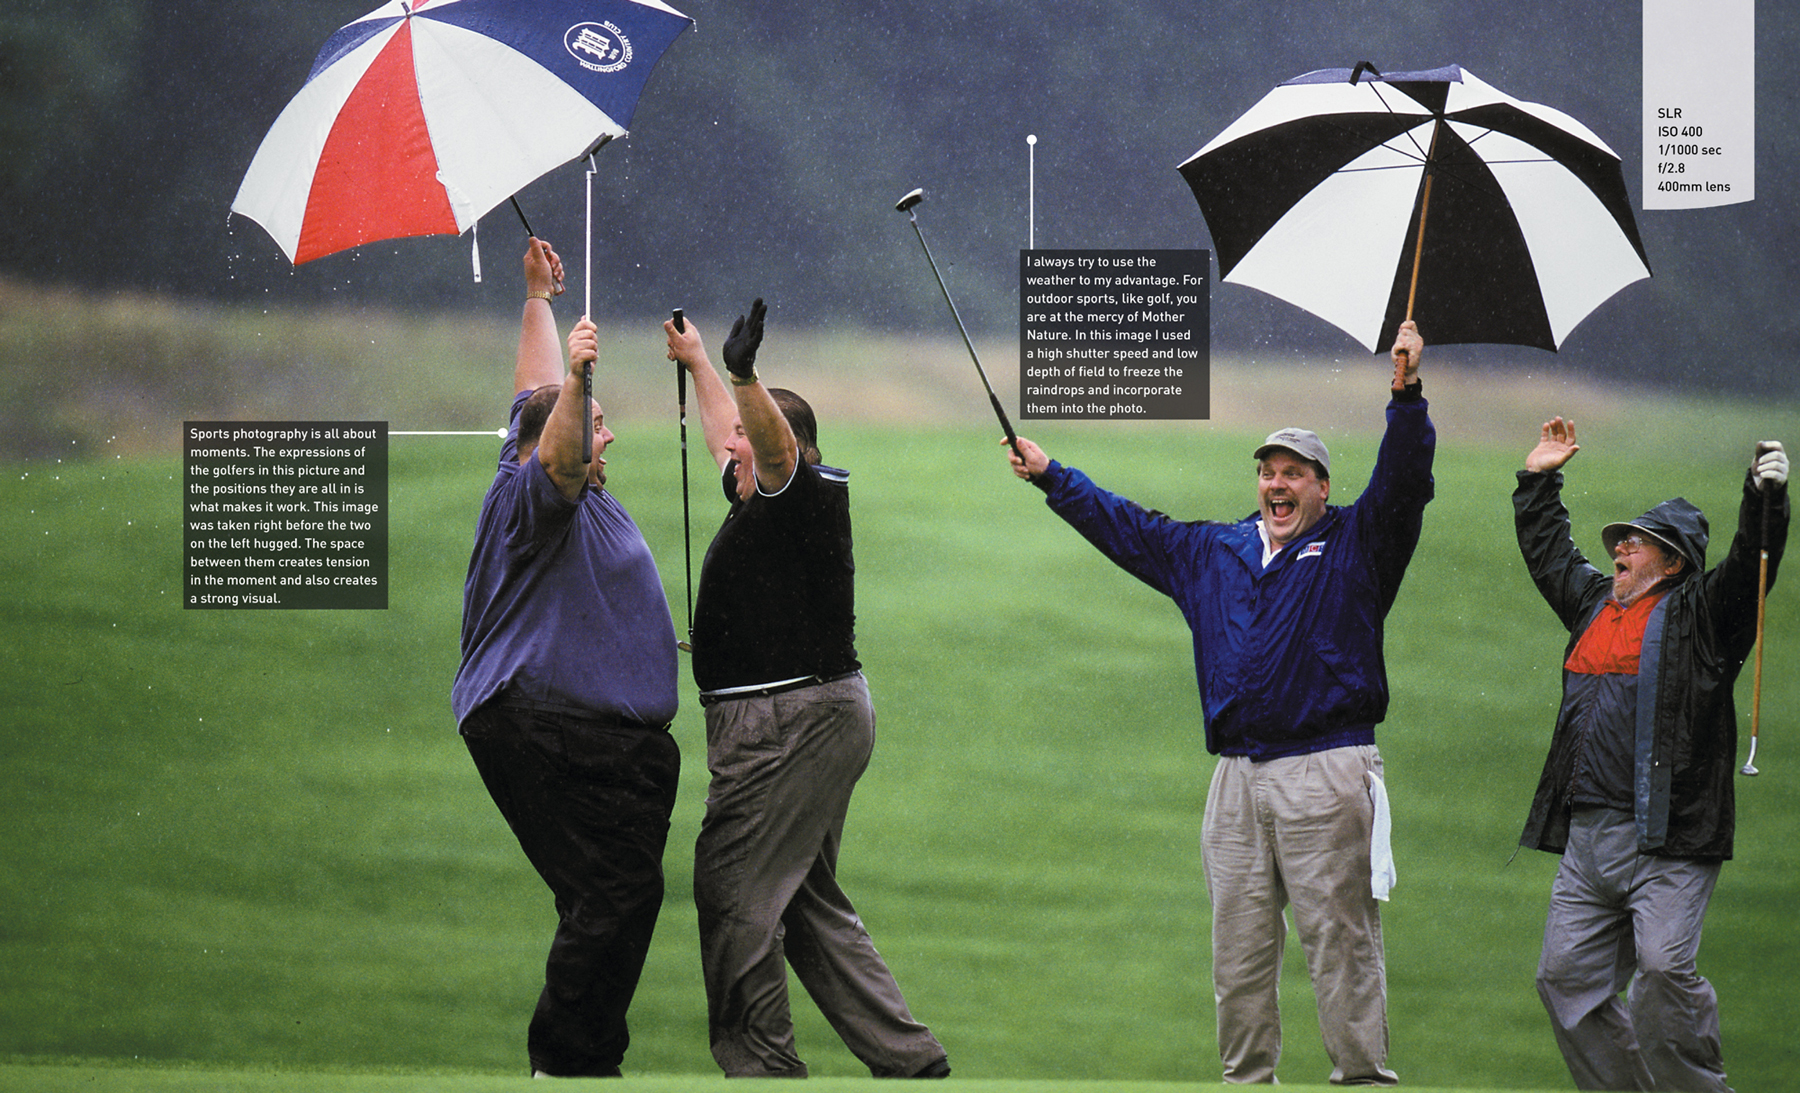
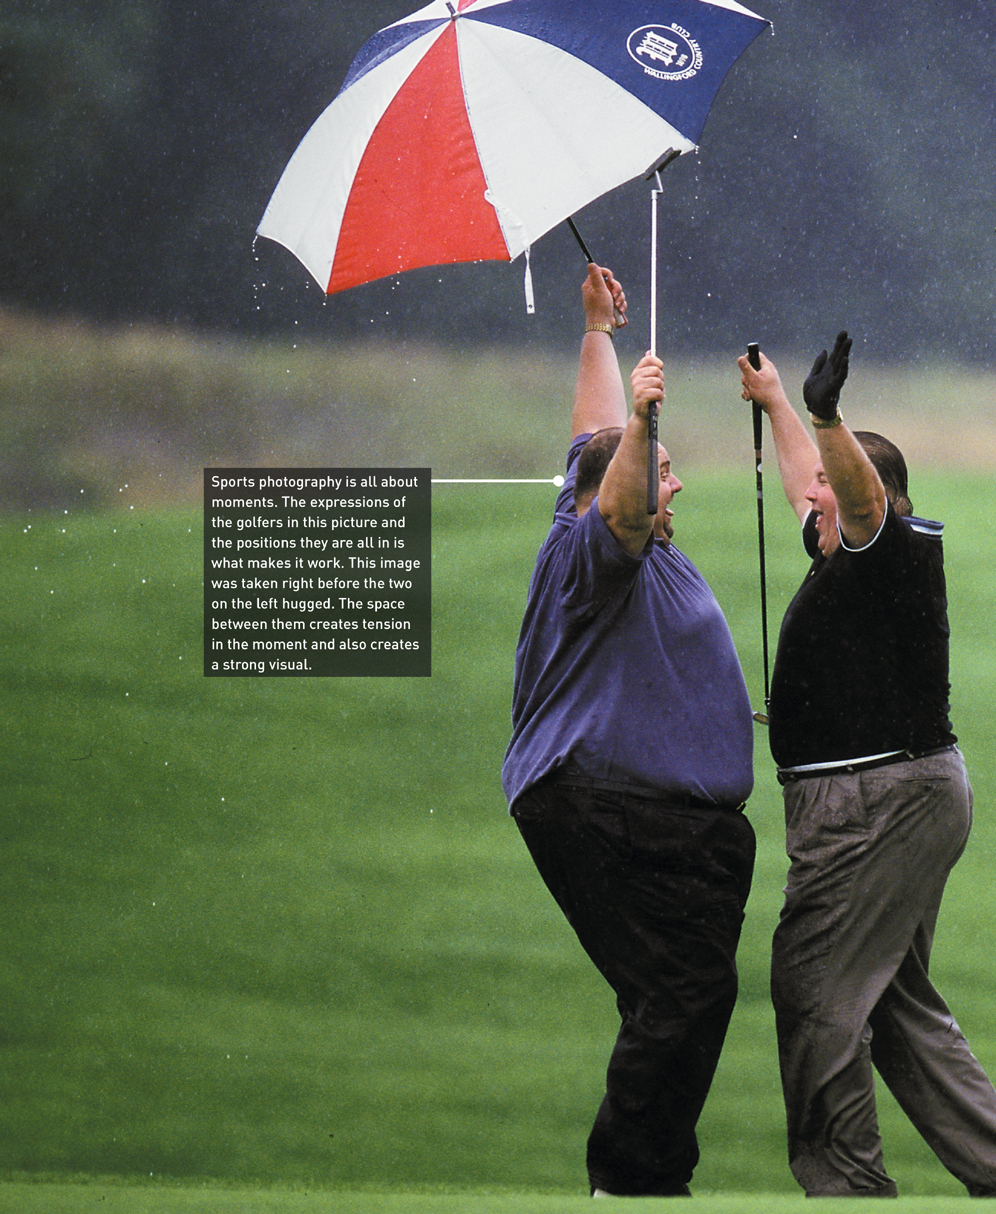
Golf tournaments are fun to cover on an amateur and professional level. In fact, sometimes the amateurs are more fun to watch and shoot. This image was taken at the Fatty Golf Tournament at Yale. The tournament is held to help fund obesity research, and all contestants in the tournament must weigh over 250 pounds.

Golf: A Nice Long Walk
Golf likely enjoys the largest fields of play of any sport. This makes finding good angles relatively easy. On the other hand, it is important not to disturb the golfers, so never shoot during a golfer’s backswing, and stay out of their direct field of vision.
Almost by definition, golf courses are lovely. They are like giant, well-kept parks where the game is played.
Because golf is played all day long in a wide range of weather conditions, it’s important to be prepared for long walks in weather good and bad. I never know what kind of conditions I’ll find, but I always try to make the best of whatever the weather offers me.
Tip
Covering golf means long walks. So wear good shoes, carry only the equipment you need, and take water with you.
Where to Position Yourself
To stay well away from the golfers, the longer the lens you can use the better. Wide angles are of course effective when you want to show the scenic nature of the surroundings, but again, you have to remember to be very conscious of any noise you make.
Tip
Don’t be afraid to shoot loose and include the grounds. Golf is a scenic sport, and the environment is important.
The object of the game of golf is to cover the course hitting the ball as few times as possible while still finishing each hole (Figure 11.1). Golf is a game of precision, not speed.
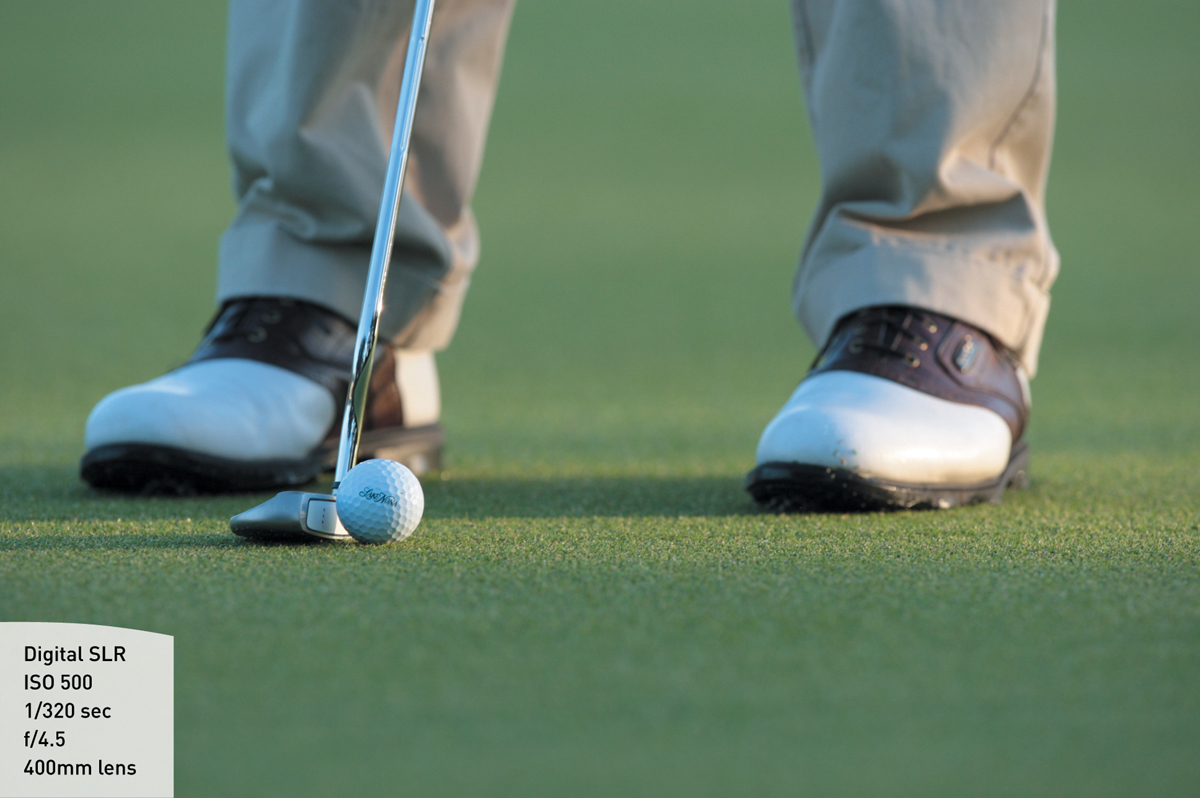
Figure 11.1 I like to make detail shots—close-ups of certain elements of the game—throughout the course of a round or tournament.
Tip
On important putts stay focused on the golfer. The reaction will come after the ball drops into the cup, or misses.
Gear
I use two cameras and three lenses when I cover golf. To show the beauty of the course while play is going on, I like to carry a very wide-angle lens. When the players are on the green and I can approach, discreetly, while they are putting, I use a medium zoom. To photograph golfers on the fairway and while they are hitting drives, it’s very important to use a long telephoto. When I’m working on tour events, I’ll often use a camera blimp to deaden the sound so I can shoot without bothering the players.
You can also make good images with a normal lens or a short zoom. Position yourself out of the golfer’s sight line, and shoot only after contact is made with the ball.
Here is the equipment I use to shoot golf:
• 2 Nikon D4 cameras
• 14–24 f/2.8 lens
• 24–120 f/4 lens
• 600 f/4 lens
• TC 1.4x teleconverter
Settings
Golf is played outdoors and is almost always played during the day. To stop the movement of the ball when it is hit, it’s best to use a shutter speed of 1/2000 of a second or higher.
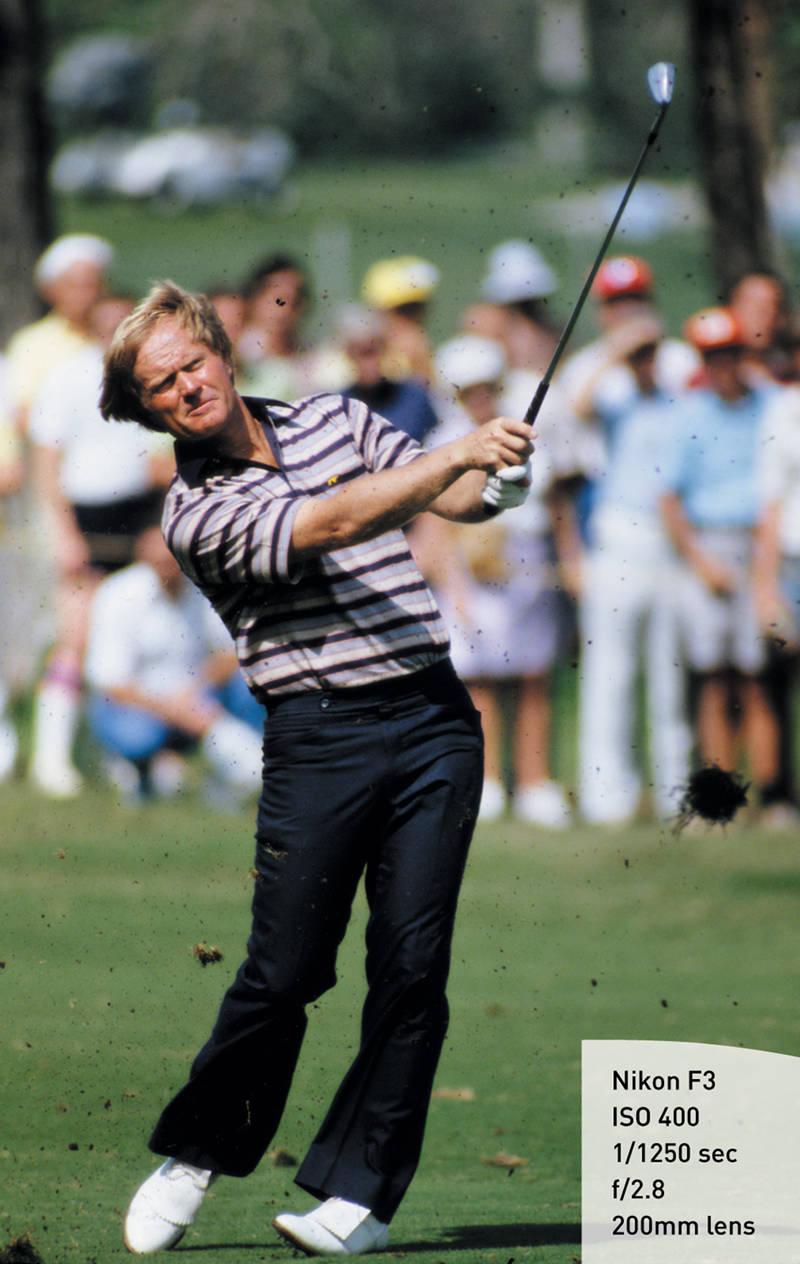
When you’re isolating a golfer, you should use the maximum aperture to decrease depth of field. For example, by shooting at a low depth of field and a high shutter speed in Figure 11.2, I was able to isolate Jack Nicklaus from the background and freeze the dirt as it flew around him.
But when you’re using a wide-angle lens to do an overall, scenic image, more depth of field is desirable to increase sharpness and add interest to the image.
Tennis: Net Gain
In tennis, each player uses a racket to hit a rubber ball covered with felt over a net and safely into the opponent’s court. The goal of the game is to place the ball where it cannot be returned by your opponent.
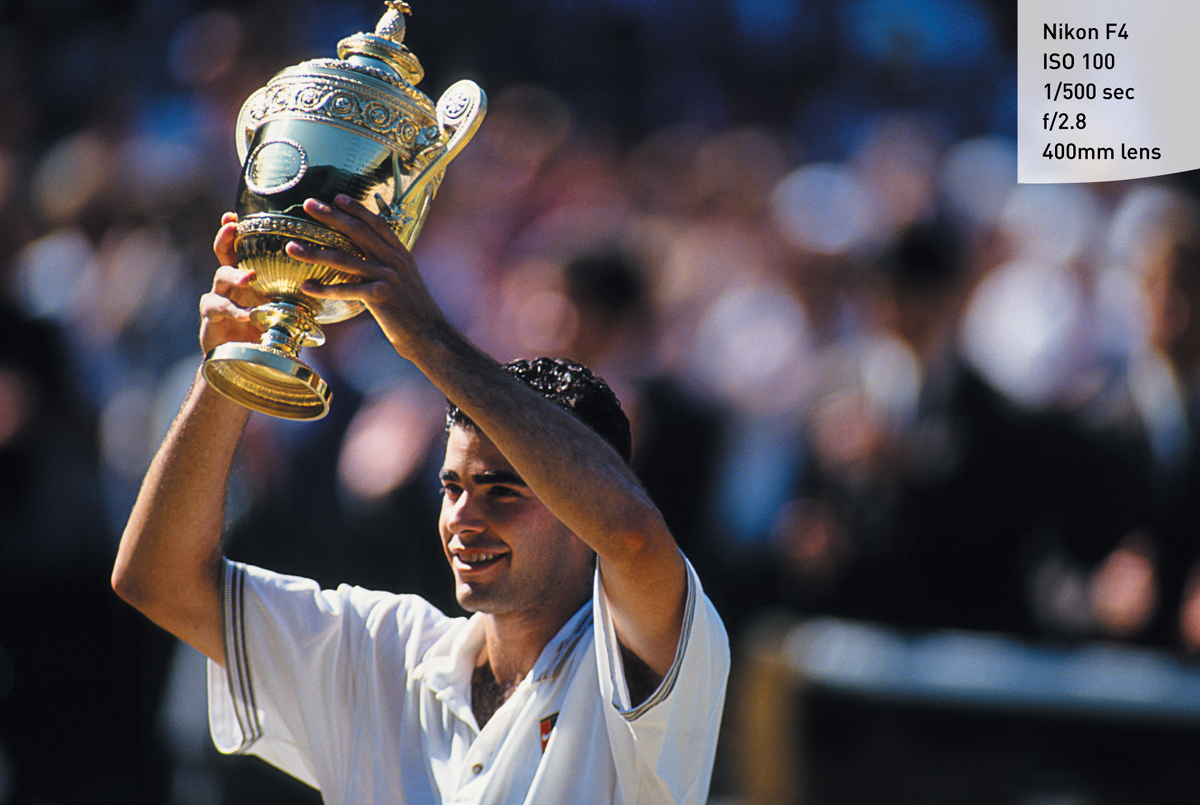
Pete Sampras sums up the game best: “It’s one on one out there man. There’s no hiding. I can’t pass the ball” (Figure 11.3).
Where to Position Yourself
Tennis is played both indoors and outdoors during the day and under lights at night. In addition, the action takes place all over the court, so it’s important to get a sense of how the players in the match play the game.
Good places to shoot will be along the sides and ends of the court. Usually, you don’t want to be on the same side of the court where the players sit during breaks. You can change positions when the players change ends of the court.
Tennis is a game of acute angles—for the players and also for photographers covering the action. It’s important to keep the ball in the picture as much as possible, and that means you need impeccable timing. It’s critical to compose and focus before the ball hits the racket. That way you are ready to shoot in the split second the ball is in the frame.
Tip
Use manual focus when you’re shooting through the net. If you use auto-focus the camera will not know what element you want to focus on and will likely as not select the net.
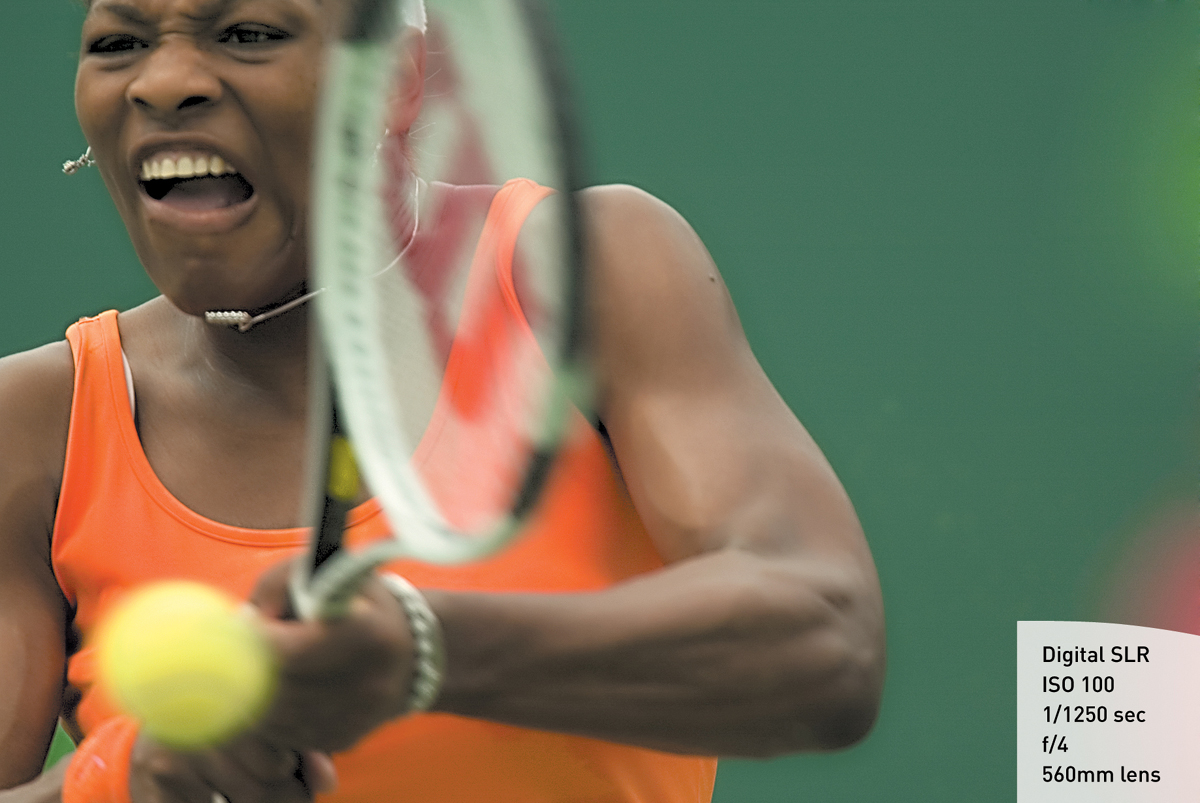
Serena Williams is one of the most powerful players in the game today. By shooting extremely tight on her at the moment of impact in Figure 11.4, I was able to show her strength and concentration as she attacked the ball.
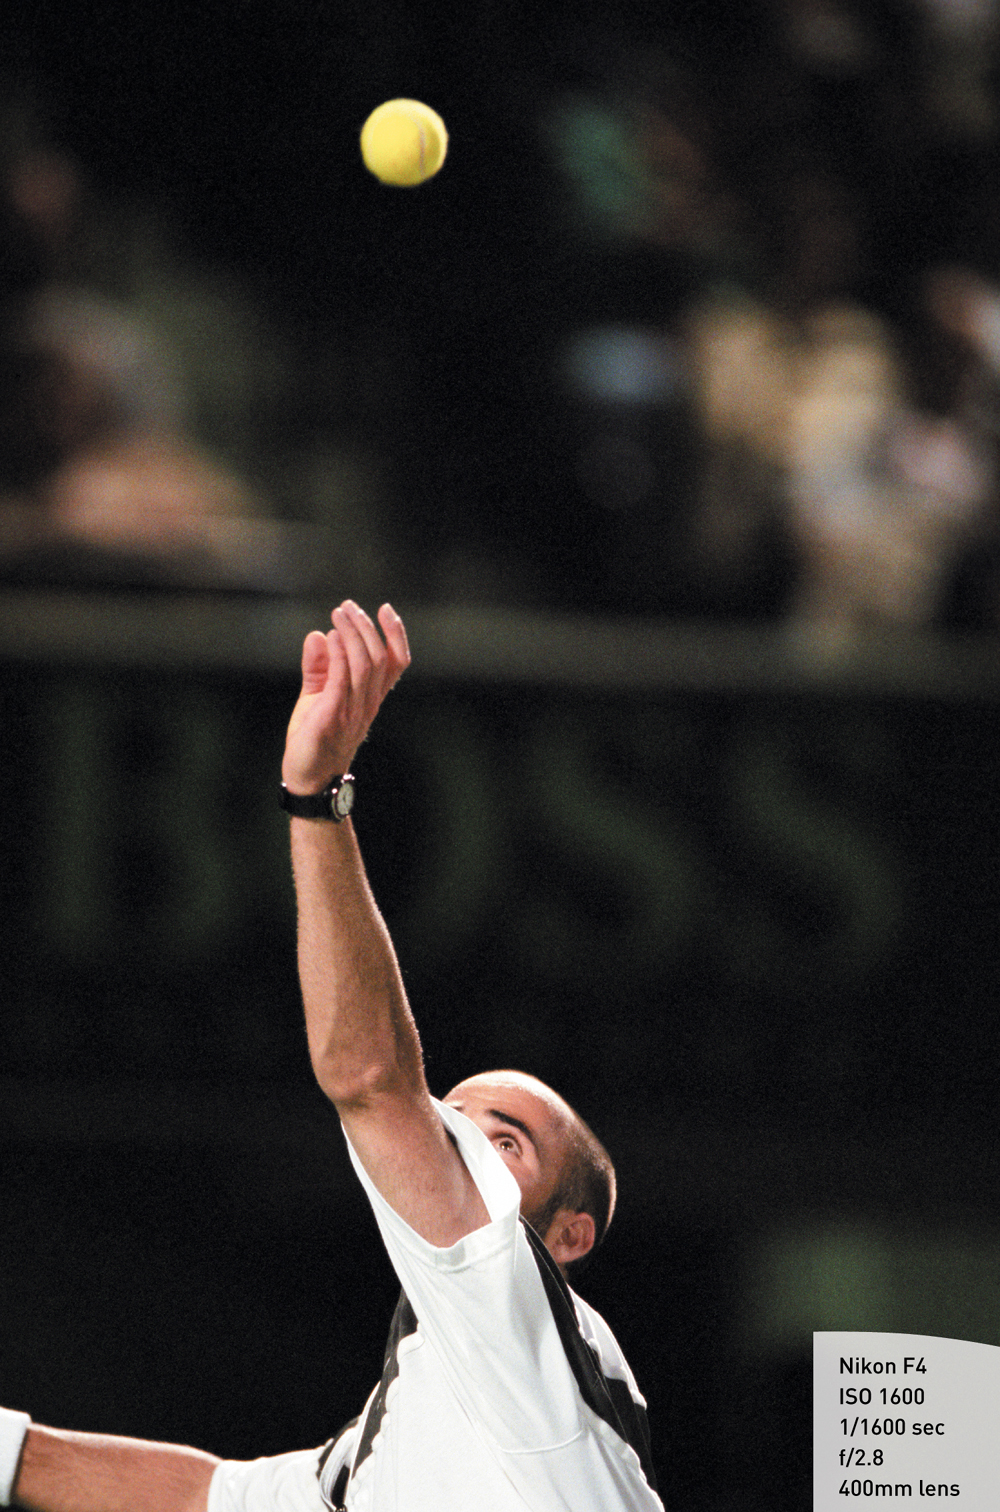
Andre Agassi was one of the game’s most dominant players. I went tight in Figure 11.5 to show his intensity.
Tip
Serves are good times to practice making images with the ball in the frame. Tennis moves very quickly, and it can be difficult to follow with precision when you first start covering it. However, it is important not to make much noise when the serve is happening.
Tennis courts are virtually all the same size. However, singles courts are slightly more narrow than doubles courts.
Clay, grass, and synthetic courts are all used as playing surfaces in the major championships. Which you will be shooting is important to know because it will not only determine the color of the light that is reflected back up into the players, but also because it will help regulate the speed at which the ball travels and how it bounces (Figure 11.6).
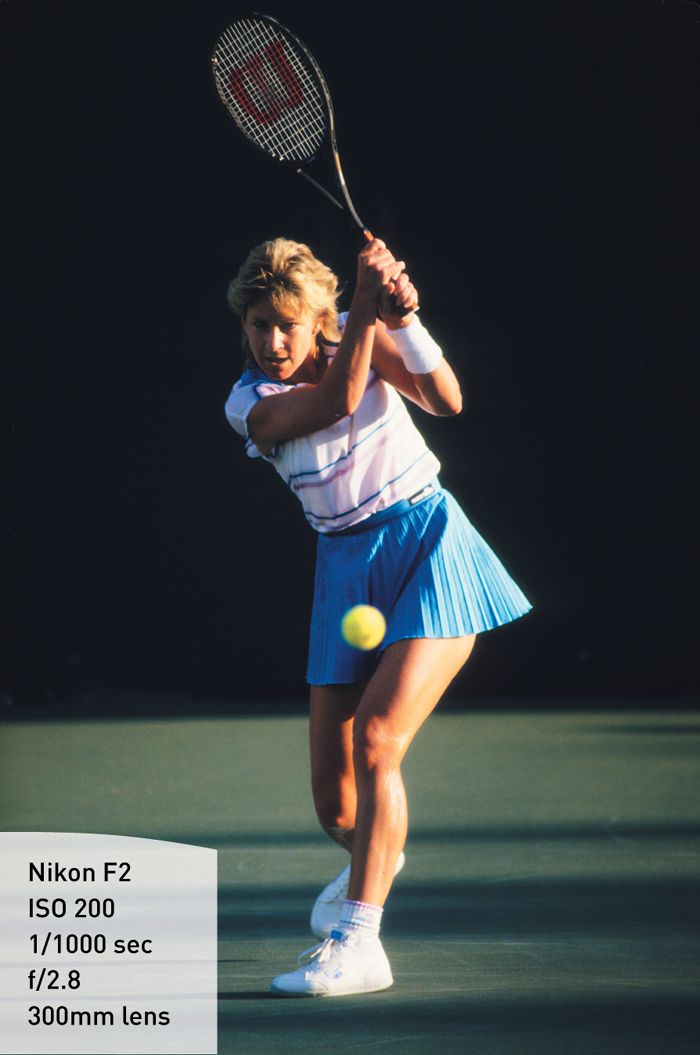
Figure 11.6 Chris Evert, winner of 18 Grand Slam events, shows the backhand shot she was famous for at the Lipton.
As with golf, it is essential not to make noise, especially when the players are serving (Figure 11.7).
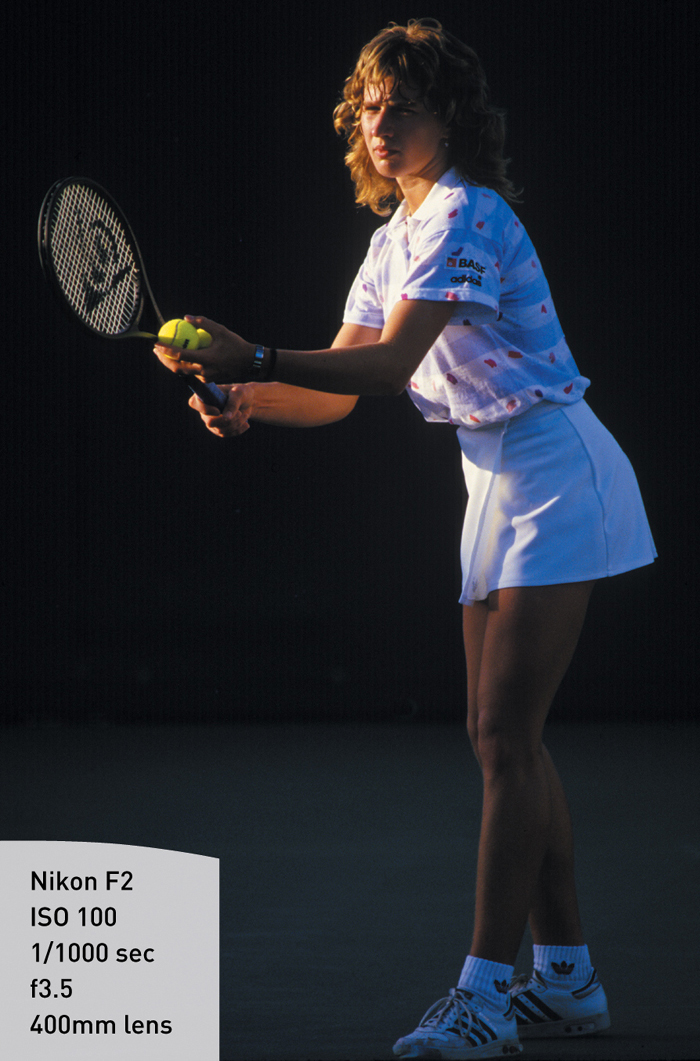
Figure 11.7 Taking advantage of strong cross lighting, I made this portrait of Steffi Graf, one of the greatest tennis players of all time.
Settings
The ball moves very quickly, as do the rackets. To freeze those actions, you need to use a fast shutter speed of at least 1/1600 of a second (Figure 11.8).
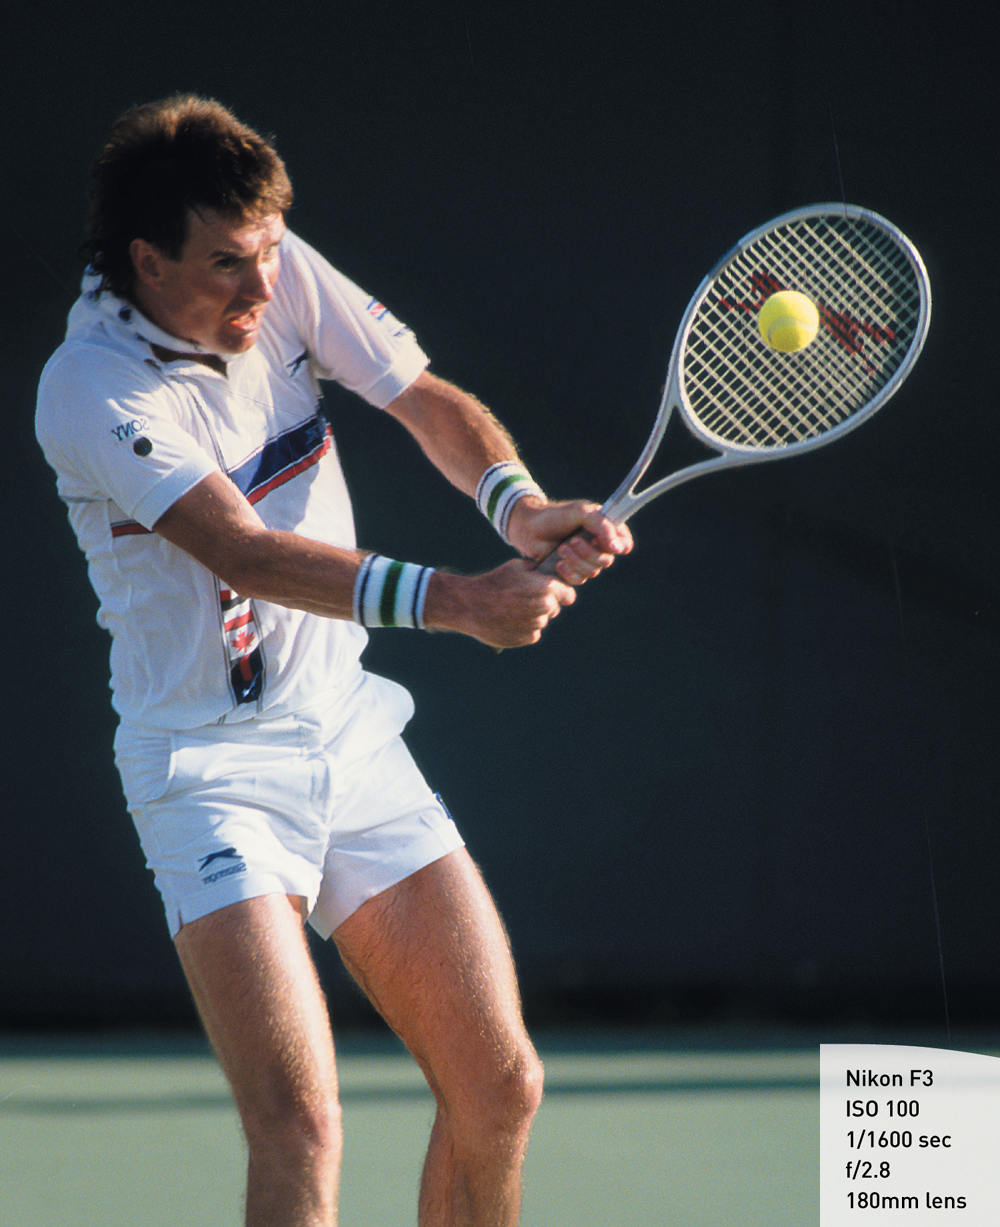
Figure 11.8 Tennis is very fast paced; therefore, high shutter speeds are imperative to stop the motion and capture crisp images.
Gear
This is the gear I normally take to a tennis match, but the most important piece of equipment is a telephoto lens:
• 3 Nikon D4 cameras
• 35 f/1.4 lens
• 200 f/2.0 lens
• v400 f/2.8 lens
Covering Moments Around the Action
As with the other sports discussed in this book, golf and tennis produce high-emotion moments, especially in the finals of big tournaments. The level and cause of a reaction varies greatly depending on the athlete (Figure 11.9).
John McEnroe was always one of my favorite players to cover. He would get upset over a bad bounce in practice. Photographing him in big tournaments always led to great reaction images (Figure 11.10).
In Figure 11.11 Conchita Martínez shows her reaction to becoming the first Spaniard to win Wimbledon, the world’s most prestigious tennis tournament.

Figure 11.11 Conchita Martínez is ecstatic after defeating nine time champion Martina Navratilova to win Wimbledon in 1994.
Chapter 11 Assignments
The goal for each of the following assignments is to practice timing your shots.
Anticipating the Peak Moment
Set your motor drive to single frame advance. Have someone bounce a tennis ball and try to capture the ball hitting the ground. Keep practicing until six times out of every ten bounces the ball is touching the ground in the photograph. This will help you learn to anticipate the peak moment.
Focusing and Composing for Movement
Go to a golf course putting green, but be careful not to disturb anyone who wants to practice putting. Take the longest lens you have and get as close to the ground as you can. Have someone roll a golf ball toward you. Practice focusing on the moving ball. Do this so that your composition is not in the center of the frame side-to-side and top to bottom but rather in a corner of the frame. You need to learn to focus and compose in this manner so that you can capture a player and the moving ball in the same frame while still filling the frame with your composition.
Timing the Hit
At the golf course, find someone who is on the driving range and ask if you can stand to the side and practice timing that person hitting drives. Do this until you can anticipate the moment of impact when the club strikes the ball. Then move slightly to the front, taking care not to be in harm’s way, and repeat the drill.
Share your results with the book’s Flickr group!
Join the group here: flickr.com/groups/sportsphotographyfromsnapshotstogreatshots.