
9. Summer Olympic Sports
From the Greeks to Now
The sports described in this chapter—beach volleyball, boxing, cycling, diving, horse competitions, gymnastics, table tennis, swimming, weightlifting, and wrestling—are all part of Olympic competition. However, they are not just played during the Olympics. Each sport has stand-alone meetings and is very popular in its own right. For purposes of discussion, I have grouped them together.
Many common threads exist between all of these sports, so I’ll start by explaining basic positioning and lens selection.
Poring Over the Picture

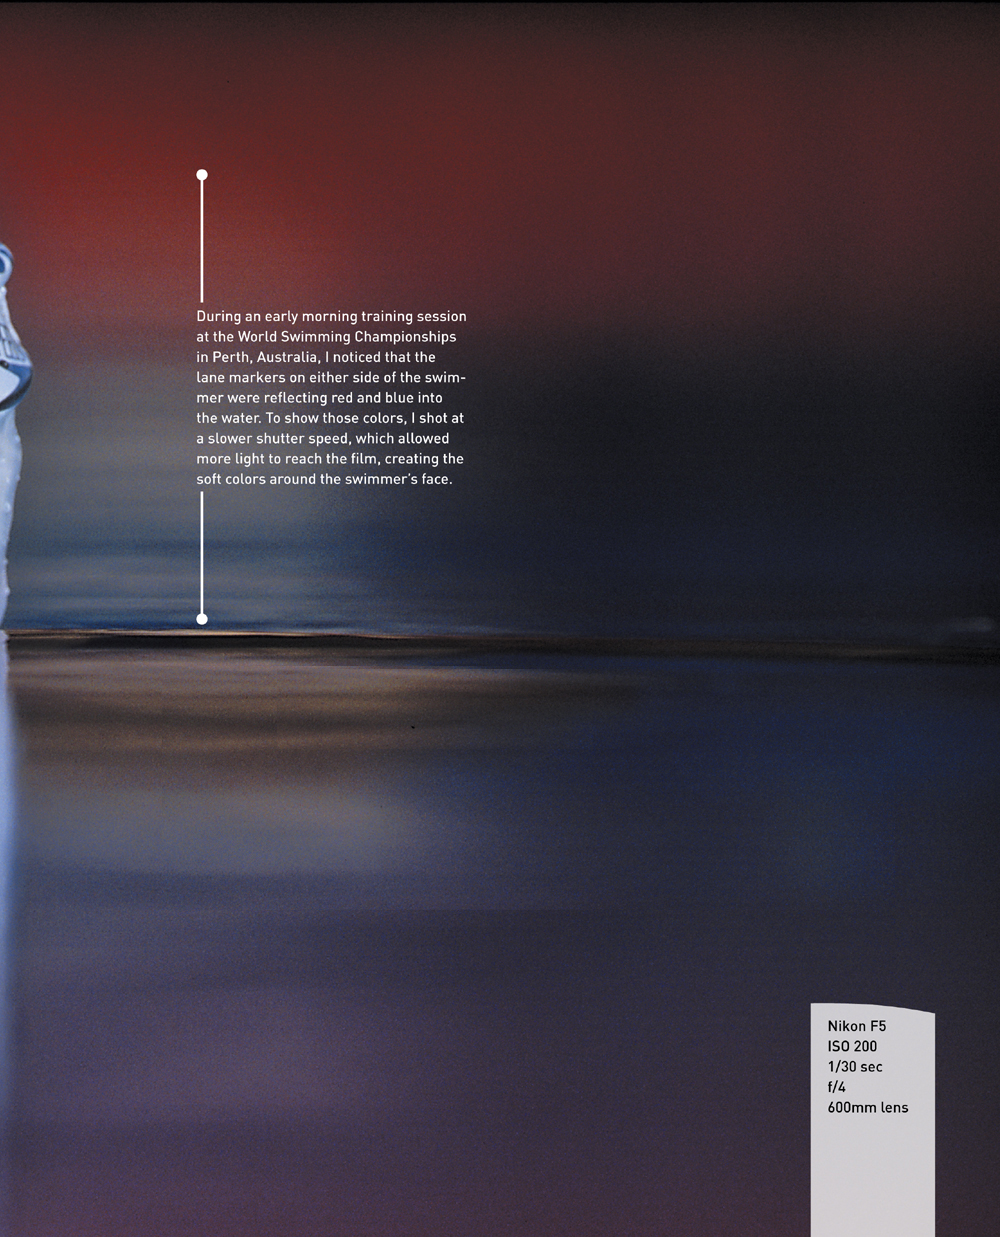
A swimmer surfaces during the 1998 World Swimming Championships in Perth. This image was taken during an early morning training session. The pool was still and the lane dividers reflected blue and red streaks in the water.
Where to Position Yourself
For each of the summer Olympic sports, the venues are wide open. There may be assigned shooting positions, but basically it is important to find a position where you have a clean background, an unblocked view, and are out of the way. Many times shooting from the stands will yield the best view of the action.
Lens Selection
The lens you have available to use may determine where you can work.
In all things context is king. If you want to make tight action images, you’ll need to be close enough to do that with the lens you are using. I am lucky to have a wide range of choices available to me now, so I figure out where I want to stand and then select the appropriate lens. That hasn’t always been the case. When I started, I had one lens, and I let my legs do the zooming. That’s still often the best solution.
The athletes competing in these summer sports don’t wear masks, which makes it easier to capture facial expressions, especially reaction shots.
Beach Volleyball: How to Get the Best Shots
Played outdoors on a sand court, beach volleyball offers abundant opportunities for action and feature images. The action takes place between two teams made up of two players each.
Matches normally consist of the best of three sets. During the first two sets, the players change ends after every seven points, and in the third set they change ends after every five points. This allows you to photograph both teams on offense and defense during each set.
A lot of celebrating goes on during most matches. Most of the time the athlete at the net will turn toward the player in the backcourt and either gesticulate strongly or hug his or her partner. This sport offers a wealth of emotion to capture (Figure 9.1).
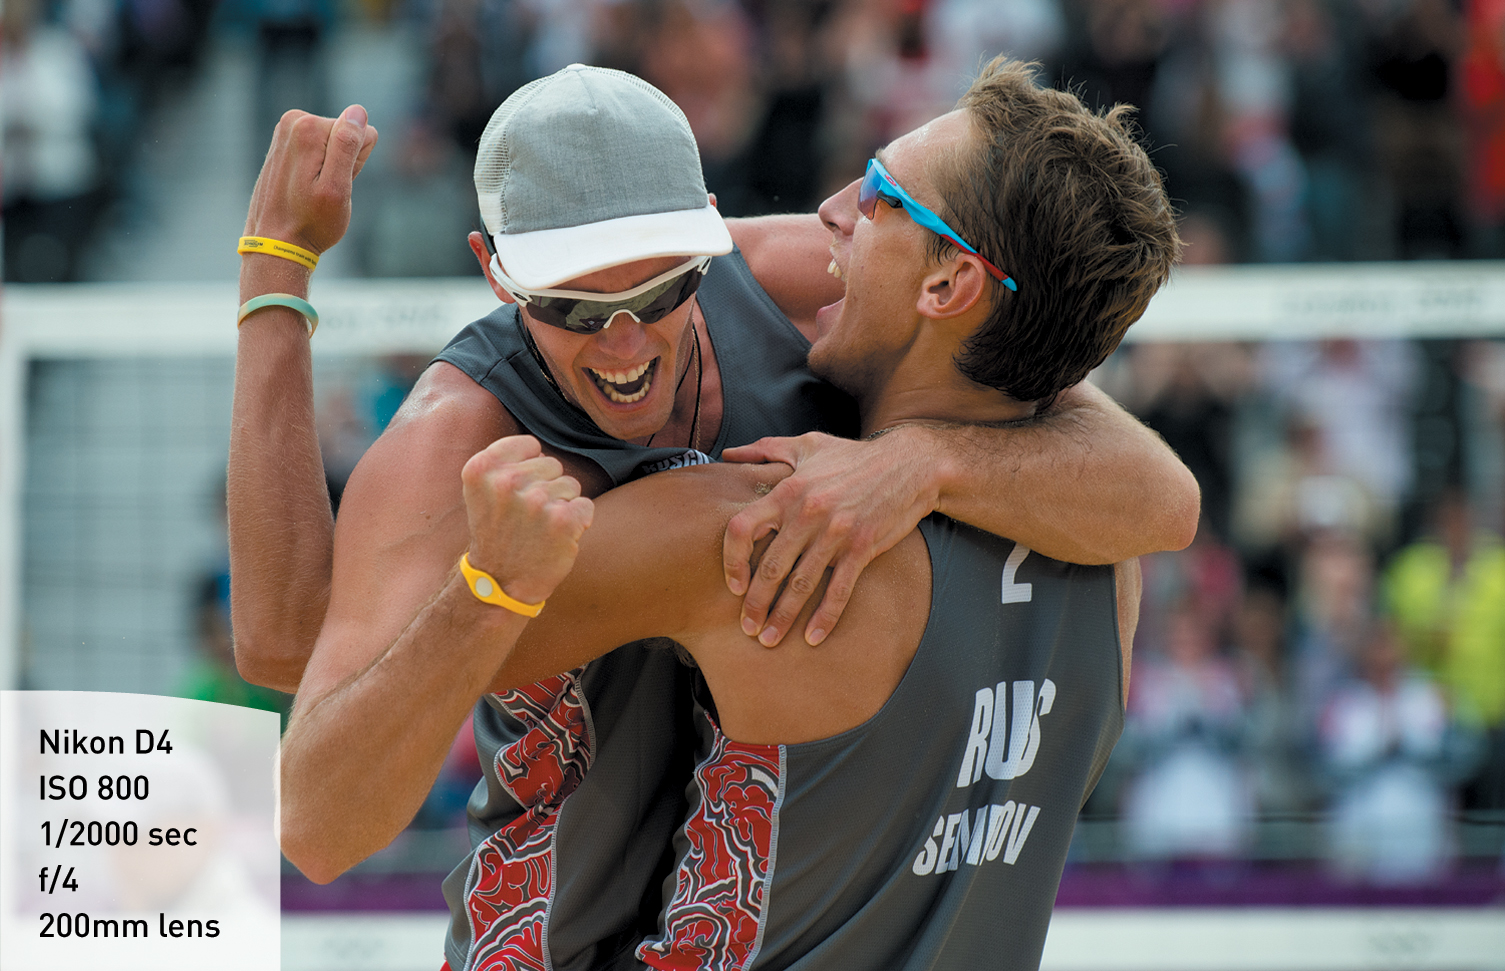
Figure 9.1 The Russian men’s beach volleyball team celebrates after beating China during the 2012 Olympic Games in London.
The players use a few basic skills: serving, digging, spiking, blocking, and attacking.
The court is divided by a net, and much of the action takes place within a few feet of the net, which makes it easy to track and anticipate what will happen (Figure 9.2).
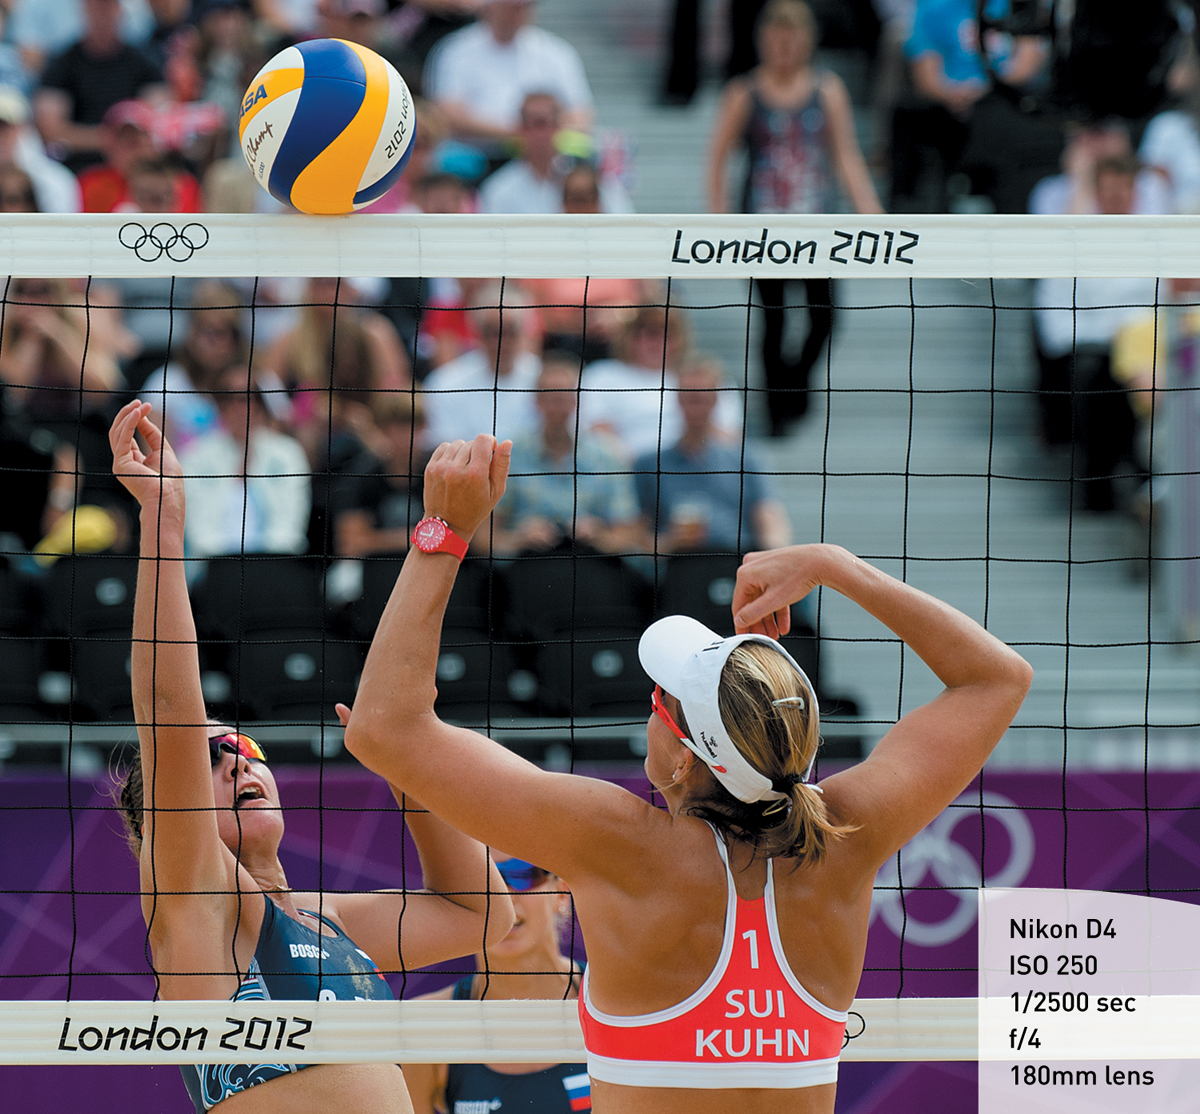
Figure 9.2 The women’s beach volleyball teams from Switzerland and Russia face off during the 2012 Olympic Games in London.
Access is normally very good. The entire baseline on both ends and the sides of the court all provide excellent shooting positions. If an overhead position is available and it is possible to shoot down on the action, the sand provides an interesting but simple background to make the action stand out.
The player at the net will signal the other partner in the backcourt to indicate which direction to move right before the ball is served (Figure 9.3). The act of signaling can make for a very nice detail image. When you’re positioned behind the serving team, paying attention to the signal allows you to know in advance how the serving team hopes the play will go. As a result, you’ll have the advantage of knowing where to focus and how to quickly compose your shot.
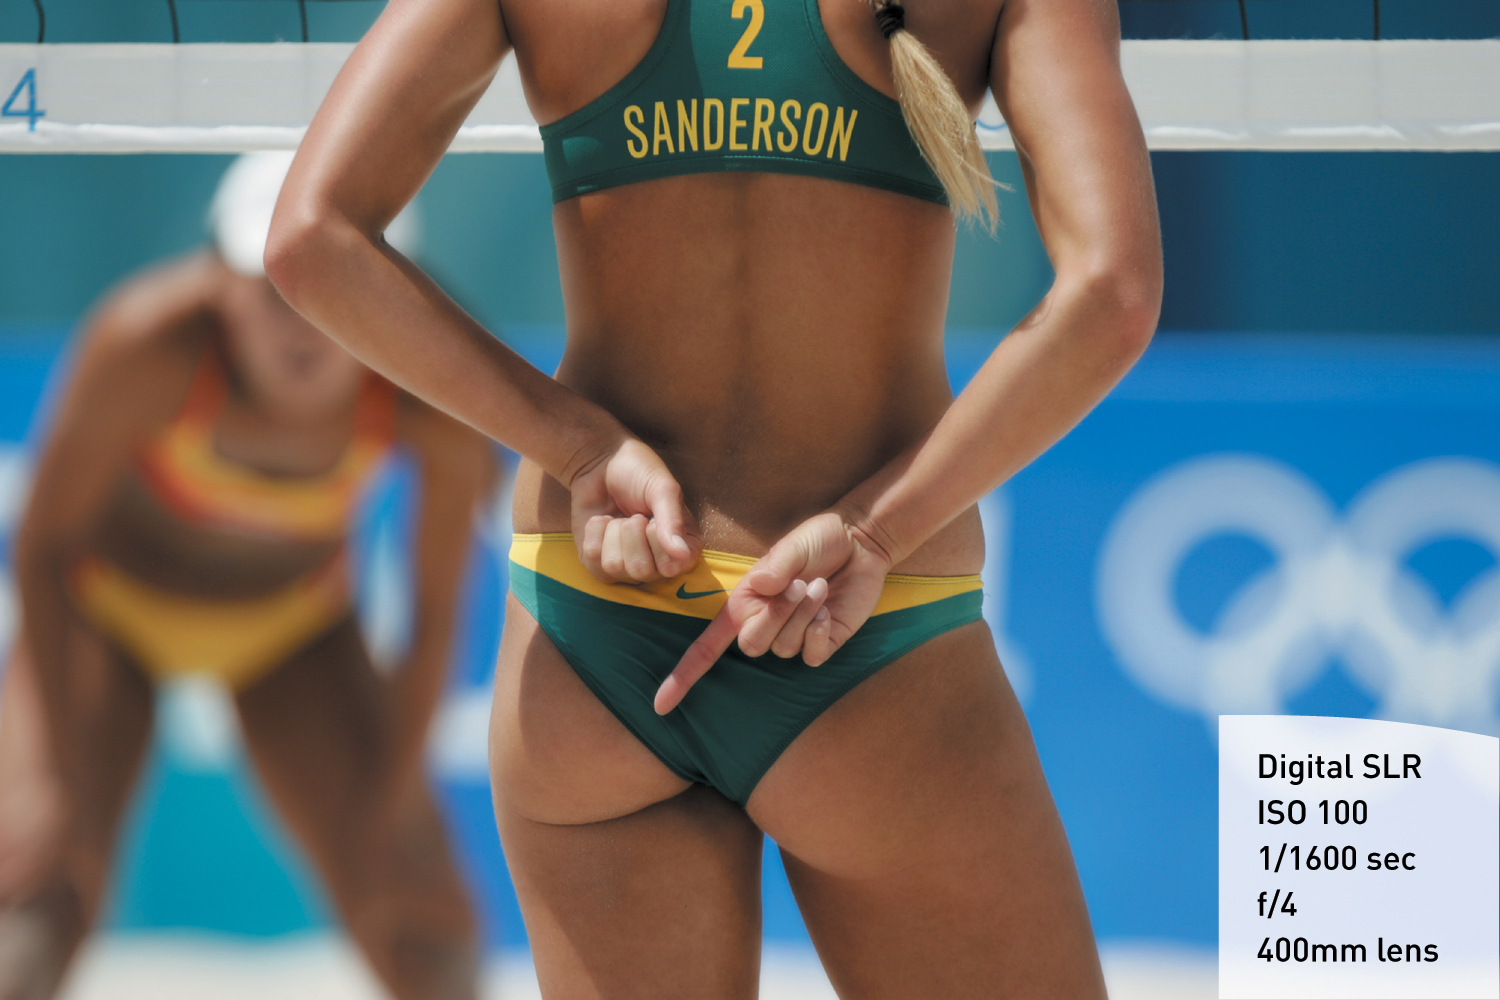
Figure 9.3 The Australian player at the net signals her teammate during the 2004 Olympic Games in Athens.
Following the return of the serve, the action sets up, most often at the net. The setter positions the ball so that the attacker can spike the ball. When the attacker comes to the net, the receiving team will attempt to block the ball. These head-to-head confrontations at the net are easy to shoot and make unfailingly good images. The other action that frequently happens when the players are at the net is that the attacker will lightly tap the ball—the action is called a dink—and attempt to tip the ball over the overstretched arms of the blocker.
Tip
Prefocus on the net when you know there is going to be a spike. It will help you react quickly because you won’t be searching for focus while you are trying to compose the image.
During day matches, the sand reflects a lot of light; it’s like having a giant reflector underneath the players. This does two things: It changes the direction of the light in a way not normally seen in action images, and it increases the quantity of the light available. The result is wonderfully lit images, which gives you the ability to use extremely fast shutter speeds at fairly low ISOs (Figure 9.4).
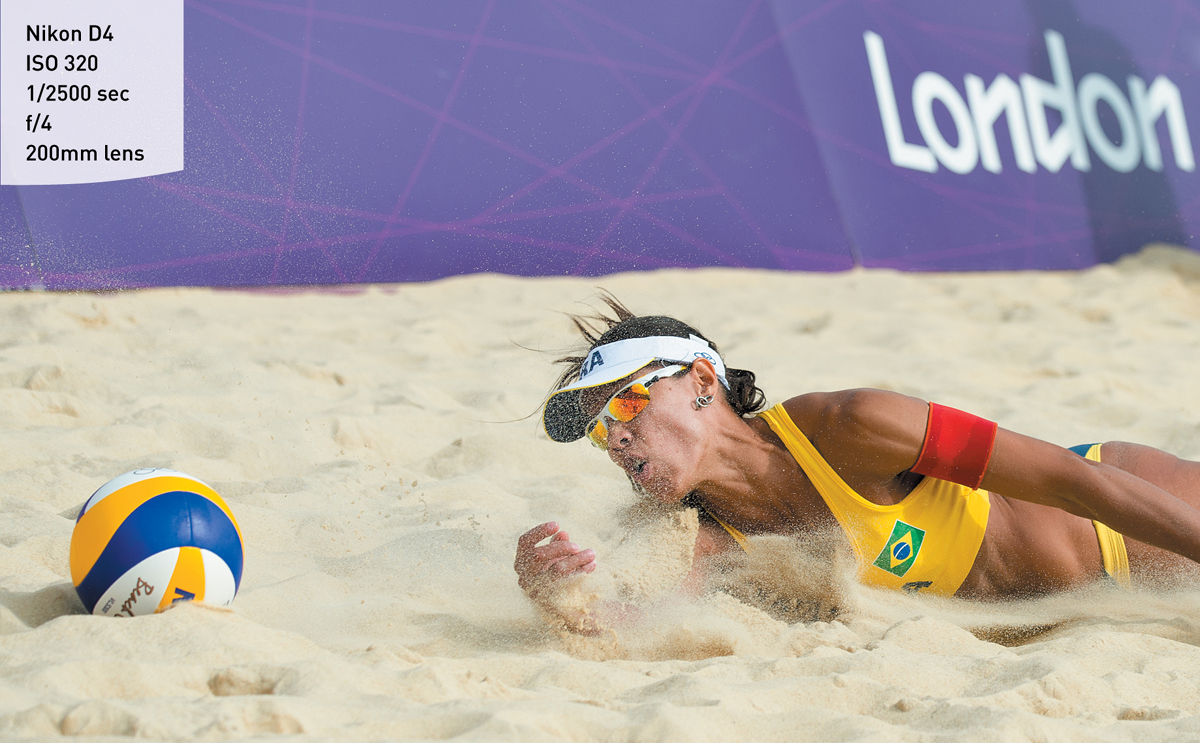
Figure 9.4 A player from Brazil dives for the ball during a match with Russia in the 2012 Olympic Games in London.
Deep blue skies, flying sand, and constant action make beach volleyball a terrific sport to photograph.
Boxing: How to Get the Best Shots
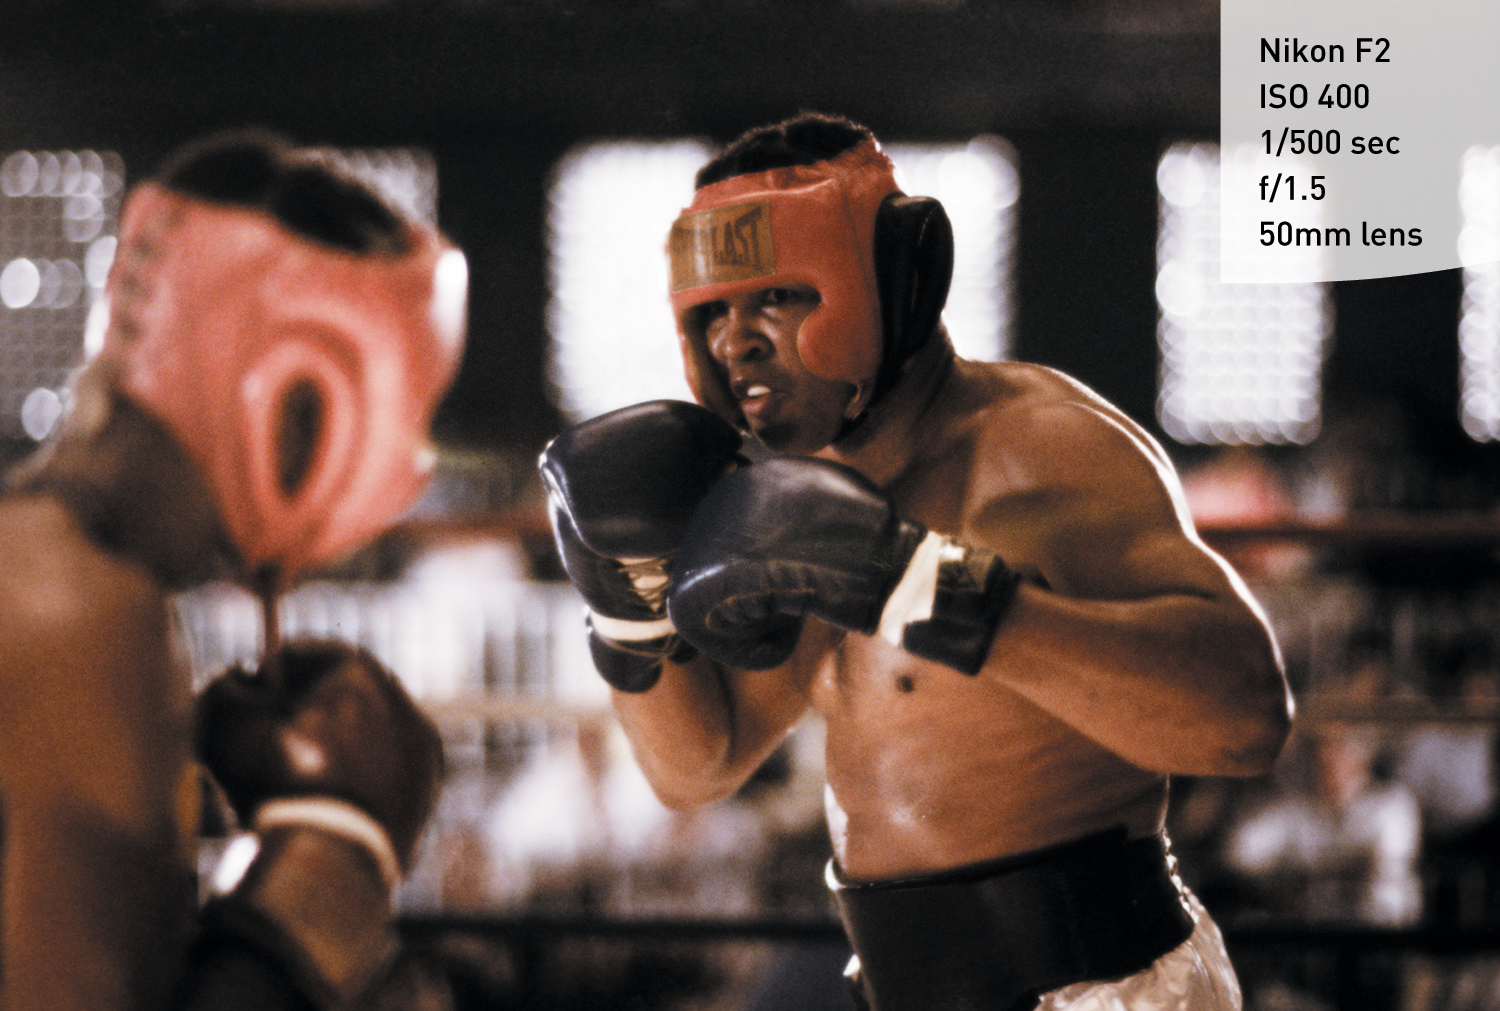
Often called the “sweet science,” boxing takes place in a ring where two athletes fight. The bout is decided when one fighter is ruled unable to proceed by a referee, quits, is disqualified for rule breaking, or is declared the winner based on the judges’ scorecards at the end of the fight (Figure 9.5).
From ringside positions, you’ll be shooting up at the fighters while they dance around the ring and throw punches. Wide-angle lenses work best here. A medium telephoto is important if you want to get in tight on the boxers’ faces between rounds while they are resting and receiving medical attention in their respective corners.
Slightly elevated positions allow you to shoot over the ropes that surround the ring. Don’t get so focused on the action that you ignore the scene. A wide angle from up high can be an important storytelling element, capturing the scene around as well as in the ring.
For capturing peak action, a very fast shutter speed is necessary. A minimum of 1/1600 is preferable.
Boxing is frequently lit “theatre style,” meaning the lights are concentrated on the ring, making it look like the scene is illuminated by a giant spotlight. This makes for dramatic images. The backlighting will help freeze the water droplets flying from the athletes when a punch is landed.
Tip
You will be working in a hunched over position most of the night, so dress appropriately.
Cycling: How to Get the Best Shots
Cycling, like many of the other Olympic sports, has a number of different divisions. The sport has been contested in every one of the modern Summer Olympic Games since 1896. The only other Olympic sports that have been in every Olympics are athletics, artistic gymnastics, fencing, and swimming.
Road cycling takes place on a course laid out over normal roads. Typically, the cyclists compete in two road cycling events: time trials, which are basically a sprint competition, and road races where cyclists compete in packs.
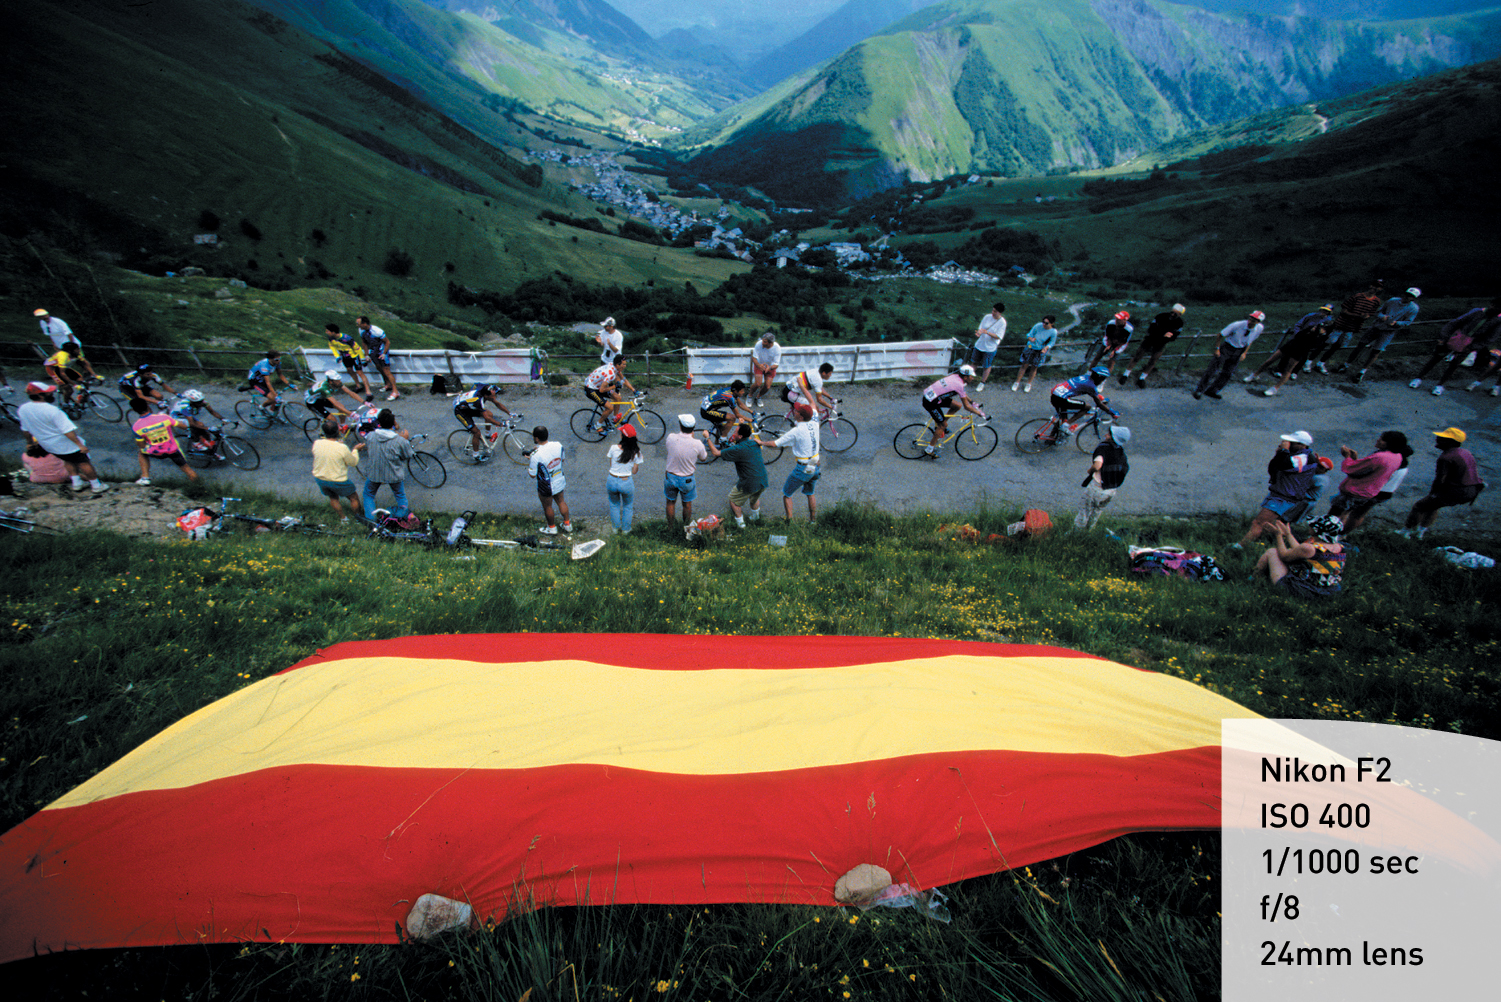
For road cycling races, I try to concentrate on two positions. One is a scenic location out on the course where I can place the racers in an environment that defines the race (Figure 9.6). After the pack has passed, I then move to the finish line to capture the winner crossing it.
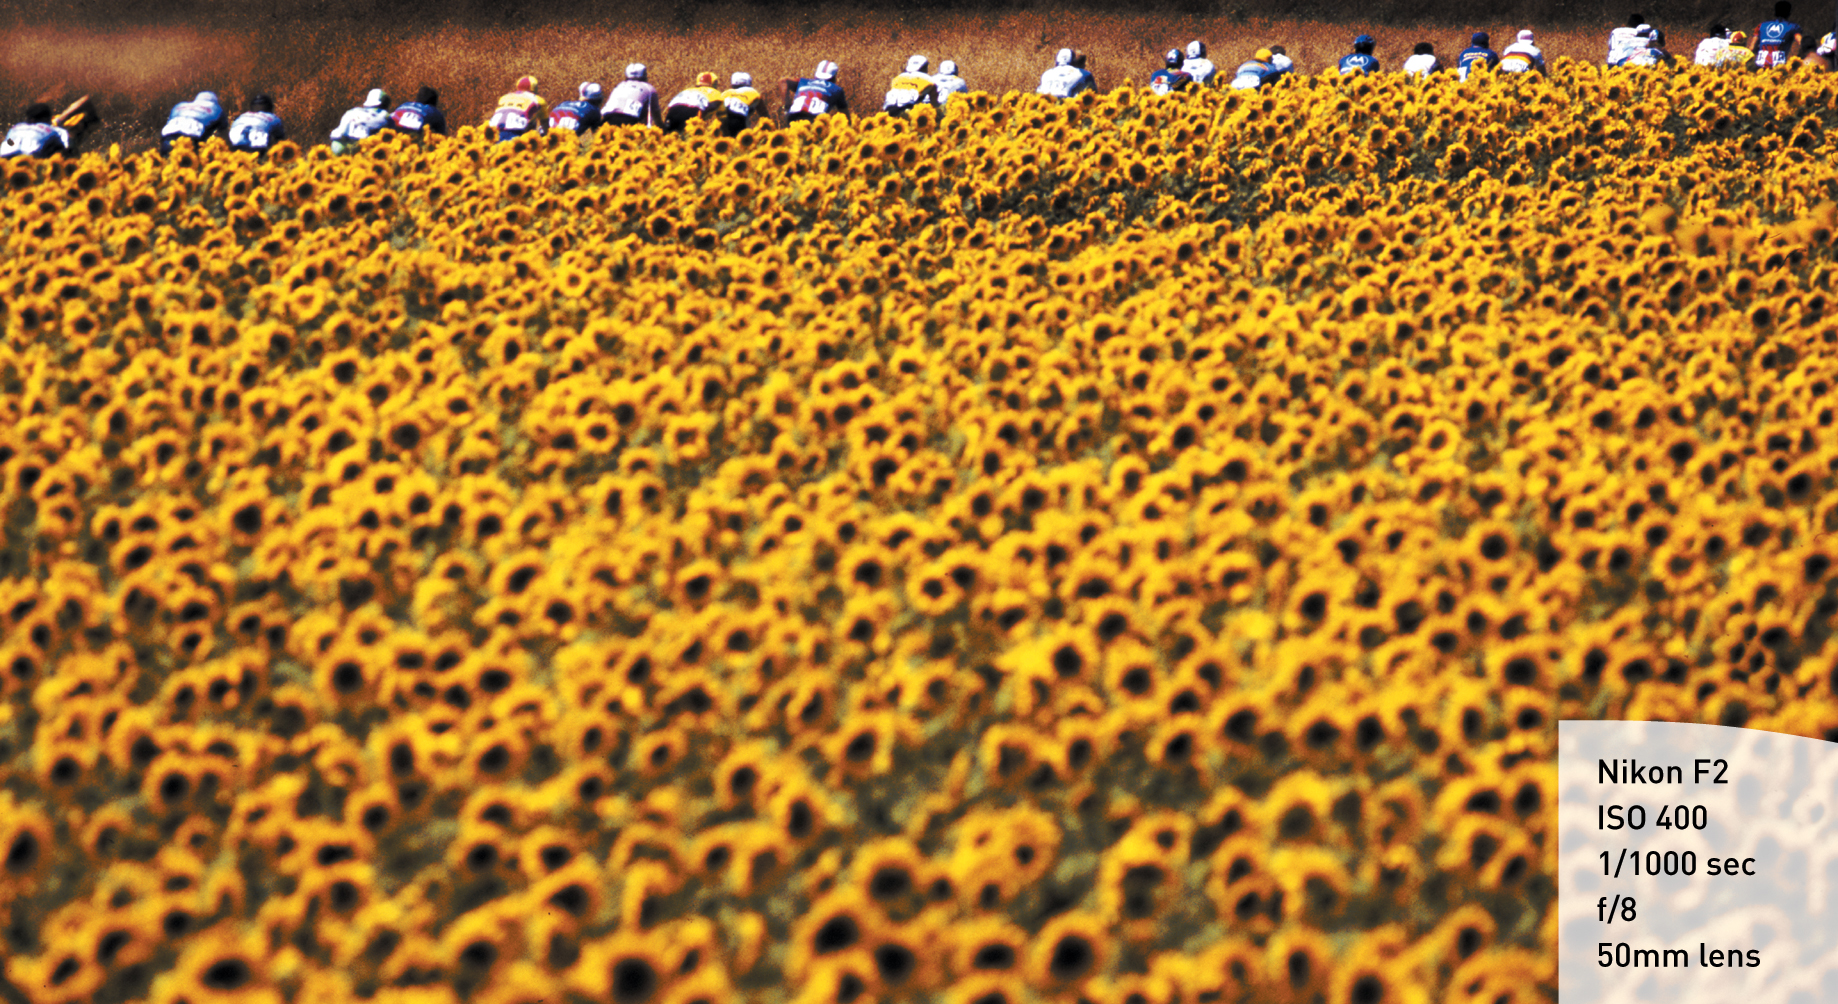
Figure 9.6 Before shooting the Tour de France for Sports Illustrated, I carefully scouted the course to try to find a nice scenic shot. While the race was taking place, I moved ahead of the riders so I could photograph the pack as the riders moved through the field.
There are literally thousands of cycling road races held every year that have nothing to do with the Olympics. The most famous of these is the Tour de France, which is held over three grueling weeks, normally in July. The race consists of 21 one-day stages. The Tour is an amazing event to cover; it is part race, part carnival (Figure 9.7). Covering the tour is a difficult challenge because the peleton (the main group of riders) moves very quickly, and the leader, wearing the coveted yellow jersey, is frequently difficult to spot until the very finish of the stage. But the scenery is spectacular, the competition fierce, and the emotions high.
Tip
Drive the course backwards when you’re looking for shooting positions so you are looking in the direction you will likely be photographing. It makes scouting much more precise.
Track cycling consists of various events: Sprint, Team Sprint, Keirin, Team Pursuit, and Omnium. Each of the events has slightly different rules and vastly different strategies. For the purposes of this book, I’ll discuss the general shooting considerations that apply to all of them.
Track cycling races take place on banked oval courses, which may be indoors or out. As with most of the other sports discussed, there are many different combinations that will work to make spectacular images.
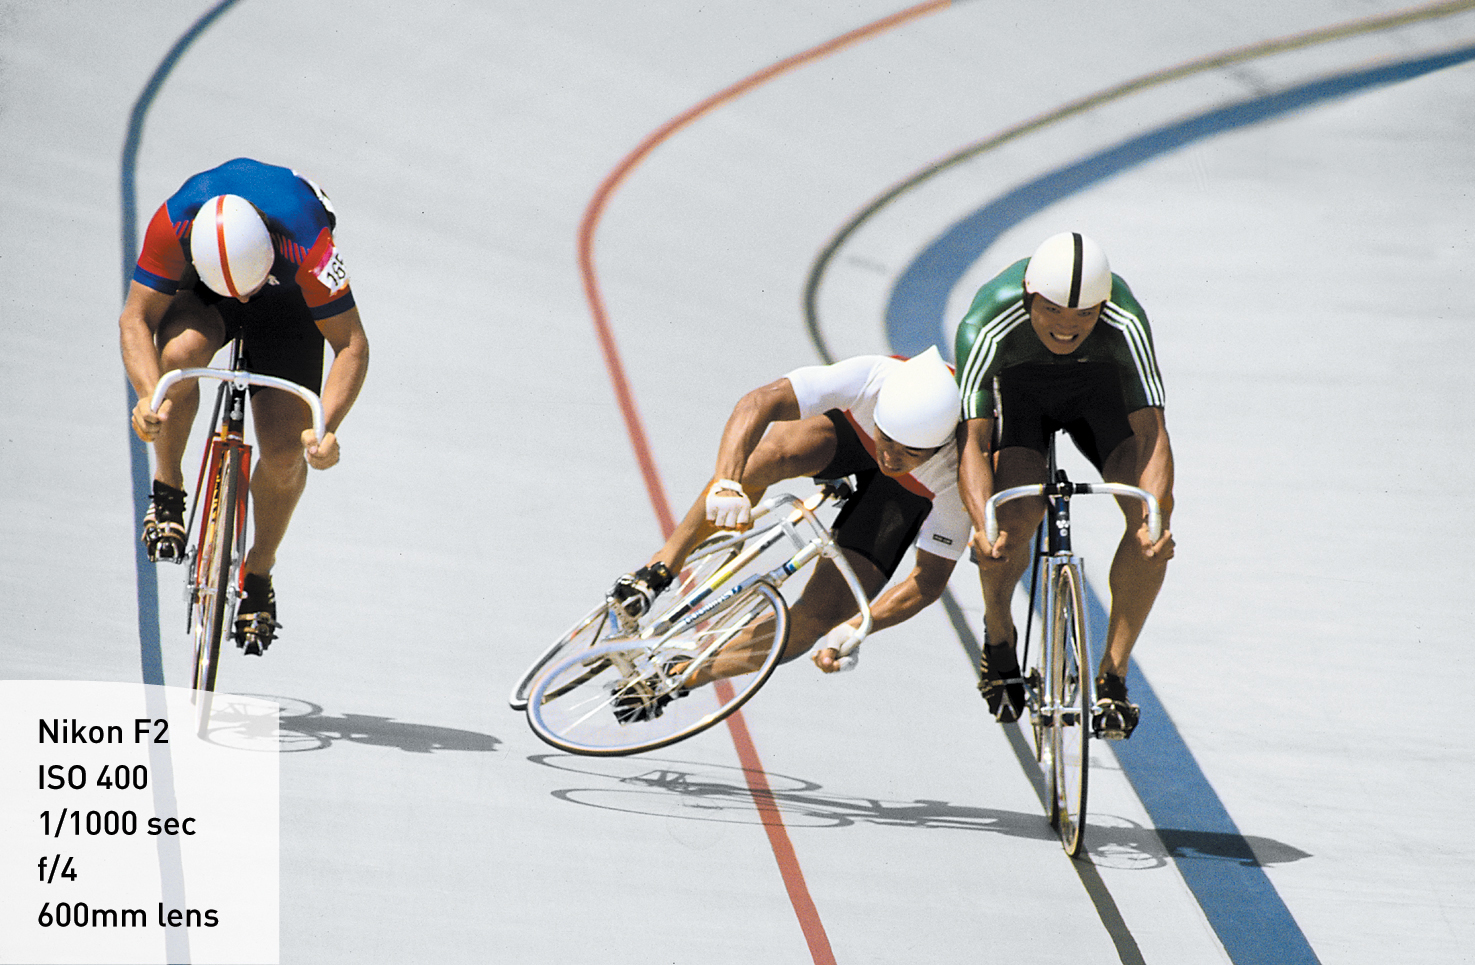
I like to shoot head on from the end of one of the straightaways, normally facing the start/finish line. To capture the action as the cyclists come out of the far turn and head toward me, I use the longest lens possible. As they power through the turn right in front of me, I switch to a wide-angle lens. If I’m able to place a wide-angle remote to capture the cyclists going through the turn, I’ll often use a short telephoto and do pans as the racers pass in front of me. Because the cyclists in most of the races do multiple laps, I have time to try a number of different lens and setting combinations (Figure 9.8).
Tip
Use a very fast shutter speed, at least 1/1250 of a second, when the cyclists are moving parallel to you. If you don’t, the image will blur.
Diving: How to Get the Best Images
Diving consists of a number of events, each with its own unique characteristics. There are two types of launching pads for the divers: springboards and platforms, and each has a different height.
Usually, every event requires the athletes to perform six different dives. As in gymnastics, each diver will practice his or her routines during a warm-up period. Pay close attention to practice and take notes; you’ll then be ready for the actual competition.
Generally, you’ll need a telephoto lens to photograph diving because access is normally very limited to the pool deck for safety reasons.
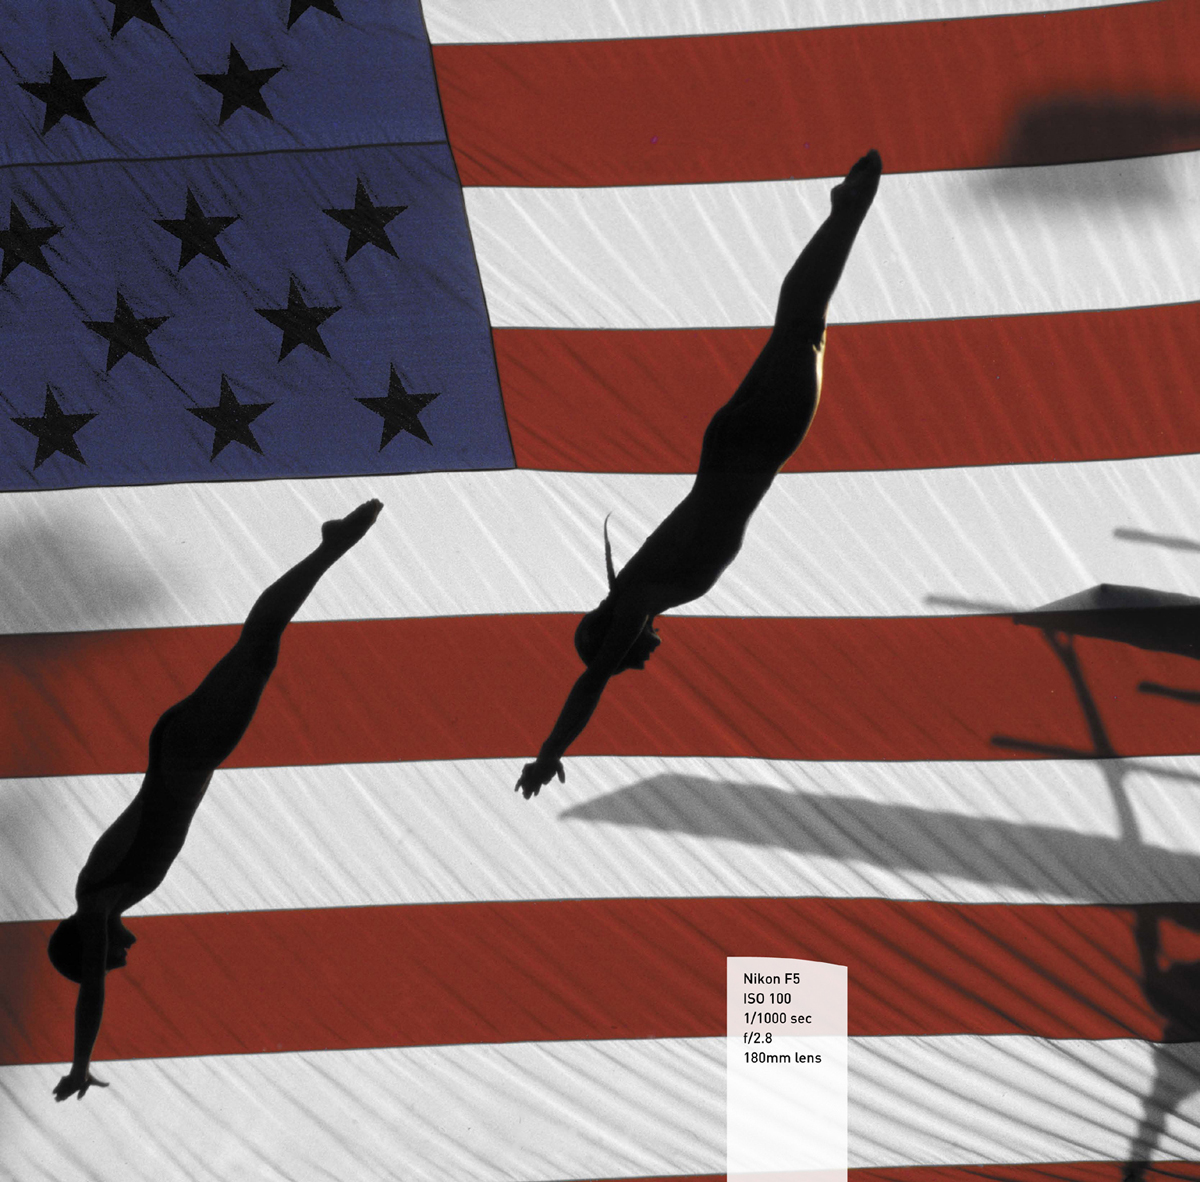
Find a position that gives you an open sight line from the start of the dive to the finish. Be careful to select a clean background (Figure 9.9). Diving is a very beautiful sport, and you want to be sure that the diver dominates the image (Figure 9.10).
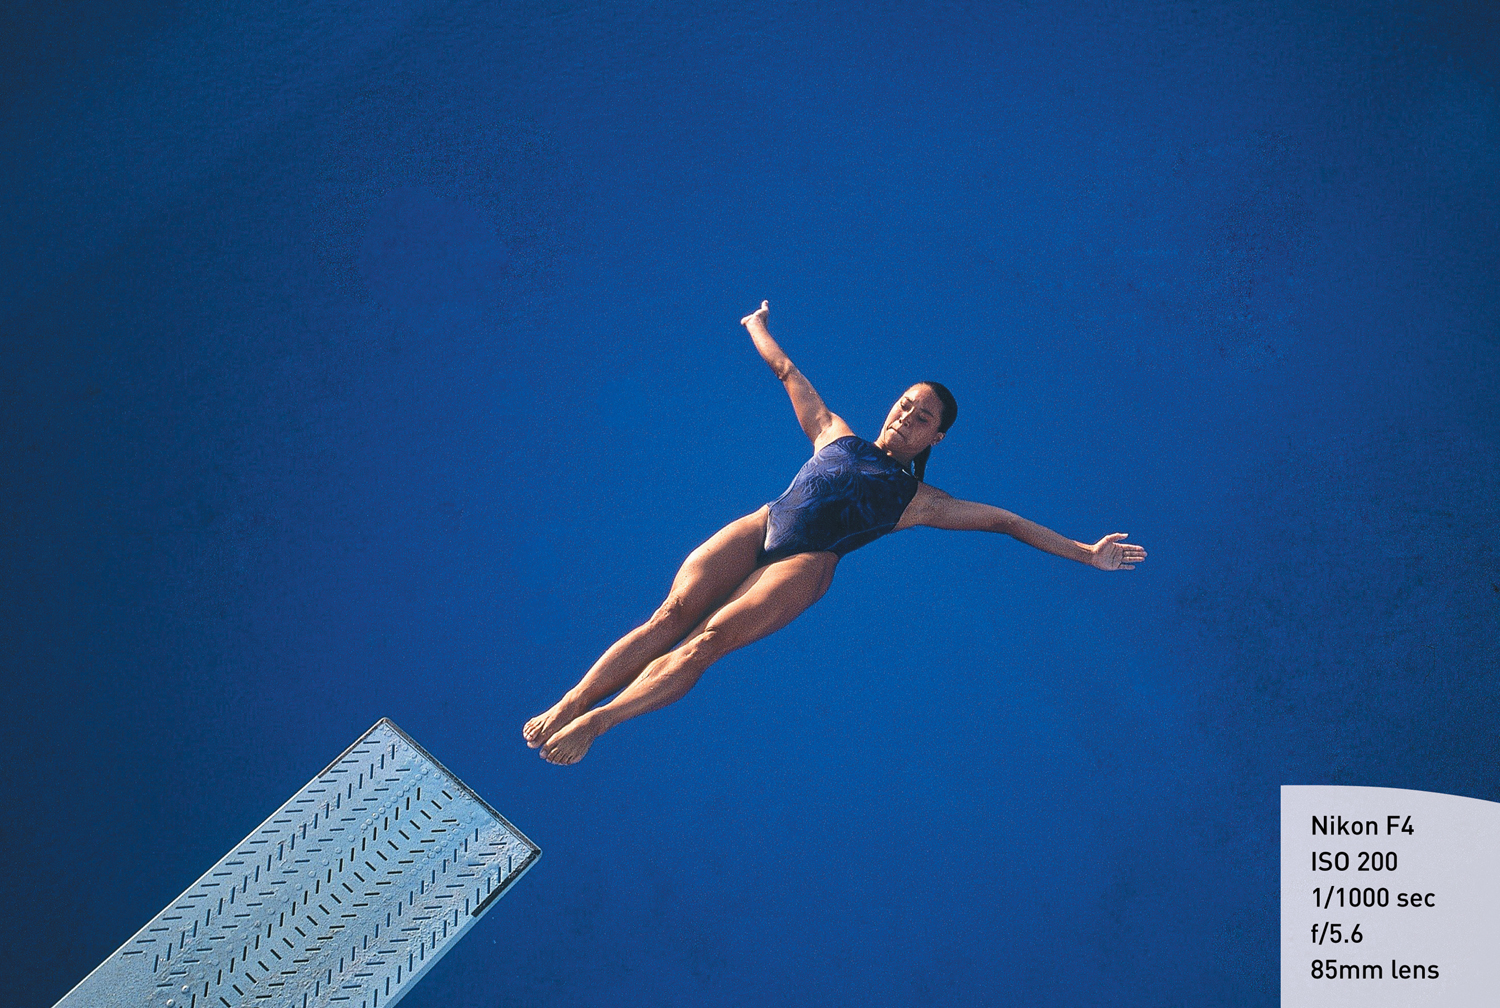
Figure 9.9 By positioning myself above the diver, I was able to capture her mid-flight above the pool, creating a very clean, simple, and beautiful image.
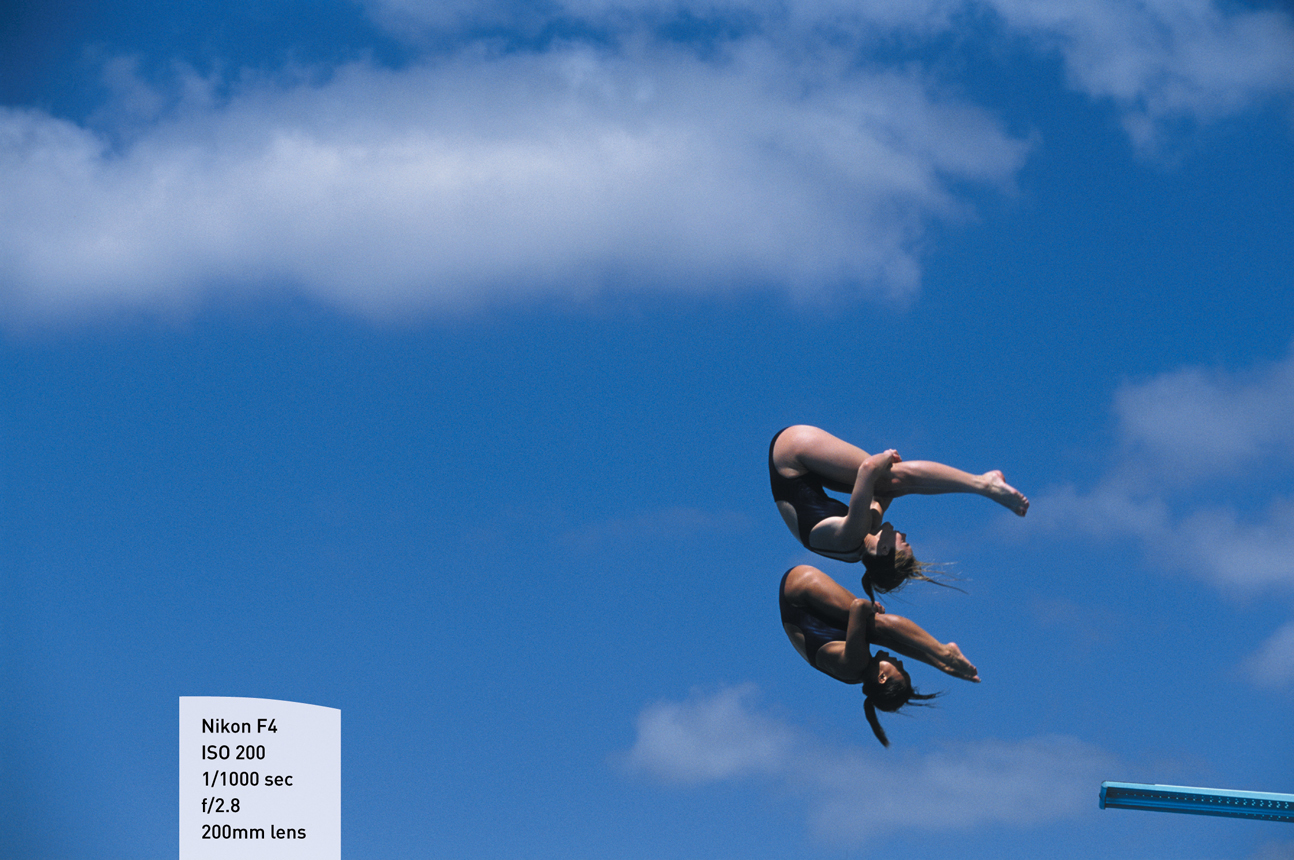
Figure 9.10 I shot this from the stands to the side of the diving platforms. From an elevated position, I was able to shoot the divers against the sky.
A tripod will allow you to do long exposures, letting the divers blur while they are in motion. If you shoot from the side of the diving board, the divers will remain in focus because their motion is up and down, not side to side.
Dressage, Eventing, and Jumping: How to Get the Best Images
Dressage, eventing, and jumping are the various horse competitions held at the Olympics and in non-Olympic competitions. Each of the events has slightly different rules and vastly different strategies. Here I’ll discuss the general shooting considerations that apply to all of them.
Tip
Using a flash near the horses is not acceptable.
Each competition features three components: the riders, the horses, and the course.
Tip
You will need to use a fast shutter speed—1/2000 of a second or more—when the horses are moving parallel to you.
These events are routinely held during the day, and many shooting positions are available. It’s best to spend time scouting the field of play and determine well in advance of the event where you can get clean, straight-on, and side-on views of the horses and riders.
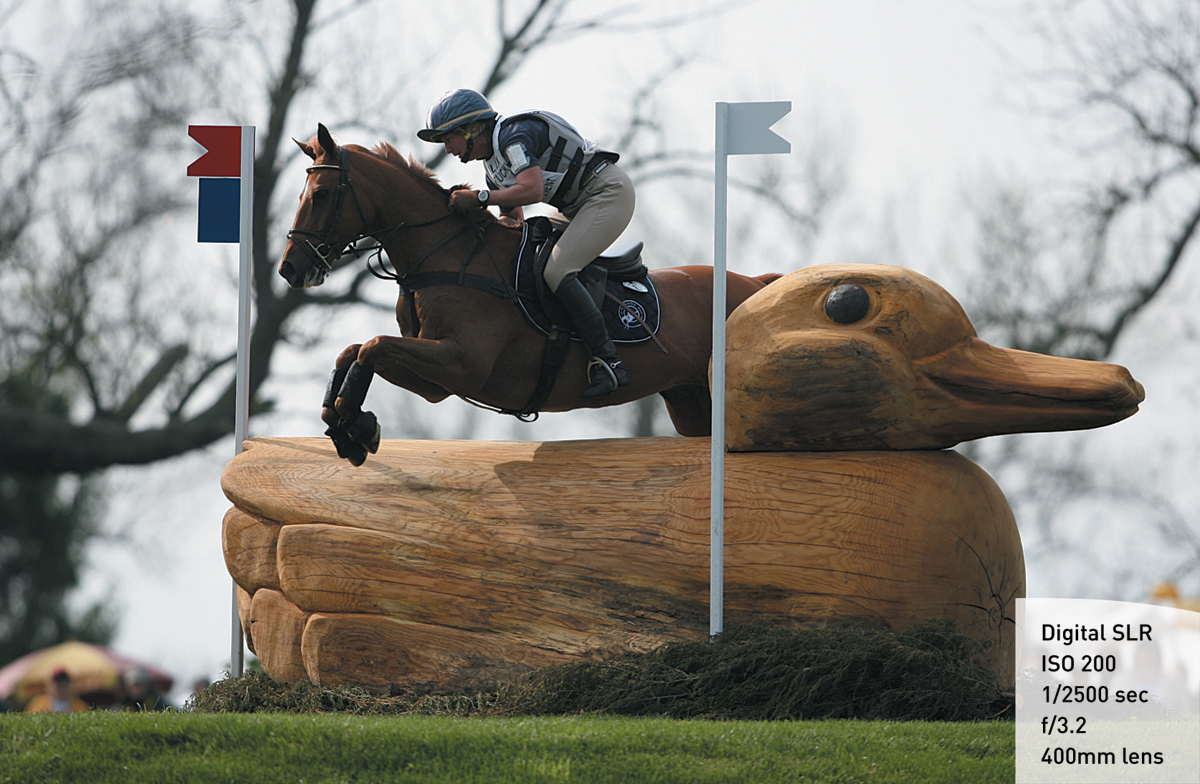
Figure 9.11 shows that by shooting with a telephoto lens and getting low to the ground, I was able to make a clean image of the horse jumping over the duck.
Tip
Remote cameras placed low and next to the jumps and obstacles make dramatic images.
High vantage points are important as well, because they allow you to show the beauty and the difficulty of the competition. My position at a high vantage point allowed me to take advantage of the location of the course in Greenwich and to show the cloudy London sky in Figure 9.12.
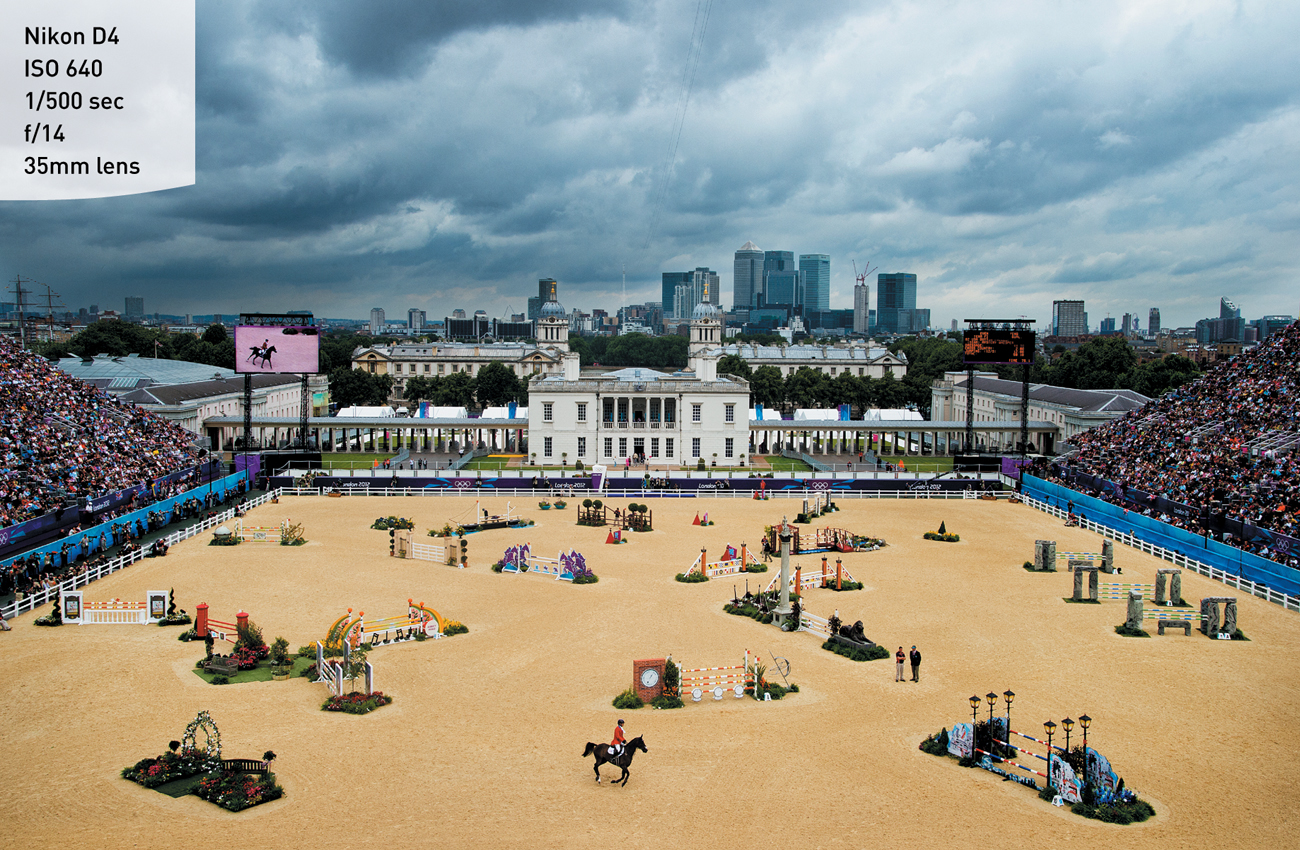
Figure 9.12 A rider from the British Eventing team makes his way around the course during the 2012 Olympic Games in London.
These horse competitions are more about stamina and grace than they are about power and speed. All four elements are certainly present, but style is the most important aspect of these images.
Tip
Use enough depth of field to capture the entire horse and the rider. The horse will move quickly and cover ground very fast. Be sure to leave yourself enough room to include both.
Gymnastics: How to Get the Best Shots
Gymnastics consists of multiple events, and each has slightly different rules and unique movements (Figure 9.13). Both men and women compete in floor exercise and vault. Women also compete in balance beam and uneven bars. Men compete in parallel bars, horizontal bars, and pommel horse.
This is another sport that is more about beauty than about speed or power, but speed and power are necessary to achieve the beauty. Showing the combination of the three elements and demonstrating how they work together is critical.
I had one chance to make the image in Figure 9.14. Alexei Nemov was expected to win the gold in the 1996 Olympic Games, so I wanted to make a special, different picture of him in action. Because you are not allowed to use tripods or strobe during the Olympics, I arrived at the location hours in advance to give myself time to find my spot and figure out how to steady my camera. I then set up with a long lens, camera, and monopod in a small space that would allow me to capture Nemov against a black background. The ten exposures show the strength, speed, and accuracy of Nemov’s performance that day.
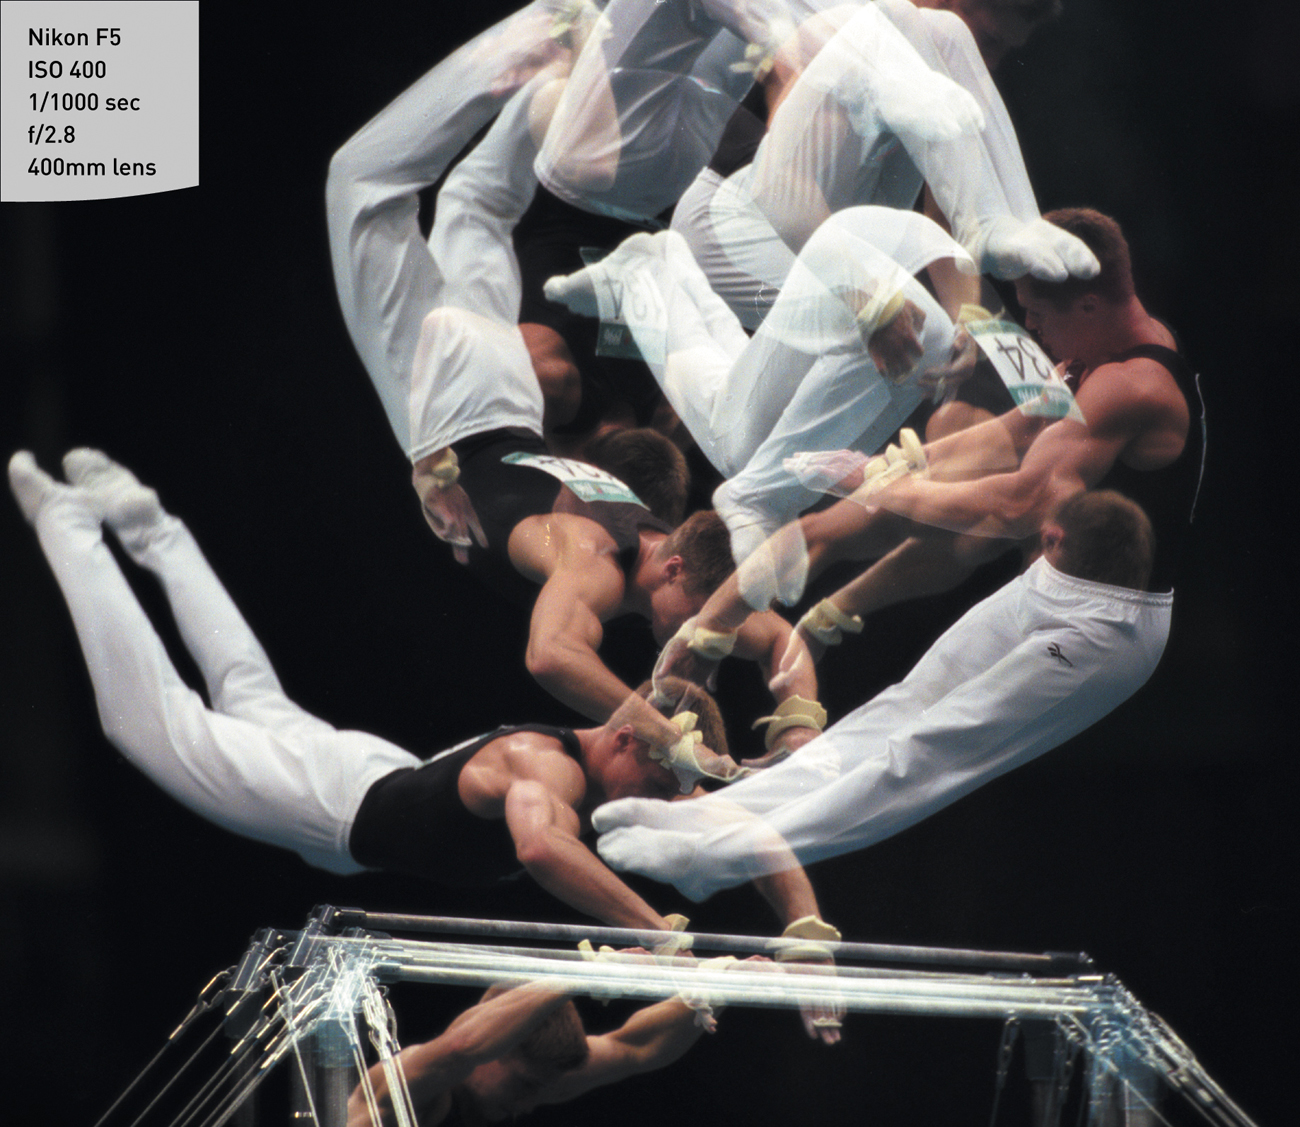
Figure 9.14 This is a multiple exposure of Alexei Nemov on the horizontal bars during the 1996 Olympic Games in Atlanta.
With each of the disciplines, you’ll need to work with the organizers of the meet to be sure you are shooting from a place that is safe for the athletes and for you, and does not cause a distraction. Flash is strictly forbidden. In addition, you should not move once the athlete starts a routine. Motion can create a distraction and cause an athlete to lose concentration while in motion, which can result in a poor performance, or worse, an injury.
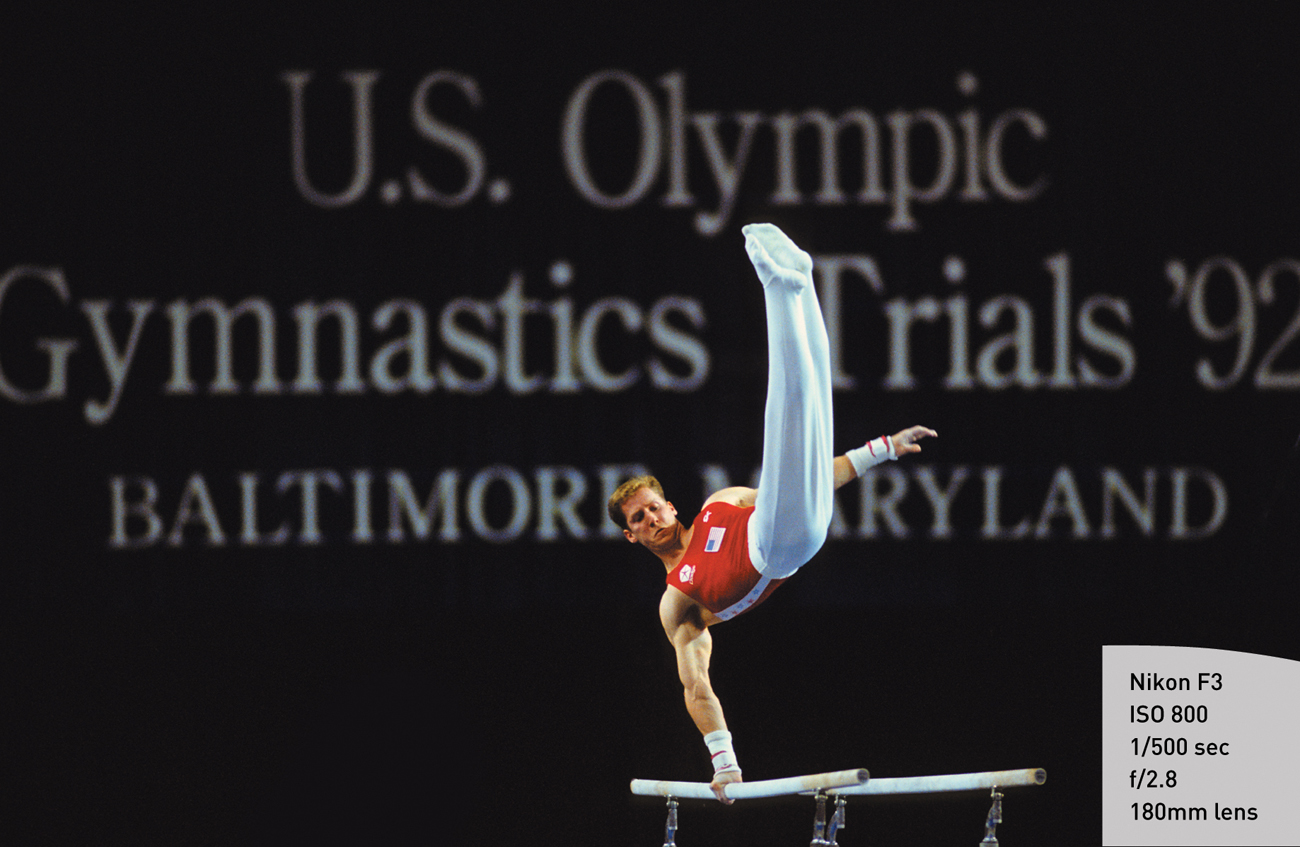
Clean sight lines are tough to find because multiple events will be going on at the same time. For the image in Figure 9.15, I positioned myself carefully to include the background. By using a shorter lens and slightly more depth of field, I was able to include more information in the photo.
Also, the gymnastic apparatuses clutter up the backgrounds, so shooting wide open with the longest lens possible will help reduce the clutter (Figure 9.16).
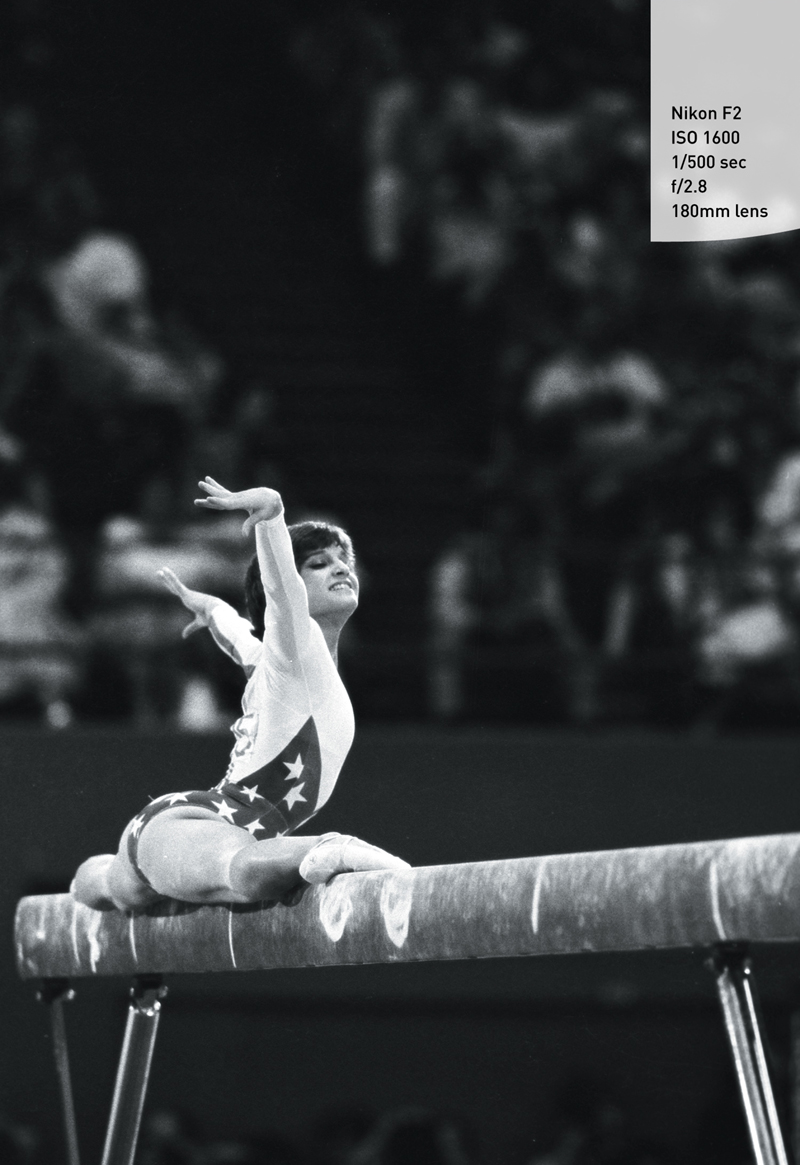
Figure 9.16 Mary Lou Retton performs on the balance beam during the 1984 Olympic Games in Los Angeles.
Tip
Watch the athletes carefully while they warm up. Almost always they will go through all of their motions in practice. That will help you know where to position yourself and how to anticipate what they will do during their routines.
Table Tennis: Getting the Best Shots
Table tennis is played indoors in a tightly controlled environment and can be played by two or four players.
Tip
Because the action takes place indoors around a relatively small surface, the table, it is easy to mount a camera on a tripod and do multiple exposures. The light and therefore the depth of field will be consistent, so you can easily calculate the exposure.
This is a wonderful sport to experiment with. The games are frequently long with repetitive action, they take place on a small surface, and they have very few key moments. This gives you a chance to try blurs, pans, and multiple exposures.
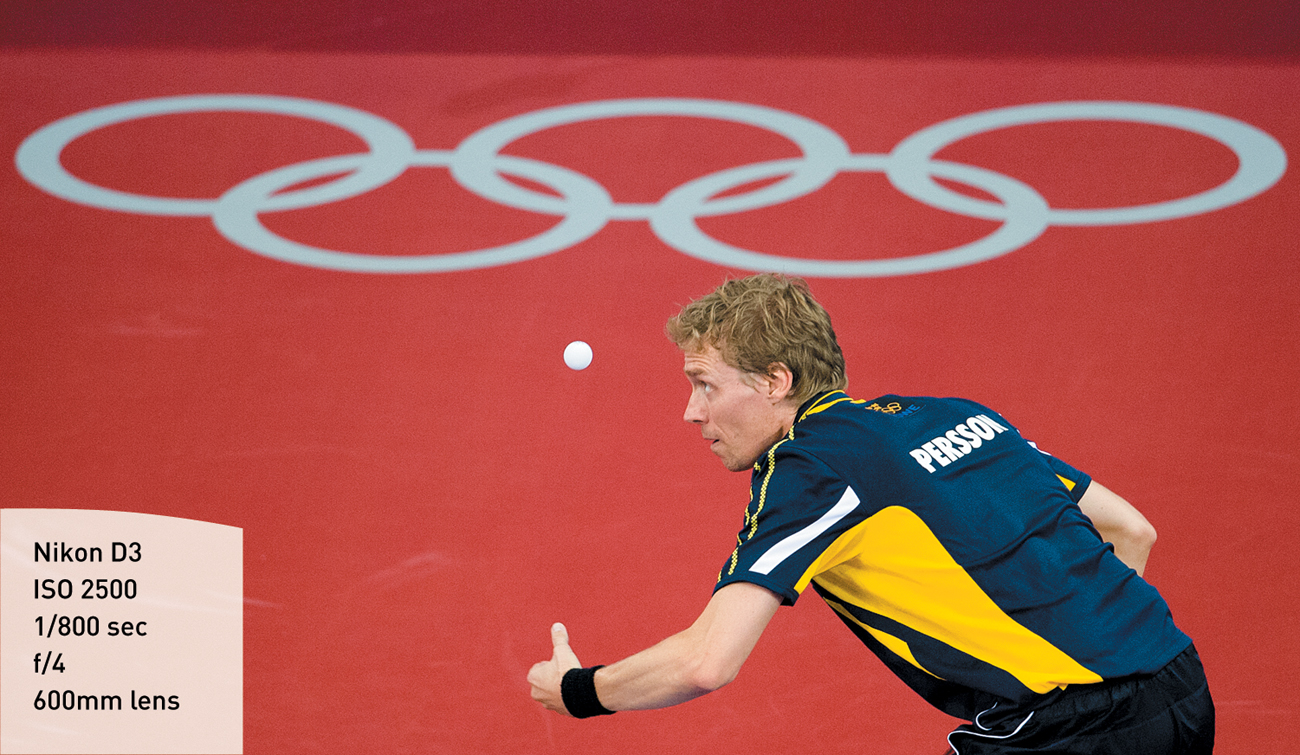
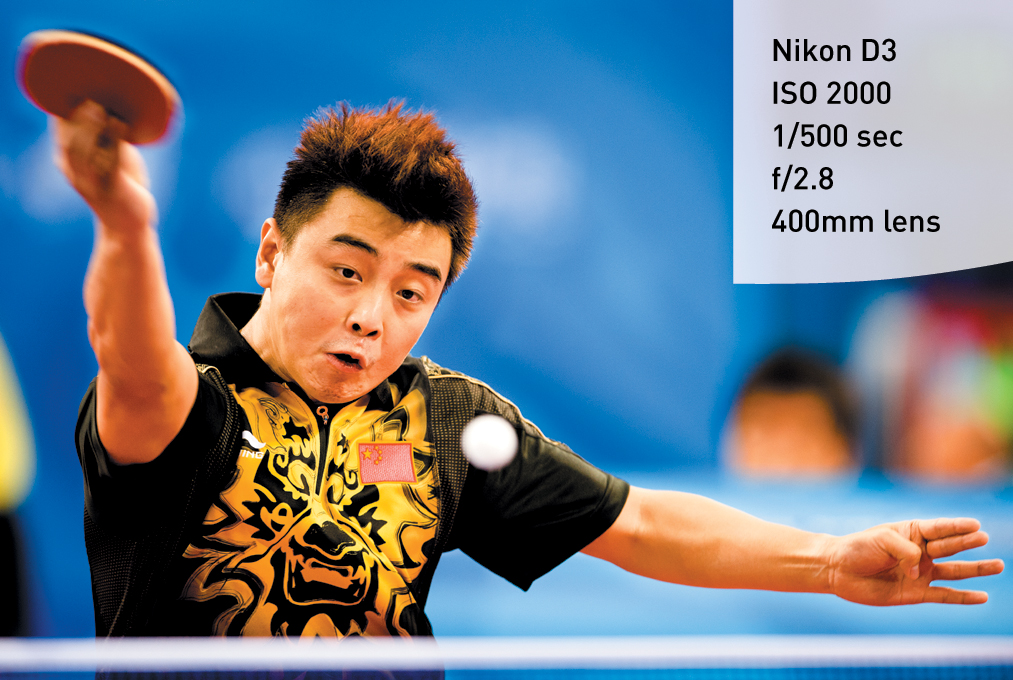
I love photographing table tennis, because it allows me to make images I simply can’t make in other sports (Figure 9.17). The courts are full of color and graphic lines.
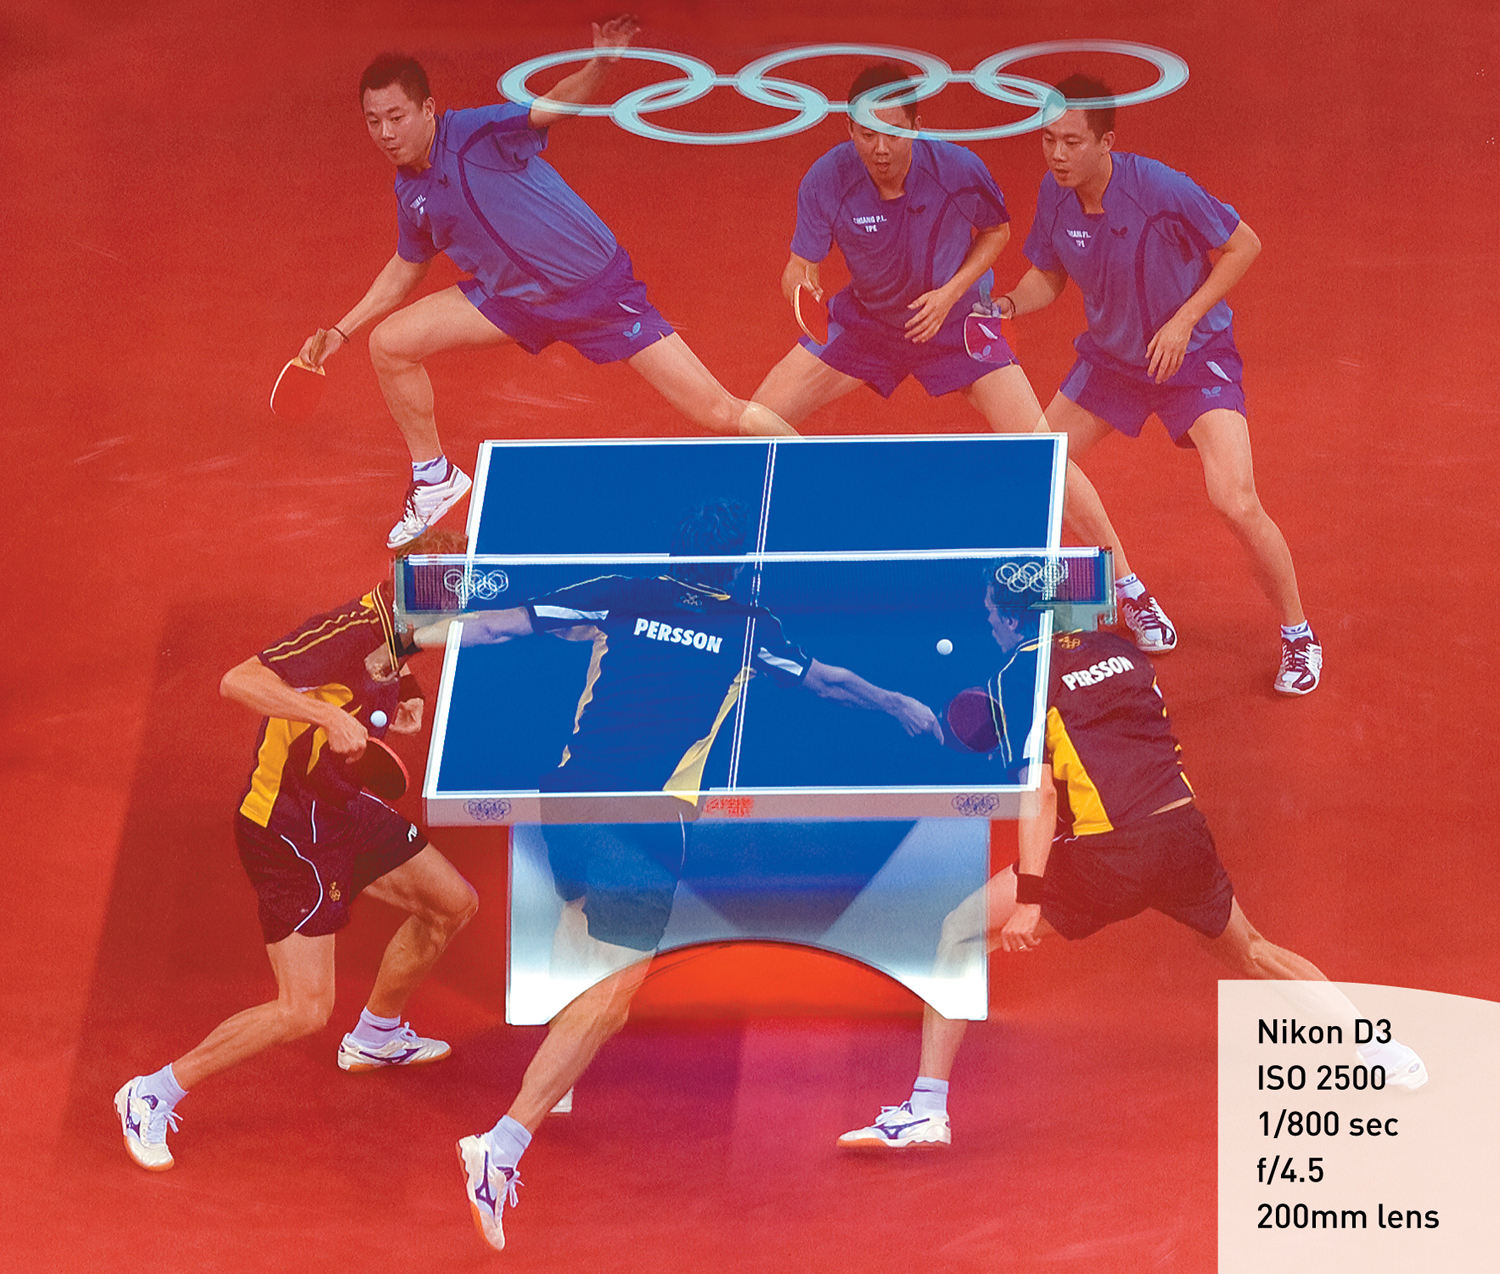
Multiple exposures and blurs work really well in table tennis, because everything but the athletes is stationary.
Tip
The athletes change sides during the match, allowing you to photograph both players equally without changing positions.
Using a long lens to isolate the athletes’ expressions as they serve can lead to intense and humorous photographs (Figure 9.18 and Figure 9.19). Also, backgrounds can be very cluttered and ugly during table tennis tournaments. By shooting with a telephoto lens at a limited depth of field, I was able to concentrate all action on the athlete and reduce the background in Figure 9.19.
Swimming: Getting the Best Shots
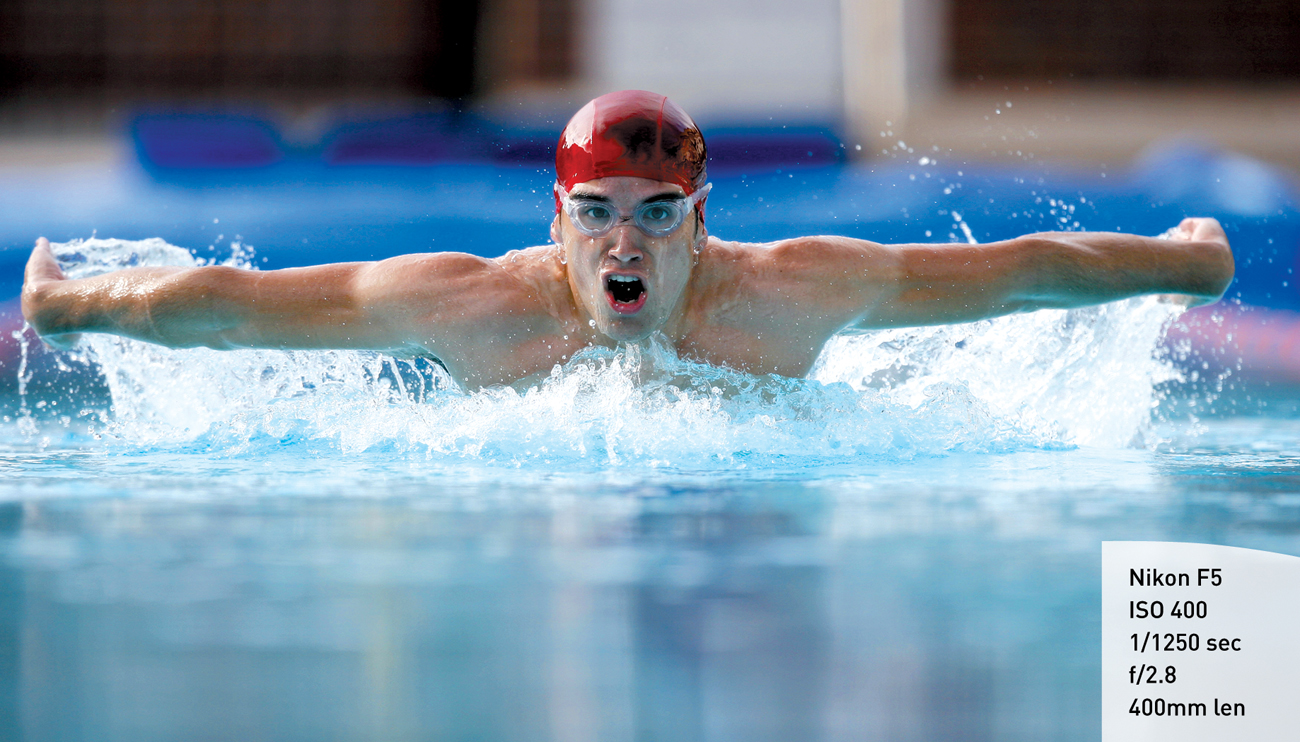
Each of the various swimming strokes requires you to shoot from different angles and positions. Because of the arm motions, you need to analyze each stroke before you select a position from which to shoot. You should be able to see the swimmers’ faces when they breathe (Figure 9.20). Having the face visible in every frame is not mandatory, but for the most part it is very important.
Tip
Use a very fast shutter speed to freeze the water droplets. That will create motion in an otherwise very still frame.
By getting as close to water level as possible, you should be able to get a good look at the swimmer’s face as he moves toward you.
Tip
For the butterfly stroke, it is critical to shoot head on; otherwise, all you will see is splash.
Being elevated is often an advantage because not only can use the lane markers as graphic elements in your composition, but you can also easily see who is in front. Shooting from the side at pool level, you can only see the leader because the splash will obscure the other swimmers (Figure 9.21).

If you want to get emotional reactions in pictures, look for the timing clock that is visible from the pool. The swimmers will turn to look at the clock to see theirs and others’ times, and often the order of finish. Then they’ll react. You need to position yourself so that you can see their faces when they see the clock (Figure 9.22).
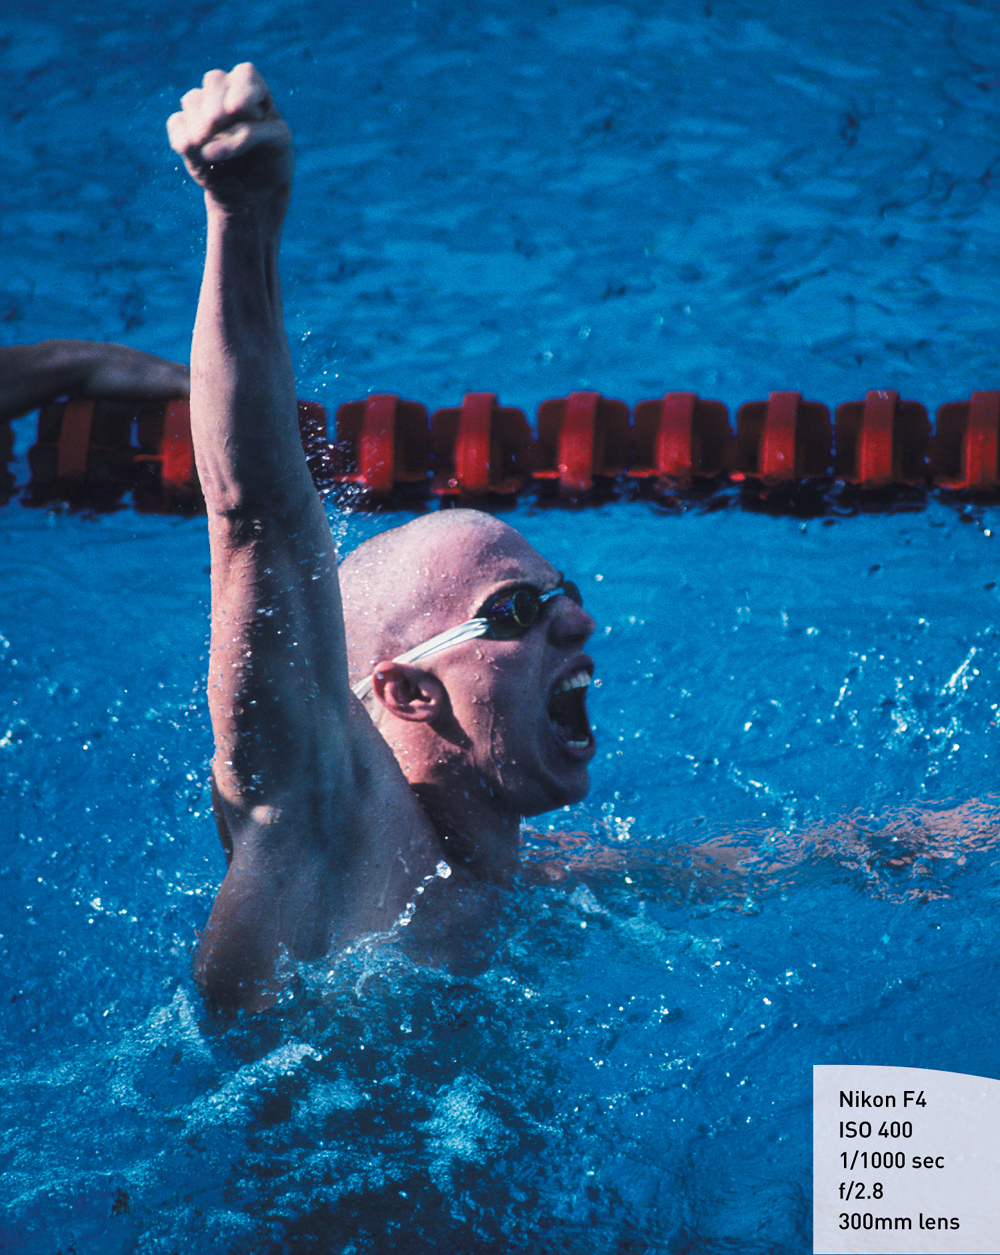
Figure 9.22 Nelson Diebel celebrates winning a gold medal in the 100-meter breast stroke during 1992 Olympic Games in Barcelona.
Tip
Many pools have viewing windows underneath the water. Shooting from that vantage point will give you a much different look.
Weightlifting: Getting the Best Shots
Competitors are ordered by their body weight in weightlifting events. Like boxing and wrestling, weightlifters are grouped together by size. The lifters compete in the snatch and the clean and jerk.
The object of the competition is to lift the most weight. It’s very straightforward. Usually, you will have great shooting positions on both sides and the front of the athlete. Because it is a solitary sport, the sight lines will be direct and typically very clean—nothing will get in the way (Figure 9.23).
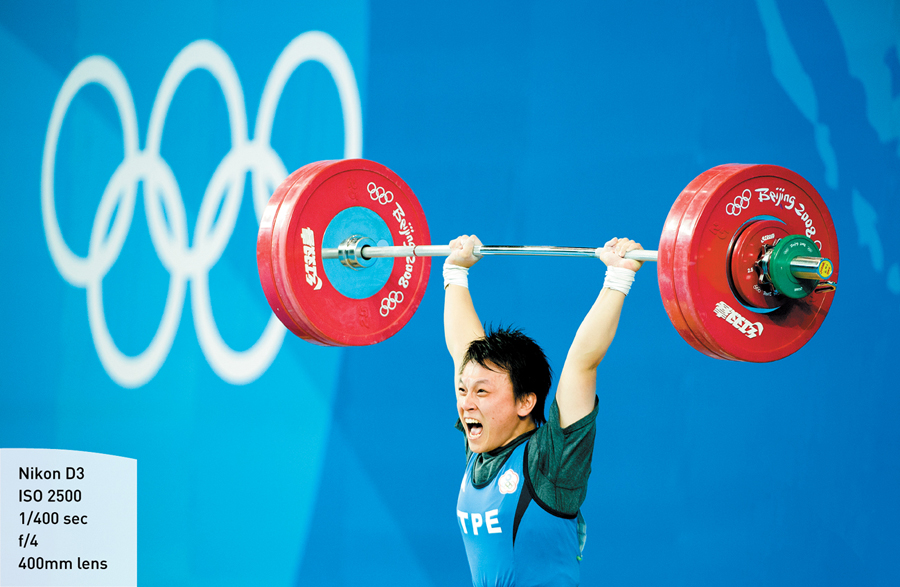
Figure 9.23 A female weightlifter from Taipei competes in the clean and jerk during the 2008 Olympic Games in Beijing.
Tip
Use a long lens and stand to the side of the athlete. A profile shot can be very graphic and emphasize the weights in the foreground.
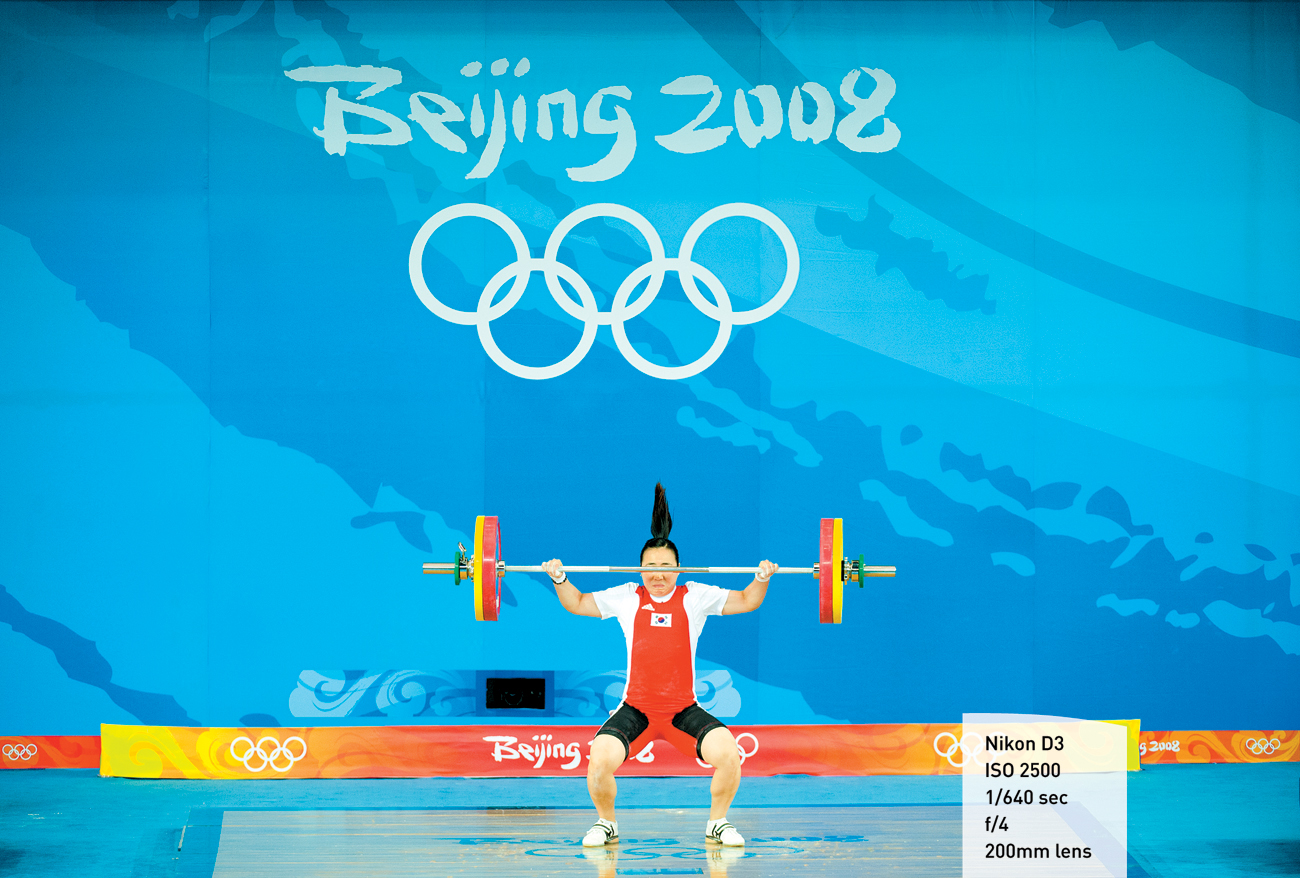
When the weight is lifted quickly, you will see explosive ballistic movement. But there is very little side-to-side or front to back movement, so focus will be easy. These athletes exhibit great grace even under maximum exertion (Figure 9.24). In addition, the light will be consistent, making exposure simple.
Tip
Often, the best images happen at the end of the lift. Don’t look away until the weight is safely back on the ground and the athlete reacts.
Wrestling: Getting the Best Shots
Wrestlers compete in weight classes. Wrestling is an individual and team sport, but only two athletes wrestle at a time. They grapple with each other in an attempt to gain a superior position (Figure 9.25).

Tip
The action does not move as fast as in many other sports, but there will be moments of explosiveness, so try to keep your shutter speed at 1/1000 or higher.
The two athletes compete on a mat. Most mats are colorful, and the center ring provides opportunities for pattern pictures. Elevated positions are very important when you’re shooting wrestling matches.
Wrestling almost always takes place indoors, so the weather and the light are not factors.
Tip
In wrestling the most dramatic action frequently takes place when one of the athletes is about to be pinned. To capture that action, the two best places are as low and close to the floor as you can get so that you can see the face of the athlete doing the pinning and from as high as possible so that you can see the face of the athlete being pinned.
Capturing the Scene Around the Events
Each of the aforementioned sports has a significant and dedicated fan base. Although many of them are team sports, the athletes compete on a solitary basis. Pay close attention to the different way the fans interact with the athletes as opposed to how the fans interact with athletes in team sports.
Because the athletes are often alone, it is easier to compose portraits while they are on the field of play.
Gear
These sports are all best covered with a wide range of lenses. That said, if you have only one camera, you can cover all of these events with one long lens and one wide-angle lens. For many of the Olympic sports—when the competition is on a local level—using a 50mm lens is perfect.
This is what I bring to every Olympic sport discussed earlier:
• At least two Nikon D4 bodies to use as handheld cameras
• At least two Nikon D4 bodies for remotes
• 600mm f/4 lens
• 400mm f/4 lens
• 300mm f/2.8 lens
• 200mm f/2.0 lens
• 50 mm f/1.4 lens
• 35mm f/1.4 lens
• 12–24mm f/2.8 lens
• TC 1.4x teleconverter
• Four PocketWizards and connectors
My gear list is inflated greatly by the number of remotes I use at the various events.
Settings
With the exception of some swimming and cycling competitions, all of these events normally take place indoors. Therefore, the light should remain constant, which will help you concentrate on focus and composition. Unless you are trying to create a special effect—a blur or a pan—it is always best to use the highest possible shutter speed.
Chapter 9 Assignments
The following assignments are designed to teach you skills that you can transfer from sport to sport. For example, the techniques that you learn while doing blurs during the table tennis assignment you can apply to the other sports. The same is true as you master panning speed and settings during the cycling assignment.
Blurring the Action
Find a table tennis table. Put your camera on a tripod, and ask two players to volley back and forth. Try different shutter speed and aperture combinations until you can anticipate the best way to let the action blur while retaining enough of the players’ shape that you can tell what is happening. You are looking for the intersection of art and action.
Panning and Stopping Action
Find a cyclist who will ride past you at varying distances and at different speeds. Practice panning. Keep the camera very stable and your motion consistent. Observe how the distance from the subject to the camera changes the speed necessary to stop action. Also, consider how the distance from the subject to the camera changes the shapes recorded during the pan.
Comparing the Direction and Color of Light
Find a piece of white fabric. With the sun overhead, stretch out the white cloth on the ground. Have your subject do different exercises while standing on the cloth. Pay attention to the amount of light that is reflected up from the cloth and what the color of the light is. Next, do the same assignment with a brightly colored piece of fabric. Then repeat the assignment using a black piece of fabric. When you are finished making photographs using all three pieces of fabric, compare the results and determine how the direction and the color of light reflected affects the results of your images.
Share your results with the book’s Flickr group!
Join the group here: flickr.com/groups/sportsphotographyfromsnapshotstogreatshots.