
In this chapter, we'll take you on a crash course though setting up a basic project using Spring and Hibernate. The tool we'll use for managing our application is Apache Maven 3. If you're already well versed in Spring, Hibernate, and Maven, you may want to just skim through this chapter, so you can get a feel for structure and conventions we'll be using throughout the book as we flesh out an art gallery application. We're going to cover a lot of ground very quickly and provide references to the chapters where we dive deeper into the various configurations along the way.
Maven was written by Sonatype's Jason van Zyl in 2002 and reached its 1.0 release as a top-level Apache Software Foundation project in 2004. Maven strives to simplify day-to-day development by ensuring an easy, repeatable process for configuring. managing, and interacting with Java-based software projects.
Maven revolves around the concept of a Project Object Model (POM), which represents the configuration for your project or module. In Maven parlance, a module is just a subproject for a given "parent" Maven project. This organizational construct allows you to create a project that is compartmentalized into a collection of smaller modules. Your POM describes many things about your project, including required dependencies, plugin configuration. and the order and operations for compiling and assembling your application.
Maven provides a ton of features out of the box. Also, a tremendous amount of plugins have been developed by its massive community of users. When the time comes to further customize your project's build process, writing Maven plugins on your own is a snap.
Maven's killer feature is its dependency management. Maven downloads all of your project's dependencies from Maven repositories when you build or compile your application. This is a huge win when working in a team. Do you want to upgrade the version of Spring your project uses? Just update the project dependencies, commit to source control, and everyone on the team will automatically have their project upgraded to the newest version of Spring as well! Maven even handles transitive dependencies, meaning that Maven can automatically fetch the dependencies of the libraries your project depends on without you explicitly including them all.
Remember how we told you that there are a huge number of mature plugins available for Maven? One example of a handy plugin that you have at your disposal is the excellent m2eclipse plugin, for integrating Maven with Eclipse. Figure 3-1, which comes courtesy of m2eclipse, shows you everything you need to know about why using a tool like Maven is important for managing enterprise Java applications. The image isn't really legible, and you can't even see all of the dependencies, which extend off to the left and right of the screen, because there are so many components that make up our application.
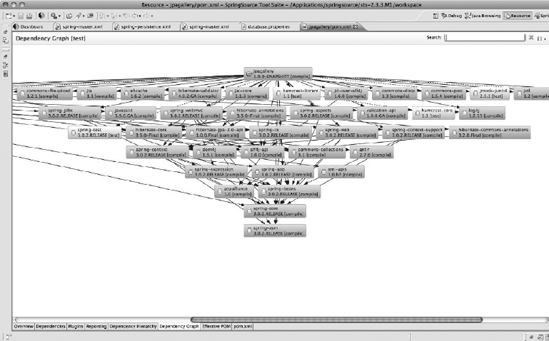
The number of dependencies may seem a bit daunting at first, but when you're using Spring and Hibernate, you are given a lot of granular choice about which JARs to include and when, which to exclude, and so on. This results in many smaller library dependencies. Through your project's dependency configuration, Maven is aware of which JAR files are required for your project and which JARs have dependencies on one another. It knows which libraries are needed only while executing unit tests, as well as which libraries should be bundled into your resulting WAR file to be deployed on an application container like Apache Tomcat.
With all of this power comes a good bit of complexity, and for that reason, Maven also has its fair share of detractors. The fact remains that at the time of this writing, Maven is far and away the most prevalent tool used by shops big and small for managing Java applications. Once you get over some of the jargon, Maven is quite simple to configure and use. Get started by downloading it from http://maven.apache.org, and let's see how you can put it to use.
Let's first create the folder structure required for a standard Maven 3 web application. Though you can define a custom directory structure and modify your Maven settings or graft Maven onto a legacy project with a directory structure that's already defined, your best bet is to stick with the basic folder structure that Maven expects. That will ensure proper interoperability with all of the plugins and tools that are available.
Since we're building a basic art gallery application, start by making a folder called gallery:
mkdir gallery
Within the gallery folder, we'll create the folders that are customary for a Java application:
mkdir gallery/src
mkdir gallery/src/main
mkdir gallery/src/main/java
mkdir gallery/src/main/resources
mkdir gallery/src/main/resources/META-INF
For web applications, we need a webapp and WEB-INF folder:
mkdir gallery/src/main/webapp
mkdir gallery/src/main/webapp/WEB-INF
We also need to create the folders that are required for unit testing our application:
mkdir gallery/src/test
mkdir gallery/src/test/java
mkdir gallery/src/test/resources
And finally, we'll create the two folders where Spring configuration files are ordinarily placed:
mkdir gallery/src/main/webapp/WEB-INF/spring
mkdir gallery/src/main/resources/META-INF/spring
Note
You can also have mavenautomatically generate your project's structure by using Maven's archetype feature. Maven archetypes are like project templates that can be used to streamline the creation of a maven project, including setting up your directory structure and a baseline pom.xml file.
The primary configuration file for Maven is pom.xml. With this configuration file, you can specify important metadata and build details about your project. The pom.xml file resides at the root of a given Maven project, so we'll create it within the gallery folder. This listing is abridged for the sake of simplicity. We recommend you check out the full listing in the source code that accompanies the book.
<project xmlns="http://maven.apache.org/POM/4.0.0"
         xmlns:xsi="http://www.w3.org/2001/XMLSchema-instance"
         xsi:schemaLocation="http://maven.apache.org/POM/4.0.0
                             http://maven.apache.org/mavenv4_0_0.xsd">

  <modelVersion>4.0.0</modelVersion>

  <groupId>com.prospinghibernate</groupId>
  <artifactId>gallery</artifactId>
  <version>1.0.0-SNAPSHOT</version>

  <packaging>war</packaging>

  <properties>
    <spring.version>3.0.2.RELEASE</spring.version>
    <hibernate.version>3.5.0-Final</hibernate.version>
  </properties>

  <dependencies>
    <dependency>
      <groupId>org.springframework</groupId>
      <artifactId>spring-core</artifactId>
      <version>${spring.version}</version>
    </dependency>

    <dependency>
      <groupId>org.hibernate</groupId>
      <artifactId>hibernate-core</artifactId>
      <version>${hibernate.version}</version>
    </dependency>

    <!-- Most dependencies omitted for brevity... -->

  </dependencies>

  <build>
    <plugins>
      <plugin>
        <groupId>org.codehaus.mojo</groupId>
        <artifactId>tomcat-maven-plugin</artifactId>
        <version>1.0</version>
      </plugin>
    </plugins>

    <!-- Other plugins omitted for brevity... -->

  </build>

</project>
There is a lot happening in this POM configuration file. First, you'll notice the XML namespace that's defined for Maven and its POM schema definition.
modelVersion is used to declare the version of the POM for your project. This protects you from compatibility issues when upgrading the version of Maven you are using.
Next up is a series of fields commonly referred to as the project coordinates because they uniquely identify the project. By convention, the groupId uses the reverse domain of the organization that created the project. The artifactId is the unique name within a given groupId, and version is the specific release of a project. No two projects may have the same combination of groupId:artifactId:version.
The packaging element is a special attribute in the project coordinates. It's not used as a part of the unique identifier, but it describes the output of a given project. The default value is jar, to produce a Java archive (JAR file). Since, we're building a web application, we specify war to output a web archive (WAR file).
The properties section offers a convenient place to define variables that you use in the rest of your configuration. In our project, we have ten Spring JAR files outlined as dependencies. Managing them all individually is tedious. Using the properties attributes simplifies the management of upgrading versions of Spring.
Finally, the build attribute offers a place for you to define, among other things, the plugins you require for your project. For our project, the Tomcat Maven plugin provides an excellent mechanism for easily building and running our web application on the Apache Tomcat application server.
With that, we have a very basic application stubbed out. You can execute mvn initialize from your root gallery folder at a command prompt. If you've done everything correctly, Maven will fetch your dependencies and deliver the message BUILD SUCCESS.
Of course, our application doesn't yet do anything. Let's start laying down our Spring configuration so we can change that.
When building reasonably large Spring applications, you end up with a lot of Spring beans configured in the Spring ApplicationContext. As you saw in Chapter 2, every object that you configure for use in the Spring container is registered in the ApplicationContext, which is a subinterface of Spring's BeanFactory. The ApplicationContext provides you with the tools you need to interact with your configured beans. We recommend creating a root configuration file, and then importing all other configuration files, so that the XML files don't become too large and obtuse.
The following is an extremely basic Spring configuration file (gallery/src/main/resources/META-INF/spring/spring-master.xml).
<?xml version="1.0" encoding="UTF-8" standalone="no"?>
<beans xmlns="http://www.springframework.org/schema/beans"
       xmlns:context="http://www.springframework.org/schema/context"
       xmlns:xsi="http://www.w3.org/2001/XMLSchema-instance"
       xsi:schemaLocation="http://www.springframework.org/schema/beans
            http://www.springframework.org/schema/beans/spring-beans-3.0.xsd
            http://www.springframework.org/schema/context
            http://www.springframework.org/schema/context/spring-context-3.0.xsd">

  <context:property-placeholder location="classpath*:META-INF/spring/*.properties"/>
<context:component-scan base-package="com.prospringhibernate">
<context:exclude-filter type="annotation"
expression="org.springframework.stereotype.Controller"/>
</context:component-scan>
<import resource="spring-datasource.xml"/>
</beans>Let's break down the contents of this spring-master.xml file in more detail.
Spring introduced extensive namespace support as of version 2.0 of the framework. Everything is just a bean in the IoC container, but over time, your configuration can become incredibly verbose. The introduction of namespaces is intended to simplify the XML configuration when dealing with integration points like transactions. You can even define your own namespaces if that's required.
Two namespaces are used in our spring-master.xml configuration file, marked by the xmlns declarations:
The
beansnamespace is required for defining all basic bean definitions for your application (such as DAOs, service layer beans, and so on).The
contextnamespace is provided as a convenience for configuring some of the core plumbing of Spring.
This configuration defines a PropertyPlaceholderConfigurer, which allows you to externalize some of your settings to a properties file outside the Spring configuration.
<context:property-placeholder
     location="classpath*:META-INF/spring/*.properties"/>
The property-placeholder will automatically locate and parse any property files you have in your classpath under the META-INF/spring directory. Any property you want replaced should be indicated in your Spring configuration like so: ${propertyKey}. You'll see a full example later in this chapter when we configure a datasource for the gallery application.
The next important piece of configuration is component scanning, which was introduced in Spring 2.5 as a mechanism for further simplifying the way you go about configuring Spring applications.
<context:component-scan base-package="com.prospringhibernate">
This declaration will cause Spring to locate every @Component, @Repository, and @Service in your application. In practical terms, this allows you to write a POJO, and then simply annotate the new POJO as a @Service. Spring will then automatically detect, instantiate, and dependency inject your service at startup time.
Additionally, component scanning turns on other notable Spring annotations like @Inject, @Named, and @PostConstruct support. These annotations allow you to use common Spring and Java EE annotations in your classes without needing to do any special configuration. The most commonly used annotation is @Inject, which instructs Spring to dependency-inject an object into your class. You can then also have your new service injected into any other class that requires it, simply by declaring a field for your service inside the relying class.
Note
@Inject and @Named are just two of the annotations defined as a part of JSR-330. JSR-330 defines a standard set of annotations to be used in Java EE applications. @Inject and @Named are wholesale replacements for the @Autowired and @Qualifier annotations in Spring that you may already be familiar with. This makes your application more portable in the event that you should decide to change your dependency-injection implementation to something like Google Guice.
The matching rules used by the component scanner can also be customized with filters for including or excluding components. You can control this matching based on type, annotation, AspectJ expression, or regular expressions for name patterns. The default stereotypes can even be disabled. In our configuration, we declared the following exclusion:
<context:exclude-filter type="annotation"
expression="org.springframework.stereotype.Controller" />
This exclude-filter is declared to avoid instantiating our @Controller classes, as these should be instantiated by a web tier application context. Yes, you read that right: our application will actually have several distinct application contexts. We will talk about this a bit more when we introduce our web application configuration via web.xml later in this chapter.
After the property-placeholder configurer, you'll notice that we specify an import statement:
<import resource="spring-datasource.xml"/>
Imports allow you to specify an external Spring configuration file to be integrated into your application context. This is a useful construct, especially in our demonstration application, as we can easily externalize the different persistence strategies, keeping each version in its own file. These imports can also reference your application classpath with the following syntax:
<import resource="classpath*:spring-config-name.xml"/>
Imports are invaluable when you're dealing with large application contexts, as they provide a great deal of flexibility for organizing your bean definitions. You can partition your application in any number of ways to make it more approachable by new developers and to help understand how the project changes over time.
Now that you have a clearer picture of how Spring is bootstrapped within your application, let's get back to integrating your database of choice. You've learned that Spring's adherence to interface-based concepts helps to take implementation choices out of your code and into configuration. So, whether you choose to use a Java Naming and Directory Interface (JNDI) factory bean to pull in a database reference from an external JNDI directory or configure a specific database driver directly, your code won't be affected one bit. In the end, you'll always end up with a JDBC DataSource, and that's all your code needs to care about.
In our example, we'll keep things simple. Let's start off by defining a Spring bean that will create a JDBC DataSource instance:
<bean id="galleryDataSource"
      class="org.springframework.jdbc.datasource.DriverManagerDataSource">
      p:driverClassName="${jdbc.driverClassName}"
      p:url="${jdbc.url}"
      p:username="${jdbc.username}"
      p:password="${jdbc.password}"/>
</bean>
If we wanted to get a bit fancier, we could instead choose a popular database connection pool as our bean implementation. A connection pool is ideal for web applications that require multiple concurrent database operations. A connection pool can be optimized for different usage scenarios, ensuring a more efficient means for handing off new database connections to the application. Again, switching to a database connection pool will give your application more efficiency without requiring any code changes.
Note
Connection pools used to be something that developers had to write on their own. Their use is actually a fun gauge to use to see how long engineers have been writing web applications in Java. If they've written their own connection pools, they've probably been at it for a long while. As a result of needing to roll their own pools, every open source project wound up with a unique implementation of a connection pool. Fortunately, all of the projects that are part of the Apache Software Foundation came together to create the commons-dbcp library (dbcp is short for database connection pool).
Notice in the configuration that follows how easily we switch to using a connection pool. This is made possible by coding to interfaces, externalizing configuration, and leveraging dependency injection. It's a really rewarding experience to be able to make such large changes so quickly and easily.
<bean id="galleryDataSource"
      class="org.apache.commons.dbcp.BasicDataSource">
      p:driverClassName="${jdbc.driverClassName}"
      p:url="${jdbc.url}"
      p:username="${jdbc.username}"
      p:password="${jdbc.password}"/>
</bean>
You may have noticed that the id for our DataSource bean is galleryDataSource. In most enterprise applications, you end up with several datasources. As a result, the best approach is to give each one a unique nameso you have finer-grained control over which portions of your application use which datasource.
Also notice that we have specified properties for driverClassName, url, username, and password for our datasource bean. These properties determine how an application connects to a given database. Within the Spring configuration, we can use placeholder references through the ${} notation. These placeholders represent external values stored in our jdbc.properties file, injected into our configuration file, courtesy of our PropertyPlaceholderConfigurer. This detail isn't necessary, but it makes our configuration more portable. It allows us to easily define different database configurations for different machines and platforms without needing to change our Spring configuration. For instance, here is a snippet of our src/main/resources/META-INF/spring/jdbc.properties file:
jdbc.url=jdbc:h2:mem:prosh;DB_CLOSE_DELAY=−1
jdbc.driverClassName=org.h2.Driver
jdbc.username=sa
jdbc.password=
The syntax is intuitive. Each line contains a simple expression, in which the left side represents the property name and the right side (after the =) represents the configured value. This externalization makes it easy to swap different database configurations for different environments and better externalizes these details from application-specific configuration.
Different databases will require different JDBC URLs. In this example, we use the popular H2 database. H2 is a Java-based database and is therefore easy to integrate into any Java-based application (it doesn't require a separate database process). You could just as easily use PostgreSQL, MySQL, or any database for which a JDBC driver is available. Just make sure your database is up, running, and configured to listen on the URL specified in the bean's configuration.
It is also critical that you include the appropriate JDBC driver on your classpath when the application is first started. Because H2 is Java-based, simply including the H2 JAR file on your classpath is all that is required to get rolling.
Hibernate almost always implies a relational database, so starting there makes the most sense. Java has evolved into a platform for building enterprise-level applications, so there are many options for connecting it to a standard relational database.
At the simplest level, you can instantiate the database driver for your database of choice, but most applications require more than that. Many application servers offer their own optimized database connection pools to improve performance when multiple clients are using the application concurrently. To simplify administration and integration, many application servers use JNDI to interface with a database.
JNDI is often described as the opposite of Spring's IoC. Instead of having dependencies automatically injected into your application, JNDI allows dependencies to be looked up from a centrally managed directory. There are certainly benefits to both approaches. For example, in the case of JNDI, developers can define logical names for database resources in their application configuration, but allow a system administrator to manage mapping that logical name to the proper database connection pool in the web application container configurations, effectively deferring the specification of database connection details until runtime. When a database migration is required, JNDI can simplify some of these administrative tasks, as no changes to the application configuration will be required.
No matter which approach you decide to take, Spring makes integrating a datasource into your application easy. The key factor is that Spring's persistence templates never require a specific type of datasource implementation. Instead, they depend on the more generic javax.sql.Datasource interface. Whether you intend to use a database connection pool or a JNDI-retrieved datasource, the resultant configuration should always produce a standard javax.sql.Datasource reference.
This brings us to a key concept in Spring: the FactoryBean interface. The FactoryBean is Spring's answer to the well-known factory design pattern. The key concept here is that you remove a direct dependency on a specific implementation by delaying the selection or instantiation of the specific implementation until runtime. You define a factory, and it is the factory's job to pick the correct implementation at runtime and instantiate (or look up) that specific class.
The Spring FactoryBean concept is quite similar. Normally in Spring, when you define a bean, the class specified by the classname attribute is the class that will be instantiated and injected into other beans that have that bean ID wired into them. This isn't the case with a FactoryBean. When you use a FactoryBean, you are instead instantiating a factory class that will then be responsible for creating the specific implementation used to resolve dependencies in Spring. So essentially, the classname attribute in this case just defines a factory implementation, whose job will then be to create the actual target implementation you need.
This concept allows us to use multiple strategies to access a datasource without tying ourselves down to a particular solution. If you use the JNDI FactoryBean, you will still end up with a datasource reference, and the same will occur if you choose to use the pooled datasource implementation.
There are other reasons to use a FactoryBean in Spring, as well. For instance, a MapFactoryBean can be used to create a Java Map entirely in your configuration file (which can be quite convenient in certain cases).
A Spring FactoryBean implements the FactoryBean interface, which defines three methods designed to instantiate the target object (that is, the instance the factory is intended to create), the target object's type, and whether the target object is a singleton or prototype. For our scenario, we would configure our JNDI datasource in the following way:
<bean id="galleryDatasource" class="org.springframework.jndi.JndiObjectFactoryBean">
    <property name="jndiName" value="java:comp/env/jdbc/gallery"/>
</bean>
Although the preceding example is fairly concise, in some situations, you can make your configuration easier to read and more terse by importing a namespace intended to handle a very specific type of configuration. For example, by importing the jee namespace, we can simplify the preceding JNDI lookup further:
<jee:jndi-lookup id="galleryDatasource"
          jndi-name="java:comp/env/jdbc/gallery"/>
Not only have we reduced the configuration to a single line, but we've also made the intention of our configuration clearer.
Java web applications are deployed as WAR files. A WAR file is a special kind of JAR file that includes things like servlets, JSPs, tag libraries, and static HTML assets.
The key configuration file for a WAR is web.xml, which outlines the structure for an application in accordance with the Java EE specifications. The configuration that follows adheres to the Servlet 2.5 specification, and can be interpreted by all major application server containers, including Tomcat, Resin, Jetty, WebSphere, WebLogic, GlassFish, and so on. The web.xml file should be placed under the WEB-INF directory. For Maven projects, the WEB-INF directory is located under src/main/webapp. Here's a basic src/main/webapp/WEB-INF/web.xml to get our art gallery application started.
<?xml version="1.0" encoding="UTF-8" standalone="no"?>
<web-app xmlns="http://java.sun.com/xml/ns/javaee"
         xmlns:xsi="http://www.w3.org/2001/XMLSchema-instance"
         xsi:schemaLocation="http://java.sun.com/xml/ns/javaee
                             http://java.sun.com/xml/ns/javaee/web-app_2_5.xsd"
         version="2.5">

    <!-- Listener to create the Spring Container shared by all Servlets and Filters -->
    <context-param>
        <param-name>contextConfigLocation</param-name>
        <param-value>
            classpath*:META-INF/spring/spring-master.xml
        </param-value>
    </context-param>

    <listener>
        <listener-class>
             org.springframework.web.context.ContextLoaderListener
        </listener-class>
    </listener>

    <!-- Spring DispatcherServlet for HTTP requests -->
    <servlet>
        <servlet-name>galleryDispatcher</servlet-name>
        <servlet-class>
            org.springframework.web.servlet.DispatcherServlet
        </servlet-class>
        <init-param>
            <param-name>contextConfigLocation</param-name>
            <param-value>
                WEB-INF/spring/spring-master-web.xml
            </param-value>
        </init-param>
        <load-on-startup>1</load-on-startup>
    </servlet>

    <servlet-mapping>
        <servlet-name>galleryDispatcher</servlet-name>
        <url-pattern>*.art</url-pattern>
    </servlet-mapping>

</web-app>
As mentioned earlier, with web-based Spring applications, you ultimately end up with multiple application contexts containing all of your Spring beans. There's a single root application context and potentially many child application contexts.
ContextLoaderListener implements the javax.servlet.ServletContextListener interface. Listeners that implement the ServletContextListener interface receive notifications from the application container whenever the servlet context is initialized or destroyed. It's a convenience mechanism to simplify your application configuration and ease system maintenance. Spring's ContextLoaderListener fires upon receiving such a notification when the servlet context is created during application startup. It expects to find a contextConfigLocation parameter defined in the servlet context, and then uses this parameter to retrieve the bean definitions and instantiates them. The beans outlined by the contextConfigLocation compose what is commonly referred to as the root application context.
The web.xml file is also where you configure any implementations of the Servlet interface that your application requires. Servlets are configured, along with any initialization parameters the servlet class expects, and then associated with the URL pattern to which you want the servlet to be applied.
For a Spring application, you would take advantage of the framework's DispatcherServlet class. DispatcherServlet is a flexible implementation of the Servlet interface that serves as a central routing mechanism for HTTP requests. With the help of adapter classes offered by Spring, you can specify how each instance of DispatcherServlet handles everything from view resolution to exception handling in a nice, pluggable way.
Each of these instances of DispatcherServlet has its own namespace, commonly referred to as a child application context. That means that each DispatcherServlet has its own ApplicationContext, but they all share the root application context. In short, this means that Spring beans defined in the ApplicationContext of a DispatcherServlet may reference the beans from your root ApplicationContext but not vice versa. It also means that separate DispatcherServlet instances may not share their bean definitions.
Note
The ApplicationContext used by each DispatcherServlet is technically an implementation of Spring's WebApplicationContext interface. The WebApplicationContext adds a getServletContext method to the generic ApplicationContext interface. It also defines a well-known application attribute name that the root context must be bound to in the bootstrap process.
Let's take another look at our galleryDispatcher servlet definition. Just as with our datasources, we give each configured DispatcherServlet a unique name, because we expect to end up with several.
<servlet>
    <servlet-name>galleryDispatcher</servlet-name>
    <servlet-class>
        org.springframework.web.servlet.DispatcherServlet
    </servlet-class>
    <init-param>
        <param-name>contextConfigLocation</param-name>
<param-value>
WEB-INF/spring/spring-master-web.xml
</param-value>
</init-param>
<load-on-startup>1</load-on-startup>
</servlet>The servlet is defined with an init-param named contextConfigLocation, which provides the servlet with all the information it needs to acquire and instantiate its Spring bean configuration. And beans in spring-master-web.xml may safely reference beans the ApplicationContext defined in spring-master.xml and its subsequent imports.
However, there's one large exception to this ApplicationContext hierarchy: implementations of the BeanFactoryPostProcessor interface and its sibling BeanPostProcessor just apply to the BeanFactory that defines them. The PropertyPlaceholderConfigurer class described earlier in this chapter is one such example. This means that you need to define a property placeholder once for each DispatcherServlet in addition to the one already defined in the spring-master.xml root application context.
Finally, we instruct our application container to map any requests that start with /art/ to this galleryDispatcher:
<servlet-mapping>
    <servlet-name>galleryDispatcher</servlet-name>
    <url-pattern>/art/*</url-pattern>
</servlet-mapping>
With that configuration in place, a fictitious request to /art/foo would be mapped to the galleryDispatcher, which would in turn route the request to a proper Spring MVC controller.
As of Spring 3.0, bootstrapping Spring MVC is incredibly simple. The following are the contents of src/main/webapp/WEB-INF/spring/spring-master-web.xml, which is the configuration file behind the galleryDispatcher servlet.
<?xml version="1.0" encoding="UTF-8" standalone="no"?>
<beans xmlns="http://www.springframework.org/schema/beans"
       xmlns:context="http://www.springframework.org/schema/context"
       xmlns:mvc="http://www.springframework.org/schema/mvc"
       xmlns:xsi="http://www.w3.org/2001/XMLSchema-instance"
       xsi:schemaLocation="http://www.springframework.org/schema/beans
            http://www.springframework.org/schema/beans/spring-beans-3.0.xsd
            http://www.springframework.org/schema/context
            http://www.springframework.org/schema/context/spring-context-3.0.xsd
            http://www.springframework.org/schema/mvc
            http://www.springframework.org/schema/mvc/spring-mvc-3.0.xsd">

    <context:component-scan base-package="com.prospringhibernate"
                            use-defaultfilters="false">
    <context:include-filter type="annotation"
                            expression="org.springframework.stereotype.Controller"/>
    </context:component-scan>
<mvc:annotation-driven/>
<!-- selects a static view for rendering without the need for an explicit controller -->
<mvc:view-controller path="/index.jsp"/>
</beans>We're using Spring's component scanning again in this WebApplicationContext. This time around, we're specifying an include-filter to restrict the beans we instantiate to only those POJOs annotated with the @Controller stereotype annotation.
Next, we employ the mvc-namespace declaration to turn on support for mapping requests to Spring MVC @Controller methods.
<mvc:annotation-driven/>
This convenience configuration syntax also registers default Spring formatters and Spring validators for use across all controllers. This allows us to write controller code like the following:
@Controller
@RequestMapping("**/people")
public class PersonController {

    @RequestMapping(value = "/{id}", method = RequestMethod.GET)
    public String show(@PathVariable("id") Long id, ModelMap modelMap) {
        // business logic to retrieve a Person entity
        return "person";
    }

    @RequestMapping(value = "/{id}", method = RequestMethod.DELETE)
    public String delete(@PathVariable("id") Long id) {
        // business logic to delete a Person entity and
        // return the appropriate view goes here
    }

}
This abridged code is annotated as a controller. It's also mapped to **/people via the Spring MVC @RequestMapping annotation. We use the @RequestMapping annotation again at the method level to specify that any HTTP GET request to **/people/{id} should trigger the show method. The @PathVariable annotation will take that {id} parameter and set it as Long id for use within the show method. Similarly, when an HTTP DELETE is issued against the URL /art/people/{id}, the request will be routed through the galleryDispatcher to the PersonController's delete method. That's a lot to digest in a short period of time, but suffice it to say that Spring's MVC annotations greatly reduce the amount of code required to build out a full-fledged enterprise web application.
Finally, we demonstrate Spring's mechanism for static view resolution:
<mvc:view-controller path="/index.jsp"/>
Often, you will want to simply route a request to a view without any logic in a controller. This is where the mvc:view-controller comes in.
In this chapter, you have gotten a sense for what is involved in setting up a web application using core Spring, Maven, a database, and Spring MVC.
Maven is a great tool that development teams can use to simplify day-to-day development. You can manage your dependencies, ensuring repeatable build processes, and provide a consistent interface for developers on your team to use for interacting with your project.
You've also learned about some of Spring's features, including component scanning, BeanFactoryPostProcessors like the PropertPlaceholderConfigurer, Spring's namespace support, and more advanced XML configuration management with import declarations. Component scanning is likely the most important of these features, since it allows Spring to locate classes within a specified package structure so that it can manage these components and resolve dependencies appropriately.
The component-scanning feature allows developers to use annotations as hints for Spring. It simplifies the work required to wire dependencies together and even reduces the amount of XML configuration required. For instance, the @Repository annotation should be used to indicate those classes that compose the DAO layer, the @Service annotation can be used to designate those classes that are part of an application's service façade, and the @Controller annotation denotes the presence of a POJO that should be used for Spring MVC interactions. These annotations simplify the definition of the respective tiers, imbuing layer classes with metadata that helps describe their purpose.
You also saw what's required to integrate a database into a Spring application using the Apache commons-dbcp library for connection pools or via JNDI if you want to use the datasource offerings from your application container.
In the next chapters, we'll build out our domain model and integrate Hibernate into our art gallery application.