Explore Homes, Rooms, and Zones
Where things really get interesting from here is with the exciting world of scenes, but before I get to that, you need to be familiar with the concepts of homes, room, and zones.
I briefly explained these ideas back in Learn the HomeKit Hierarchy, but to refresh, homes and rooms are exactly what they say they are (assuming you set things up correctly), while a Zone is a collection of rooms within a home, most typically a level such as upstairs or downstairs.
Taking a few minutes to fully understand these concepts is critical to a smooth home automation experience. Just imagine what a mess it’d be if you told Siri to turn off the kitchen lights and the lights in the living room turned off instead! Scenes and automations are especially powerful home automation tools, but you’ll likely use them with rooms and zones, so it’s crucial that you understand these basics before moving on to those topics.
Set Up Homes
Chances are, you need only one Home in your HomeKit setup—the one you establish when you first set up HomeKit—but you’ll want to know how to tweak that home in the home app to get the most from your HomeKit home (Thanks to Apple for making that clear!).
When do you need more than one Home? If you have a second home, such as a cottage or vacation home, you’ll want to set that up as a second home if you plan to use HomeKit there. However, if you have something like a detached garage, should that be treated as a separate home, or as a room?
An important consideration here is that you cannot easily transfer accessories between homes. To move an accessory from one home to another, you must first completely remove it from HomeKit in the current home (open accessory settings, scroll down, and tap Remove Accessory), and then set it up from scratch with the other Home.
To create a Home, go to the Home view of the Home app, tap the home  button in the upper-left corner and tap Add Home. Give the new home a name, choose a custom photo if you like (more on this in a bit), and tap Save. This drops you into the new Home’s settings.
To switch between homes in iOS and iPadOS, go to the Home screen and tap the home button in the upper-left corner, and then choose a home from the menu. On macOS, click the home ![]() icon and choose the home from the list. If you have multiple homes, the Home Switching option automatically switches between homes based on your location. Unless it gives you problems, it’s best to leave Home Switching on.
icon and choose the home from the list. If you have multiple homes, the Home Switching option automatically switches between homes based on your location. Unless it gives you problems, it’s best to leave Home Switching on.
To open home settings, tap the home button and then Home Settings. (In macOS, choose Edit > Edit Home). If you have only one Home, you’re taken directly to its settings when you tap the home button.
Once you get to a Home’s settings, here is what you’re looking at:
Name: Set this to whatever you prefer. Perhaps that’s the street address, the home’s nickname, or something as simple as “House.”
People: You can let other members of your house control your HomeKit accessories, assuming they have a suitable Apple device, like an iPhone. Tap Invite and enter their contact details to get started.
Once they have accepted your invitation, they appear under People in your Home’s settings. Tap that person’s icon to see and edit the settings for that person:
Control Accessories Remotely: If you have a Home Hub that enables this functionality, this setting allows the person to view and adjust accessories when away from home. It’s enabled by default.
Add and Edit Accessories: This lets the other person edit accessories, scenes, favorites, and the like. It’s disabled by default, and I encourage keeping it disabled unless the other person needs to edit your HomeKit settings, because the more administrators you have, the more likely something will get accidentally screwed up.
Show Me on Apple TV: Completely unrelated to home automation, this setting lets you add yourself as a user on an Apple TV, which lets different family members customize the contents of the TV app.
Remove Person: Tap this only if you want to remove the person from your Home! You can always add them back later. (This option isn’t available for the person who set up the Home.)
Notifications: This gives you a central place to manage push notifications from your doors, locks, and sensors, as I discussed in Tweak Accessories.
Speakers & TVs: Allow Speaker & TV Access lets you set who is allowed to broadcast to AirPlay 2 receivers (like an Apple TV or HomePod) in your home. The default is anyone on the same Wi-Fi network, but you can set it to anyone or only people you share your Home with. You can also require a password for anyone to use AirPlay, which is good to know about in case someone abuses the privilege.
Hubs & Bridges Hubs: Tap this to see your Home Hubs. A Home Hub is a HomePod, Apple TV, or iPad that lets you control your accessories when you’re away from home. It’s also required for automations, as I discuss in Set Your Home on Autopilot. If you have any HomeKit devices that act as bridges, like a Philips Hue Bridge, they’re also listed here.
Home Wallpaper: There are three generic color backgrounds built in. However, you can take a picture of your house and use it as your background (Figure 20), or use any other photo on your device. That’s purely an aesthetic choice.
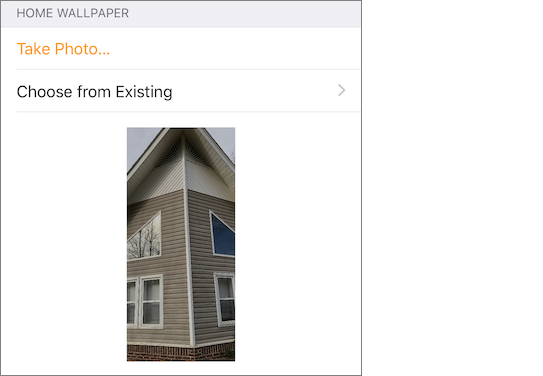
Figure 20: The Home app prefers tall, skinny portrait photos on the iPhone. Note, however, that these wallpapers do not sync between devices. If you want to use custom photos, I recommend creating an album of home photos in the Photos app to use for this purpose so that they’re easy to access. Interestingly, the iPhone version of Home prefers photos in the portrait orientation, while on the iPad it prefers landscape.
Home Notes: You can add notes here for anyone you share your Home with. Apple probably intended this for HomeKit-related notes like “Don’t use the wall switch to control the bedroom lamp, use the app!” But you can use this field for whatever you want, like the location of a spare key.
Remove Home: This removes a Home. Note that you can remove all Homes, even if you have only one, but doing so also unregisters any accessories associated with that Home. You’re asked to verify before removing the Home, but use this option with caution! This is usually only used as a last-ditch troubleshooting step—see Troubleshoot HomeKit.
Establish and Configure Rooms
HomeKit lets you split your Home into separate Rooms, which are the second level of the HomeKit hierarchy. HomeKit Rooms, of course, should match up with the physical rooms where you have accessories. I have Rooms like Kitchen, Office, and TV Room; you get the idea.
Rooms group your accessories together in a manner both you and HomeKit can understand. So when I tell Siri to turn off all the lights in my TV Room, it knows to turn off the overhead light (controlled by an Eve Light Switch) and to turn off the floor lamp (which contains a Hue bulb). Rooms are also useful for sensors. I can put Eve Degree units in different rooms and monitor their respective temperatures.
(When you first set up a device, it’s automatically added to a room called Default Room; you can later move it to the appropriate room.)
View accessories by room: On the Rooms screen, tap the menu
 button and choose a Room from the menu to see all the accessories (and scenes!) tied to that room (Figure 21). Or swipe left or right on the Room screen to browse rooms individually. In macOS, you can see all your Rooms in the View menu.
Figure 21: One of the advantages of setting up Rooms is that the Home app lets you view and monitor accessories by room. Note that in my Home app, shown here, scenes are tied to the Room. Add a Room: From the Rooms screen, tap the menu
 button in the upper-left corner, tap Room Settings, and then Add Room. (If you already have a good number of rooms set up, you may need to scroll down to see the Room Settings command.) Enter a name, choose a room wallpaper if you like, and tap Save.
Move an accessory to a different room: From the accessory’s settings view (refer back to Activate Accessories), tap Room and pick or create a Room.
To view the settings for Rooms, tap the menu ![]() button on the Rooms screen, tap Room Settings, and choose the Room you want to edit. In macOS, choose Edit > Edit Room. The settings you see there are very similar to those for a Home:
button on the Rooms screen, tap Room Settings, and choose the Room you want to edit. In macOS, choose Edit > Edit Room. The settings you see there are very similar to those for a Home:
Room Name: This is the name your Room is identified by. As always, keep it simple and pronounceable: Kitchen, Bathroom, Bedroom, etc. See Tips for Naming Rooms and Accessories.
Zone: Again, a Zone is yet another container in the HomeKit hierarchy—specifically, a collection of Rooms. There are a number of ways you could use this, like Upstairs and Downstairs, Inside and Outside, or Basement and Main Level.
Of course, if you live in a larger single-story home, you might set up Zones for individual wings. In a smaller single-story, you might group, say your kitchen and dining room. Feel free to be creative, but a Room can belong to only a single Zone.
The most practical use for Zones is for Siri control. For example, when set up properly, you can tell Siri to turn off all the lights on a single floor. You should set up your Zones now for the sake of well-structured data—it may prove beneficial later. For instance, if you were to ever tell Siri to turn off the downstairs lights on a whim, wouldn’t it be nice if that worked the first time?
Room Wallpaper: This is just like the Home Wallpaper option discussed above. Personally, none of my rooms are ever clean enough to get a good shot, but help yourself. You could also use pictures of people for bedrooms and so on.
Remove Room: Tap this to remove a Room.