Use Graphics in Notes
Notes isn’t restricted to text: you can embed photos and videos in a note, draw in notes, or even scan documents!
Add Photos or Videos
macOS and iOS offer different ways of importing photos and videos into Notes.
Add Photos and Videos to Notes in macOS
The easiest way to add a photo or video to a note on a Mac is to drag in one from the Finder or Photos or paste in one that you copied from elsewhere. Here are some other ways to add graphics to a note in macOS:
Continuity Camera: You can use a device running iOS 12 or later to capture a photo directly into Notes on a Mac running macOS 10.14 Mojave or later. This feature is called Continuity Camera. Here’s how it works:
While in a note, choose File > Import from iPhone or iPad > Take Photo (what you see here depends on which devices you have).
A streamlined version of the Camera app opens on your device—you can tap the flash
 or change camera
  icons to adjust those things, but otherwise tap the shutter button to take a photo.
The photo appears directly in your note.
I’ve made a video showing how to use Continuity Camera.
Photos browser: You can view your Photos library directly in Notes by choosing Window > Photo Browser. From there you can drag and drop an image into a note (Figure 20).
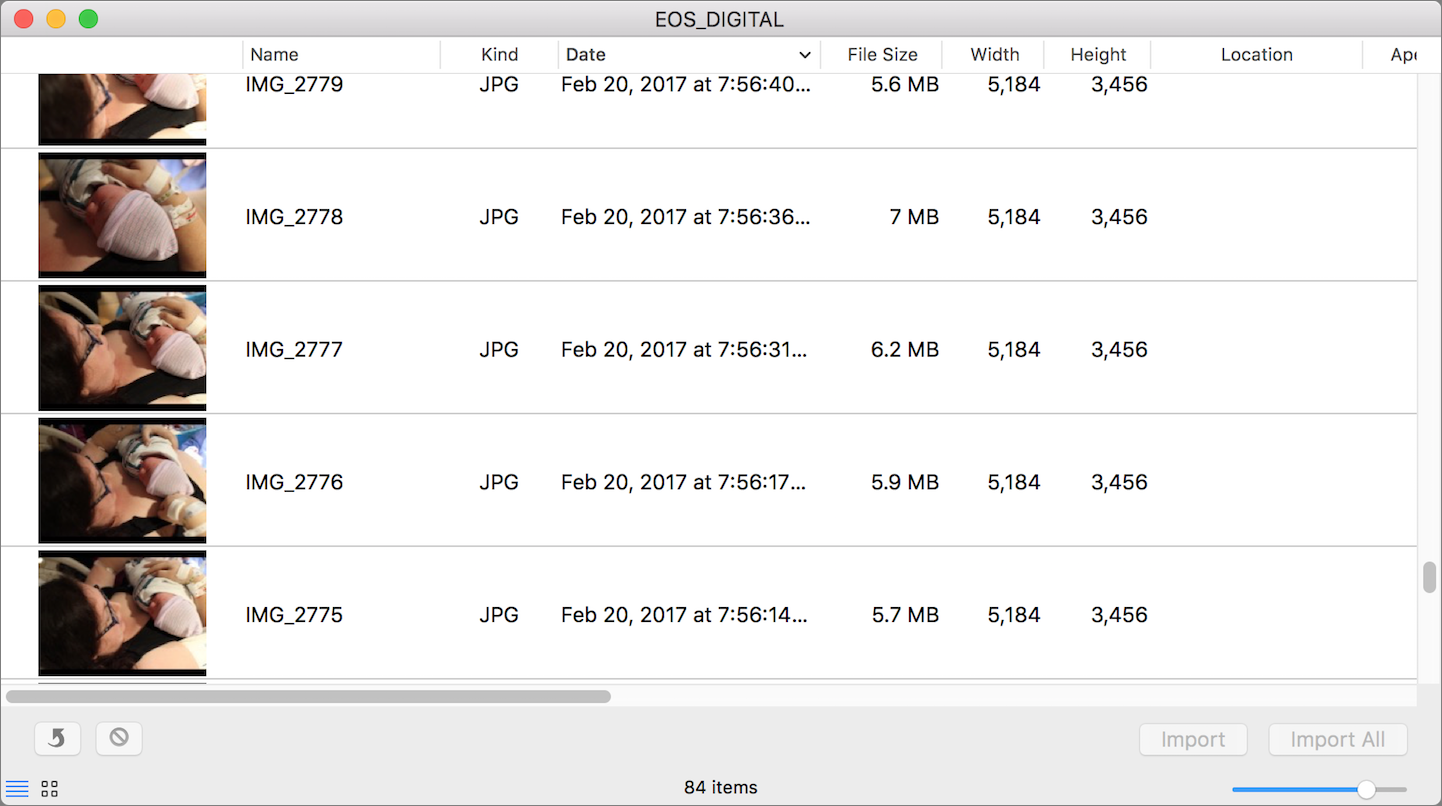
Figure 20: The Photos Browser lets you view your Photos library directly from Notes. Import Image: If your Mac is already set up to use Image Capture with a supported device, you can use Image Capture to directly import images into a note from a SD card, digital camera, or scanner:
Control-click inside a note and choose Import Image from the contextual menu.
Click your device and click Select.
Choose an image from the list and click Import or click Import All (Figure 21).
Add Photos and Videos to Notes in iOS and iPadOS
As with macOS, the easiest way to add images to a note in iPadOS is drag and drop, but you can only do so while Notes is in Split View (for more on that see, Take Control of iOS 13 and iPadOS 13). Here are two methods that work with any iOS or iPadOS device:
Take Photo or Video: You can take a photo or video that will go directly into your note. In a note, tap the camera
 icon (on iOS, you may have to tap the plus
  button to reveal it), and choose Take Photo or Video, which opens a slimmed-down version of the Camera app. Take your photo or video as usual and it is added directly to the note.
Import from Photos: You can add any photo or video saved in the Photos app. Tap the camera
icon (on iOS, you may have to tap the plus button to reveal it), and choose Photo Library to bring up the photo browser. Tap a photo to select it—selected photos show a blue  checkmark. Tap Done when you’re finished to insert the selected photos and videos into the note.
Scan Documents
Notes lets you use an iOS device to scan documents into Notes, in iOS, iPadOS, and macOS 10.14 Mojave or later. As opposed to just taking a picture of a document, scanning automatically identifies page edges, deskews the image, lets you create multi-page documents, and saves the result as a PDF attachment in the note.
Scan Documents in iOS
While in a note, tap the camera ![]() icon (on iOS, you may have to tap the plus
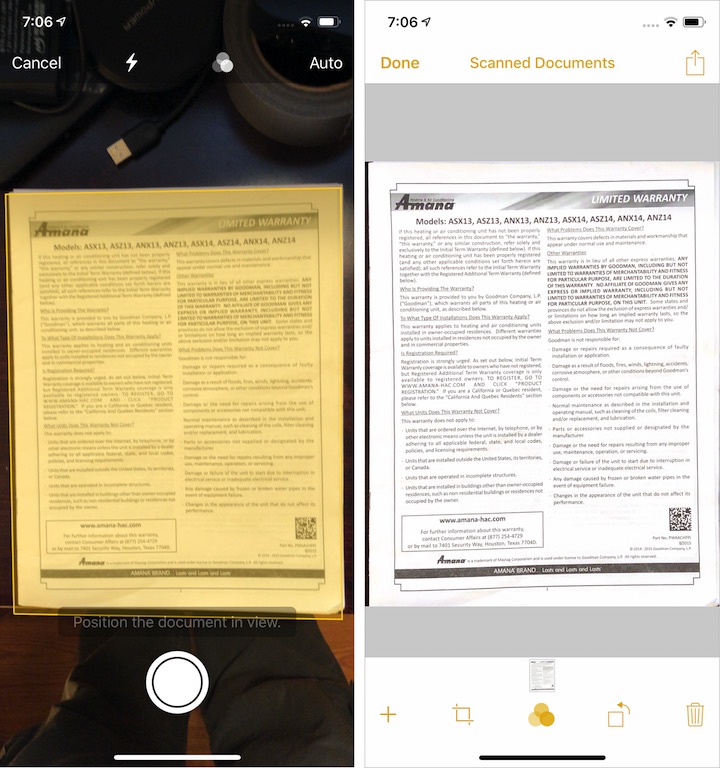
icon (on iOS, you may have to tap the plus ![]() button to reveal it) and choose Scan Documents to open a Camera-like viewfinder. By default, the scanner takes images automatically when it detects a document. Here’s the workflow:
button to reveal it) and choose Scan Documents to open a Camera-like viewfinder. By default, the scanner takes images automatically when it detects a document. Here’s the workflow:
Lay your document down on a flat surface—ideally in a well-lit room with a dark background.
Fit the document inside the viewfinder until a yellow overlay appears over the document and it captures the image.
You can keep doing this to combine several pages into a single scan. The Save button shows a number in parentheses to indicate how many pages are in the document.
Tap Save when you’re finished and the document is deposited into the note.
While scanning images, you can tap the flash ![]() icon to turn the flash on and off, the filter
icon to turn the flash on and off, the filter  icon to choose color or black-and-white capture, and Auto to switch to manual capture with the shutter button.
You can view the current scans in the document by tapping the thumbnail in the lower-left corner. Swipe to move between scans. From this screen, you can tap crop  to adjust the scan’s corners, filters
  to adjust the scan’s color, rotate
  to rotate the scan, trash
  to delete the scan, or Retake to recapture the scan (Figure 22).
Scan with Continuity Camera in Mojave
Just as you can use an iOS or iPadOS device to capture a photo directly into Notes on a Mac running macOS 10.14 Mojave or later, you can also use Continuity Camera to scan documents. Here’s how:
While in a note, choose File > Import from iPhone or iPad > Scan Documents (what you see here depends on which devices you have).
Now use your iOS device to scan your documents as described in the previous topic. After you tap Save, your scan appears in the note.
I’ve made a video showing how to use Continuity Camera (this is the same video as above, so if you’ve already seen it, you don’t need to again).
Draw with Notes
You can draw inside notes on iOS and iPadOS, and even mark up attachments. It’s even easier if you have an Apple Pencil paired to an iPad, since you can just start drawing in a note.
To start an inline drawing, while viewing a note, either tap the drawing  icon (on iOS, you may have to tap the plus
 ![]() button to reveal it) or tap the tip of a paired Apple Pencil on a compatible iPad’s screen.
button to reveal it) or tap the tip of a paired Apple Pencil on a compatible iPad’s screen.
Drawing Tools in iOS/iPadOS Notes
Here are the tools available to you when drawing in Notes:
Pen, Marker, Pencil: The first three tools are the pen, marker, and pencil. All three make marks—just of different thicknesses—with your finger or an Apple Pencil.
Tap a selected tool to adjust its thickness and opacity (Figure 23).
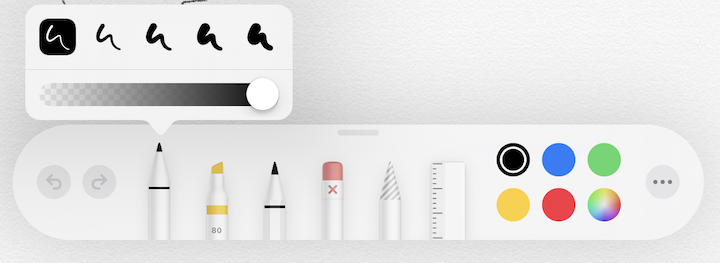
Figure 23: While making an inline drawing, tap a tool to adjust its thickness and opacity. To change the tool’s color, tap the colored dot on the far right of the tool bar.
Ruler: The ruler tool helps you draw straight lines. Tap it to place the ruler on the note. Touch, hold, and drag with one finger to move the ruler. Touch, hold, and rotate with two fingers to change the angle of the ruler—a circle in the middle of the ruler shows the angle of the ruler. Draw alongside either side of the ruler to draw a straight line at that angle. As you draw, a bubble appears next to your finger or pencil tip showing how many pixels long the line is.
Eraser: There are two versions of the eraser tool. The default is the object eraser, which deletes an entire object. Tap the eraser tool while it’s active to see the option to switch to the pixel eraser, which works more like a real eraser.
Lasso: The lasso tool lets you select objects in a drawing. Draw around the object or objects you want to manipulate—selections show a moving dotted line around them. While objects are selected, touch, hold, and drag to move them around the note. Tap the selected marks to see options to cut, copy, delete, or duplicate the marks.
Use Lines and Grids
In iOS, you can change the background to display lines or grids to emulate those kinds of paper, which can be especially useful for sketches. Open a note, tap the Share ![]() icon, and tap Lines & Grids from the bottom share bar.
icon, and tap Lines & Grids from the bottom share bar.
On the Lines & Grids screen, tap the option you want: a blank background, one of three ruled backgrounds, or one of three grid backgrounds (Figure 24).
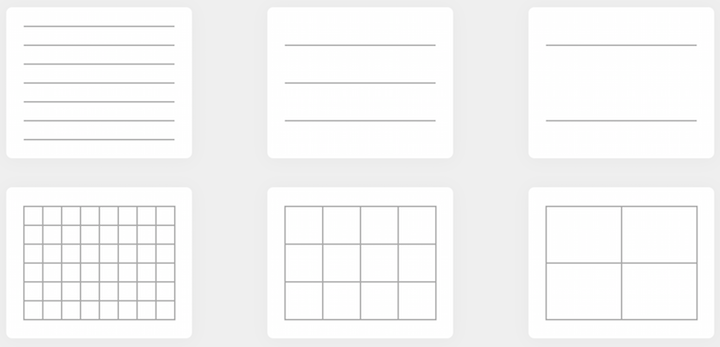
You can change or remove the background again at any time by following the above instructions.
Import a Sketch to macOS Catalina
A new feature in macOS 10.15 Catalina lets you draw on a device running iOS 13 or iPadOS and have it appear in a note on your Mac:
In Notes in Catalina, choose File > Import from iPhone or iPad > Add Sketch. If you have multiple devices, there will be multiple Add Sketch options.
The sketching device will wake up to a drawing canvas. Make your drawing as described above.
Tap Done on the sketching device.
The drawing appears in the note on your Mac.
Mark Up Attachments in iOS and iPadOS
In addition to drawings, you can mark up attached documents in notes, such as those you scan directly into Notes. To do so, tap an attachment to open it, tap the Share ![]() icon, and then tap Markup in the activity view.
icon, and then tap Markup in the activity view.
Most of the available tools are the same as if you were making an inline drawing, but tapping the plus ![]() icon reveals more options:
icon reveals more options:
Text: Tap Text to insert text, which you can adjust with the text settings
 icon.
icon.Signature: Tap Signature to insert a signature, either synced from Preview or Mail on a Mac, or one you draw on screen.
Magnifier: Tap Magnifier to insert a magnifying loupe to highlight small elements. Drag the green drag handle around the loupe to adjust the magnification. Tap the shape
 icon to adjust the magnifier outline.
Square, circle, speech balloon, line tool: Tap the square
 , circle
  , speech balloon
  , or line
  tool to insert those shapes. After inserting a shape, you can tape the shape icon to adjust the shape.
Mark Up Attachments in macOS
You can also mark up note attachments in macOS. To get started, double-click a note attachment to view it, click the down ![]() arrow in the upper-right corner of the attachment (move your mouse pointer in that direction to reveal it), and choose Markup.
arrow in the upper-right corner of the attachment (move your mouse pointer in that direction to reveal it), and choose Markup.
That reveals a toolbar with the following tools:
Sketch
 : Use this to draw free-handed. You can also draw rough shapes (Figure 25) and then transform them into smoothly drawn shapes by clicking the popover that appears (Figure 26).
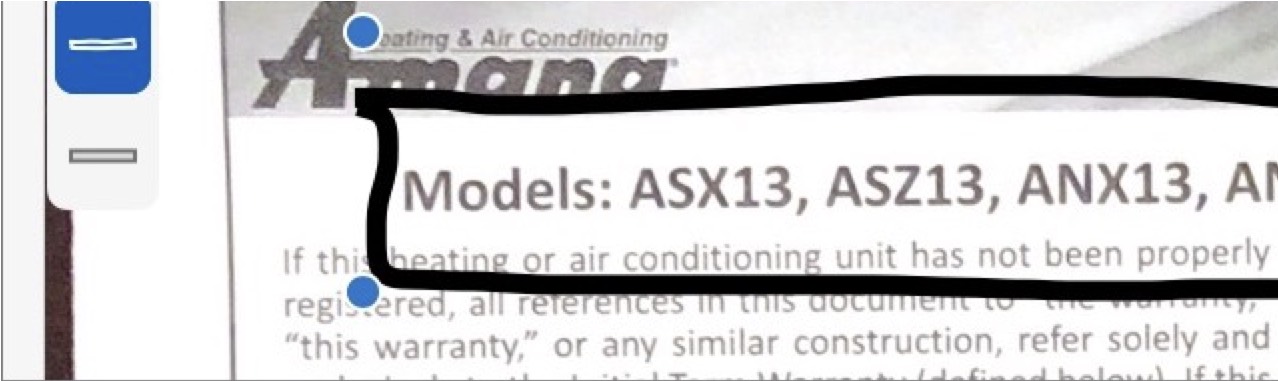
Figure 25: This sloppily drawn rectangle can be transformed into a nice, square rectangle with the popover at the left. 
Figure 26: Here is the same rectangle straightened out with the popover. Shapes
 : Click this to see a variety of shapes you can insert in the attachment: line, arrow, rectangle, rounded rectangle, circle, speech balloon, star, polygon, mask, and magnifying loupe. Use the border color
  and fill color
  menus to adjust shape colors.
Text
 : Click this to insert a text box. Click Text Style
  to adjust font and color.
Highlight
 : If the attachment is a PDF with embedded text, you can use this tool to highlight that text. Unfortunately, documents scanned with Notes don’t capture text so that you can highlight it.
Signature
 : If you have any saved signatures in Preview, you can click this to insert one.
When you’re finished marking up the attachment, click Done in the upper-right corner.