Annotate PDFs
Preview isn’t just a mere PDF reader—it also offers an array of PDF annotation capabilities that can take your reading and collaboration to the next level.
Highlighting Text lets you mark interesting passages in a PDF. Adding Notes to a PDF helps you add context to your highlights and include independent notes throughout the document. If those annotation methods are too complex for your needs, Bookmarking a PDF is a simple way to keep your place. For more graphical annotations, try Adding Shapes and Text to a PDF.
Finally, we cover Working with Forms, such as those issued by the government, and Signing PDFs, which makes it easier to slap your John Hancock on a digital document.
Highlighting Text
If you’re one of those people who highlight important passages in textbooks, you’re going to love Preview’s highlighting feature. It works much like using a marker to highlight passages in a book, except that you can add a note to go with each highlighted passage, rather than having to write in the margin with another pen. This is tremendously handy when you’re reviewing a PDF document for someone else, or even to leave yourself notes.
To highlight a passage, click the Highlight ![]() button in the toolbar. When selected, it turns blue
button in the toolbar. When selected, it turns blue ![]() , with the yellow highlighter enabled by default. Click the arrow next to the button to choose among different highlight colors, or to use red underline or strikethrough marking (Figure 83).
, with the yellow highlighter enabled by default. Click the arrow next to the button to choose among different highlight colors, or to use red underline or strikethrough marking (Figure 83).

Now, drag over your passage to highlight it. The highlight color or style remains selected, so you can keep highlighting passages without any additional action.
Once you’ve highlighted a passage, you can modify the highlight in a few ways:
Change the highlight: Control-click the highlight and click a different color, or click the underline
 icon.
icon.Delete the highlight: Control-click the highlight choose Remove Highlight.
Remove part of a highlight: Choose the same highlight color or style as is used in the highlighted text you want to modify, and select some of the highlighted text. (In other words, each highlighter works to erase its own highlights as well.)
Add a note: We explain how to add a note in the next topic.
You can efficiently view all your highlights in the sidebar or the Annotations inspector. See Quickly Viewing Highlights and Notes, ahead.
Adding Notes to a PDF
When it comes to adding notes, Preview offers two options:
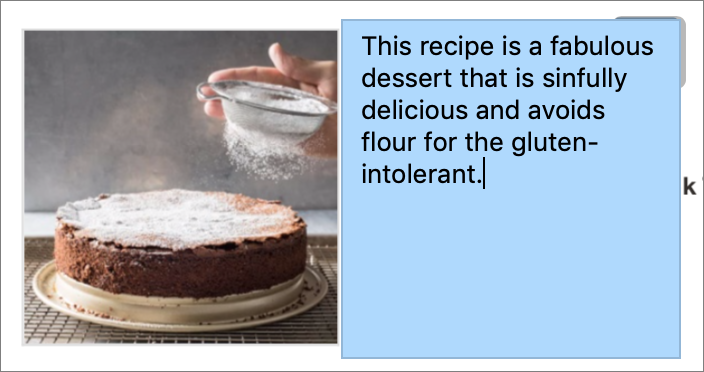
Make a general note: A general note can be positioned anywhere on the page (Figure 84). It’s easy to move it around or duplicate it.

Figure 84: For this screenshot, we’ve chosen View > Highlights and Notes to show how notes can be viewed in the sidebar. The blue note is a general note; the “unsalted” underlining doesn’t get a color; the green note goes with the highlighted “almond flour”; and the red note goes with the struck-out “Dutch-processed.” Attach a note to a highlight: You can attach a note to highlighted text—this is a handy way to help yourself remember why you highlighted a passage in the first place.
Adding a General Note
To add a general note, choose Tools > Annotate > Note or click the Note ![]() icon on the Markup toolbar. (We also like its keyboard shortcut, ⌘-Control-N.)
icon on the Markup toolbar. (We also like its keyboard shortcut, ⌘-Control-N.)
A colored box appears; start typing to add your text (Figure 85). When you’re done, click outside that box, and it shrinks down to become a smaller box.
You can do several things with your note:
Change its color: Control-click the closed note box, and choose a different color.
Edit it: To expand the note box and make its text editable, select its closed box and then click it again. Or, click it in either the sidebar or the Annotations inspector (more about that slightly ahead).
Move it: Drag the note box to the side of the page so it doesn’t obscure the document’s text (usually a good idea). Or cut it (⌘-X) and paste it (⌘-V) in a different location—this works well for pasting onto a different page.
Copy it: Option-drag the note box to copy it to a different location; this could be helpful if you need to apply the same comment to multiple spots in the document. Or use copy (⌘-C) and paste (⌘-V) to duplicate the note on another page.
Delete it: Select the note box and press Delete. This is worth doing when reviewing comments from others that you’ve dealt with and that nobody needs to see again.
Adding a Highlight Note
We talked about Highlighting Text earlier in this chapter. Once you’ve highlighted a passage, here’s how to attach a note to it:
Control-click the highlighted text and choose Add Note from the panel that appears (Figure 86).

Figure 86: Control-click the highlighted text and choose Add Note. Preview displays a blank rectangle in the same color as your highlight. Type your note in the rectangle (Figure 87).
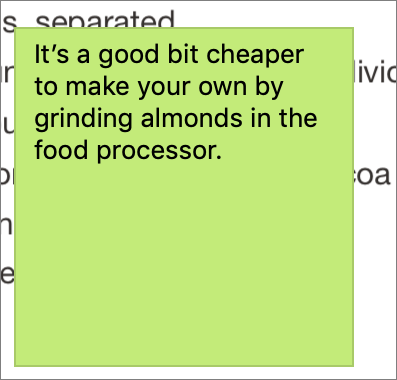
Figure 87: In the note box that appears, type your note. Click outside the note rectangle when you finish.
The note box appears as a tiny square icon just above and to the right of the highlighted text (Figure 88).

To edit a highlight-attached note, click its square icon in the main Preview window. Click to position the insertion point in the text, make your revision, and click outside the note area when you finish.
To delete a highlight-attached note, Control-click its highlighted text and choose Remove Note. You can also delete highlight-attached notes from the sidebar or Annotations inspector.
Quickly Viewing Highlights and Notes
Preview provides two places for working with a document’s highlights and notes from a summary view: the sidebar and the Annotations ![]() inspector. In both locations, you can theoretically rapidly scan a list of entries, click any entry to see it in the main portion of the document, and edit and delete entries.
inspector. In both locations, you can theoretically rapidly scan a list of entries, click any entry to see it in the main portion of the document, and edit and delete entries.
To access highlights and notes in the sidebar, choose View > Highlights and Notes (⌘-Option-4). This is useful if your highlights and notes are scattered in a multi-page PDF, as in the 175-page document shown in Figure 89.

Click any note in the sidebar to scroll to it. If you want to remove an item, select it in the sidebar and press Delete.
In previous versions of Preview, we suggested that you could work effectively with a document’s highlights and notes in the Annotations ![]() inspector because you could sort highlights and notes in various ways by clicking the column headers. However, in the Mojave version of Preview, sorting no longer works, and although it claims you can add and edit notes, that doesn’t work either. Stick with the sidebar!
inspector because you could sort highlights and notes in various ways by clicking the column headers. However, in the Mojave version of Preview, sorting no longer works, and although it claims you can add and edit notes, that doesn’t work either. Stick with the sidebar!
Bookmarking a PDF
Reading a long document isn’t much fun if you can’t save your place. You don’t have to rely on highlights and notes for that, since you can bookmark a page in a PDF by choosing Tools > Add Bookmark or pressing ⌘-D. A little red bookmark icon appears in the upper-right corner of the page (Figure 90).
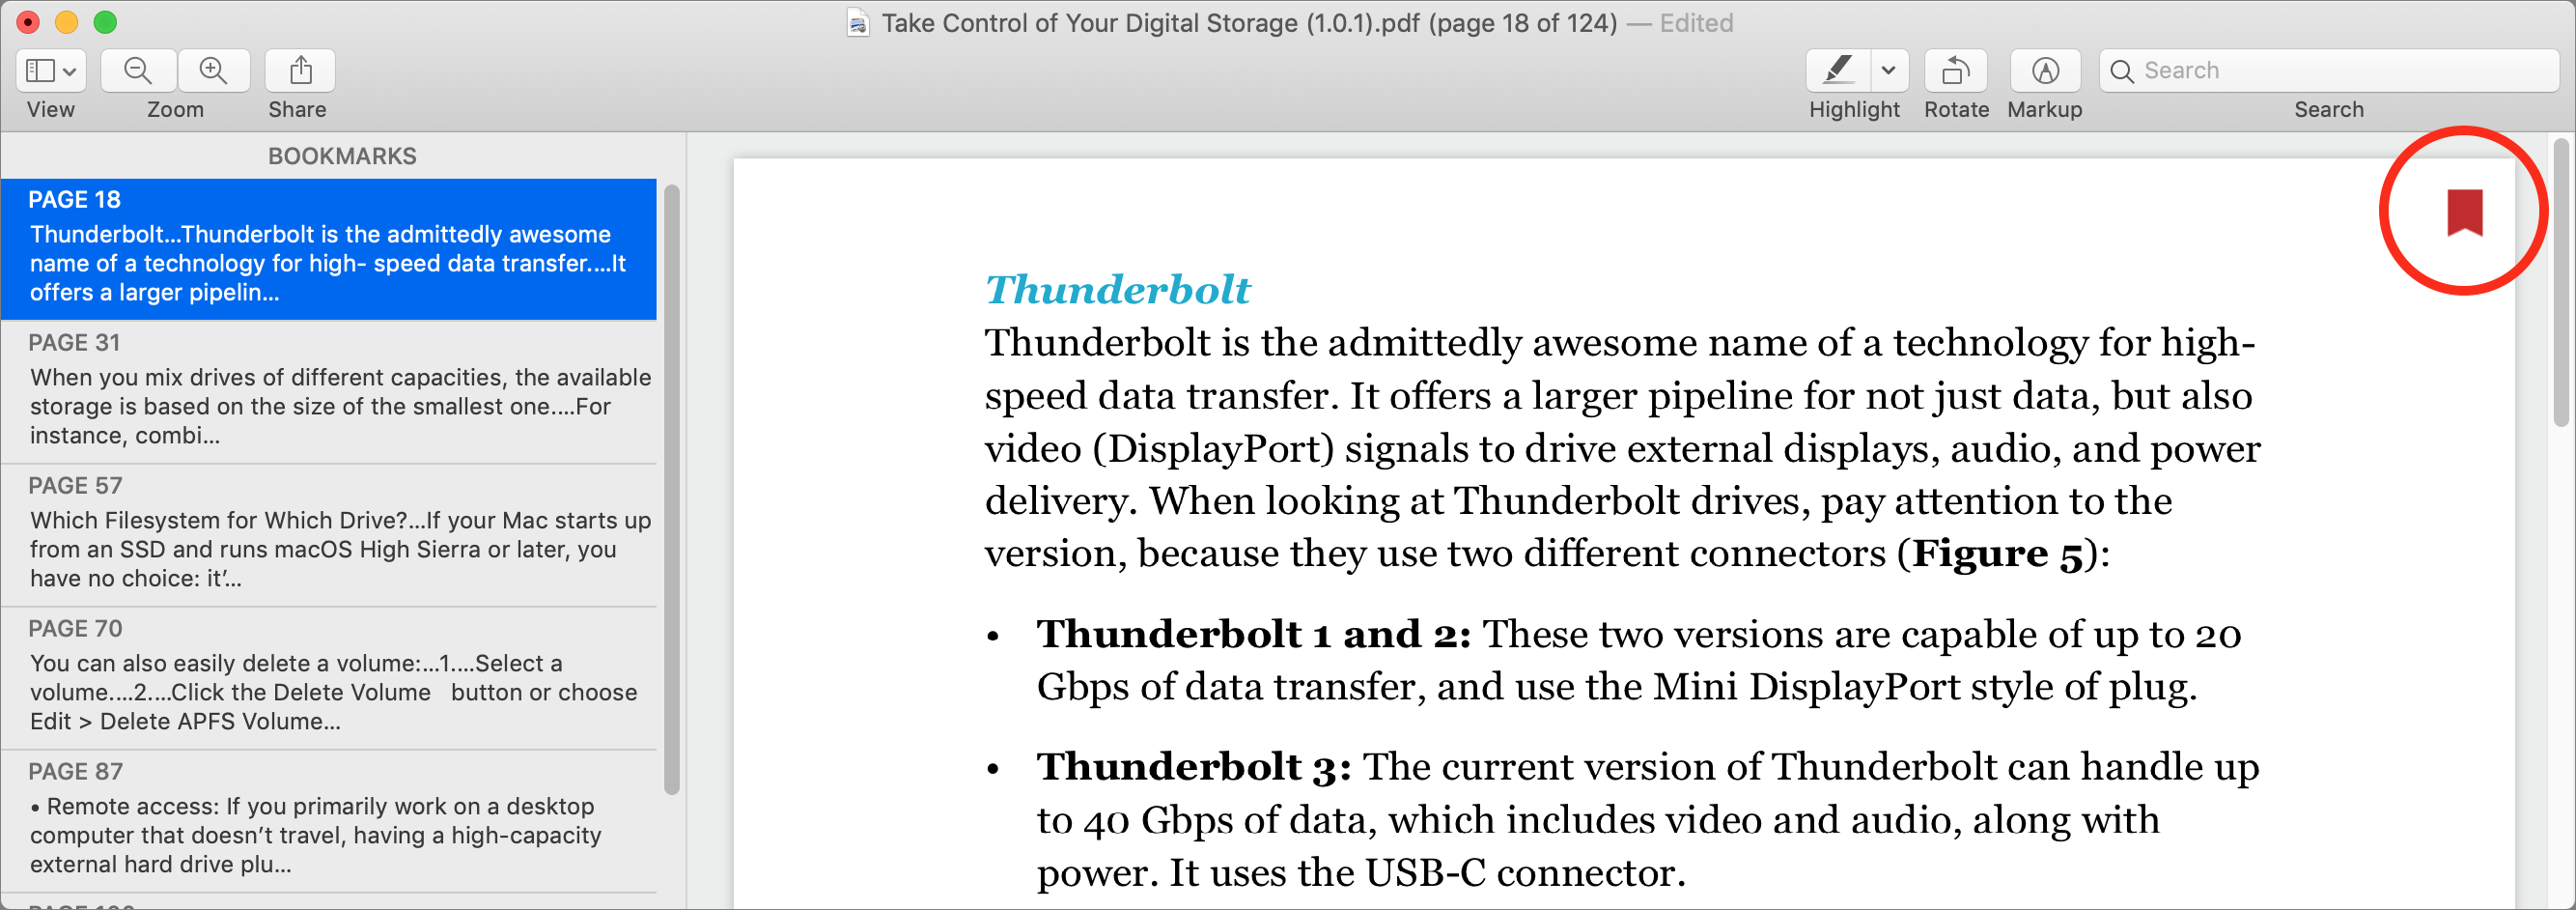
To view your bookmarks in the sidebar, choose View > Bookmarks (⌘-Option-5). Click one to jump to that spot in the document. To delete an unneeded bookmark, select it in the sidebar and press Delete.
Adding Shapes and Text to a PDF
In Inserting and Manipulating Basic Shapes, we explained how to add shapes, text, loupes, and masks to images in order to annotate them. Those exact same tools also work in PDFs. Here are some ways these tools are useful for PDFs.
Adding Text
Let’s say you want to fill out a PDF form, but it’s not a proper PDF form with text fields into which you can type. No problem, click the Text ![]() icon in the Markup toolbar (or press ⌘-Control-T) to add a text box with “Text” as placeholder text. Click inside the box and start typing. See Adding Text to Images.
icon in the Markup toolbar (or press ⌘-Control-T) to add a text box with “Text” as placeholder text. Click inside the box and start typing. See Adding Text to Images.
Redacting Text
Shapes can be helpful for redacting sensitive text from PDFs that you’re planning to print. Choose Rectangle ![]() from the Shapes
from the Shapes ![]() icon on the Markup toolbar to insert a rectangle in the PDF (or press ⌘-Control-R).
icon on the Markup toolbar to insert a rectangle in the PDF (or press ⌘-Control-R).
With the rectangle selected, use the Border Color ![]() and Fill Color
and Fill Color ![]() icons in the Markup toolbar to create a black rectangle. Drag the black rectangle over sensitive material to cover it (Figure 91).
icons in the Markup toolbar to create a black rectangle. Drag the black rectangle over sensitive material to cover it (Figure 91).

Drawing Attention to Details
If you want to call attention to something in a document without Highlighting Text or Adding Notes to a PDF, you have three tool options: Shapes, Loupe, and Mask.
We’ve found that no-fill red ovals (or rectangles, of course) are a great choice when you want to call out certain text or images. Choose Oval ![]() from the Shapes
from the Shapes ![]() icon on the Markup toolbar to insert one (or press ⌘-Control-O). While the shape is selected, use the Border Color
icon on the Markup toolbar to insert one (or press ⌘-Control-O). While the shape is selected, use the Border Color ![]() and Fill Color
and Fill Color ![]() icons in the Markup toolbar to give the oval a red border and a clear fill. Drag the oval over the desired content, and use the blue adjustment handles to tighten the oval around the content. For more on customizing shapes, see Inserting and Manipulating Basic Shapes.
icons in the Markup toolbar to give the oval a red border and a clear fill. Drag the oval over the desired content, and use the blue adjustment handles to tighten the oval around the content. For more on customizing shapes, see Inserting and Manipulating Basic Shapes.
When you’d like to magnify small details in a PDF, the Loupe ![]() tool can be handy (Figure 92). Like the others, it’s available from the Shapes
tool can be handy (Figure 92). Like the others, it’s available from the Shapes ![]() icon menu in the Markup toolbar (or press ⌘-Control-L).
icon menu in the Markup toolbar (or press ⌘-Control-L).
Finally, there’s the Mask tool, which works by leaving a rectangular area alone while darkening the surrounding area. Insert a mask by choosing Mask ![]() from the Shapes
from the Shapes ![]() icon on the Markup toolbar. It’s useful for highlighting an important section of text on a page—you can have only one mask per page. See Using the Mask and Loupe Shapes for details on how to use masks and loupes.
icon on the Markup toolbar. It’s useful for highlighting an important section of text on a page—you can have only one mask per page. See Using the Mask and Loupe Shapes for details on how to use masks and loupes.
Pointing Things Out
Once you’ve drawn attention to something in a document, you may need more context to explain what’s important about it. For that, the arrow ![]() shape is useful—find it in the Shapes
shape is useful—find it in the Shapes ![]() icon menu in the Markup toolbar (or press ⌘-Control-A).
icon menu in the Markup toolbar (or press ⌘-Control-A).
When an arrow is selected, start typing to insert text off to its side—you don’t even have to create a text box (Figure 93).

When adjusting arrows, Border Color ![]() changes the color of the arrow and line, while Fill Color
changes the color of the arrow and line, while Fill Color ![]() changes the color of the attached text box. For more on customizing arrows, see Inserting and Manipulating Basic Shapes.
changes the color of the attached text box. For more on customizing arrows, see Inserting and Manipulating Basic Shapes.
Working with Forms
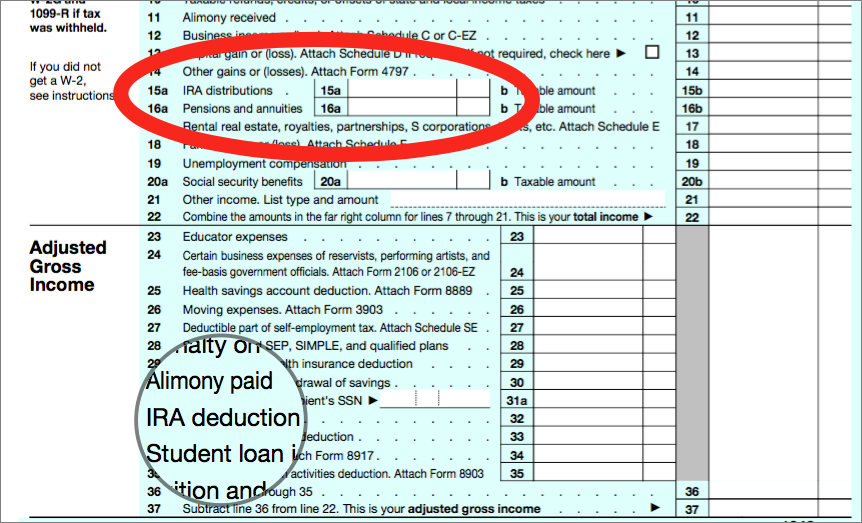
Some PDFs—for example, many government documents—include pre-defined interactive text fields and checkboxes (Figure 94). Although you can fill in these forms with Preview, it can’t create PDFs that include such forms. For that you need an app like Smile’s PDFpen Pro or Adobe’s Acrobat Pro.

To fill in an interactive form, just click inside a form element with the Text Selection ![]() tool, which should be selected by default. If not, click it on the Markup toolbar:
tool, which should be selected by default. If not, click it on the Markup toolbar:
Text fields: When you mouse over a text field, a highlight appears over the field; click it and a blinking text cursor appears. You’re ready to type, but don’t worry about trying to format your text in any way, since the formatting is set by the PDF’s creator. To move to the next field, press Tab.
After you finish typing in a field, be aware that if you click in it again, Preview selects all the text inside. Thus, if you click a field unintentionally and start typing, you’ll overwrite your previous text. To edit what you previously entered, click once in a field and then again inside it. Preview deselects the text so you can make a change.
Checkboxes: To tick a checkbox, click it, and a checkmark appears. Click it again to remove the checkmark.
Although a group of checkboxes may be set up logically so that it makes sense to select only one, the creator of a particular PDF may not have configured it properly to prevent you from selecting several conflicting options. It’s up to you to keep the selection sensible.
If you fill in a form partway, you can save the PDF and finish it or edit your previous entries in Preview later.
Signing PDFs
Here’s a classic problem: someone sends you a form to sign via email. You have to print it, sign it, and then scan it back into the computer so you can email it back (or, horrors, fax it). Preview solves this problem neatly with its Signature feature, (Tools > Annotate > Signature), but more easily accessible with the Sign ![]() icon in the Markup toolbar. Using this tool, you can create one or more signatures, and then easily add them to PDFs.
icon in the Markup toolbar. Using this tool, you can create one or more signatures, and then easily add them to PDFs.
Creating Signatures
There are two ways to create a digital signature: by writing it on a trackpad or by scanning a handwritten signature with the Mac’s built-in camera.
To create a signature using a trackpad:
Click the Sign
 icon in the Markup toolbar and choose Create Signature.
Click the Click Here to Begin button.
Write out your signature on the trackpad with your finger.There’s no way to erase, so if you’re unhappy with the results, click Clear and try again.
When you’re satisfied, click Done to add the signature to Preview’s list (Figure 95).

If you dislike how shaky your signature appears when you try to draw it with your finger on the trackpad—or if you don’t have a trackpad, write it on a piece of paper and snap a picture with your Mac’s built-in camera instead. Here’s how:
Sign your name on a blank, white piece of paper, preferably with a black marker.
Choose Create Signature and click the Camera button. Inside the popover, a window appears displaying what your camera sees.
Hold your paper signature up to the camera, making sure to get it close and line it up with the blue line.
When Preview detects the signature, it displays the digital version in the camera window. As long as you hold the paper up to the camera, Preview keeps trying to detect it, so you can move it slightly to keep improving the results. Once you like how it looks, click Done to save the signature (Figure 96).

Using Signatures
Once created, your signature is easy to insert into an image or PDF.
Choose Tools > Annotate > Signature or click the Sign ![]() icon. This time, you see your new signature in the list. Choose it to insert it in the document.
icon. This time, you see your new signature in the list. Choose it to insert it in the document.
You can move it by clicking and dragging, or resize it using the blue handles (Figure 97). Signatures are usually much larger than the space available, which is good, since shrinking them to fit a signature line tends to make them look better.

Once you save the PDF, the signature is embedded into the PDF’s visual layer, so it can’t easily be copied out and reused. Of course, someone could extract it by taking a screenshot of it in the PDF, but they could also scan or photograph a paper document to get the signature, so there’s no real difference in security either way.