Get Started with Slack
Slack offers a set of regularly updated—some say, too frequently updated—client apps for all major desktop and mobile platforms, and for the web. The Slack apps talk to Slack’s back-end servers, retrieve data, and display the results in real time. Unlike a platform like Twitter, there are no third-party apps that mirror the functionality of Slack’s apps.
As you’re likely to be using Slack on multiple platforms, it’s worth noting that Slack’s native apps for macOS, Windows, iOS/iPadOS, and Android (plus betas for Linux platforms) receive updates on different schedules. Some changes may even appear in an app you use before you install an update from an app store or the Slack website. This can manifest itself in different text labels or icons within the app.
Also, Slack didn’t harmonize its Android, iOS/iPadOS, and mobile/web apps very well in early releases, and while that’s improved over time, you will still find different interface elements and sometimes different labels in one or both of the mobile apps compared to the desktop and web apps, which are more closely synced up.
Before you can interact with Slack, you need to join a Slack workspace. Thus, the first thing this chapter looks at is handling a workspace invite along with how to Fill Out Your Workspace Profile and Set Up Two-Factor Authentication.
With those important steps out of the way, I then examine the pros and cons of using the web app, as well as covering how to Use the Web App, how to Install a Native App, and how to Sign In to a Workspace that you’ve joined.
Handle a Workspace Invite
If you haven’t created a workspace, you’ll be invited to join one via a message with an invitation link, which opens in the Slack web app. You’re allowed to use the same email address with as many workspaces as you want.
You obtain this invitation in one of four ways:
In most cases, your workspace’s administrator emails an invitation to you. (These can be re-issued if lost.) In paid plans, the invitation may have a customized message. In Figure 2, you can see an invitation to a Slack workspace called Aperiodical LLC.

Figure 2: A Slack invitation can be customized on paid plans, but the Join Now button is the important element. Some workspaces allow anyone with a given domain name in their email address to create an account. If that’s the case for you, in your web browser’s address field, enter
workspace-name.slack.com/signup, then enter your email address and click Create Account. Slack generates an invitation email message and sends it to you.The workspace you want to join might be a public Slack workspace that’s designed to let in anyone who wants to be part of it. In this case, you typically enter your email address into a signup form, and automatically receive an invitation. (Several Slack apps let an admin set up this linkage to a workspace.)
A Slack admin can also use a built-in tool to generate an invitation link that lets anyone join. That admin can then distribute it, including posting it on a webpage. (These invitations last for 1, 7, or 30 days, at which point a new one can be generated; or, an invitation can be set to last forever.)
No matter how you receive an invitation, click the link to continue the process of joining the workspace. The link opens in your web browser. (You cannot set up an account via a native Slack app.)
The invitation webpage prompts you for two items:
Full name. What you enter here (or change if entered for you by the administrator inviting you) appears on your posts throughout the workspace and identifies you in the Workspace Directory.
Password. Slack fortunately doesn’t enforce ridiculous password rules (Figure 3).
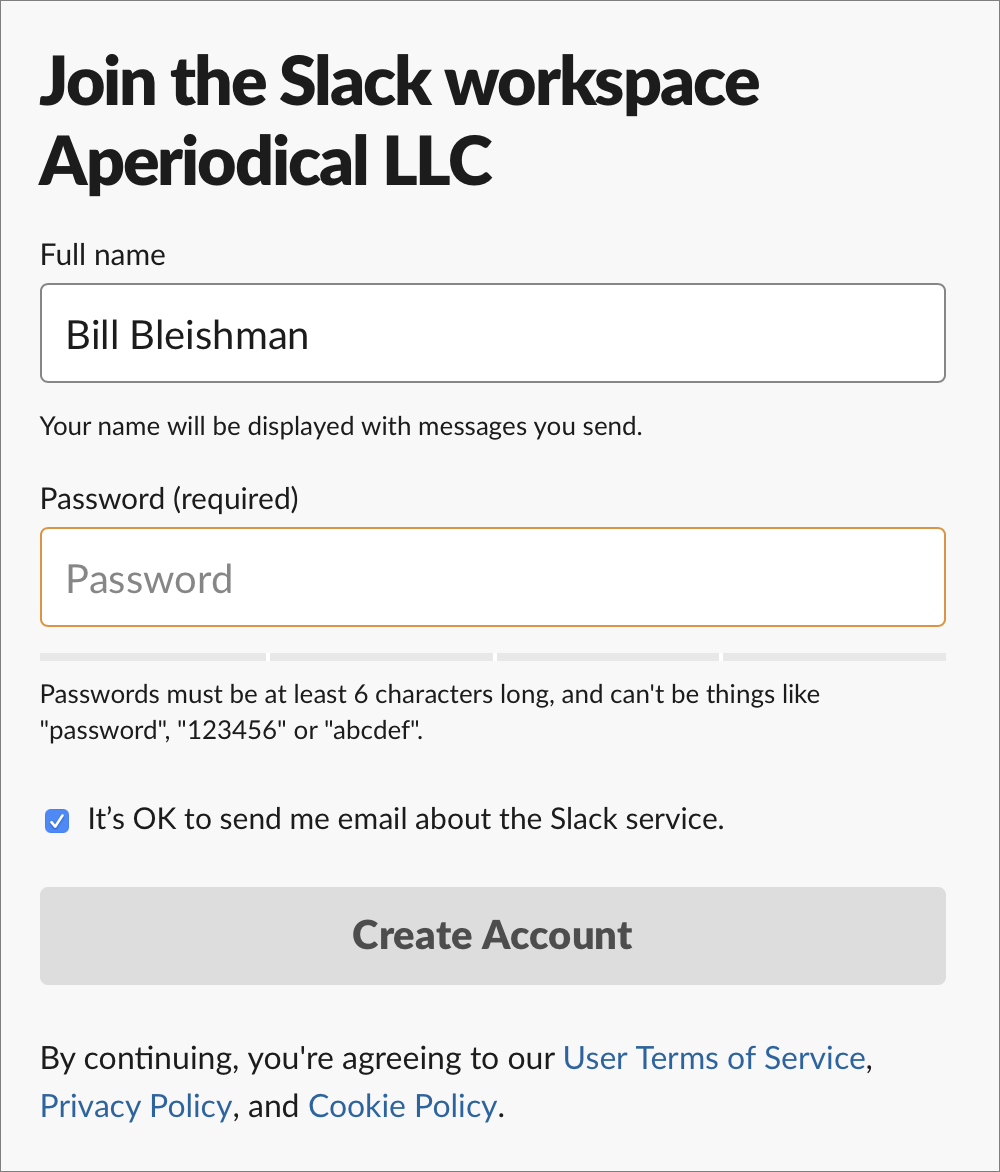
Figure 3: Enter or change your full name and a password.
You Might Be a Guest
Slack has two kinds of users: full members and guests. With free plans, Slack allows only full members, who may join and search any public channel. All full members have effectively the same permissions across free or paid plans.
However, in paid workspaces, Slack also lets administrators set up guest access. You might find yourself invited to a paid workspace as a single-channel guest or multi-channel guest if you are a contractor, freelancer, consultant, or are from another part of an organization that uses multiple workspaces. (In multi-workspace enterprise configurations, member access can be set centrally across workspaces, making this kind of guest option unneeded.)
Guest accounts can also be set to expire, useful for administrators to create short-term accounts for people for particular projects.
A single-channel guest can access only one channel, which could be the all-hands #general channel. The workspace admin who issues the invitation decides which channel. A multi-channel guest can be invited to public channels, in addition to being part of #general. However, they can neither join other public channels nor create channels.
Within a channel or conversation of which they are a part, guests have almost the same permissions as full members. However, guests cannot access—either by private message or within the workspace directory—anyone who is not a participant in the allowed channel or channels. Workspace admins may also prevent guests from using group address handles, described in Reference Other People.
You should have been told if you were a guest or not, but you can also check in either of two ways:
Look for your name in the Direct Messages area in the main sidebar. If it’s a right triangle, you’re a single-channel guest; a square, a multi-channel guests. Full members receive a circle. This may be a little hard to see on mobile devices.
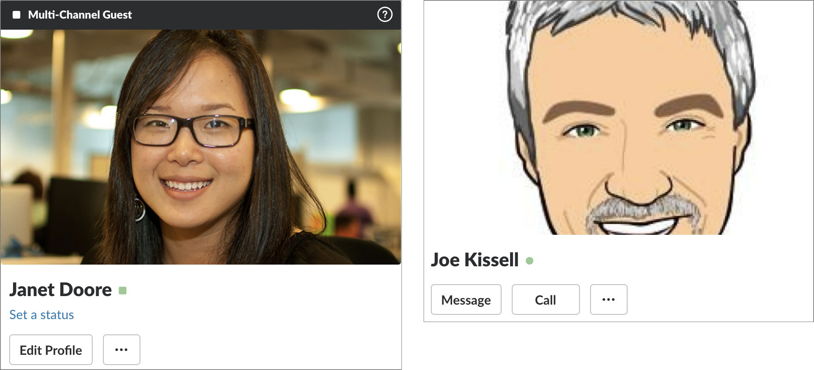
Click the workspace name at the top of the main sidebar and choose Profile & Account. Look at the top. If you are a single-channel or multi-channel guest, you’ll see that label above your avatar image (Figure 4). If there’s no label, you’re a full member.
Fill Out Your Workspace Profile
Your Slack workspace teammates may want to know more about you, such as your role and how to reach you. Slack creates a skeleton profile for every member, but you should punch it up with more detail. (Some workspaces may even require that you do.)
You can revise your profile in any version of Slack:
First, open your workspace profile:
In a desktop or web app, click the workspace name in the upper-left corner to open the Workspace menu, choose “Profile & account” to see your profile at right, and click the Edit Profile button.
Click or tap your avatar or name in a posted message, and choose Edit Profile.
Tap the More Items
 button in a mobile app and tap Edit Profile.
As desired, fill in or edit the fields (Figure 5). You may see just a few basic fields, or there may be additional fields added by your workspace administrator. In one workspace that I belong to, the group added fields for typical work area, title, and areas of responsibility. You may see fields in which you can enter Slack names for other workspace members, such as your boss or direct reports. An administrator may have inserted a note about how to pick a display name, which is typically shorter than the full name. Slack’s generic advice is “however you’d like people to refer to you in Slack.”

Figure 5: You can expand your profile with useful details, such as how to reach you outside of Slack. I recommend that you add a profile photo, which I’ll call an “avatar” throughout this book. Click the photo icon to get started. Depending on the platform, you can upload, select, or take a photo, as well as choose which portion appears in the square by zooming in or out (Figure 6).
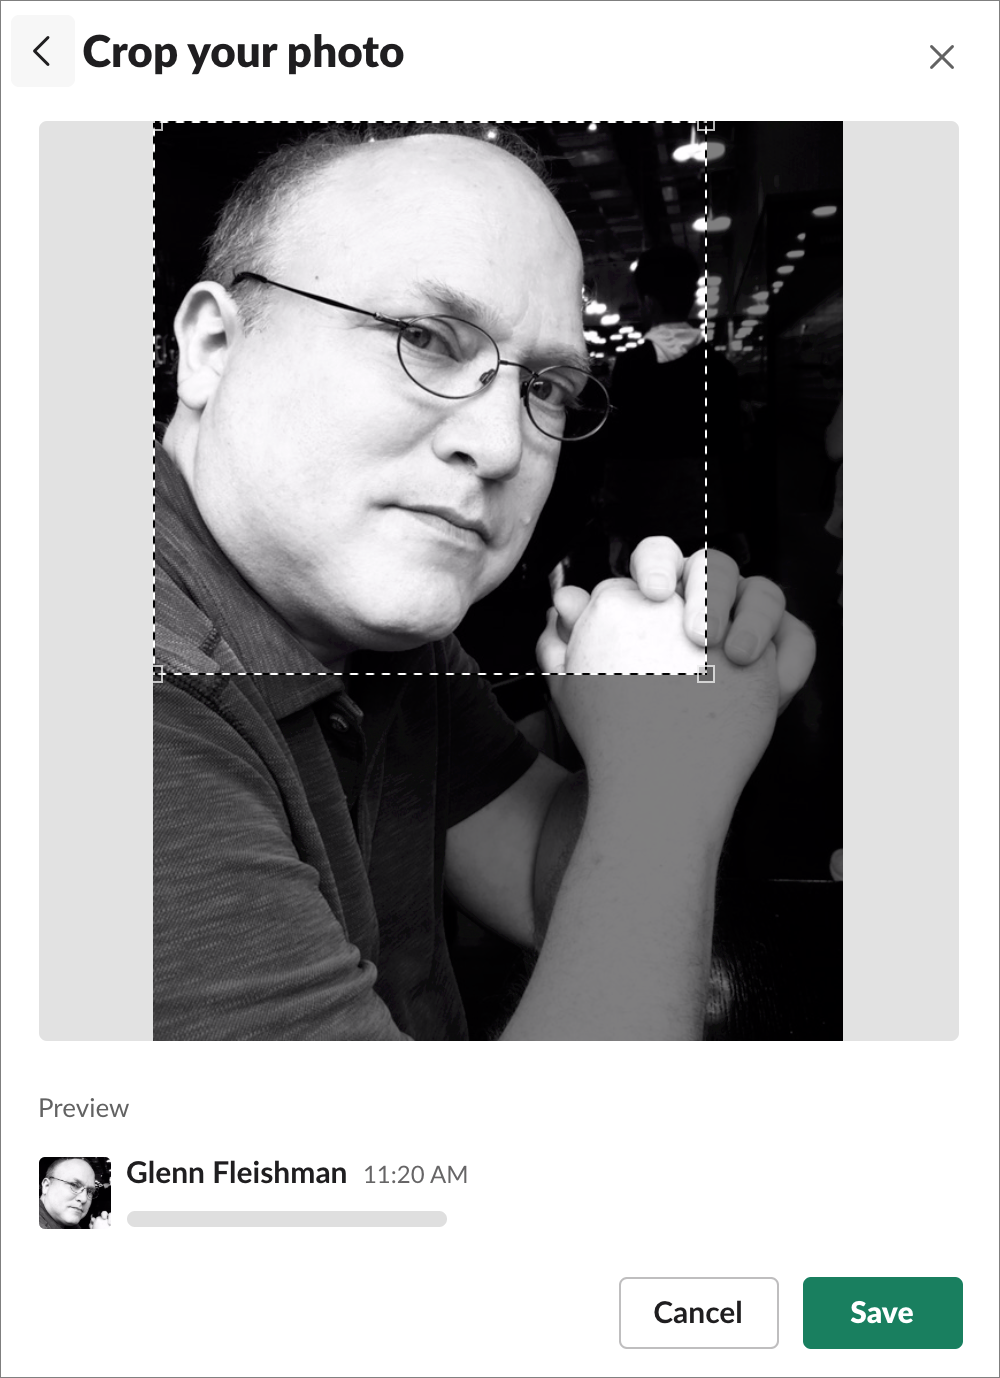
Figure 6: What a punim! After making changes to your profile, click Save Changes or tap Save.
Keep in mind that profiles are workspace-specific. If you join an unrelated workspace, you have to set up an entirely different profile in that workspace.
Set Up Two-Factor Authentication
Slack offers two-factor authentication (2FA) for all accounts, both as an option that individual users can select (in both free and paid workspaces), and as something an administrator can make mandatory (for paid tiers only). With 2FA, every time you log in to a workspace, whether on a new device or in a new browser or just when Slack decides that you should, you must also enter a code.
Although Slack encrypts 100% of data in transit and has other security precautions in place, I recommend 2FA for everyone, even for Slack users in casual workspaces. Why? Because any publicly accessible internet service can be reached by any attacker located anywhere in the world. 2FA requires a second, out-of-band authentication credential—someone who can obtain, guess, or bypass your password still can’t access your account unless they also have physical access to a device you own and can grab your 2FA code.
This, in turn, can prevent all manner of malicious activity. Slack is an intimate communication mechanism, in which people rarely doubt that you are you. A villain could:
Impersonate you and pretend that you’ve been robbed while on vacation, convincing a Slack workspace member to wire “you” $1,000 in emergency funds.
Extract information from your workspace’s posted information to engage in identity theft—of both you and your group’s members.
Post vile messages and images that lead to a boss, co-worker, friend, or relative being appalled by your behavior—forcing you to explain (convincingly!) that it wasn’t you.
Obtain corporate information used for extortion (“pay us or we post this information”), sabotage, or competitive espionage.
Slack 2FA can use SMS text messaging to send you a code or produce a code via an authentication app like Google Authenticator, Duo Mobile, 1Password, and Authy. Those apps scan a seed code from Slack on setup, then produce a unique time-based one-time password (TOTP) whenever they’re launched.
You set up Slack 2FA on the Account page in the web app at https://workspace-name.slack.com/account/settings. Follow these steps on the Settings tab:
In the Two-Factor Authentication section, click the Expand button, then click Setup Two-Factor Authentication (Figure 7).
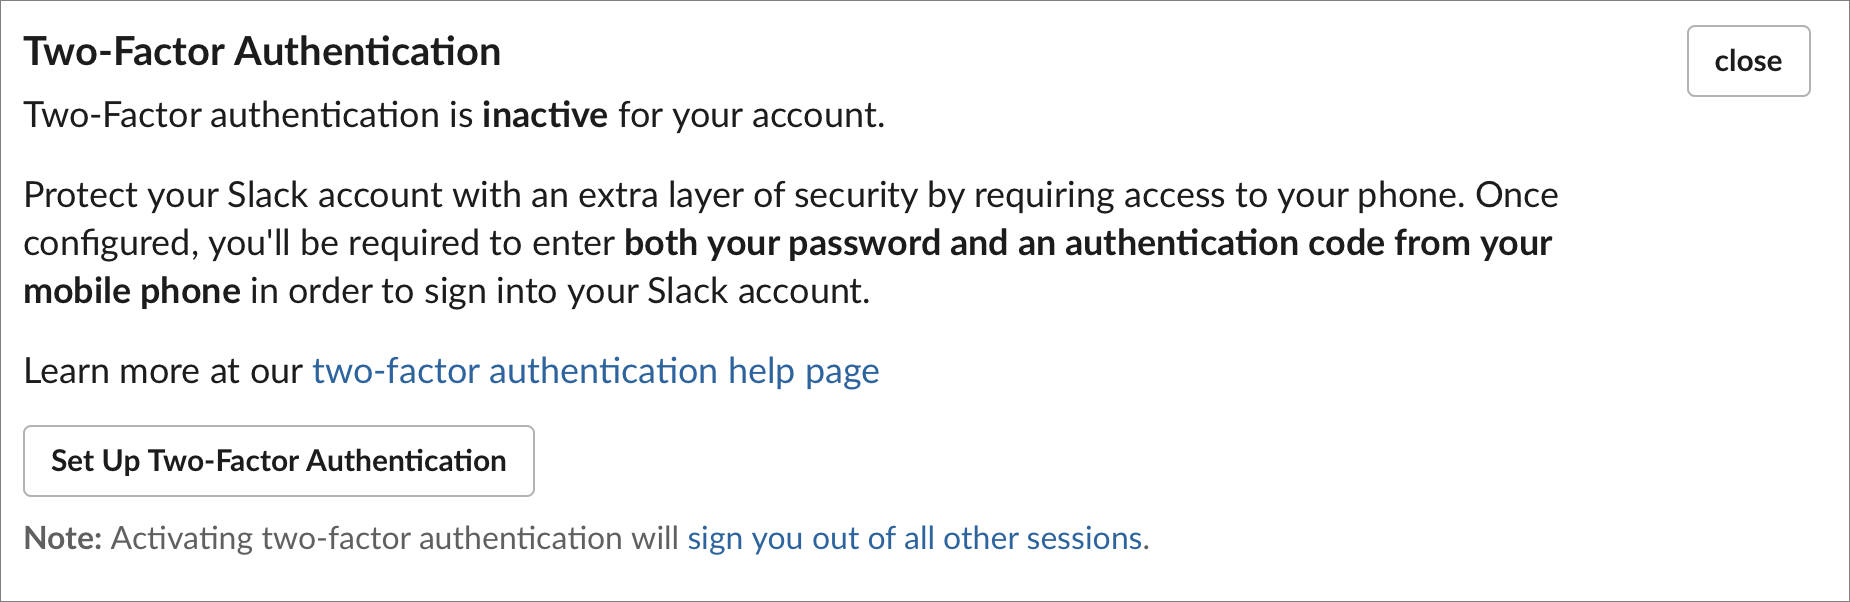
Figure 7: Start the process for setting up 2FA via the web app. If Slack asks for your password, enter it and click Confirm Password.
Pick whether you want to use SMS or an authentication app. You can add the other later.
Set up and verify your choice:
If you selected SMS, enter your phone number and click Add Phone Number. Slack sends a text message with a 6-digit code to your number. Enter that and click Verify Code and Enable.
If you chose to use an app, using the directions for your app, scan the onscreen QR code and enter the 6-digit TOTP code when requested by Slack (Figure 8).
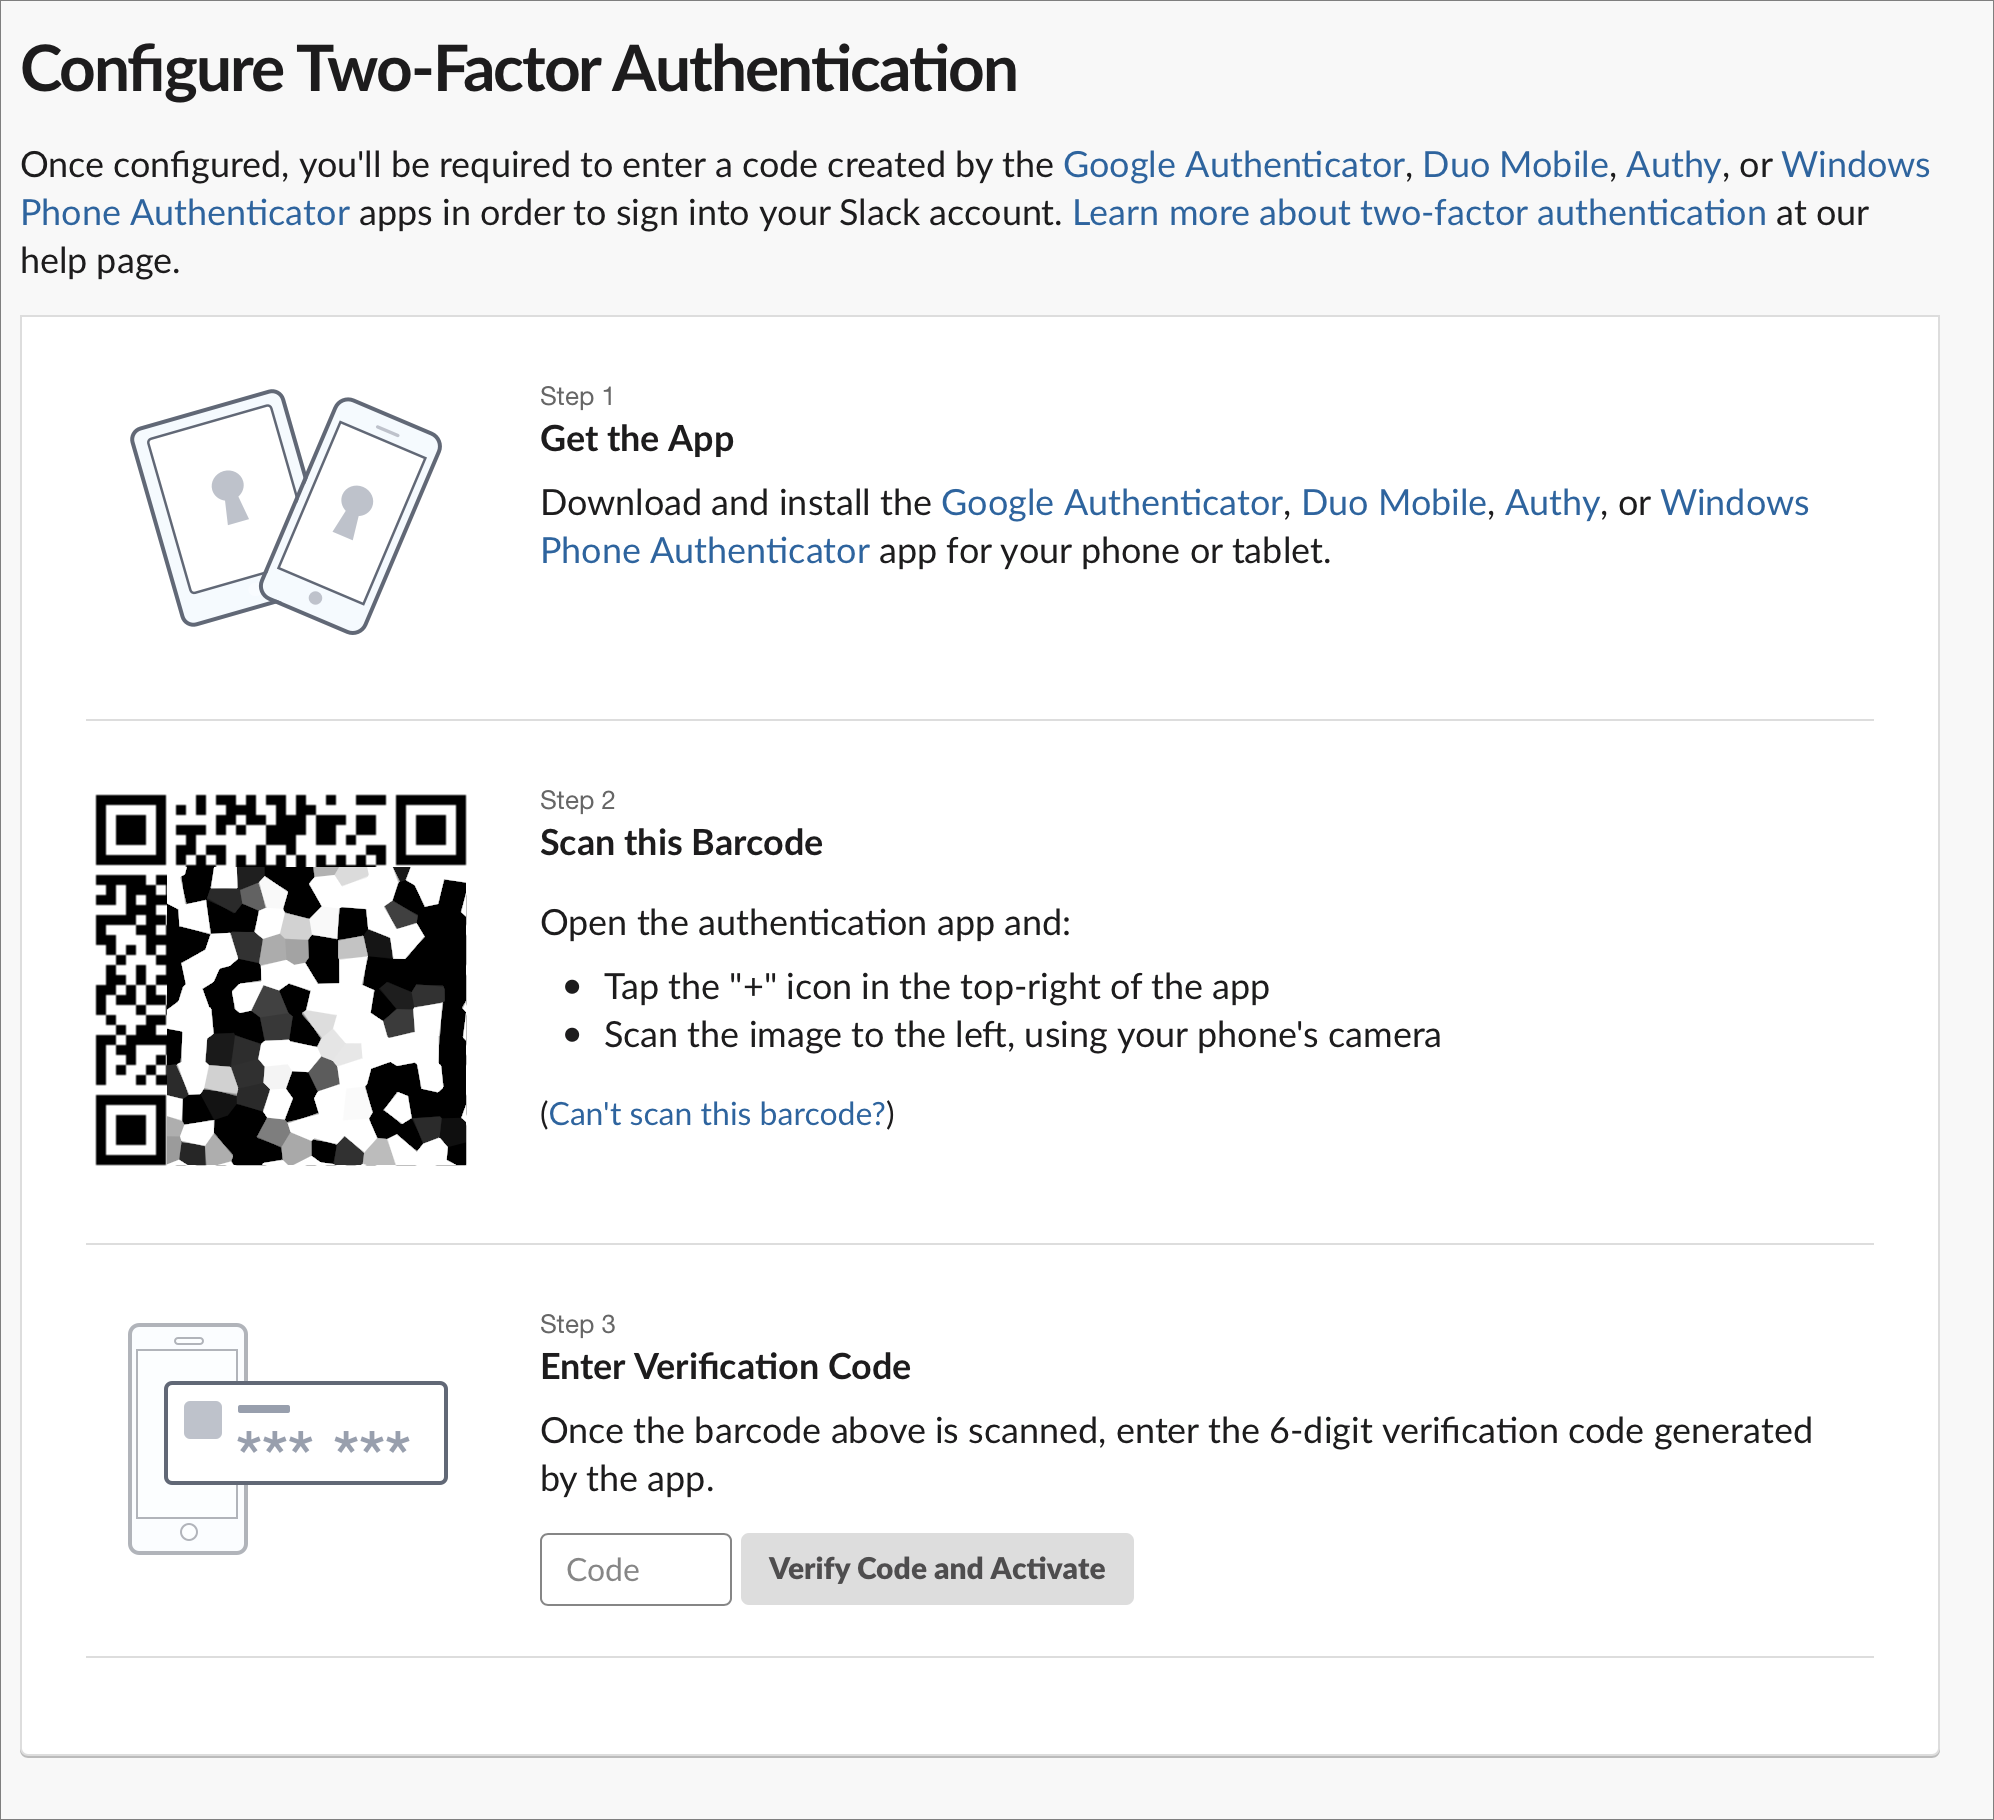
Figure 8: With an authentication app, you seed the verification process with a QR Code generated by Slack (blurred here). If Slack suggests having a second login method, you can opt to enable the other one.
Slack displays a set of single-use backup codes in case you lose access to all your devices and apps. Print these out, or store them digitally and encrypt them securely, such as in a password manager like 1Password or LastPass. Don’t store them in plain text on anything connected to the internet!
If you didn’t set up a second login method in step 5 above, and if you would like to have a second login method, repeat step 1, click “Set up a backup option,” and follow the prompts.
Now, whenever you log in to Slack, you’ll be prompted to enter a code through whatever your primary method is. If that’s not available, you can click “Problems with your code?” and select a backup option or try again (Figure 9).

Every Slack workspace is like its own website, and your account password and two-factor status are tied to each workspace. If you join another Slack workspace, you can re-use the same Slack password you used for another workspace, but two-factor authentication must be enabled separately.
Start Using Slack Apps
In this section, I walk you through getting up and running with a Slack app. Slack offers support across major platforms and through a web app, and you will almost certainly install a mobile app and probably a desktop app.
We start with Install a Native App, then look at how you interact with the web app alternative in Use the Web App, which also has a portion that exclusively manages certain Slack customizations and preferences. I explain how to Sign In to a Workspace and what you see immediately afterwards. Finally, I describe how to Sign Out from Slack.
Install a Native App
To obtain a Slack app, visit Slack’s downloads page, which automatically brings up the appropriate information based on whatever device you’re using, or visit this link. Apps may be obtained from a variety of places, as follows, and some have system requirements as well:
Mobile apps must be downloaded from the iOS, iPadOS, and Google Play app stores:
iOS/iPadOS (iOS 11.1 or later, including iPadOS 13 and alter)
Android (5.0 or later)
The macOS app requires version 10.10 or later, and can be downloaded directly or via the Mac App Store.
The Windows 7 and later version can be downloaded directly. Slack for Windows 10 may be downloaded from the Windows Store.
Slack has made a Linux beta available for each of Ubuntu, Fedora, and Red Hat Enterprise Linux (RHEL). All are 64 bit.
Slack manages updates via various app stores as well as pushing updates for directly downloaded versions. You may be prompted on the desktop to click a link to reload the app to see the latest updates, or to quit and relaunch.
Use the Web App
You can also opt to use the web app exclusively or as a complement to a native Slack app. The web app works nearly identically across every supported desktop browser, and has almost every feature present in the native apps. This includes notifications for Mac and Windows browsers that can tie into the operating systems’ native notification systems.
The biggest difference is that a left-hand Workspaces sidebar isn’t present in the web app. Instead, you use the Workspace menu (accessed by clicking the workspace name in the upper-left corner) to navigate among workspaces, as described in greater detail later.
In a desktop browser, type your workspace URL into the address field, as in workspace-name.slack.com and, if you are asked, follow the prompts to enter your username and password, and a 2FA code if set.
Once signed into Slack, you see what I describe as the “workspace interface,” which is the only interaction approach offered in the native apps—it’s where you enter and read messages, navigate channels, and the rest.
The web app also offers the only place to set certain workspace preferences. Access these preferences by navigating to my.slack.com/homeand clicking Account Settings.
In a desktop browser, these preferences are listed by category in a navigation bar at the left. In a mobile browser, you find them in a dropdown hamburger menu in the upper-left corner. For regular members of a workspace, this includes a mix of security, profile, notification, app configuration, and other options. Which preferences appear depends in part on what permissions a workspace admin or owner has granted to all or some users.
Some of these user preferences and workspace settings also appear in Slack’s native apps, although you’ll find more of them in the desktop apps than in the mobile apps. However, Slack is inconsistent about which appear where, and that’s more than a little frustrating.
For workspace admins and owners, that navigation bar or drop-down menu in the web app is the only place where you can manage users and workspace settings. There’s no admin support within native apps.
You switch from the web app’s preferences interface to the workspace interface by clicking the Launch ![]() button located in the upper-right corner.
button located in the upper-right corner.
Sign In to a Workspace
Slack lets you sign in to more than one workspace in the same native app or browser.
After setting up your workspace account, here’s how you add it to another Slack app:
Web app: In any supported desktop browser, enter the workspace URL and log in.
If you’re currently in the workspace interface, click the workspace name in the upper-left corner and choose “Sign in to another workspace” from the menu.
If you’re currently in the Account preference interface, click the Workspaces
 button and choose “Sign in to another workspace.”
Desktop app: In the left-hand Workspaces sidebar, click the “Add a new workspace”
 button at the bottom (Mac) or choose “Add a new workspace” from the Workspaces menu (Windows). This opens the web app to the sign in page. You can also choose Window > “Sign in to another workspace.” (On a Mac, the “Add a new workspace” button may not appear until two workspaces are added.)
Mobile apps: There are two methods. The easiest is when you haven’t yet logged in via the app. Tap “Sign in” and then tap “Email me a magic link.” This sends a special URL to your email address that you can tap in a mobile email client and which then makes available in the mobile app all the workspaces associated with that address. You are prompted for any second factors needed, too.
The other method involves a number of steps with some variations between iOS/iPadOS and Android. Use this approach when you’re not offered a magic link or need to sign in multiple email addresses to the same mobile app:
In iOS/iPadOS, tap the channels
 icon in the upper-left corner; swipe right if Workspaces isn’t showing. In Android, tap the workspace icon in the upper-left corner and then tap the Workspaces icon.
Tap “Add workspaces”
icon. (Workspaces is capitalized in iOS/iPadOS for some reason.)If you haven’t confirmed an email address yet on this device, tap the confirmation link and then in an email app on the same mobile device, tap the link in the message that arrives.
In the Add Workspaces screen, Slack lists all workspaces associated with confirmed email addresses, sorted by email address.
Tap Join, Sign In, or Add next to any group.
You can also swipe to the bottom and tap “Sign in to another workspace” or “Join another workspace” and then tap “Use a different email address” to confirm another email address.
Join follows the invitation process noted in Handle a Workspace Invite.
Sign In causes Slack to email you a message with a link. Click that link in an email app on the same mobile device; you may also be prompted for a 2FA code if it’s enabled. You can instead of using the link, tap “use password to sign in” and enter your password manually and complete any necessary 2FA step. Add instantly adds you, though you may be prompted for a 2FA code if 2FA is enabled.
Now That You’re Signed In
When you first launch a Slack app as a regular user, you’re dropped into the #general channel, and Slackbot introduces itself. (See Chat with Slackbot for more on this beast and how to interact with it.) For single-channel and multi-channel guests, you might be dropped into another channel.
What you do next depends on your most pressing needs. Refer to the Slack Quick Start, earlier, to jump quickly to the information you need next.
Sign Out from Slack
If you’re done using Slack on a public computer, or if you just want to sign out from the Slack app you’re using, you can easily do that:
Desktop or web app: Click the workspace name at the top of the main sidebar and choose Sign out of Workspace Name.
Mobile app: Tap the More Items
button, then select Settings and tap Sign Out of Workspace Name.iOS/iPadOS app: In iOS and iPadOS, you can instead tap the channels
icon, tap Edit in the upper-right corner, tap the delete icon, then tap Sign Out to remove a workspace. (Tap Done to exit without removing a workspace.)
For security reasons, you might want to sign out of a workspace on every platform all at once, and Slack lets you do this. You might, for example, forget whether you left yourself logged in at a public computer or accidentally leave your tablet in an airplane.
Signing out everywhere is also a good idea if you think someone may have gained access to your Slack password. You can disable all Slack sessions except in the browser you’re using, then you can change the password. Signing out is not irrevocable: you just have to log in again on all your devices.
Follow these steps:
If you are signed in to more than one workspace, first switch to the workspace from which you want to sign out.
Access the Account & profile page in the Slack web app—visit
https://workspace-name.slack.com/account/settings.In the Settings tab, click or tap the “Sign out all other sessions” button (Figure 10).

Figure 10: Use this button to ensure that no one has access to your Slack account for this workspace on any platform, browser, or device. Due to Slack’s use of login tokens, after the next action taken in any of your logged-in Slack apps or the next time one of these apps requests an update from Slack, the app logs you out of the workspace you picked in step 1.
If you signed in to multiple workspaces, click the Workspaces
button on the toolbar to switch to each workspace in turn and sign out.If you are concerned that your password isn’t secure, change it. While still in the Settings tab of the Account page, work in the Password area.
You’ve now signed out of all your Slack workspaces, though you remain logged in to Slack in the current desktop browser. If you like, you can log out there as well: Click Sign Out at the bottom of the left-hand navigation bar.