
MacBook comes with many applications installed by default, including Safari for Web browsing, Mail for e-mail, iTunes for music and video, and iPhoto for your digital photos. You can also install many other applications as you use MacBook to provide even more functionality. Whether you install them yourself or they came installed on MacBook, there are some general things you need to know about applications that apply no matter what applications you use.
Although every application is different from the others, all applications share fundamental concepts that apply to each of them. Understanding these fundamentals will help you use a wide variety of applications on your MacBook.

Applications
The reason computers work so well is that they are very good at following repetitive instructions that adhere to very specific syntax and logic rules. An application is a collection of programming statements, more commonly called code, that are constructed according to a specific programming language. Applications separate us from the detailed code so that we can control what the application does by interacting with menus and graphical elements of the user interface, instead of having to re-create the lines of code each time we want to do something. Applications are created for many purposes, from running the MacBook (Mac OS X is a very complex application) to providing the weather at a glance through a simple Dashboard widget (a specific kind of application delivered through the Dashboard).

Documents
Most applications, but certainly not all of them, work with documents. In MacBook lingo, a document is much more than just a text file; documents can certainly contain text, but they can also be images, e-mails, and songs. Basically, a document is the content an application works with. So, for a text processor such as Microsoft Word, a document can include text and graphics. A graphics application, such as Photoshop, uses images as documents. The songs and video stored within iTunes can also be considered documents. If you open or save something with an application, that something can be called a document.

Chapter 2 talked about the various kinds of windows you see on MacBook. As that chapter mentioned, applications provide windows through which you view documents or controls and functions when an application doesn't work with documents (such as a game). An application's windows are whatever you see when you open and use that application. Most applications allow you to have many documents open at the same time, with each appearing in a separate window.
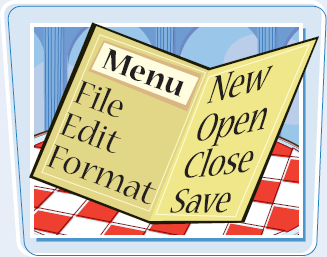
Applications contain commands that you use to perform actions. For example, when you want to save changes you have made, you use the Save command. Commands are organized into logical collections on menus. When you open a menu, you can see and choose the commands it contains. Mac OS X applications are supposed to support a set of standard menus that have the same or similar commands; these include the application menu (which has the name of the application), File, Edit, Window, and Help. These menus also contain a set of standard commands; for example, the application menu always contains the Preferences command. Applications can and usually do have more menus than just the standard menus that are part of Mac OS X design specifications. Some applications, mostly games, do not include standard menus at all.
Application Preferences
Not everyone uses applications in the same way, and we all have our own preferences. Because of this, applications include preferences that enable you to configure various aspects of how the application looks and works. You can use preferences to enable or disable functions, change the appearance of the application's windows, and so on. In effect, these commands enable you to tailor the way they work to your preferences, thus the name for this type of command.

To be able to use applications on MacBook, you must install them. There are two ways you do this. Some applications include an installer program; to install the application, you open the installer and follow the onscreen instructions. Other applications use a drag-and-drop installation method that requires you to drag a folder or file onto MacBook's hard drive.
Install Applications
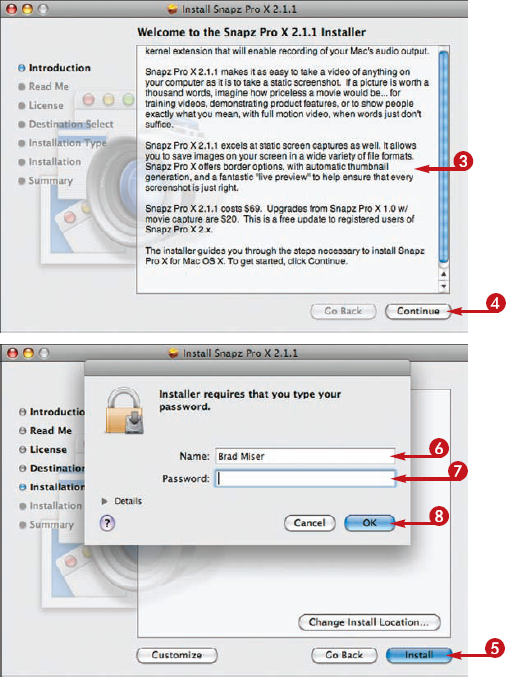
INSTALL APPLICATIONS WITH AN INSTALLER

In most cases, the installer starts automatically; if so, skip step 2.
Note
When you download an installer, by default it is stored in the Downloads folder on the Dock. Go there to access the installer.

The installer starts running.


Eventually, you move to the Install screen.

You are prompted to authenticate yourself as an administrator.


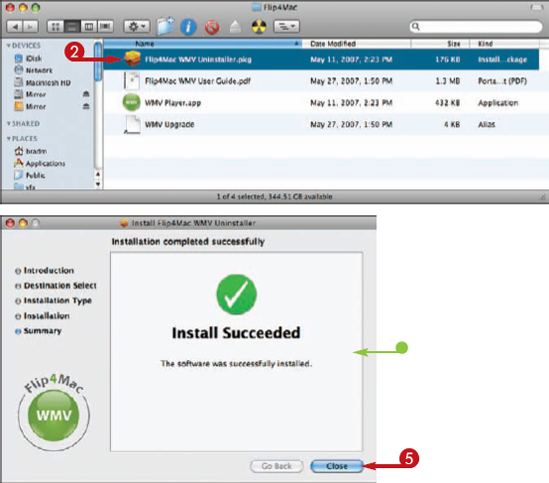
The installer runs and presents progress information in its window. When the process is done, you see the Complete screen.
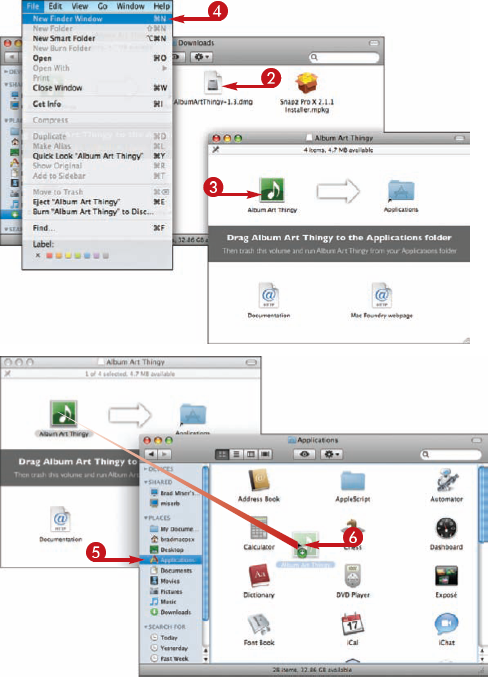
INSTALL APPLICATIONS WITH DRAG AND DROP
In most cases, the files are provided as a disk image, which usually mounts on MacBook automatically. If so, skip step 2.
The disk image is mounted on MacBook.
A new Finder window appears.
The Applications folder is shown in the window.
The application is copied into the Applications folder and is ready for you to use.
Tip
What is the Customize button in the Install window for?
Most installer applications include a Customize button that enables you to customize the application's installation. If your MacBook is very low on disk space, you might want to take a look at the customization options to see if you can skip features or resources you do not need.

Where should I install an application?
In most cases, the answer is in the Applications folder on MacBook's startup drive. You can install applications in other locations, but you need to make sure everyone who needs that application has the security to get to the location in which you install it, such as within your Home folder.

The first step in using an application is to open, or launch, it. There are many ways to do this, and as you use MacBook, you will no doubt develop your preferred method.
Once applications are running, there are a number of ways to control them.

Launch and Control Applications
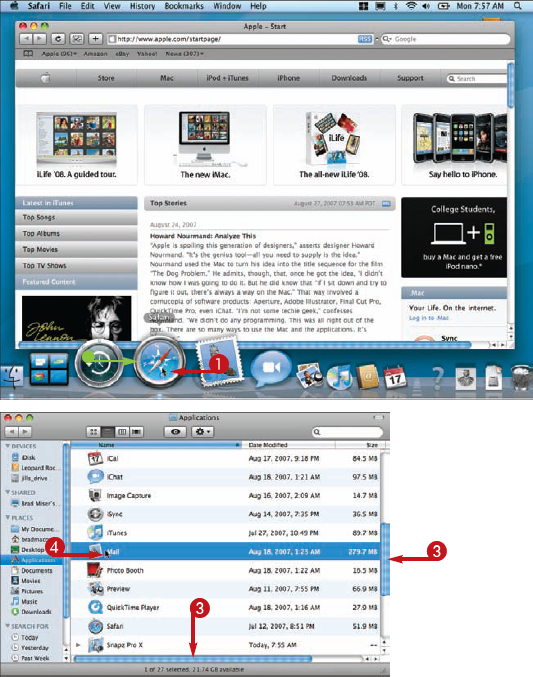
OPEN APPLICATIONS FROM THE DOCK
Note
The first time you open an application, you see a warning dialog box; this is intended to prevent you from opening applications unintentionally that might harm your computer, such as viruses.

When complete, the application's windows appear and it is ready for you to use.
Note
You can also install applications on the Sidebar by dragging their icons there.
OPEN APPLICATIONS FROM THE DESKTOP
The Applications folder appears in a Finder window.
The application opens and is ready for you to use.
Note
If an application is not installed on the Dock, its icon appears on the right or bottom side of the Dock when it is running. When you quit the application, its icon disappears from the Dock.
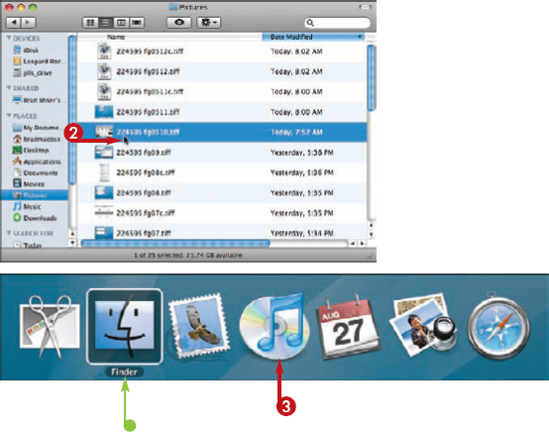
OPEN APPLICATIONS FROM DOCUMENTS
The application with which the document is associated opens and you see the contents of the document you opened.
Note
Chapter 6 explains how to have applications open automatically when you log in to your user account.
Tip
An application does not appear to be doing anything and I see a spinning wheel on the screen.
Occasionally, an application hangs and stops working even though its windows remain on the screen. Let some time pass to see if the application starts working again. If it does not, open the Apple menu and choose Force Quit. The Force Quit window appears. Select the application that is having problems and click Force Quit. Click Force Quit again in the resulting dialog box. The application is forced to quit. You lose any unsaved changes in the application's open documents, so only do this as a last resort. Restart MacBook after normally quitting all other applications.

I have opened a lot of applications and do not want to quit all of them one by one. Is there a faster way?
Log out of your user account by pressing Shift+

If you no longer need an application, you can remove it from MacBook. You do not have to do this if MacBook's hard drive has lots of room, because the disk space an application requires is the only downside of leaving it on your MacBook. So, if your disk has lots of room, you can just leave the application installed in case you ever need it again. Or, you can get rid of it if you are sure will not use it again.
Like installing applications, there are two ways to remove an application from MacBook.
Remove Applications
REMOVE APPLICATIONS WITH AN UNINSTALLER APPLICATION
The application launches.
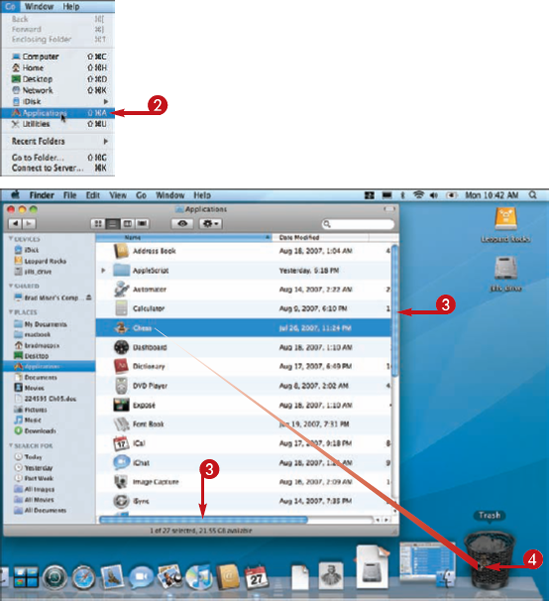
REMOVE APPLICATIONS WITH DRAG AND DROP
The Applications folder appears in a Finder window.
The application is moved into the Trash. The next time you empty the Trash, it is deleted from MacBook.
Tip
I want to keep an application I do not use on my MacBook, but documents I open still open in that application. What can I do?
You can stop MacBook from opening an application by changing the association between documents and that application. Change the association for the file that opens in the unwanted application, and then click the Change All button to change all documents associated with it. You might have to do this several times if the application is associated with several different types of documents.

If I remove an application and then decide I need it again, what do I do?
The answer depends on how you obtained the application. If you received it on CD or DVD, you can reinstall it from the original discs (you must also reapply any patches). If you downloaded the application from the Internet, you must have the original files you downloaded to reinstall it; sometimes these continue to be available at the Web site, but sometimes they are not. You should always keep a backup of any software you download from the Internet in case you ever need to reinstall it.

As you make changes to a document, you need to save those changes to keep them. This sounds simple, and it is, but many people do not regularly save their work. If an application quits before you save changes, you lose all the work you have done. So, get in the habit of saving documents frequently and often.
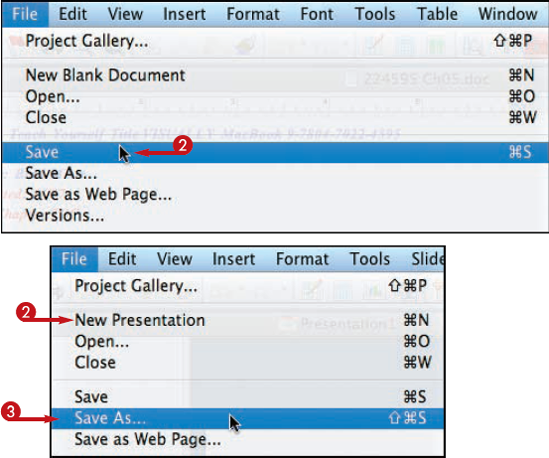
Save Documents
Note
The first time you save a document, you use the Save As command instead; see the next section for details.
The document is saved in its current state, and the new version replaces the previous version you saved.
An empty document appears in a new window.
Note
The first time you save a document, you can use the Save or Save As command because they do the same thing. When you want to rename a document or save a new version, you can use the Save As command.
The dialog expands so you see more details.
The document's file is created in the location you set and you are ready to get to work.

Tip
Can my documents be saved automatically?
Many applications, such as Microsoft Word, have preference settings that can be configured to save your documents periodically, for example, every 5 minutes. Open the application's Preferences dialog box and look for the save preferences. Set them to a frequent amount of time.

My hard drive crashed. Can I recover my saved document?
It depends on what kind of failure your disk had. In some cases, the documents and other data can be restored. In other cases, you are out of luck. You should always keep important documents backed up so you can recover them if needed.