MacBooks are complicated machines. The good news is that their hardware and the Mac OS X software are so well designed that it is not likely you will experience problems. Even better news is that with a few simple maintenance tasks, you can further decrease the already small chance that you will have problems and lessen the severity of problems you do experience.

It is important to know what to do when a problem happens so that you can quickly get MacBook back into action.
Apple regularly issues updates for its applications to correct these problems (hopefully before you experience them). Along with correcting problems, Apple also issues updates to improve its software by adding new features and capabilities.
Mac OS X includes built-in tools to make it simple to keep your Apple software (Mac OS X plus any Apple applications installed on MacBook) current. Keeping your software up to date is one of the most important things you can do to maintain MacBook to prevent problems.
Keep MacBook's Apple Software Current
UPDATE APPLE SOFTWARE MANUALLY

The Software Update application launches, connects to the Internet, and compares the versions of Apple software installed on MacBook to the current versions.
Note
If the current versions of Apple software are already installed, you see a message stating that no new software was found.


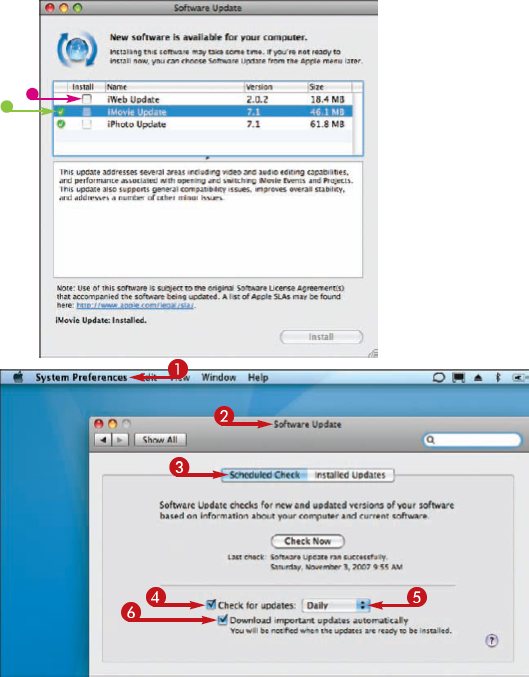
MacBook downloads and installs the selected updates.
Note
Some updates require you to restart MacBook; click Restart at the prompt and skip the rest of these steps.
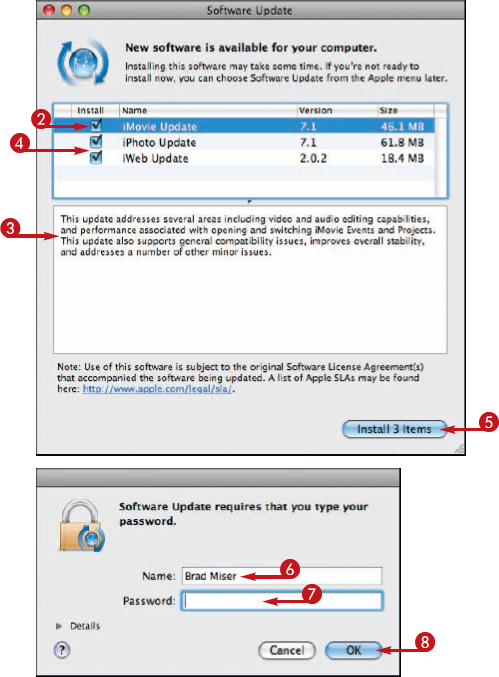
When the process is complete, Software Update window appears.
UPDATE APPLE SOFTWARE AUTOMATICALLY
The Software Update pane appears.
Note
If you do not check this check box, you are prompted to download the updates when they are available.
When the specified amount of time passes, Software Update checks for new software.
Tip
Should I install all updates to my software?
In general, you should install all updates as they become available. Rarely, an update actually causes more problems than it solves; but that is unusual, and in such cases the problematic update is immediately followed by one that corrects its problems. Make the update process easy on yourself by configuring MacBook for automatic updates.

How do I know what updates have been installed?
Open the Software Update pane of the System Preferences application. Click the Installed Updates tab. A list of all the updates you have installed successfully appears.

The odds are great that you also have third-party software on MacBook, such as Microsoft Word and Excel or Intuit's Quicken. Like Apple, other software companies also issue updates to their software to fix bugs and add features.
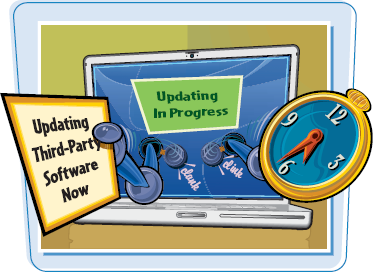
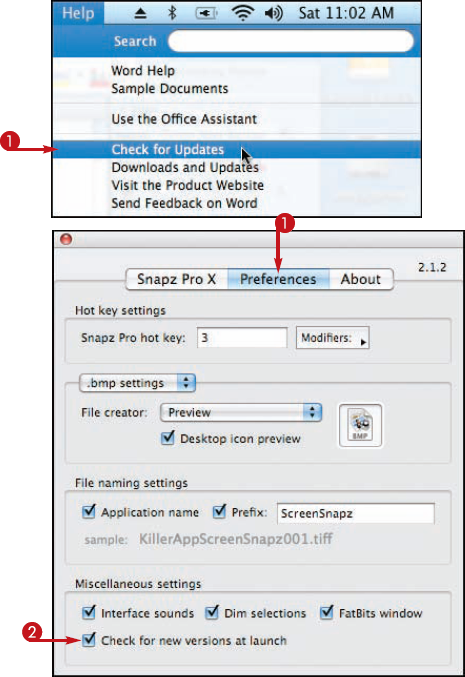
Unfortunately, support for these updates is not built into Mac OS X. Instead, each application provides its own tools to download and install updates. Most of these also support manual and automatic updates. The details of using these tools depend on the specific application. The following sections show how to update Microsoft Office applications manually and Ambrosia Software's Snapz Pro X automatically; other third-party applications are updated similarly.
Maintain and Update Third-Party Applications
The application checks for updates either using built-in tools or through a separate update application.
Maintain and Update Third-Party Applications Automatically
Note
This command may use different wording, but most applications provide some way to check for updates automatically.
Each time you launch the application, it checks for newer versions. When one is found, you are prompted to download and install it.
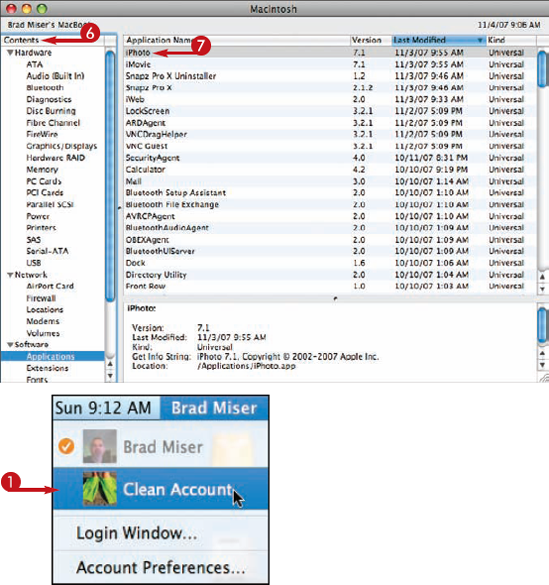
MacBook includes lots of hardware components and many different kinds of software. Each of these has a specific version and set of capabilities. Most of the time, you do not need to worry about these details. However, there are times when these details can be very important, especially when you are trying to troubleshoot and solve problems.
Keeping a current profile of MacBook is a good idea so that you have detailed information about it when you need to solve a problem or evaluate MacBook's capabilities (such as if it meets the system requirements for hardware or software you are thinking about adding).
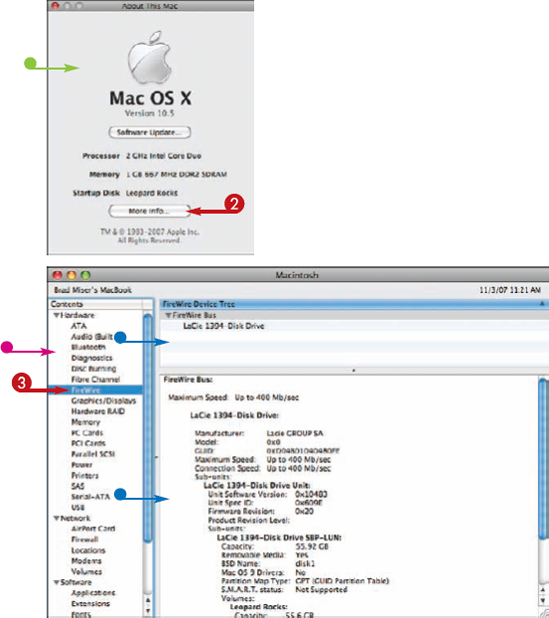
You cannot always tell what is happening with MacBook just by looking at its screen or observing how applications are performing. It is useful to be able to identify what is happening with MacBook in detail, especially when you are troubleshooting a problem.
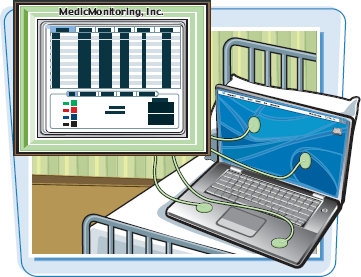
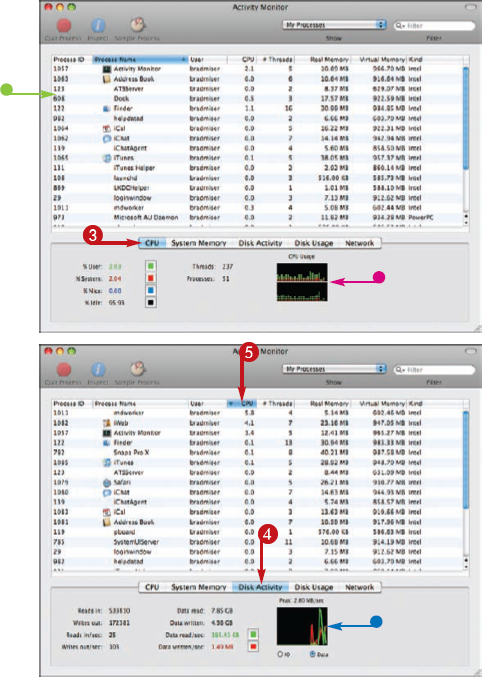
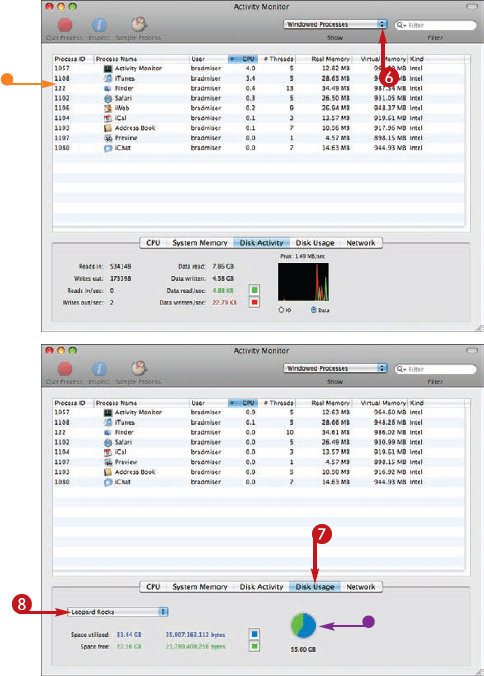
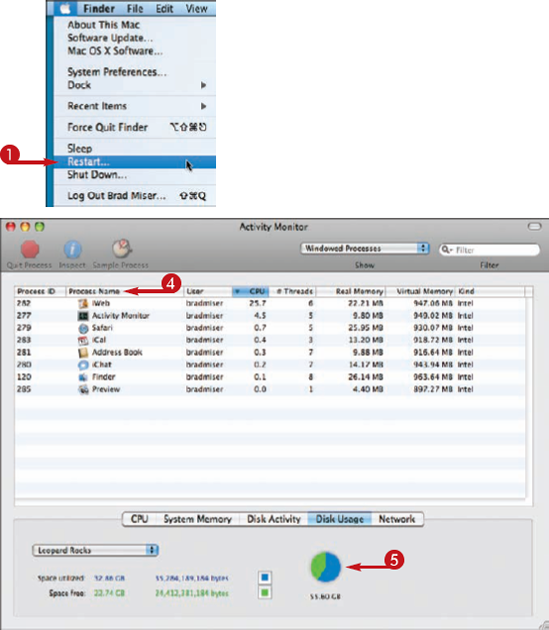
With the Activity Monitor application, you can see the status of MacBook in a very detailed way. For example, you can see how much of MacBook's processing power specific applications are using, which can often tell you when an application is having a problem.
Monitor MacBook's Activity
The Activity Monitor application opens.
You can limit the processes shown in the window to be just for applications, which can make the window's information easier to interpret.
Tip
What do I do if a process is using a lot of the CPU for a long period of time?
Switch to the application and try to quit it. If it does not quit, it is hung, meaning that its processes are locked up because it is having a problem. Go back to Activity Monitor, select the process, and click the Quit Process button. Click Force Quit. The process is stopped; forcing an application to quit loses any unsaved data in it, so make sure the application is really hung before doing this.

How can I get even more detail about a specific process?
Select a process and click the Inspect button. The Inspect window opens and you see several tabs providing information about various aspects of the process such as its memory use, statistics about how it is working, and the files and ports it has open. Sometimes this information is useful when doing detailed troubleshooting.

If MacBook's hard drive is not performing optimally, MacBook will not be at its best either.
You can do a lot for MacBook's hard drive by practicing good housekeeping on it to keep as much free space available as possible (see the first tip at the end of this section). If you have an external hard drive, create a second startup disk to use in case something happens to your primary startup disk. You can also use Mac OS X's Disk Utility application to maintain MacBook's hard drive and to solve some problems if they occur.
Maintain MacBook's Hard Drive
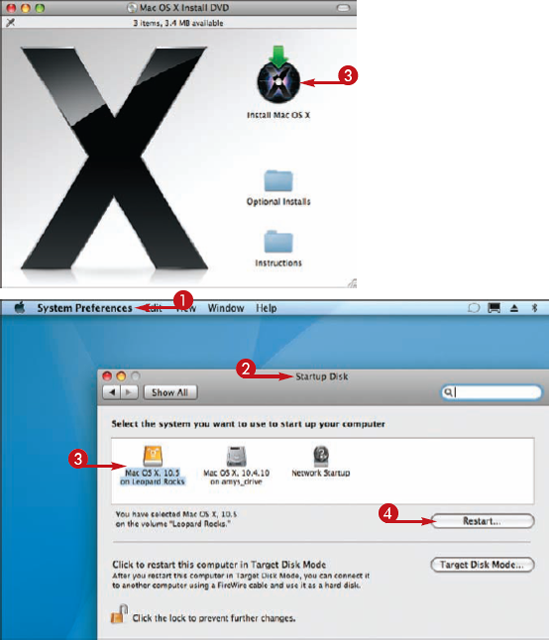
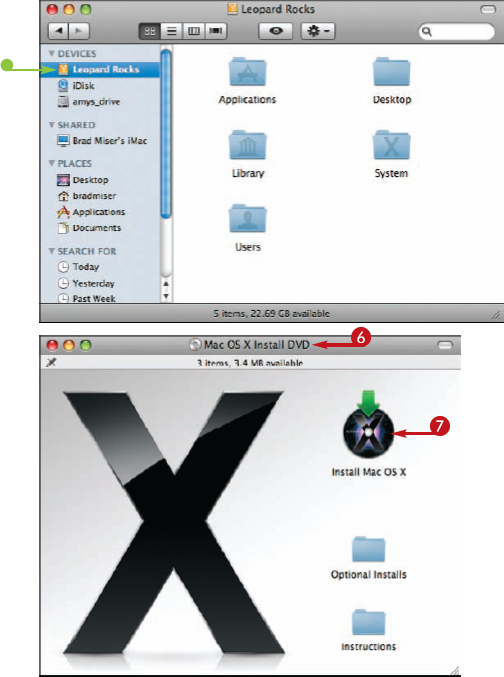
CREATE AN ALTERNATE STARTUP DISK
The Mac OS X Install DVD window opens.
The Mac OS X installer application starts.
The installer completes the installation and MacBook restarts using the new startup disk.
CHOOSE A STARTUP DISK
The Startup Disk pane appears.
MacBook starts up from the disk you selected.
Note
You can also choose a startup disk by restarting MacBook and holding the Option key down.
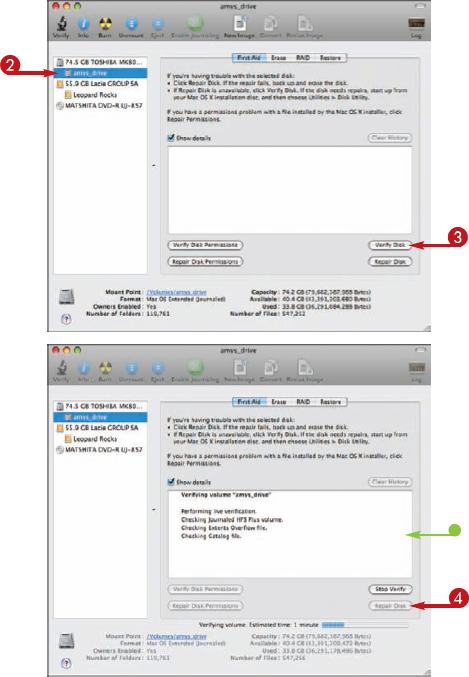
MAINTAIN OR REPAIR A MACBOOK'S HARD DRIVE USING DISK UTILITY
Note
You cannot repair MacBook's internal hard drive with Disk Utility.
Note
If you selected an external hard disk, click Repair Disk instead of Verify Disk because the verify function is part of the repair process.
Disk Utility attempts to repair the problems it found. If successful, you see a success message.
Tip
What are good housekeeping practices for a hard disk?
When you are done with folders or files, move them off the hard drive. Delete them if you are sure you will not need them again, or archive them by burning them onto a CD or DVD and then deleting them from the hard drive. You should keep your folders and files well organized so that you have a good idea of what you have stored on the disk. You should also make sure that you keep a good backup for all the important files on your hard drive.

Should I use a third-party disk maintenance application?
If Disk Utility is unable to repair a disk, you can purchase a more sophisticated disk maintenance application. These applications usually include a DVD from which you can startup in order to repair your startup disk.
If something really bad happens to MacBook, you can lose all the files it contains. This includes music from the iTunes Store (you have to pay for it again if you want it back) along with other content such as applications you have downloaded. However, what is worse is losing data you create, such as your photos in iPhoto, movies, and documents. Much of this data simply cannot be replaced.
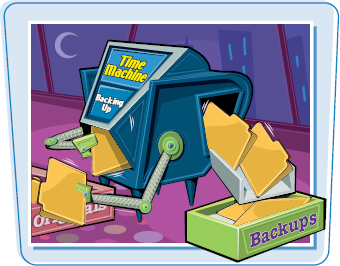
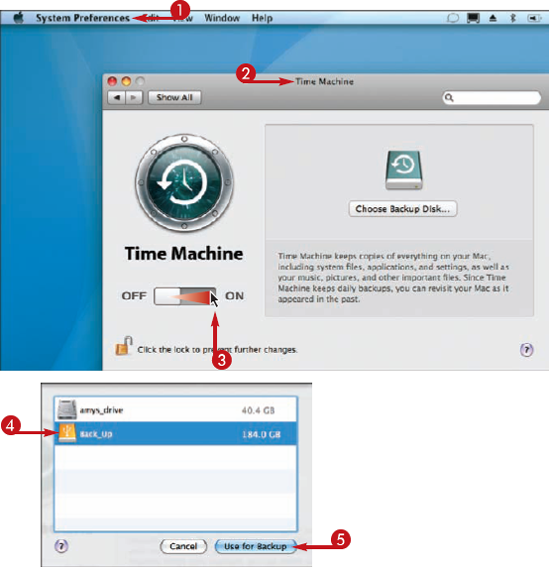
Use Time Machine to Back Up MacBook
The Time Machine pane opens.
Time Machine activates and the select drive sheet appears.
Note
When you use a hard drive for Time Machine, the hard drive's icon becomes the Time Machine icon.
The sheet closes and you return to the Time Machine page.
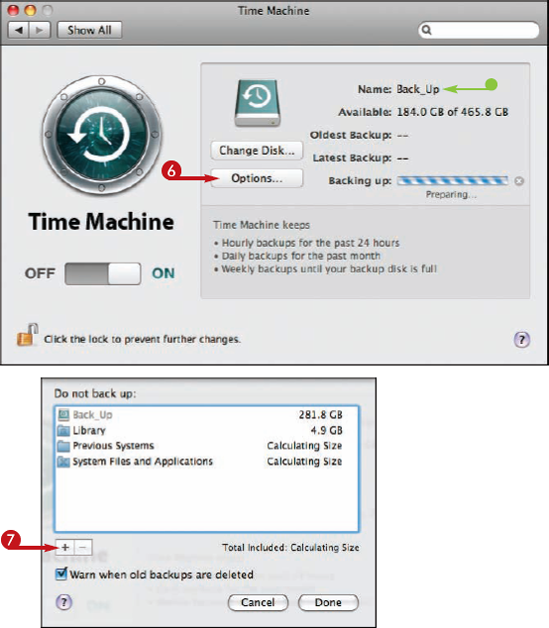
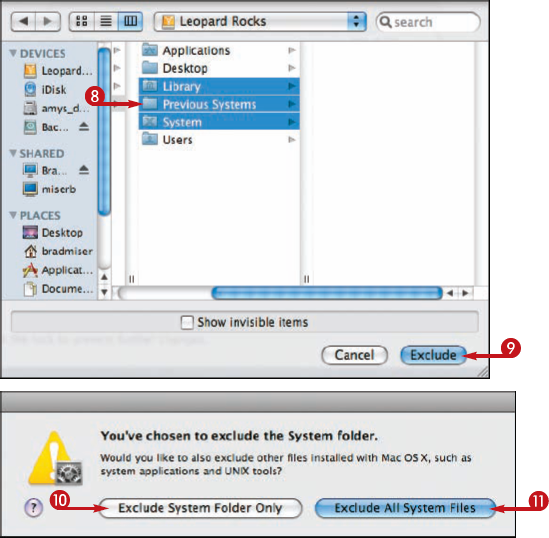
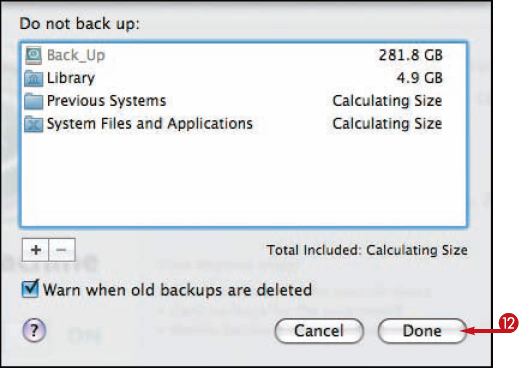
The Do not back up sheet appears. The sheet enables you to exclude files from the back-up process.
The way to minimize the risk of losing important data is to back it up. Mac OS X's Time Machine application is designed to make it easy for you to do this so you can recover important files easily when you need to. All you need is an external hard drive on which to store your backups.
The select sheet appears.


Time Machine automatically backs up your data to the selected hard drive. New backups are created every hour.
Note
After you disconnect the external hard drive so you can move MacBook around, the next time you reconnect the external hard drive, the next backup is made.
Tip
How long is my data protected?
Time Machine backs up your data for as long as it can until the back-up hard drive is full. It stores hourly backups for the past 24 hours. It stores daily backups for the past month. It stores monthly backups until the back-up disk is full. To protect yourself as long as possible, use the largest hard drive you can afford and exclude files that you do not need to back up (such as System files if you have the Mac OS X installation disc) to save space on the back-up drive.

How else should I protect my data?
Hard disks can fail, and no matter how large your back-up drive is, it fills up at some point and you will not be able to back up all the files you might need. You should also back up important files in a second way, such as to DVD. You can do this by burning files to a disc from the Finder (see Chapter 4) and from within some applications (such as iTunes, from which you can back up your iTunes Library onto disc).

If you have used Time Machine to keep MacBook backed up, losing data from MacBook is not a big deal. (If you do not have your data backed up, it will be a very, very big deal.) You can use Time Machine to restore files that are included in your backups. You can restore files and folders from the Finder and you can recover individual items from within some applications (such as photos from within iPhoto).
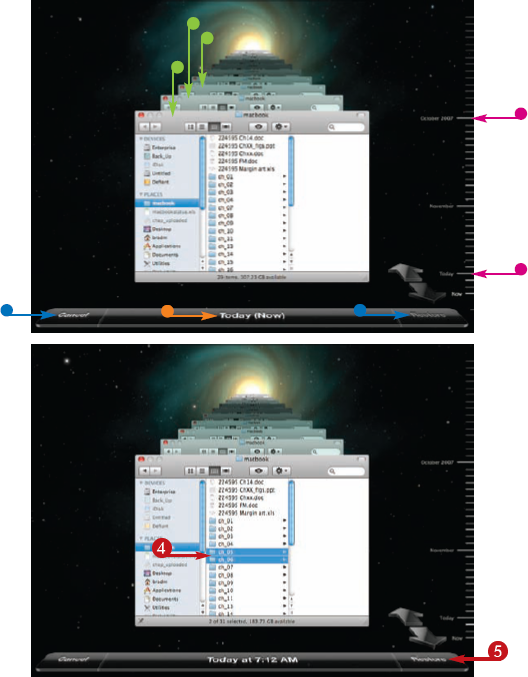
Restore Files with Time Machine
RESTORE FILES IN THE FINDER
The desktop disappears and the Time Machine window fills the entire space.
The files and folders you selected are returned to their locations.
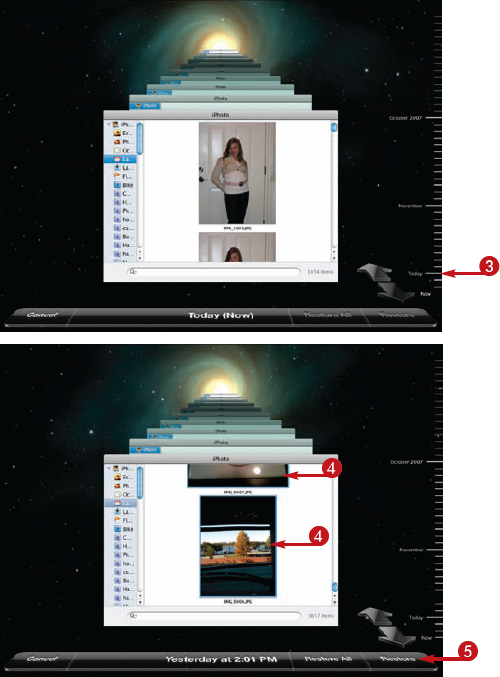
RESTORE FILES IN APPLICATIONS
The desktop disappears and the Time Machine window fills the entire space.
As you go back in time, you see the versions of the application window that are saved in the backup.
Note
To restore all of the files in the frontmost window, click Restore All.
The files are returned to the application and you can use them as if they had never been lost.
Tip
What if an application I use does not support Time Machine? Can I still restore files for it?
Not all applications support Time Machine; currently only some Apple applications support the ability to back up and restore individual files within an application. Hopefully, more applications will support this technology over time. However, you can always use Time Machine to restore files being managed in an application by including them in the backups you create and then restoring the individual files from the Finder. This is not as slick as using a supported application such as iPhoto or iTunes, but it works well.

Once in a while, MacBook is not going to cooperate with you. You might experience applications that hang (they stop doing anything while displaying the spinning color wheel icon) or quit unexpectedly; or, something odd might happen and you cannot quite put your finger on it. At the most extreme, you might not be able to get MacBook to start up at all.

Troubleshoot and Solve MacBook Problems
Note
Restarting MacBook solves many problems you experience. Because it is easy to do, it should always be one of the first steps you try to solve a problem.
Note
If MacBook does not respond to any commands or keys, press and hold the Power button until MacBook shuts off. Press the Power button again to restart it.
Note
A MacBook profile includes such information as all the applications you have installed.
The detailed information you collected should give you an idea of the cause of the problem.
DETERMINE IF A PROBLEM IS SYSTEMWIDE OR USER-SPECIFIC
Note
If you can repeat the problem, it is systemic rather than being specific to a user account.
The problem is likely related to something with your user account.
The first step in solving any problem is understanding when and how it happens, which is usually more than half the battle. Part of this is determining if the problem is general or related to a specific user account.

Note
The application's name is part of the preference's file name.
If you cannot replicate it, you have likely solved it.
If you can replicate the problem, continue on.
SOLVE THE "HUNG APPLICATION" PROBLEM
Note
You can recognize a hung application by the spinning color wheel icon appearing on the screen for a long period of time.
The Force Quit Applications window appears.
Note
If the Finder is hung, when you select it, the button becomes Relaunch, which attempts to restart the Finder.
The application is forced to shut down.
Note
See "Keep a MacBook's Apple Software Current" and "Maintain and Update Third-Party Applications" earlier in this chapter.
If the update solves the problem, you are done. If not, seek out professional support.

SOLVE THE "MACBOOK WILL NOT START UP" PROBLEM
After a few moments, the valid startup disks are shown.
Note
If MacBook starts up, you know the problem is probably with the system software installed on the primary startup disk.
Note
If you do not have an alternate startup disk, you can start up from the Mac OS X installation disc by inserting it, restarting MacBook, and holding down the C key. MacBook restarts in the Mac OS X Installation application.
Tip
What are the most important things I can do to protect myself from MacBook problems?
Back up your data. You should always have current backups of your data because losing data is not just something that might happen to you; it will happen to you at some point. Second to keeping good backups of data is maintaining an alternate startup drive. If something happens to the system software on MacBook, you can restart from the alternate hard drive and get back to work, not to mention have a better chance of fixing the problem. Third, keep your Mac OS X software installation disc available. If you need to restore MacBook's system software, you need this disc.

When you experience a problem, being able to capture a screenshot is a great way to describe and document the problem for yourself. It is even more useful when you ask for help because you can give the screenshots to the person from whom you are asking help.
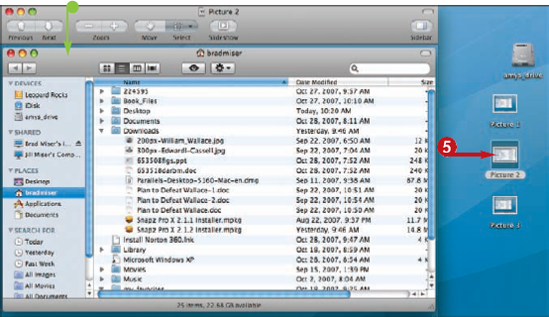
Capture a Screenshot
An image file is created on the desktop.
An image file is created on the desktop.
Tip
How can I capture screens with Grab?
Grab is a screenshot capture application that you can find in the Utilities folder. When Grab is open, its menu (but no windows) opens on MacBook's screen. Choose Capture from the menu, then choose from the options. If you choose Timed Screen, for example, the Timed Screen Grab dialog box opens; after you have arranged your screen how you want it to be captured, click Start Timer on the dialog box. After 10 seconds, the screen is captured and the result is opened in a new window, where you can choose to save or delete your screenshot.

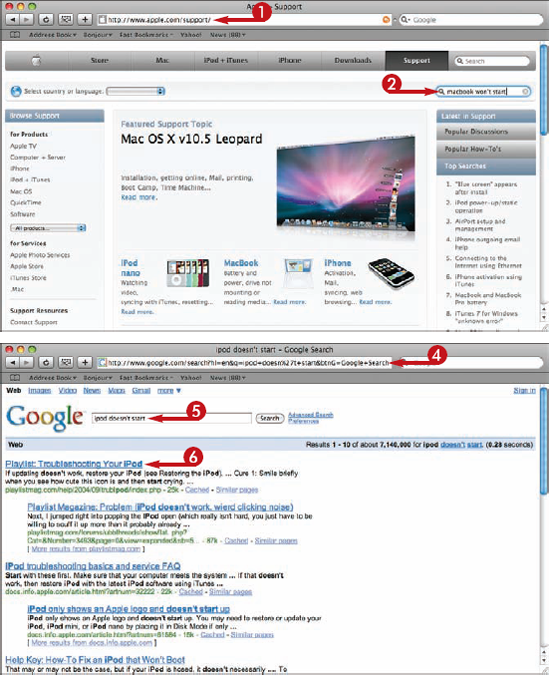
One of the most important troubleshooting skills is to be able to ask for help in the right places and in the right way. Many problems you encounter have been experienced and solved by someone else already.

Get Help with MacBook Problems
Note
If you purchased AppleCare, you can use that technical support service. See your documentation for contact information.
Note
If you live near an Apple retail store, call for an appointment at the Genius bar. You can often get excellent technical support for no cost if the problem can be solved in the store.