
Overview
This chapter describes the use of Topic Modeling to understand common themes in a document set by analyzing documents using Amazon Comprehend. You will learn the fundamentals of the algorithm used for Topic Modeling, Latent Dirichlet Allocation (LDA). Learning LDA will allow you to apply Topic Modeling to a multitude of unique business cases. You will then perform Topic Modeling on two documents with a known topic structure. By the end of this chapter, you will be able to extract and analyze common themes through Topic Modeling with Amazon Comprehend and describe the basics of Topic Modeling analysis. You will also be able to perform Topic Modeling on a set of documents and analyze the results.
Introduction
Topic Modeling is an important capability for business systems to make sense of unstructured information, ranging from support tickets to customer feedback and complaints, to business documents. Topic Modeling helps process automation to route customer feedback and mail; it enables a business to categorize and then effectively respond to social media posts, reviews, and other user-generated content from the various channels. It enables businesses to respond faster to critical items by understanding the topics and themes on incoming omnichannel interactions as well as responding most effectively by routing the materials to the most appropriate teams. Another two areas where Topic Modeling helps are knowledge management and brand monitoring.
Topic Modeling with Latent Dirichlet Allocation (LDA)
The subjects or common themes of a set of documents can be determined with Amazon Comprehend. For example, you have a movie review website with two message boards, and you want to determine which message board is discussing two newly released movies (one about sport and the other about a political topic). You can provide the message board text data to Amazon Comprehend to discover the most prominent topics discussed on each message board.
The machine learning algorithm that Amazon Comprehend uses to perform Topic Modeling is called Latent Dirichlet Allocation (LDA). LDA is a learning-based model that's used to determine the most important topics in a collection of documents.
How LDA works is that it considers every document to be a combination of topics, and each word in the document is associated with one of these topics.
For example, if the first paragraph of a document consists of words such as eat, chicken, restaurant, and cook, then you conclude that the topic can be generalized to Food. Similarly, if the second paragraph of a document contains words such as ticket, train, kilometer, and vacation, then you can conclude that the topic is Travel.
Basic LDA Example
LDA has lots of math behind it—concepts such as Expectation Maximization, Gibs sampling, priors, and a probability distribution over a "bag of words". If you want to understand the mathematical underpinnings, a good start is the Amazon documentation on SageMaker (https://docs.aws.amazon.com/sagemaker/latest/dg/lda-how-it-works.html). Let's look at LDA more pragmatically and understand it empirically through an example.
Say you have one document with six sentences, and you want to infer two common topics.
The sentences are as follows:
- They loved each other greatly.
- Most people experience love without noticing that there is anything remarkable about it.
- It was partly the war; the revolution did the rest.
- The war was an artificial break in life, as if life could be put off for a time. What nonsense!
- I said life, but I mean life as you see it in a great picture, transformed by genius, creatively enriched.
- Only now have people decided to experience it not in books and pictures, but in themselves, not as an abstraction, but in practice.
When you feed these sentences into an LDA algorithm, specifying the number of topics as two, it will discover the following:
Sentence-Topics
Sentence 1: Topic 0
Sentence 2: Topic 0
Sentence 3: Topic 1
Sentence 4: Topic 1
Sentence 5: Topic 0
Sentence 6: Topic 0
Topic terms
Topic 0: life 12%, people 8%, experience 8%, love 5%, and so forth
Topic 1: 62% revolution, 23% war, and the rest 15%
Of course, knowing that the sentences are from the book Dr. Zhivago by the famous Russian author Boris Pasternak, the topics war and life/love seem reasonable.
While this example is a simplistic depiction of a complex algorithm, it gives you an idea. As discussed in this chapter, in various business situations, an indication of what a document or an e-mail or a social media post is about is very valuable for downstream systems—and the ability to perform that classification automatically is priceless.
Why Use LDA?
LDA is useful when you want to group a set of documents based on common topics, without thinking about the documents themselves. LDA can create subjects from inferring the general topics by analyzing the words in the documents. This is usually utilized in suggestion frameworks, report arrangement, and record synopsis. In conclusion, LDA has many uses. For example, you have 30,000 user emails and want to determine the most common topics to provide group-specific recommended content based on the most prevalent topics. Manually reading, or even outsourcing the manual reading, of 30,000 emails would take an excessive investment in terms of time and money, and the accuracy would be difficult to confirm. However, Amazon Comprehend can seamlessly provide the most common topics in 30,000 emails in a few steps with incredible accuracy. First, convert the emails to text files, upload them to an S3 bucket, and then imitate a Topic Modeling job with Amazon Comprehend. The output is two CSV files with the corresponding topics and terms.
Amazon Comprehend—Topic Modeling Guidelines
The most accurate results are obtained if you provide Comprehend with the largest possible corpus. More specifically:
- You should use no fewer than 1,000 records in every subject.
- Each document ought to be something like three sentences in length.
- If a document comprises, for the most part, numeric information, you should expel it from the corpus.
Currently, Topic Modeling is limited to two document languages: English and Spanish.
A Topic Modeling job allows two format types for input data (refer to the following Figure 3.1). This allows users to process both collections of large documents (for example, newspaper articles or scientific journals), and short documents (for example, tweets or social media posts).
Input Format Options:
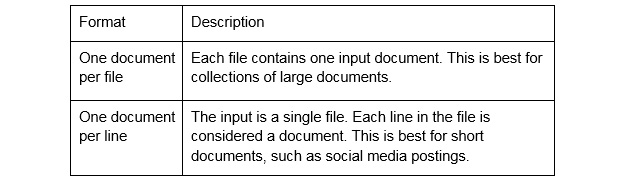
Figure 3.1: AWS Comprehend—Topic Modeling input format options
Output Format Options:
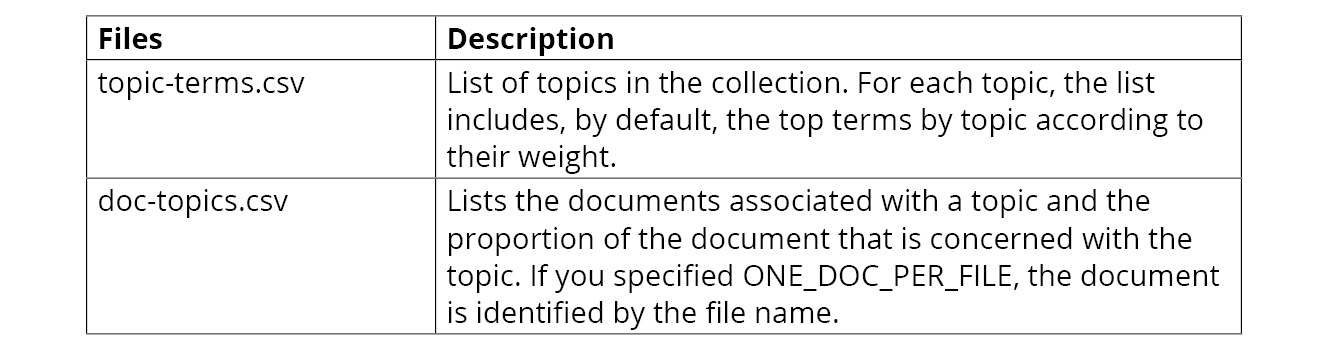
Figure 3.2: AWS Comprehend—Topic Modeling output files description
After Amazon Comprehend processes your document collection, the modeling outputs two CSV files: topic-terms.csv (see Figure 3.2) and doc-topics.csv.
The topic-terms.csv file provides a list of topics in the document collection with the terms, respective topics, and their weights. For example, if you gave Amazon Comprehend two hypothetical documents, learning to garden and investment strategies, it might return the following to describe the two topics in the collection:
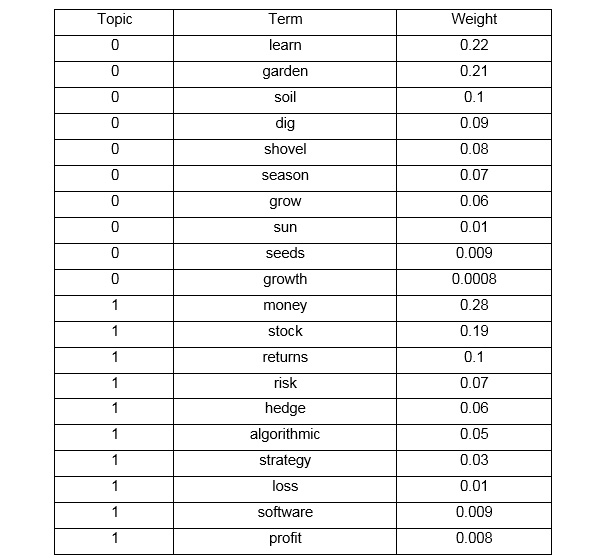
Figure 3.3: Sample Topic Modeling output (topic-terms.csv) for two documents' input
The doc-topics.csv file provides a list of the documents provided for the Topic Modeling job, and the respective topics and their proportions in each document. Given two hypothetical documents, learning_to_garden.txt and investment_strategies.txt, you can expect the following output:
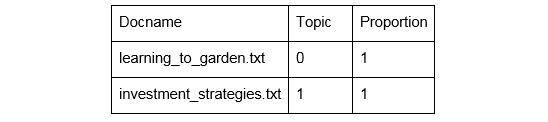
Figure 3.4: Sample Topic Modeling output (doc-topics.csv) for two documents' input
Exercise 3.01: Using Amazon Comprehend to Perform Topic Modeling on Two Documents with Known Topics
In this exercise, we will use two documents (Romeo and Juliet and War of the Worlds) to better understand LDA. We will use Amazon Comprehend to discover the main topics in the two documents. Before proceeding to the exercise, just look at an overview of the data pipeline architecture. The text files are stored in S3, and then we direct Comprehend to look for the files in the input bucket. Comprehend analyzes the documents and puts the results back in S3 in the output bucket:
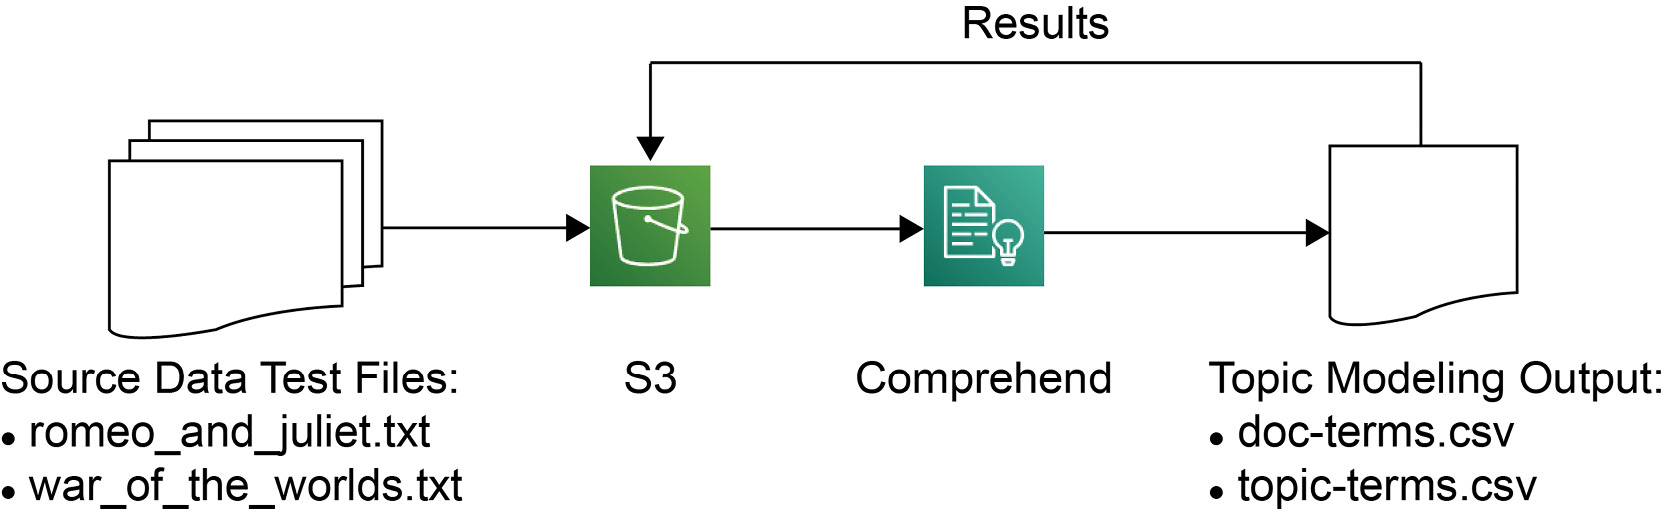
Figure 3.5: Data pipeline architecture overview
Complete the Topic Modeling of a known topic structure:
- First, you need to get to the S3 console. Please refer to Chapter 1, An Introduction to AWS, for account setup instructions. Go to https://aws.amazon.com/ and click My Account followed by AWS Management Console. Click Services, and then search or select S3 in a new browser tab. You will see the S3 console as shown in the following screenshot:
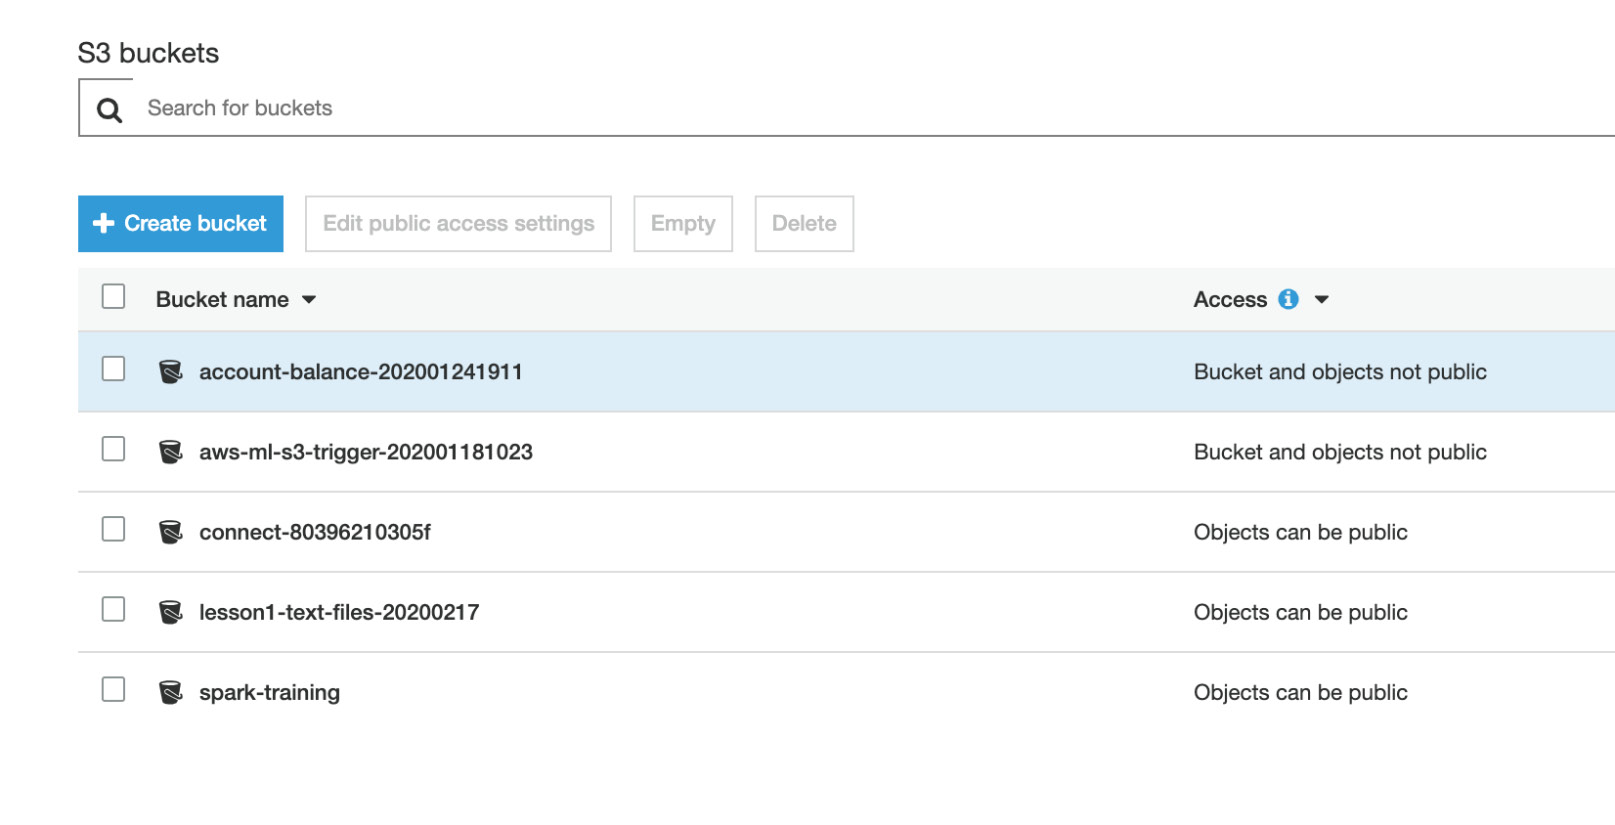
Figure 3.6: Amazon S3 console
- We need an input and output S3 bucket. Let's create both. Now, click the Create bucket button to create a bucket:
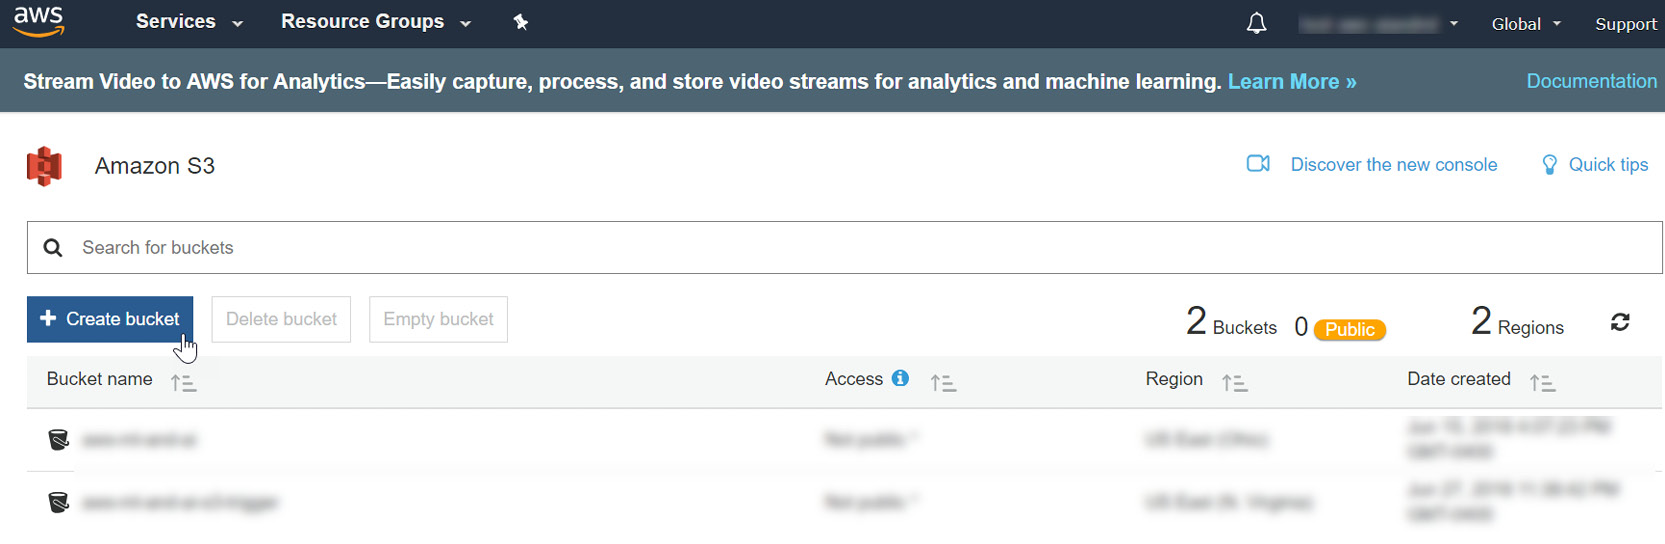
Figure 3.7: Creating a bucket
- For the bucket name, enter a unique name that describes the function. Here, the name aws-ml-input-for-topic-modeling is used. Click the Create button:
Note
The bucket names in AWS have to be unique. So, you might get an error saying, "Bucket name already exists." One easy way to get a unique name is to append the bucket name with today's date (plus time, if required); say, YYYYMMDDHHMM. While writing this chapter, we created a bucket, aws-ml-input-for-topic-modeling-20200301.
Clicking Create in the following window uses all the default settings for properties and permissions, while clicking Next allows you to adjust these settings according to your needs.

Figure 3.8: Creating a bucket name input
- Click Next, then Next again to go to Configure options, click Next once more to go to Set permissions, and finally click on Create Bucket in the Review tab:
- Now, click the bucket and then the Create folder button to create a folder:
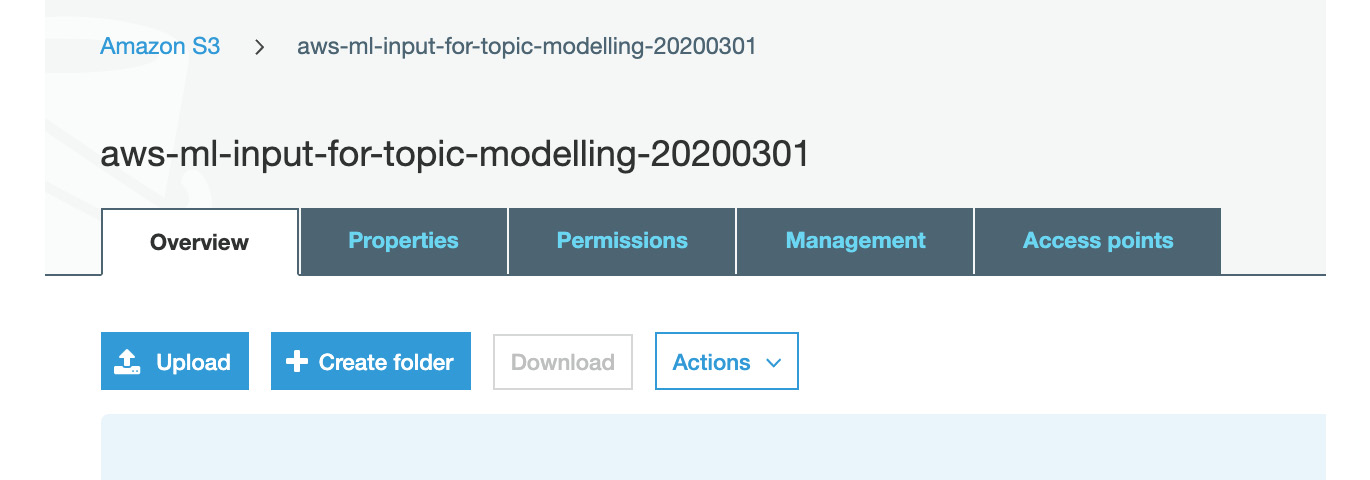
Figure 3.9: Creating a folder in S3 for Topic modeling input
- Now, type in known_structure as the folder name, and then click the Save button:
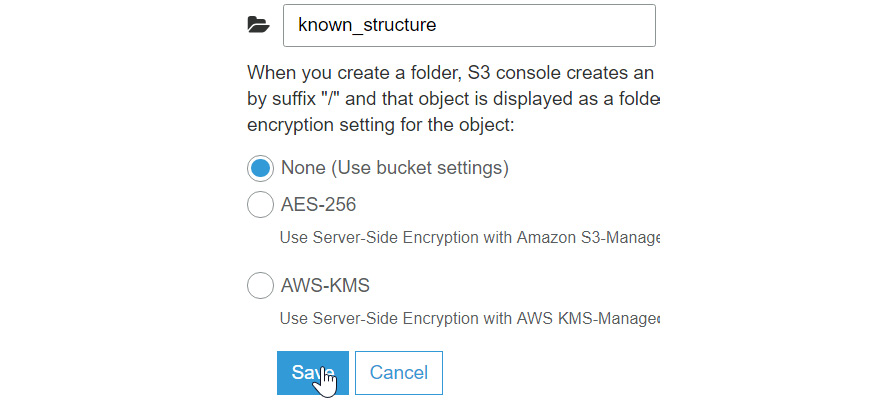
Figure 3.10: Saving the known_structure folder name
- After clicking the Save button, your folder will be generated. Now, click the known_structure folder:
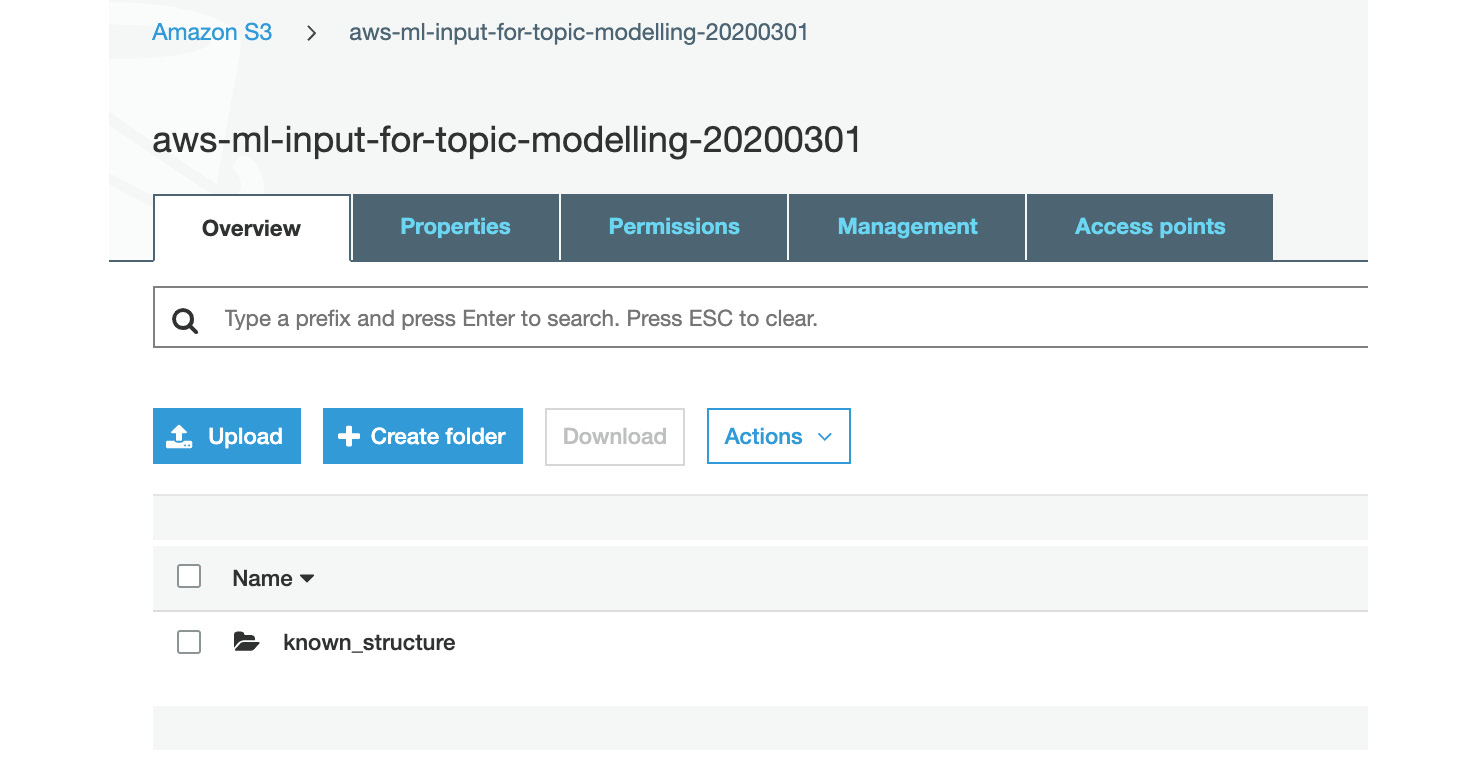
Figure 3.11: The input bucket screen
- Now, click the Upload button:
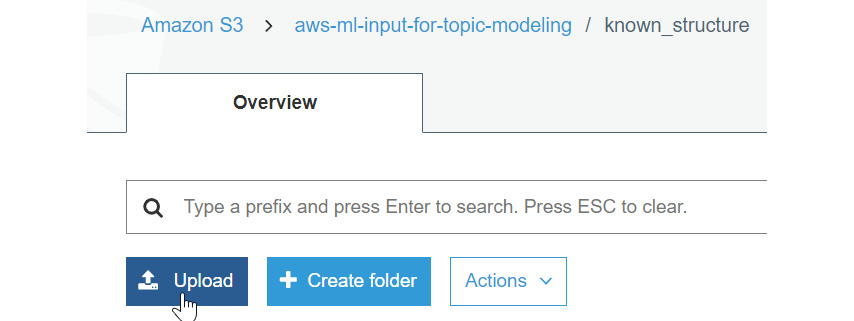
Figure 3.12: The Upload button
- Now, you will be prompted to add files to the folder. Click Add files, or drag the files onto the screen:
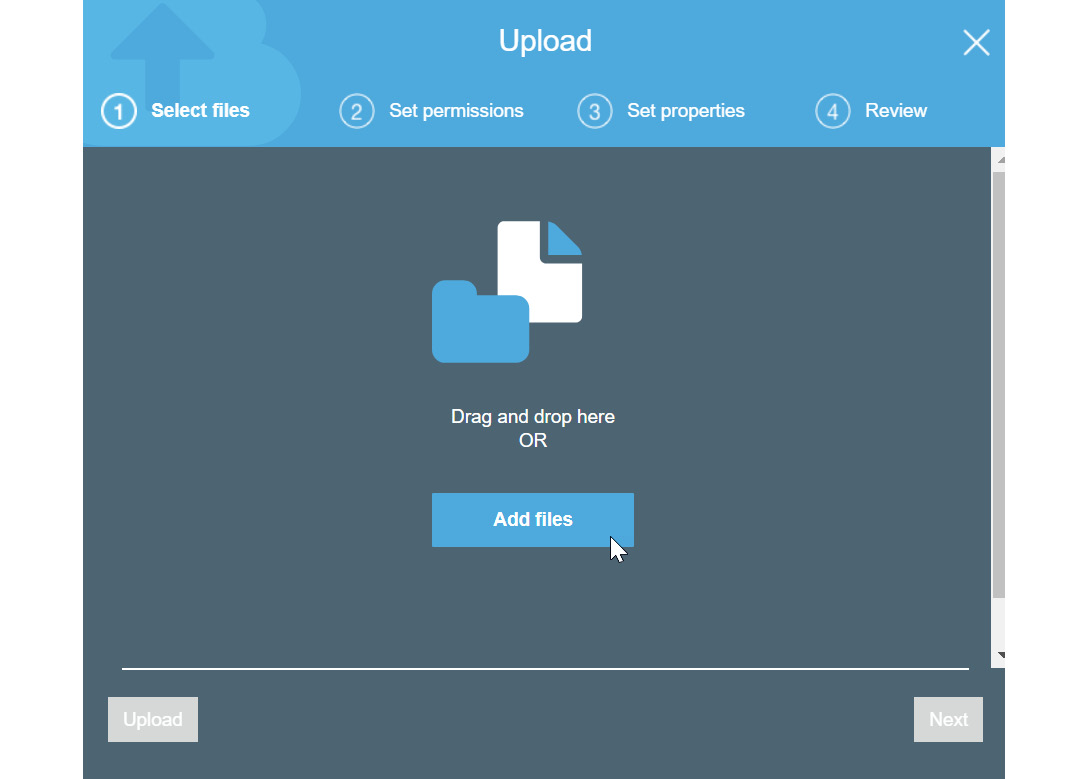
Figure 3.13: The Add files button
- The files for this chapter are located in the Chapter03 folder in the GitHub repository at https://packt.live/3eba6rM. As we mentioned in Chapter 1, An Introduction to AWS, you should have downloaded the GitHub files to a local subdirectory.
By way of an example, we have downloaded the files to the Documents/aws-book/The-Applied-AI-and-Natural-Language-Processing-with-AWS directory. Navigate to Upload and select the following two text files from your local disk. As you may have guessed, the files for this exercise are located in the Exercise3.01 subdirectory:
Once the files have been selected, click on the Open button to upload the files:
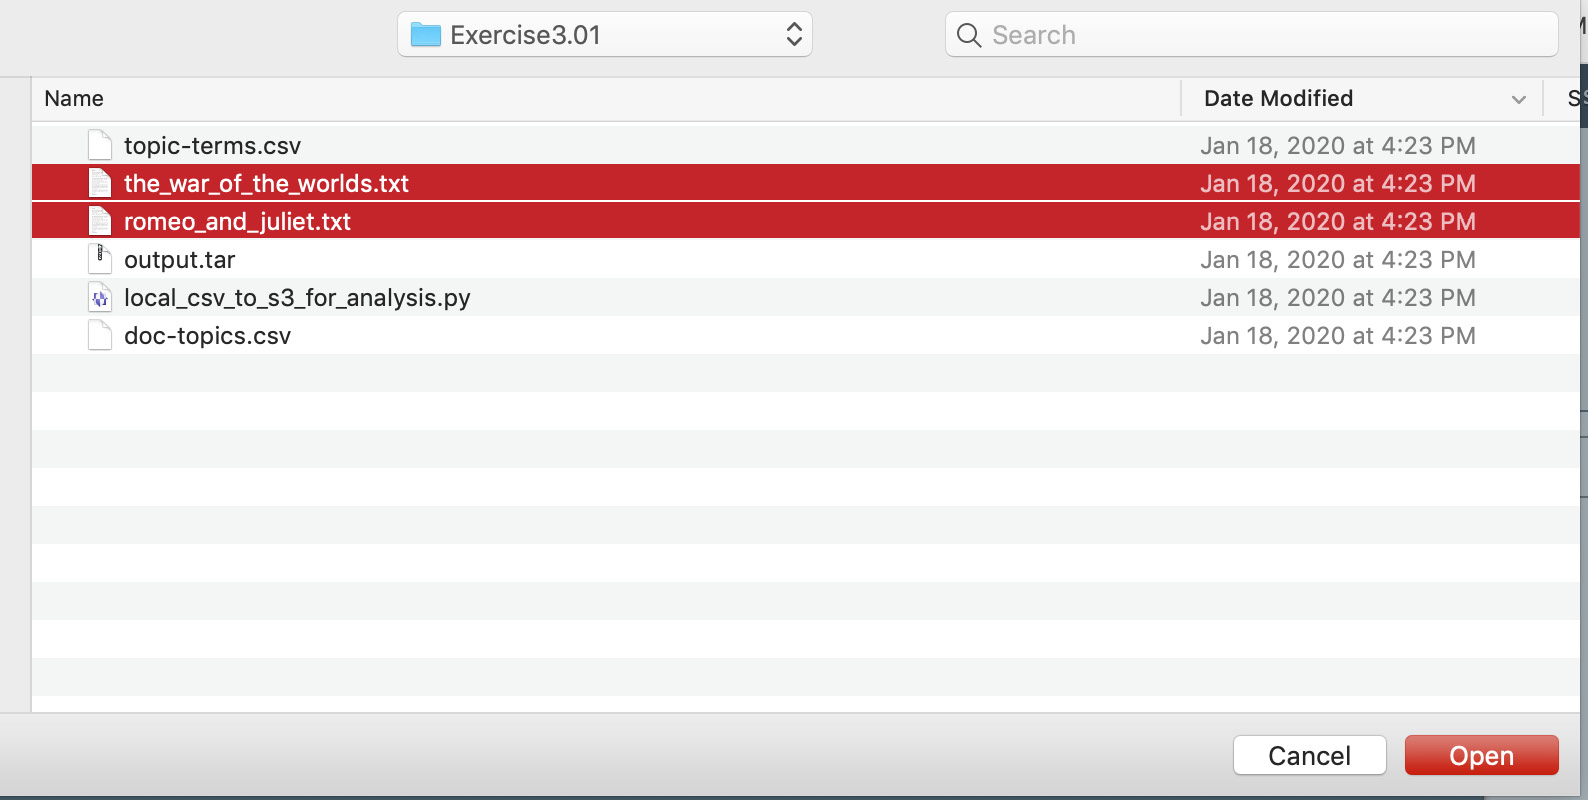
Figure 3.14: Selecting files to upload from the local directory
The following figure shows the uploading of text files:
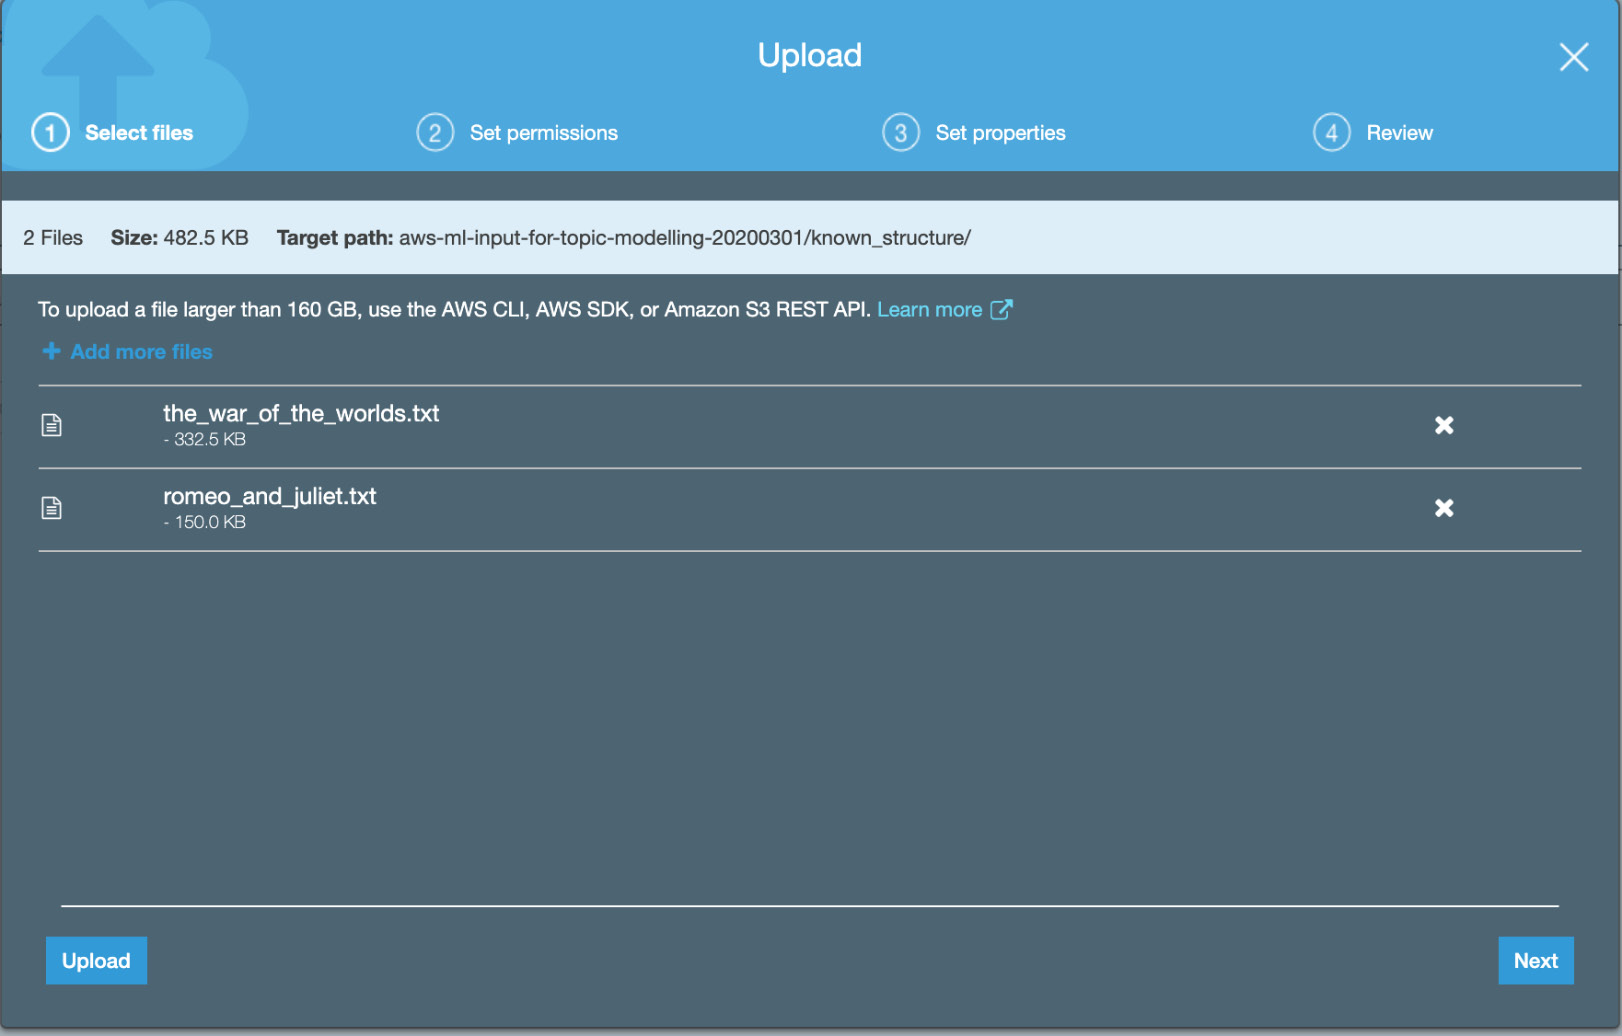
Figure 3.15: Uploading for the two known_structure text files
- Click Next in the Set permissions and Set Properties tabs. Select Upload in the Review tab:
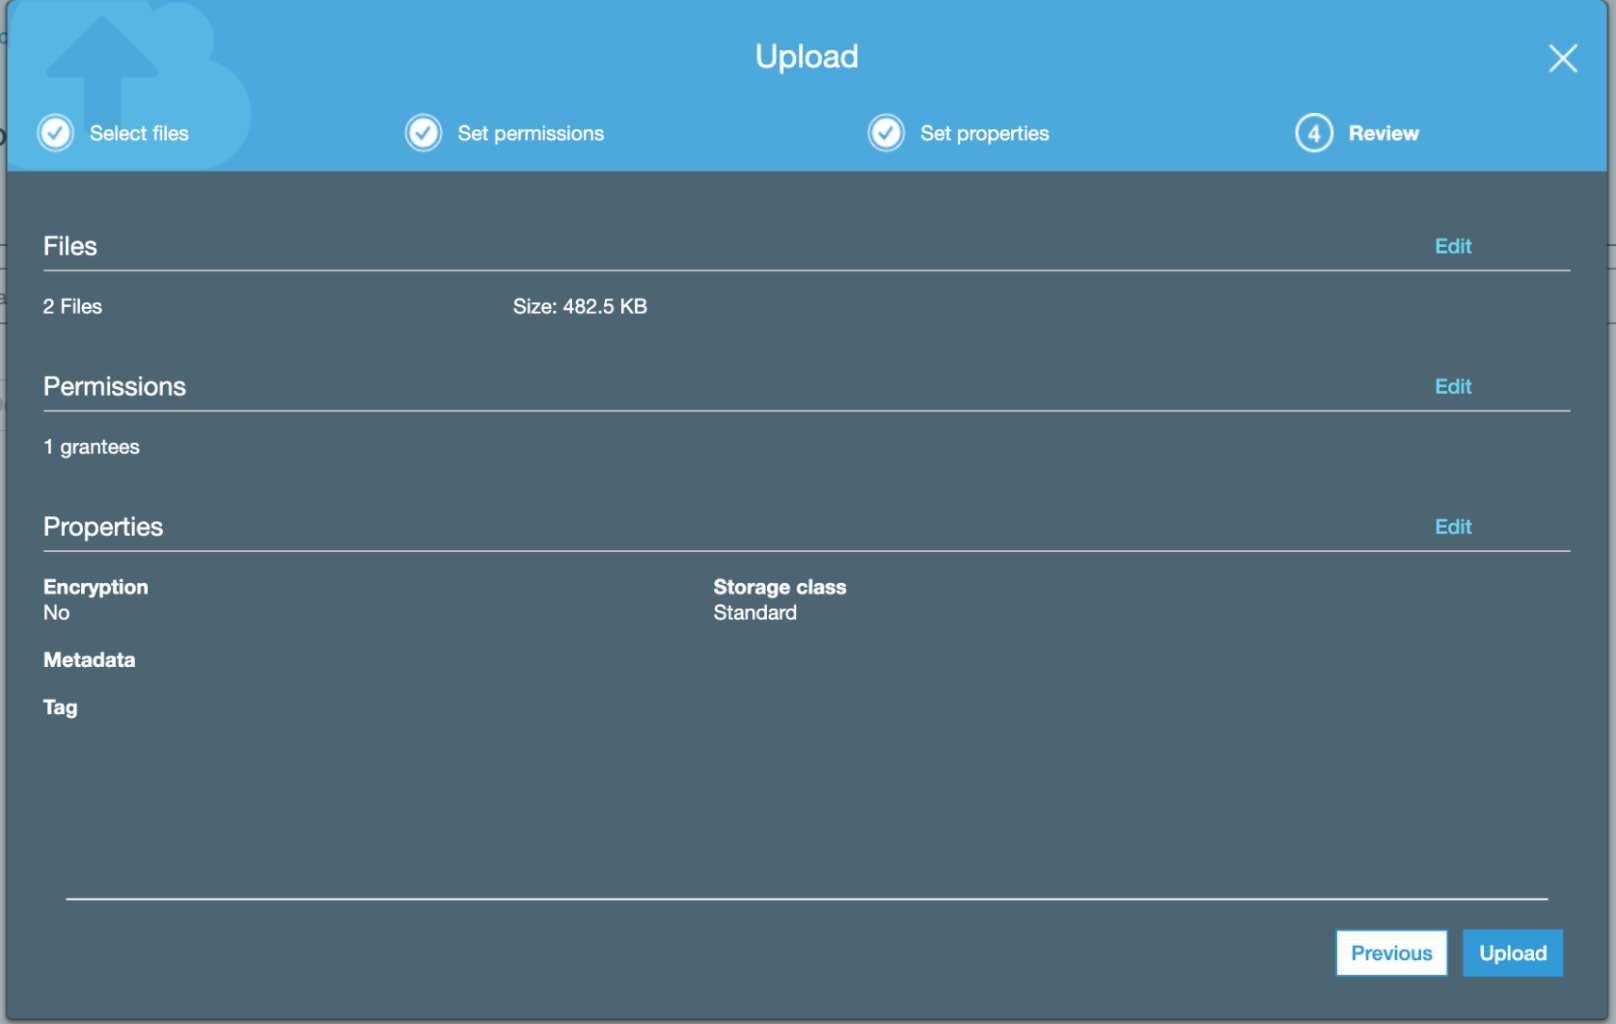
Figure 3.16: Amazon S3 upload files
- Navigate to the Amazon S3 home screen:

Figure 3.17: Amazon S3
- Next, create an output S3 bucket. Use the same S3 bucket creation process. To do so, click the Create bucket button:
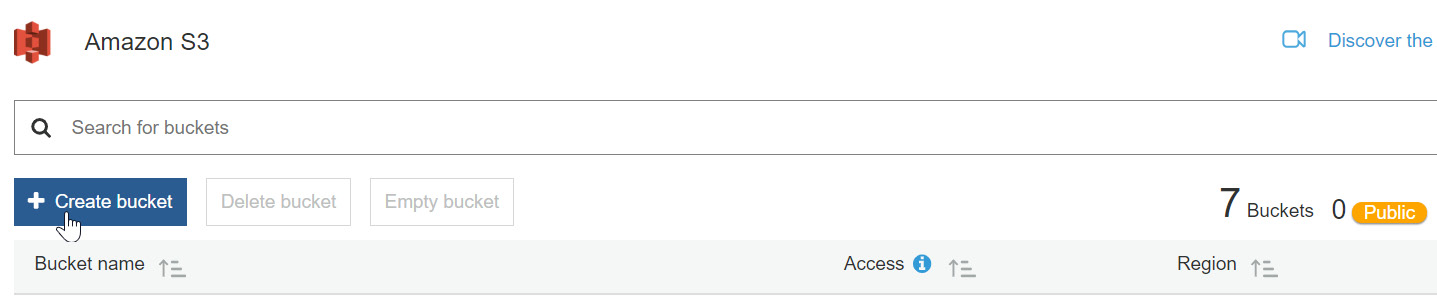
Figure 3.18: Creating a bucket
- Now, name the bucket and then click the Create button:
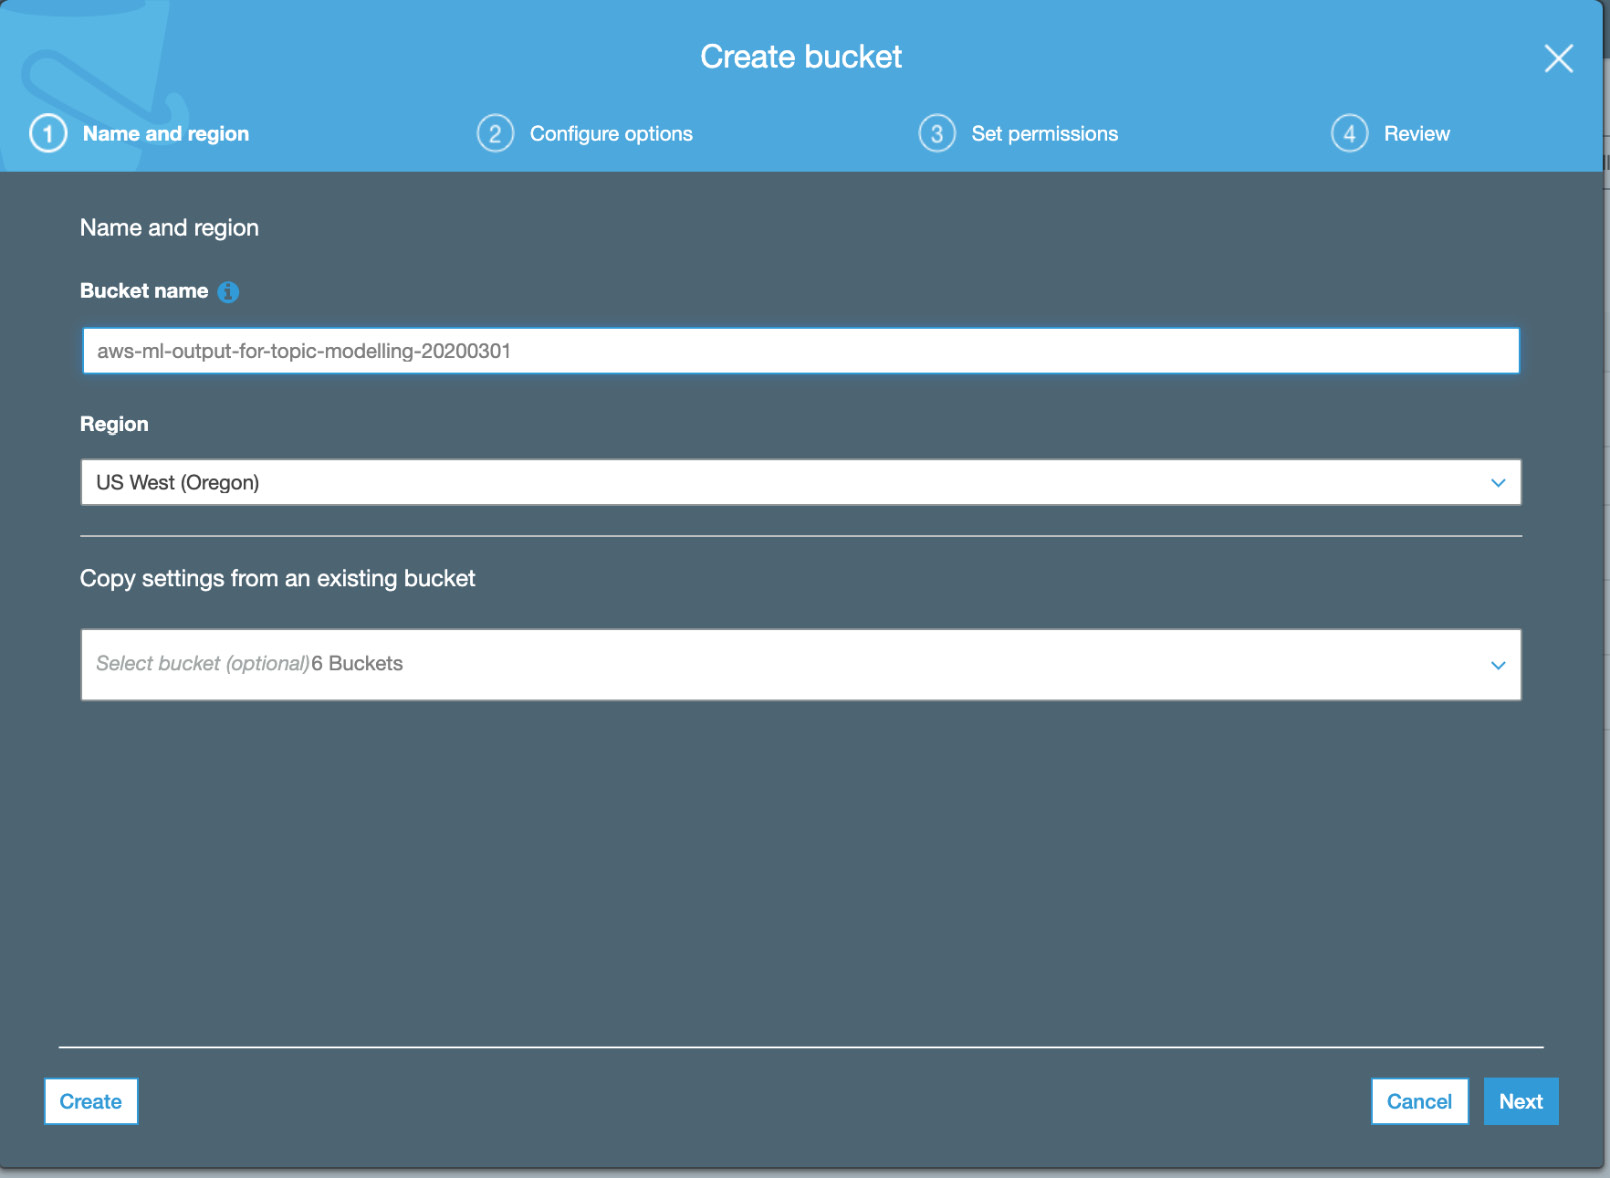
Figure 3.19: Creating bucket output for Topic Modeling
- Click Next under Configure Options, Next under Set permissions, and Create Bucket in the Review window.
Now you have two buckets, one for input with two text files, and an empty output bucket. Let's now proceed to Amazon Comprehend.
- Navigate to Amazon Comprehend: https://console.aws.amazon.com/comprehend/. If you are presented with the following screen, click Launch Amazon Comprehend:
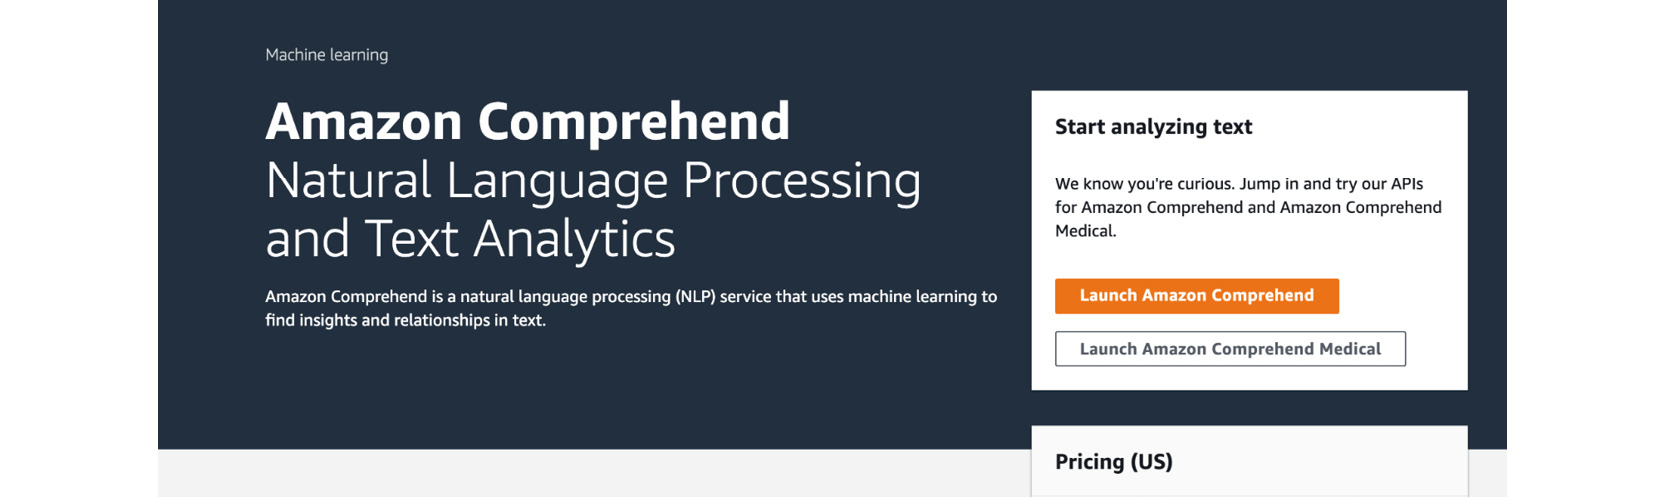
Figure 3.20: The Amazon Comprehend home screen
- Now, click the first Analysis jobs option in the left-hand side toolbar (not the one under Amazon Comprehend Medical):
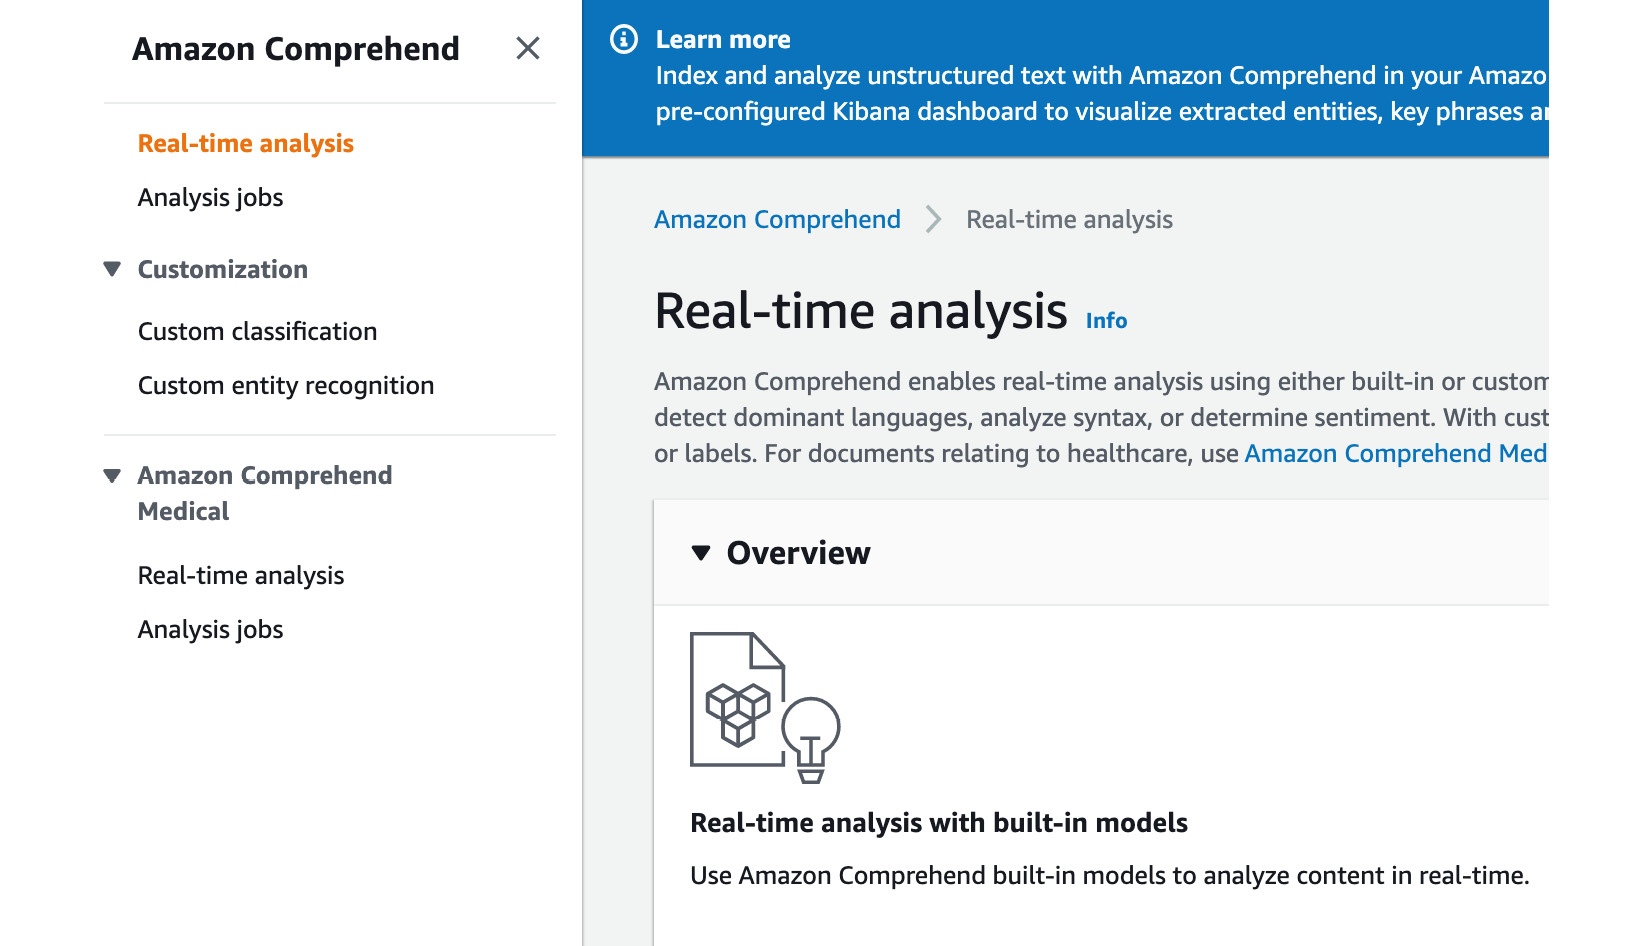
Figure 3.21: The Amazon Comprehend organization screen
- Now, click the Create job button:
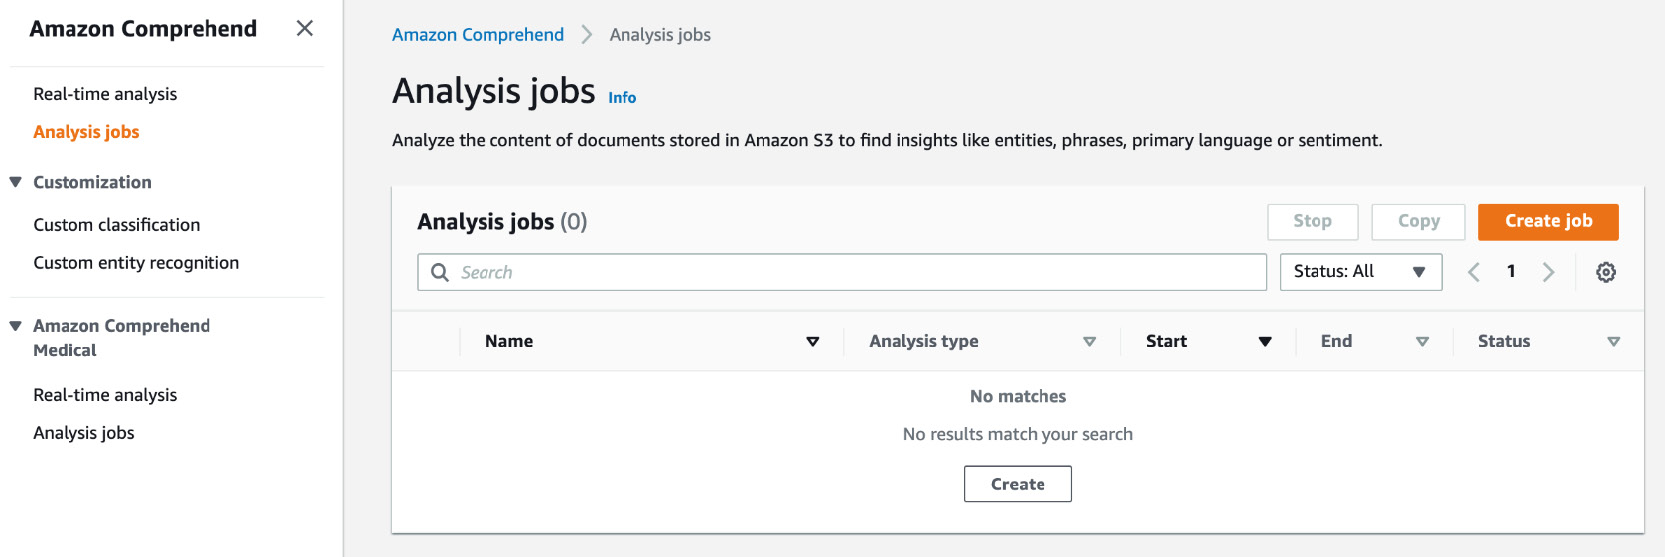
Figure 3.22: The Amazon Comprehend Create job button
- Enter known_structure_topic_modeling_job in the Name field:
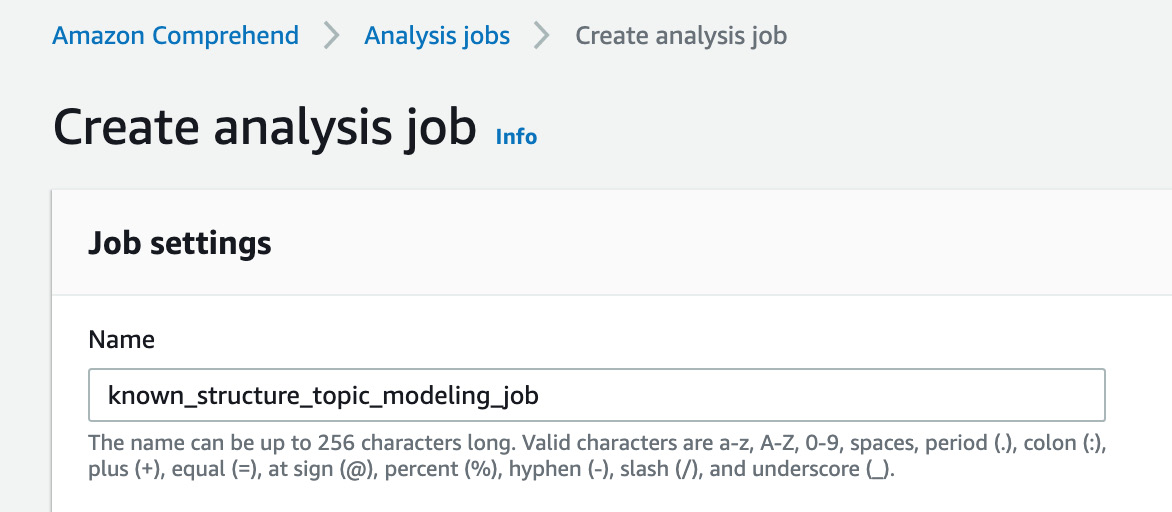
Figure 3.23: Name of the Topic Modeling job
- Select Topic Modeling in the Analysis type drop-down box:
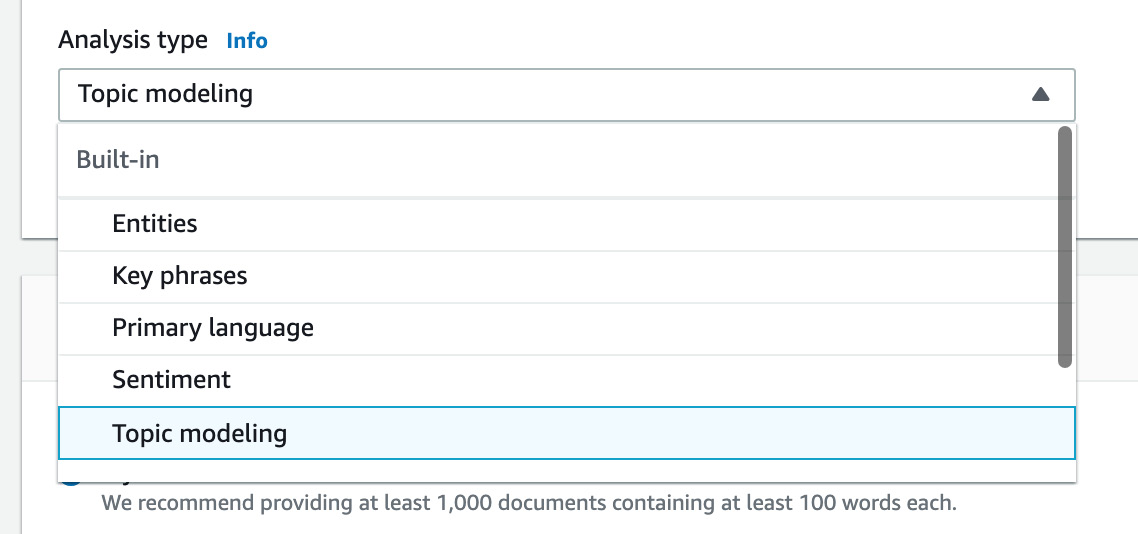
Figure 3.24: Selecting analysis type (Topic Modeling)
- Now, scroll down to the Input data tab and then click Browse S3:
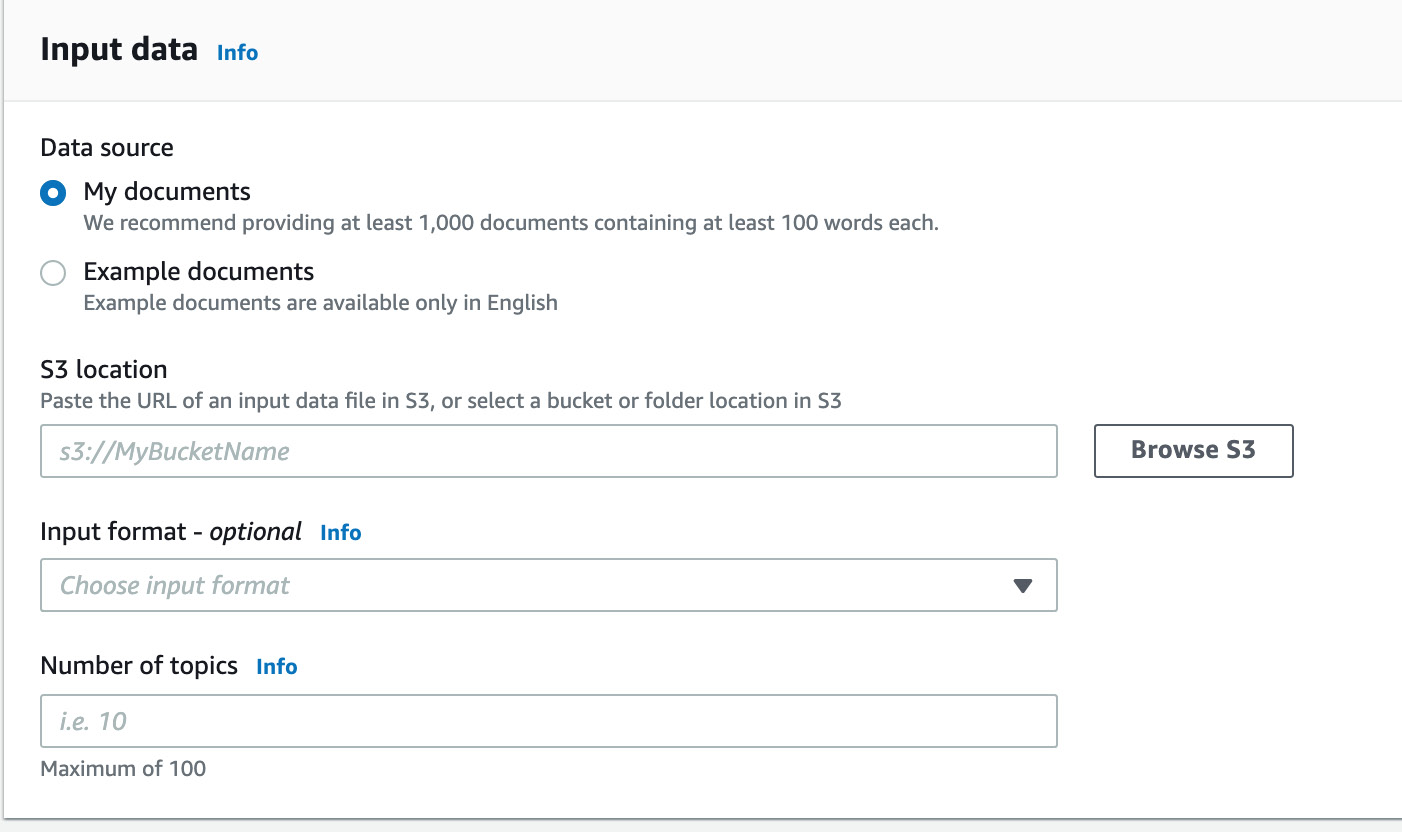
Figure 3.25: Clicking Search to locate the Topic Modeling input data source
- The list of S3 buckets will be displayed:
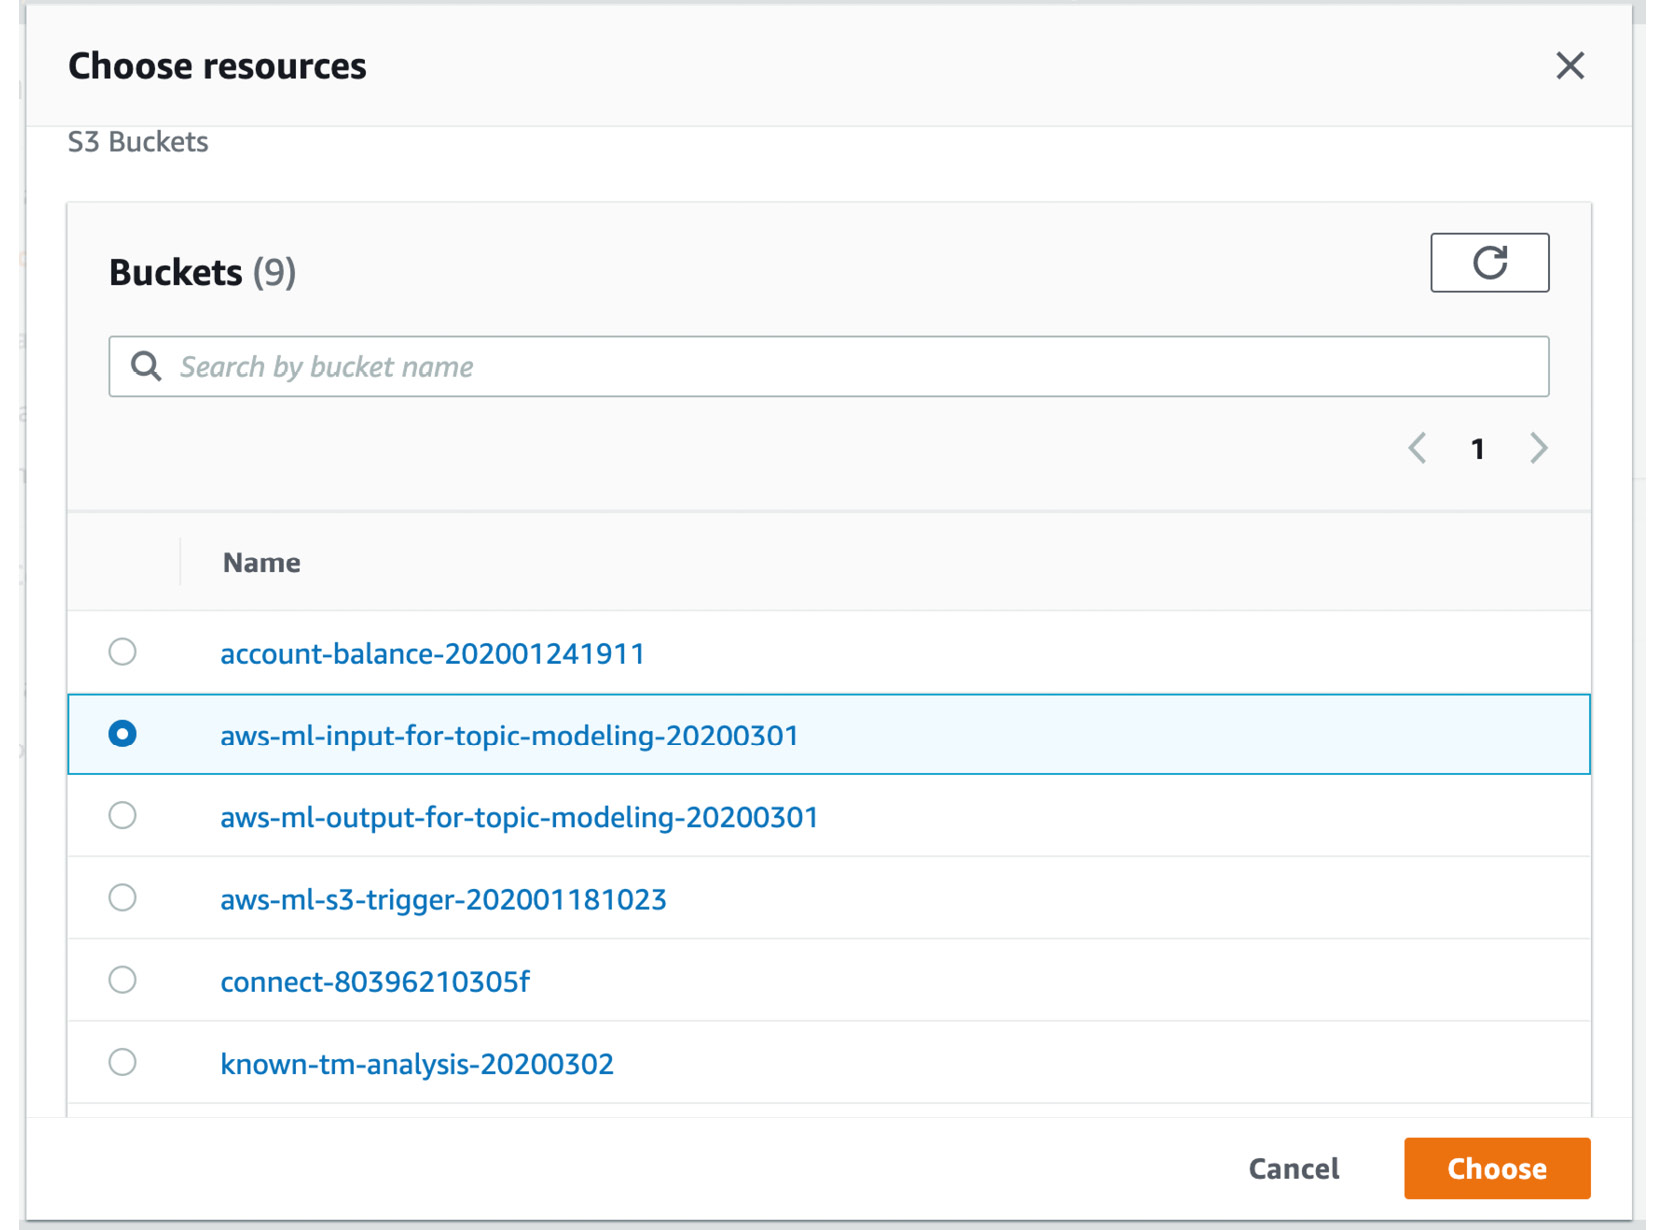
Figure 3.26: Selecting the input bucket
- Select the input bucket (in my case, it is aws-ml-input-for-topic-modeling-20200301) and click on the bucket. Then, the folder will be displayed:
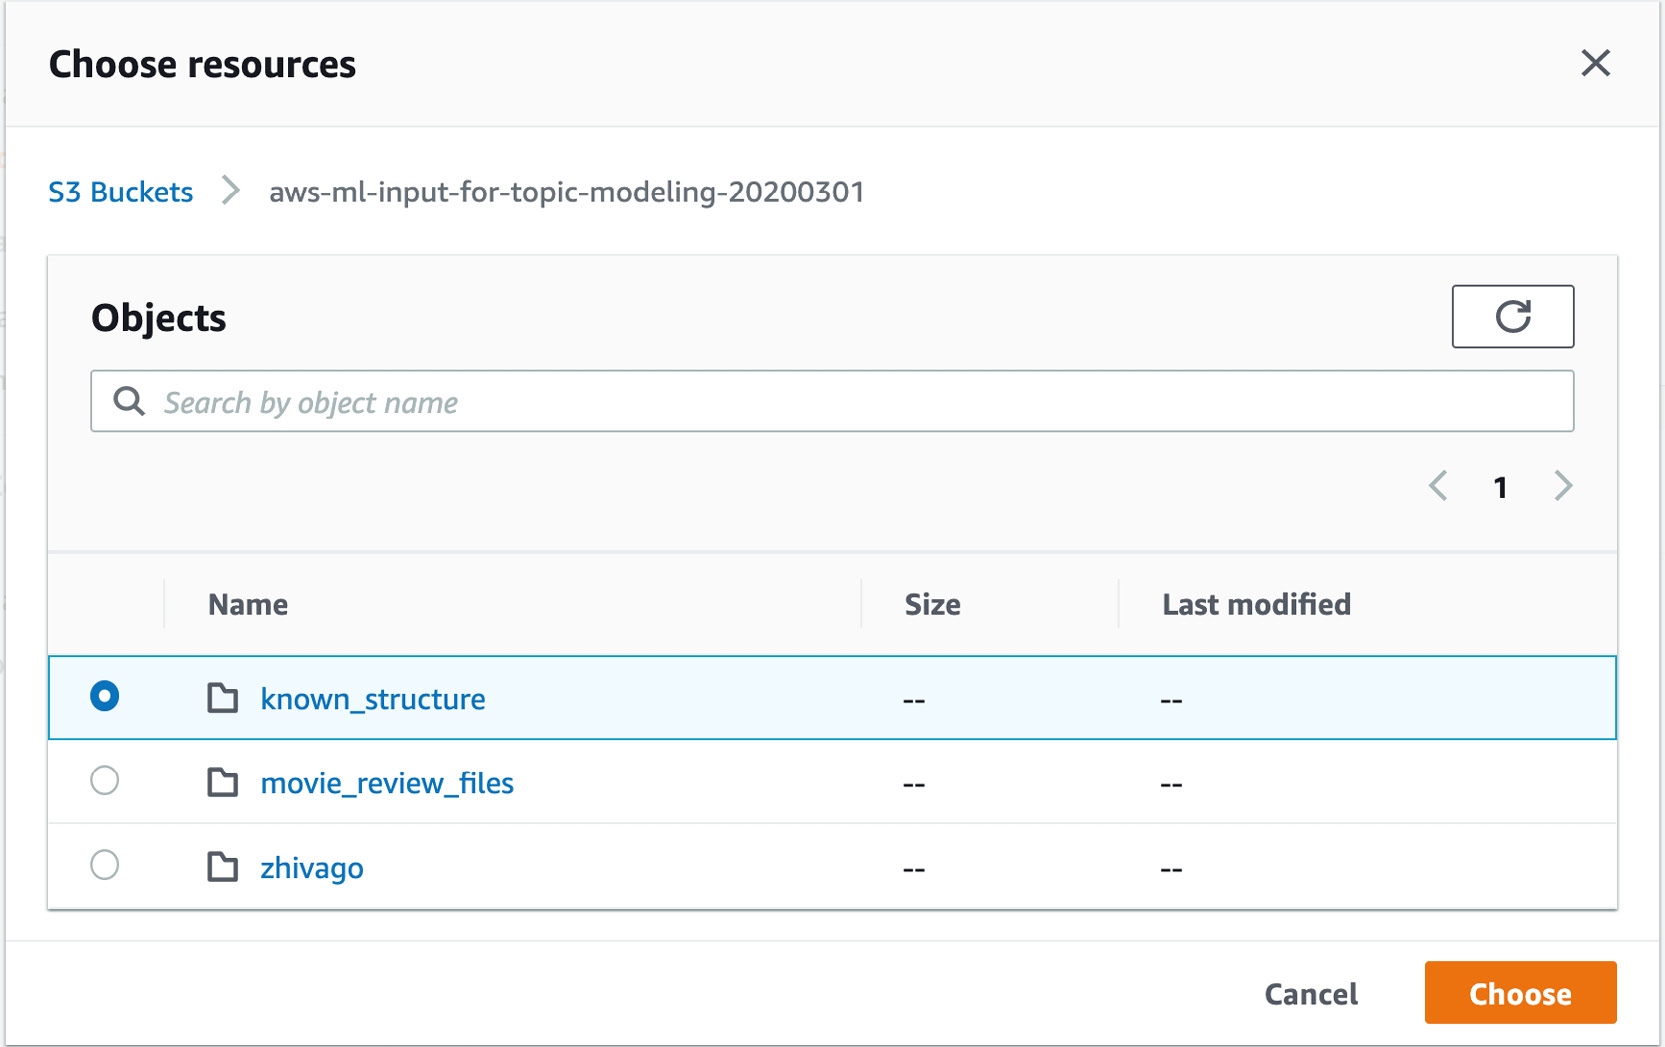
Figure 3.27: Selecting the input folder
- Click the radio button next to known_structure and then click the Choose button, which will direct you to the following screen:
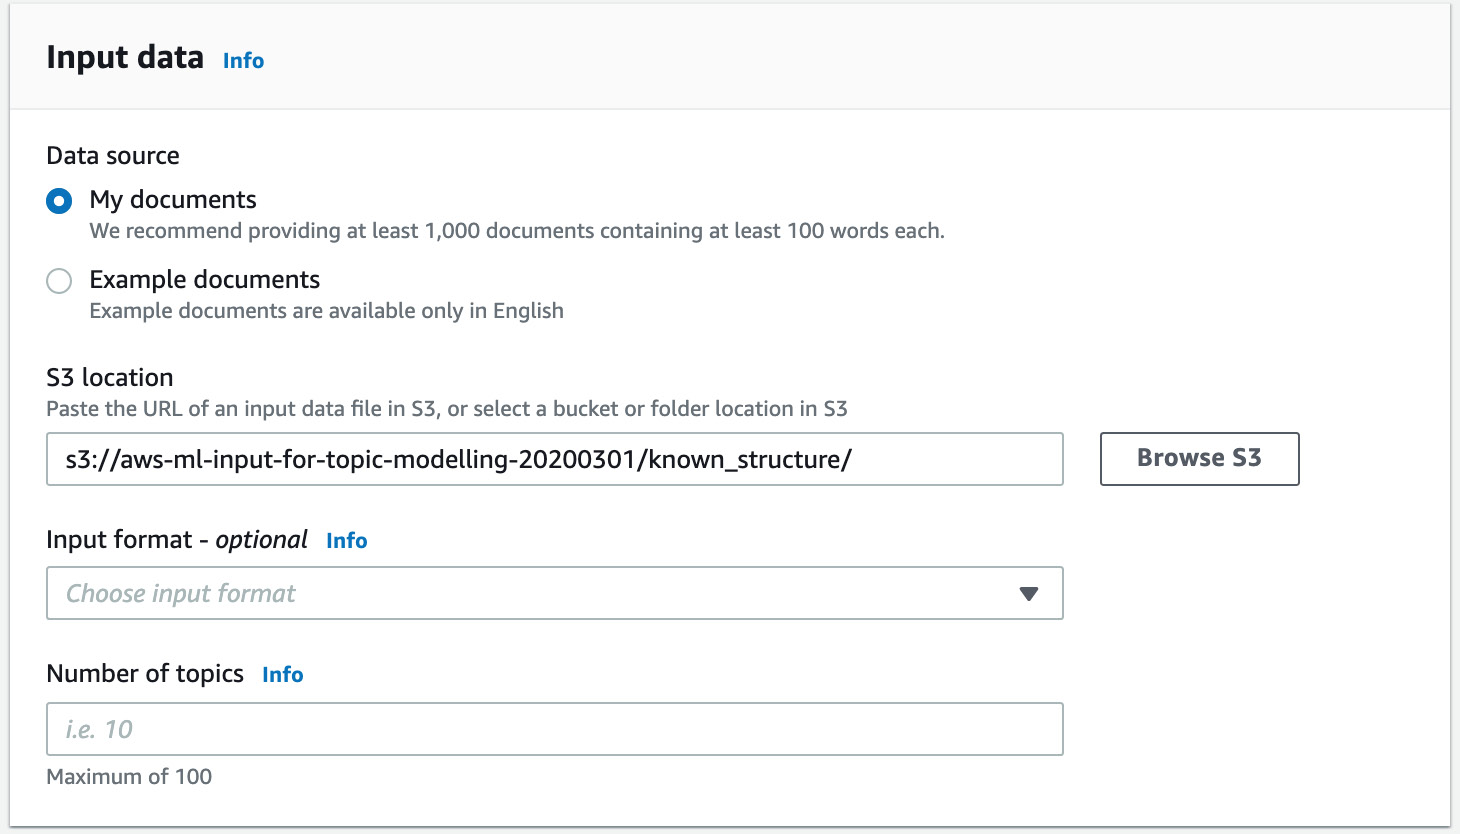
Figure 3.28: The Input data section with the S3 location filled in
- Now, from the drop-down menu, select One document per file:
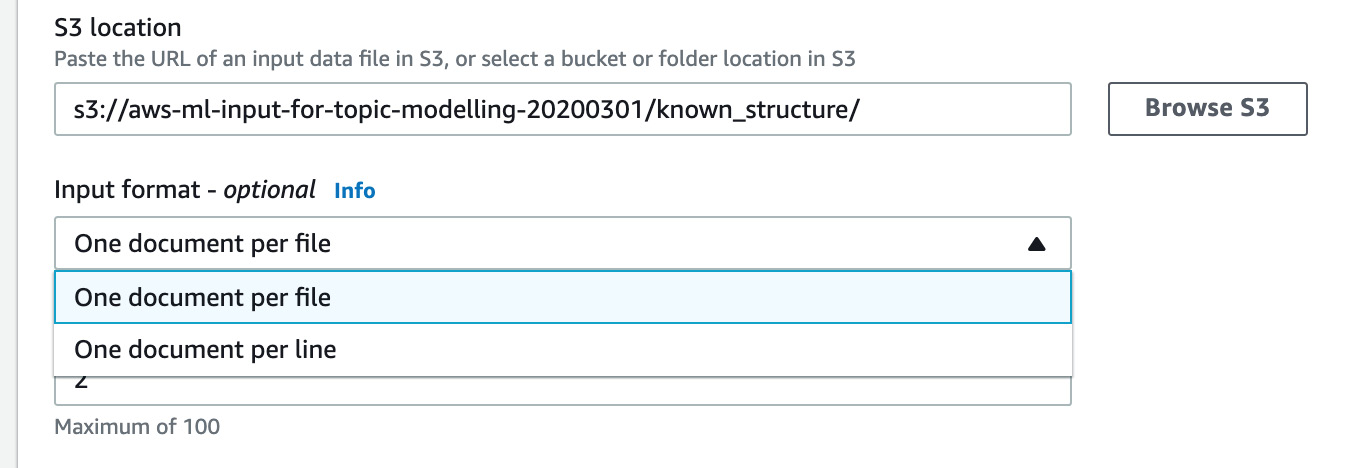
Figure 3.29: Selecting One document per file
- Now, enter 2 for the Number of Topics you need to have:

Figure 3.30: Entering 2 for the number of topics to perform Topic Modeling
- Next, click Browse S3 in the Output data tab:
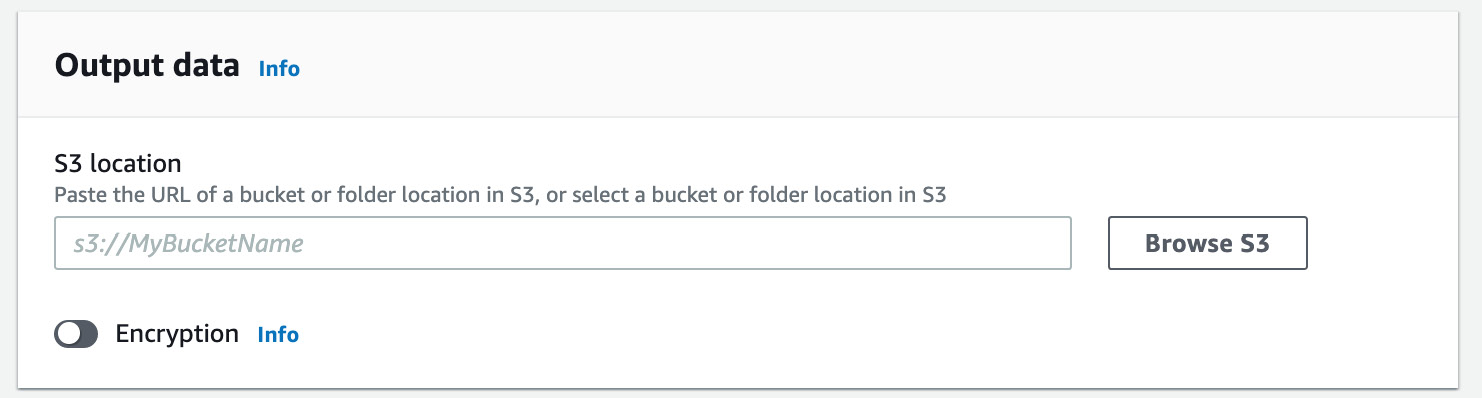
Figure 3.31: Output data tab and the Browse S3 button for the Topic Modeling S3 output location
- Select the output bucket (in our case, it is aws-ml-output-for-topic-modeling-20200301) and then click Choose:
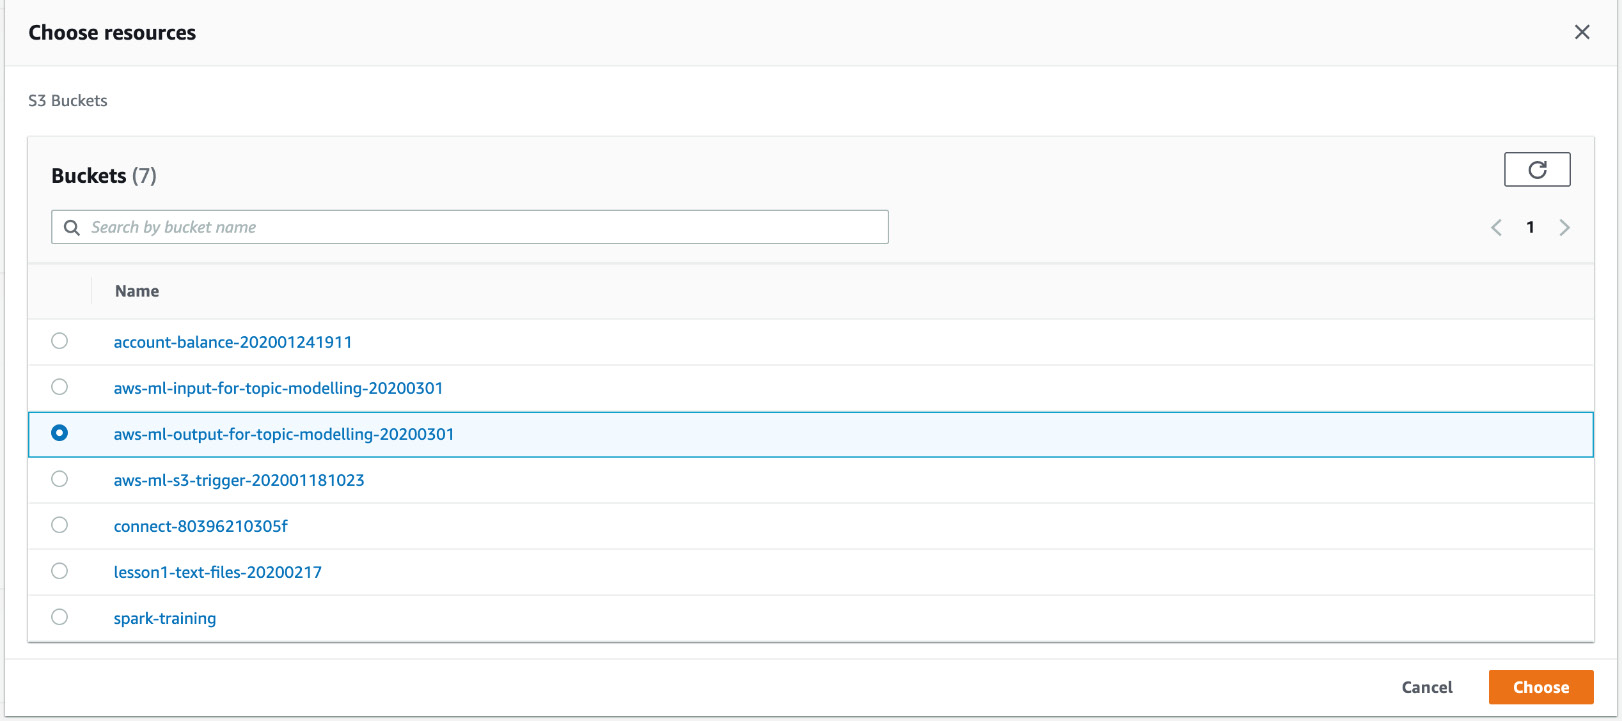
Figure 3.32: Selecting the output S3 bucket
- Make sure that the Output data tab looks similar to the following screenshot:
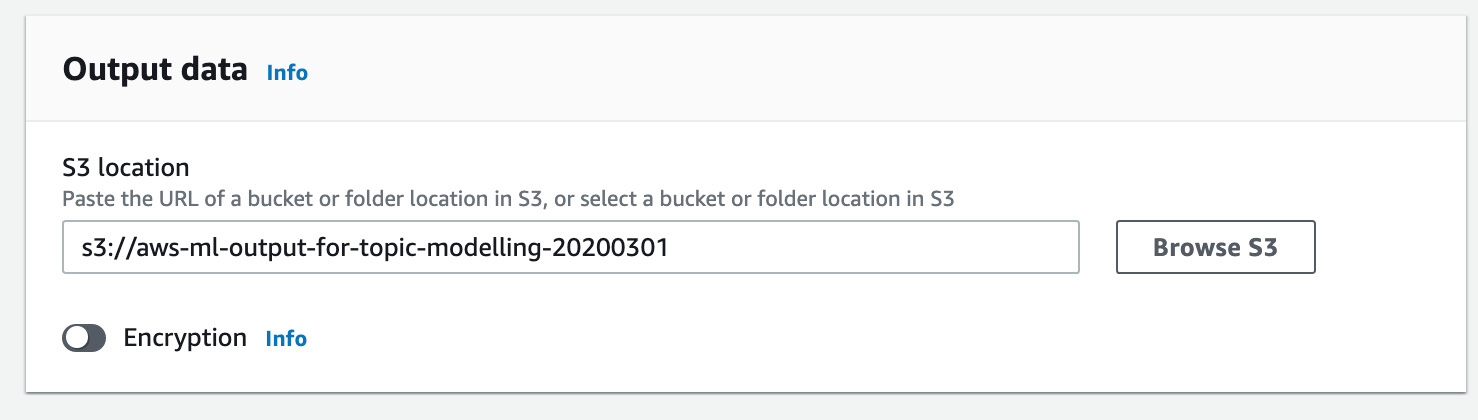
Figure 3.33: Output data tab with the output bucket name
- Scroll down to the Access permissions tab, and then select the option Create an IAM role:
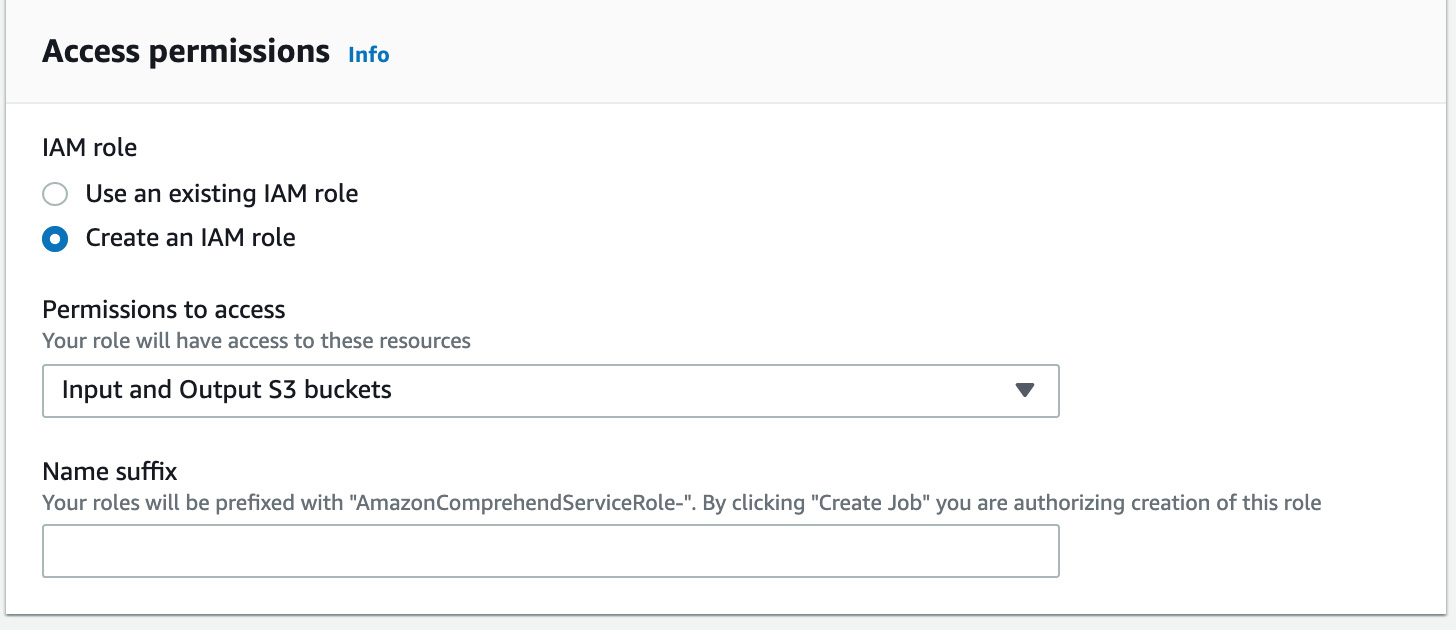
Figure 3.34: Selecting Create an IAM role and providing permission to Input and Output S3 buckets
Check to make sure that Input and Output S3 buckets is listed under Permissions to access:
- Enter myTopicModelingRole in the Name suffix field and then click the Create job button:
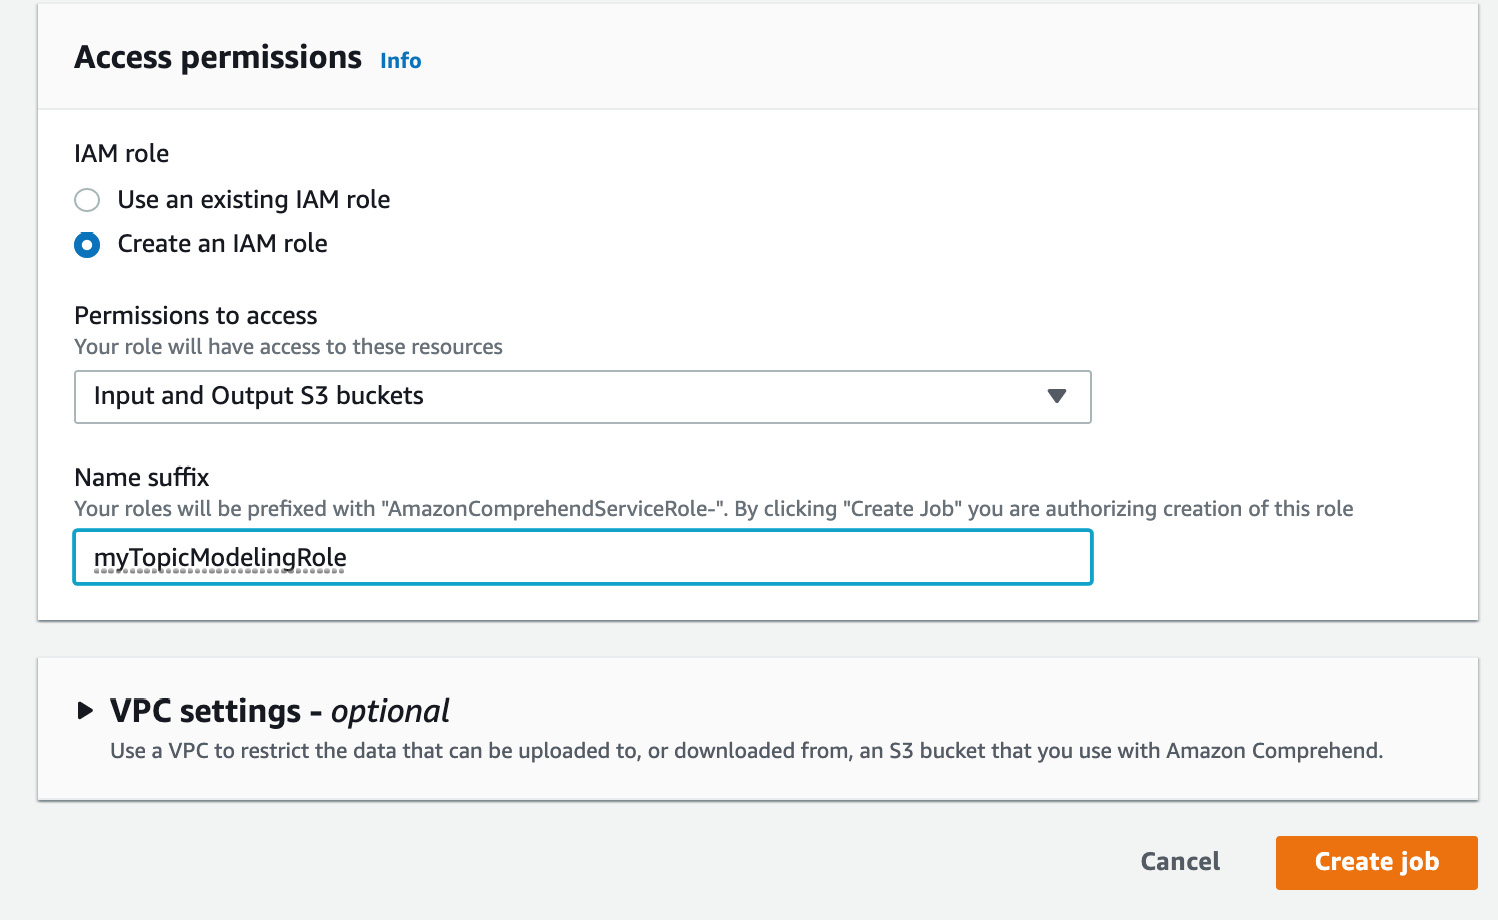
Figure 3.35: Clicking the Create job button
- Creating the job may take a few minutes and you might see a message "Propagating IAM role, please remain on the page." Once the creation is complete, you will be redirected to the Comprehend home screen as follows:
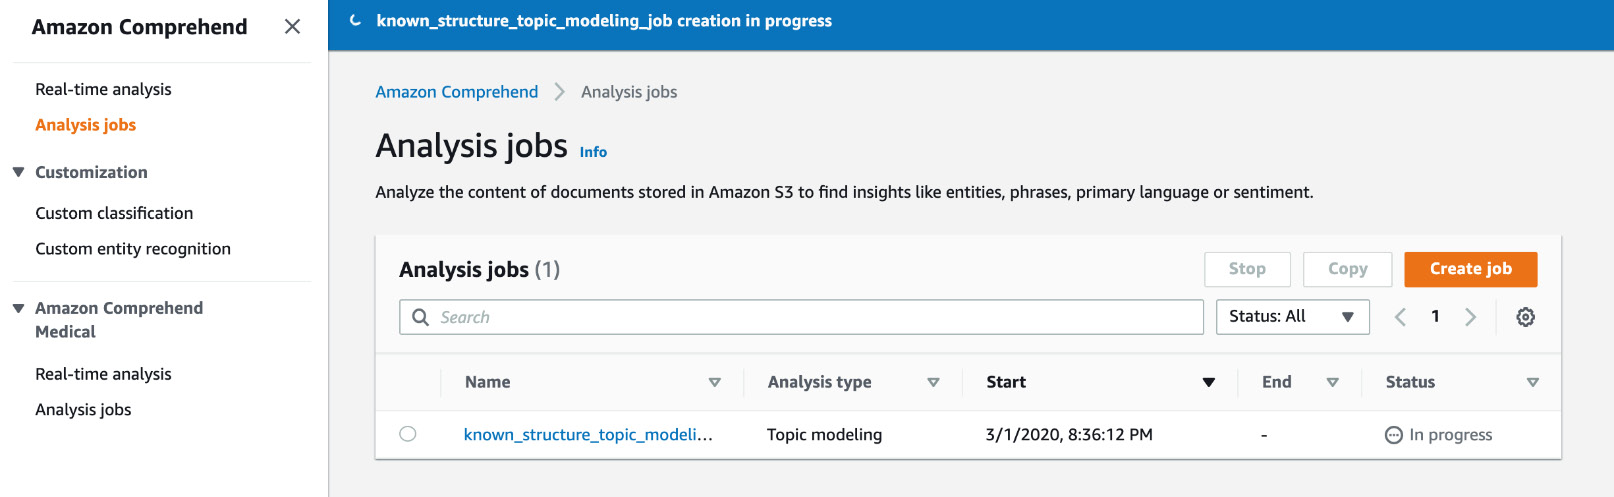
Figure 3.36: The Comprehend home screen
Note
Bear in mind that clicking Create job starts the job as well. There is no separate "start a job" button. Also, if you want to redo the job, you will have to use the Copy button.
- While the job is being processed, the status displayed will be In Progress:

Figure 3.37: In progress status displayed
- On our account, it took around 4 minutes to complete the job. When the status changes to Completed, click the Topic Modeling job name:
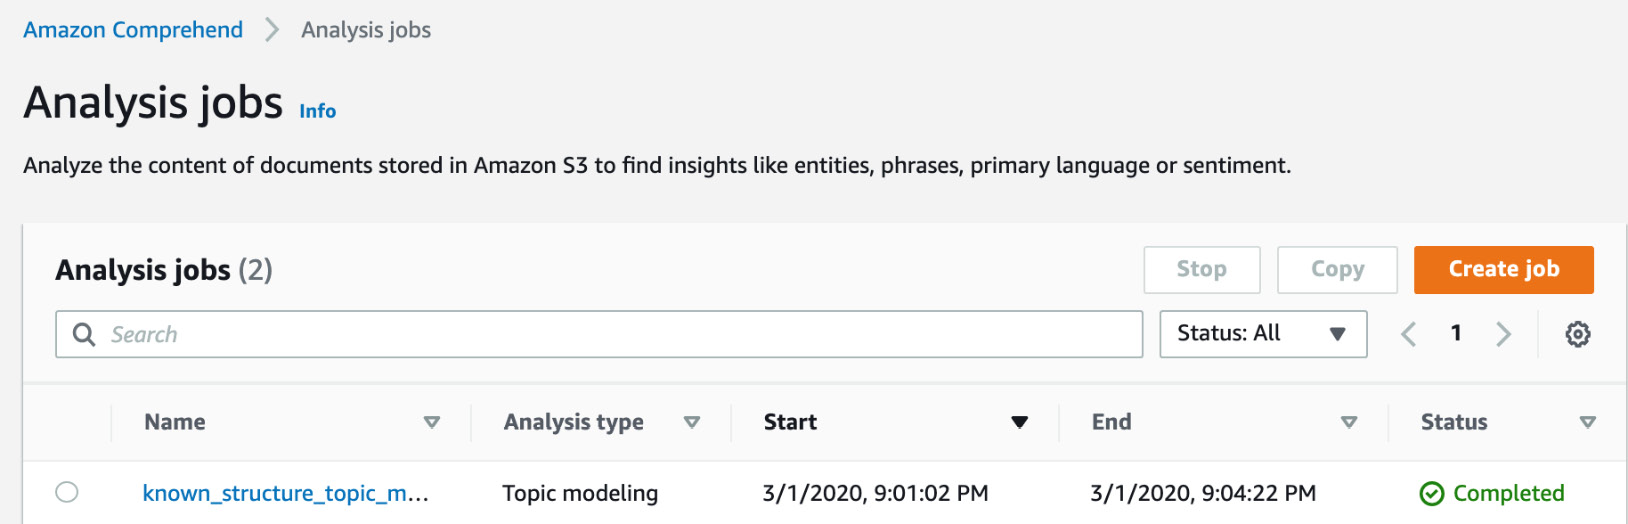
Figure 3.38: Completed status displayed
- Now, scroll down to the Output section:
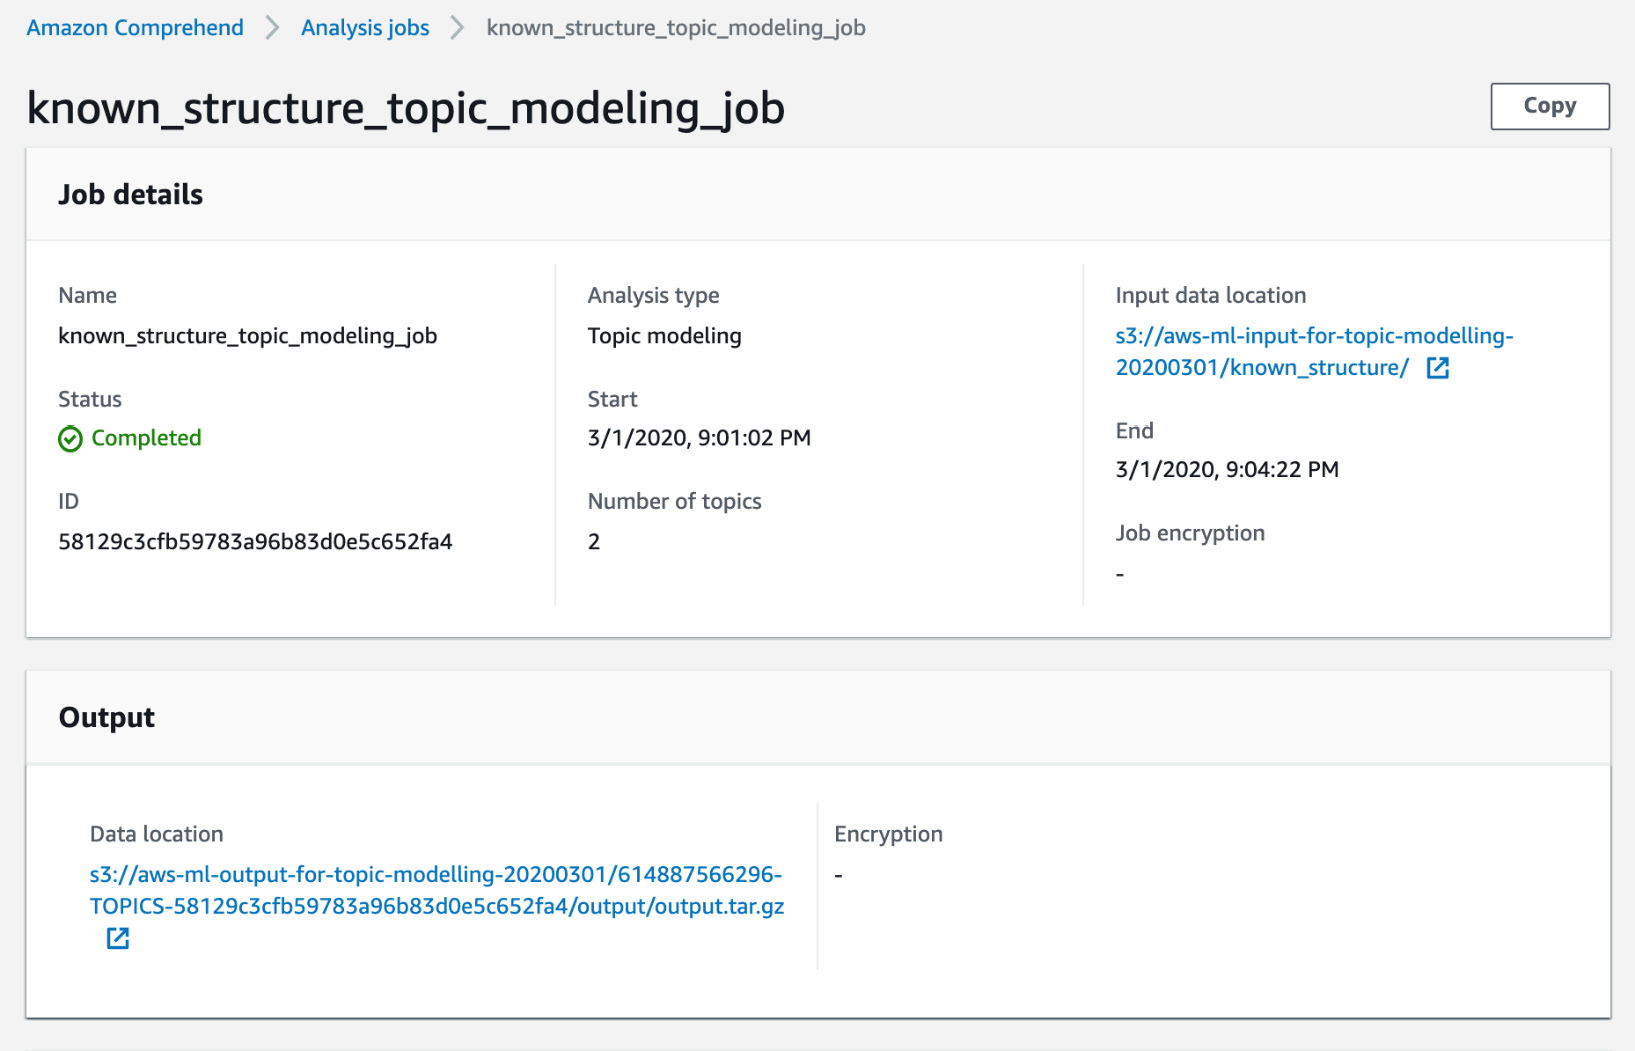
Figure 3.39: Topic Modeling output display home screen
- Click the hyperlink under Data location:
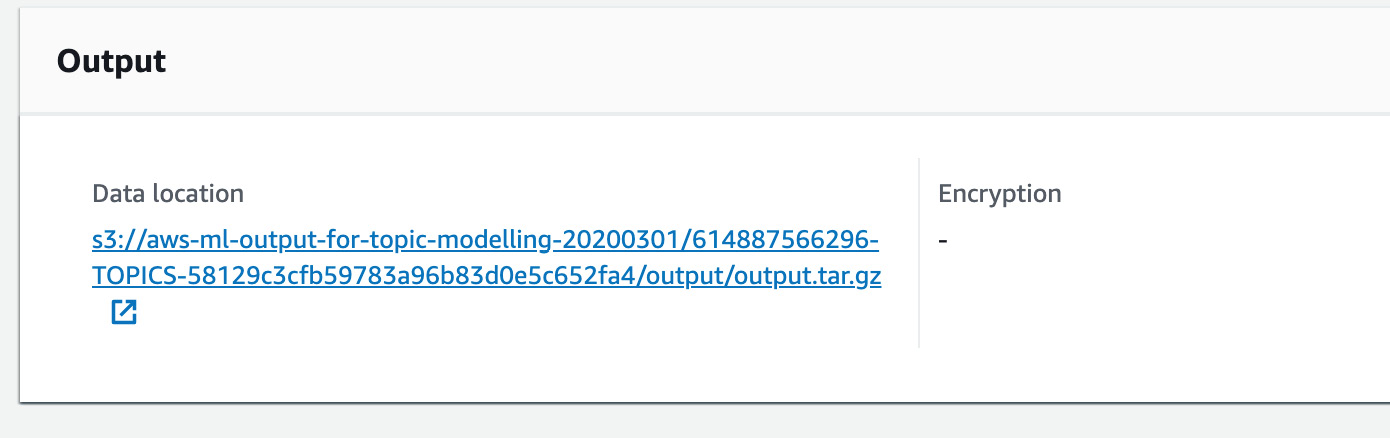
Figure 3.40: Topic Modeling data output hyperlinked location
This will take you directly to the S3 bucket:
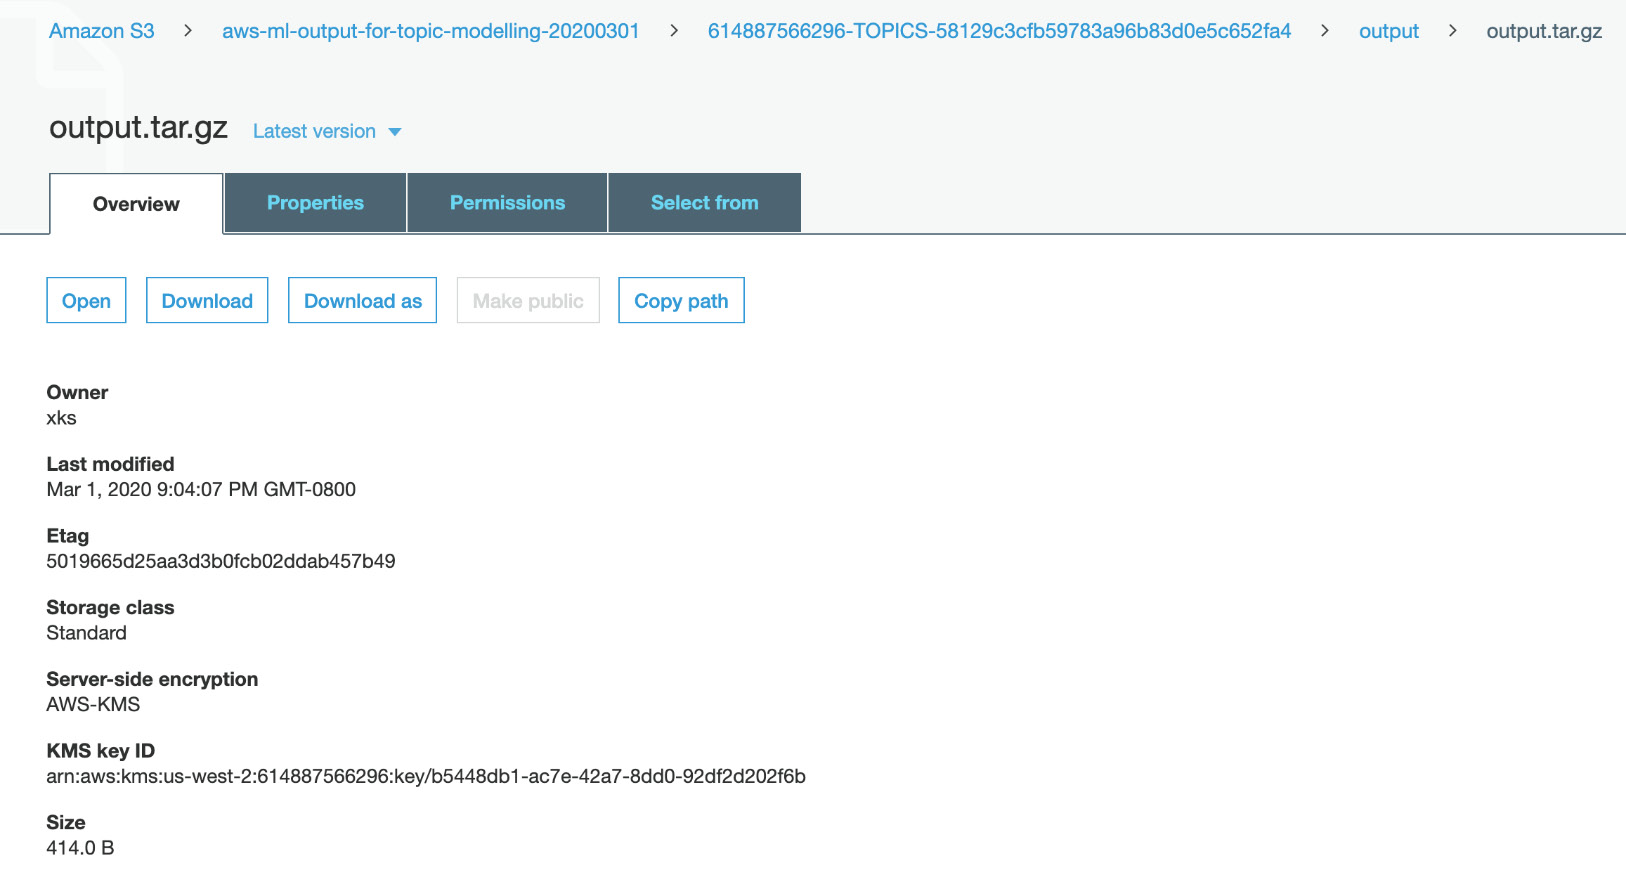
Figure 3.41: Topic Modeling output file in S3
- Click Download and save the file in your local disk. Usually, the Downloads folder is an ideal location:
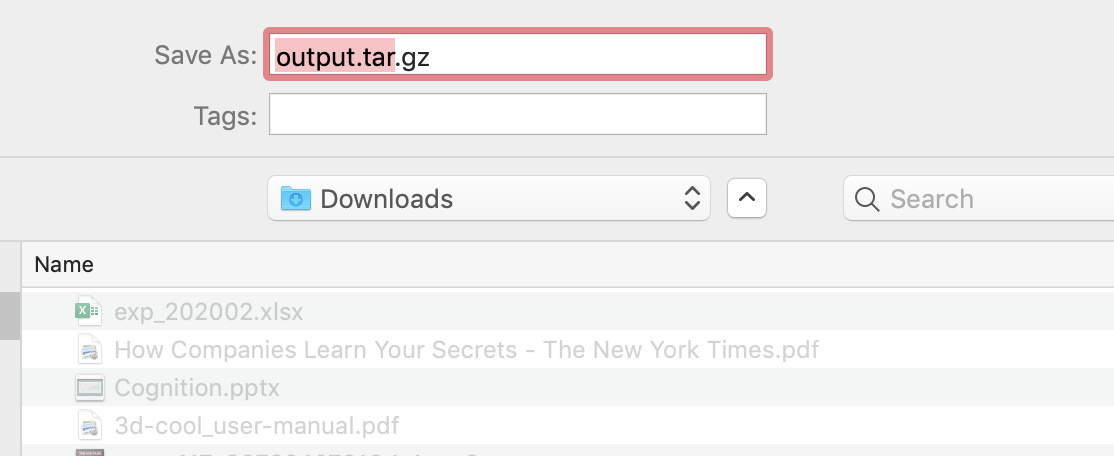
Figure 3.42: Topic Modeling downloading the output file to the local disk
- Extract output.tar.gz and usually, it will show up in a directory output:
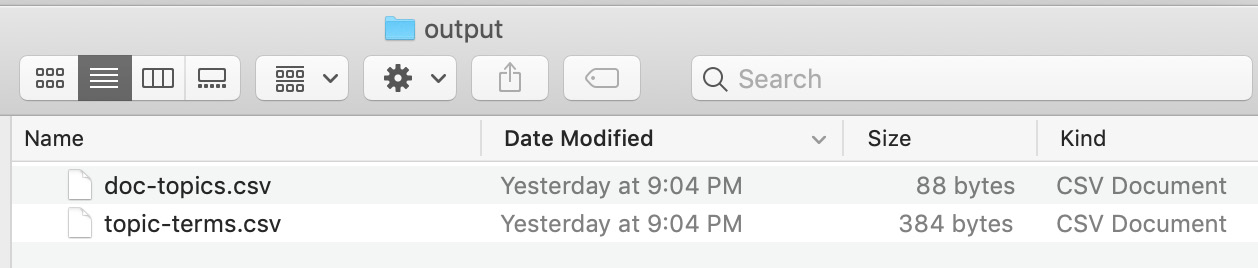
Figure 3.43: Output files from Topic Modeling
- Now examine the two files: topic-terms.xlsx and doc-topics.xlsx:
Note
Your topic-terms.csv and doc-topics.csv results should be the same as the following results. If your results are NOT the same, use the output files for the remainder of the chapter, which are located at Chapter03/Exercise3.01/topic-terms.csv https://packt.live/3iHlH5y and Chapter03/Exercise3.01/doc-topics.csv https://packt.live/2ZMTaTw.
The following is the output generated. As we had indicated that we want to have topics, Comprehend has segregated the relevant words into two groups/topics as well as the weights. It doesn't know what the topics are, but has inferred the similarity of the words to one of the two topics:
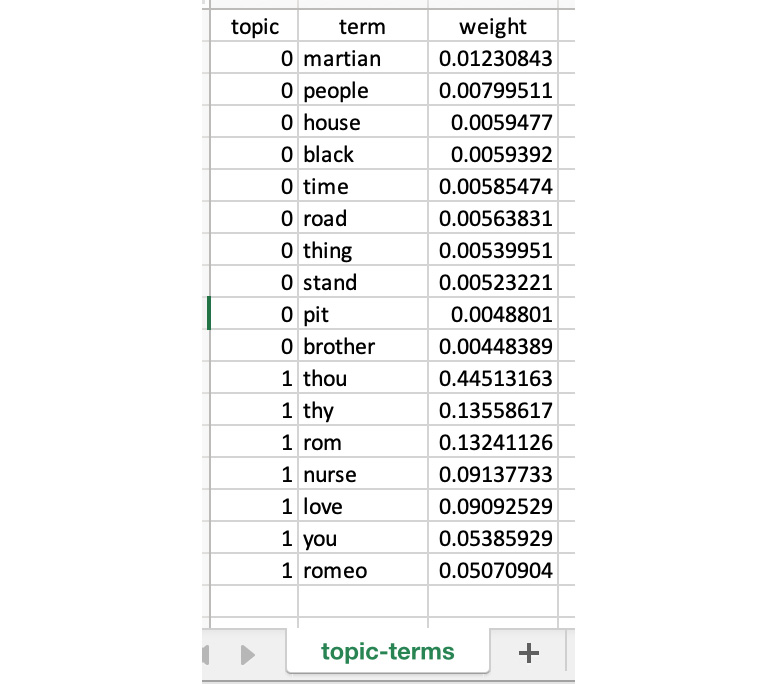
Figure 3.44: topic-terms.csv result
The doc-topics.csv shows the affinity of the documents to the topics. In this case, it is very deterministic, but if we have more topics, the proportion will show the strength of the topics in each of the documents:
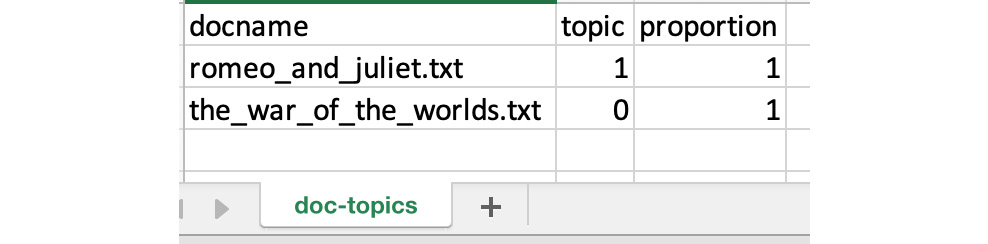
Figure 3.45: doc-topics.csv results
In this exercise, we used Amazon Comprehend to infer topics embedded in a set of documents. While this is easier to do with two documents; Amazon Comprehend is very effective when we have hundreds of documents with multiple documents and we want to perform process automation.
Exercise 3.02: Performing Known Structure Analysis Programmatically
While it is easy to look at one or two outputs, when we want to scale and analyze hundreds of documents with different topics, we need to use Comprehend programmatically. That is what we will do in this exercise.
In this exercise, we will programmatically upload the CSV files (doc-topics.csv and Topic-terms.csv) to S3, merge the CSV files on the Topic column, and print the output to the console. The following are the steps for performing known structure analysis:
Note
For this step, you will be using Jupyter Notebook. You may either follow along with the exercise and type in the code or obtain it from the source code folder, local_csv_to_s3_for_analysis.ipynb, and paste it into the editor. The source code is available on GitHub in the following repository: https://packt.live/2BOqjWT. As explained in Chapter 1, An Introduction to AWS, you should have downloaded the repository to your local disk.
- First, we will import boto3 using the following command:
import boto3
- Next, we will import pandas using the following command:
import pandas as pd
- Now, we will create the S3 client object using the following command:
# Setup a region
region = 'us-west-2'
# Create an S3 client
s3 = boto3.client('s3',region_name = region)
- Next, we will create a variable with a unique bucket name. Here, the selected bucket name is known-tm-analysis, but you will need to create a unique name:
# Creates a variable with the bucket name
#'<insert a unique bucket name>'
bucket_name = 'known-tm-analysis-20200302'
- Next, create a new bucket:
# Create a location Constraint
location = {'LocationConstraint': region}
# Creates a new bucket
s3.create_bucket(Bucket=bucket_name,
CreateBucketConfiguration=location)
- Create a list of the CSV filenames to import:
filenames_list = ['doc-topics.csv', 'topic-terms.csv']
Note
Ensure that the two CSV files (highlighted) in the aforementioned step are stored in the same location where you're running the Jupyter Notebook code. An alternative is to specify the exact path as it exists on your local system.
- Now, iterate on each file to upload to S3 using the following line of code:
for filename in filenames_list:
s3.upload_file(filename, bucket_name, filename)
Note
Do not execute steps 7 and 8 yet. We will show the code for the entire for block in step 9.
- Next, check whether the filename is doc-topics.csv: and get the doc-topics.csv file object and assign it to the obj variable.
if filename == 'doc-topics.csv':
obj = s3.get_object(Bucket=bucket_name, Key=filename)
- Next, read the csv object and assign it to the doc_topics variable. You can see the entire code block, including steps 7 and 8 below:
for filename in filenames_list:
# Uploads each CSV to the created bucket
s3.upload_file(filename, bucket_name, filename)
# checks if the filename is 'doc-topics.csv'
if filename == 'doc-topics.csv':
# gets the 'doc-topics.csv' file as an object
obj = s3.get_object(Bucket=bucket_name, Key=filename)
# reads the csv and assigns to doc_topics
doc_topics = pd.read_csv(obj['Body'])
else:
obj = s3.get_object(Bucket=bucket_name, Key=filename)
topic_terms = pd.read_csv(obj['Body'])
- Now, merge the files on the Topic column to obtain the most common terms per document using the following command:
merged_df = pd.merge(doc_topics, topic_terms, on='topic')
# print the merged_df to the console
print(merged_df)
- Next, execute the notebook cells using the Shift + Enter keys:
- The console output is a merged DataFrame that provides the docnames with their respective terms and the term's weights (refer to the following):
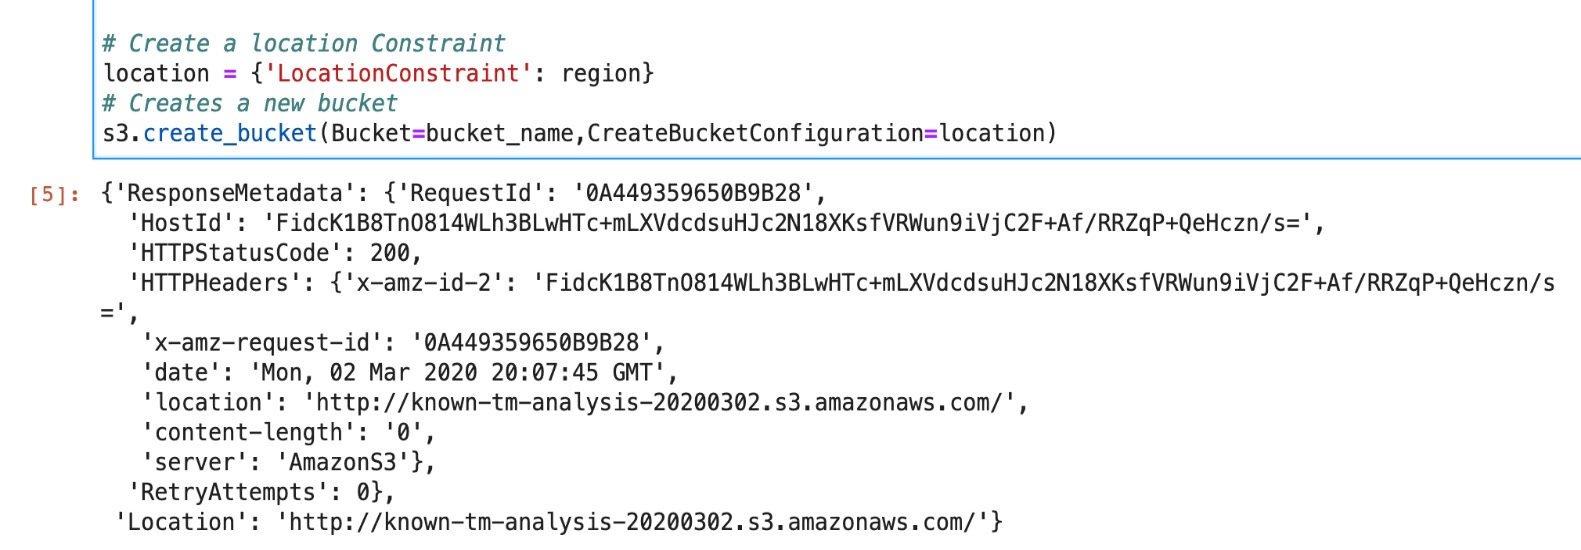
Figure 3.46: Output from the s3.create_bucket call
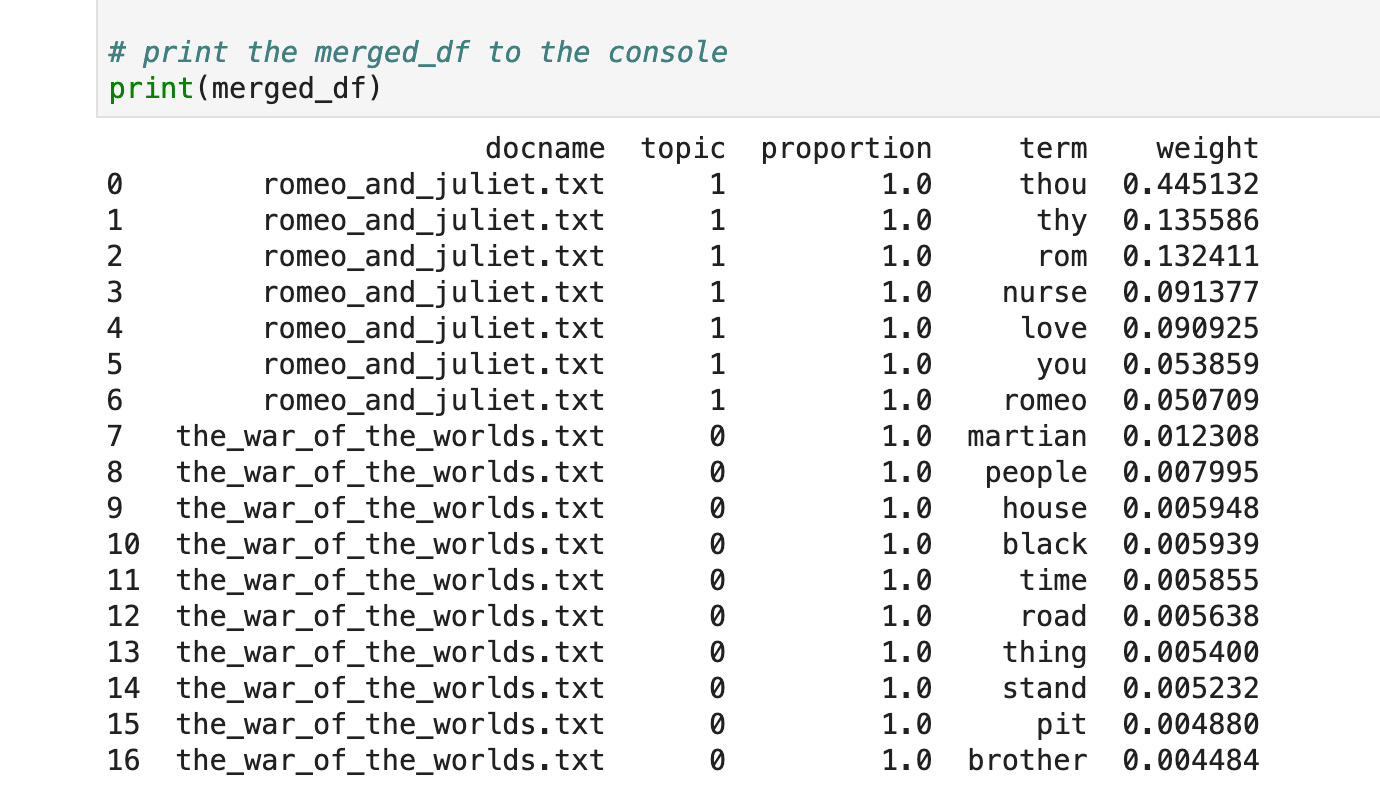
Figure 3.47: known_structure Topic Modeling merged results
- To verify the CSV files, navigate to S3 (reload the page if the new bucket does not appear), and the new bucket will have been created in S3. Click on the bucket to verify a successful import:
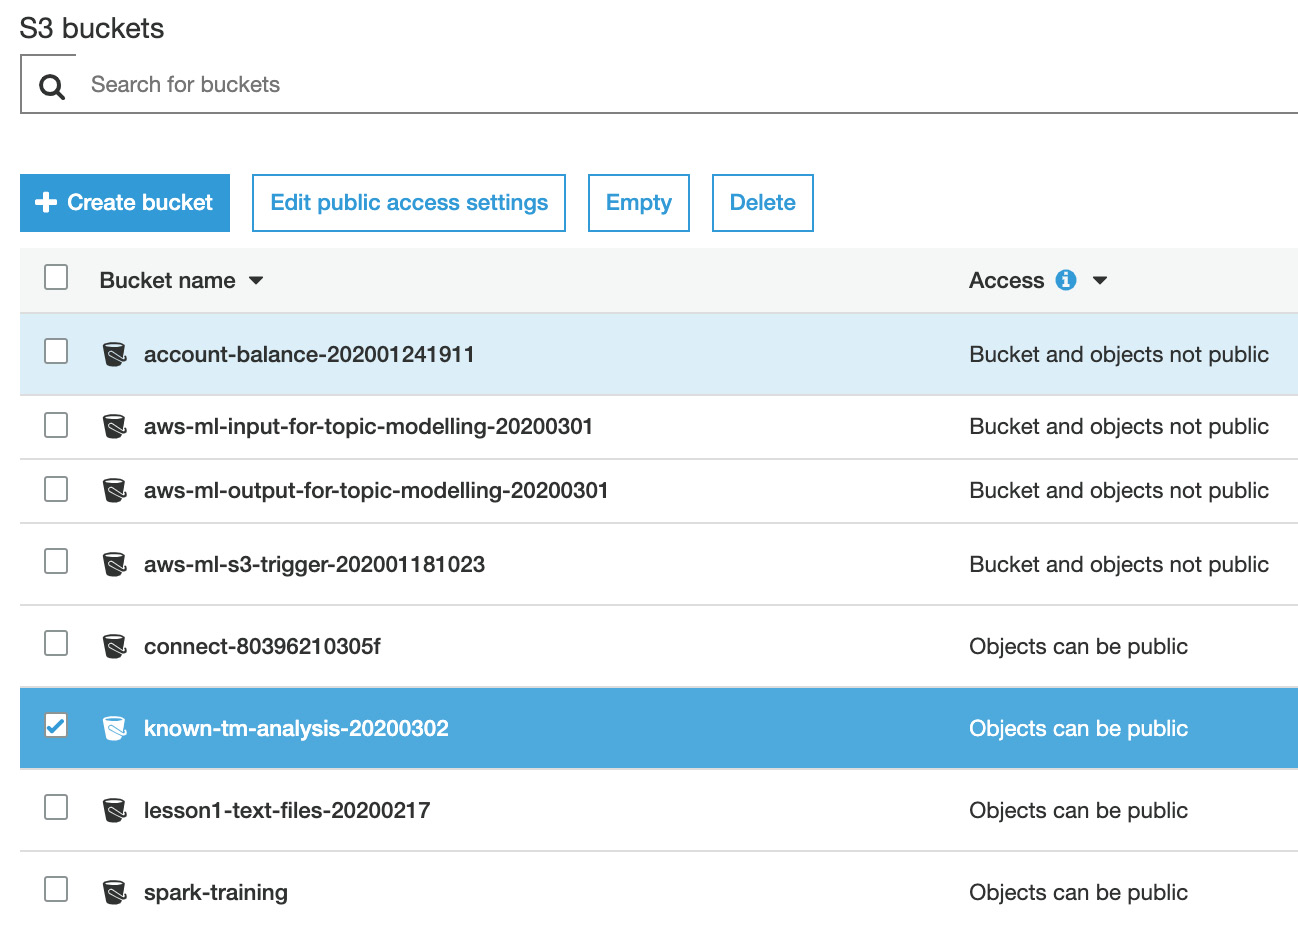
Figure 3.48: known-tm-analysis S3 bucket
There will be two CSV files in the bucket – doc-topics.csv and topic-terms.csv:
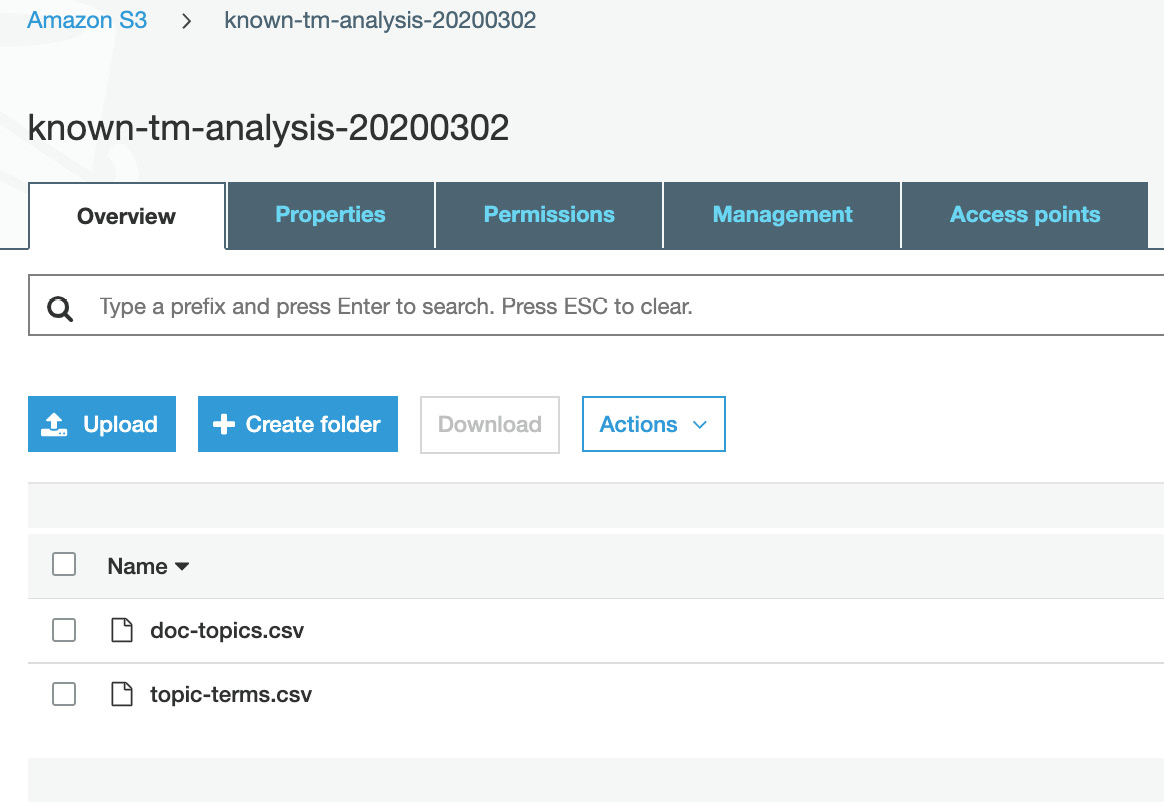
Figure 3.49: Topic Modeling results uploaded to S3
In this exercise, we learned how to use Comprehend programmatically. We programmatically uploaded two CSV files to S3, merged them on a column, and printed the output to the console.
Activity 3.01: Performing Topic Modeling on a Set of Documents with Unknown Topics
In this activity, we will perform Topic Modeling on a set of documents with unknown topics. Suppose your employer wants you to build a data pipeline to analyze negative movie reviews that are in individual text files with a unique ID filename. Thus, you need to perform Topic Modeling to determine which files represent the respective topics. Overall, negative reviews represent a loss to the company, so they are prioritizing negative reviews over positive reviews. The company's end goal is to incorporate the data into a feedback chatbot application. To ensure that this happens correctly, you need a file that contains negative comments. The expected outcome for this activity will be the Topic Modeling results from the negative movie review files.
Performing Topic Modeling:
- Navigate to the following link (or to your local directory where you have downloaded the GitHub files) to obtain the text data file that contains negative review comments: https://packt.live/38Nw4jT.
- Create a bucket for Topic Modeling with a unique name.
- Create a folder for Topic Modeling.
- Import the dependencies of the Python library, such as os and boto3.
- Mention your unique bucket name.
- Gather all of the working directories of the local path and make them into text files.
- Create a list for all of the text files.
- Iterate the files and upload them to S3.
- Create a job in Organization using Amazon Comprehend.
- As per requirements, choose the input data. This may be My document or Example document.
- Choose the file from the data source.
- Apply the input format.
- Provide the number of topics to perform the modeling.
- Choose an IAM role and create a job.
- Download the output file and extract the file.
- The generated output will include the two CSV files.
Analysis of Unknown Topics:
- Import dependences of the Python library, such as boto3 and pandas.
- Create an S3 client.
- Create a new bucket with a unique name.
- Create a list of CSV filenames to import.
- Check the filename and assign it to the obj variable.
- Read the obj variable.
- Merge the files on the Topic column.
- Print the merged files to the console.
This is a long activity. Yet, you were able to manage 1,000 files, upload them to S3, perform Topic Modeling using Amazon Comprehend, and then merge the results into a table that had more than 40,000 rows. In real-world situations, you will be handling thousands of documents, not just one or two. That is the reason we did this activity using Jupyter Notebook and Python.
However, this is only the first step in a multi-step automation process — an important and essential step of inferencing on the unstructured documents. While Comprehend analyzed the documents and gave us a list of topics, it is still our job to figure out what to do with them.
Note
The solution for this activity can be found on page 291.
Summary
In this chapter, we learned about analyzing Topic Modeling results from AWS Comprehend. You are now able to incorporate S3 to store data and use it to perform analysis. Also, we learned how to analyze documents where we know the topics before performing Topic Modeling, as well as documents where the topic is unknown. We know that the latter requires additional analysis to determine the relevant topics.
We did not build the downstream systems that analyze the topic lists and then route the document appropriately. For example, you might have a mapping of the topics to a SharePoint folder for knowledge management or a workflow to route the files via email to appropriate persons depending on the topics detected. While the broader topic of Robotic Process Automation (RPA) is beyond the scope of this book, you have learned how to use Amazon Comprehend to implement the Topic and Theme detection steps for process automation.
Another application of what you learned in this chapter is document clustering for knowledge management. In this case, we would restrict the number of topics to 10 and then segregate the documents based on their major topics. For example, if these documents were news articles, this process would divide the articles into 10 subjects, which are easier to handle in downstream systems such as a new recommendation engine.
As you can see, Topic Modeling can be applied in a variety of applications and systems. Now you have the skills required to perform Topic Modeling using Amazon Comprehend.
In the next chapter, we will dive into the concept of chatbots and their use of natural language processing.