
IDA has a tremendous number of additional options that must be configured through the IDA user interface. Options for formatting individual disassembly lines were discussed in Chapter 7. Additional IDA options are accessed via the Options menu, and in most cases, any options that you modify apply only to the currently opened database. Values for those options are stored in the associated database file when the database is closed. IDA’s Color (Options ▸ Colors) and Font (Options ▸ Font) options are two of the exceptions to this rule in that they are global options that, once set, remain in effect in all future IDA sessions. For Windows versions of IDA, option values are stored in the Windows registry under the HKEY_CURRENT_USERSoftwareHex-RaysIDA registry key. For non-Windows versions of IDA, these values are stored in your home directory in a proprietary format file named $HOME/.idapro/ida.reg.
Another piece of information that is saved in the registry concerns dialogs for which you may choose the Do not display this dialog box again option. This message occasionally appears in the form of a checkbox in the lower-right portion of some informational message dialogs that you may not wish to see in the future. Should you select this option, a registry value is created under the HKEY_CURRENT_USERSoftwareHex-RaysIDAHidden Messages registry key. If, at a later time, you wish to have a hidden dialog displayed once again, you will need to delete the appropriate value under this registry key.
The color of virtually every item in an IDA display can be customized via the Options ▸ Colors dialog shown in Figure 11-1.
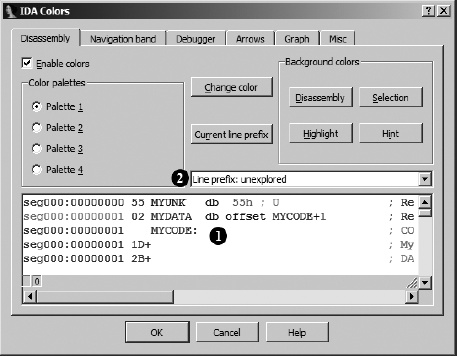
The Disassembly tab controls the colors used for various parts of each line in the disassembly window. Examples of each type of text that can appear in a disassembly are given in the example window ![]() . When you select an item in the example window, the item’s type is listed at
. When you select an item in the example window, the item’s type is listed at ![]() . Using the Change Color button, you may assign any color you wish to any item you wish.
. Using the Change Color button, you may assign any color you wish to any item you wish.
The color selection dialog contains tabs for assigning colors used in the navigation band, the debugger, the jump arrows in the left margin of the text disassembly view, and various components in the graph view. Specifically, the Graph tab controls the coloring of graph nodes, their title bars, and the edges that connect each node, while the Disassembly tab controls the coloring of disassembled text in the graph view. The Misc tab allows for customizing the colors used in IDA’s message window.
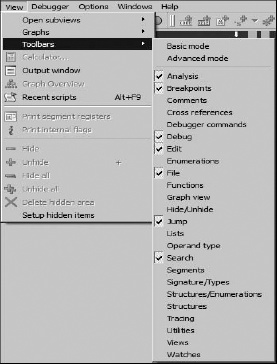
In addition to menus and hotkeys, the GUI version of IDA offers a large number of toolbar buttons spread across more than two dozen toolbars. Toolbars are typically docked in the main toolbar area beneath IDA’s menu bar. Two predefined toolbar arrangements accessible using the View ▸ Toolbars menu are Basic mode, which enables seven of IDA’s toolbars, and Advanced mode, which enables every IDA toolbar. Individual toolbars can be detached, dragged, and relocated to any location on the screen to suit your personal taste. If you find that you have no need for a particular toolbar, you can remove it from the display entirely via the View ▸ Toolbars menu, which is shown in Figure 11-2.
This menu also appears if you right-click anywhere within the docking area of the IDA display. Turning off the Main toolbar removes all toolbars from the docking area and is useful if you need to maximize the amount of screen space dedicated to the disassembly window. Any changes that you make to your toolbar arrangement are stored with the current database. Opening a second database will restore the toolbars to the arrangement that was in effect when the second database was last saved. Opening a new binary to create a new database restores the toolbar arrangement based on IDA’s current default toolbar settings.
If you settle on a toolbar arrangement that you happen to like and wish to make it the default, then you should save the current desktop arrangement as your default desktop using Windows ▸ Save Desktop, which opens the dialog shown in Figure 11-3.
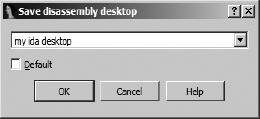
Each time you save a desktop configuration, you are asked to supply a name for the configuration. When the Default checkbox is selected, the current desktop layout becomes the default for all new databases and the desktop to which you will revert if you choose Windows ▸ Reset desktop. To restore the display to one of your custom desktops, select Windows ▸ Load Desktop and choose the named layout that you wish to load. Saving and restoring desktops is particularly useful in situations that involve using multiple monitors with different sizes and/or resolutions (which may be common with laptops using different docking stations or when connecting to projectors for presentations).