© Grady Koch 2020
G. KochThe LEGO Arduino Cookbookhttps://doi.org/10.1007/978-1-4842-6303-7_2

2. Programming the EV3 Intelligent Brick

Grady Koch1 
(1)
Yorktown, VA, USA
 

A quick overview of the essential steps is presented in this chapter for programming in the MINDSTORMS EV3 environment. After this overview, some of the more advanced programming techniques will be presented that are used in this book including My Blocks and working with third-party developed programming blocks. While there are many programming languages that have been adapted to work with MINDSTORMS, the programming for the EV3 Intelligent Brick used in this book stays with the simple graphical-based environment supplied by LEGO.

Getting Started with the MINDSTORMS EV3 Programming Environment

The MINDSTORMS EV3 program, which can be downloaded at www.lego.com/en-us/themes/mindstorms/download, associated with the LEGO 31313 set has the welcome lobby screen shown in Figure 2-1. This screen comes up when the program is started. Beginners are meant to click one of the five robots in the lobby to learn to build and activate a particular robot. But to create a MINDSTORMS EV3 program from scratch, the option is selected from the toolbar at the top of the screen for File ➤ New Project.
../images/502674_1_En_2_Chapter/502674_1_En_2_Fig1_HTML.jpg
Figure 2-1

The welcome lobby screen of the MINDSTORMS EV3 program has options for basic tutorials, as well as creating custom programs

This brings up a programming screen, shown in Figure 2-2. At this point, it’s a good idea to check for a connection to an EV3 Intelligent Brick, which can be determined at the bottom-right section of the screen. Figure 2-2 shows a situation in which an EV3 Intelligent Brick is not found, as indicated by the message “No Brick Connected.”
../images/502674_1_En_2_Chapter/502674_1_En_2_Fig2_HTML.jpg
Figure 2-2

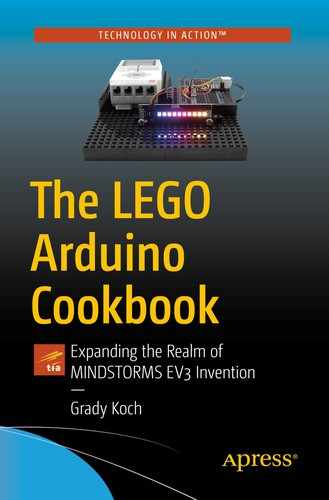
Programs are built in the MINDSTORMS EV3 programming environment by dragging various blocks onto the center section of the screen

There are three ways to connect the EV3 Intelligent Brick to the host programming computer: USB cable, Bluetooth, or WiFi. The USB connection is the simplest, using the cable supplied with the MINDSTORMS EV3 31313 set. The Bluetooth or WiFi connection allows loading programs without a cable, though requiring some setup as described at www.lego.com/en-us/service/help/products/themes-sets/Mindstorms. These wireless connections can be useful if the USB cable is not at hand. Bluetooth is easier to set up than WiFi, since WiFi requires purchasing a separate dongle. When the EV3 Intelligent Brick is connected to the host computer, it will show up as found in the lower-right corner, such as in the case of Figure 2-3 where a USB cable connection has been made. Of course, for the EV3 Intelligent Brick connection to be made, the brick must be turned on, which is accomplished by pressing the center button on the front panel.
../images/502674_1_En_2_Chapter/502674_1_En_2_Fig3_HTML.jpg
Figure 2-3

Connection to the EV3 Intelligent Brick is confirmed in the lower right-hand corner of the programming environment

Programming

Programs are created by placing programming blocks in the center of the screen, as has been done in Figure 2-3, with the insertion of a Loop block. Programming blocks are organized under tabs at the bottom of the screen, with selection of a particular block made by a click-hold-drag into the programming area. Tabs are under six headings, as labeled in Figure 2-4. An example programming step is taken in Figure 2-4 with selection of a Medium Motor block from the Action tab being inserted into the loop.
../images/502674_1_En_2_Chapter/502674_1_En_2_Fig4_HTML.jpg
Figure 2-4

Programming blocks are organized by function under tabs at the bottom of the screen

EV3 code diagrams are part of the project chapters that follow in this book and can be duplicated by pulling in the matching blocks and selecting the options on each block. Or the programs can be downloaded from www.github.com to be imported into the EV3 programming environment. Once the program has been written, it gets downloaded for execution to the EV3 Intelligent Brick by one of the three buttons at the bottom right of the screen: “Download,” “Download and Run,” or “Run Selected.” “Download” places the program into the memory of the EV3 Intelligent Brick, but does not run the program. To run the program, the center button on the EV3 Intelligent Brick is pressed. This download-only option is useful for a situation in which some action of the program, like activation of a motor, needs to be watched closely for proper operation. If no problems are anticipated, then “Download and Run” can be selected as a shortcut to both place the program into memory and run the program. The last option of “Run Selected” is a tool for debugging in which only the code blocks highlighted by mouse selection are run.

Extra and Aftermarket Device Blocks

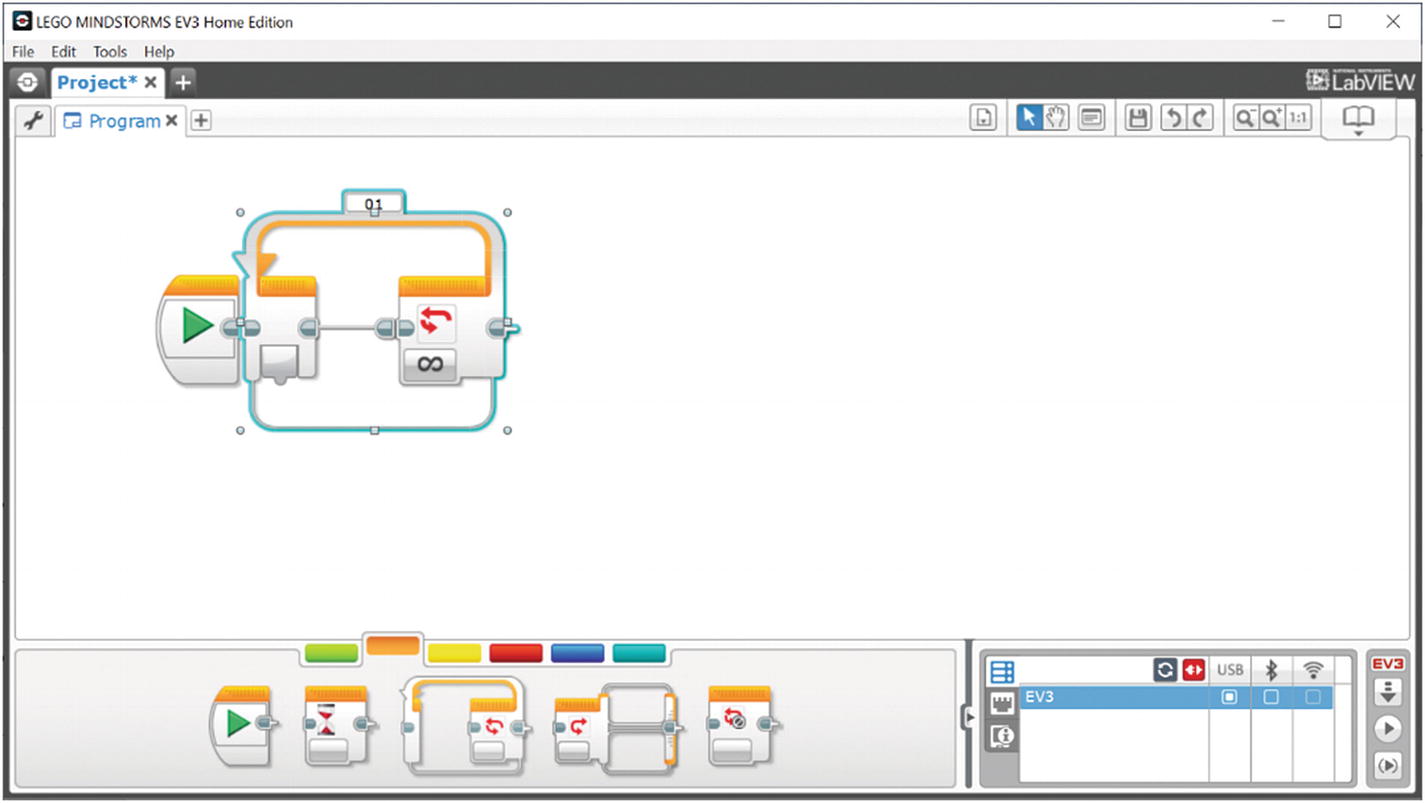
LEGO makes several sensors that are not included with the EV3 31313 set but that can be purchased separately, including the Energy Meter, Gyro Sensor, Sound Sensor, Temperature Sensor, and Ultrasonic Sensor. The blocks for these sensors have to be downloaded (www.lego.com/en-us/themes/mindstorms/downloads) and installed into the EV3 programming environment. Similarly, aftermarket sensor developers sell devices that will work with MINDSTORMS, including Mindsensors.com, Dexter Industries (www.dexterindustries.com), and Vernier (www.vernier.com). The websites associated with these extra sensors have a downloadable file that can be imported into the EV3 programming environment, where they will appear as programming blocks that can be pulled into use. For example, Figure 2-4 has two programming blocks under the Action tab that are extra devices for a Dexter Industries dSwitch and a Mindsensors LED Matrix. The installation of these programming blocks is done from the toolbar by selecting Tools ➤ Block Import. A prompt will then appear to find the .ev3 file from where it was stored after download from the sensor developer’s website.

My Blocks

The MINDSTORMS programming environment has an advanced feature to collect groups of coding blocks under a single block, similar to programming a subroutine in line-by-line coding. This single-block representation, called My Blocks, is useful when the same section of code is used repeatedly. Figure 2-5 serves as an example to show how My Blocks are created. As in Figure 2-5, the sections of code blocks to collect together are highlighted, in this example, to play a tone, create a random number, display the number, and pause for 1 second. Highlighting the blocks is done by left-click and hold, then drawing a box around the section of blocks. Alternatively, multiple blocks can be selected by holding down the Shift key and left-clicking individual blocks. Highlighted blocks appear with a blue border around them. The Start block is never part of a My Block creation, so it is not highlighted in the example of Figure 2-5.
../images/502674_1_En_2_Chapter/502674_1_En_2_Fig5_HTML.jpg
Figure 2-5

Blocks to include in a My Block are first highlighted

After the blocks of interest have been highlighted, My Block construction is initiated from the toolbar with selection of Tools ➤ My Block Builder. A menu then appears, such as that in Figure 2-6. Attributes get assigned to the new My Block, including Name, Description, and Icon. In the example of Figure 2-6, the icon of a die has been selected to represent the My Block. Clicking Finish in the My Block Builder will bring back the program area of the screen, as shown in Figure 2-7, and a result of the programming blocks previously highlighted being replaced with the new My Block. Much like any other programming block, the new My Block can be used again as many times as desired by selecting it from under the My Blocks tab.
../images/502674_1_En_2_Chapter/502674_1_En_2_Fig6_HTML.jpg
Figure 2-6

Opening the My Block Builder provides areas for user input for name, description, and icon

../images/502674_1_En_2_Chapter/502674_1_En_2_Fig7_HTML.jpg
Figure 2-7

The new My Block can be pulled into action by selecting it from the My Blocks tab

Summary

This chapter reviewed the setup for the software programming of the EV3 Intelligent Brick. The EV3 Intelligent Brick is programmed by a graphical user interface, assembling various control blocks to create programs. A more advanced use of the EV3 programming environment was introduced with the means to import control blocks that are not part of the core EV3 programming environment. Importing control blocks is associated with both LEGO and aftermarket devices, such as will be found in later chapters of this book. Another advanced feature explored was the creation of My Blocks, user-made subroutines useful for when a set of program blocks will be used repeatedly.

..................Content has been hidden....................

You can't read the all page of ebook, please click here login for view all page.
Reset
3.12.36.30