
3. Xooming on the Highway
For many users, the Xoom isn’t going to be a front-line computing device. It won’t be the go-to computer that they use to get a presentation ready for an important business meeting (although it’s technically capable of doing that), and it won’t be the main repository for an avant-garde music collection. What the Xoom will most likely be used for is good ol’ Web surfing. Yep, take off your shoes and put some zinc on your nose, because the Xoom is designed to be the awesome water-cruising, Web-wave-riding boogie board of the ages, and this chapter is going to show you how it’s done!
Using the Xoom’s Web Browser
At this writing, the Xoom certainly doesn’t have a plethora of alternatives to the Web browser that comes with the device. There’s good news, however, because the built-in Browser app ![]() is actually a fantastic feature that does very well. It’s certainly more than powerful and functional enough for the vast majority of users to accomplish what they want to accomplish. It includes HTML 5 support and even an Adobe Flash 10 player.
is actually a fantastic feature that does very well. It’s certainly more than powerful and functional enough for the vast majority of users to accomplish what they want to accomplish. It includes HTML 5 support and even an Adobe Flash 10 player.
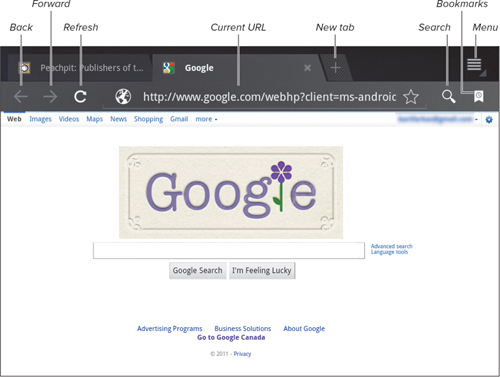
![]() The Browser app.
The Browser app.
Finding a Web page
To get you acquainted with the built-in Xoom browser, the following task shows you how to do a Google search for a particular Web page.
To find a Web page
- Touch the Browser app’s icon on the home screen
 .
.
 Touch the Browser icon.
The first time the app starts, expect to get the message shown in
 as Google finds your personal settings and applies them to the Xoom browser.
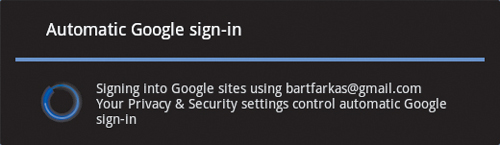 The first time the Browser app starts, this message pops up.
When the settings are loaded, you’re taken to the default home page—in this case, Google
 .
.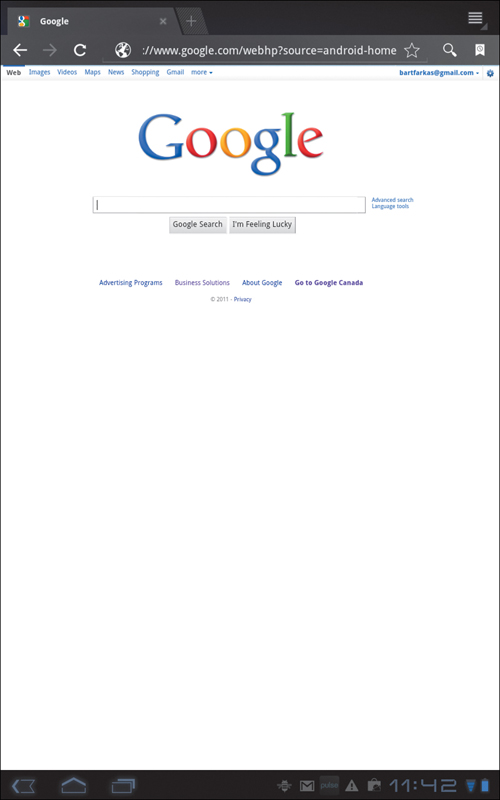 By default, Google is the Xoom’s home page on the Web.
 - Touch the search field, and use the onscreen keyboard
 to enter what you want to search for.
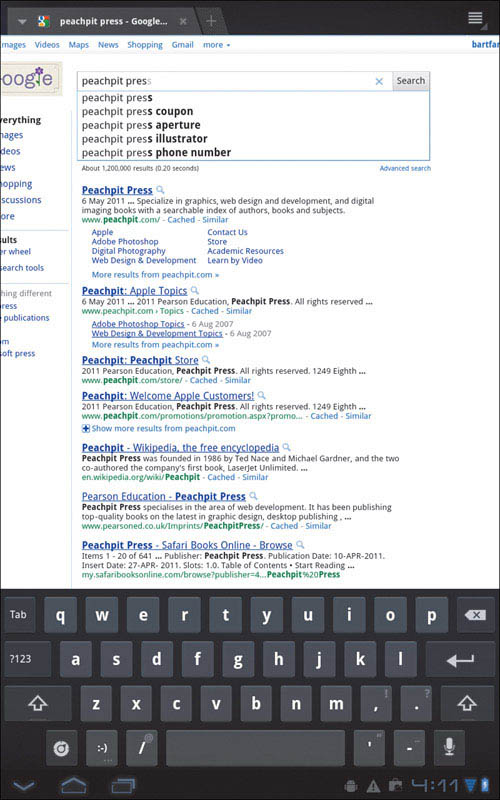 Enter your search term.
As you type, a list of suggested links appears below the search field
 .
. - Touch the Search button to display search results, or touch a suggested link to open that page.
If you want other options, hold a link for a few seconds, and you’re greeted by an impressive list of options ![]() .
.
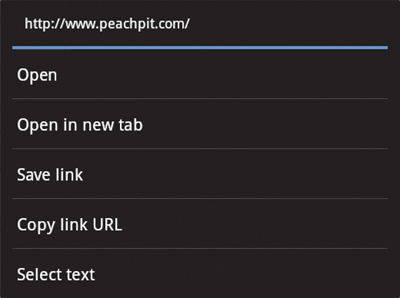
![]() Touch and hold a link to display this option window.
Touch and hold a link to display this option window.
Opening new tabs
The Xoom browser (like most modern browsers) supports tabs, which let you have multiple Web pages open at the same time and move among them quickly and easily merely by touching the tabs. Creating new tabs is easy, as you see in this section.
To open a new tab
- Touch the plus sign (new tab) at the top of the screen
 .
.
The default page
 opens.
 - Hop between the two pages by touching the tab for the page you want to be active
 .
.
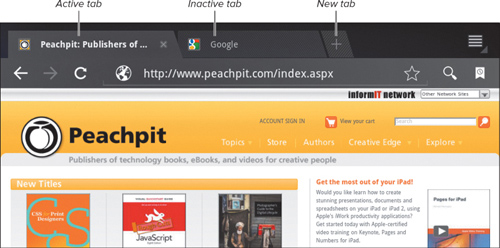 Touch the tab of the page you want to view.
The only practical limits to the number of tabs that can be open at one time are your Xoom’s memory and the amount of space in the browser bar. After more than three or four tabs are open, it can become difficult to see which tab represents which page, because the screen real estate doesn’t allow for each page’s full name to be displayed ![]() .
.
Managing Web History and Bookmarks
When you’re surfing the Web, it doesn’t take long to visit tens or even hundreds of pages in a single day. What if you want to revisit a page you were looking at earlier? Read on.
To navigate the bookmark/history area
- If the Browser app isn’t already open, touch its icon on the home screen (refer to
 in “To find a Web page” earlier in this chapter.
 - Touch the Bookmark icon
 in the top-right corner of the screen.
 Touch the Bookmark icon.
You’re taken to the Bookmarks/History screen.
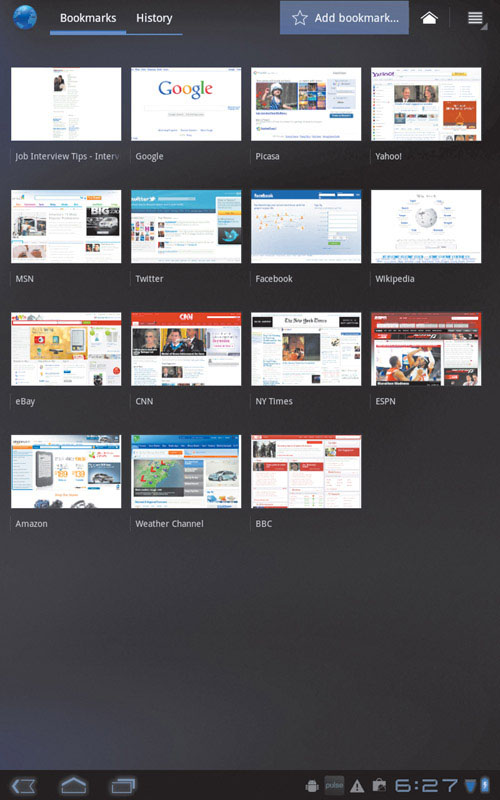
- Touch the Bookmarks tab at the top of the screen to see a grid of recently visited pages .
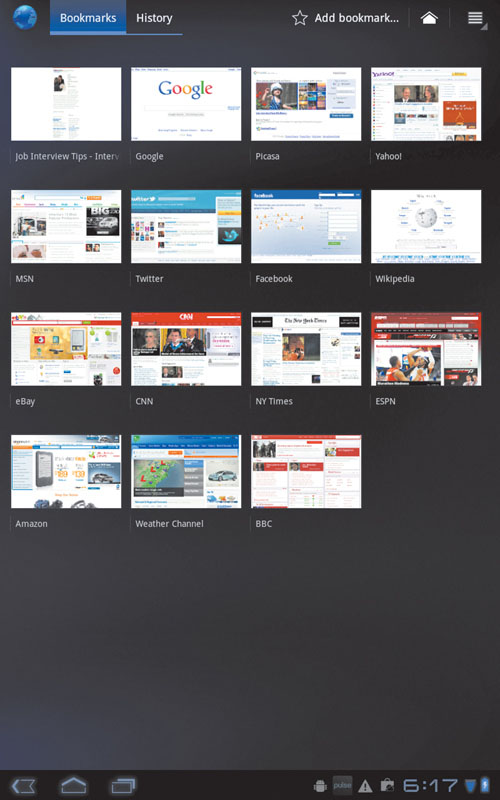 Touch the Bookmarks tab to see this grid of recent Web-page visits.
 - Touch the History tab at the top of the screen .
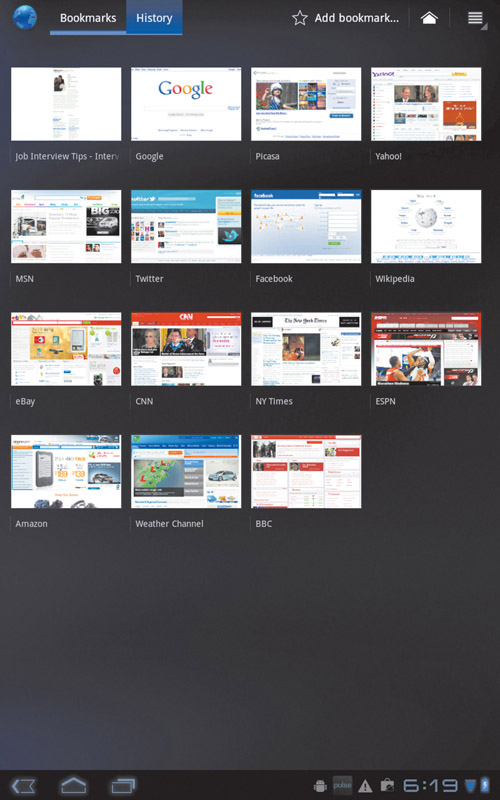 Touch the History tab.
You’re greeted by a menu
that allows you to see your Web-surfing history for several time periods, as well as your most-visited sites.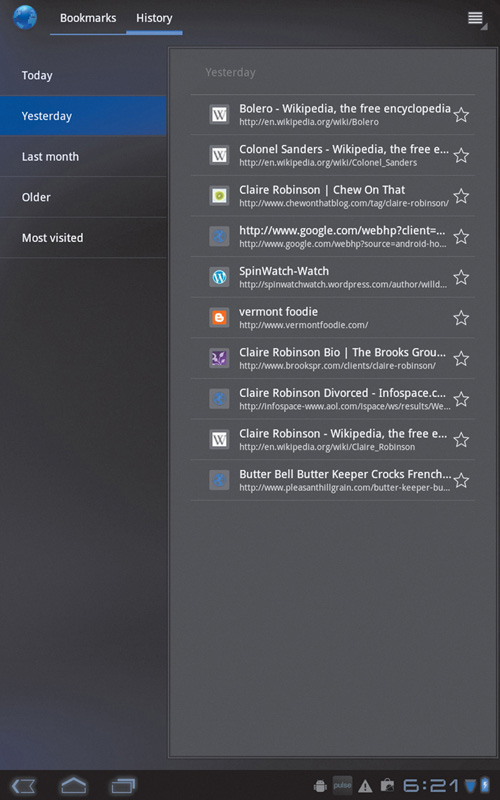 This menu lists the Web sites you visit most often.
 - To return to a particular Web page, select it in the list on the right side of the screen.
If you touch and hold a page’s link, a detailed menu appears ![]() , displaying options that allow you to do more with the link. Selecting Share Link, for example, displays the options shown in
, displaying options that allow you to do more with the link. Selecting Share Link, for example, displays the options shown in ![]() .
.
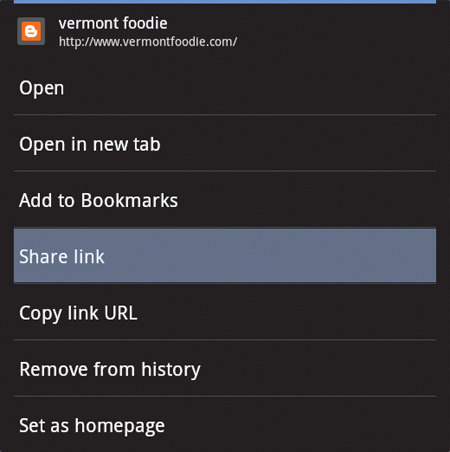
![]() Touching and holding a link brings up this dialog box.
Touching and holding a link brings up this dialog box.
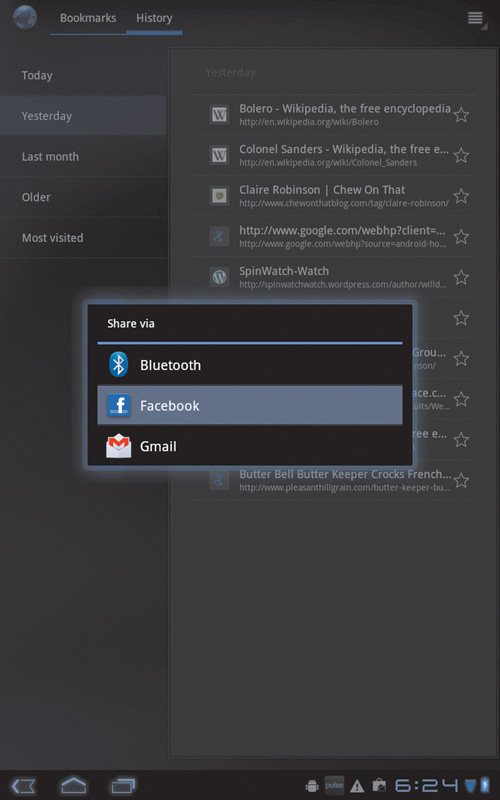
![]() Select Share Link to get these sharing options.
Select Share Link to get these sharing options.
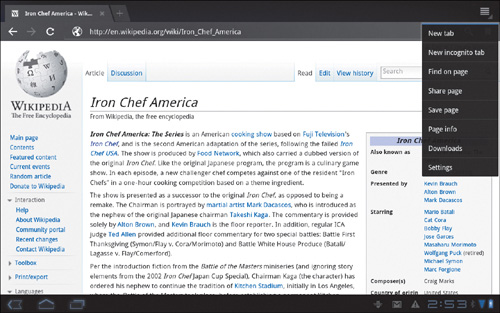
One of the Xoom’s more-obscure options lets you keep your browsing history under wraps. To turn it on, touch the Menu icon in the top-right corner of the screen (refer to ![]() in “Using the Xoom’s Web Browser” earlier in this chapter), and choose New Incognito Tab from the menu.
in “Using the Xoom’s Web Browser” earlier in this chapter), and choose New Incognito Tab from the menu.
To add a bookmark
- Go to a Web site in the Browser app.
- Touch the Bookmark icon .
- Touch Add Bookmark at the top of the screen .
 Touch Add Bookmark.
You’re greeted by a dialog box
 that allows you to bookmark the page, as well as change the bookmark’s label and location.
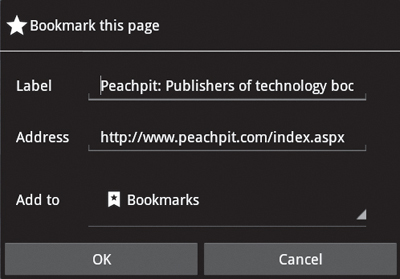 This dialog box allows you to bookmark the page and change the bookmark label.
 - Select Add To.
A menu drops down.
- Select Other Folder
 if you want to put the bookmark somewhere other than your home screen or the standard list of bookmarks.
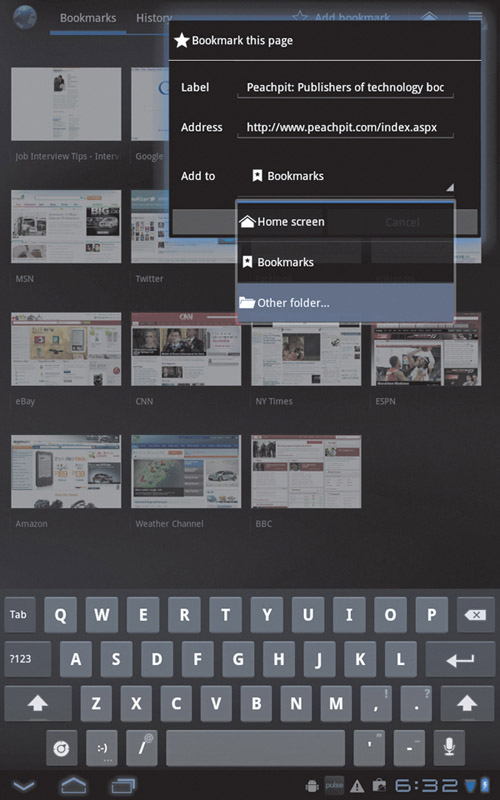 If you want to put the bookmark somewhere other than the default locations, touch Add To > Other Folder.
Searching a Web Page
It can be very handy to search a Web page for a particular word or phrase. The following task shows you how.
To search for content on a Web page
- With a Web page displayed in the Browser app, touch the Settings icon to open the Settings menu .
 Open the Settings menu by touching the Settings icon.
 - Choose Find on Page.
- Use the onscreen keyboard to type what you’re looking for on the Web page.
What’s very cool about this search feature is that the letters you type are highlighted in the document as you type
. Search words are highlighted as you type them.
Configuring the Browser App
In the top-right corner of every Browser-app screen is the Settings icon. Touch this icon to open the Settings menu ![]() , which contains options that let you configure the browser in various ways.
, which contains options that let you configure the browser in various ways.

![]() The Browser app’s Settings menu.
The Browser app’s Settings menu.
To configure browser settings
- Touch the Settings icon to open the Settings menu .
- Touch Settings at the bottom of the menu.
The Xoom opens the Settings screen for the Browser app
. The Settings screen for the Browser app.
 - In the list on the left side of the screen, touch the category you want to change:
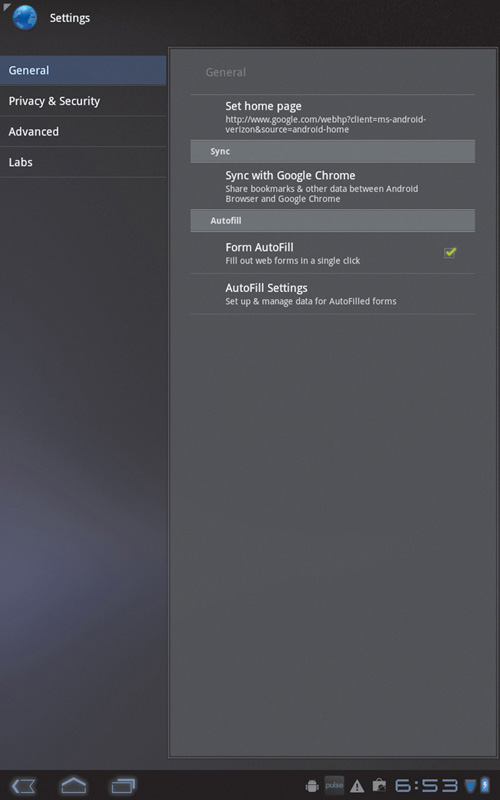
• General. The settings in this category let you set the home page (the page your browser automatically opens to), sync with Google Chrome, and autofill forms.
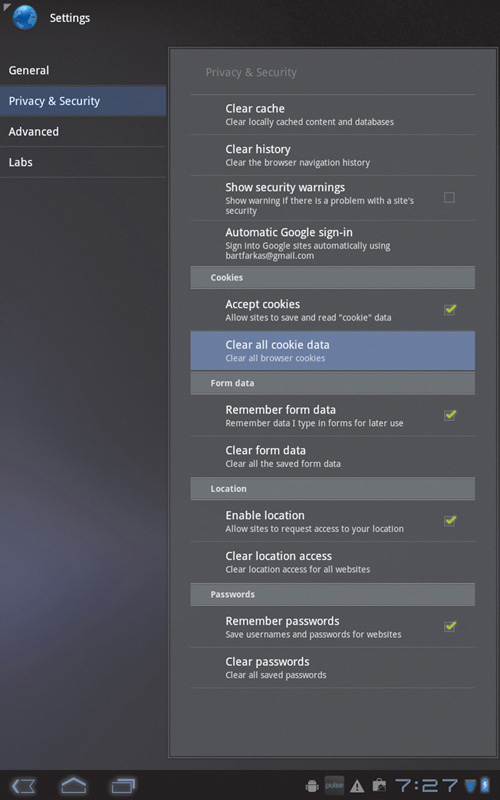
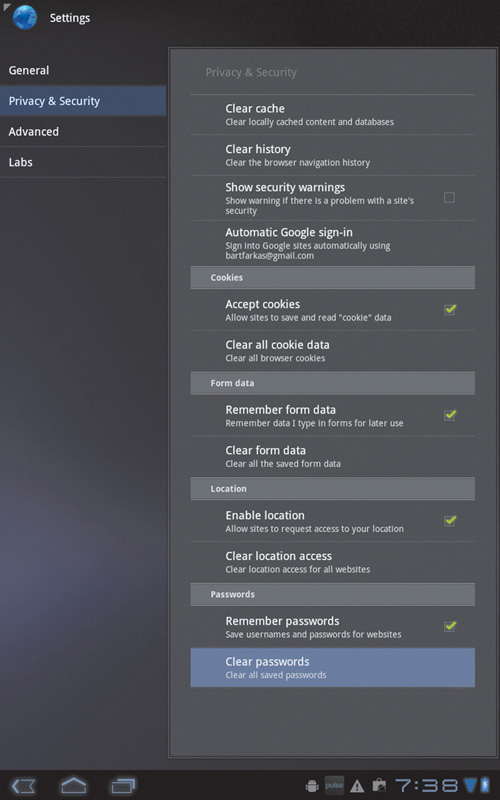
• Privacy & Security. If you’re concerned about turning cookies on or off, or clearing cookie data, the Privacy & Security screen
is where you need to be. This screen is also the place where you can tell the Xoom to remember your Web passwords (or not), show security warnings, and enable or disable data about your current location.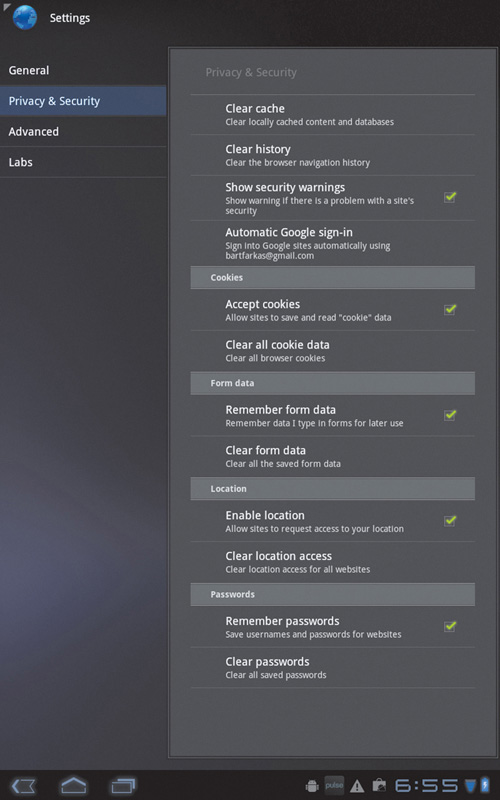 Touch Privacy & Security if you want to turn cookies on or off (among other things).
• Advanced. To toggle JavaScript, block pop-up windows, or disable the automatic loading of Web images (among other things), the Advanced screen
is the place.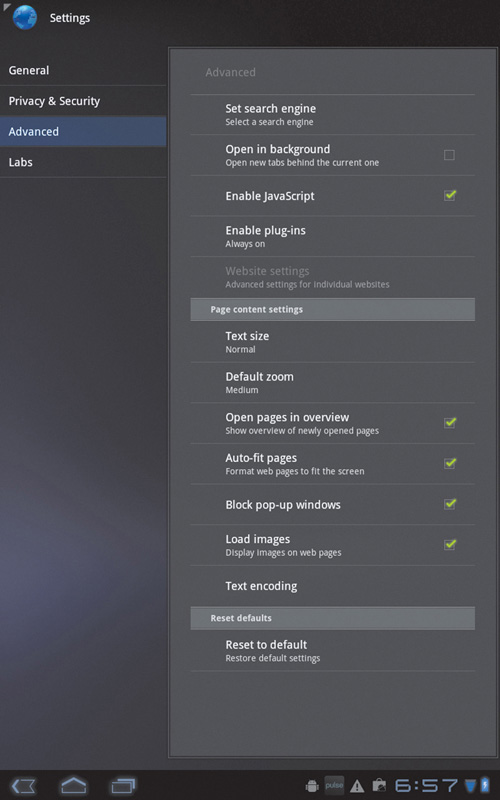 The Advanced screen lets you do things like block pop-ups.
• Labs. The Labs screen has two settings: Quick Controls, which lets you swipe your thumb from the left or right edge of the screen to access quick controls for the Web page; and Most Visited Homepage, which I cover in the next section.
- Touch the setting that you want to change.
- Follow the onscreen instructions to configure the setting the way you want.
To set your most-visited sites as your home page
- Complete steps 1 and 2 of “To configure browser settings” earlier in this chapter.
- Select the Labs category on the left side of the screen.
- In the resulting screen, select Most Visited Homepage .
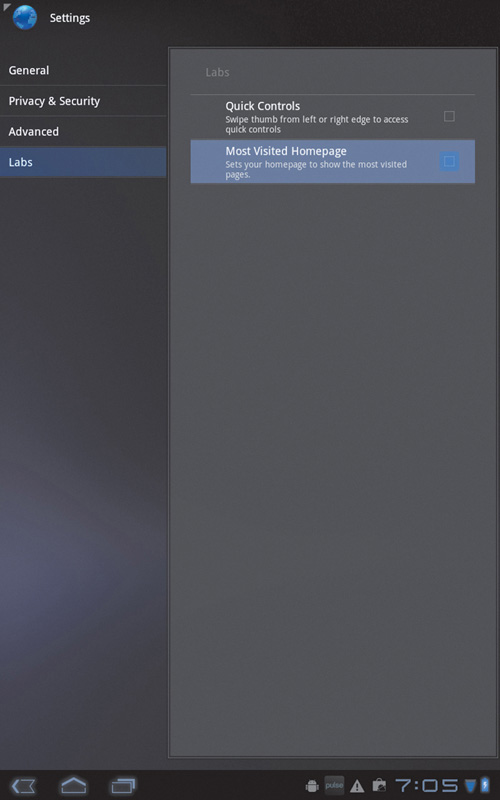 Select Most Visited Homepage.
 - Return to the Browser app’s home page, and check out your handiwork
 .
.
 Now your home page shows a selection of the Web sites you visit most often.
Managing Privacy and Security
Privacy and security are of paramount interest to those who inhabit the Internet. Fortunately, the Xoom gives users a fair bit of control, as I discuss in this section.
Security warnings
Some folks out there are interested in hurting you or stealing from you while you surf the Web. Fortunately, most Web browsers have built-in security, and in this section, I show you how to activate security in the Xoom’s Browser app.
To turn on security warnings
- Complete steps 1 and 2 of “To configure browser settings” earlier in this chapter.
- Select Privacy & Security .
 Touch Privacy & Security.
 - Touch Show Security Warnings .
 Select Show Security Warnings.
This option is a toggle, so if you ever want to turn off security warnings, just repeat these steps.
Cookies
Cookies are little pieces of data that are recorded and stored on a user’s computer by a Web browser. Many people think of cookies as being evil, but they usually contain shopping-cart information, passwords, name and address data, and/or previous-visit settings.
Whether you want cookies to be active depends on how much interaction with the Web you do on your Xoom. If you’re mostly just reading Web pages—never shopping, buying stuff, or posting forum or blog posts—you can turn cookies off. If you like to do any of these activities, however, turning cookies off could make your life a real pain in the patootie.
To turn off cookies
- Complete steps 1 and 2 of “To turn on security warnings” earlier in this chapter.
- In the Privacy & Security screen , touch Accept Cookies.
- If you also want to take all cookie data off your Xoom, touch Clear All Cookie Data .
 Clear all cookies here.
Form autoentry
If you fill out a lot of forms on the Web, such as name and address information or surveys, you may want to have the Xoom remember the form data so you don’t have to type this information again and again. Form autoentry is turned on by default, but you can turn it off if you want.
To toggle form autoentry
- Complete steps 1 and 2 of “To turn on security warnings” earlier in this chapter.
- In the Privacy & Security screen , depending on what you want to do with the autofill settings, touch Clear Form Data or Remember Form Data .
 Select Clear Form Data or Remember Form Data.
GPS feature
Your Xoom is equipped with a handy-dandy GPS receiver, which is a double-edged sword. It can help you find your way around the complicated downtown core in a foreign city, but it can also allow evil organizations to find you and send fleets of black helicopters after you. Whether you want GPS to be on or off is entirely up to you, but from where I’m sitting, the upside of leaving it on far outweighs any known potential downsides.
To toggle GPS
- Complete steps 1 and 2 of “To turn on security warnings” earlier in this chapter.
- In the Privacy & Security screen , select Enable Location to let the GPS satellites know where you are .
 Select Enable Location.
Passwords
You can store passwords for various Web sites, blogs, forums, and shopping areas on the Xoom to make it easier to conduct your business online. That said, if your passwords are stored, they could be stolen. The Xoom is set to remember passwords by default, but you can turn that setting off and clear the password data.
To set a password
- Complete steps 1 and 2 of “To turn on security warnings” earlier in this chapter.
- In the Privacy & Security screen , select Clear Passwords .
 Touch Clear Passwords.