
5. The Multipurpose Xoom
Tablet computers are relatively new, and as with all new computing devices, many people initially think that they’re only gaming devices or novelties. Indeed, plenty of users probably view tablet computers as being toys at worst or as adjuncts to desktop or laptop computers at best. I wouldn’t disagree with that view, actually, but if you want to make a tablet computer like the Motorola Xoom your main computing device, you certainly can.
In this chapter, I look at basic computing tasks that most users perform on their desktop or laptop computers but that you can do on a Xoom: alarms, contacts, calendars, email, documents, and chat.
Managing the Xoom’s Clock and Alarm
What would a computer be without basic clock functions? In this case, the Xoom would still be a fantastic tablet computer, but a built-in alarm is a basic necessity for computing. The folks at Motorola haven’t let us down; the Clock app is simple to use and easy to manage.
To set an alarm
- Touch the Apps icon
 in the top-right corner of the home screen.
 Touch Apps.
The Apps page appears.
- Touch the Clock app’s icon
 on the Apps page.
 Touch Clock.
You’re greeted by a full screen showing the time
 .
.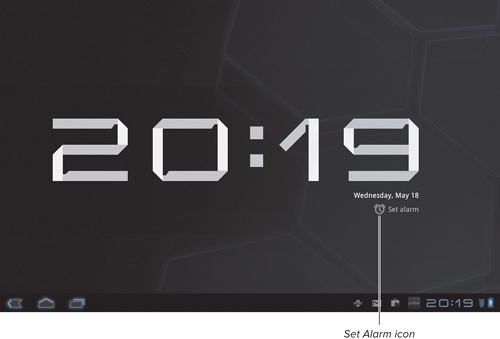 The time appears full-screen.
 - Touch the Set Alarm icon
 to bring up the Alarms panel
  .
.
 Alarms panel.
 - Touch Add Alarm
 .
.
 Select Add Alarm.
The Set Time panel opens
 .
.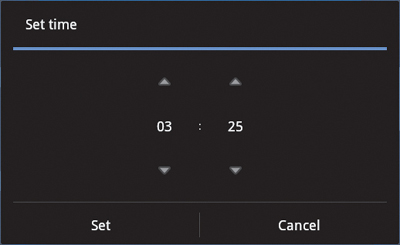 Set the alarm time using the arrows.
 - Touch the up and down arrows for the hour and minute
 to select the time when you want the alarm to go off.
 - Touch the Set button to set the alarm
 .
.
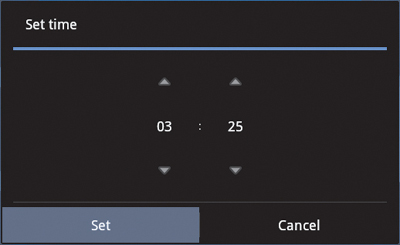 Touch Set to activate your alarm.
The Set Alarm panel opens.
- Touch the appropriate options to turn the alarm on and off, set the repeat or the ringtone, and even label the alarm; then touch the Done button
 .
.
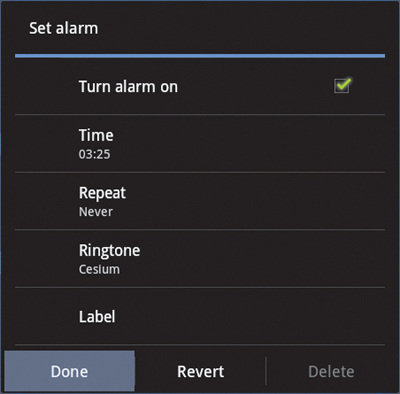 Touch Done to lock in your settings.
You return to the Alarms panel
 , where the alarm time you just added is displayed
  .
. New alarm displayed in Alarms panel.
 - Touch Done to finish the process.
To set the Xoom’s time and date
- Touch the Apps icon
 to open the Apps page.
 - Touch the Settings icon
 to open the Settings page.
 Touch Settings.
 - Select Date & Time
 near the bottom of the left column.
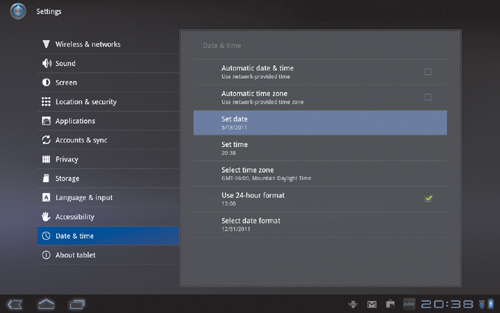
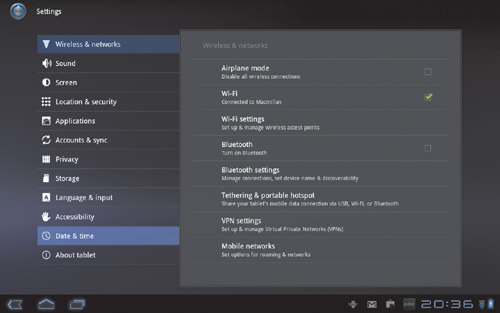 Touch Date & Time.
 - Do one of the following:
• Touch Automatic Date & Time and Automatic Time Zone
 on the right side of the screen to have the Xoom set this information for you.
 If you want automatic date/time and time-zone settings, check those boxes.
• Touch Set Date
 to set the date with the help of a calendar
  .
. Touch Set Date to set the time manually.
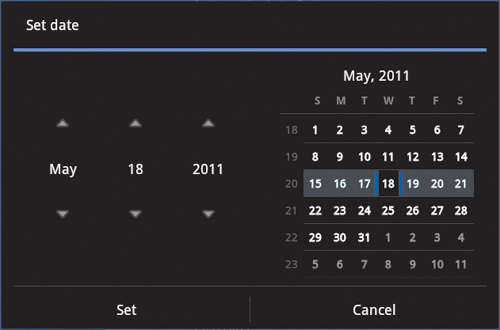 Use this calendar to set the date.
 - Touch Use 24-Hour Format
 to toggle 24-hour time format.
 Touch the Use 24-Hour format to set this option.
 - Touch Select Date Format
 to set the date format (mm/dd/yyyy or dd/mm/yyyy).
 Set the format you prefer.
 - Touch the Home icon
 to exit the Settings screen.
 Touch Home to complete this task.
Using the Calendar App
The Xoom’s Calendar app is tied to Google Calendars, so whatever you enter in the calendar on your Xoom is reflected in Google Calendars online. Likewise, if you’ve set up Microsoft Outlook on your Xoom (see “Handling Email” later in this chapter), your Outlook events calendar synchronizes with the Xoom’s Calendar app via Microsoft Exchange Server. It’s way cool, to say the least.
To open the Calendar app
- Touch and hold an empty area of the home screen, and sweep it to the right .
 Move to the screen that’s right of the home screen.
 - Touch the Calendar app’s icon to open the Calendar app .
 Touch Calendar.
 The calendar appears full-screen.
To add a calendar event
- In the Calendar screen , touch the Add Event icon in the top-right corner .
 Touch Add Event.
 - Enter the event’s name in the space provided .
 Name the event.
 - Touch the From, To, or Time Zone field
 to open the Set Date/Time dialog box .
 Set the date and time.
 - Set the date and time for the event, using the appropriate controls , and touch Set when you finish.
You return to the screen shown in
. - Add guests by touching the plus sign to the right of the Add Guests field and then entering their email addresses .
 Add as many guests as you like by entering their email addresses.
If a guest’s email address matches a contact in the contacts list on your Xoom (see the next section) or an entry in your Gmail address book (see “Handling Email” later in this chapter), the field autofills. This feature cuts your typing chores dramatically.
- When the event is set up to your satisfaction, touch Done in the top-right corner of the screen .
 Touch Done.
You return to the Calendar screen
, where your new event is in place.
To display the calendar in week view instead of month view, touch Week in the top-left corner ![]() .
.

![]() Touch Week to view the calendar in week view.
Touch Week to view the calendar in week view.
Working with Contacts
The Xoom automatically populates your contacts list with contacts from your Google account. If you don’t have a Google account or are new to Google, your contacts from Outlook can still show up after you add your Outlook account to the Xoom, as I show you how to do in this section.
After you add a contact, it synchronizes with your Google and/or Outlook account within a few minutes.
To add a contact
- Touch and hold an empty area of the home screen, and sweep it to the right (refer to in “To open the Calendar app” earlier in this chapter).
- Touch the Contacts app’s icon to open the Contacts app.
 Touch Contacts.
 - Touch New in the top-right corner to open the New Contact screen.
 Touch New.
 - Fill out the contact information, using the onscreen keyboard .
 Enter contact information.
 - (Optional) To add a photo of the contact, touch the picture icon to open a drop-down menu ; then choose Take Photo to shoot a photo of the contact right now on your Xoom’s camera, or choose Select Photo from Gallery (see Chapter 4) to do just that.
 Set a picture for the contact, if you want.
 - When all the information is in place, touch Done in the top-right corner to add the contact to your contacts list .
 The contact appears in the contacts list. That’s it!
Handling Email
The Xoom is powered by the Android operating system, developed by Google, so it stands to reason that using a Google mail (Gmail) account is the easiest, most painless choice with the Xoom. It’s not your only choice, though. Setting up an Outlook-based email account on your Xoom isn’t difficult, as I show you in this section.
To send and receive email
- On the home screen, touch the icon for the email app you want to use: Gmail .
 Touch Gmail.
For this example, touch Gmail.
When you touch the icon, the app opens
.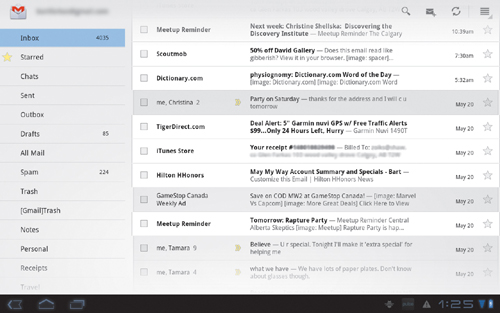 The Gmail app opens to the inbox.
 - Touch the Refresh icon in the top-right corner .
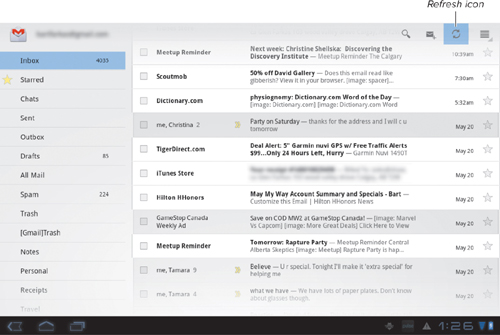 Touch Refresh to send and receive emails.
A little animated circle appears for a split-second; then any new emails that have arrived appear at the top of the screen
. New emails appear at the top of the screen.
To add an Outlook email account
- Touch the Apps icon in the top-right corner of the home screen to open the Apps page.
- Touch the Settings icon to open the Settings screen.
 Touch Settings.
 - Touch Accounts & Sync on the left side of the screen .
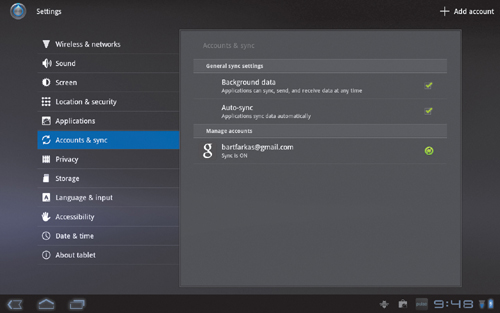 Touch Accounts & Sync.
 - Touch Add Account in the top-right corner of the screen .
The Add an Account panel appears.
- Select Corporate at the top of the list .
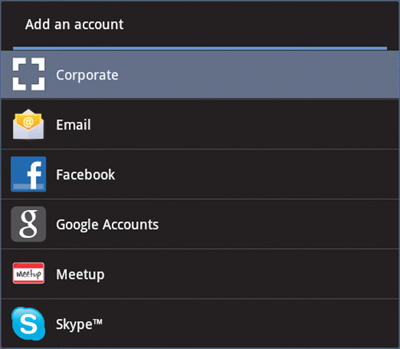 Touch Corporate.
The Add an Exchange Account screen opens.
- Enter your Outlook email address and password ; then touch Next to proceed.
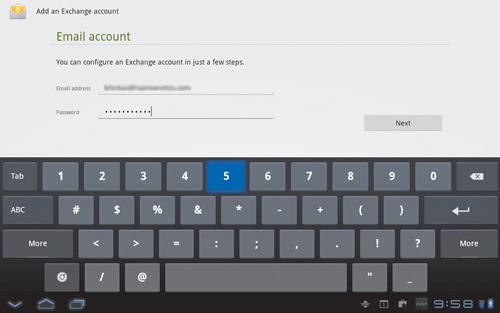 Enter the email address and password.
 - In the next screen , enter the server information; then touch Next.
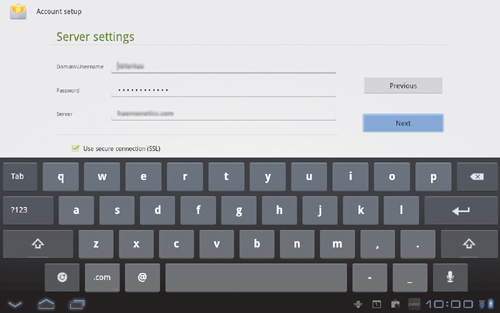 Enter the server settings.
The Xoom checks the settings
. When the Xoom confirms the settings, you’re set up.
It’s always a good idea to have the IT people at your workplace set up your business mail on your personal devices.
Chatting with Google Talk
For many people, communication via online chat has become a popular choice (after email) for both business and personal communication. The Xoom stands ready for this purpose with its Google Talk app. Google Talk allows you to chat with anyone you know who has a Google account. It also allows you to make voice and video calls, which are free beyond the cost of your Internet connection.
To log on to Google Talk
- On the home screen, touch the Google Talk icon .
 Touch this icon to open Google Talk.
 - In the Google Talk launch screen, select or enter the account you want to use .
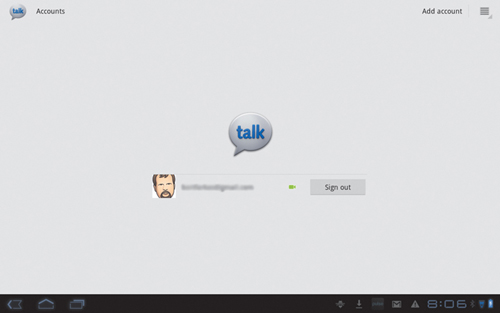 Touch the account you want to use.
Your Gmail contacts are listed on the left side of the screen, and those who are currently online (including you) appear at the top of the screen
.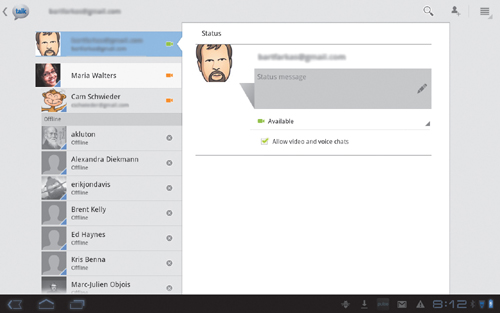 You are logged on and ready to chat.
To text-message in Google Talk
- Complete the steps in “To log on to Google Talk” earlier in this chapter.
- To chat with one of your contacts via text messaging, touch his or her icon on the left side of the screen.
A chat window opens on the right side of the screen. Unlike the screen shown in
, which shows a chat in progress, this window will be blank.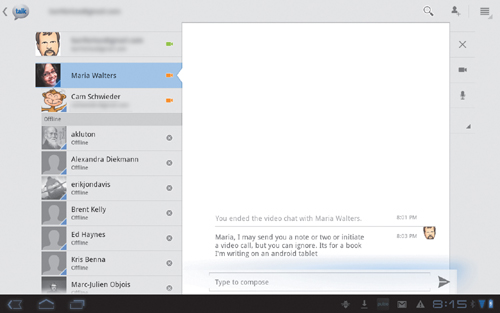 Touch the icon of the person you want to chat with.
 - Touch the Type to Compose field at the bottom of the screen to bring up the onscreen keyboard .
 Touch Type to Compose to access the keyboard.
To voice or video chat in Google Talk
- Complete steps 1 and 2 of “To text-message in Google Talk” earlier in this chapter.
- In the chat window , touch the camera icon (for video chat) or the microphone icon (for voice chat) .
 Touch the appropriate icon to initiate a chat (here, video).
Google Talk places the call
. Placing the call.
When the person you’re calling accepts the call, a new chat window opens.
- Chat away!
- To end the session and close the chat window, touch the X in the top-right corner of the window .
If the other party ends the session, your chat window closes automatically.
Working with Documents
The Xoom doesn’t come with any built-in text editors, but you can transfer text documents to it and then view and edit those documents with one of several excellent third-party apps. In this section, I show you how to transfer documents to your Xoom from a Mac or a PC and then show you how to use a third-party app to view those documents.
To transfer a document from a Mac
- If you don’t already have it, download the Android File Transfer app to your computer.
You can obtain this app at www.android.com/filetransfer.
- Connect your Xoom and your Mac via USB cable.
- On your Mac, double-click the app’s icon to open it.
 Open Android File Transfer.
 - In the Android File Transfer window, locate the Documents folder on your Xoom .
 Find the Documents folder on your Xoom in Android File Transfer.
 - Browse to and select a document that you want to transfer to the Xoom .
 Select a document on your Mac you want to transfer.
 - Drag the document file to the Documents folder in Android File Transfer .
 Drag the file to the Documents folder.
The file copies to the Xoom
. The file is on the Xoom, and your job is done.

To transfer a document from a PC
- Connect the Xoom to your PC via USB cable.
The window shown in
opens on your PC. Connection window.
 - Click Open Device to View Files.
An Organize window opens.
- Double-click the Device Storage icon in the list on the left side of the screen.
Your PC calculates the free space on your Xoom
and then displays a list of folders.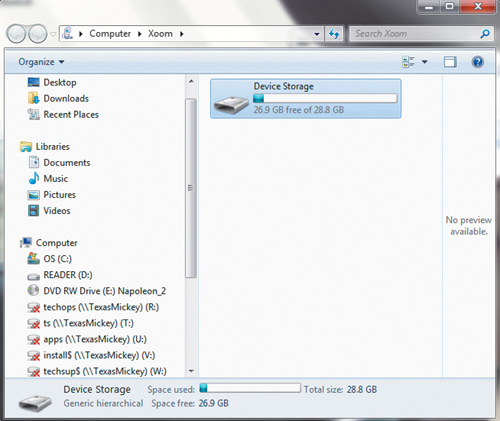 Checking free space.
 - Double-click the Documents folder to open it.
 Open the Documents folder.
 - Browse for and select a document that you want to transfer to your Xoom, and drag it to the Xoom’s Documents folder .
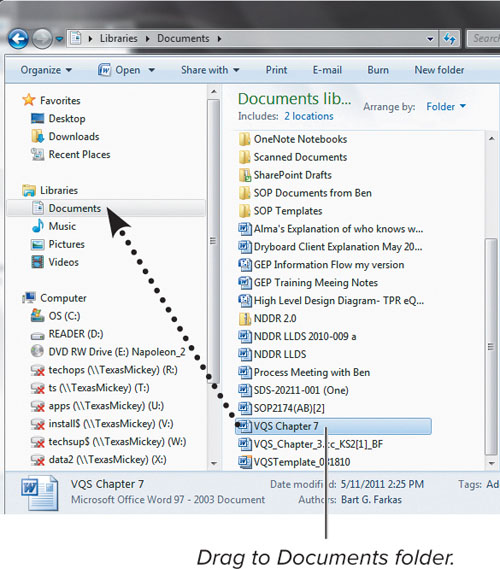 Transferring a document.
A confirmation dialog box pops up
. Confirm your decision.
 - Click Yes to complete the file transfer to the Xoom.
If you need to use Microsoft Office or comparable document files on your Xoom for business, I suggest purchasing some good third-party software. Your options include OfficeSuite Pro (trial version covered in the next section), Quickoffice Pro HD, and Documents To Go. All these programs are priced below $20.
To open a document with OfficeSuite
- Download and install OfficeSuite on your Xoom.
A trial version of this app is available from the Android Market (see Chapter 2).
- Open OfficeSuite by touching its icon .
 Touch OfficeSuite.
The OfficeSuite window opens, listing three options: Device, Memory Card, and OfficeSuite Pro.
- To open a file on your Xoom, select Device .
 Touch Device.
A list of folders on your Xoom opens.
- Select the sdcard folder .
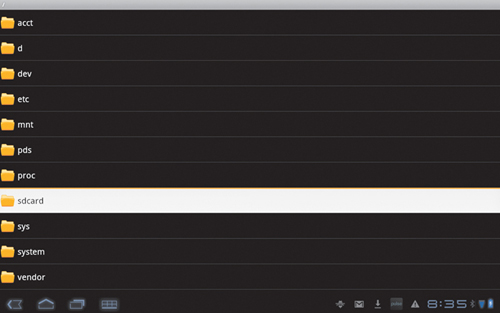 Touch sdcard.
 - In the resulting screen, select the Documents folder .
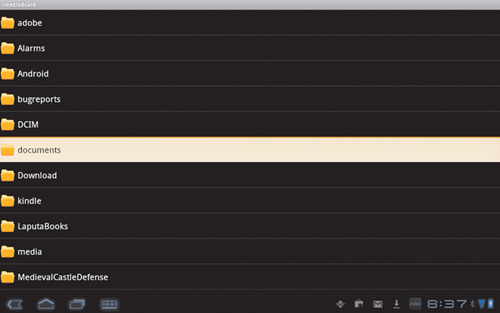 Touch Documents.
 - Select the Sample Files folder (your only choice).
- Select the document you want to view .
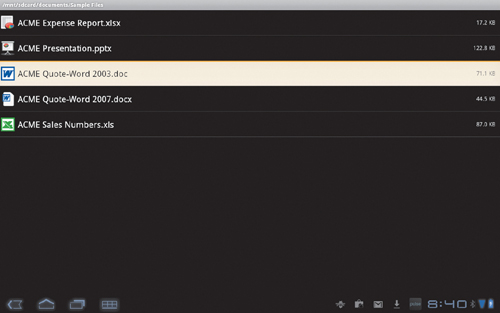 Touch a document.
The file opens
. The document opens. Happy viewing!